AI SRE Onboarding Guide for Incident Responders
This guide walks you through the essentials of using Harness AI SRE as a responder or engineer.
You will learn how to navigate the dashboard, respond to incidents, collaborate with your team, and use runbooks and AI-powered tools to resolve issues faster.
Your administrator has already configured the integrations and incident types. This guide focuses on what you need to know to be effective as an incident responder from day one.
Prerequisites
Before getting started, confirm the following with your administrator:
| Item | Details |
|---|---|
| Harness account access | You have been added to your organization's Harness account with appropriate permissions |
| Collaboration tools connected | The Harness AI SRE bot is installed in your team's Slack workspace or Google Chat |
| Monitoring tools configured | Your organization's monitoring tools (Datadog, New Relic, Grafana, etc.) are already integrated |
| On-call schedule (if applicable) | You have been added to your team's on-call rotation in PagerDuty, OpsGenie, or a similar tool |
If your organization has not configured AI SRE yet, share the AI SRE Onboarding Guide for Administrators with your platform team to get started.
1. Explore the AI SRE dashboard
- Step by Step
- Interactive Guide
The AI SRE dashboard is your central hub during on-call shifts and day-to-day operations.
-
Log in to your Harness account.
-
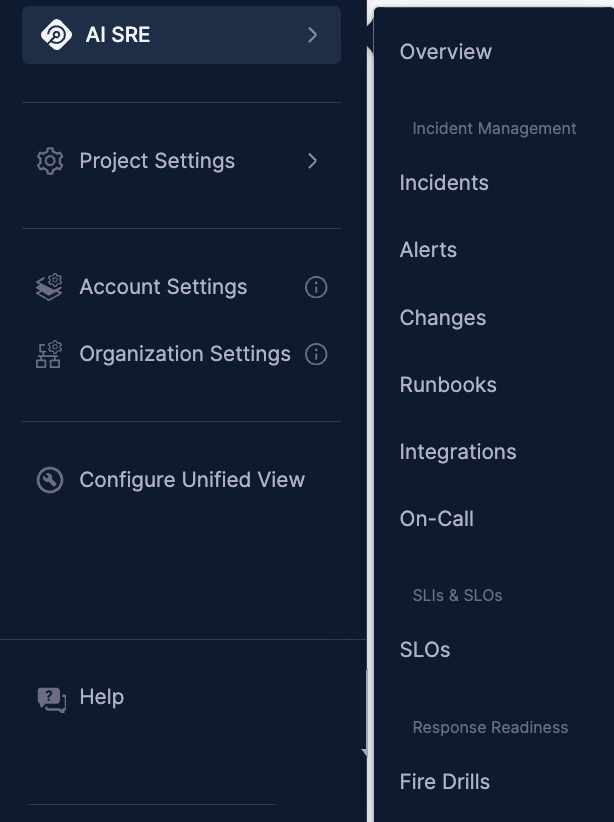
Navigate to AI SRE from the left navigation panel, then click Overview.
-
The dashboard opens, shown below.
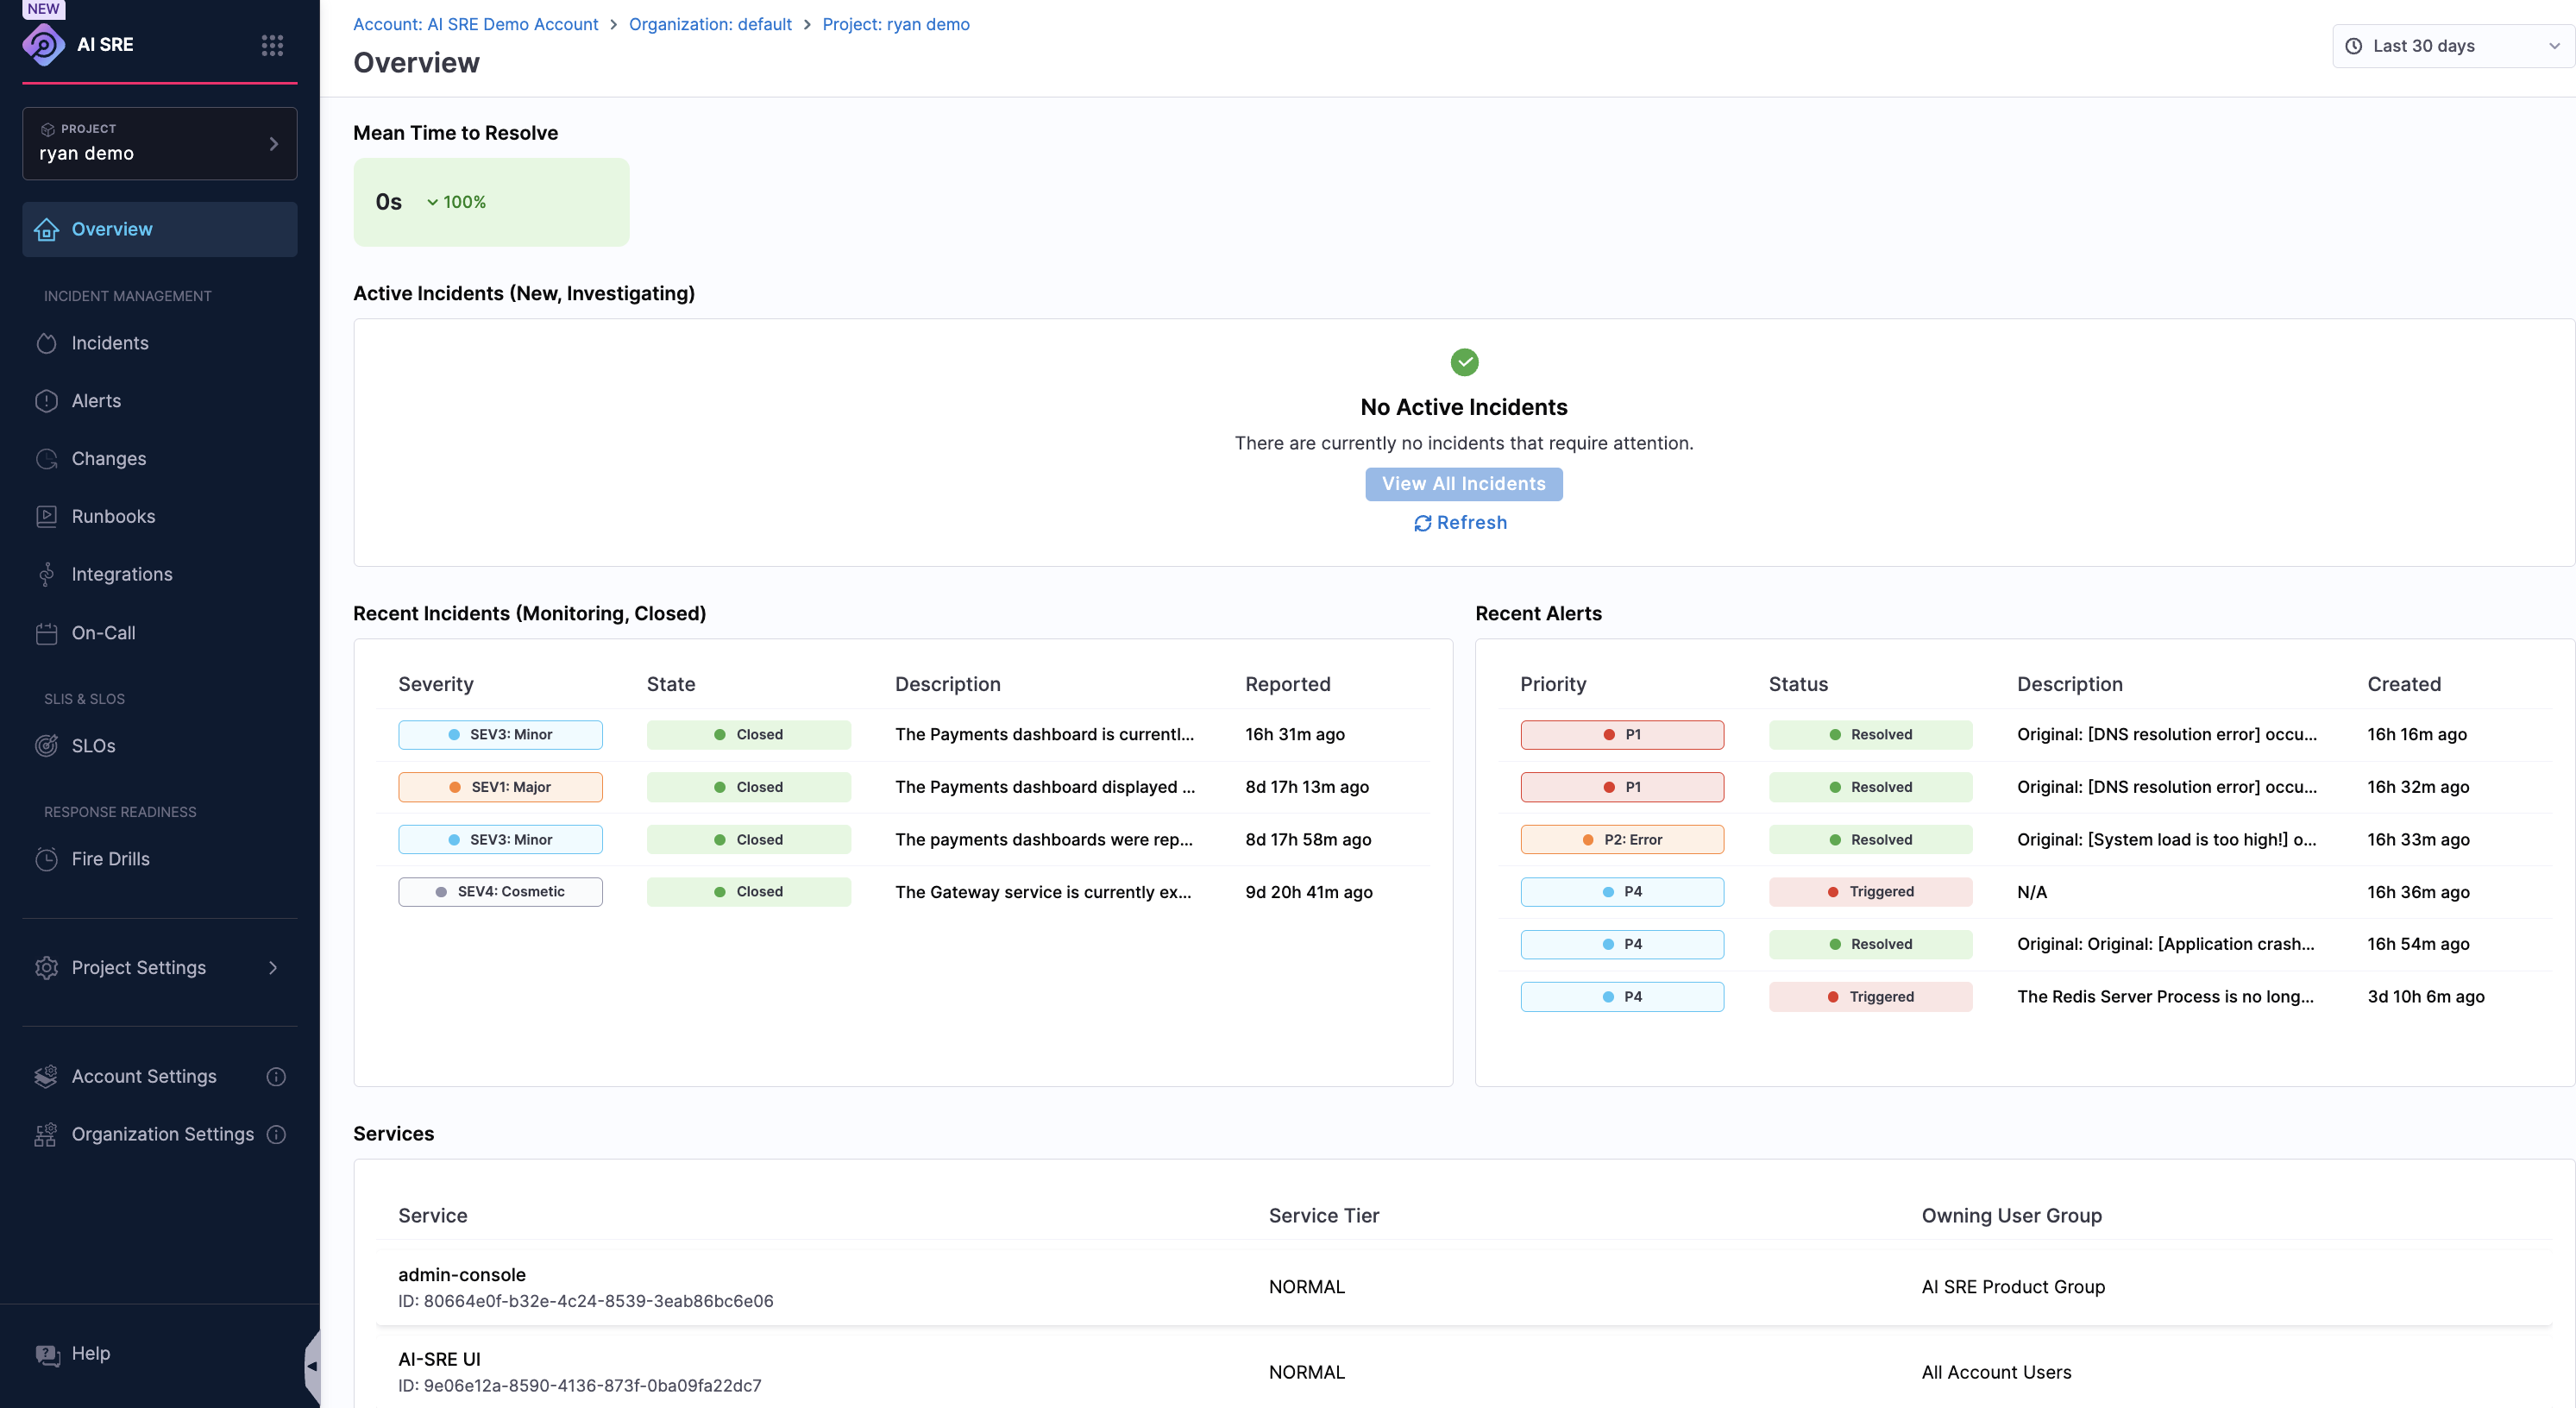
On the dashboard, review the following:
- Active Incidents: Any ongoing incidents that need attention.
- Recent Alerts: The latest alerts from your monitoring tools.
- Metrics and Trends: Key reliability metrics like MTTR and incident volume.
-
Use the filters at the top to narrow by incident type, severity, status, or assigned team.
Bookmark the AI SRE dashboard for quick access during on-call shifts. The active incidents panel updates in real time.
Get familiar with the dashboard layout, active incidents, alerts, and key metrics at a glance.
Explore the dashboard further with these resources:
- Go to Understanding Incident Types to understand how incident types map to severity levels and responder teams.
- Go to Integration Overview to review which monitoring tools are connected to your environment.
2. Respond to an incident
- Step by Step
- Interactive Guide
When an incident is created, automatically from a monitoring alert or manually by a teammate, here is how to respond.
-
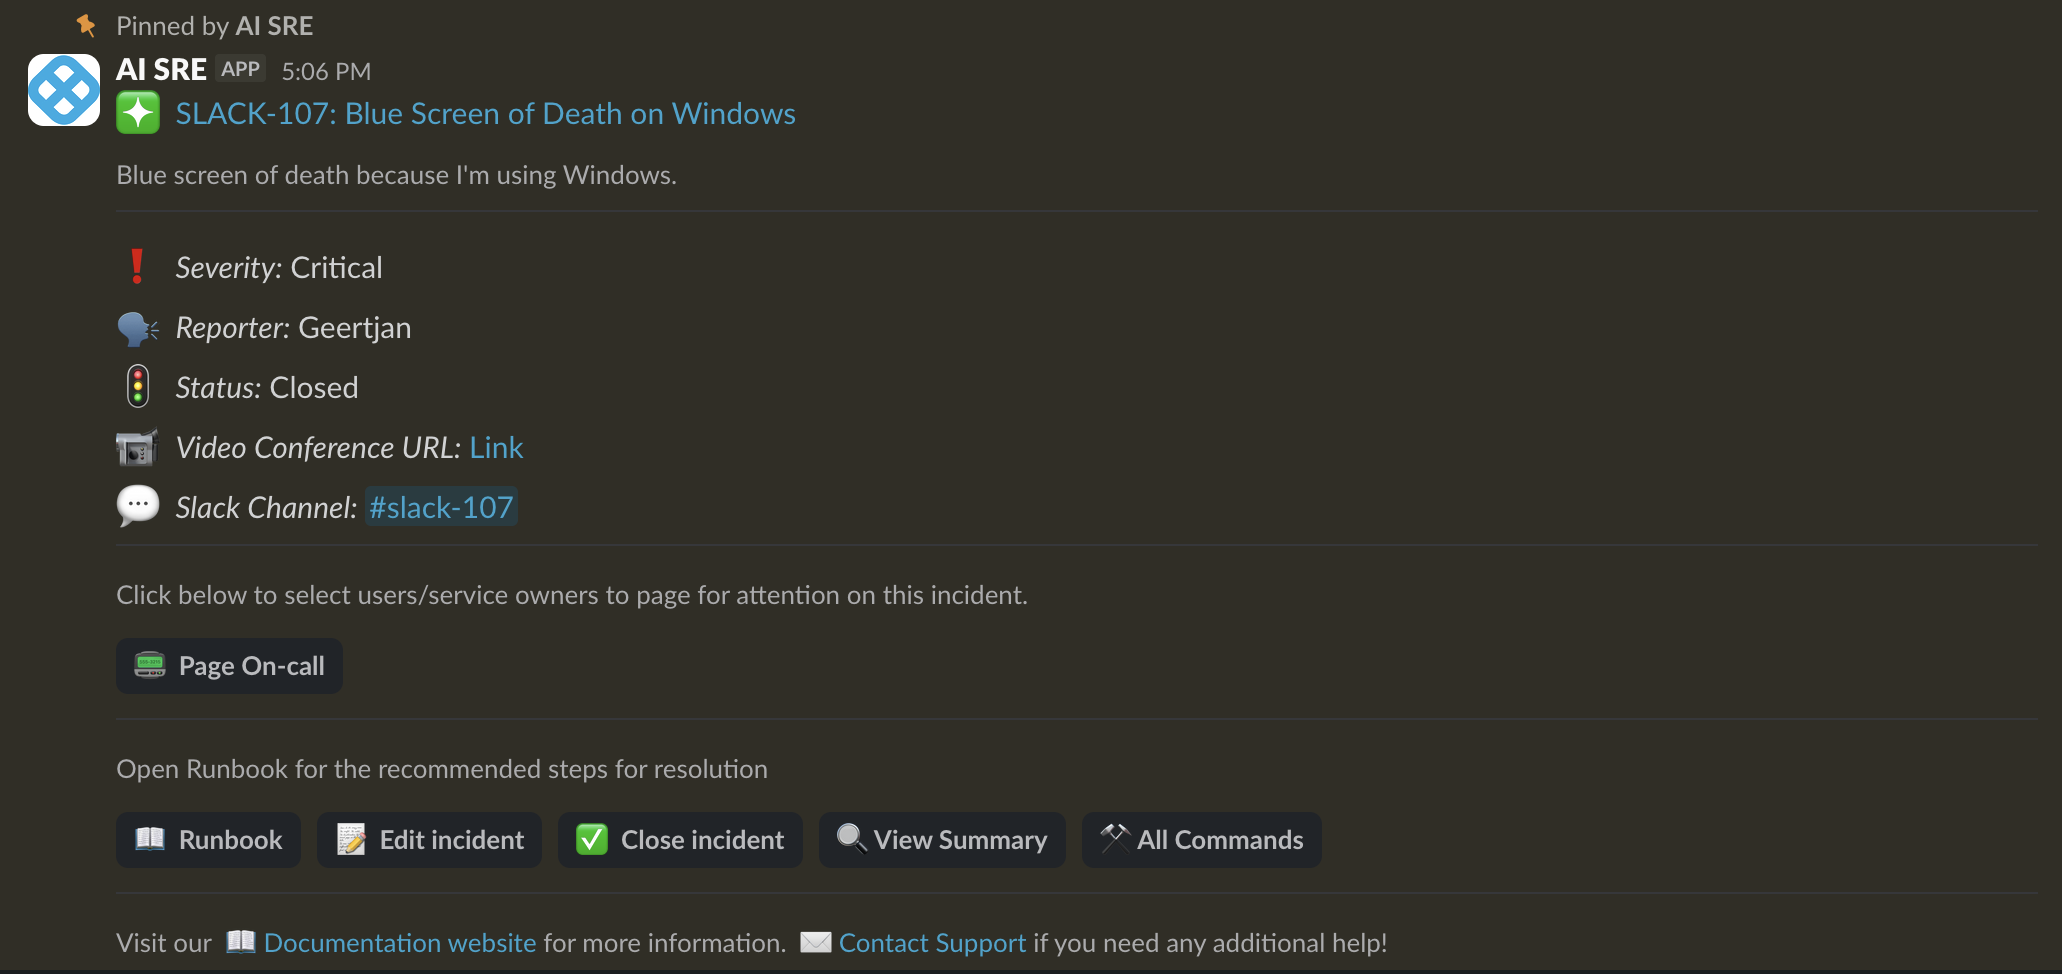
You will receive a notification via Harness On-Call, Slack, Google Chat, or your on-call tool.
-
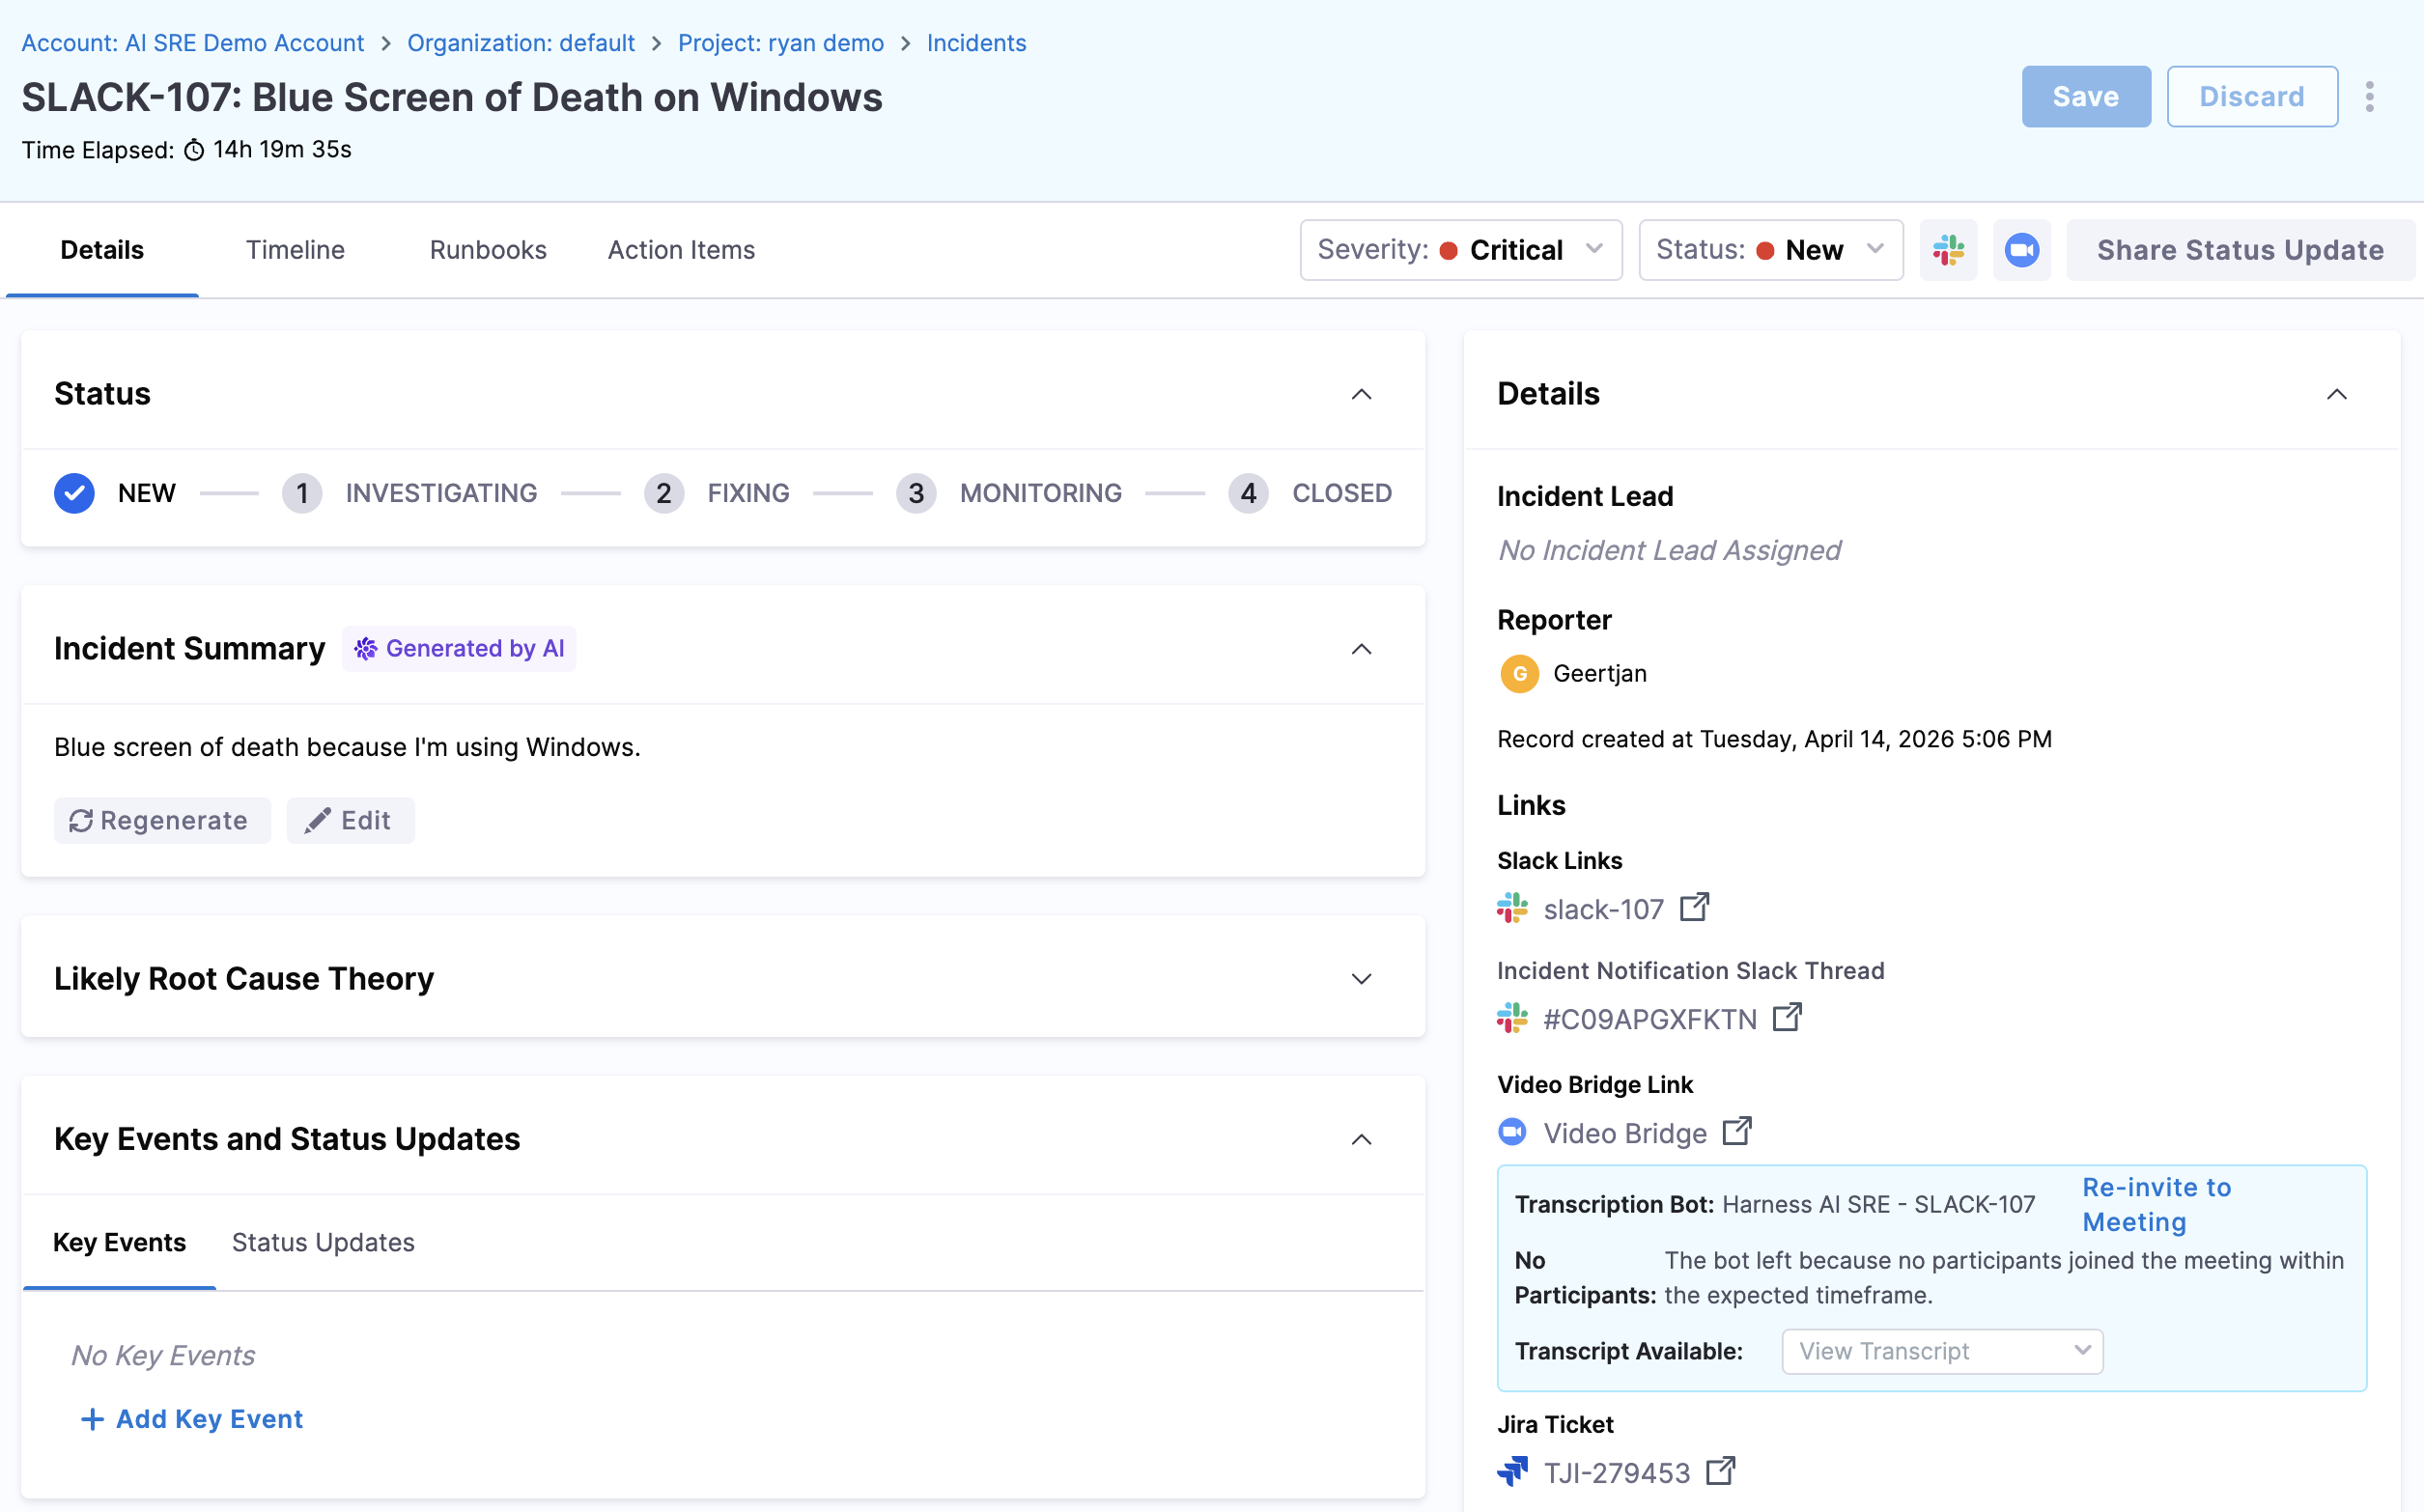
Click the notification link to open the incident detail page in Harness.
-
Review the incident summary:
- Severity and incident type: Understand the scope and priority.
- Timeline: The sequence of alerts and events that triggered the incident.
- Related alerts: Correlated monitoring data and affected services.
-
If you have been paged about the incident, acknowledge the incident to let your team know you are on it.
-
Update the status as you work through it: Investigating, Fixing, Monitoring, Closed.

-
Use the incident channel in Slack or Google Chat to collaborate with other responders in real time.
-
Add notes and updates to the incident timeline to keep a clear record of actions taken.
You can manage incidents without leaving Slack. Use /harness slash commands to acknowledge, update status, add notes, and more.
Learn how to acknowledge, triage, and begin working on an incident when you are paged or alerted.
Extend your incident response skills with these resources:
- Go to Slack Commands Reference to manage incidents directly from Slack without switching to the UI.
- Go to AI Scribe Agent to understand how the Scribe captures your incident activity automatically.
3. Create an incident manually
- Step by Step
- Interactive Guide
Not every incident starts from an automated alert. If you notice a problem, customer reports, degraded performance, or a teammate flagging something, you can create an incident manually.
-
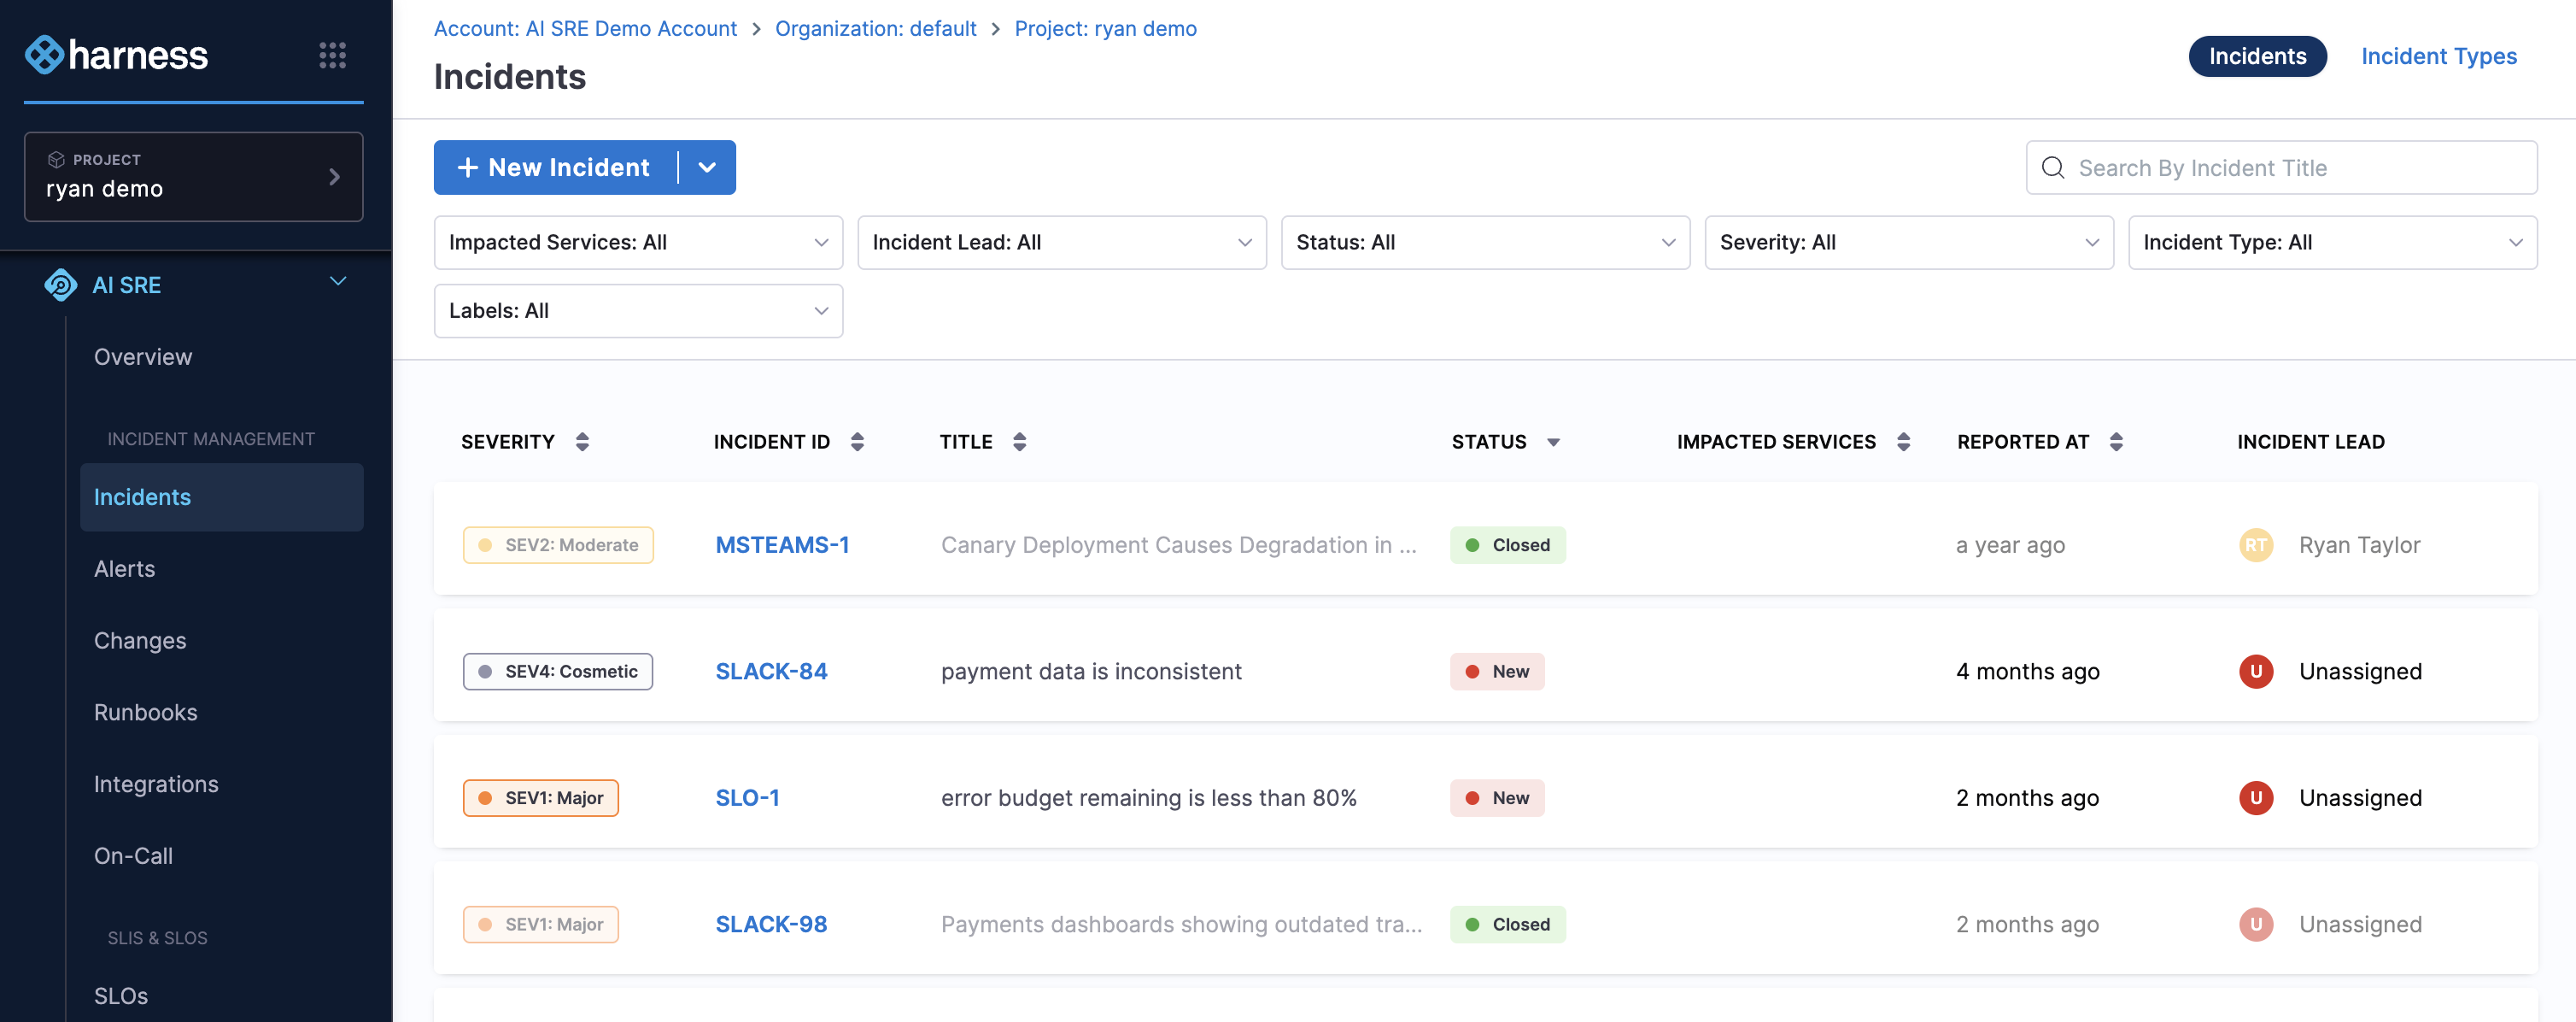
Navigate to Incidents from the left panel.
-
Click New Incident, or select an incident type from the New Incident dropdown.
-
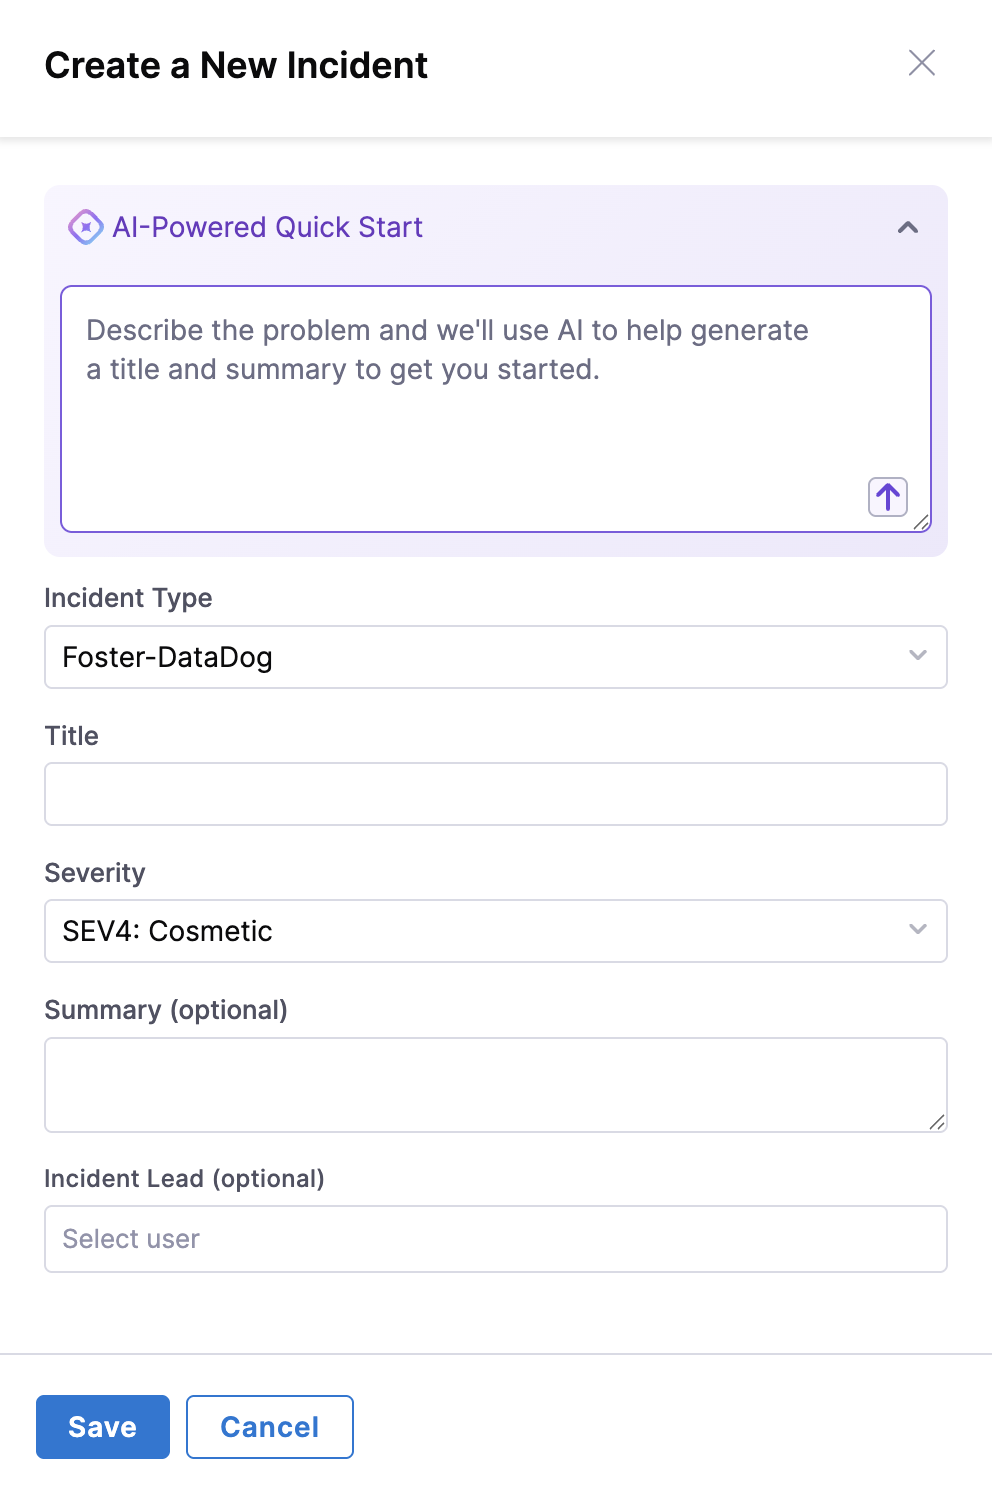
The Create a New Incident form appears.
-
Fill in the incident details:
- Title: A clear, concise summary (for example, "Elevated error rates on checkout API").
- Severity: Choose the appropriate level based on impact.
- Description: What you are observing, when it started, and any initial hypotheses.
- Any additional required fields specific to your incident type.
-
Click Save.
An incident channel is created in your communication tool and relevant team members are notified.
You can also create incidents directly from Slack using the /harness new command. This is useful during on-call when you want to stay in your communication tool.
Sometimes you will spot an issue before automated monitoring catches it. Learn how to declare an incident manually.
Create incidents more efficiently with these resources:
- Go to Slack Commands Reference to use
/harness newand other commands to create and manage incidents from Slack. - Go to Understanding Incident Types to understand what incident types are available and how they affect notifications and runbooks.
4. Use runbooks during an incident
- Step by Step
- Interactive Guide
Runbooks are predefined playbooks that guide you through incident response.
Some run automatically when certain conditions are met; others can be triggered manually.
-
Navigate to Incidents from the left panel.
-
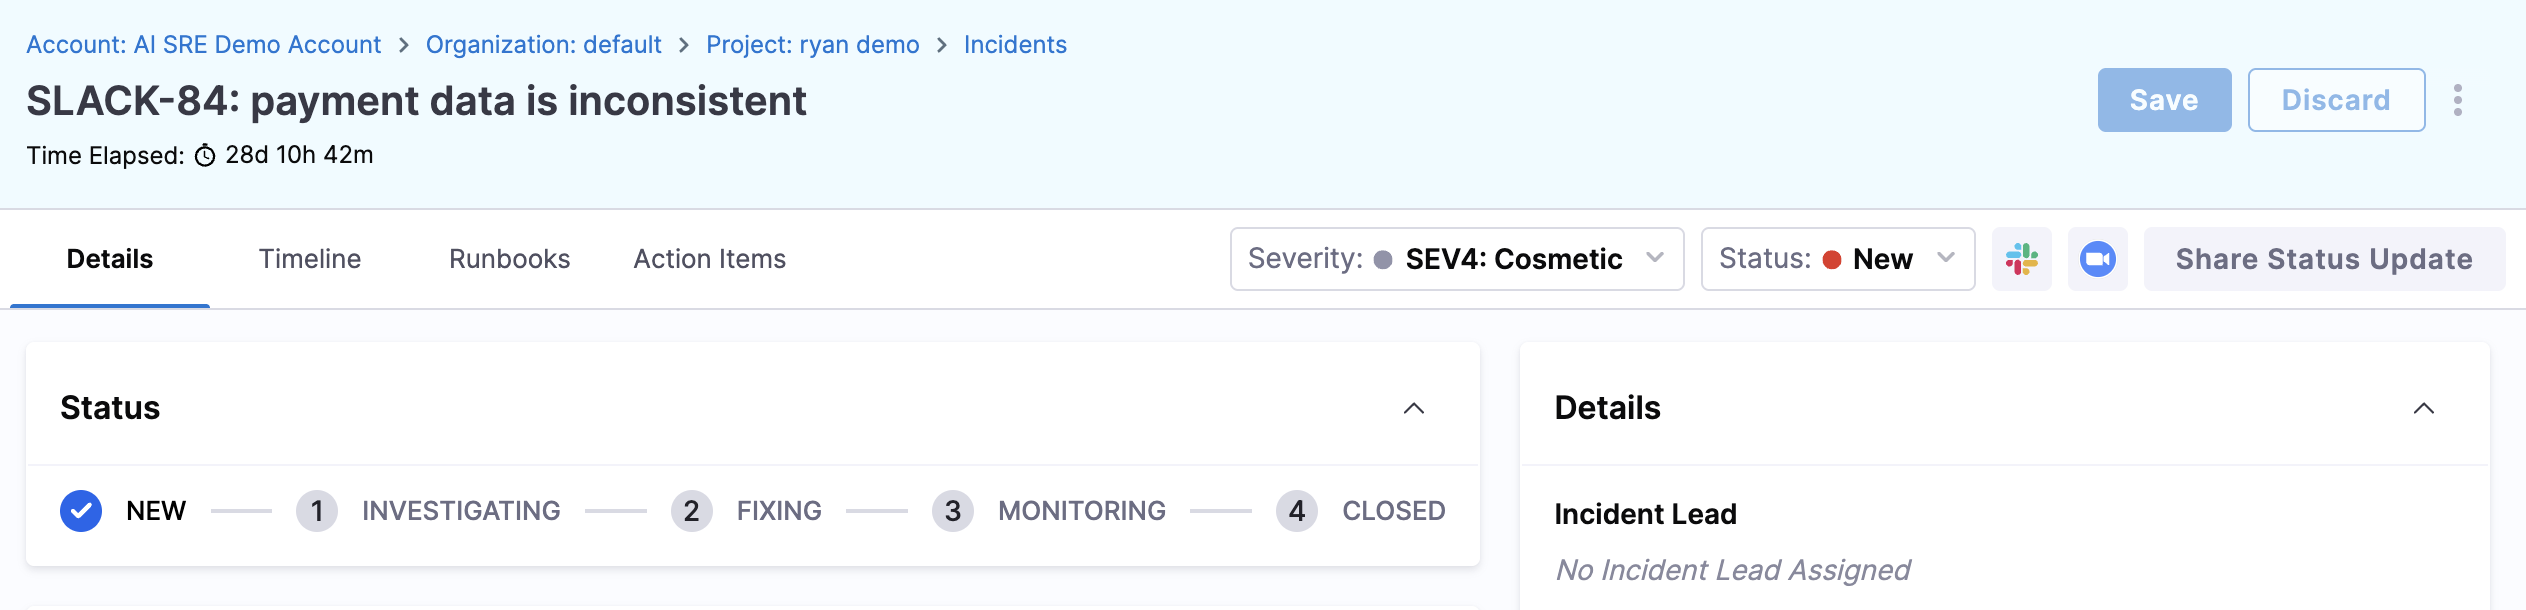
Click the Incident ID of the relevant incident to open the Details tab for an active incident.
-
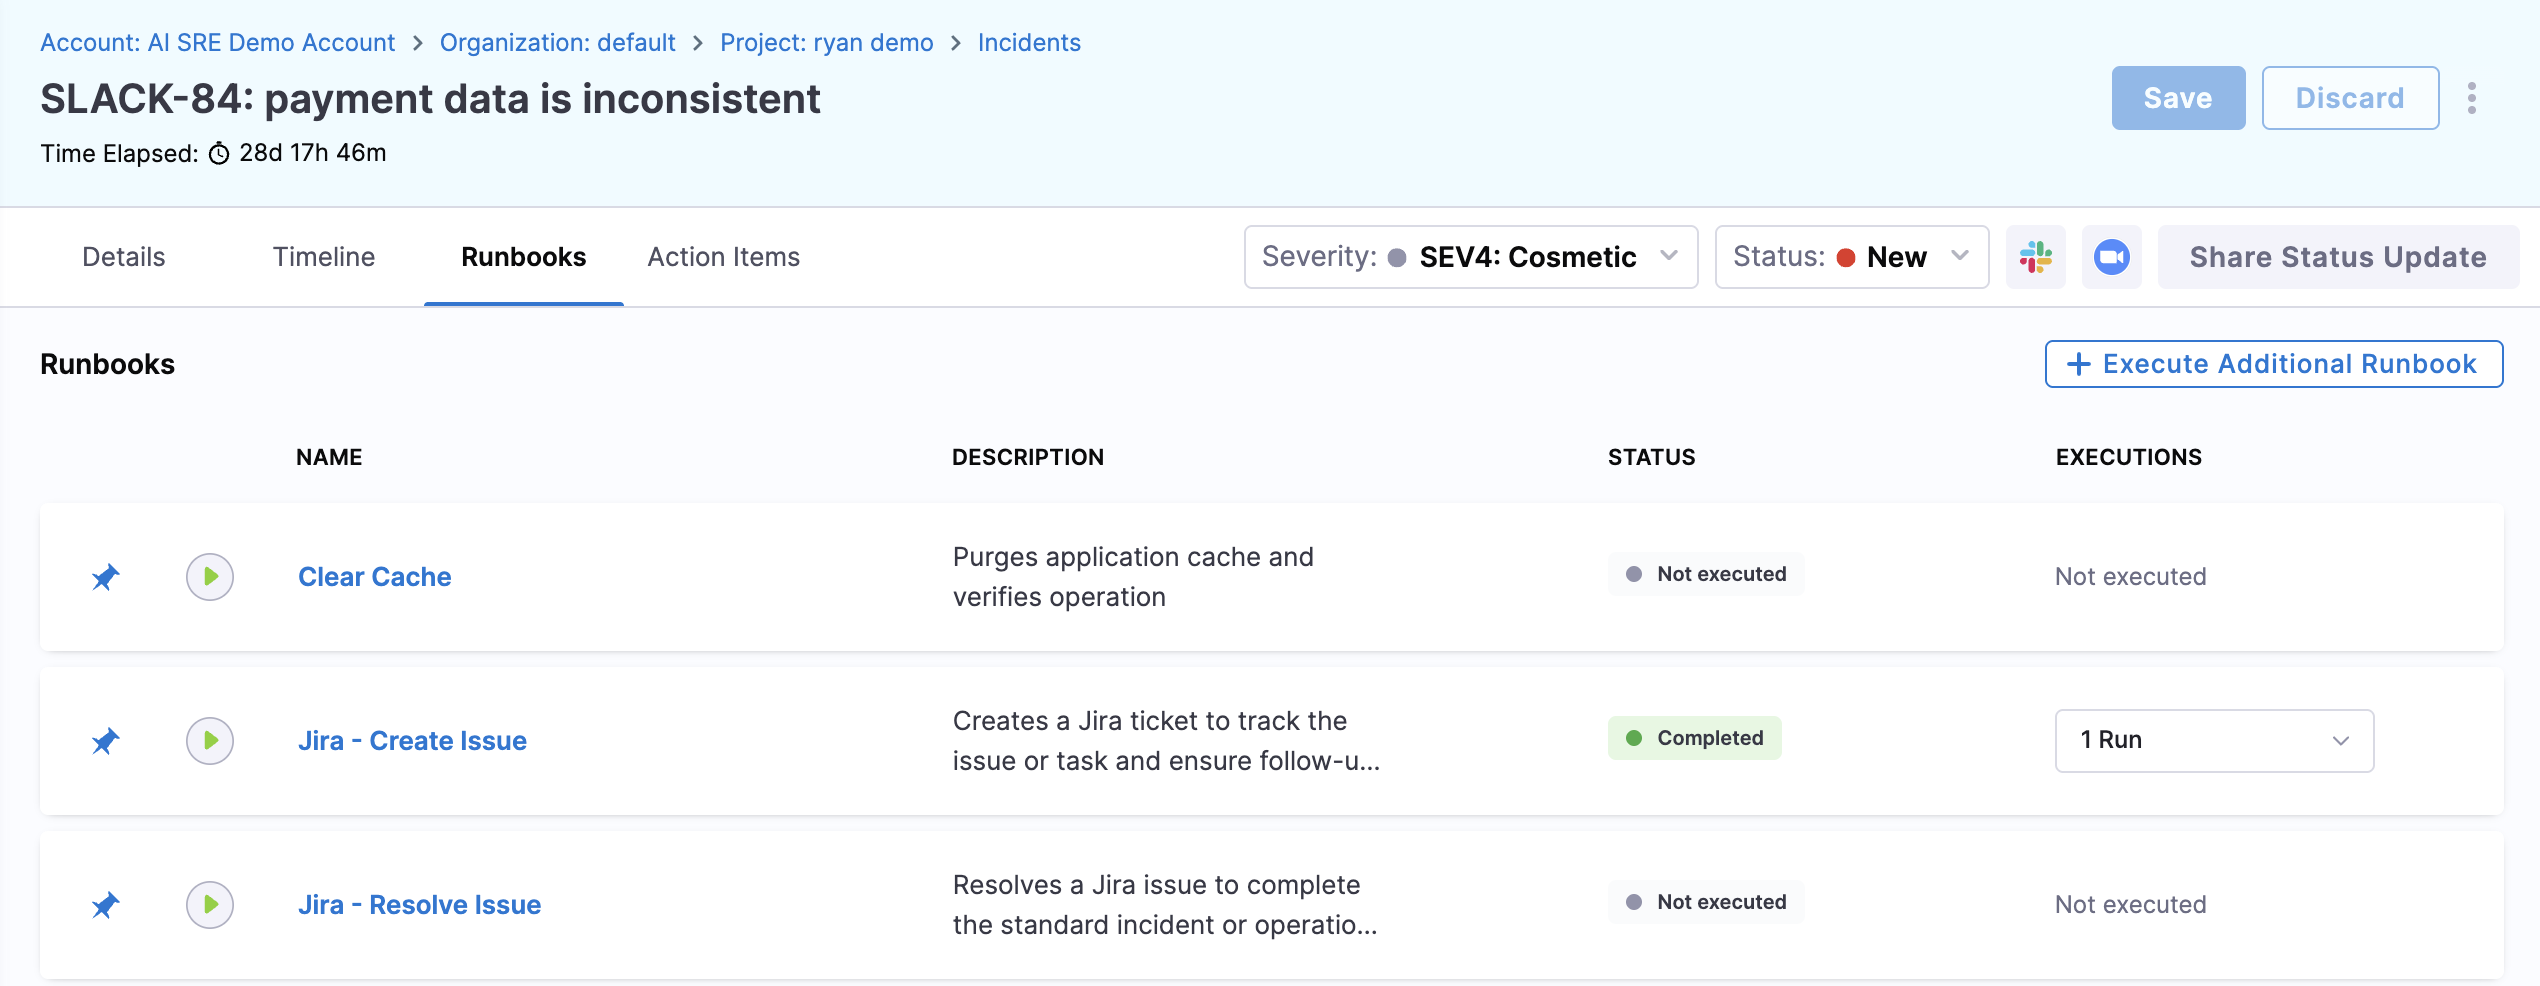
Click the Runbooks tab.
-
Review any runbooks that have been auto-attached based on the incident type.
-
To manually attach a runbook, click Add Runbook, search for the one you need, and confirm.
-
Work through the runbook step by step:
- Automated steps: Run and report results without any action from you.
- Manual steps: Show instructions for you to follow. Mark each one complete as you go.
Runbook execution is logged in the incident timeline.
If you are unsure which runbook applies, check the incident type. Your administrator has likely associated recommended runbooks with each type. You can also browse all available runbooks under Runbooks in the left navigation.
Runbooks guide you through predefined response steps and can automate common actions during an incident.
Get more out of runbooks with these resources:
- Go to Browsing Runbooks to explore the runbook library and see what playbooks are available to you.
- Go to Understanding Incident Types to review which runbooks are associated with each incident type.
5. Use the AI Scribe Agent
The AI Scribe Agent works alongside you during incidents to reduce manual overhead.
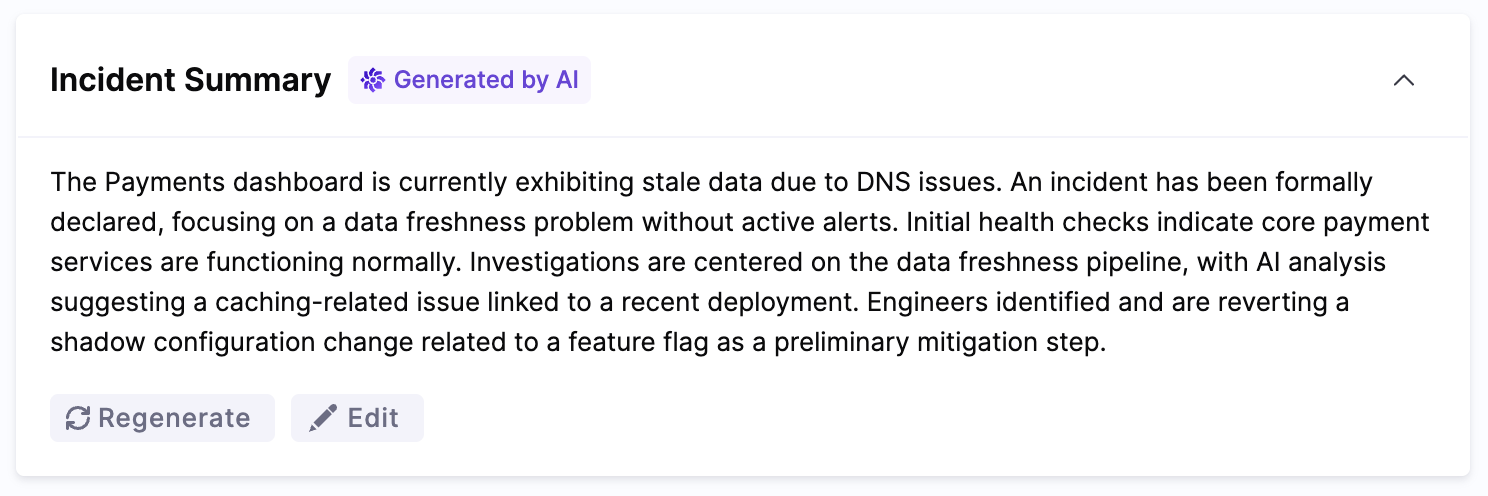
- Automatic summaries: The Scribe monitors your incident channel and picks out key decisions, actions, and findings as they happen.
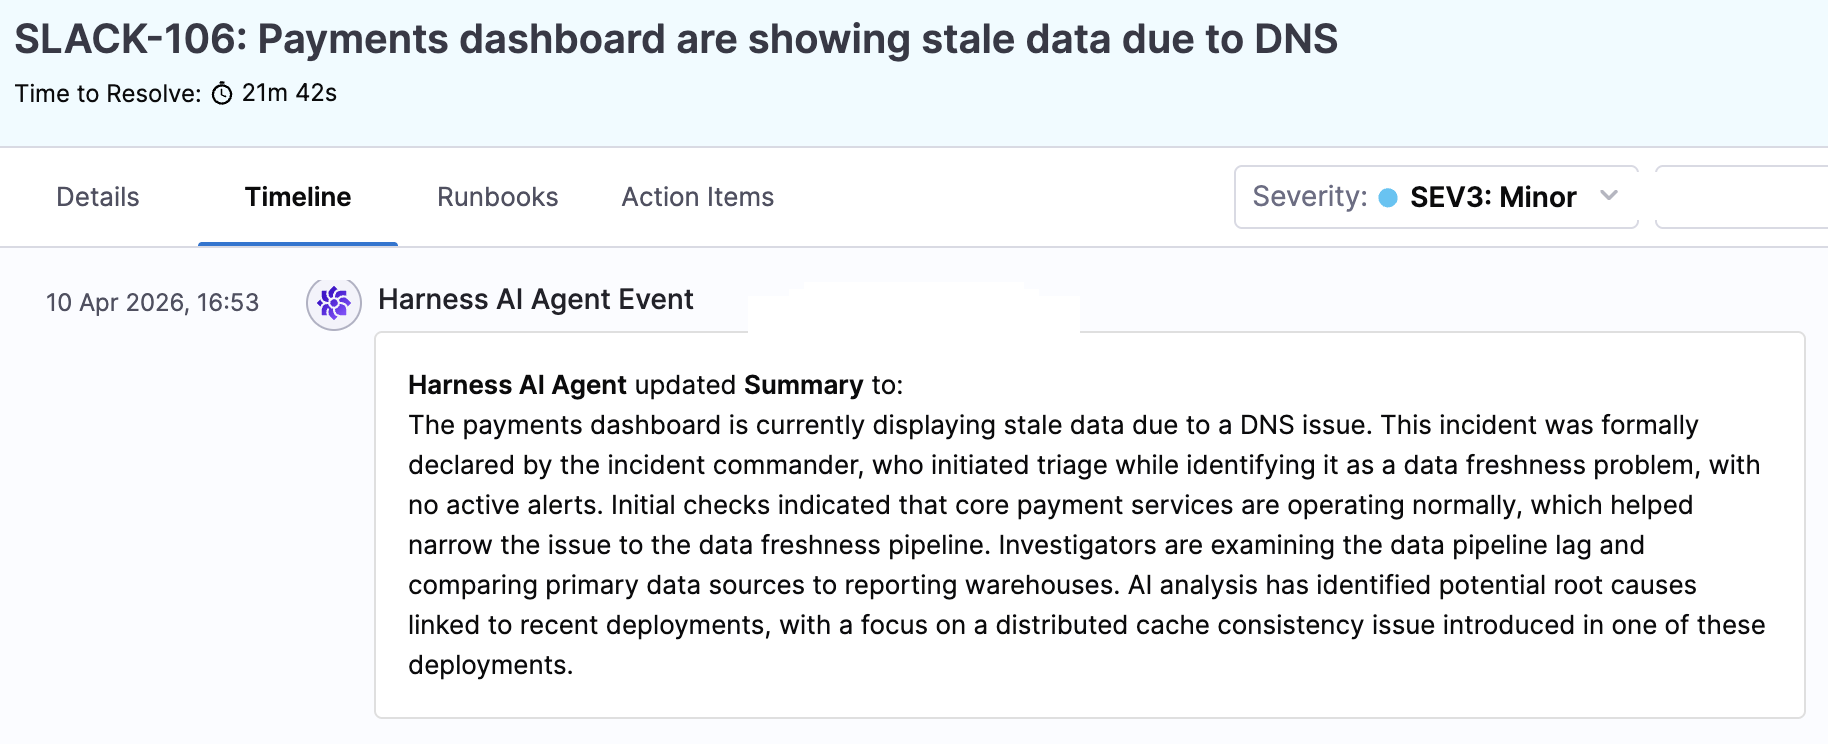
- Timeline generation: It builds a structured timeline from channel activity, status changes, and runbook execution.
- Post-incident reports: After resolution, the Scribe drafts a post-incident report from the timeline and channel discussions, giving you a head start on the retrospective.
To access Scribe outputs, open the Details page and look for the AI-generated Incident Summary.
Also, the Timeline tab shows updates generated by the Scribe.
Dive deeper into the AI agents with these resources:
- Go to AI Scribe Agent to read the full documentation on how the Scribe works and how to get the most out of it.
- Go to RCA Change Agent to understand how AI-powered root cause analysis works alongside the Scribe during an incident.
Next steps
Continue with these resources to deepen your AI SRE knowledge:
- Go to Slack Commands Reference to use the full set of slash commands for managing incidents from Slack.
- Go to Understanding Incident Types to understand how incident types map to severity levels, responder teams, and escalation paths.
- Go to Browsing Runbooks to explore the automated playbooks available to you.
- Go to Integration Overview to see which monitoring, communication, and ITSM tools are connected to your environment.
- Go to AI Scribe Agent for deeper documentation on AI-powered incident documentation and insights.