Create Runbooks
Runbooks in Harness AI SRE enable you to automate incident response workflows, operational procedures, and remediation actions.
This comprehensive guide walks you through creating, configuring, and deploying effective runbooks that can significantly reduce mean time to resolution (MTTR) and improve your team's operational efficiency.
Before you begin
Prerequisites
Ensure you have the following before creating your first runbook:
- Platform Access: Active Harness AI SRE account with appropriate permissions.
- User Permissions: Required Account, Organisation and Project level permissions.
- Integration Access: Configured integrations for the tools you plan to use (Slack, Jira, ServiceNow, etc.).
- Monitoring Setup: Alert sources configured (Datadog, New Relic, PagerDuty, etc.).
Key concepts
Before diving into runbook creation, familiarize yourself with these core concepts:
- Actions: Individual tasks or operations within a runbook (notifications, API calls, pipeline executions).
- Triggers: Conditions that automatically initiate runbook execution.
- Variables: Dynamic values that can be passed between actions and customized per execution.
- Sequences: The order in which actions are executed within your workflow.
Create your runbook
- Step by Step
- Interactive Guide
Step 1: Access runbooks
Open the runbooks management interface:
- Click Runbooks from the left panel in your Harness AI SRE platform
- This will take you to the runbooks management interface
Step 2: Create a new runbook
Start a new automated workflow:
- Click New Runbook to start creating your automated workflow
- This opens the runbook creation interface
Step 3: Configure basic details
Provide the core information that identifies your runbook:
- Fill in the essential details for your runbook:
- Name: Use a descriptive name (e.g., "High CPU Alert Response", "Database Connection Recovery")
- Description: Clearly explain the runbook's purpose and when it should be used
- Provide clear, meaningful information that helps team members understand the runbook's function
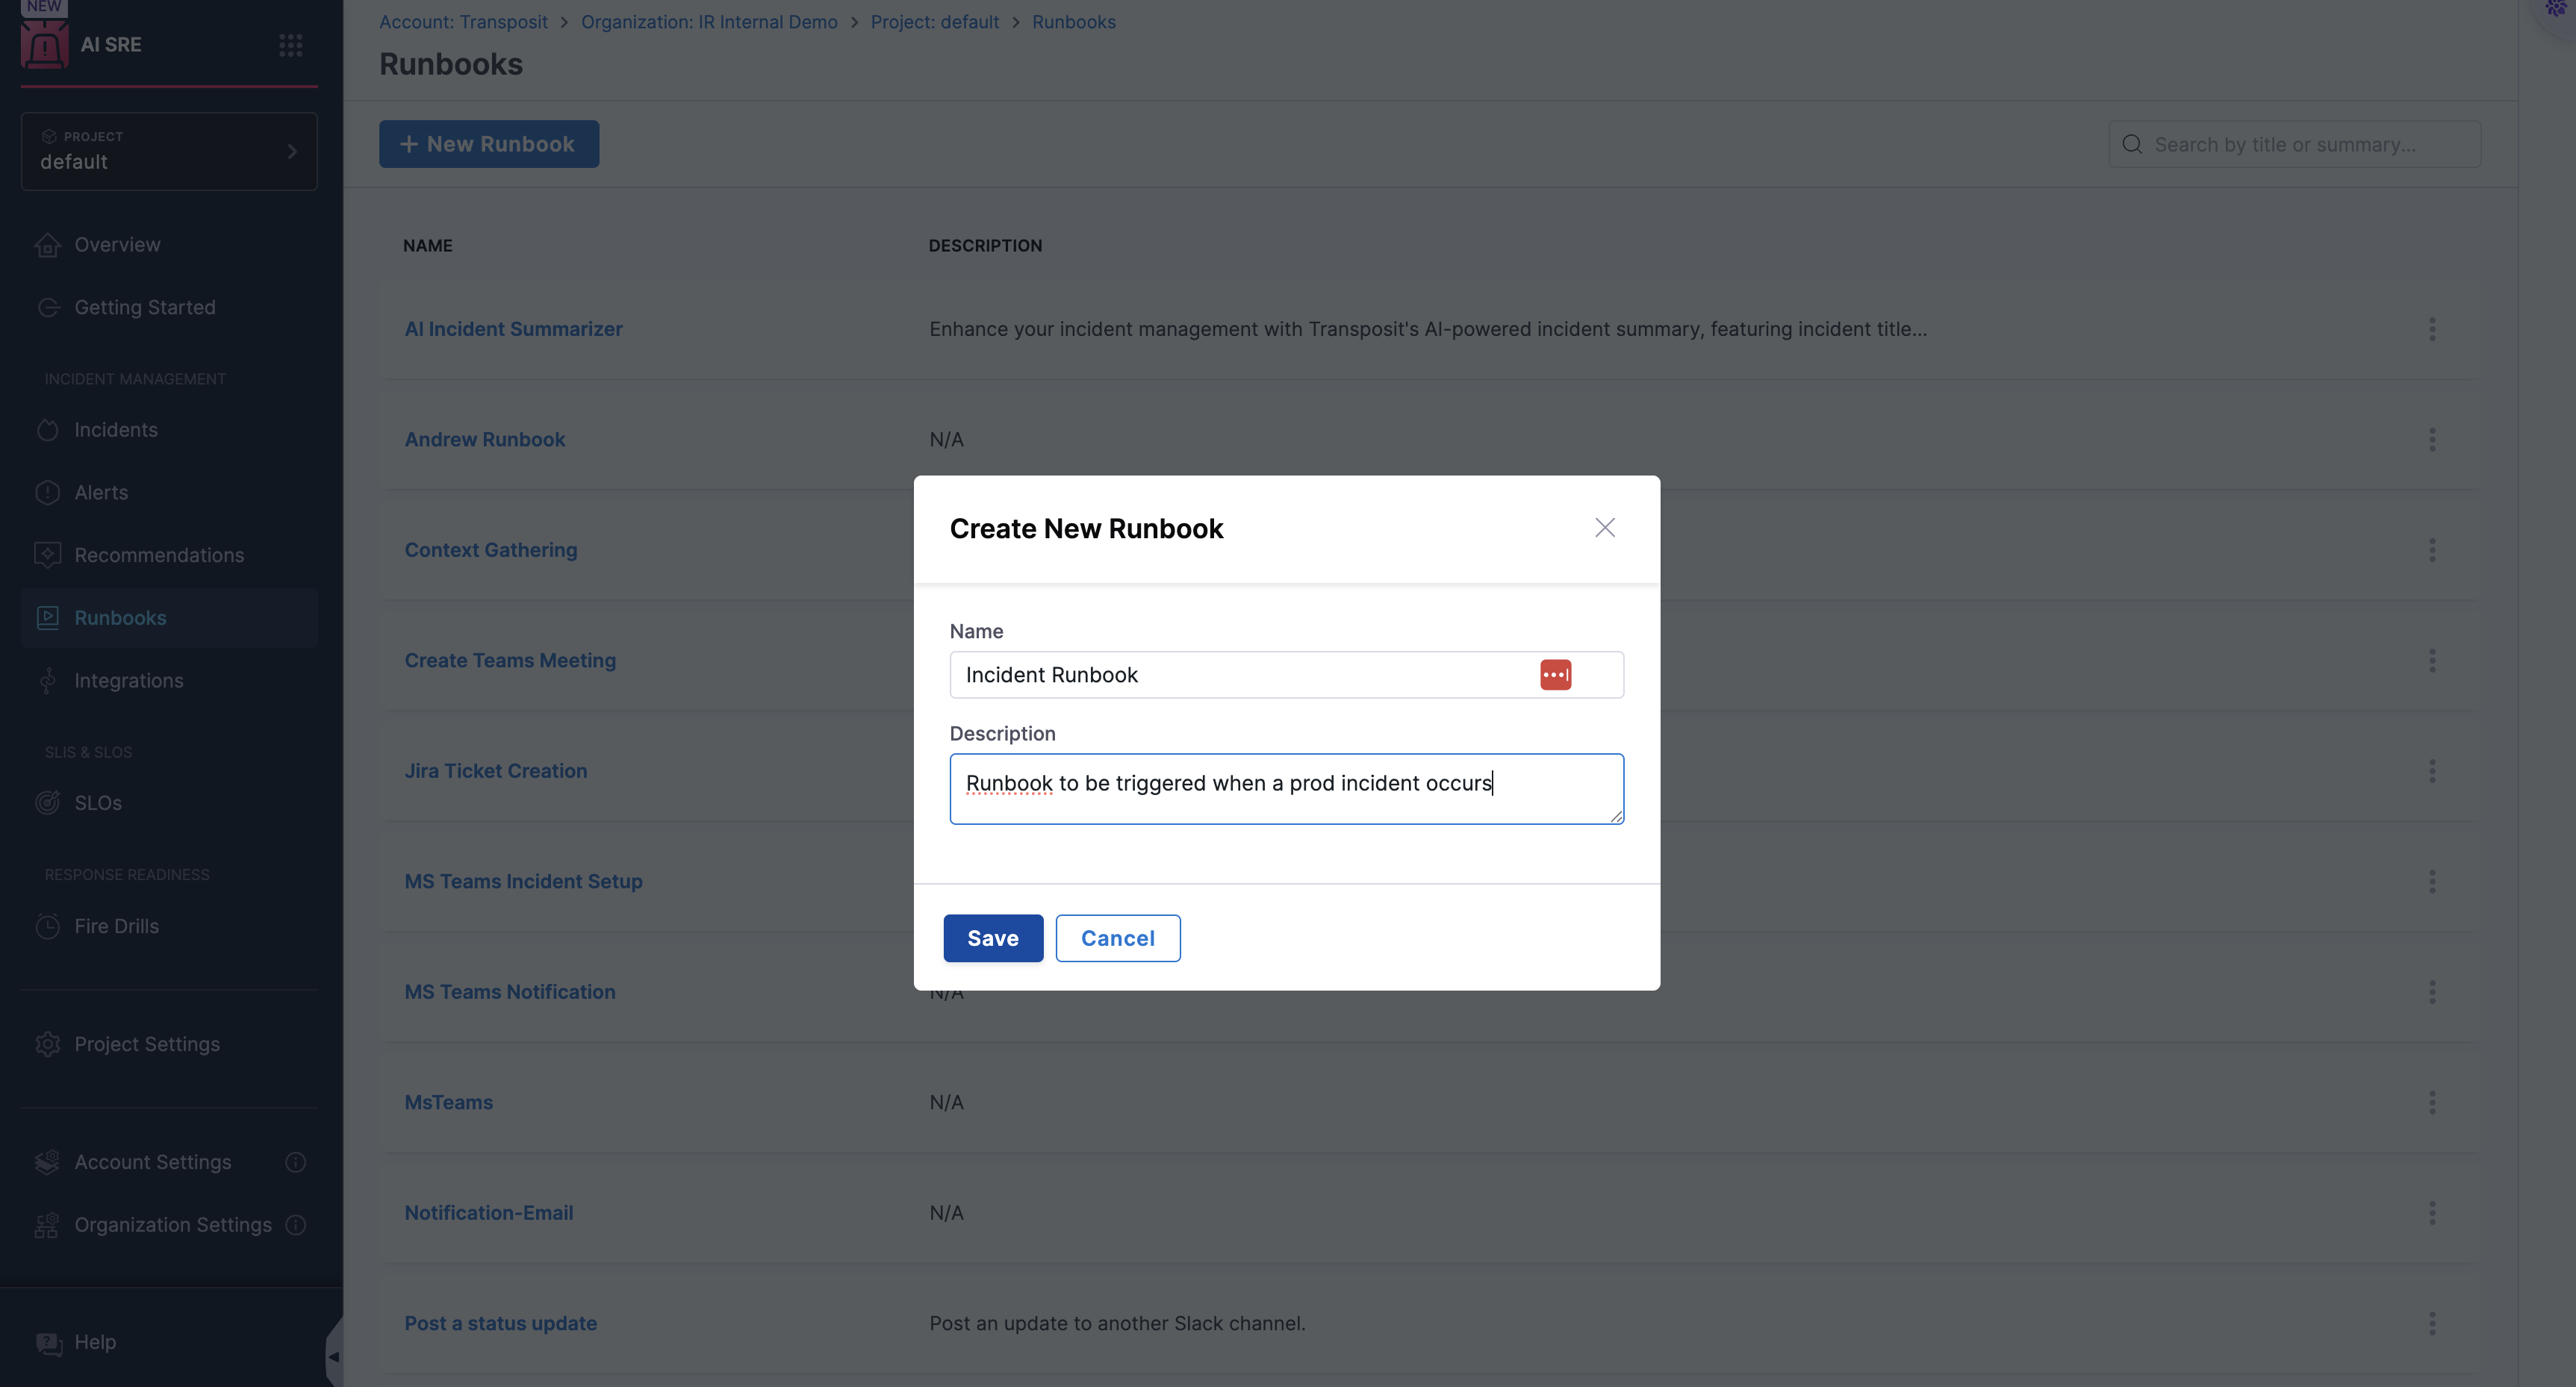
Step 4: Save the initial configuration
Create the base runbook and open the workflow designer:
- Click Save to create the basic runbook structure
- This establishes your runbook and opens the workflow designer
Step 5: Add your first action
Add an automated action to the workflow:
- Click New Step to add steps to your runbook workflow
- Select Action from the dropdown menu to add an automated action
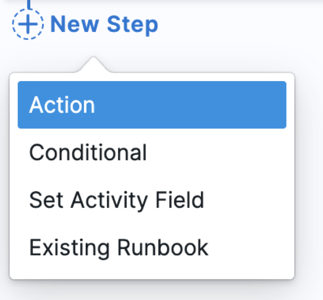
- This opens the action selection interface where you can choose from various automation categories
Step 6: Explore action categories
Review the available action categories in the left panel:
- The left panel displays different action categories:
- Communication: Slack, MS Teams, Zoom, and Email
- Tickets & Code: Jira, ServiceNow, GitHub, Confluence
- On-Call: OpsGenie, PagerDuty
- Incidents and Alerts: Managing incident timeline, resolving alerts, and closing incidents
- Other: Additional integrations and custom actions
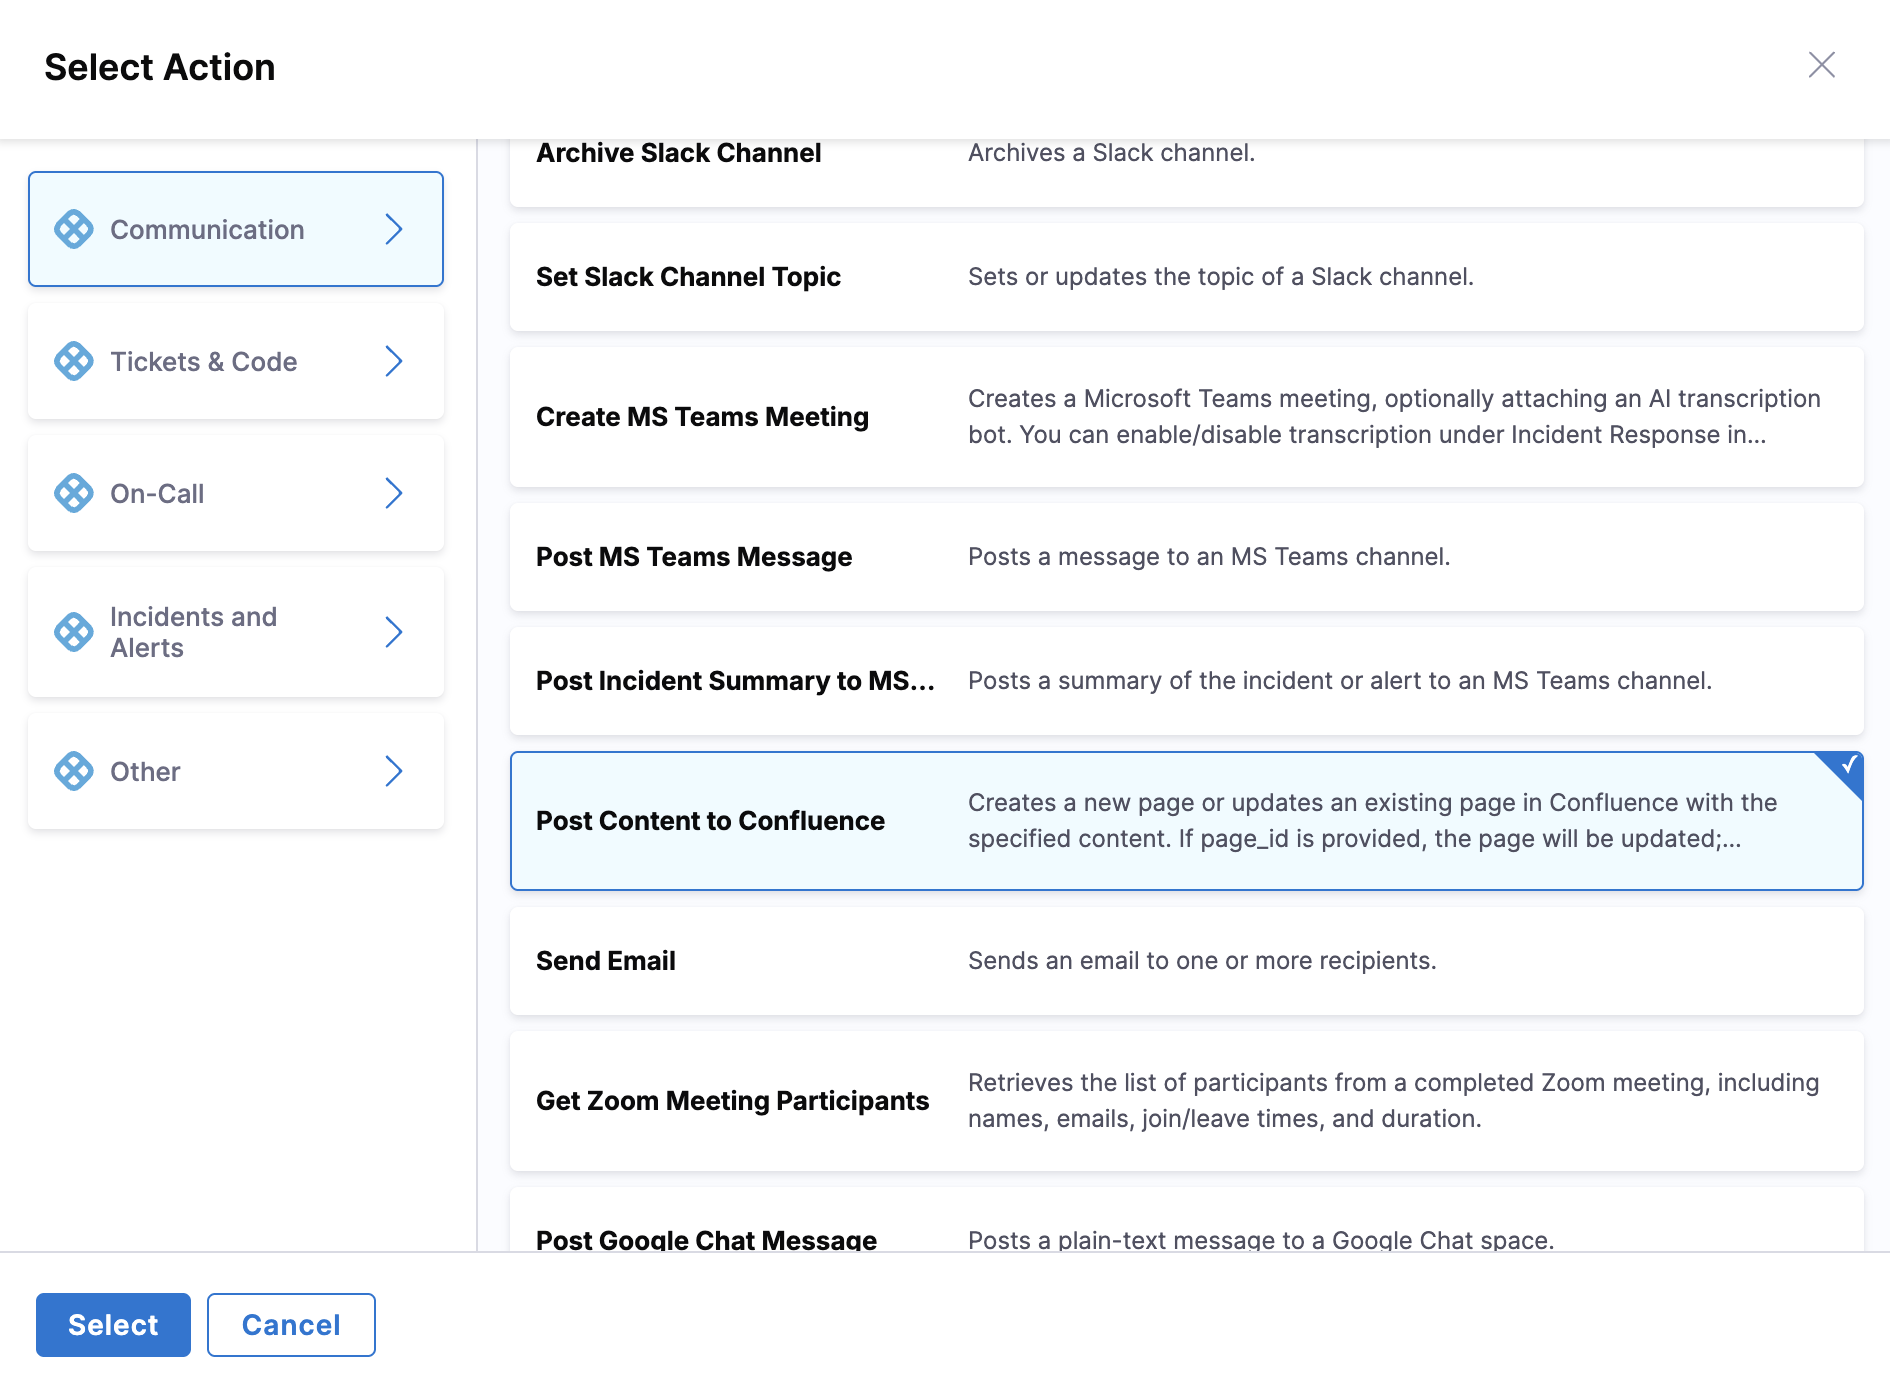
- Browse through categories to find the appropriate action for your workflow
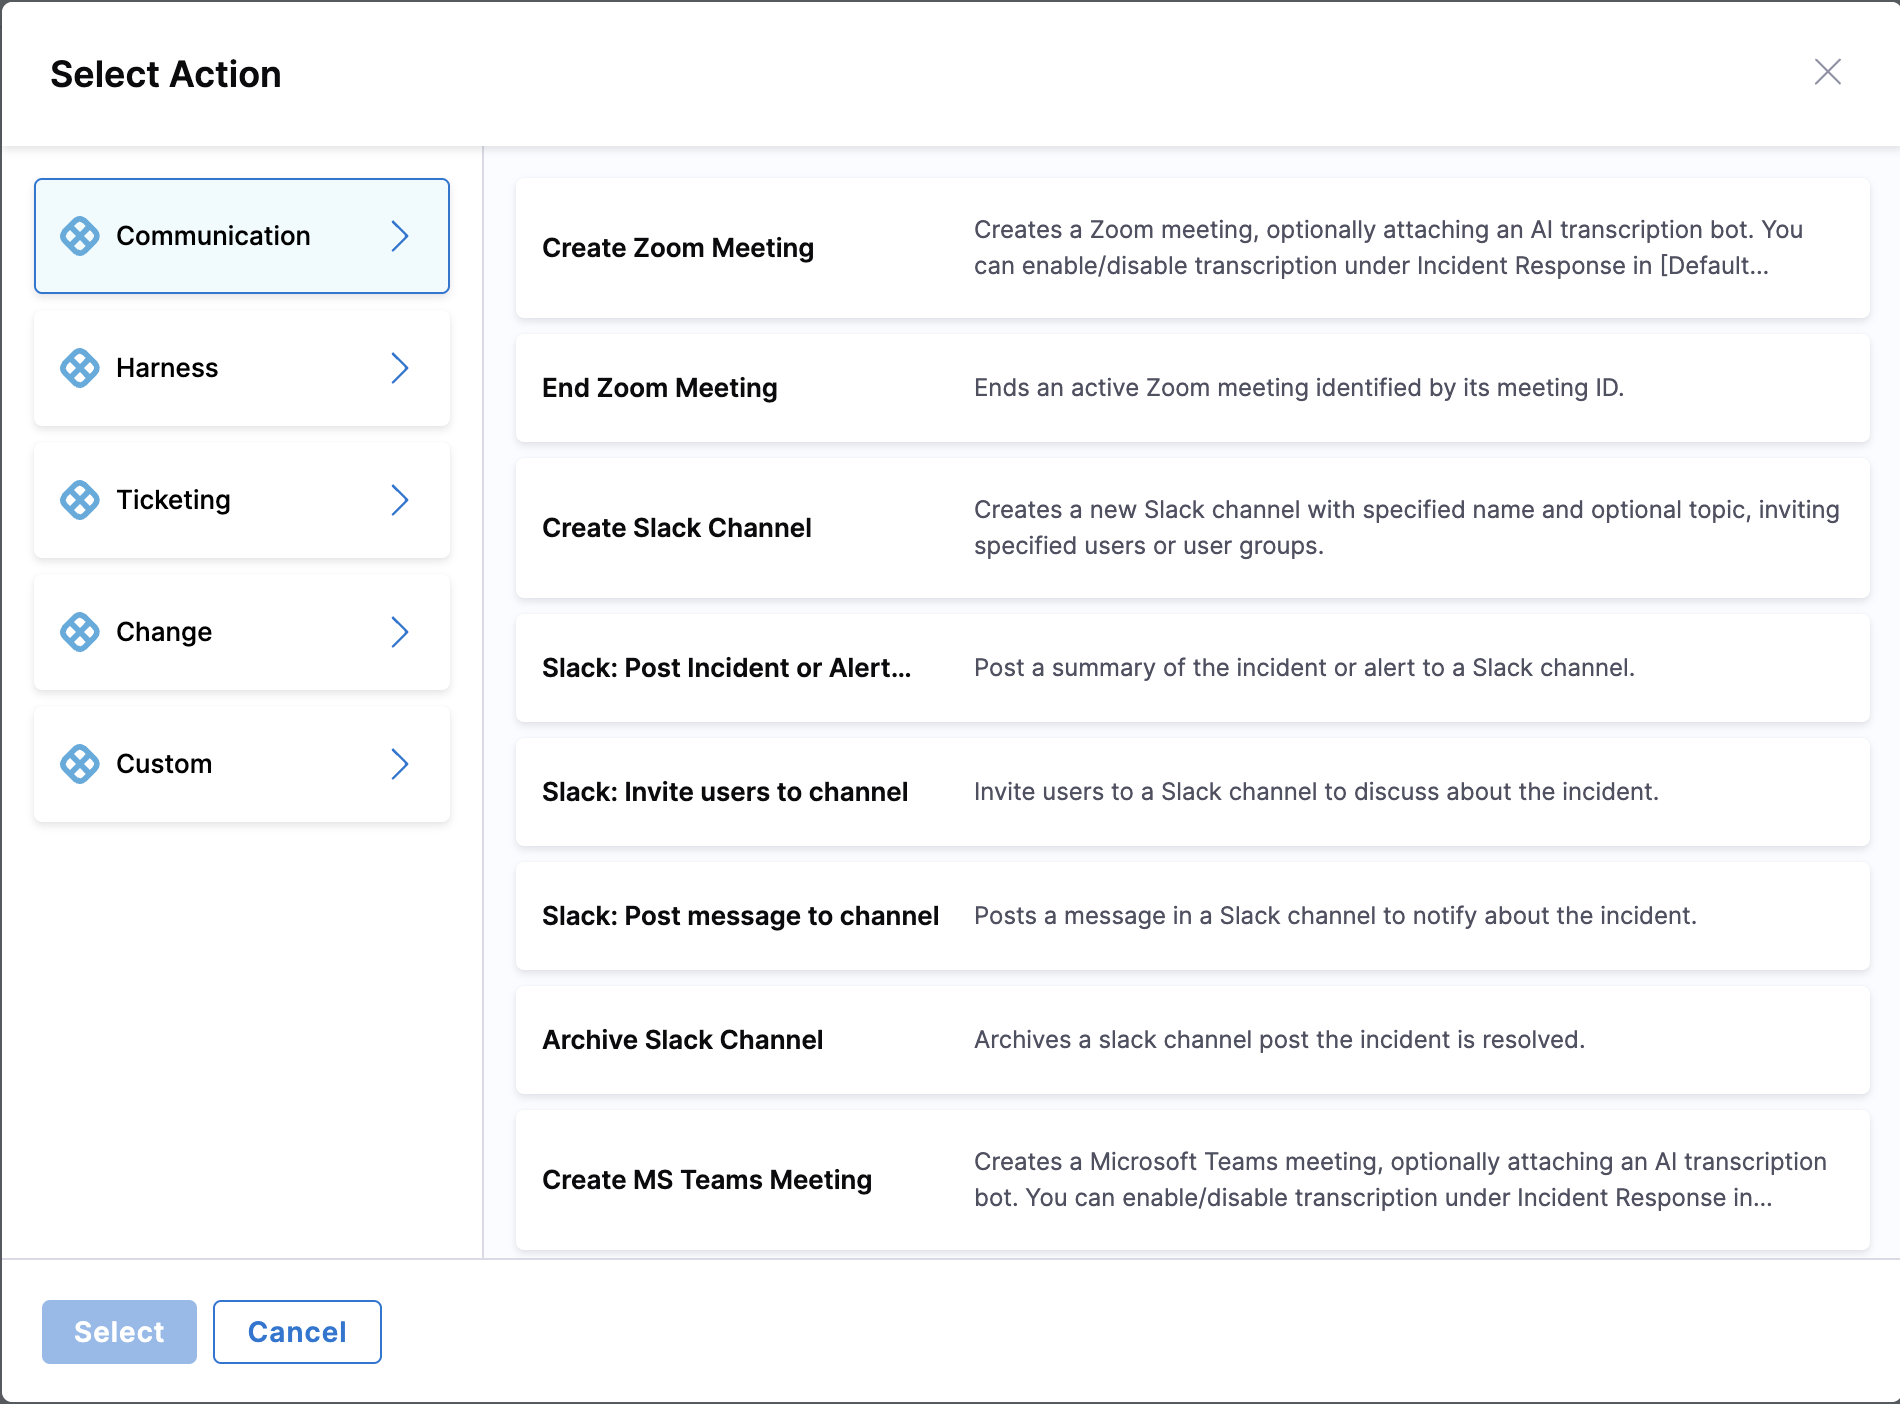
Step 7: Select and configure the action
Add an action from your chosen category to the workflow:
- Choose any action from the available list in your selected category
- Click Select to add the action to your workflow
- Each action will have specific configuration requirements based on its functionality
Step 8: Configure input/output context
You can configure the context to determine which fields will be available in the data picker when setting up action parameters:
- Select Context Type: Choose the Incident or Alert Context (Any/No/Custom) based on your runbook's purpose
- Choose Specific Type: For Custom Incident or Alert Context:
- Select the appropriate Incident Type from the dropdown for incident-based runbooks
- Select the appropriate Alert Type from the dropdown for alert-based runbooks
- Field Availability Impact:
- Basic Context (Any/No): Data picker shows only standard incident/alert fields
- Specific Incident Type: Data picker displays both basic fields AND custom fields defined for that incident type
- Specific Alert Type: Data picker displays both basic fields AND custom fields defined for that alert type
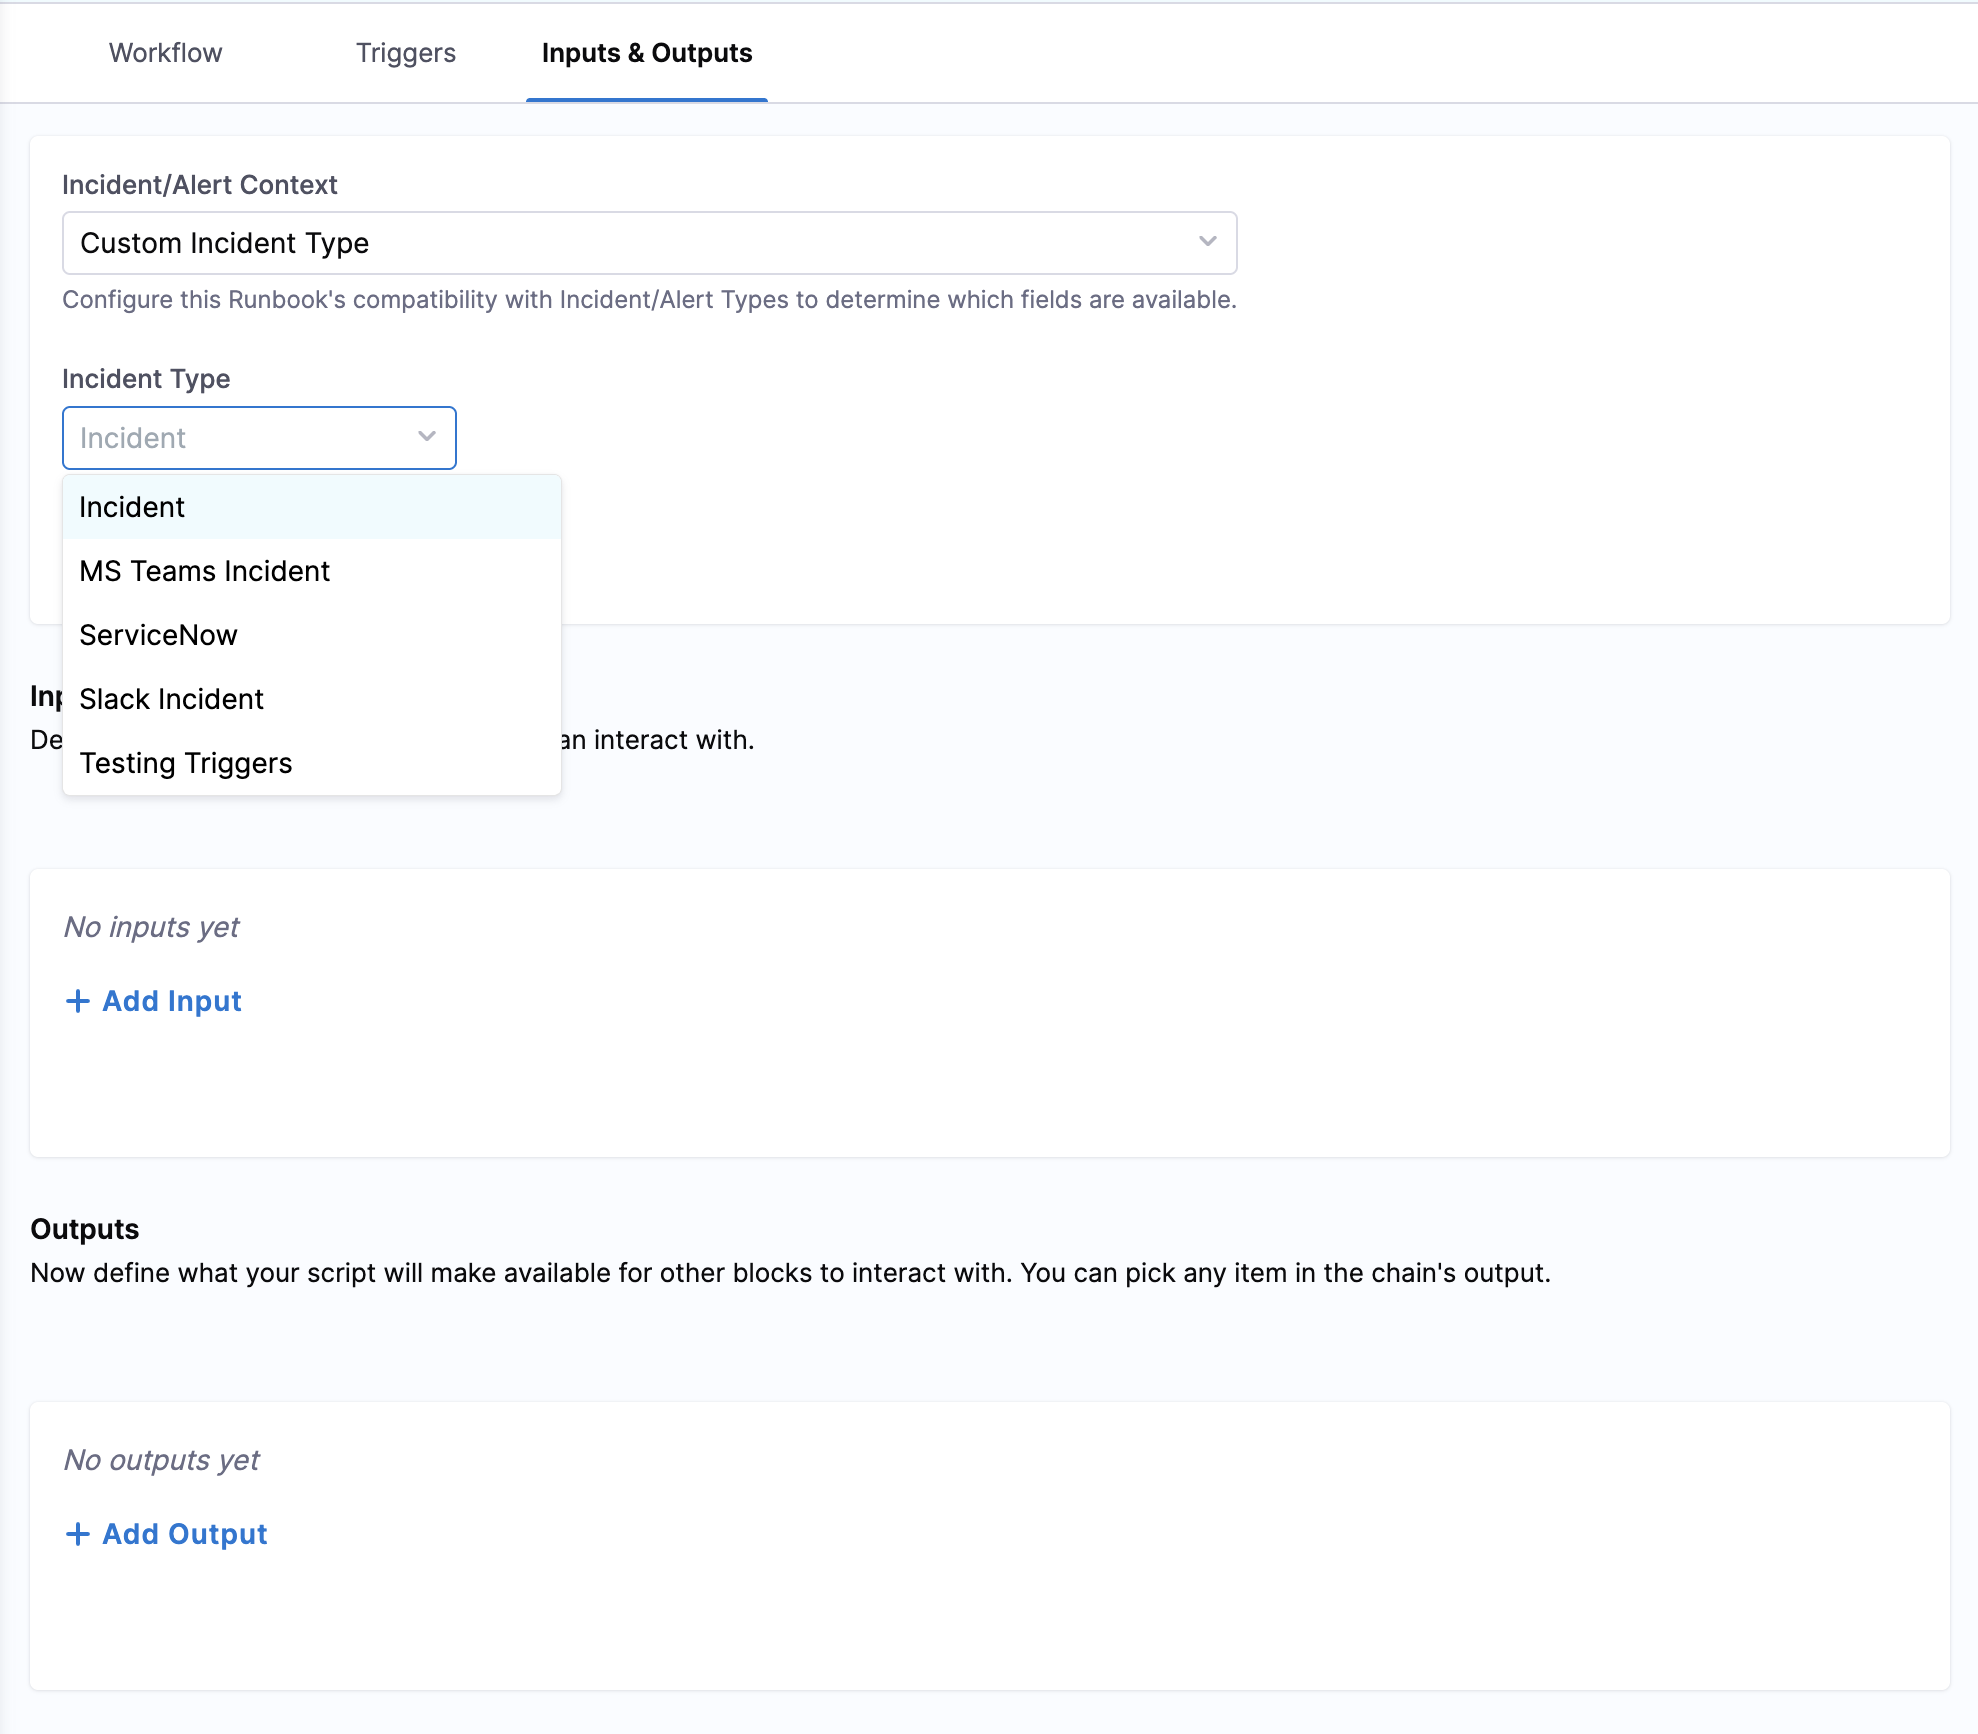
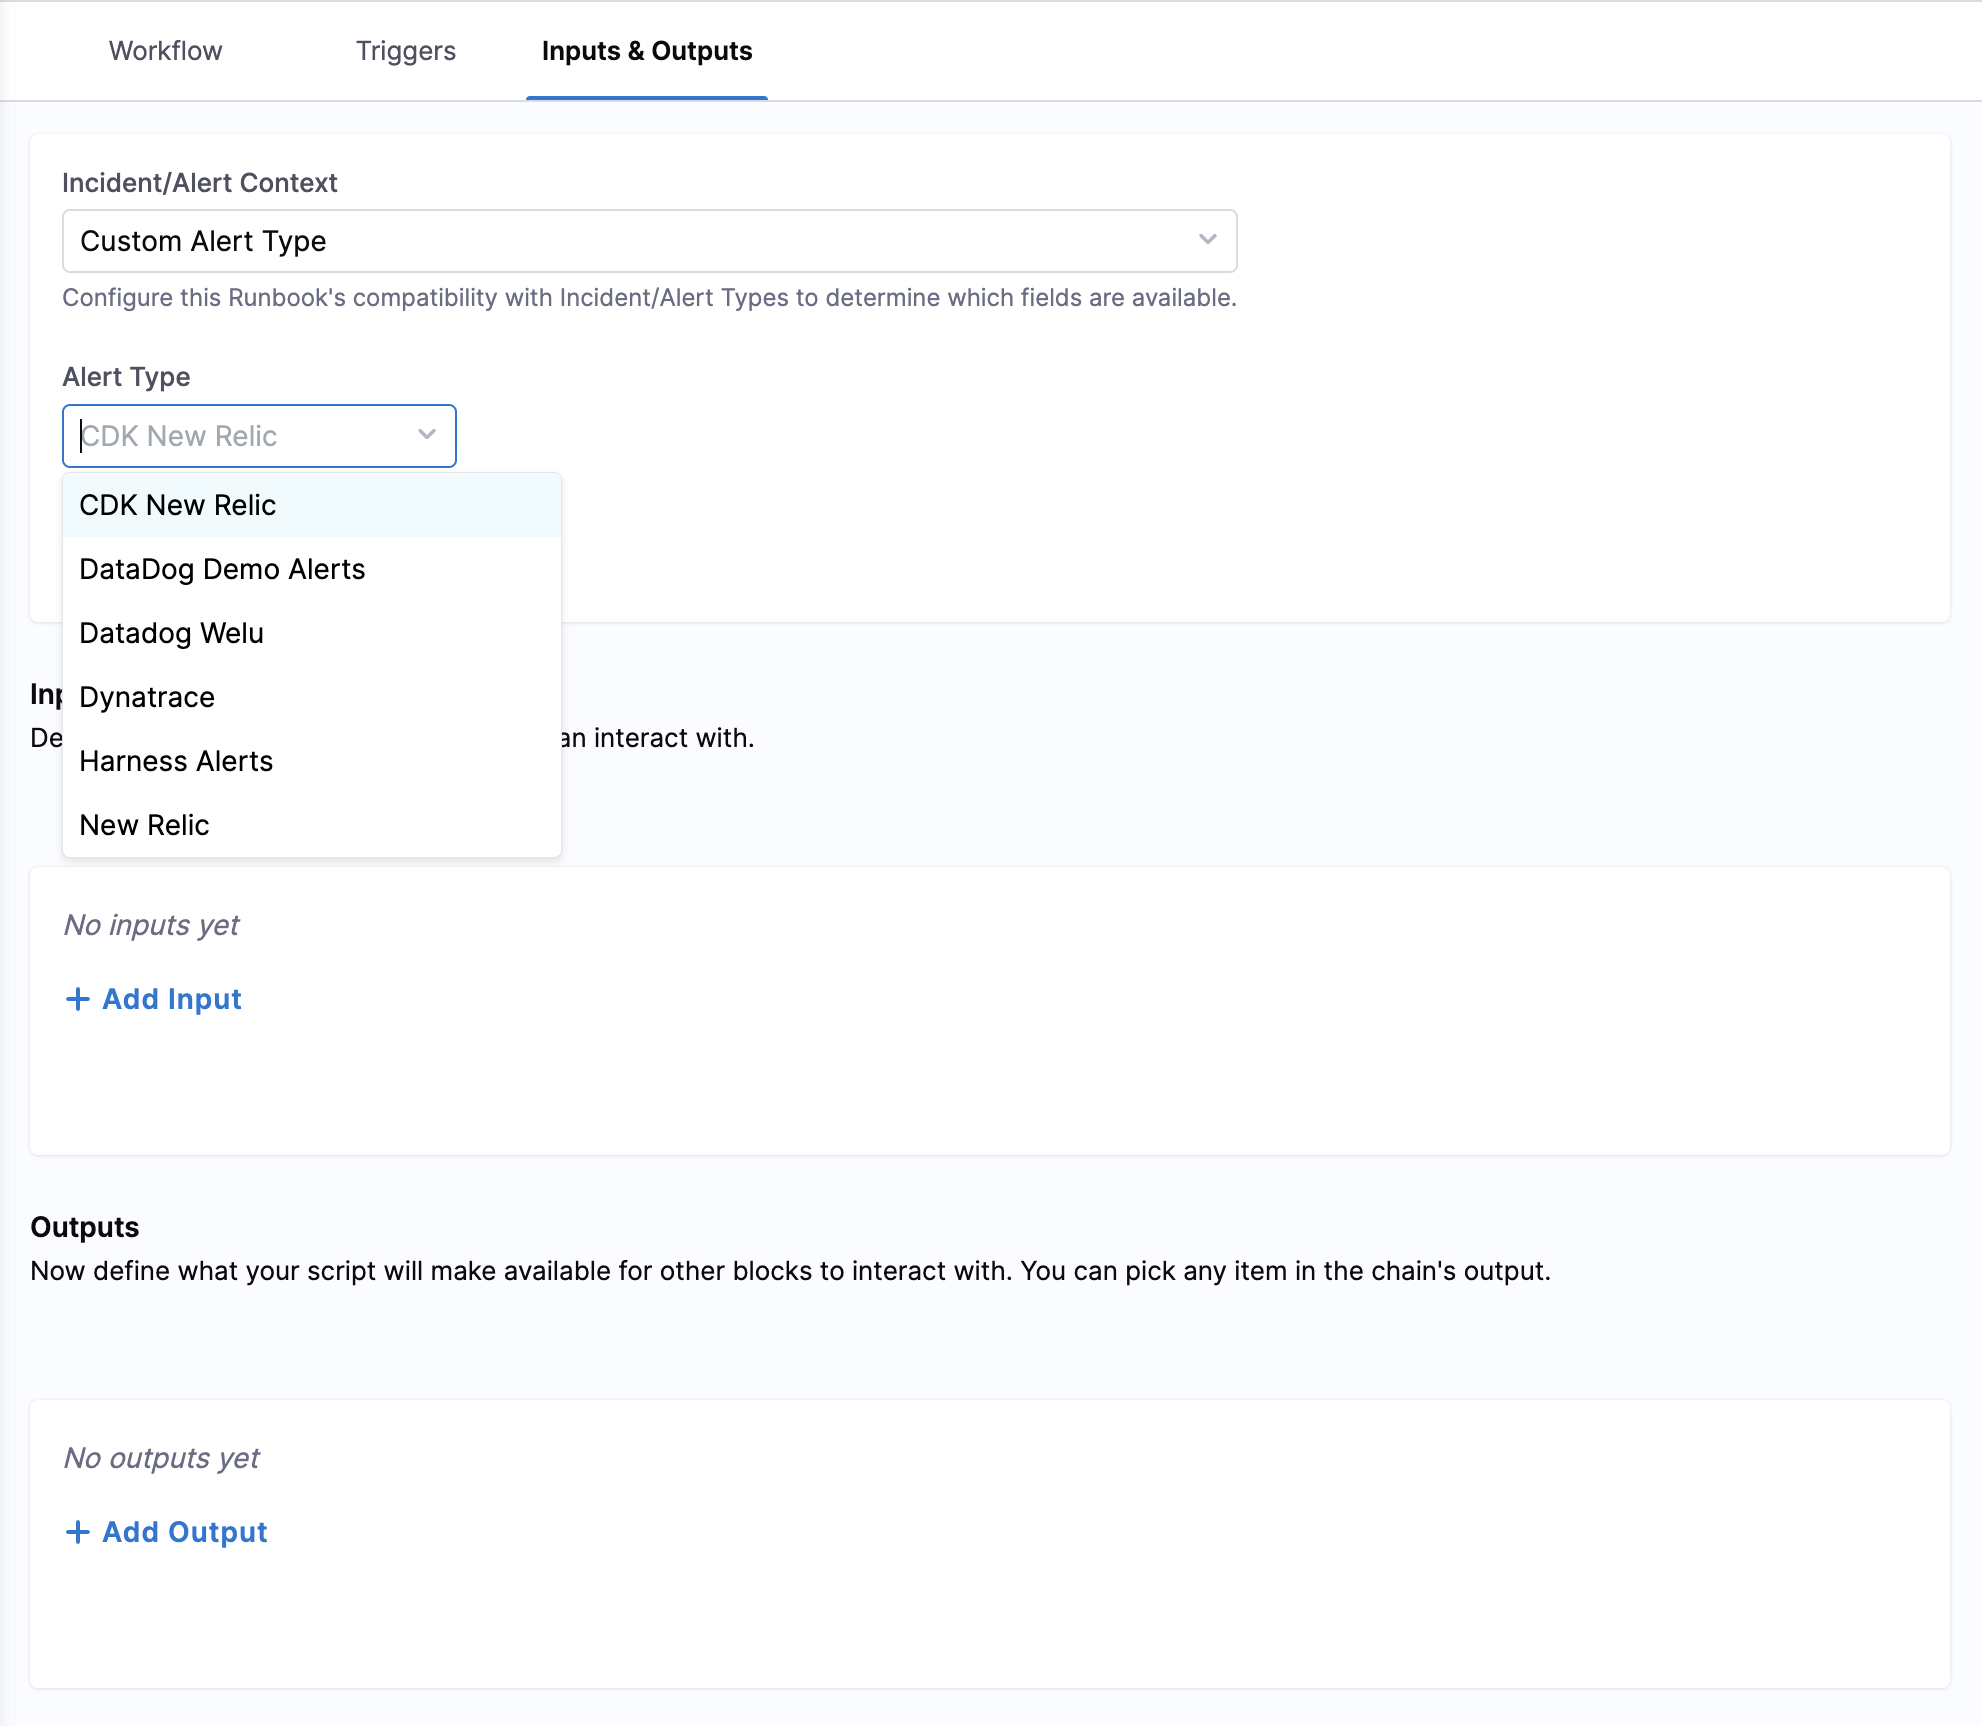
Why this matters: The context selection directly affects what data will be available when configuring your action parameters. Choosing a specific incident type ensures you have access to all custom fields defined for that type, making your runbook more powerful and context-aware.
Variable configuration details
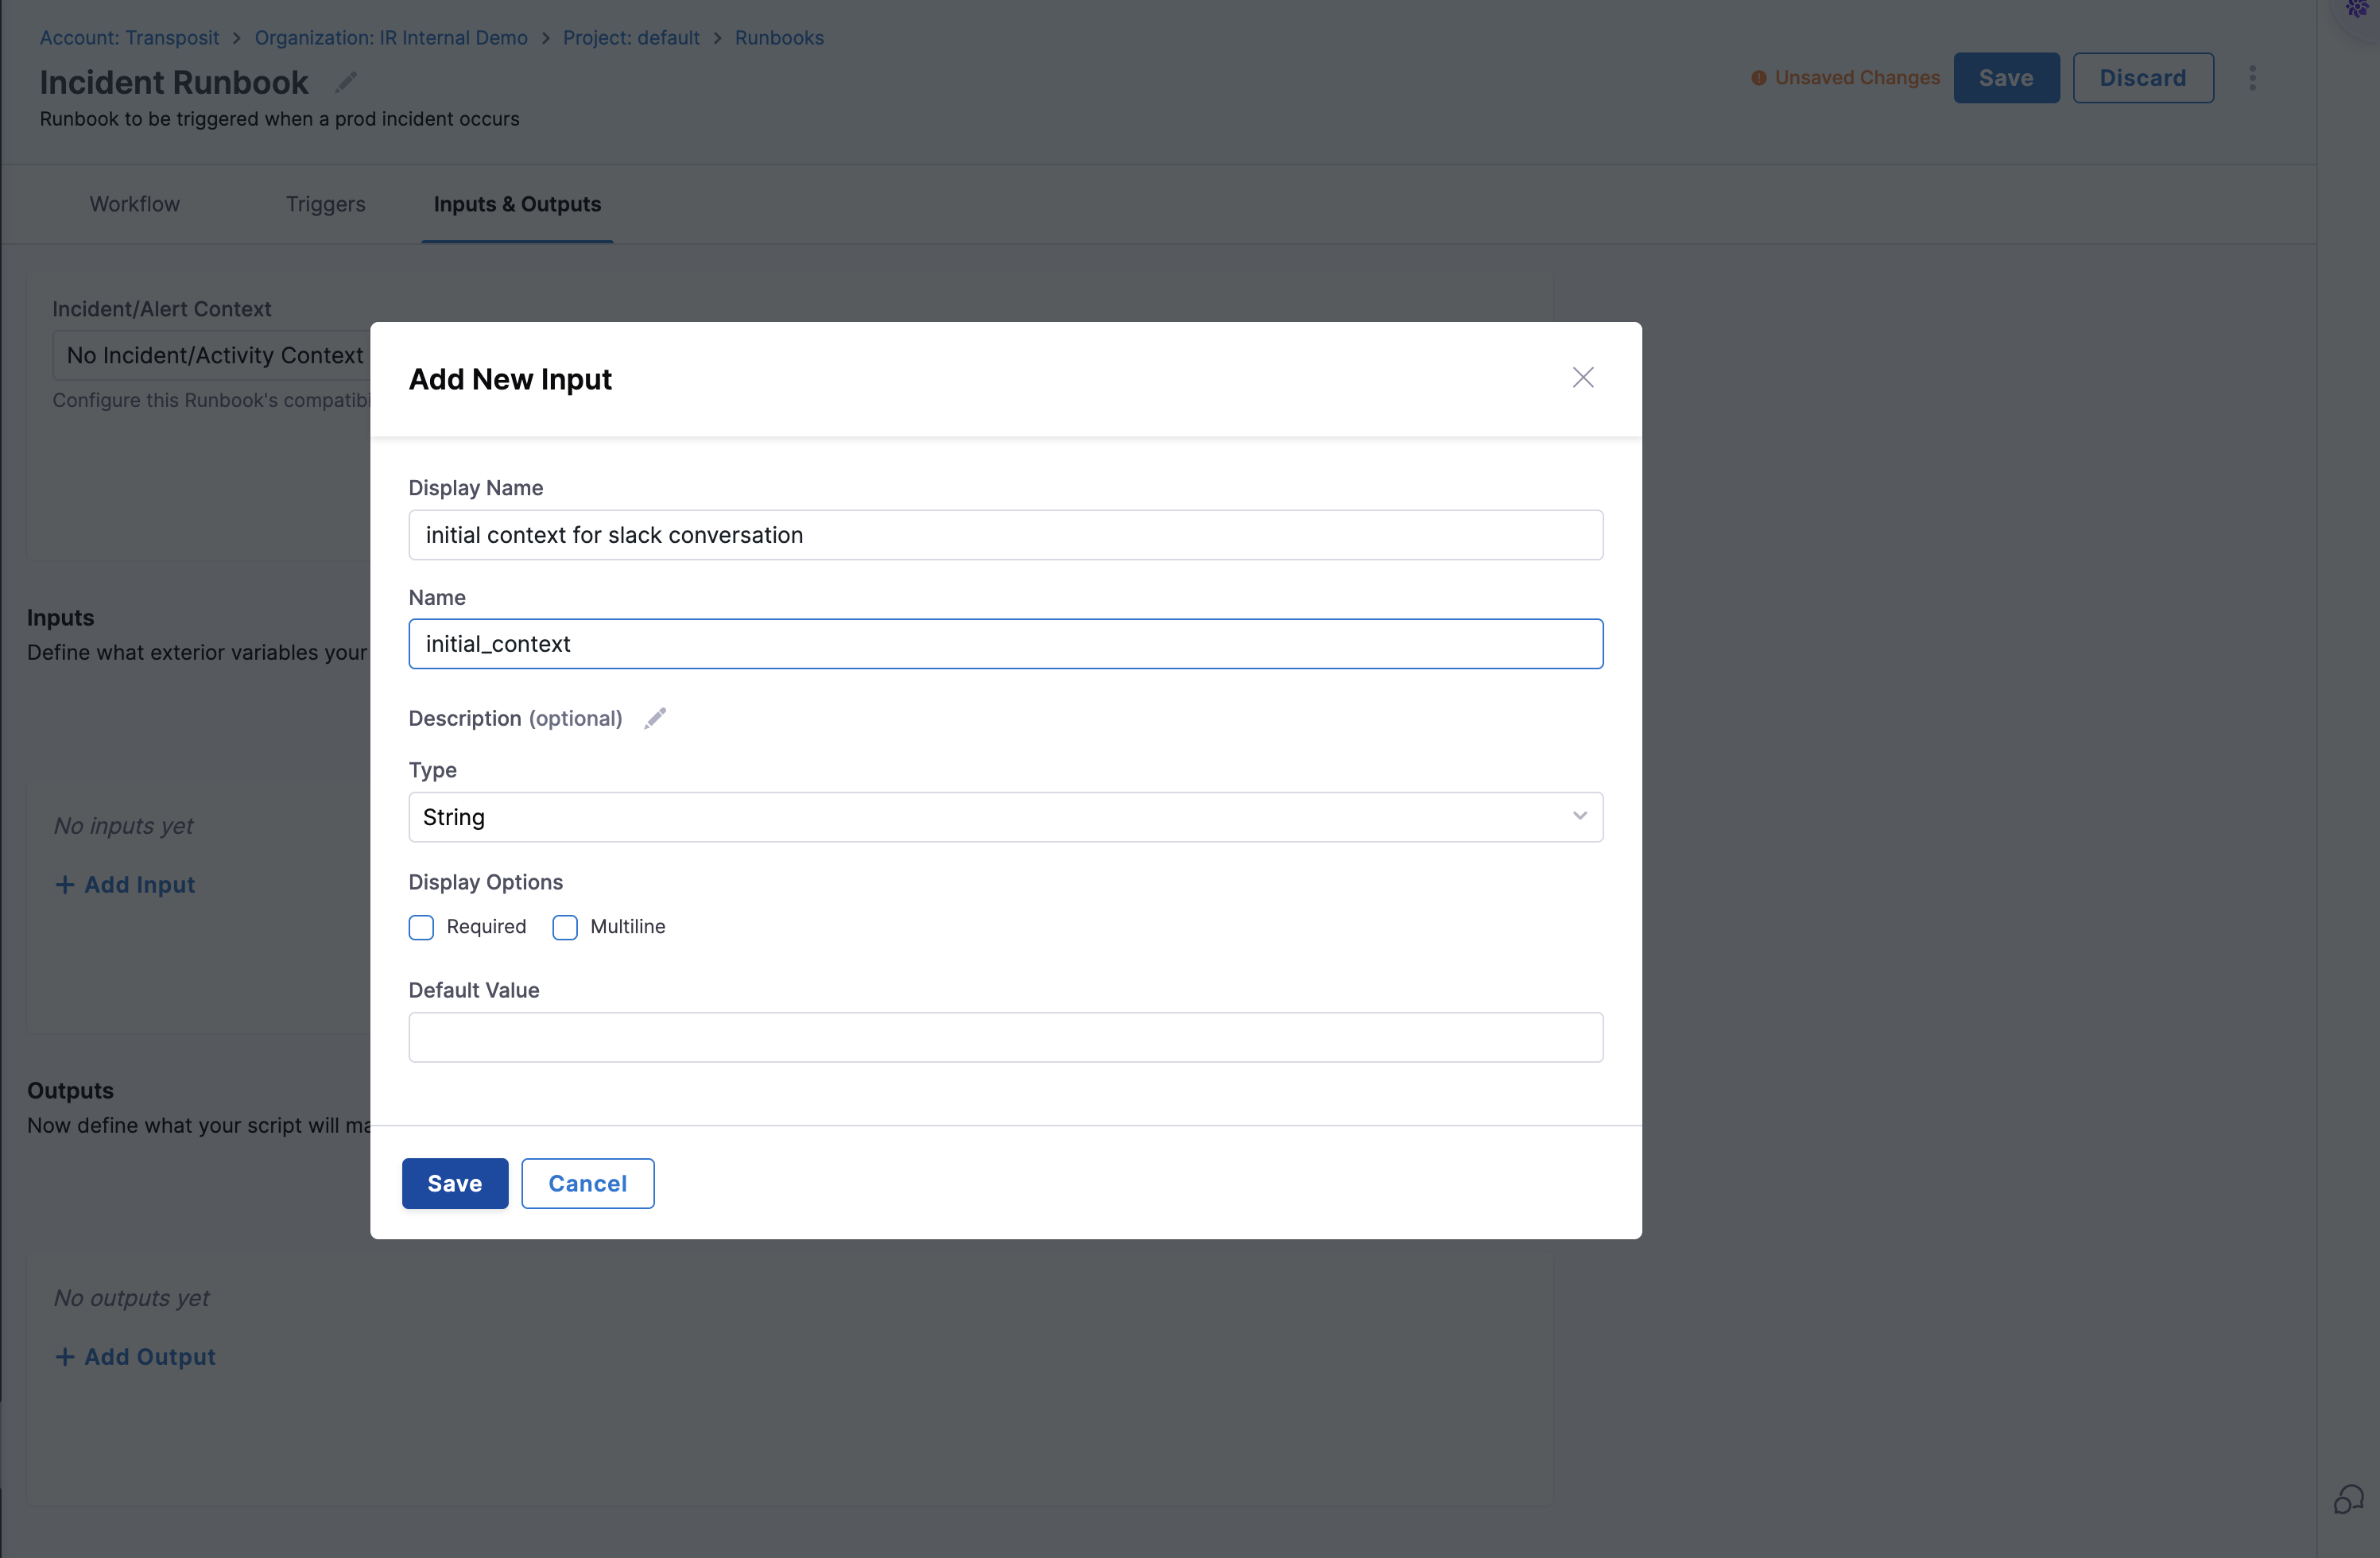
When configuring Input/Output context, you can also define custom variables:
- Input Variables: Values provided when the runbook is triggered, must be defined based on the incident or alert context
- Output Variables: Results from action executions, must be defined based on the action execution
- Required Fields: Name, Display Name, Description, Type, and Default Value
- Data Types: String, Integer, Number, Boolean, Object, or Array
- Requirement Level: Variables can be defined as required or optional based on the use case
Dynamic parameter sources available
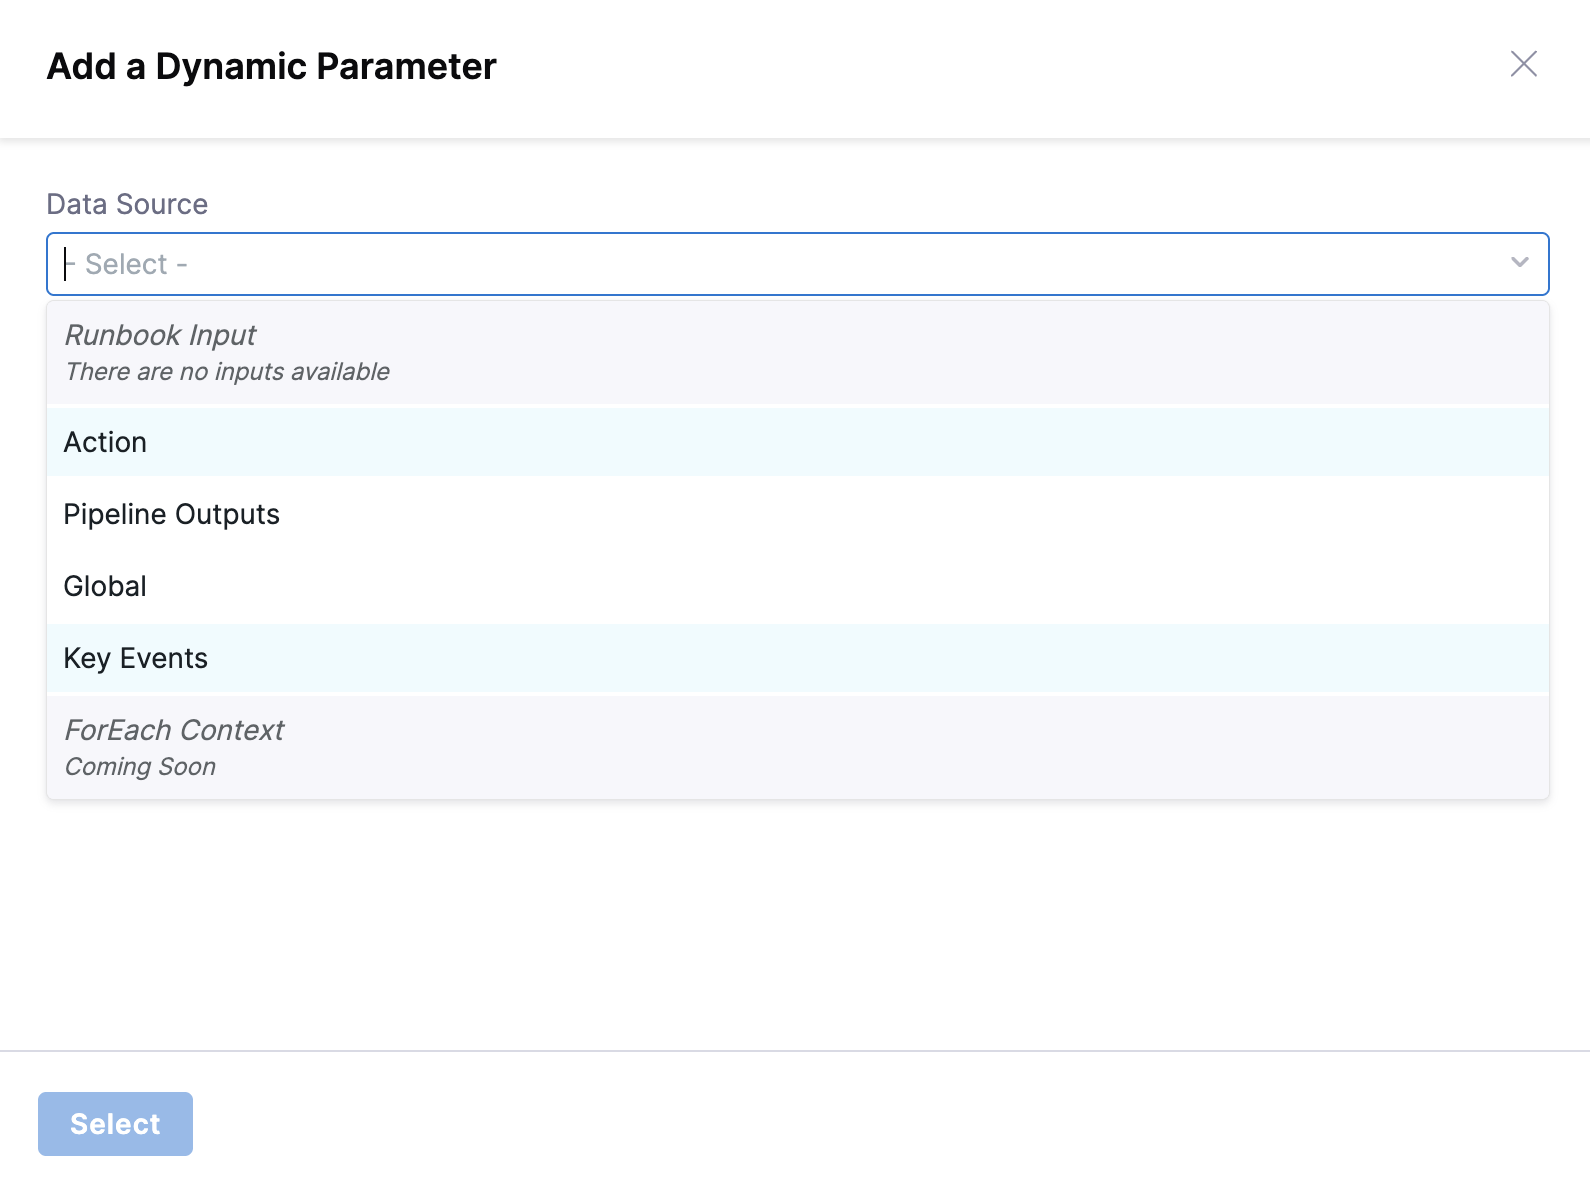
Once context is configured, the data picker will provide access to multiple dynamic data sources:
- Runbook Inputs: Variables defined in the Input/Output section
- Action Outputs: Results from previously executed actions
- Pipeline Outputs: Data from Harness pipeline executions
- Global Variables: System-wide variables available to all runbooks
- Key Events: Event-driven data that can trigger specific behaviors
Key event integration setup
For event-driven runbooks, you can configure Key Events directly:
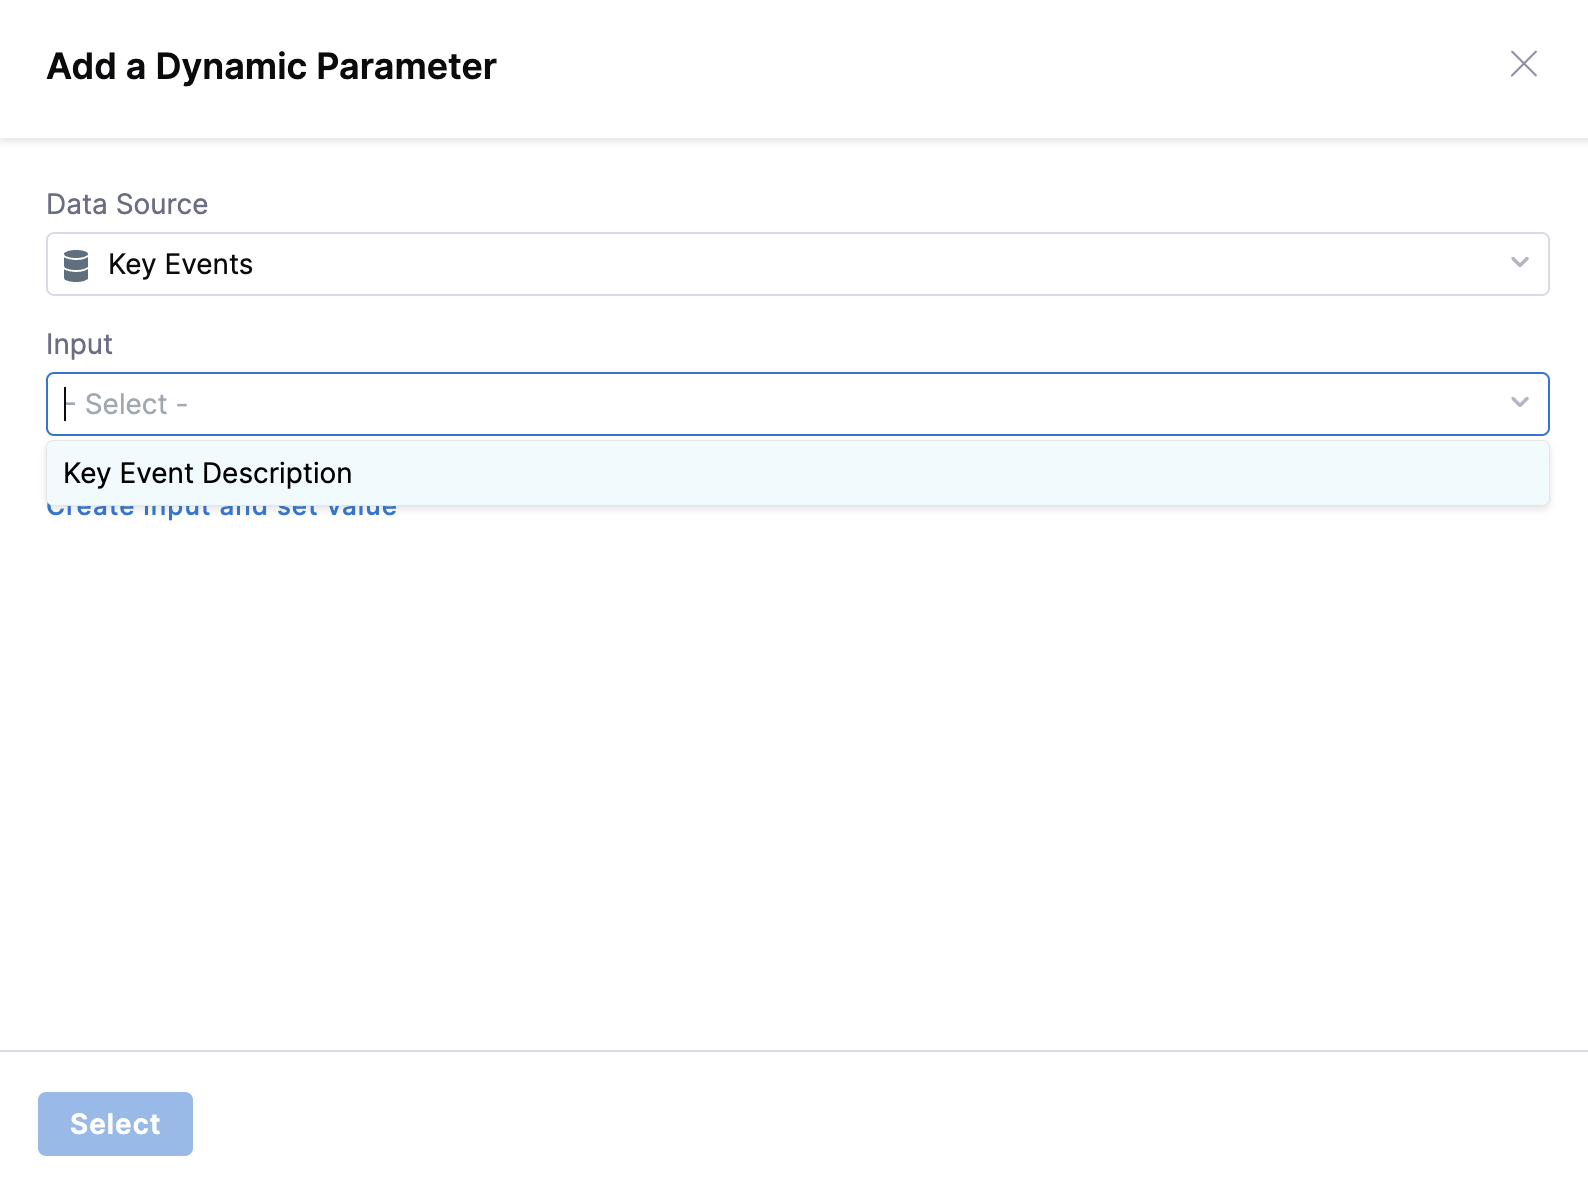
- Select Key Event as Source: When configuring an action parameter, choose "Key Event" as the data source
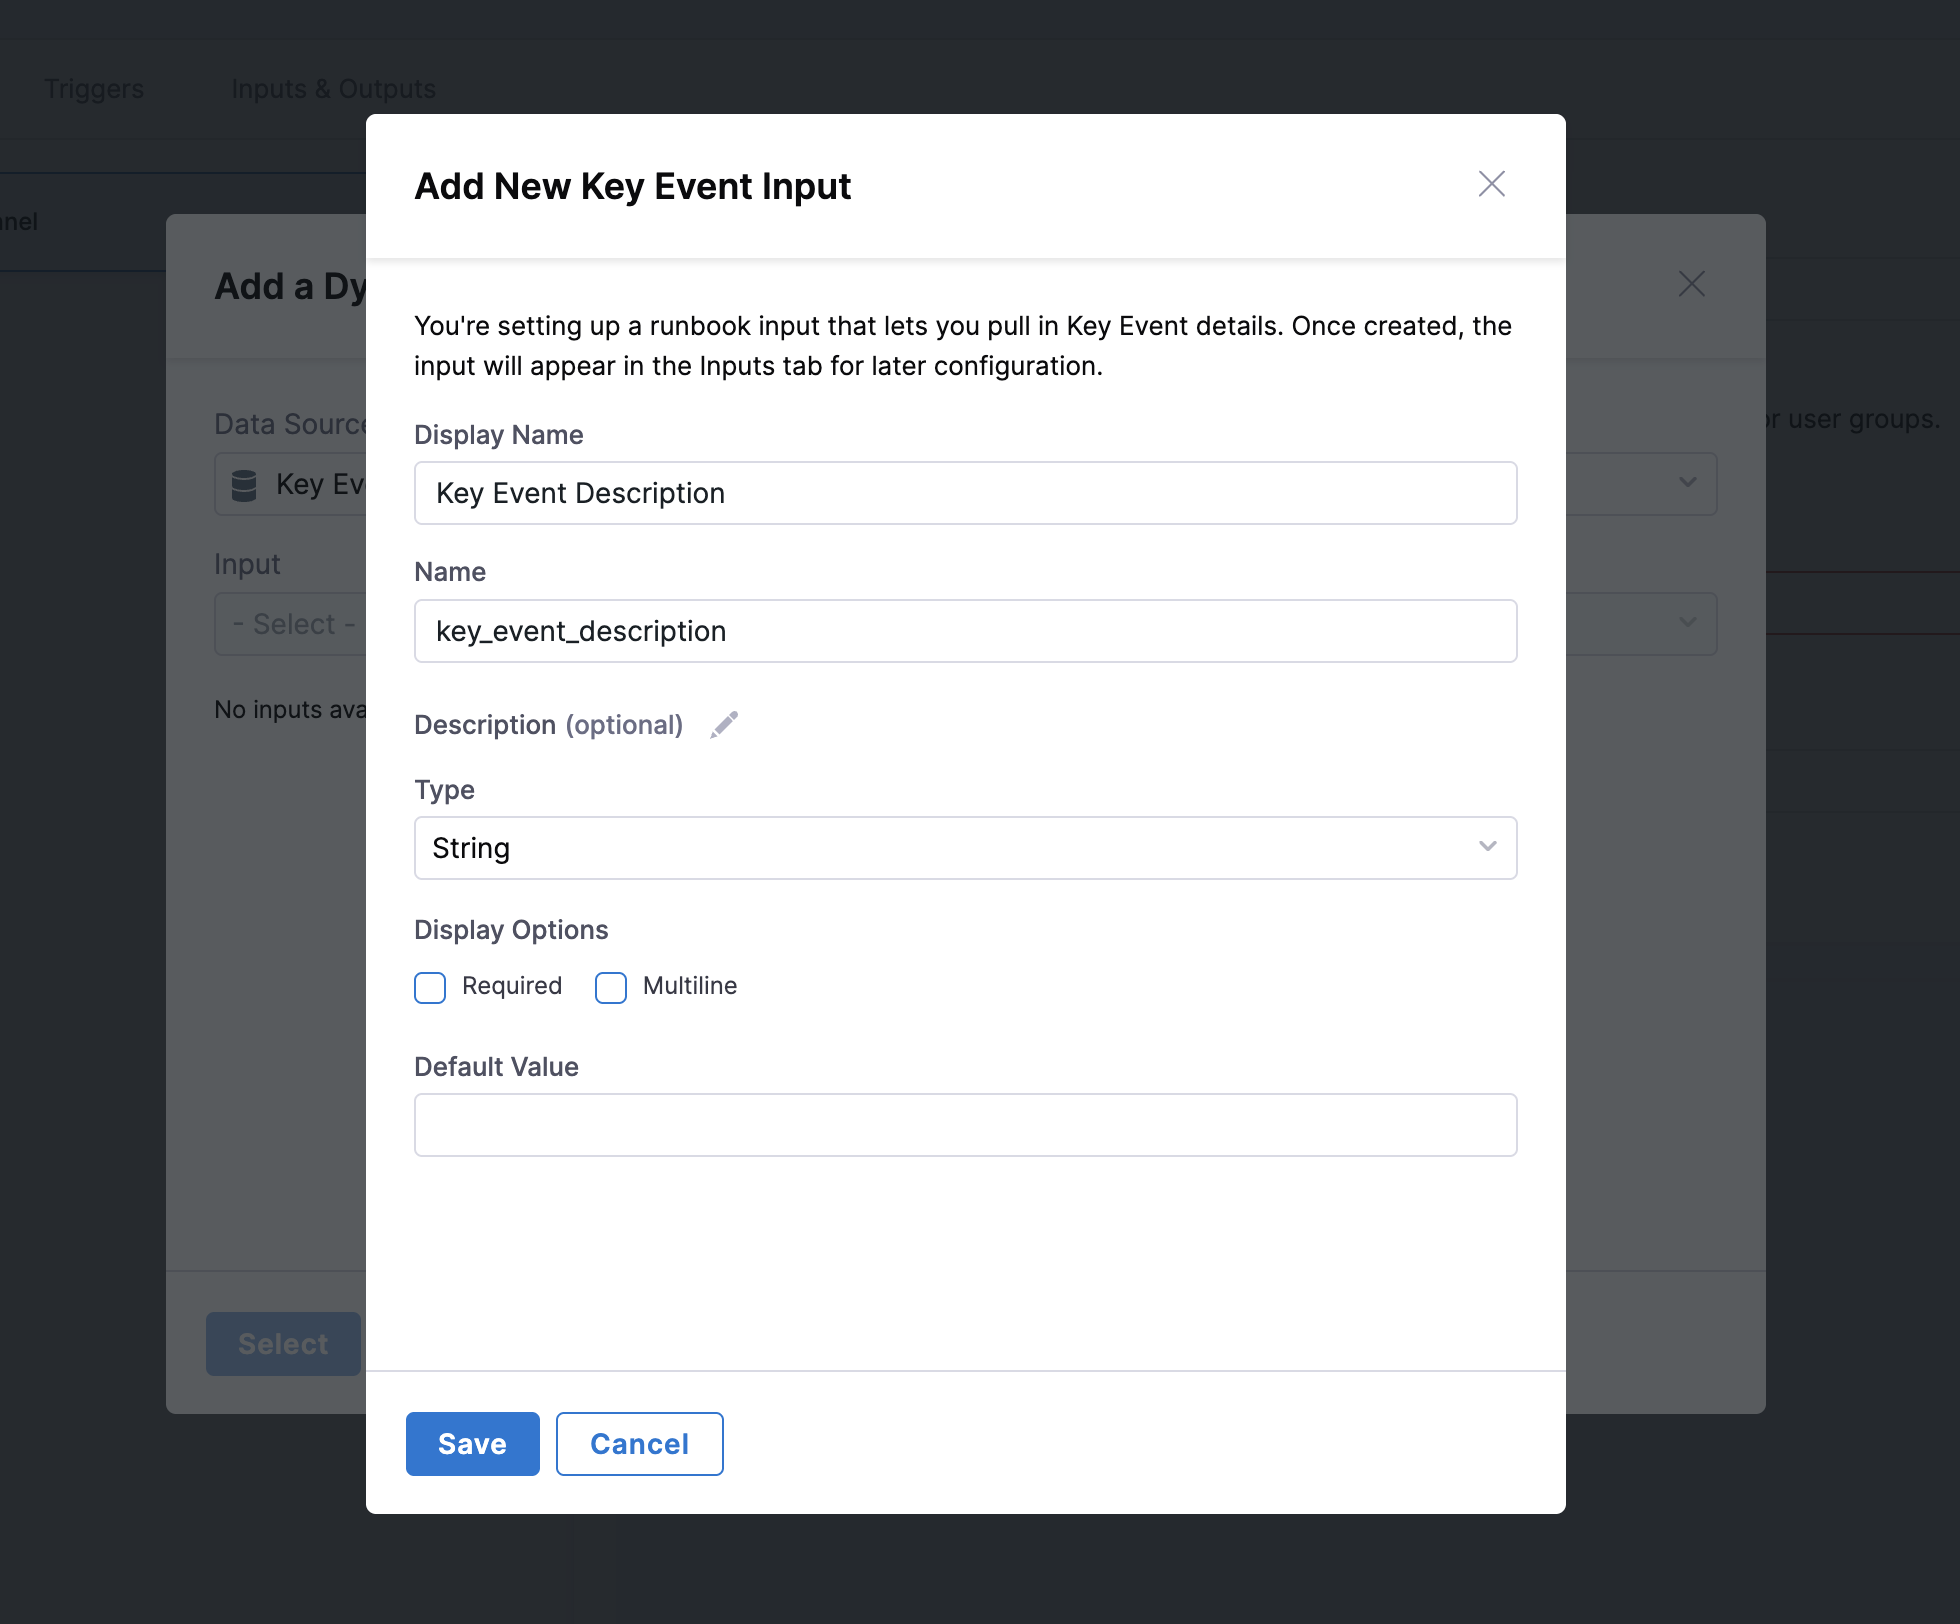
- Create Input and Set Value: Create inputs directly without navigating to Input/Output section:
- Click "Create Input and Set Value"
- Provide a Display Name, Type, and Default Value
- Save the new input variable
- Select the Key Event text from the input dropdown
Step 9: Configure action parameters
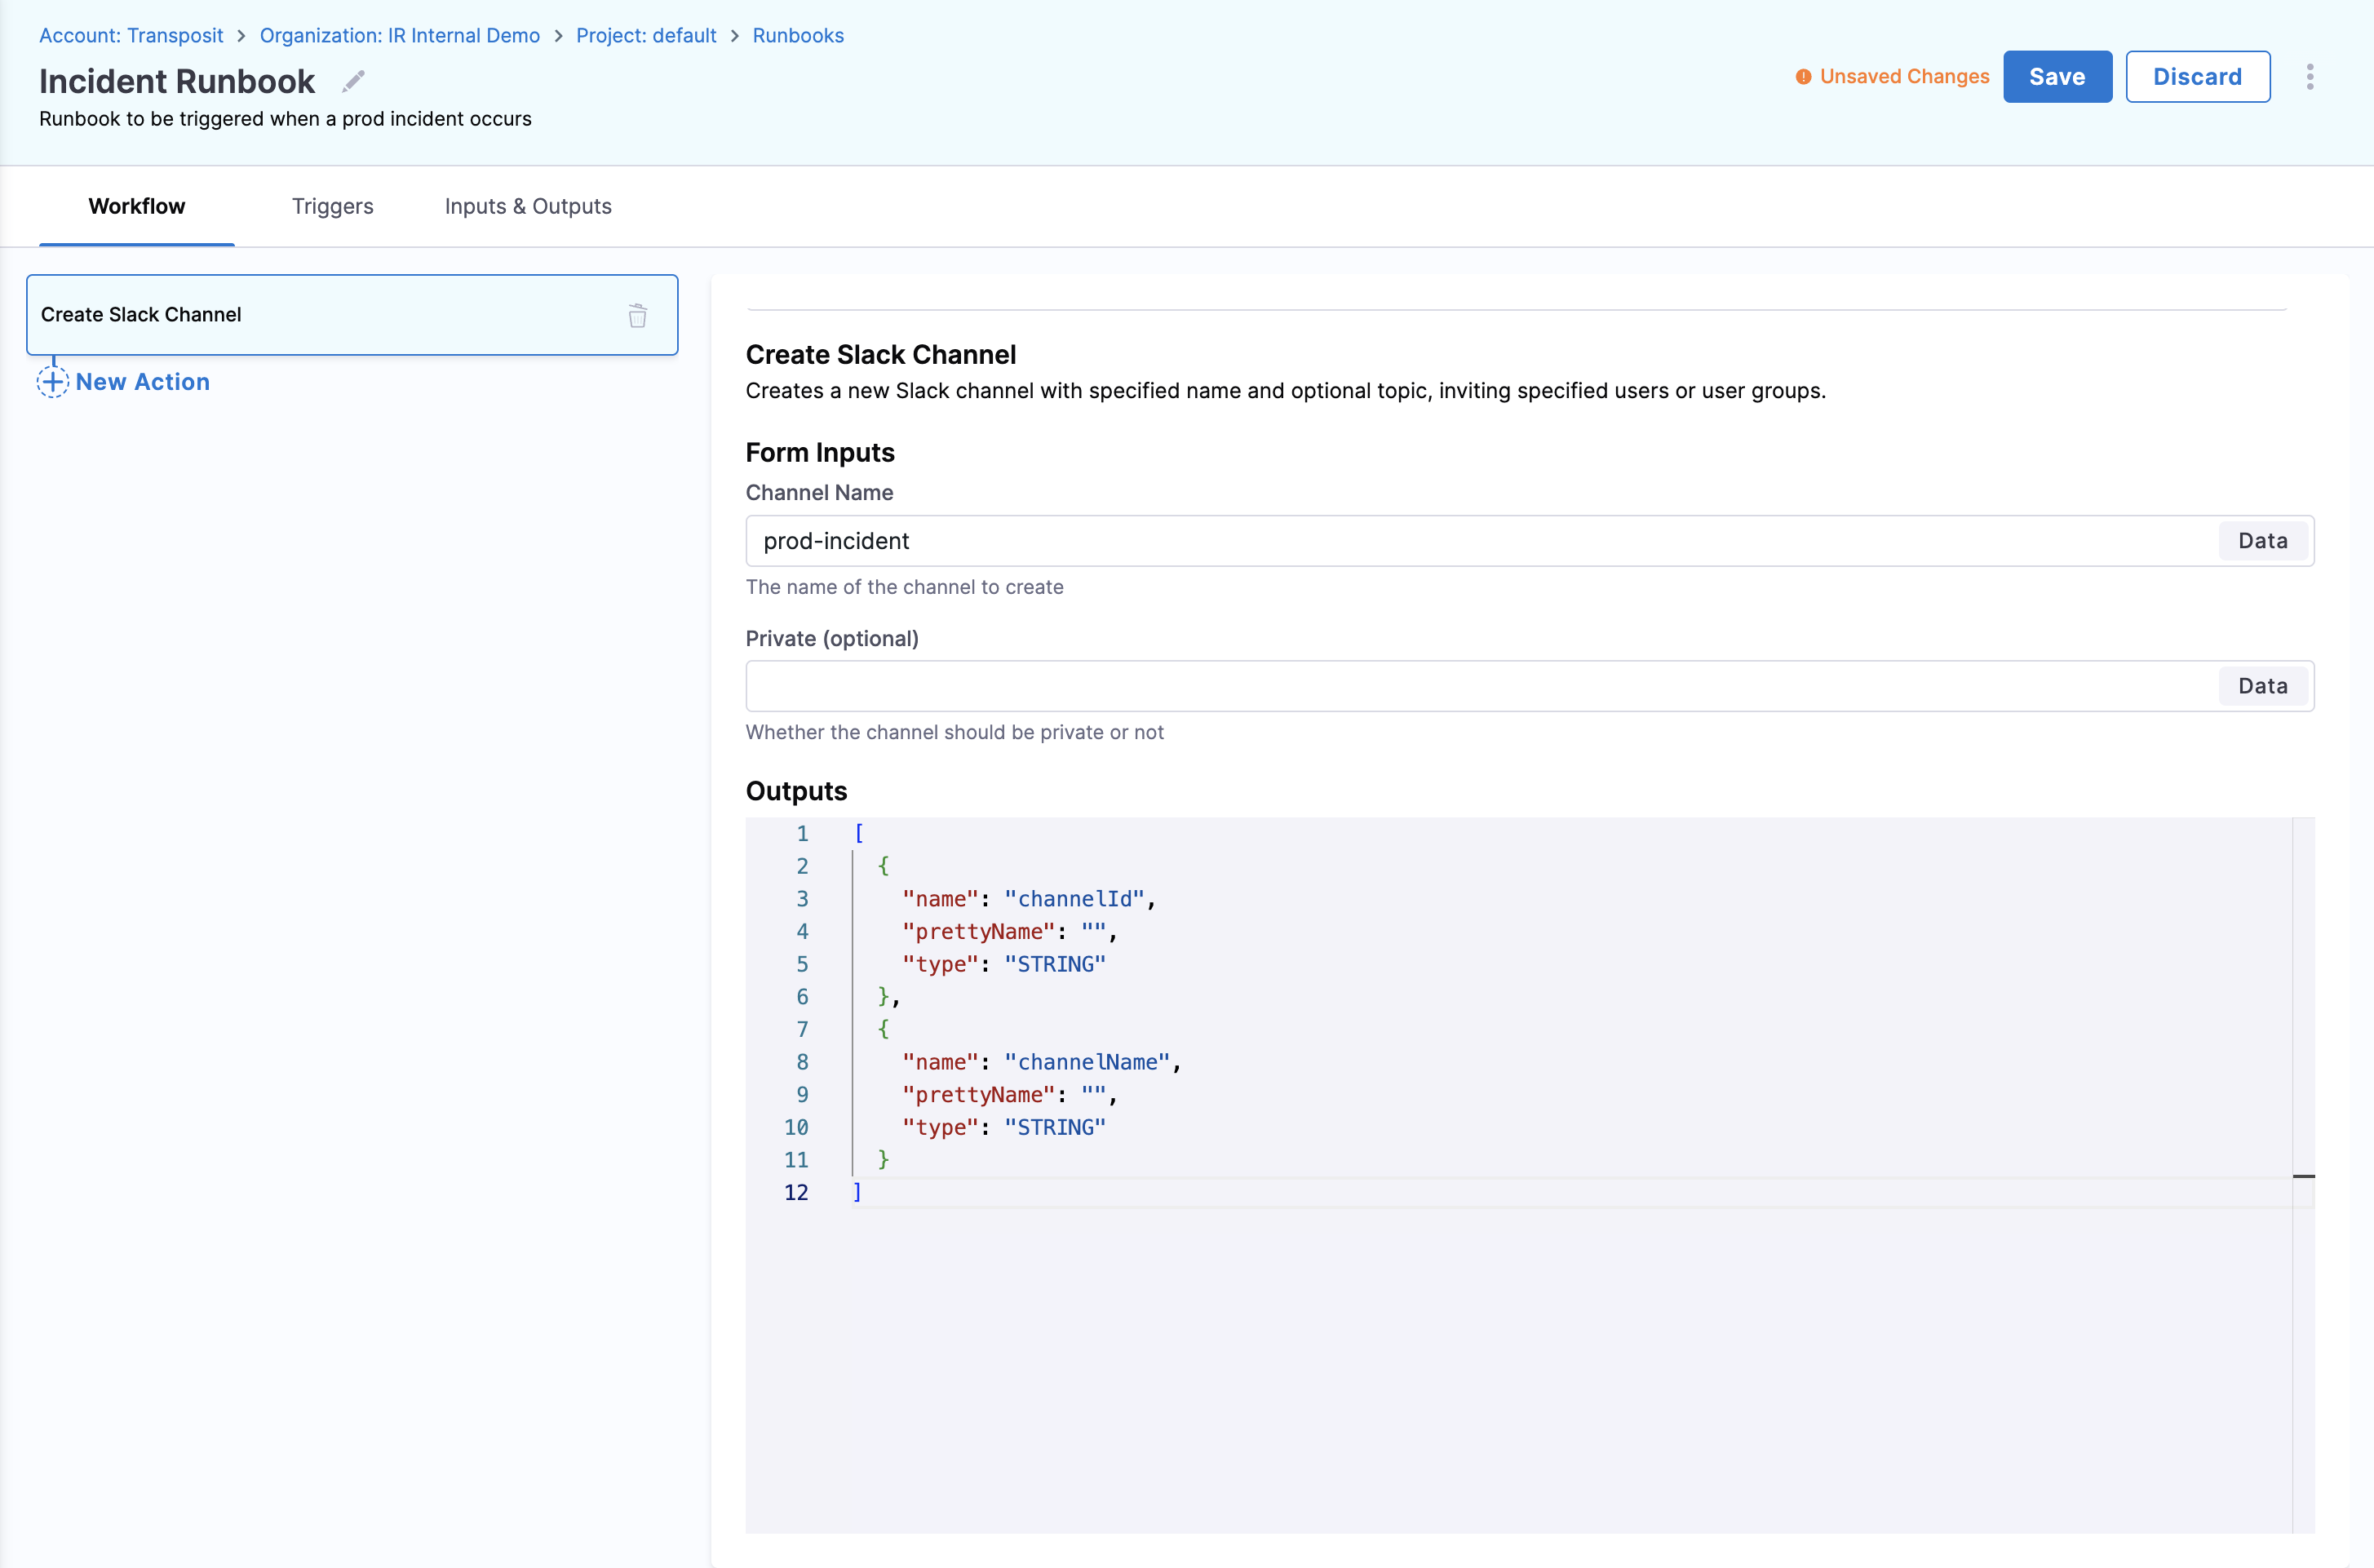
Fill in the input fields for the action you added:
- Click the Data picker to fill in values for the action's input fields
- The data picker will now show fields based on your Input/Output context selection:
- Basic fields (always available): Standard incident/alert properties
- Custom fields (if specific type selected): Additional fields defined for your chosen incident/alert type
- Configure parameters specific to your chosen action:
- Static Values: Enter fixed values for consistent behavior
- Dynamic Values: Use variables for flexible, context-aware execution
Step 10: Use dynamic data sources
Choose where each parameter value comes from:
- Select from available data source options (now configured in Step 8):
- Runbook Input: Variables defined for the runbook
- Action Outputs: Results from previously executed actions
- Pipeline Outputs: Data from Harness pipeline executions
- Global Values: System-wide variables available to all runbooks
- Choose the appropriate data source based on your workflow requirements
Step 11: Build the complete workflow
Add and sequence the remaining actions:
- Click New Action to add more steps based on your workflow needs
- Click Action to access the action library again
- Click Select for each action you want to add
- Repeat the configuration process for each action:
- Configure parameters
- Set up data sources
- Define action sequences
- Arrange actions in logical order for effective execution
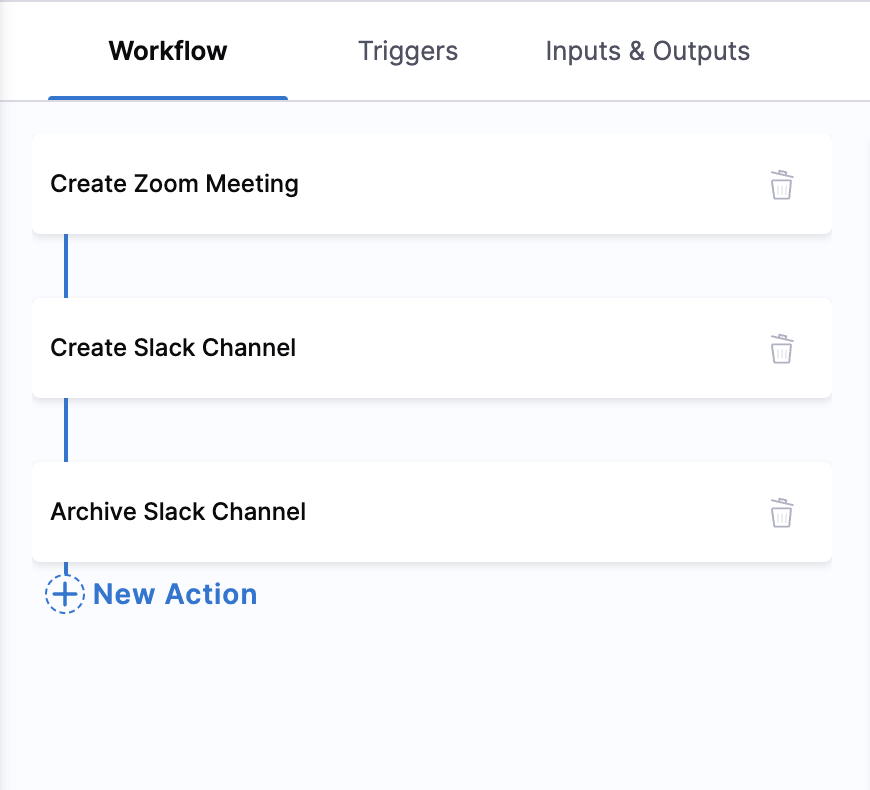
Best practices for action sequencing:
- Immediate Response: Start with critical notifications and incident creation
- Information Gathering: Follow with diagnostic and monitoring actions
- Remediation: Execute fix actions based on gathered information
- Validation: Verify that remediation was successful
- Closure: Update stakeholders and close incidents
Step 12: Save your runbook
Finalize and preserve your runbook configuration:
- Click Save from the top right corner to finalize your runbook configuration
- Your runbook is now ready for testing and deployment
- All configured actions and workflows are preserved for future execution
Follow this interactive guide to create automated runbooks with actions, workflows, and integrations.
Advanced configuration
Go to Create a Runbook Trigger to configure advanced triggers, including Key Events, conditional logic, and complex automation scenarios.
Configure triggers
Triggers determine when and how your runbooks execute automatically. Go to Create a Runbook Trigger to configure automated runbook execution based on incidents, alerts, and key events, including interactive guides and detailed setup instructions.
Quick trigger setup
Configure a basic trigger with these steps:
- Access Trigger Configuration: Click the Triggers tab in your runbook editor
- Add Trigger: Click New Trigger to begin the trigger setup process
- Choose Trigger Template: Select the template from the incident types
- Define Conditions: Set specific conditions for runbook activation
- Test and Deploy: Validate trigger logic before production deployment
Note: Multiple triggers can be added to a single runbook based on your use case requirements.
Configure runbook slugs
Runbook slugs enable on-call responders to execute runbooks directly from Slack using short commands like /harness run restart-pods. Slugs provide a faster path to runbook execution during high-pressure incidents by removing UI navigation from the response workflow.
How to assign a slug
Assign a slug to a runbook by completing these steps:
- Access Trigger Configuration: Navigate to the Triggers tab in your runbook editor.
- Locate Slug Field: Find the Slug field in the trigger configuration section.
- Enter a Slug: Enter a short, memorable identifier for the runbook (3 to 15 characters).
- Save: Click Save to apply the slug configuration.
Slug naming rules
Slugs must follow these requirements:
- Length: 3 to 15 characters
- Allowed characters: Lowercase letters (
a-z), numbers (0-9), and hyphens (-) - Format:
^[a-z0-9-]*$(enforced by the UI) - Uniqueness: Slug must be unique within the organization
- Reserved names: Cannot use native action names as slugs
While the UI enforces lowercase letters, numbers, and hyphens, the backend also accepts underscores (_) and uppercase letters (^[-_\w]{3,15}$). However, the UI-enforced format is recommended for consistency.
Slug naming best practices
Follow these conventions when you name a slug:
- Use short, descriptive names:
restart-pods,scale-up,rollback - Team-specific conventions: If multiple teams use AI SRE, prefix slugs with team identifiers (e.g.,
platform-restart,data-scale) - Action-oriented names: Use verbs that describe what the runbook does (
fix,deploy,reset) - Avoid abbreviations: Use
restartinstead ofrstfor clarity - Test before deployment: Verify the slug is easy to enter and remember
Example slugs
| Slug | Runbook Name | Use Case |
|---|---|---|
restart-pods | Restart Kubernetes Pods | Restart pods for a specific service |
scale-up | Scale Up Infrastructure | Increase capacity during traffic spikes |
rollback | Rollback Recent Deployment | Revert to previous stable version |
clear-cache | Clear Redis Cache | Flush cache to resolve stale data issues |
restart-db | Restart Database Connection Pool | Reset database connections |
Using slugs in Slack
Once configured, on-call responders can execute runbooks from Slack:
Execute by slug:
/harness run <slug>
List available slugs:
/harness run
Prerequisite: Users must authenticate Slack with Harness AI SRE before using slug commands.
Go to Use Slack Commands to review complete user documentation on slug commands.
Test your runbook
Thorough testing is essential before deploying runbooks to production. A well-tested runbook prevents failures during critical incidents and ensures reliable automation.
Testing steps
Follow these steps to test a runbook against a real alert or incident:
- Select an Alert or Incident: Go to AI SRE, then Alerts or Incidents in your Harness platform, then select the alert or incident you want to test.
- Select a Runbook: Click the Runbooks tab and select the runbook you want to test.
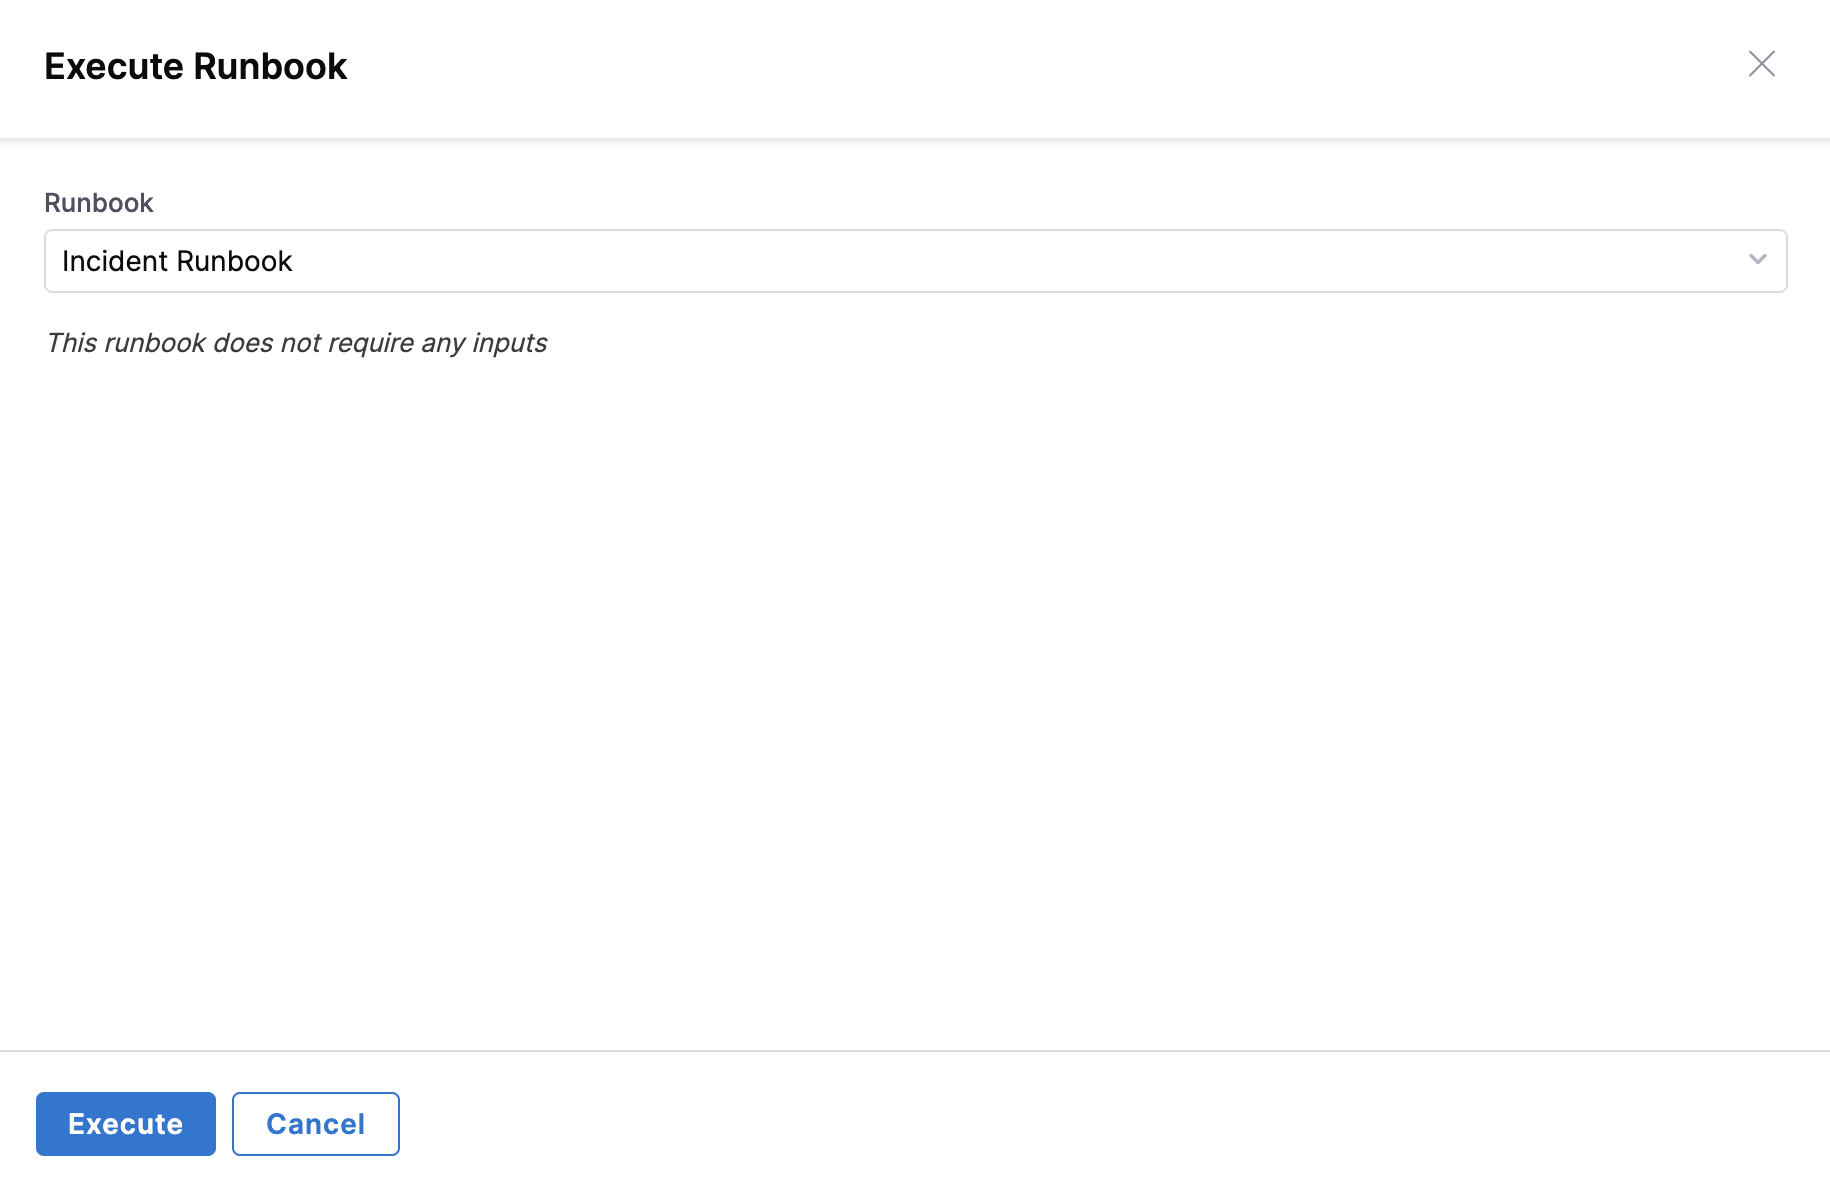
- Execute Runbook: In case of no associated runbooks, click Execute Runbook to begin the testing process.
- Test Runbook: Click Execute to begin the testing process.
Test in pre-production
1. Environment preparation
- Test Environment: Set up a dedicated testing environment that mirrors production.
- Test Data: Prepare realistic test scenarios and data sets.
- Integration Sandboxes: Use test instances of integrated tools (Slack, Jira, etc.).
- Mock Services: Create mock endpoints for external dependencies.
2. Functional testing
- Action Validation: Verify each action executes correctly with expected parameters.
- Sequence Testing: Confirm actions execute in the correct order.
- Variable Passing: Validate that variables are correctly passed between actions.
- Error Handling: Test failure scenarios and error recovery mechanisms.
3. Integration testing
- Notification Delivery: Confirm all notifications reach intended recipients.
- Pipeline Executions: Verify that triggered pipelines complete successfully.
- API Responses: Check that external API calls return expected results.
- Authentication: Ensure all integrations authenticate properly.
4. End-to-end testing
- Complete Workflows: Execute full runbook scenarios from trigger to completion.
- Multiple Scenarios: Test various input combinations and edge cases.
- Performance Testing: Measure execution times and resource usage.
- Concurrent Execution: Test behavior when multiple instances run simultaneously.
Testing checklist
- All actions execute without errors.
- Notifications are delivered to correct channels/recipients.
- Variables are properly populated and passed.
- External integrations respond as expected.
- Error conditions are handled gracefully.
- Execution logs provide sufficient detail for troubleshooting.
- Performance meets acceptable thresholds.
- Security permissions are correctly enforced.
Deploy and monitor
Once testing is complete, deploy your runbook to production and establish monitoring to ensure continued effectiveness.
Deployment process
- Final Review: Conduct a final review of runbook configuration and testing results.
- Stakeholder Approval: Obtain necessary approvals from the team.
- Production Deployment: Activate the runbook in your production environment.
- Documentation Update: Update operational documentation with runbook details.
Best practices for runbook creation
Design principles
- Start Simple: Begin with basic workflows and gradually add complexity as you gain experience.
- Modular Design: Create reusable actions and workflows that can be combined for different scenarios.
- Clear Naming: Use descriptive names for runbooks, actions, and variables that clearly indicate their purpose.
Operational excellence
- Regular Updates: Review and update runbooks regularly to reflect changes in infrastructure and processes.
- Timeout Configuration: Set appropriate timeouts to prevent runbooks from hanging indefinitely.
- Conditional Logic: Use conditional statements to avoid unnecessary action execution.
Troubleshooting common issues
Runbook actions fail to execute in Harness AI SRE
Check integration credentials and network connectivity, and implement health checks and credential rotation.
Variables are not passing between actions in a Harness AI SRE runbook
Verify that variable names and data types match expectations, and use consistent naming conventions with validated variable mappings.
Harness AI SRE runbooks execute slowly
Optimize action sequences, enable parallel execution where possible, and run regular performance testing and monitoring.
Next steps
Advanced configuration
- Create a Runbook Trigger: Set up automated runbook execution based on incidents, alerts, and events.
- Configure authentication: Set up secure access to integrated tools and services.
- Configure incident fields: Customize incident data collection and processing.
- Return to overview: Explore additional runbook capabilities and features.
Integration setup guides
Communication & collaboration
- Slack integration: Complete setup guide for Slack automation.
- Microsoft Teams integration: Configure Teams notifications and collaboration.
- Zoom integration: Set up automated meeting creation and management.
Incident management
- Jira integration: Automate issue tracking and project management.
- ServiceNow integration: Integrate with enterprise service management.
Automation & pipelines
- Harness Pipelines integration: Execute deployment and remediation pipelines.
Need Help? Contact our support team by email at support@harness.io or visit the Harness Documentation for additional resources and troubleshooting guides.