Create Incidents
When you spot a problem, whether from a customer report, degraded performance, or a teammate flagging something, you can declare an incident in Harness AI SRE.
The AI-powered Quick Start feature analyzes your problem description and auto-populates incident fields, so you can get an incident up and running in seconds.
Create incidents from the UI
- Step by Step
- Interactive Guide
Step 1: Access incident creation
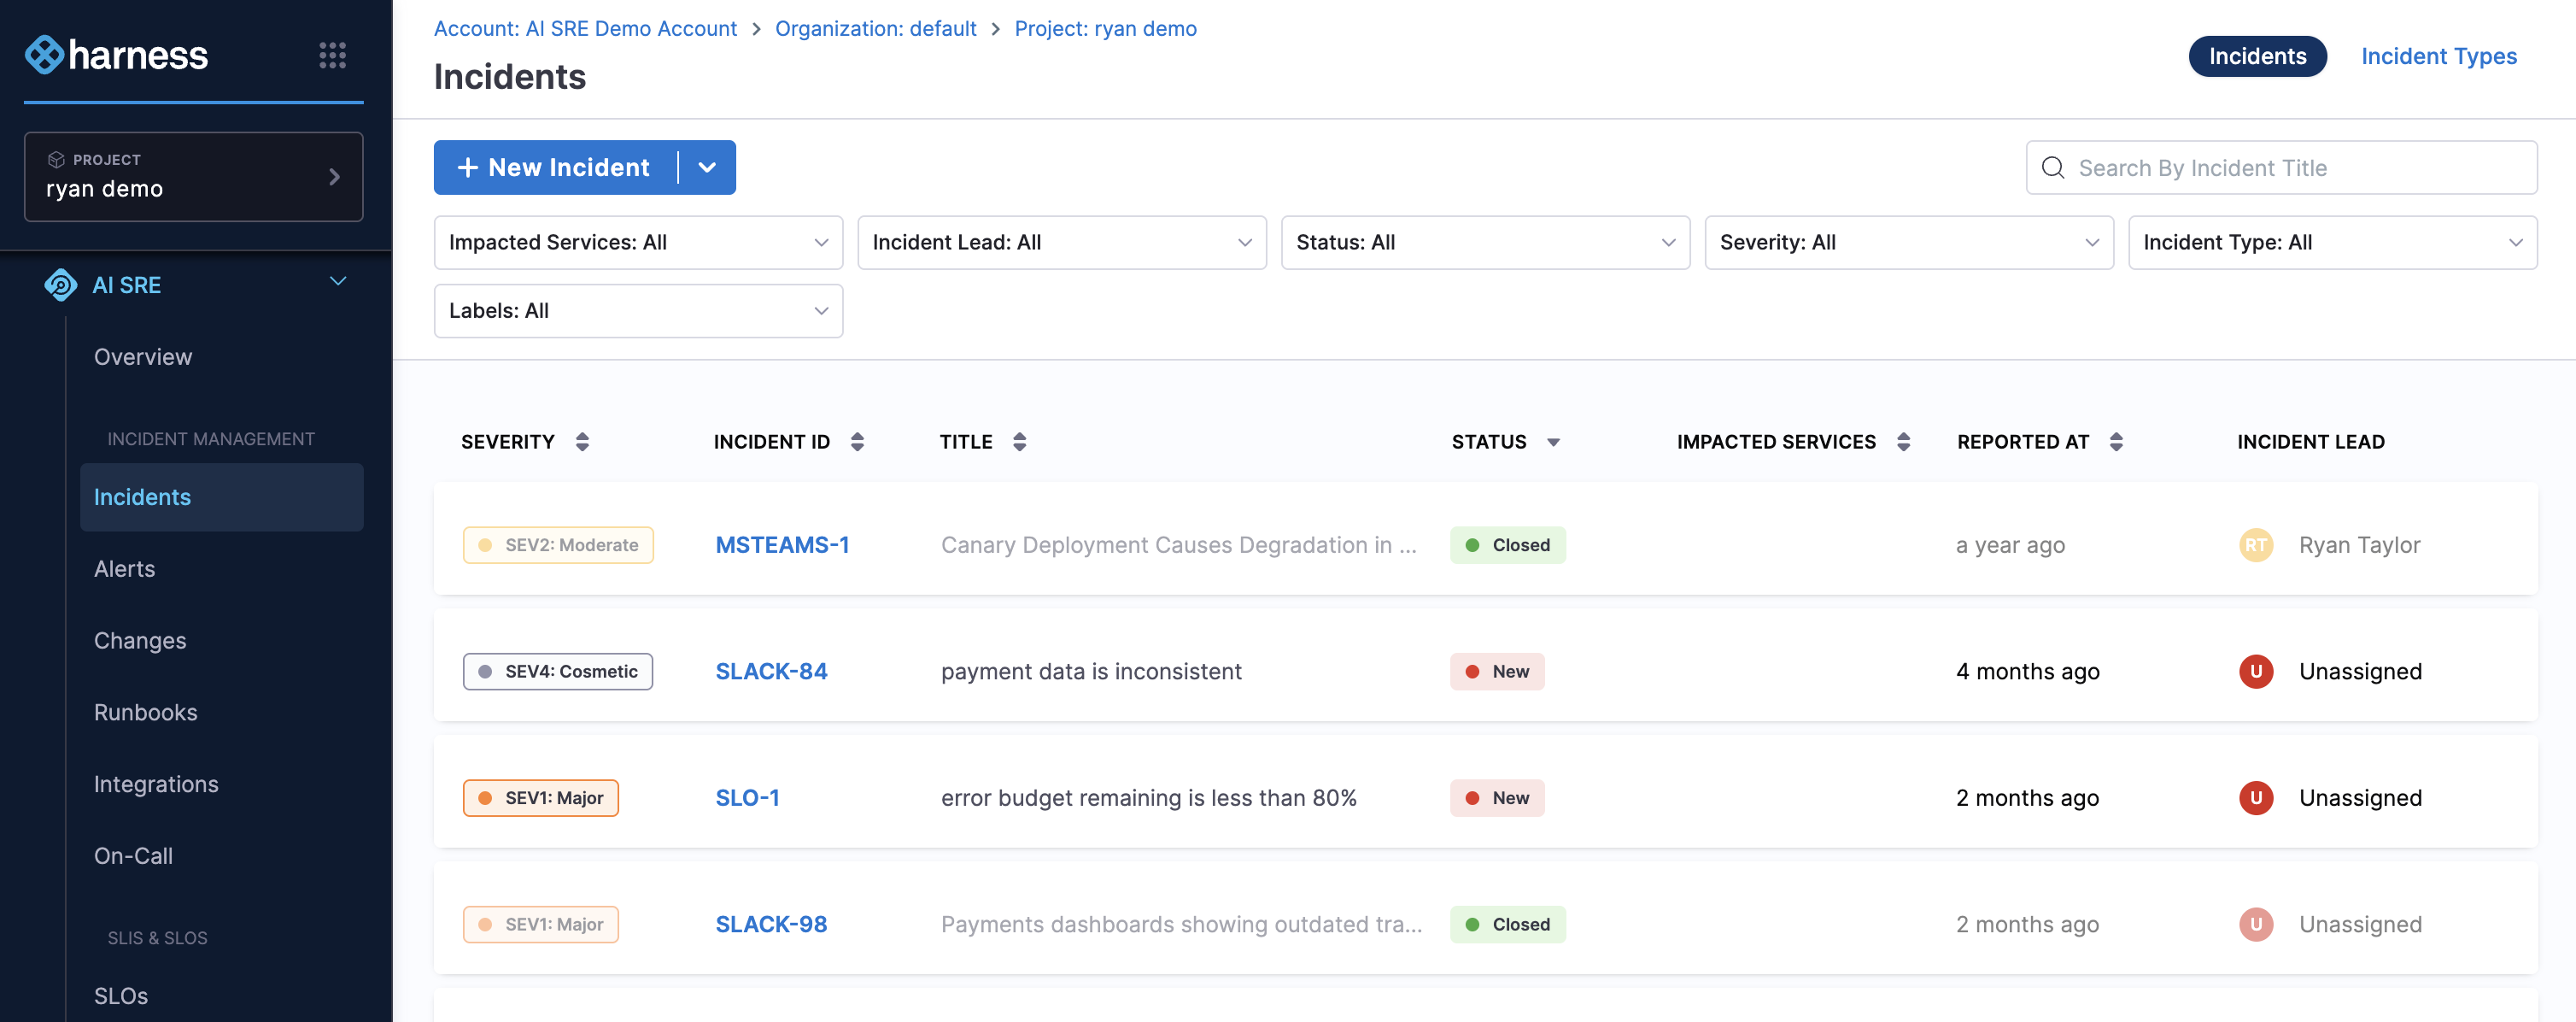
Open the incident list and start a new incident:
-
Navigate to Incidents from the left panel.
-
Choose your creation method:
- Click New Incident for a blank incident.
- Select an Incident Type from the dropdown next to "New Incident" to use a pre-configured template.
Step 2: Select incident type
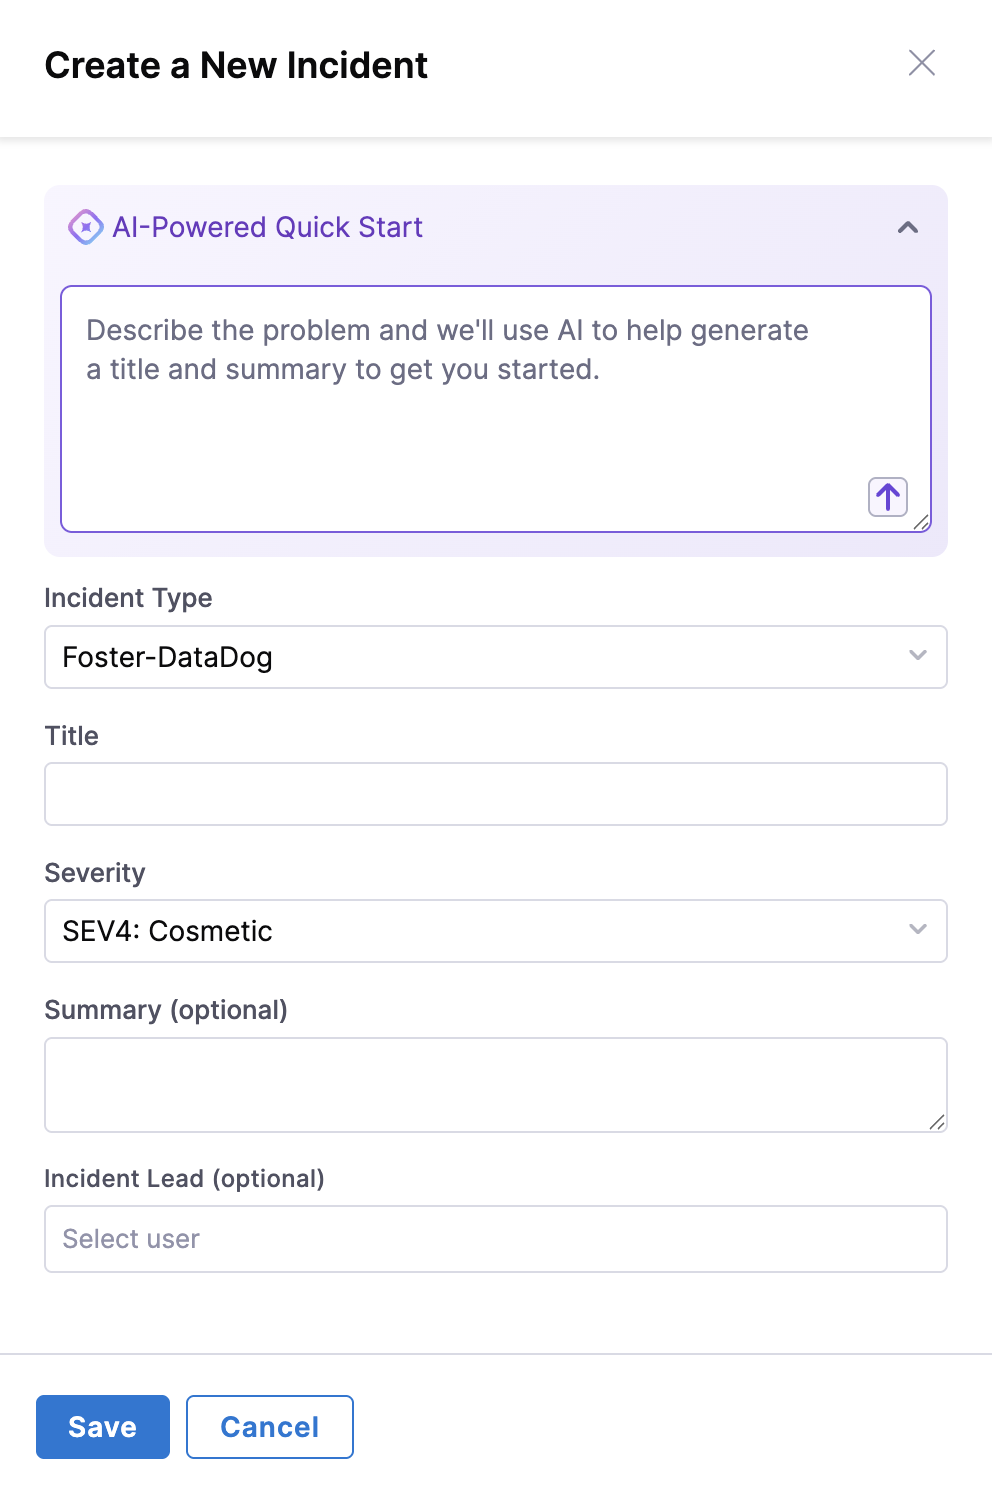
Pick the incident type that matches the problem:
-
Choose the appropriate Incident Type from the available options.
-
This will pre-populate relevant fields and associate appropriate runbooks.
-
If you are unsure which type to pick, check with your team lead, incident types are configured by your administrator to match your organization's response processes.
Step 3: Describe the problem
Describe the problem so the AI can suggest field values:
- Use the Quick Start block to describe the problem in plain language.
- Provide a clear, concise description including affected services, symptoms, and impact.
- The AI system will analyze your description and suggest field values automatically.
Step 4: Generate incident fields
Run the AI analysis to populate the incident fields:
- Click the up arrow to process your description.
- AI will automatically populate incident fields (severity, priority, etc.) based on what you wrote.
Step 5: Review and customize
Confirm the suggested values and save the incident:
- Review all auto-generated field values.
- Manually adjust anything that needs correction:
- Title and description
- Severity and priority levels
- Assignee
- Any custom fields specific to the incident type
- Click Save to create the incident.
Follow this interactive guide to create an incident with AI-powered assistance.
Create incidents from Slack
You can also create incidents directly from Slack using the /harness new command. This is especially useful during on-call shifts when you want to stay in your communication tool.
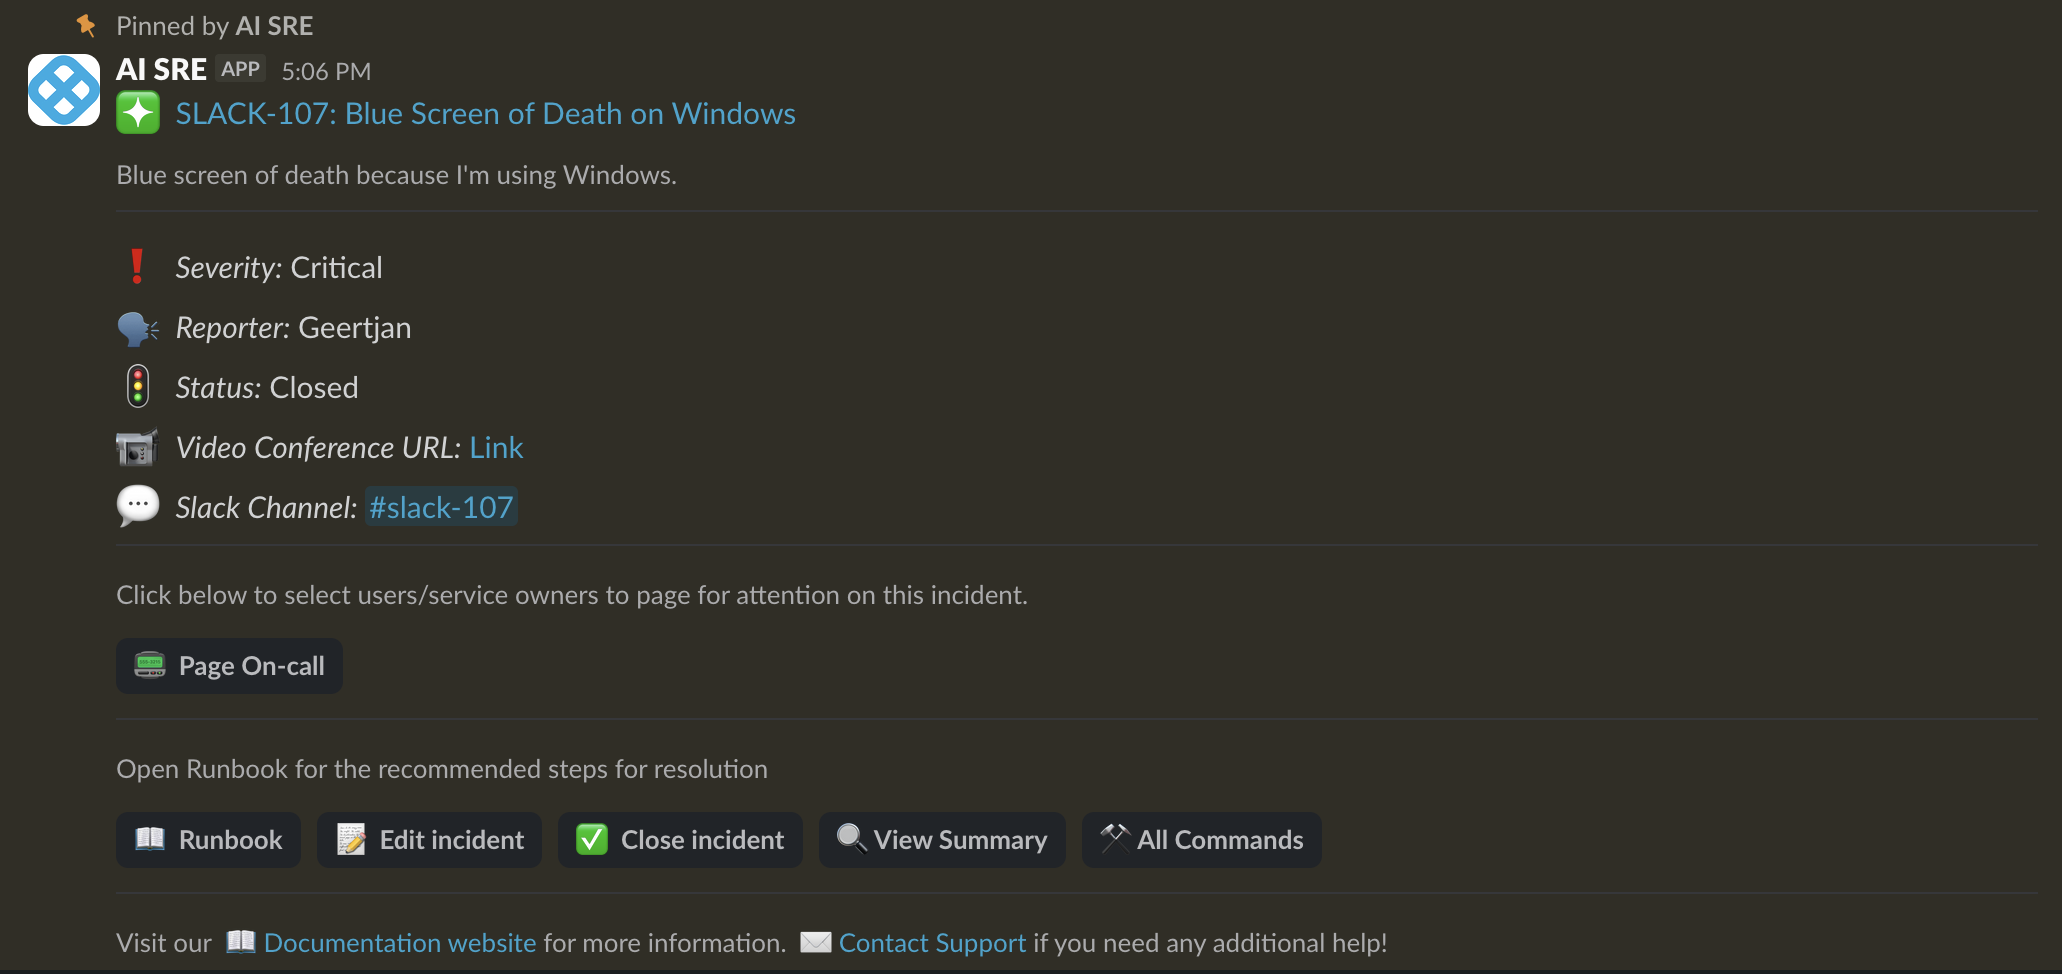
Go to Managing incidents in Slack to review the full command reference.
Best practices for incident creation
Follow these practices to create accurate, actionable incidents:
- Choose the right incident type: Select the most specific type available to get the right runbooks and field configuration.
- Write a clear description: Good Quick Start descriptions lead to more accurate AI field suggestions. Include what is affected, what you are observing, and when it started.
- Verify auto-generated fields: Always review and adjust AI-suggested values to ensure accuracy.
- Set correct severity levels: Align severity with actual business impact and response time requirements.
What happens next
Once you save the incident:
- An incident channel is automatically created in your communication tool (Slack or Teams).
- Relevant team members are notified based on the incident type's configuration.
- Any runbooks associated with the incident type may be auto-attached.
- The Incident Details page opens, where you manage the incident through resolution.
Go to Active incident management to work through an active incident.
Next steps
- Go to Active incident management to work through an active incident.
- Go to Create and track action items to assign follow-up work.
- Go to Managing incidents in Slack to run incidents from Slack.