Trigger pipelines on a new artifact
You can trigger Harness pipelines in response to a new artifact version being added to a registry. For example, every time a new Docker image is pushed to your Docker Hub account, it triggers a CD pipeline that deploys it automatically.
An artifact trigger is a simple way to automate deployments for new builds.
Currently, this feature is behind the feature flag CD_TRIGGERS_REFACTOR. Contact Harness Support to enable it.
Harness variable expressions are not supported in triggers for pipeline or stage variables.
What will you learn in this topic?
By the end of this topic, you will be able to:
- Identify the supported artifact providers for artifact triggers.
- Create an artifact trigger for your registry using the Configuration, Conditions, and Pipeline Input steps.
- Configure a multi-region artifact source.
Before you begin
Before you create an artifact trigger, ensure you have the following:
- A Harness CD pipeline: An existing pipeline that includes an artifact in the stage's Service Definition.
- CD pipeline familiarity: Familiarity with Harness CD pipelines. Go to the Kubernetes CD quickstart to build a CD pipeline.
How artifact triggers work
On New Artifact triggers listen to the registry where one or more of the artifacts in your pipeline are hosted. You can set conditions on the triggers, such as matching a Docker tag or label, or a traditional artifact build name or number.
An artifact source does not need to be defined in the service definition for the trigger to work. The only possible failure scenario is during the initial collection of the artifact, within one minute of creating the trigger. For example, suppose the Docker registry contains 10 tags for a specific image and a trigger is created. In that case, the delegate's polling job retrieves all 10 tags and sends them to the manager, which does not initiate any pipelines. This is because running the pipeline for all 10 tags that were pushed before the trigger was created could leave the system in an undesirable state. However, when an 11th or any subsequent tag is pushed, the trigger executes and initiates the pipeline.
Supported artifact providers for artifact triggers
You can use the following artifact providers to trigger pipelines:
- Harness Artifact Registry
- ACR (Azure Container Registry)
- Amazon Machine Image (AMI)
- Amazon S3
- Artifactory
- Azure Artifacts
- Bamboo
- Custom
- Docker Registry
- ECR (Amazon Elastic Container Registry)
- GCE Image (Google Compute Engine Image)
- GCR (Google Container Registry)
- GitHub Package Registry
- Google Artifact Registry
- Google Cloud Storage
- Jenkins
- Nexus2
- Nexus3
Google Container Registry (GCR) is deprecated and was shut down on March 18, 2025. Migrate to Google Artifact Registry (GAR) instead. Go to Google's official transition documentation to review the migration path, and go to the Harness GCR documentation to understand GCR support in Harness.
Artifact trigger behavior
Review the following behavior and recommendations before you create an artifact trigger:
-
One artifact triggers deployment: If more than one artifact is collected during the polling interval (one minute), only one deployment starts, and it uses the last artifact collected.
-
All artifacts trigger deployment: All artifacts collected during the polling interval trigger a deployment, with one deployment triggered for each artifact collected.
noteTo enable this feature, navigate to your Harness project, organization, or account Default Settings, select Pipeline, and then enable Execute Triggers With All Collected Artifacts or Manifests.
When this setting is enabled, a separate deployment is triggered for each artifact collected during the polling interval, which does not maintain the tag ordering. For example, if tags
v1.2.0andv1.1.0are collected within the same polling window, you might see thatv1.2.0is executed beforev1.1.0. -
Trigger based on file name: The trigger is executed based on file names and not metadata changes.
-
Do not trigger on the latest tag: Do not trigger on the latest tag of an artifact, such as a Docker image. With latest, Harness only has metadata, such as the tag name, which has not changed, so Harness does not know if anything has changed. The trigger is not executed.
-
Control access with repository RBAC: In Harness, you can select who is able to create and use triggers, but you must use your repository's RBAC to control who can add the artifacts or initiate the events that start the Harness trigger.
-
Verify a new trigger: Whenever you create a trigger for the first time, Harness recommends submitting a tag or pushing an artifact to verify its functionality. This way, the trigger executes and the pipeline runs as expected when subsequent tags are pushed.
noteWhen you link a Docker repository to a trigger, the trigger status remains
pendinguntil there are available tags. After the first artifact push, the trigger status changes tosuccessbecause of new tags, but this alone does not activate the pipeline. The pipeline is only triggered after a second push to Docker. -
Allow time for polling to start: Whenever a trigger is created or updated, it takes about five to ten minutes for the polling job to start and for the trigger to be in a working state. Harness recommends that you wait five to ten minutes after a trigger is created or updated before you push the artifact.
-
Polling and disabled triggers: Polling stops when you disable a trigger. Artifact polling restarts after you reenable the trigger. Harness recommends that you submit a tag or push an artifact and verify the flow, because this is treated as a new polling job.
-
Use lexically sortable tags: Due to a Docker API limitation, image build numbers and tags are always listed in lexical order. To ensure that executions are triggered with the image pushed last, a best practice is to create build numbers or tags that can be sorted lexically using their creation date. With this method, higher build numbers are assigned for later creation dates, which ensures that the image pushed last is used when more than one image is pushed over a short period, such as less than five minutes.
Visual summary
The following five-minute video walks you through building an app from source code and pushing it to Docker Hub using Harness CIE, and then having an On New Artifact Trigger execute a CD pipeline to deploy the new app release automatically.
Artifact polling
After you create a trigger to listen for new artifacts, Harness polls for new artifacts continuously. Polling is immediate because Harness uses a perpetual task framework that constantly monitors for new builds and tags.
Set the artifact tag to deploy
Set the artifact tag to control which artifact version the pipeline deploys when a trigger fires. When you add a Harness service to the CD stage, you set the artifact tag to use in Artifacts Details.
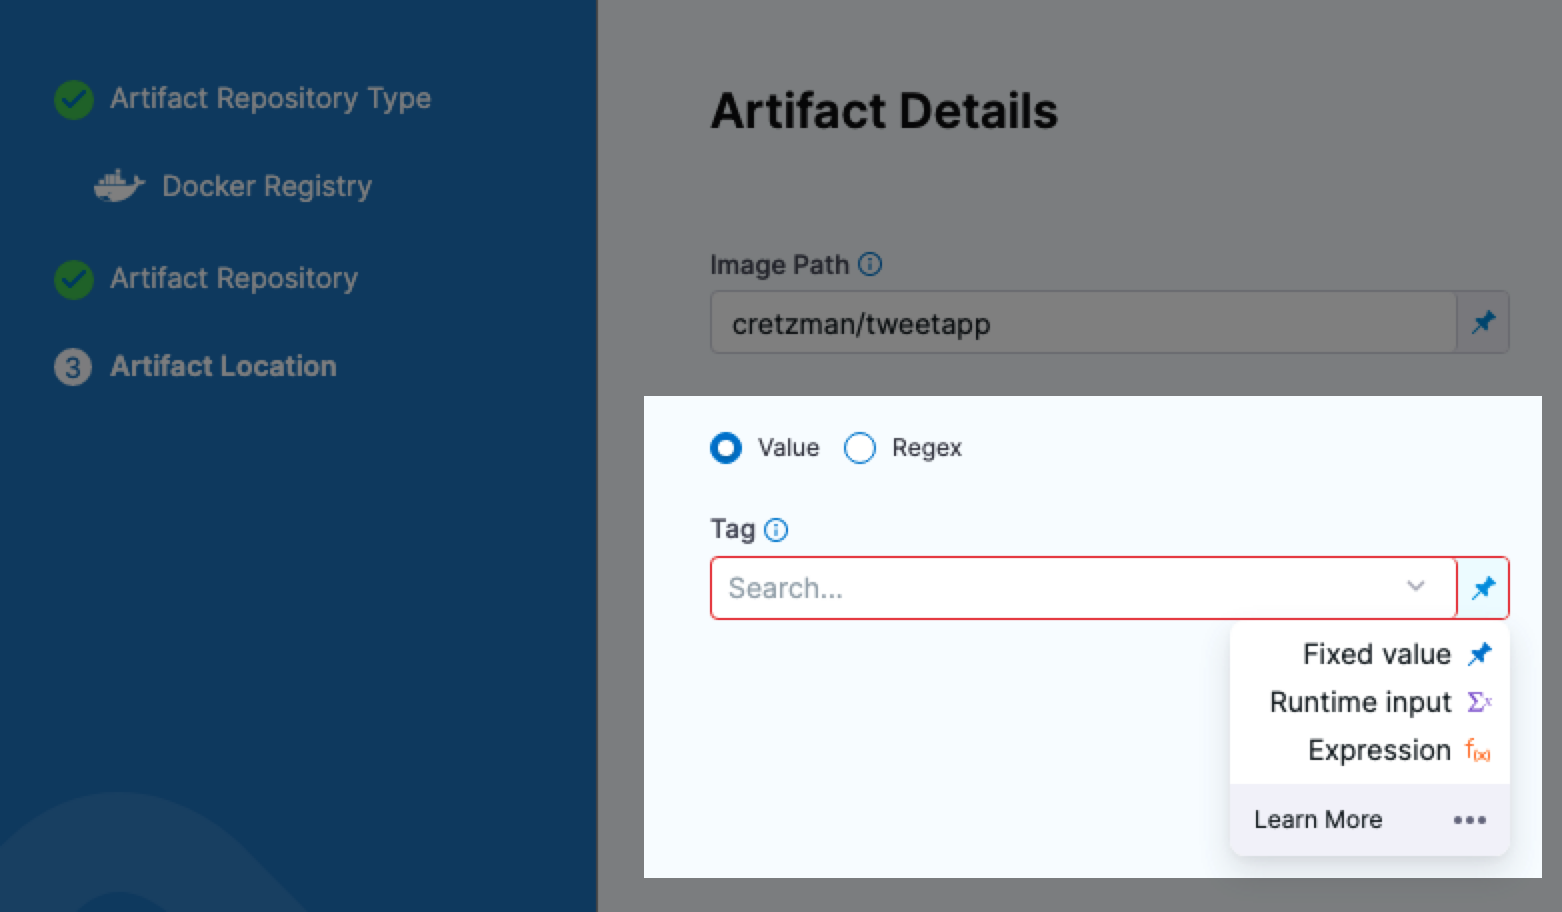
Set the artifact Tag field to any of the following options:
- Fixed value: Deploy a specific fixed value tag, such as
2. Harness deploys the artifact with that tag when the trigger executes the pipeline. <+trigger.artifact.build>: Deploy the artifact version that initiated the trigger.<+lastPublished.tag>: Deploy the last successful published artifact version.<+lastPublished.tag>.regex(regex): Deploy the last successful published artifact version that matches a regex.
The lastPublished tag returns the lexicographically last published tag for container image based artifact sources.
You can also set the tag as a runtime input, and then use <+trigger.artifact.build> in the trigger's pipeline input settings.
Create an artifact trigger
Create an artifact trigger on a pipeline that already references an artifact, so a new artifact version starts a deployment. The trigger wizard walks you through three steps in order:
- Configuration: Name the trigger and define the artifact source to poll.
- Conditions: Set optional conditions that must match for the trigger to run the pipeline.
- Pipeline Input: Provide the runtime inputs the pipeline needs when the trigger runs it.
To open the trigger wizard, do the following:
-
Select a Harness pipeline that includes an artifact in the stage's Service Definition.
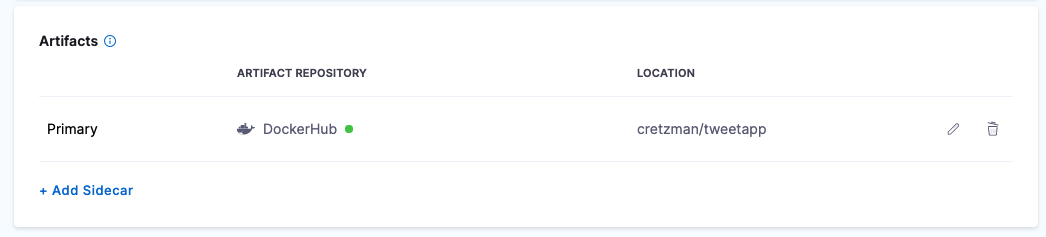
You reference an artifact in the stage's service definition in your manifests using the expression
<+artifact.image>. Go to Add container images as artifacts for Kubernetes deployments to reference artifacts in your manifests. -
Select Triggers.
-
Click New Trigger.

- The On New Artifact Trigger options are listed under Artifact. Each of the Artifact options is described below.
- Select the artifact registry where your artifact is hosted. If your artifact is hosted on Docker Hub and you select GCR, you cannot set up your trigger.
Step 1: Configuration
In Configuration, name the trigger and define the artifact source that Harness polls for new versions. Select the tab for your artifact registry.
- Docker Registry Artifacts
- GCR Artifacts
- ECR Artifacts
- AWS S3
- Artifactory
- ACR
- Bamboo
-
In Configuration, in Name, enter a name for the trigger.
-
In Listen on New Artifact, select Define Artifact Source. This is where you tell Harness which artifact repository to poll for changes.
-
Create or select the connector to connect Harness to the repository, and then click Continue. Go to the Docker Registry connector settings reference to configure Docker Registry connectors.
-
In Artifact Details, enter the artifact for this trigger to listen for, and click Submit. For example, in Docker Hub, you might enter
library/nginx. The artifact is now listed in the trigger.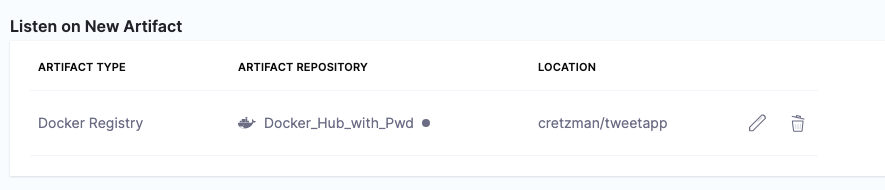
-
Click Continue.
In your Docker Registry connector, to connect to a public Docker registry like Docker Hub, use
https://registry.hub.docker.com/v2/. To connect to a private Docker registry, usehttps://index.docker.io/v2/.
-
In Configuration, in Name, enter a name for the trigger.
-
In Listen on New Artifact, select Define Artifact Source.
-
Create or select the GCP connector to connect Harness to GCR, and then click Continue. Go to Add a Google Cloud Platform (GCP) connector to configure GCP connectors.
-
In Artifact Details, in GCR Registry URL, select the location of the registry, listed as Hostname in GCR.
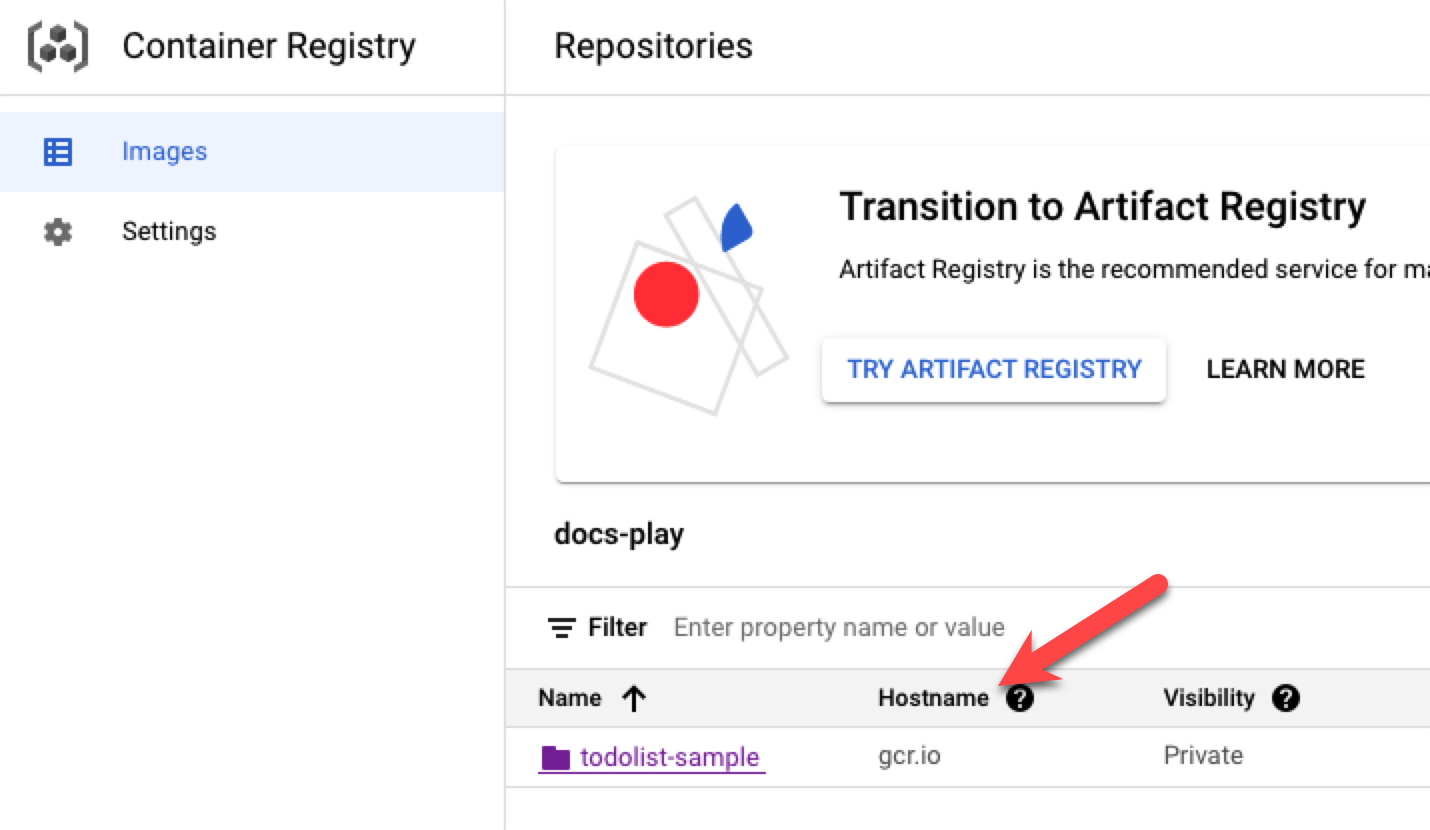
-
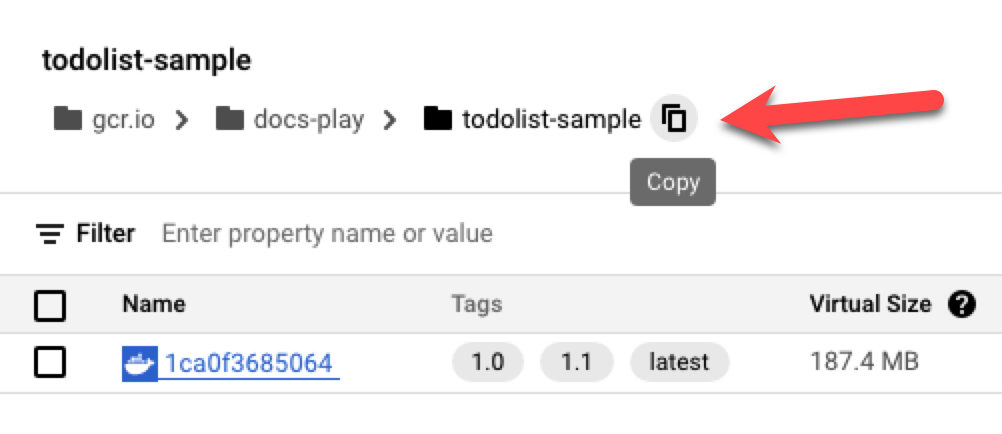
In Image Path, enter the artifact for this trigger to listen for. You can click the copy button in GCR and then paste the path into Harness.
-
Click Submit, and then click Continue.
- In Configuration, in Name, enter a name for the trigger.
- In Listen on New Artifact, select Define Artifact Source.
- In Artifact Repository, create or select the AWS connector to connect Harness to ECR, and then click Continue. Go to the AWS connector settings reference to configure AWS connectors.
- In Artifact Location, in Region, select the region for the ECR service you are using.
- (Optional) In Registry ID, enter the AWS account ID of the ECR registry you want to use. This field is useful when the AWS connector can access AWS accounts other than the one it is configured with. If you do not specify a registry ID, Harness uses the default registry associated with the AWS account.
- In Image Path, enter the path to the repo and image. You can copy the URI value from the repo in ECR. For example,
public.ecr.aws/l7w9l6a8/todolist(public repo) or085111111113.dkr.ecr.us-west-2.amazonaws.com/todolist(private repo). - Click Continue.
- In Configuration, in Name, enter a name for the trigger.
- In Listen on New Artifact, select Define Artifact Source.
- Create or select the AWS connector to connect Harness to S3, and then click Continue. Go to the AWS connector settings reference to configure AWS connectors.
- In Artifact Details, in Region, select the region for the S3 service you are using. While S3 is regionless, Harness needs a region for the S3 API.
- In Bucket Name, enter the S3 bucket name.
- In File Path Regex, enter a regex like
todolist*.zip. The expression must either contain a*or end with/.noteUse
*for regex matching, not.*. For example,*.tgzortodolist-v*.zip. - Click Continue.
- In Configuration, in Name, enter a name for the trigger.
- In Listen on New Artifact, select Define Artifact Source.
- Create or select the Artifactory connector to connect Harness to Artifactory, and then click Continue. Go to the Artifactory connector settings reference to configure Artifactory connectors.
- In Artifact Details, in Repository Format, select Generic or Docker.
- Generic:
- Repository: enter the Name of the repo.
- Artifact Directory: enter the path to the Directory that is inside the repo.
- Docker:
- Repository: enter the Name of the repo.
- Artifact/Image Path: enter the path to the Artifact/Image that is inside the repo.
- Repository URL (optional): enter the URL to file.
- Generic:
- Click Continue.
- In Configuration, in Name, enter a name for the trigger.
- In Listen on New Artifact, select Define Artifact Source.
- Create or select the Azure connector to connect Harness to ACR, and then click Continue. Go to Add a Microsoft Azure Cloud connector to configure Azure connectors.
- In Artifact Details, in Subscription Id, select the Subscription Id from the ACR registry.
- In Registry, select the registry you want to use.
- In Repository, select the repository to use.
- Click Continue.
- In Configuration, in Name, enter a name for the trigger.
- In Listen on New Artifact, select Define Artifact Source.
- Create or select the Bamboo connector to connect Harness to Bamboo, and then click Continue.
- In Artifact Details, specify the plan name, artifact paths, and builds to monitor.
- Click Continue.
To trigger the pipeline based on the same artifact version being available across regions, go to Define a multi-region artifact source instead of a single artifact source.
When you are done, click Continue to move to Conditions.
Step 2: Conditions
In Conditions, specify the conditions that must be met for the trigger to run the pipeline. For example, run the pipeline only when an artifact tag, label, filename, or build matches a certain value or pattern. Conditions are optional.
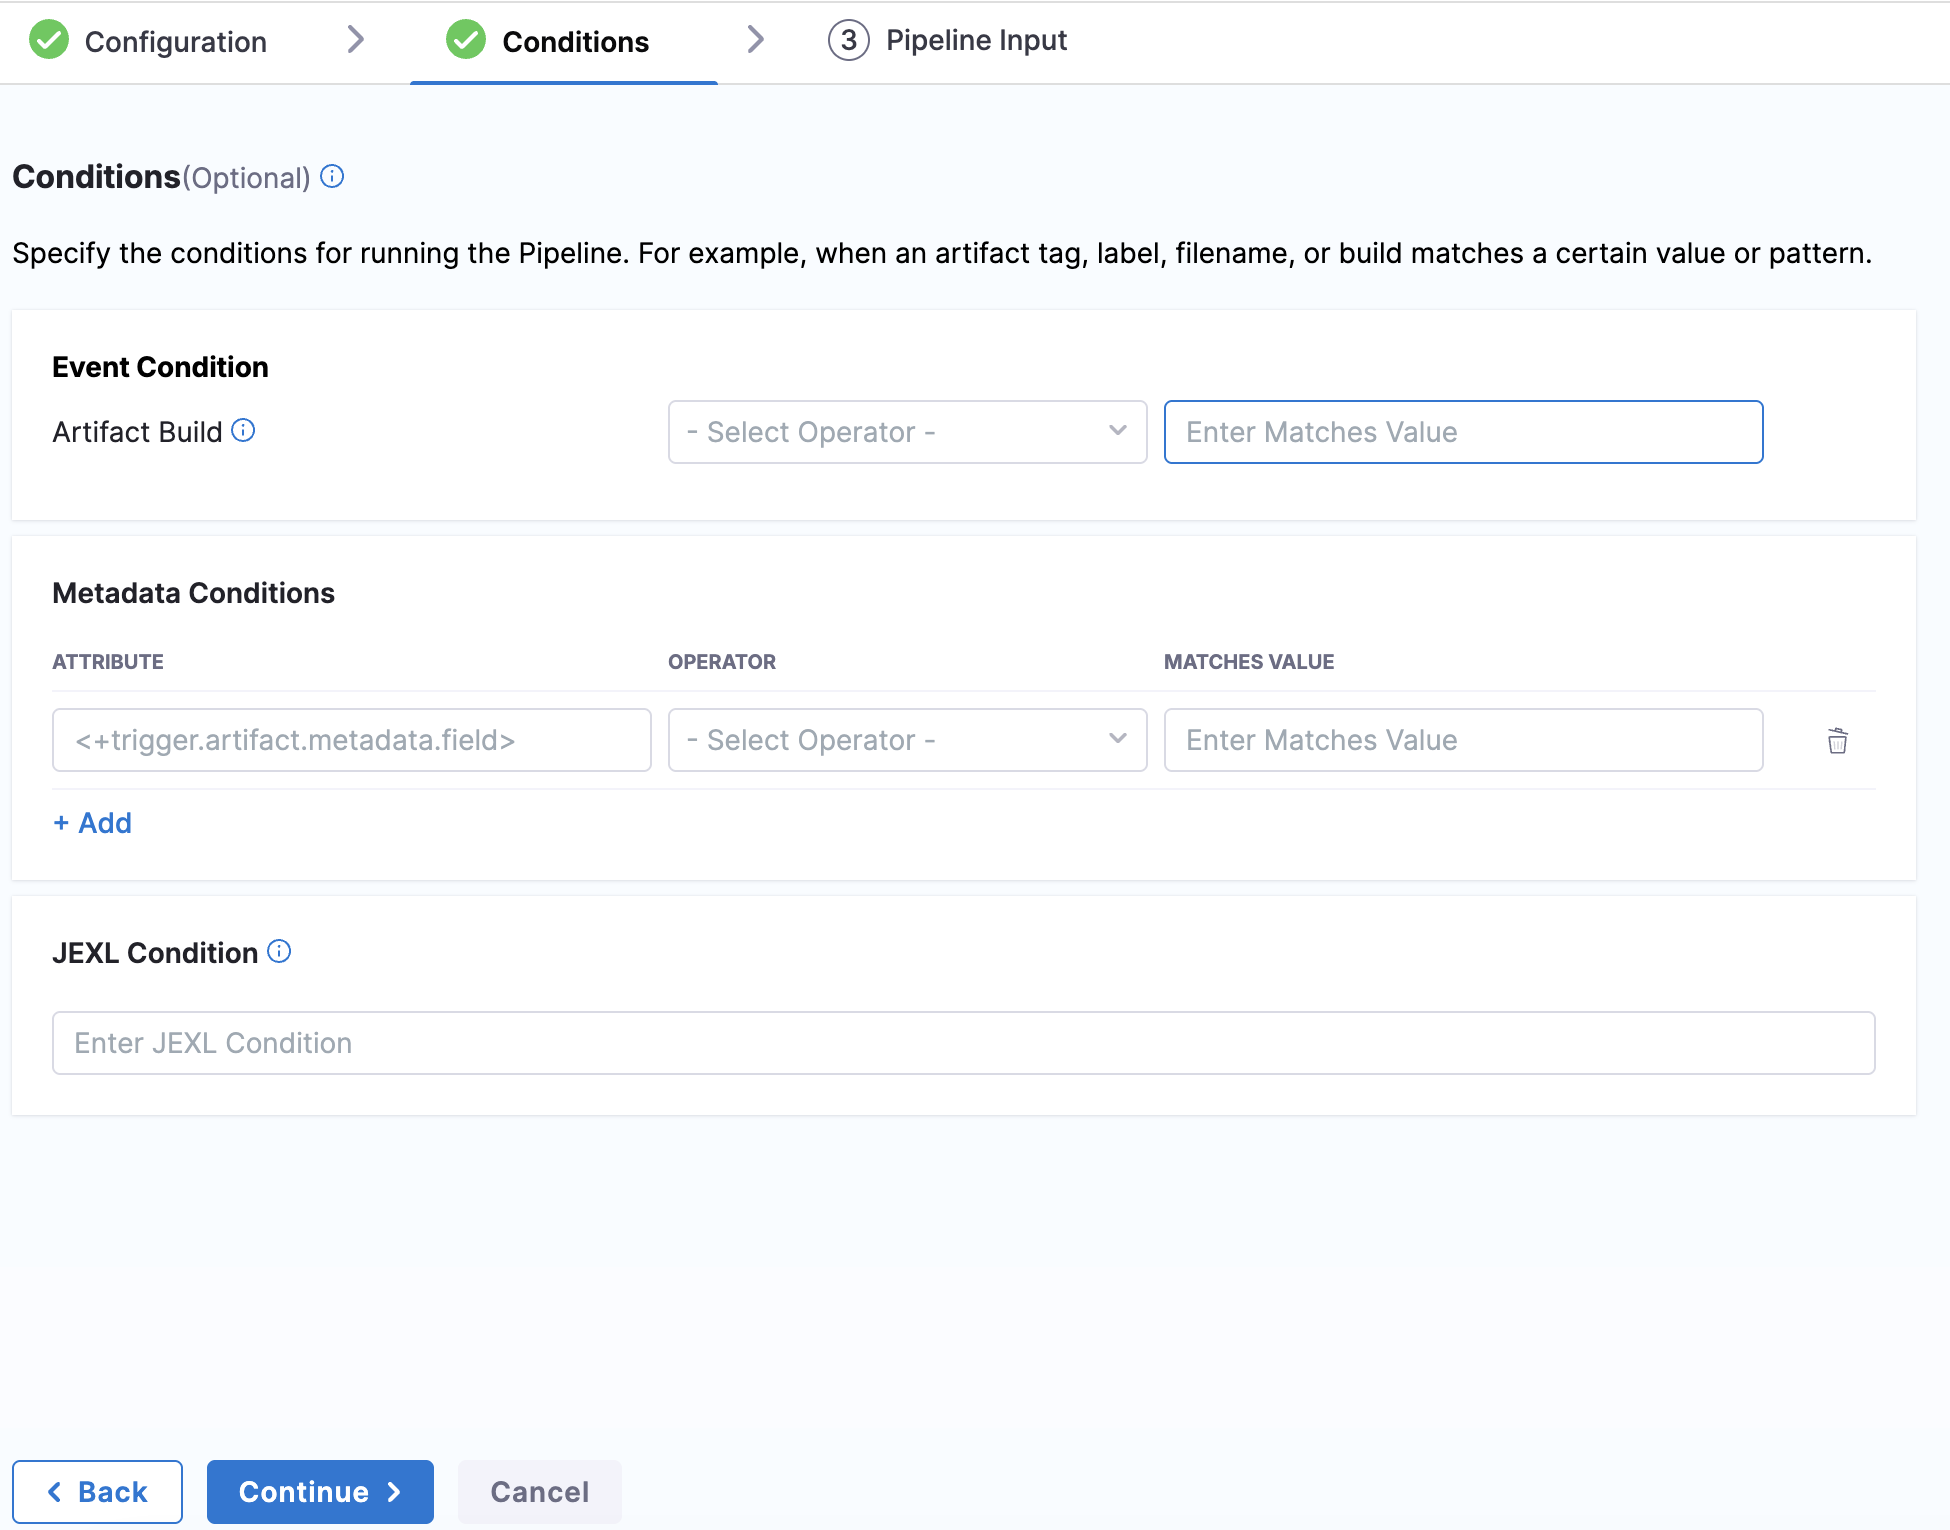
An artifact trigger supports the following condition types:
- Event Condition: Match against the incoming Artifact Build. Select an operator and enter a value or pattern to match the artifact build that fired the trigger.
- Metadata Conditions: Match against one or more artifact metadata attributes, such as the image, tag, or SHA. Go to Set metadata conditions for the supported attributes.
- JEXL Condition: Enter a JEXL expression for advanced logic that combines multiple attributes or values.
When the trigger fires, Harness evaluates every condition you set. The pipeline runs only when all of the conditions match.
Regex and wildcards
You can use wildcards in the condition's value, and you can select Regex.
For example, if the build is todolist-v2.0:
- With regex selected, the regex
todolist-v\d.\dmatches.
If the regex expression does not result in a match, Harness ignores the value.
Harness supports standard Java regex. For example, if regex is enabled and the intent is to match any branch, the wildcard should be .* instead of simply a wildcard *. To match all of the files that end in -DEV.tar, enter .*-DEV\.tar.
Set metadata conditions
On New Artifact triggers support conditions based on artifact metadata expressions. You can define conditions based on metadata apart from the artifact build and JEXL conditions.
To configure a condition based on artifact metadata, do the following:
- In Metadata Conditions, click Add.
- In Attribute, enter a metadata expression, such as
<+trigger.artifact.metadata.field>. - Select an operator and enter a value to match against the metadata attribute when the expression is resolved.
When the trigger is executed, the metadata condition is evaluated and, if the condition matches, the pipeline is executed.
The following are the artifact metadata expressions you can use:
- Docker registry
- ECR
- ACR
- GAR
- Artifactory
- Jenkins
- Nexus 2
- Nexus 3
You can use the following expressions:
<+pipeline.stages.DS.spec.artifacts.primary.metadata.image>
<+pipeline.stages.DS.spec.artifacts.primary.metadata.tag>
<+pipeline.stages.DS.spec.artifacts.primary.metadata.SHAV2>
<+pipeline.stages.DS.spec.artifacts.primary.metadata.SHA>
<+pipeline.stages.DS.spec.artifacts.primary.metadata.url>
<+pipeline.stages.DS.spec.artifacts.primary.dockerConfigJsonSecret>
You can use the following expressions:
<+pipeline.stages.DS.spec.artifacts.primary.metadata.image>
<+pipeline.stages.DS.spec.artifacts.primary.metadata.tag>
<+pipeline.stages.DS.spec.artifacts.primary.metadata.SHAV2>
<+pipeline.stages.DS.spec.artifacts.primary.metadata.SHA>
<+pipeline.stages.DS.spec.artifacts.primary.dockerConfigJsonSecret>
You can use the following expressions:
<+pipeline.stages.s1.spec.artifacts.primary.metadata.image>
<+pipeline.stages.s1.spec.artifacts.primary.metadata.registryHostname>
<+pipeline.stages.s1.spec.artifacts.primary.metadata.tag>
<+pipeline.stages.s1.spec.artifacts.primary.metadata.SHAV2>
<+pipeline.stages.s1.spec.artifacts.primary.metadata.SHA>
<+pipeline.stages.s1.spec.artifacts.primary.metadata.url>
The following are the expressions for Google Artifact Registry (GAR):
<+pipeline.stages.firstS.spec.artifacts.primary.metadata.image>
<+pipeline.stages.firstS.spec.artifacts.primary.metadata.registryHostname>
<+pipeline.stages.firstS.spec.artifacts.primary.metadata.SHAV2>
<+pipeline.stages.firstS.spec.artifacts.primary.metadata.SHA>
You can use the following expressions:
<+pipeline.stages.tas_0.spec.artifacts.primary.metadata.fileName>
<+pipeline.stages.tas_0.spec.artifacts.primary.metadata.url>
You can use the following expressions:
<+pipeline.stages.SSH_Jenkins_ArtifactSource.spec.artifacts.primary.metadata.url>
You can use the following expressions:
<+pipeline.stages.SSH_Nexus2_NPM.spec.artifacts.primary.metadata.fileName>
<+pipeline.stages.SSH_Nexus2_NPM.spec.artifacts.primary.metadata.package>
<+pipeline.stages.SSH_Nexus2_NPM.spec.artifacts.primary.metadata.repositoryName>
<+pipeline.stages.SSH_Nexus2_NPM.spec.artifacts.primary.metadata.version>
<+pipeline.stages.SSH_Nexus2_NPM.spec.artifacts.primary.metadata.url>
You can use the following expressions:
<+pipeline.stages.SSH_Nexus3_Maven.spec.artifacts.primary.metadata.extension>
<+pipeline.stages.SSH_Nexus3_Maven.spec.artifacts.primary.metadata.fileName>
<+pipeline.stages.SSH_Nexus3_Maven.spec.artifacts.primary.metadata.imagePath>
<+pipeline.stages.SSH_Nexus2_NPM.spec.artifacts.primary.metadata.repositoryName>
<+pipeline.stages.SSH_Nexus2_NPM.spec.artifacts.primary.metadata.version>
<+pipeline.stages.SSH_Nexus2_NPM.spec.artifacts.primary.metadata.url>
<+pipeline.stages.SSH_Nexus3_Maven.spec.artifacts.primary.metadata.artifactId>
<+pipeline.stages.SSH_Nexus3_Maven.spec.artifacts.primary.metadata.groupId>
Step 3: Pipeline Input
In Pipeline Input, provide the runtime inputs the pipeline needs when the trigger runs it. If the pipeline has no runtime inputs, Harness displays No Runtime Inputs.
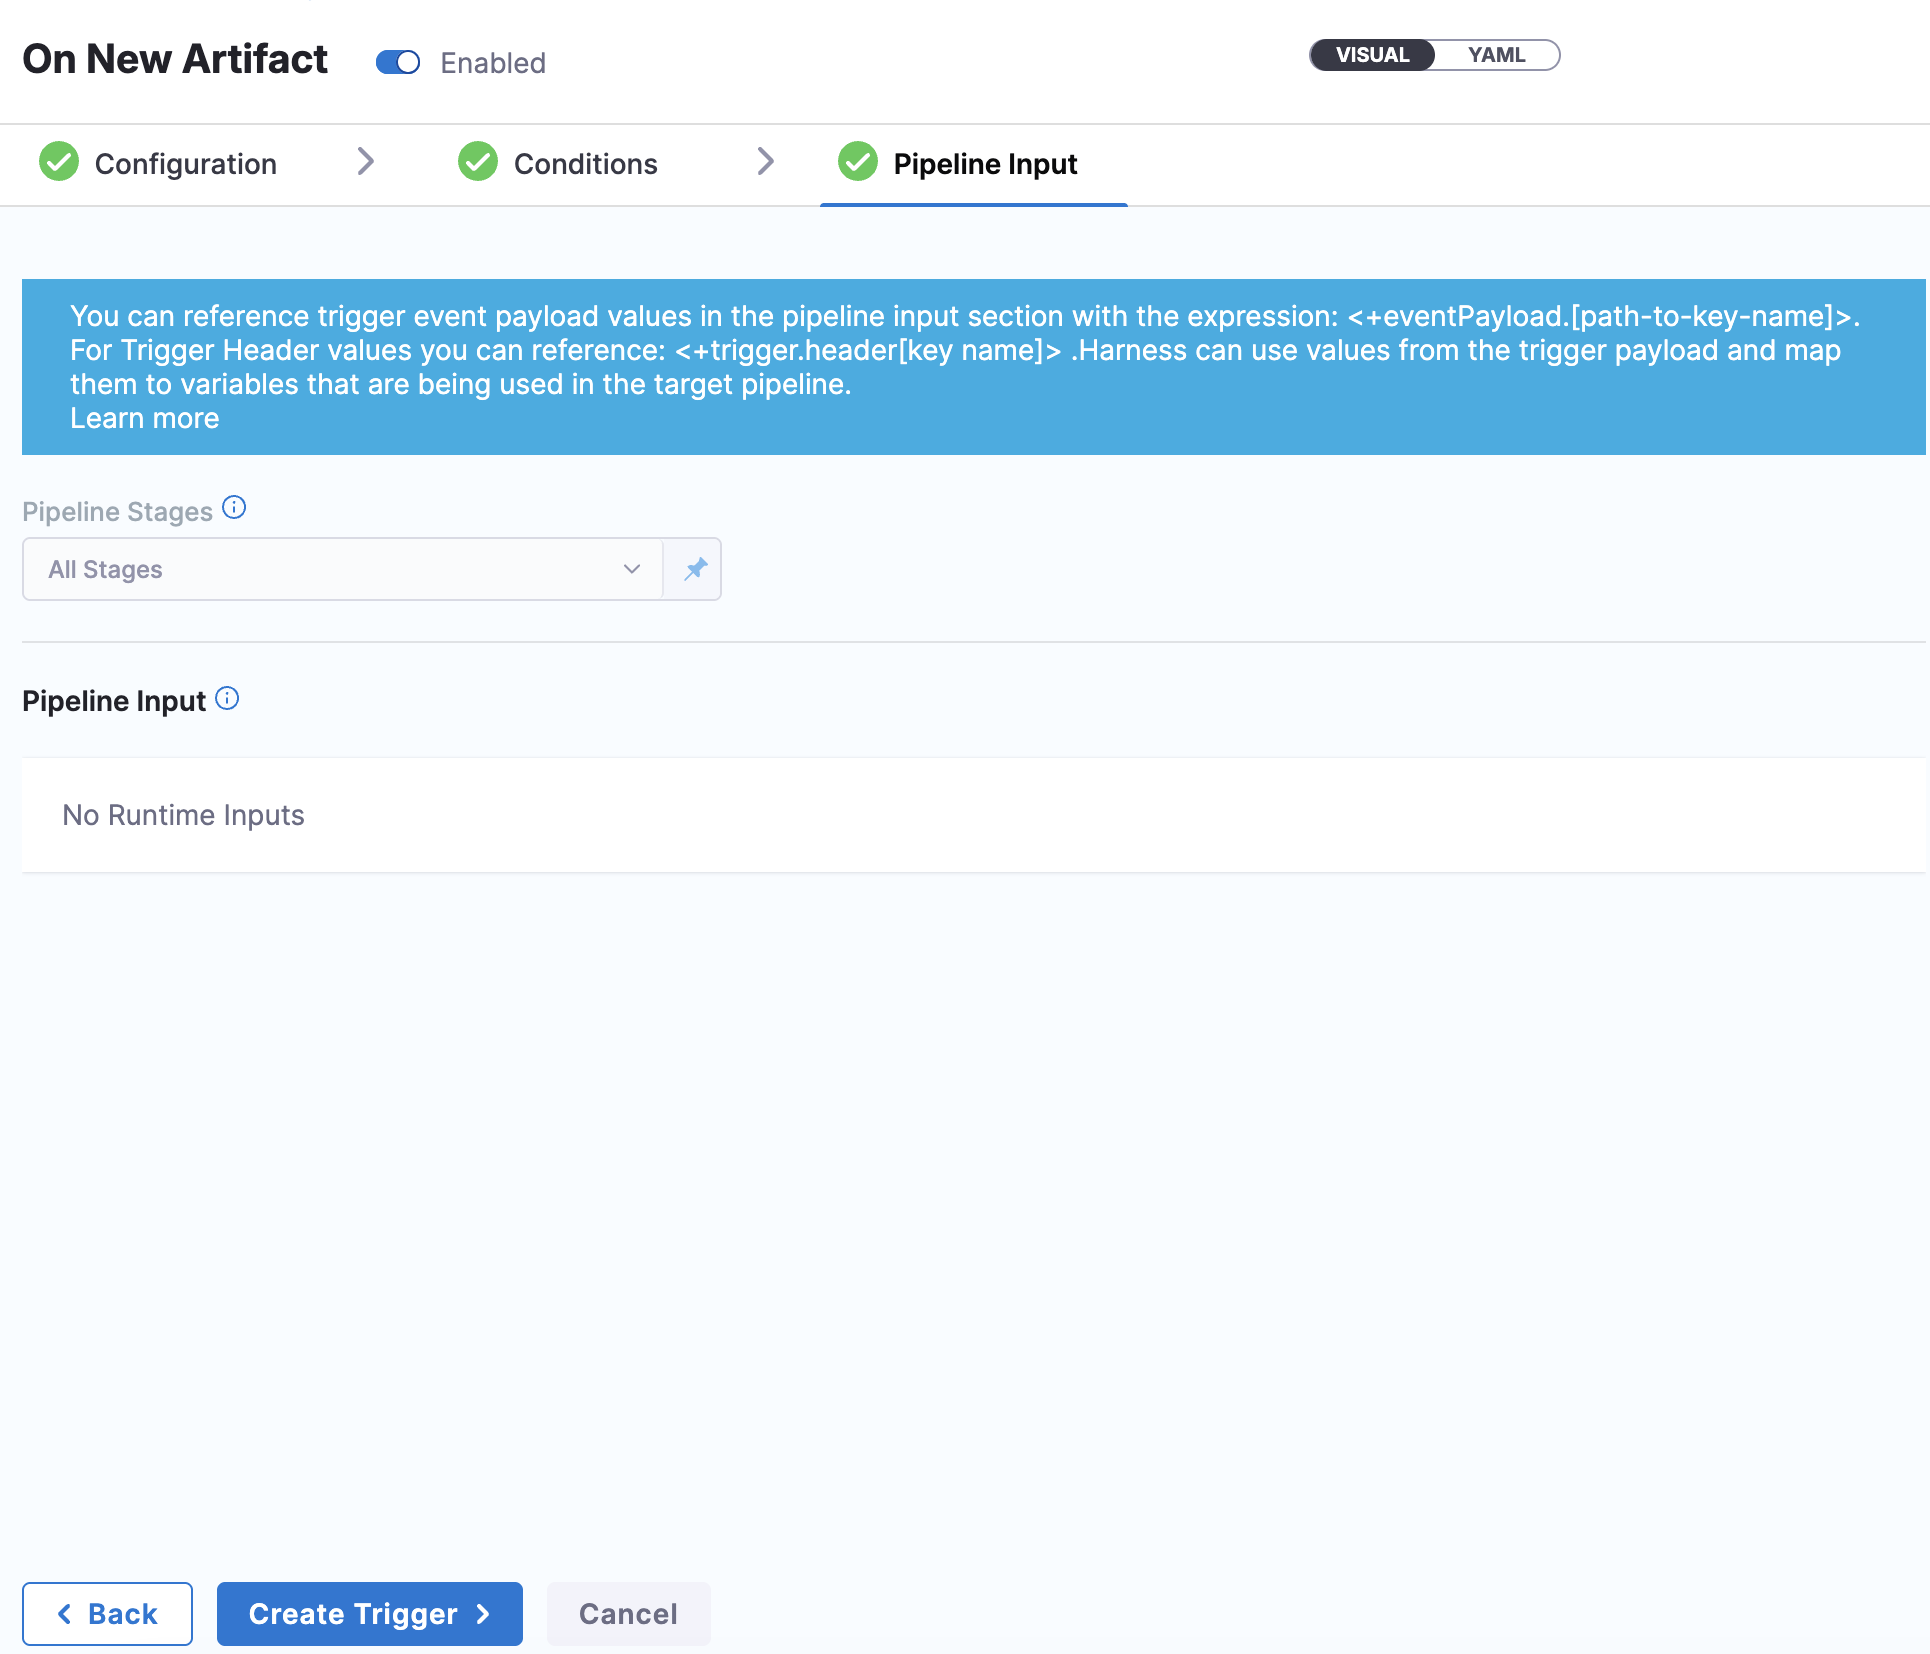
If your pipeline uses input sets, you can select the input set to use when the trigger executes the pipeline.
When you configure pipeline inputs for a trigger, you can use either an input set or provide runtime values directly, but not both at the same time. If you select an input set, any fields not covered by the input set use their default values. To override specific values from an input set while keeping the rest, use the override YAML approach in the trigger configuration.
You can reference trigger event payload values in the pipeline input using <+eventPayload.[path-to-key-name]>. For trigger header values, use <+trigger.header[key name]>.
When you are done, click Create Trigger.
Customize trigger input configuration using override YAML
To use an input set for both trigger and manual runs, override input parameters in the trigger inputYAML configuration. This provides the flexibility to modify a specific parameter within the associated Input Set. Go to Customize trigger input configuration using override YAML to override input parameters.
Define a multi-region artifact source
Configure a multi-region artifact source when the same artifact version is available across regions and you want the pipeline to trigger based on availability in different regions. This is an alternative to the single artifact source you define in Step 1: Configuration.
When artifact repositories such as Google Artifact Registry (GAR) are enabled with multi-region support, artifacts of the same version are available across different regions for easy consumption. Each region can have similar artifacts. This support enables the configuration of Harness triggers using artifacts from multiple regions.
In On New Artifact triggers, you can configure the regions and conditions associated with the artifact across regions. This enables the pipeline to be triggered based on the availability of artifacts in different regions.
To configure multi-region for the artifact, do the following:
-
In your pipeline, select Triggers.
-
Create an On New Artifact trigger for your artifact registry.
-
In Configuration, in the Listen on New Artifact section, add the primary artifact. This is the region where the artifact is first available, and the Harness connector you use must point to that region.
-
After you add the primary artifact, select Define Multi Region Artifact Source and add artifacts corresponding to the other regions. Add as many regions as needed for the trigger.

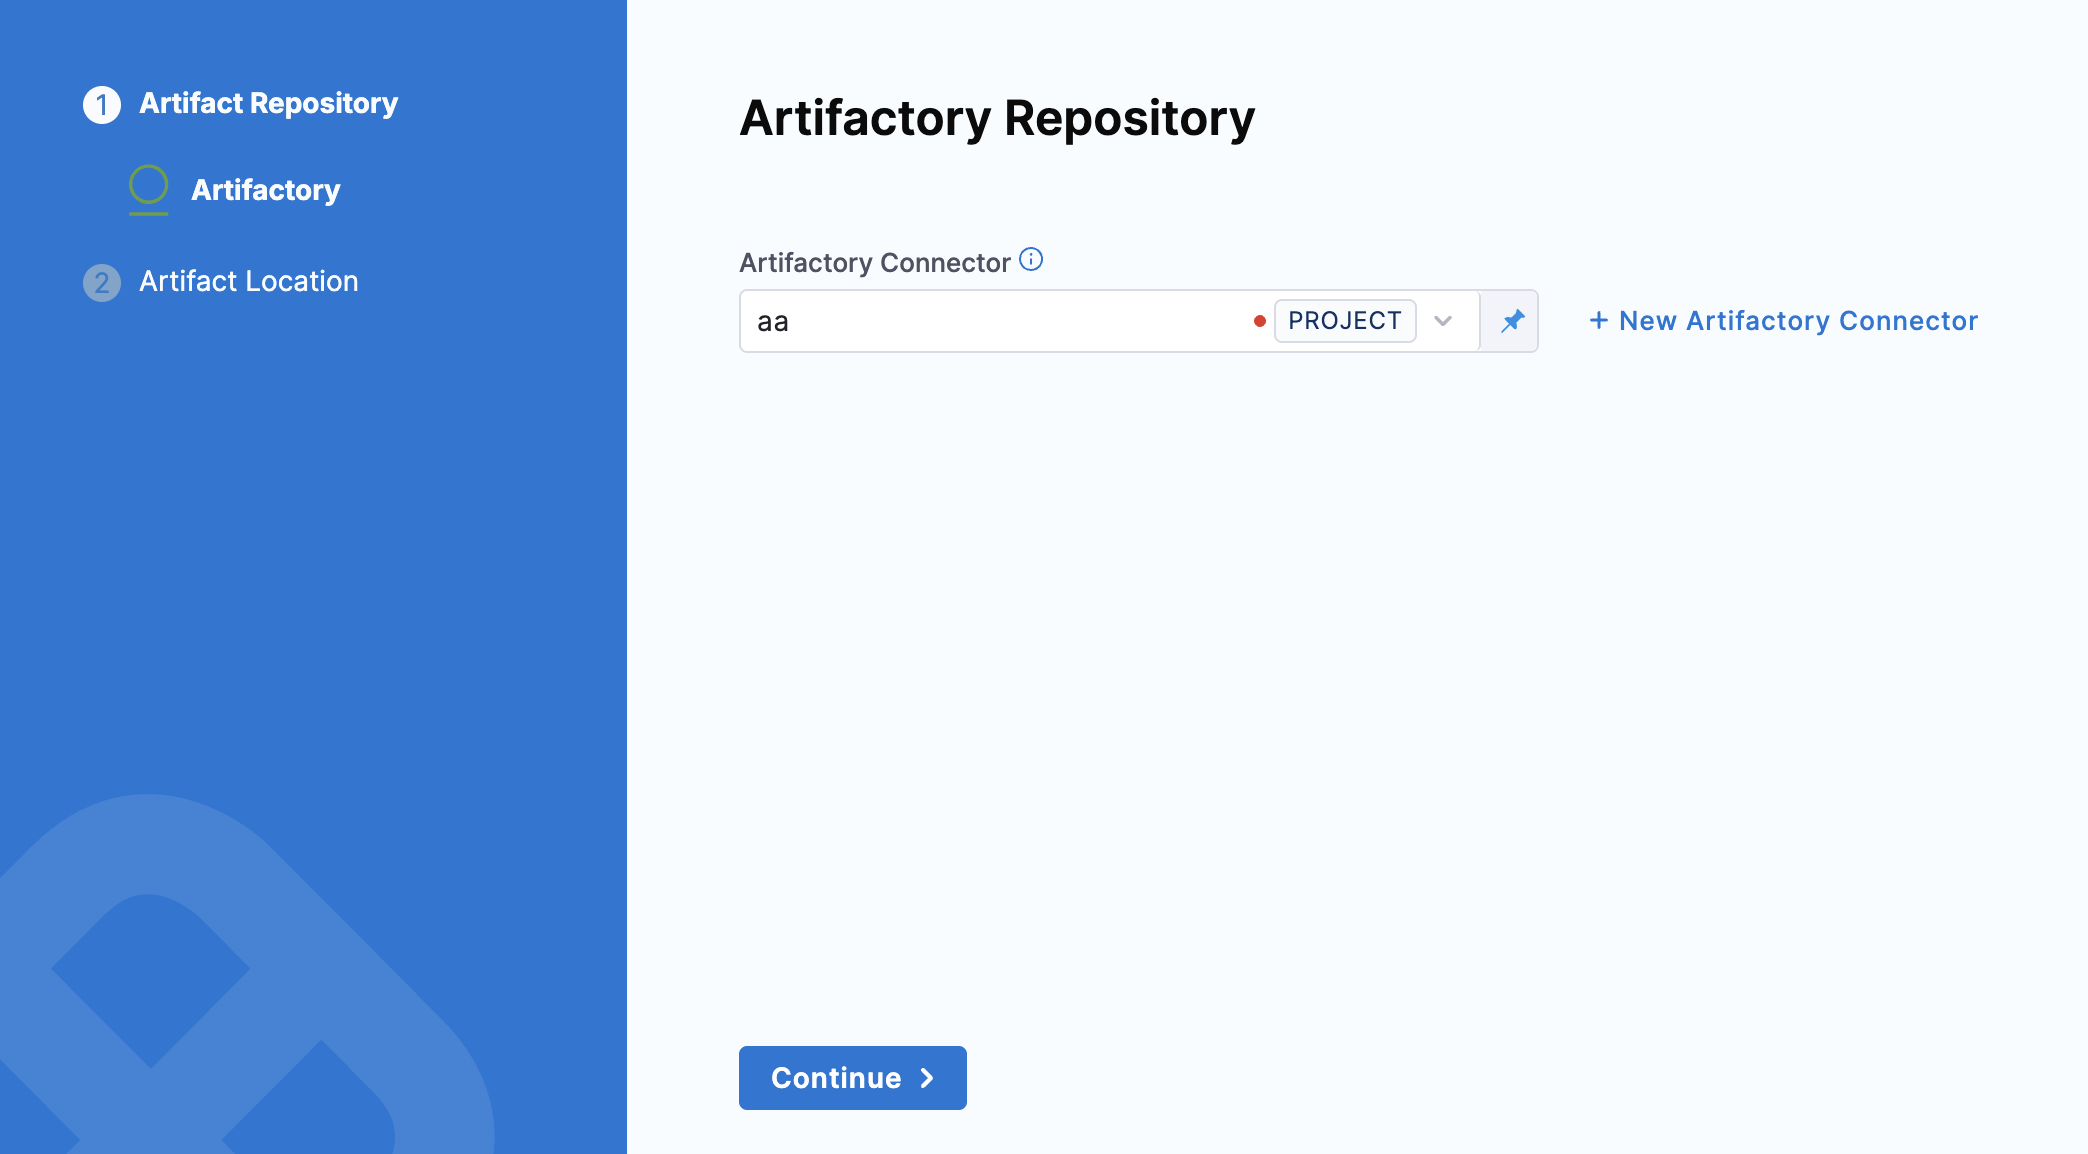
- In Artifact Repository, select or create the connector, and then click Continue. In Artifact Location, set the Repository Format and Repository, and then click Submit.
-
When you are done, click Continue to move to Conditions.
-
Select the conditions required for the artifacts across different regions.
When the artifact version is available across different regions, the condition is evaluated for all the artifacts and the pipeline is triggered.
-
Complete the trigger setup.
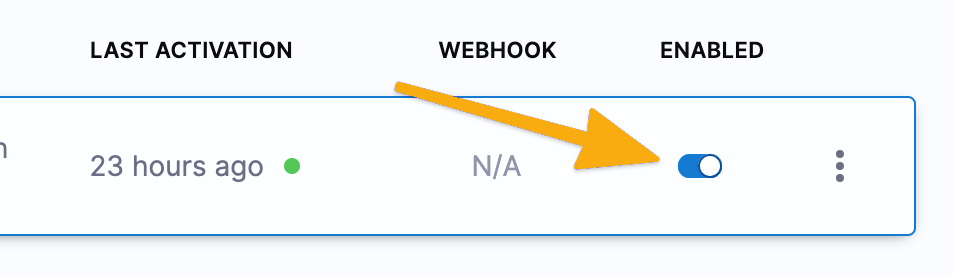
Enable or disable a trigger
Use the enabled toggle to enable or disable a trigger:
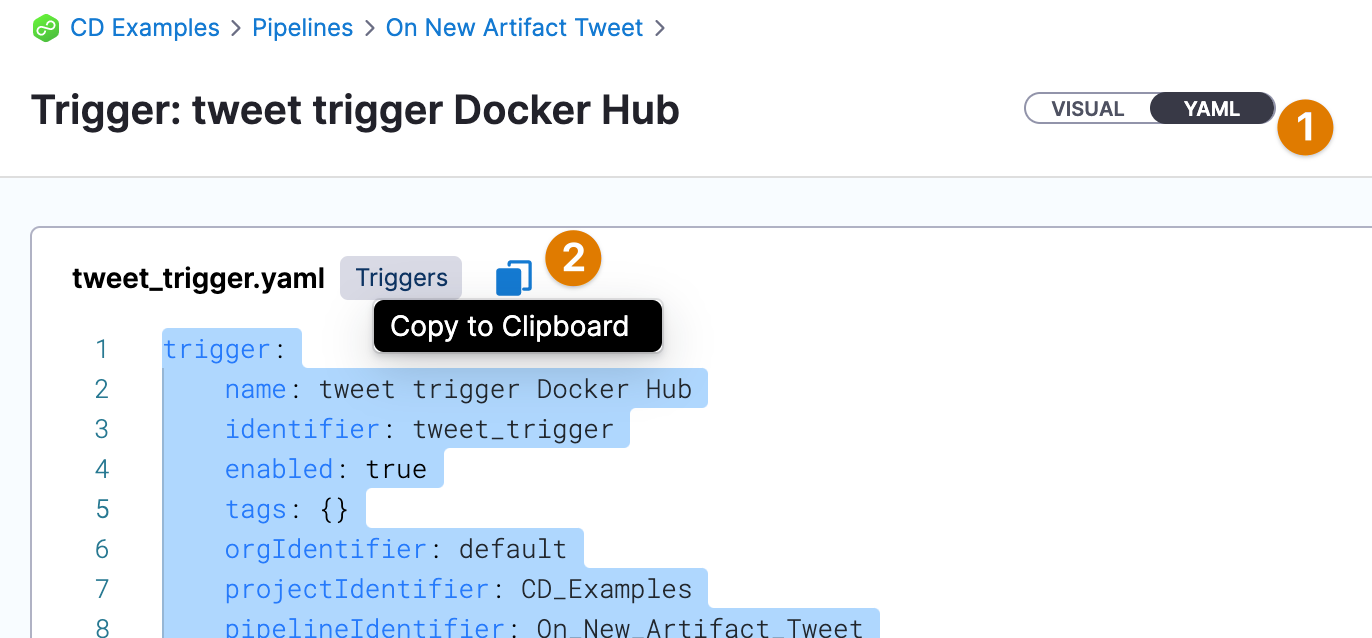
Reuse trigger YAML to create new triggers
Reuse triggers by copying and pasting trigger YAML. This is helpful when you have advanced conditions you do not want to set up each time.
Trigger artifact expressions used in a pipeline are resolved when you rerun a pipeline that was activated by a trigger.
Related articles
- Schedule pipelines using triggers: Schedule pipeline executions with cron triggers.
- Trigger pipelines using Git events: Run pipelines in response to Git events.