RBAC
Supply Chain Security (SCS) often involves multiple users working across security workflows, integrations, and remediation activities. Without clear access controls, users can unintentionally perform actions beyond their responsibilities, leading to misconfigurations and operational risks.
Role-Based Access Control (RBAC) for SCS addresses this by enabling administrators to define controlled access to SCS operations. This helps organizations enforce secure access boundaries and maintain better governance across security workflows.
The SCS RBAC enhancements described in this topic are enabled by default. However, if you are an existing SCS customer, these enhancements are placed behind the SCS_RBAC feature flag to prevent breaking changes to your current setup. Contact Harness Support to enable the feature in your account.
What will you learn in this topic?
By the end of this topic, you will be able to understand:
- How Role-Based Access Control (RBAC) works in Supply Chain Security (SCS).
- How to identify supported SCS resources and their available permissions.
- How to configure SCS RBAC permissions across Account, Organization, and Project scopes.
- How to create and modify roles with custom SCS permissions.
- How to create and manage resource groups for SCS access control.
Before you Begin
Make a note of the following before you proceed with configuring RBAC in SCS:
- Understanding of Role-based access control (RBAC) in Harness. Harness RBAC helps you manage user access to specific features, resources, and actions across the platform. For more information on Harness RBAC, see Role-based Access Control (RBAC).
Understand Role-Based Access Control in SCS
RBAC in SCS helps organizations control who can access and manage different SCS operations. In large environments, multiple users often work on integrations, remediation workflows, and security configurations simultaneously. RBAC helps ensure that only authorized users can perform sensitive actions within SCS, reducing the risk of unauthorized changes and operational issues.
RBAC for SCS introduces granular permissions for key SCS workflows, including integrations, configurations, external tickets, and remediation pull requests. Permissions can be assigned at the Account, Organization, and Project levels based on your organizational needs. Each permission category includes access controls such as View, Create, Edit, and Delete, allowing administrators to provide users, user groups, and service accounts with only the level of access they require within SCS.
The following table provides an overview of why RBAC is important for SCS, when it should be used, and how organizations can leverage it to manage access across SCS workflows and operations.
| Why use it? | When to use? | How can you leverage it? |
|---|---|---|
| Helps control access to sensitive SCS operations and workflows. Reduces the risk of unauthorized configuration changes and unintended operations. Helps enforce least-privilege access across SCS resources. | When multiple teams manage integrations, configurations, and remediation workflows within SCS. When you want to restrict create, edit, or delete access for specific users or teams. When managing SCS access across Account, Organization, and Project scopes. | Assign granular SCS permissions based on user responsibilities and operational requirements. Configure resource-specific permissions to control access across different SCS workflows and operations. Configure RBAC permissions through existing Harness managed roles or custom roles. |
Default Managed Role Access for SCS
SCS RBAC permissions are automatically mapped to selected existing Harness managed roles based on their access level. This helps organizations apply SCS access controls without manually configuring permissions for commonly used administrative and viewer roles.
The following table shows how the existing Harness managed roles are mapped to SCS permissions across different scopes:
| Managed Role | Available Scope | SCS Access Level |
|---|---|---|
| Viewer | Account, Organization, and Project | Provides view-only access to supported SCS resources and workflows. Users cannot perform create, edit, or delete operations. |
| Admin | Account, Organization, and Project | Provides full access to supported SCS resources and workflows, including configuration and management operations. |
| Security Testing AppSec | Account, Organization, and Project | Provides access to supported SCS security and remediation workflows, including integrations, external tickets, configurations, and remediation pull requests. |
Supported SCS Resources and Permissions
SCS RBAC permissions help administrators control access to different SCS resources and workflows based on user responsibilities and operational requirements. The following table describes the supported SCS resources, their available permissions, and the actions each permission allows within SCS.
| SCS Resource | Permission | Description |
|---|---|---|
| Integrations | View | Grants users read-only access to configured integrations. |
| Create | Allows users to create new integrations for supported repositories and platforms. | |
| Edit | Enables users to modify existing integrations and manage associated repository selections. | |
| Delete | Allows users to remove integrations from SCS. | |
| Configurations | View | Grants users read-only access to SCS configuration settings. |
| Create | Allows users to create supported SCS configurations. | |
| Edit | Enables users to modify existing SCS configurations and related settings. | |
| External Tickets | View | Grants users read-only access to external remediation tickets, such as Jira tickets, linked within SCS workflows. |
| Create | Allows users to create external remediation tickets from supported workflows. | |
| Edit | Enables users to manage supported external ticket workflows and settings. | |
| Pull Requests | View | Grants users read-only access to remediation pull requests. |
| Create | Allows users to create remediation pull requests for supported dependencies and vulnerabilities. | |
| Edit | Enables users to manage supported remediation pull request workflows. | |
| Remediation Tracker | View | Grants users the ability to view remediation trackers in read-only mode. |
| Create/Edit | Enables users to create new remediation trackers and modify existing trackers. | |
| Close | Allows users to close remediation trackers. |
Configure RBAC for SCS
Configuring RBAC for SCS helps administrators control access to different SCS resources and workflows based on user responsibilities and operational requirements. By assigning granular permissions, organizations can restrict unauthorized actions while ensuring that users have the appropriate level of access required for their tasks.
You can configure RBAC permissions for SCS at the Account, Organization, and Project scopes. Depending on your access management requirements, you can configure SCS RBAC in the following ways:
- Create a new role with SCS permissions
- Modify/Delete an existing role
- Create a new resource group
- Modify/Delete an existing resource group
Create a new role with SCS permissions
Creating a new role allows administrators to define custom SCS permissions based on specific user responsibilities and access requirements.
The configuration workflow remains similar across all scopes, with only the navigation path changing based on the selected scope. Use the following navigation paths based on where you want to configure SCS permissions:
| Scope | Navigation Path |
|---|---|
| Account | Use the scope selector to select the required Account scope, and then go to Account Settings > Access Control > Roles. |
| Organization | Use the scope selector to select the required Organization scope, and then go to Organization Settings > Access Control > Roles. |
| Project | Use the scope selector to select the required Project scope, and then go to Project Settings > Access Control > Roles. |
To create a new role with SCS permissions, complete the following steps:
-
Navigate to the appropriate Roles page based on your selected scope.
-
Click the
+ New Rolebutton on the top left to open theNew Roledialog.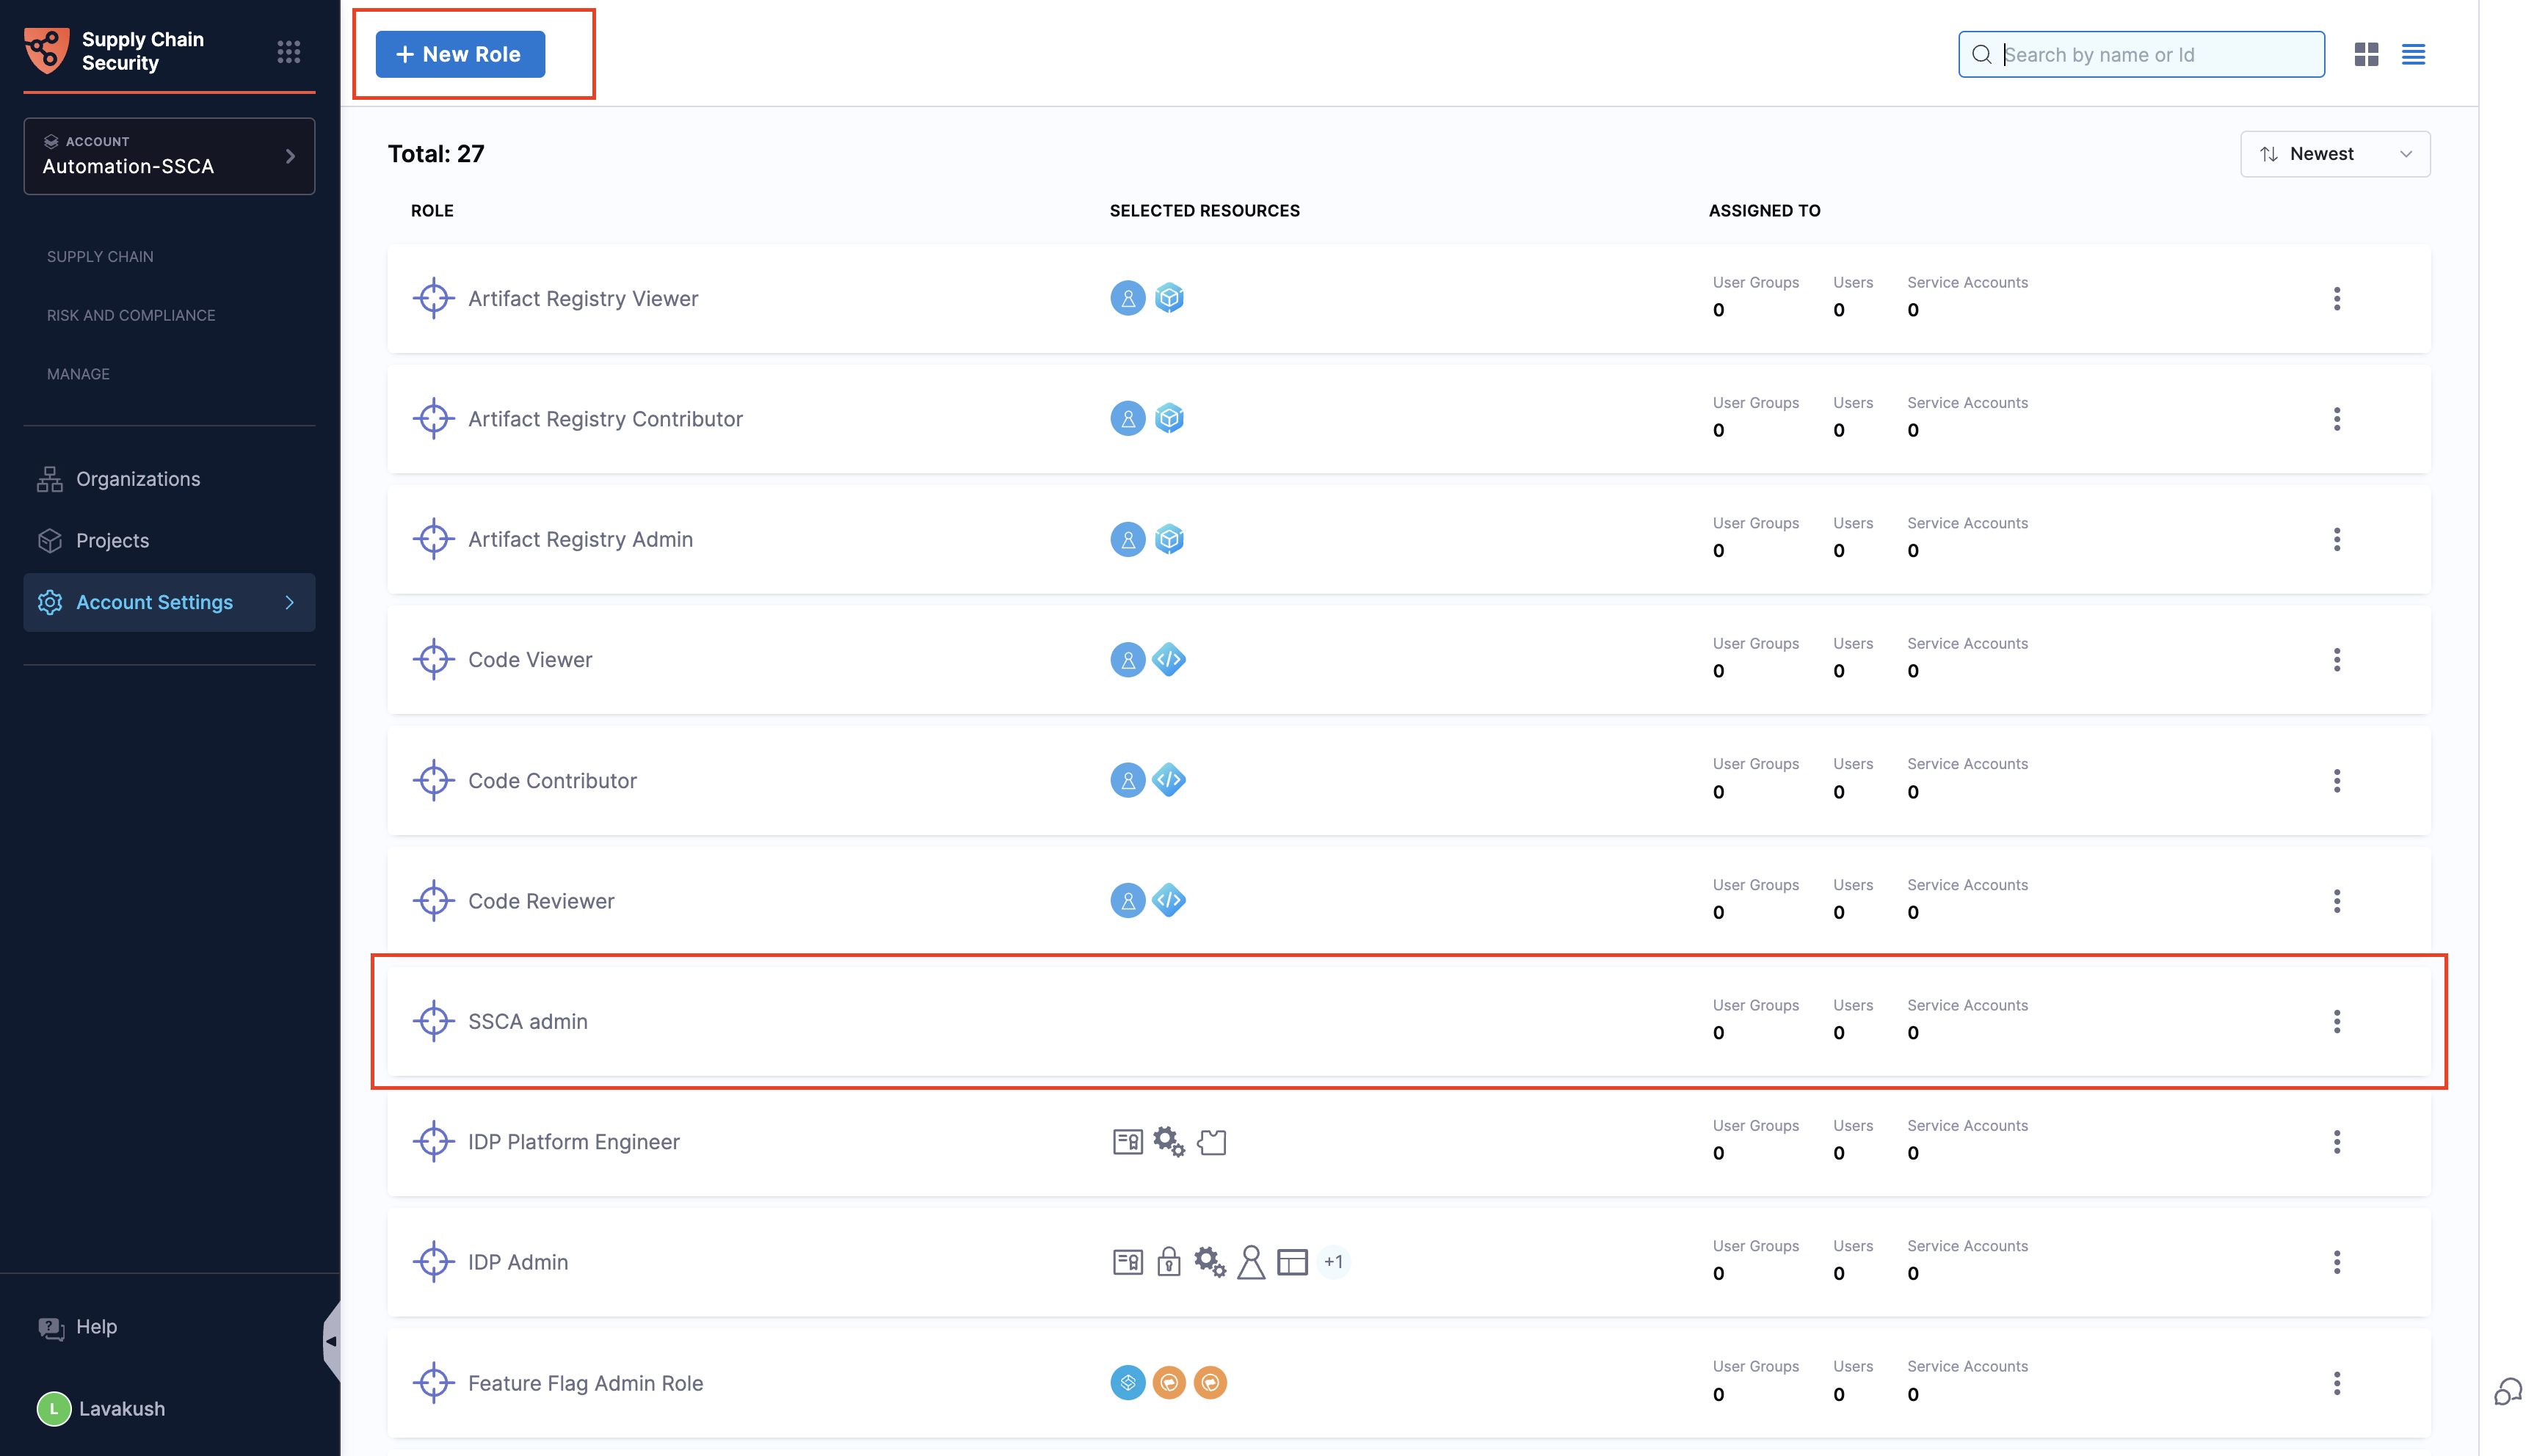
-
Specify the Name of the role, for example, demo_role. Harness automatically generates a role ID from the role name. Once the role is created, you can't change the ID.
-
(Optional) Enter a description for the role.
-
(Optional) Specify tags for the role by clicking on
+ Add “<tag_name>”. The option appears automatically as you enter a tag name. -
After verifying the details, click Save. Once saved, you can view the Role created successfully toaster message at the top, indicating the successful creation of a new role. The role details page opens automatically with the default Permissions tab, where you can configure permissions for the required SCS resources.
-
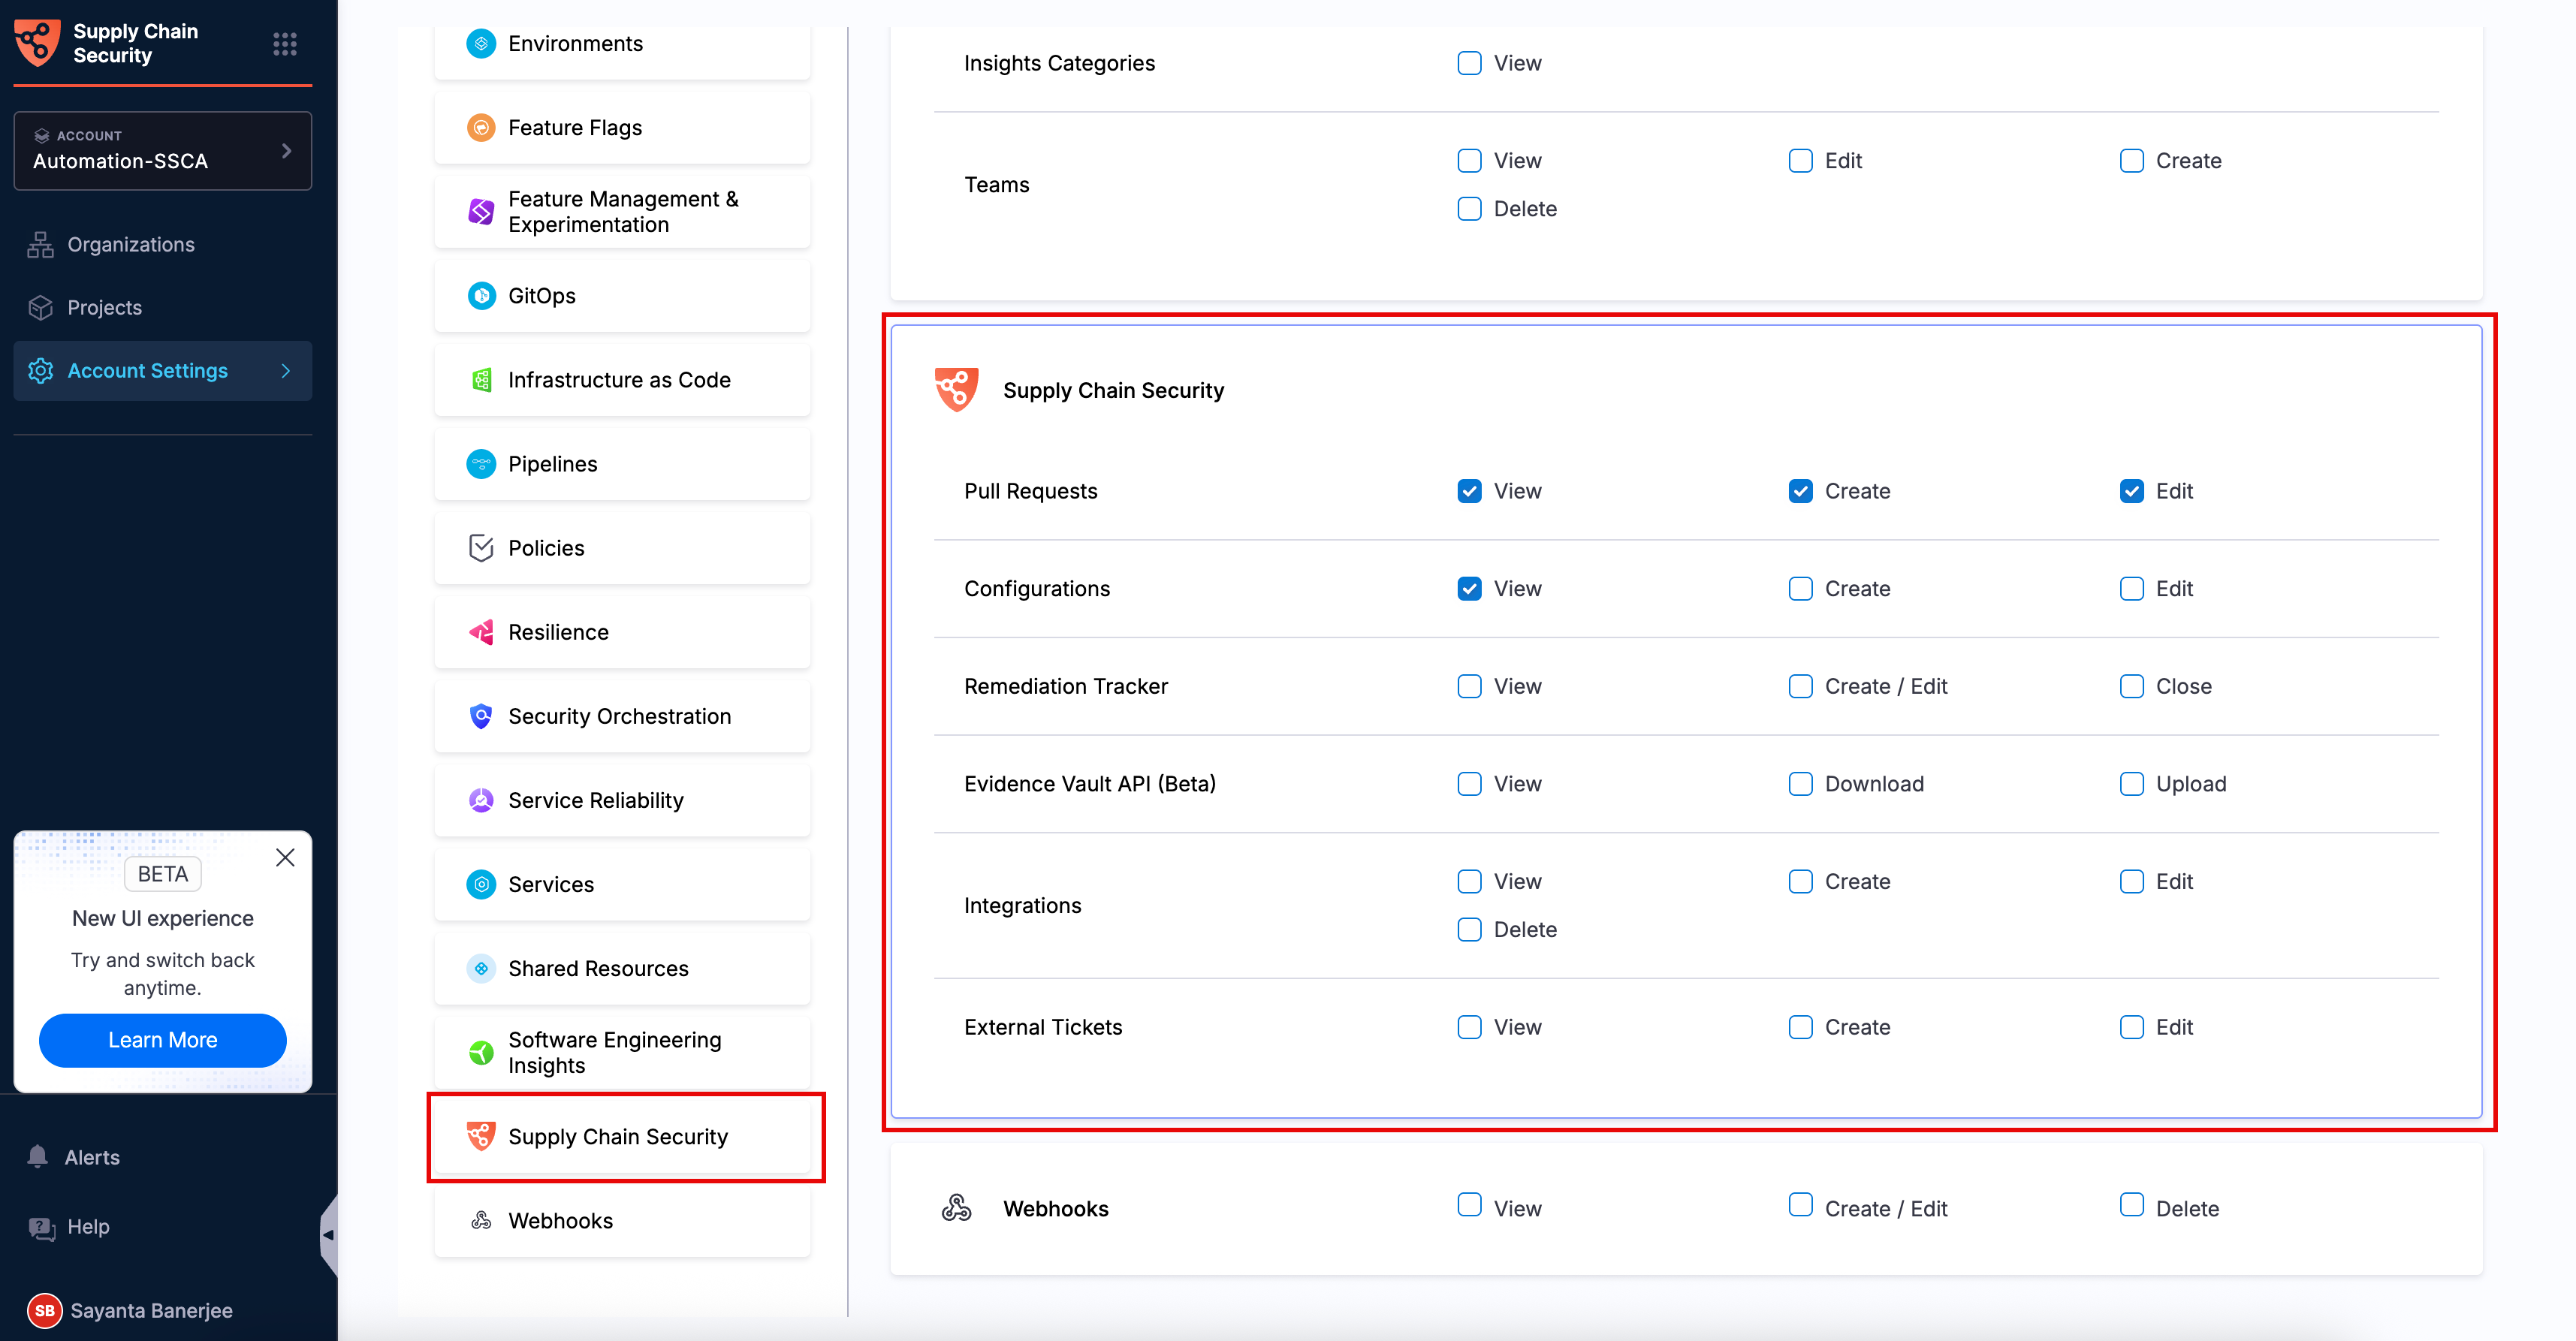
Scroll down through the different categories or through the Update Role Permissions section to locate Supply Chain Security.
-
Select the checkboxes for the required permissions across different SCS resources based on your access requirements.
-
Scroll up to the top of the page and click Apply Changes. Once done, the Permissions updated successfully toaster message will appear at the top, indicating the successful assignment of custom permissions.
noteYou can assign the newly created role to a new or existing user. For more information on creating new users and assigning roles, see Manage Users.
-
(Optional) After assigning the role to a user, user group, or service account, click the
Assigned Totab to view the associated users, user groups, and service accounts.
Modify/Delete an existing role
Modifying an existing role allows administrators to update the role name, description, tags, and assigned SCS permissions, while deleting an existing role removes it from SCS.
Modify SCS permissions for an existing role
To modify the SCS permissions for an existing role, complete the following steps:
- Navigate to the appropriate Roles page based on your selected scope.
- From the list of available roles, locate and select the role that you want to modify. The role details page opens with the default Permissions tab.
- Scroll down through the different categories or through the Update Role Permissions section to locate Supply Chain Security.
- Select or unselect the checkboxes for the required permissions across different SCS resources based on your access requirements.
- Scroll up to the top of the page and click Apply Changes. Once done, the Permissions updated successfully toaster message will appear at the top indicating the successful modification of custom permissions.
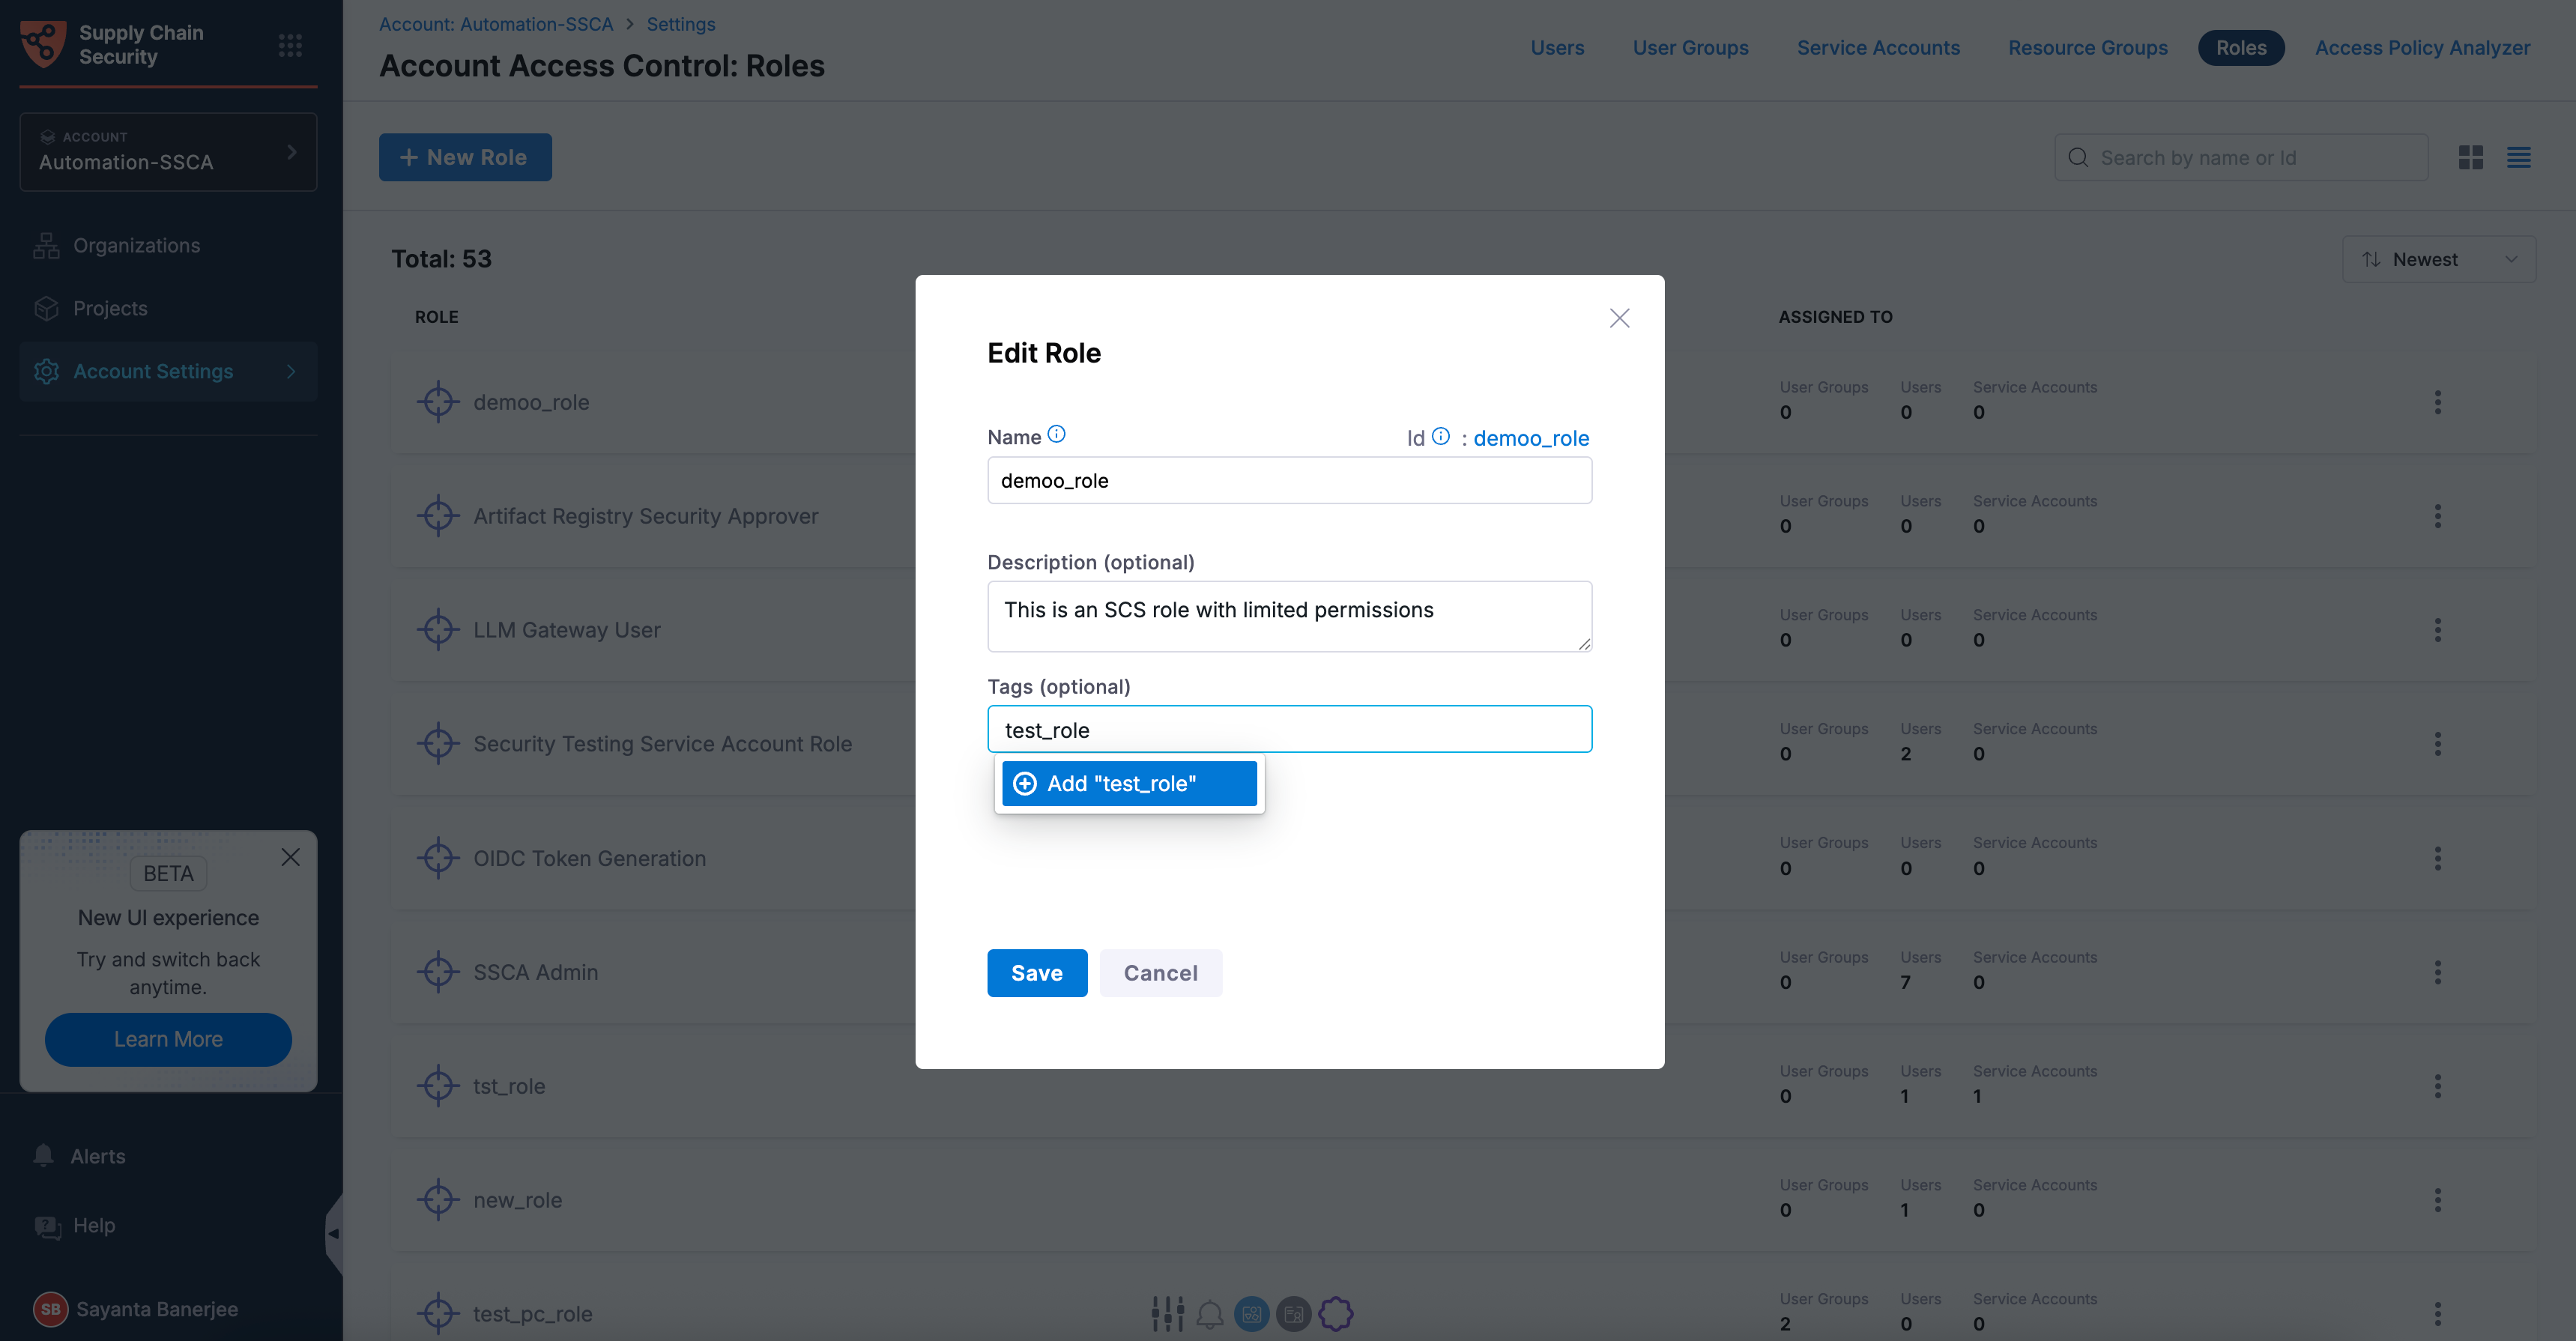
Modify the role name, description, or tags for an existing role
Modifying an existing role allows administrators to update the role name, description, or tags to reflect changing organizational and access management requirements. For more information, see Edit a Role.
Delete an Existing Role
Deleting an existing role allows administrators to remove roles that are no longer required or are no longer used within the organization. For more information, see Delete a Role.
For more information on managing roles, see Manage Roles.
Create a new resource group
Resource groups help you manage access to SCS resources. They define which resources users and service accounts can access, making it easier to provide the right level of access.
The configuration workflow remains similar across all scopes, with only the navigation path changing based on the selected scope. Use the following navigation paths based on where you want to configure SCS resource groups:
| Scope | Navigation Path |
|---|---|
| Account | Use the scope selector to select the required Account scope, and then go to Account Settings > Access Control > Resource Groups. |
| Organization | Use the scope selector to select the required Organization scope, and then go to Organization Settings > Access Control > Resource Groups. |
| Project | Use the scope selector to select the required Project scope, and then go to Project Settings > Access Control > Resource Groups. |
SCS resources appear in the resource tree only under the Project scope, so a resource group must include Projects in its resource scope to grant access to them.
- When creating a resource group at the Account scope, select All (including all Organizations and Projects) or Specified Organizations (and their Projects) as the resource scope. The Account only resource scope does not include SCS resources.
- When creating a resource group at the Organization scope, select All (including all Projects) or Specified Projects as the resource scope. The Organization only resource scope does not include SCS resources.
To create a new resource group with SCS resources, complete the following steps:
-
Navigate to the appropriate Resource Groups page based on your selected scope.
-
Click the
+ New Resource Groupbutton on the top left to open theNew Resource Groupdialog.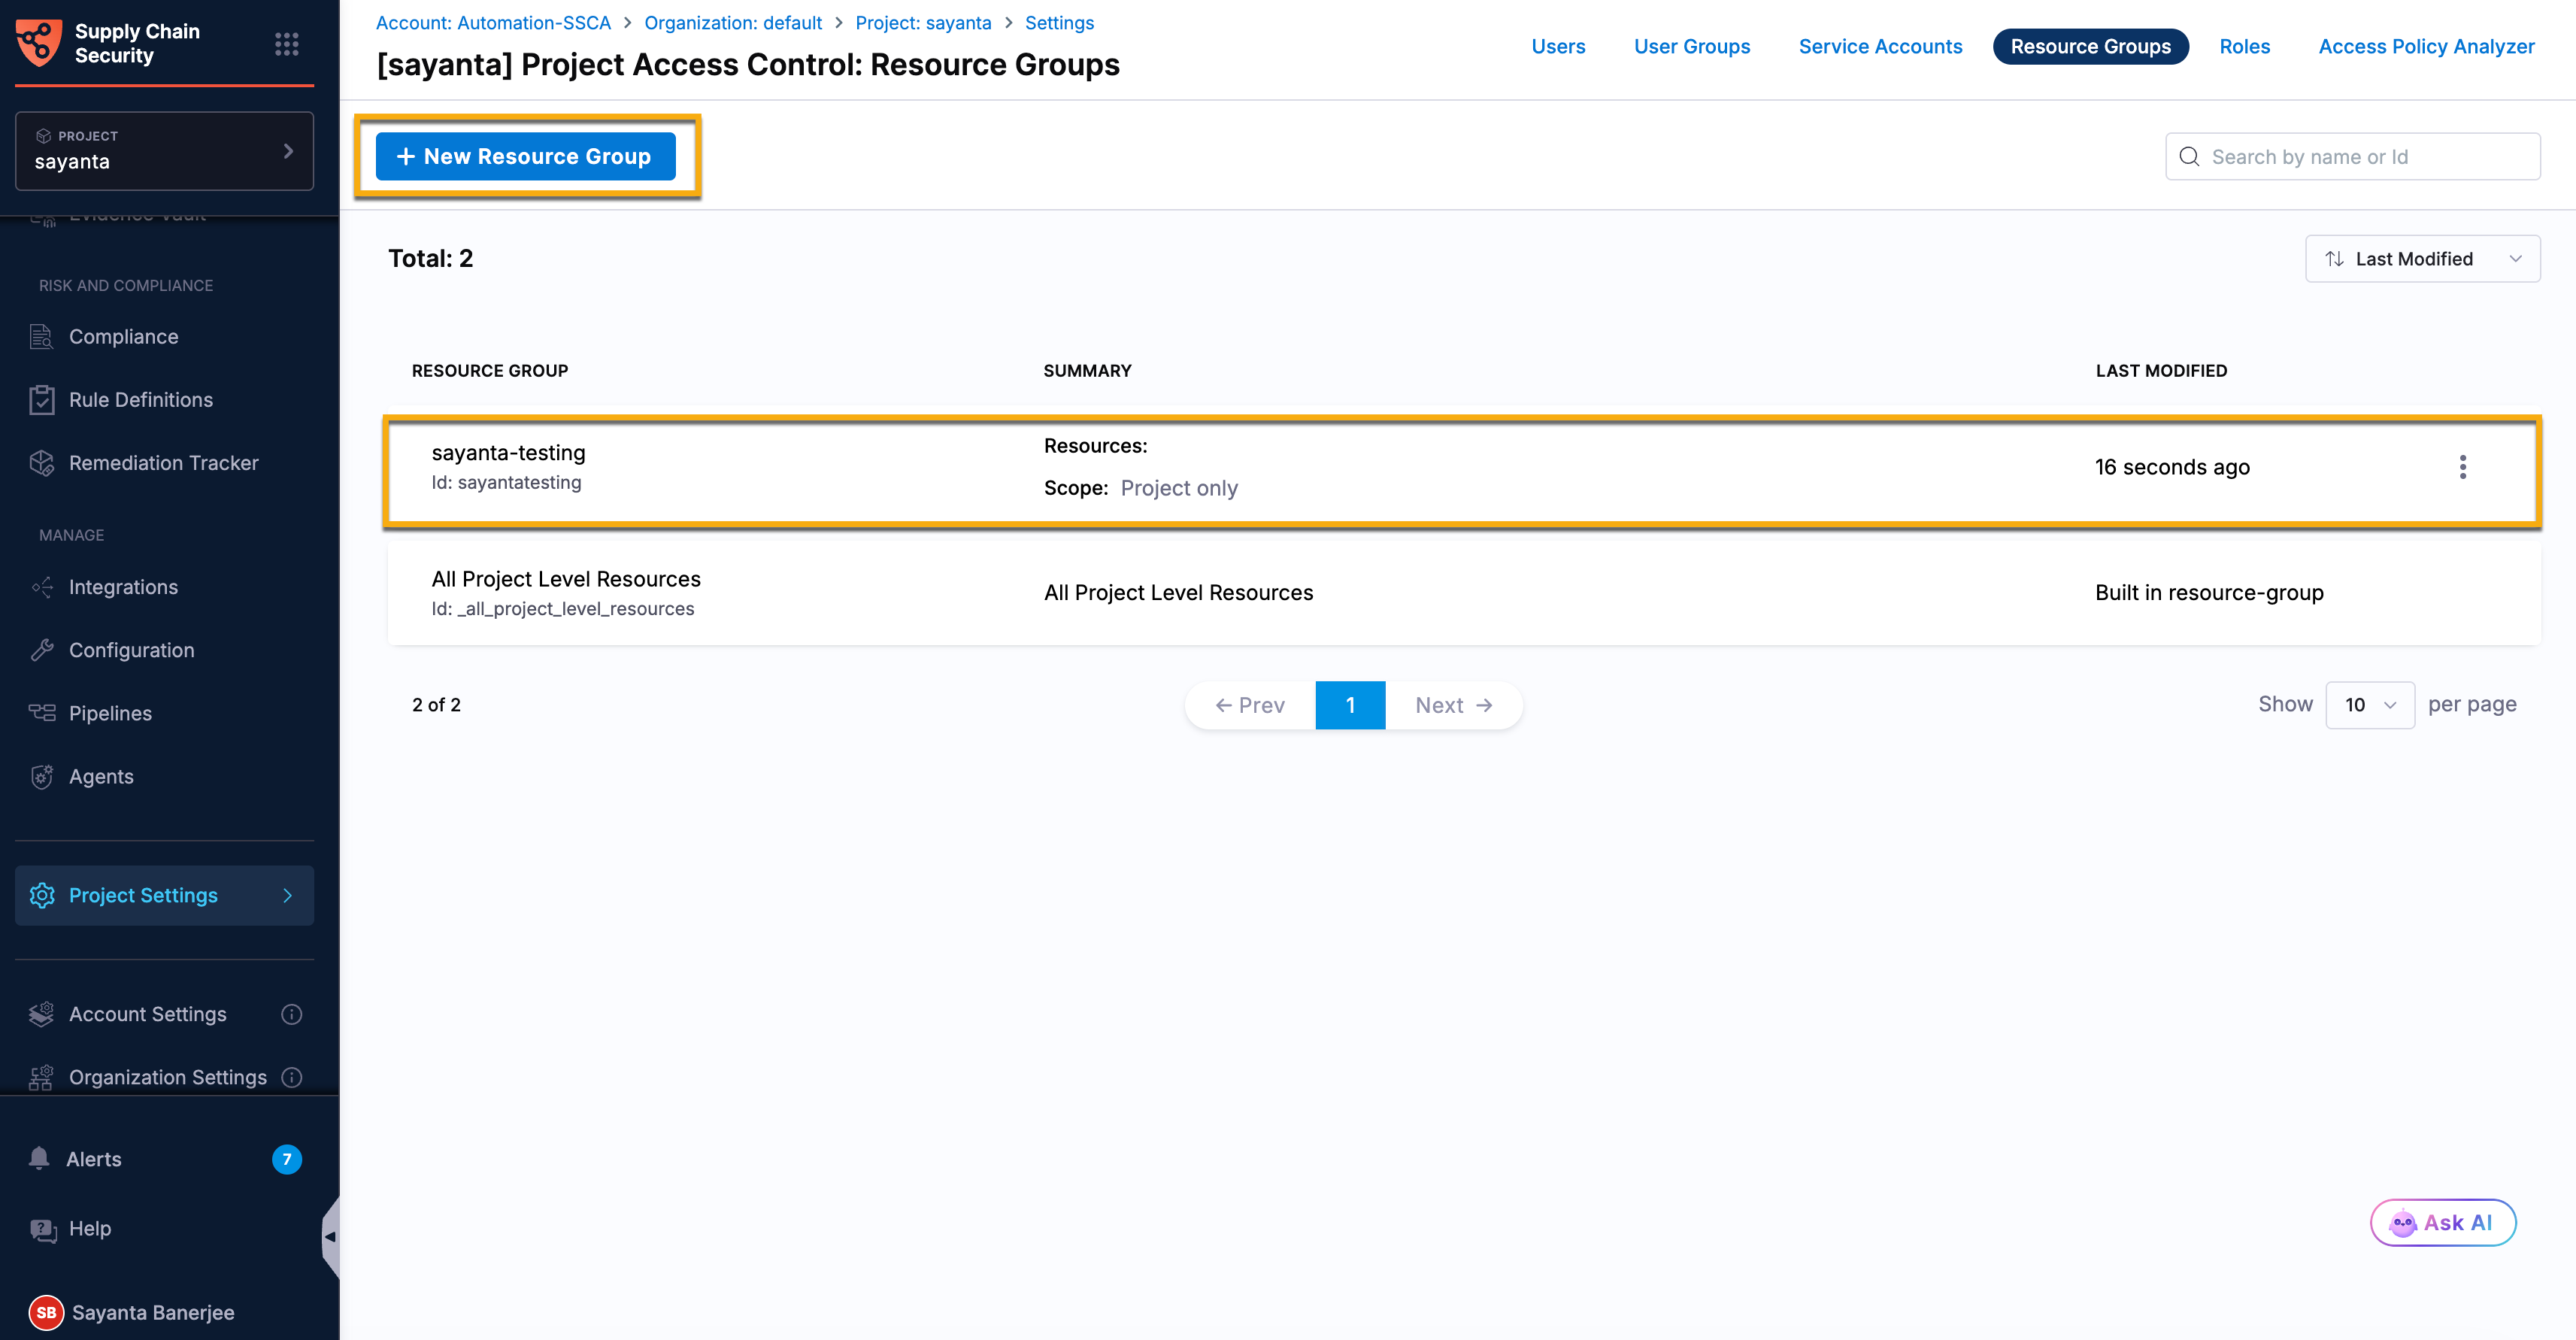
-
Specify the Name of the resource group, for example, demo_resource_group.
Harness automatically generates a resource group ID from the resource group name. -
(Optional) Enter a description for the resource group.
-
(Optional) Specify tags for the resource group by clicking on
+ Add "<tag_name>". The option appears automatically as you enter a tag name. -
Select a color for the resource group. The default color is blue.
-
After verifying the details, click Save. Once saved, you can view the Resource Group created successfully toaster message at the top, indicating the successful creation of a new resource group.
-
By default, the Resource Scope is selected to Project only for the Project scope.
- At the Account scope, select All (including all Organizations and Projects) or Specified Organizations (and their Projects) as the resource scope.
- At the Organization scope, select All (including all Projects) or Specified Projects as the resource scope.
-
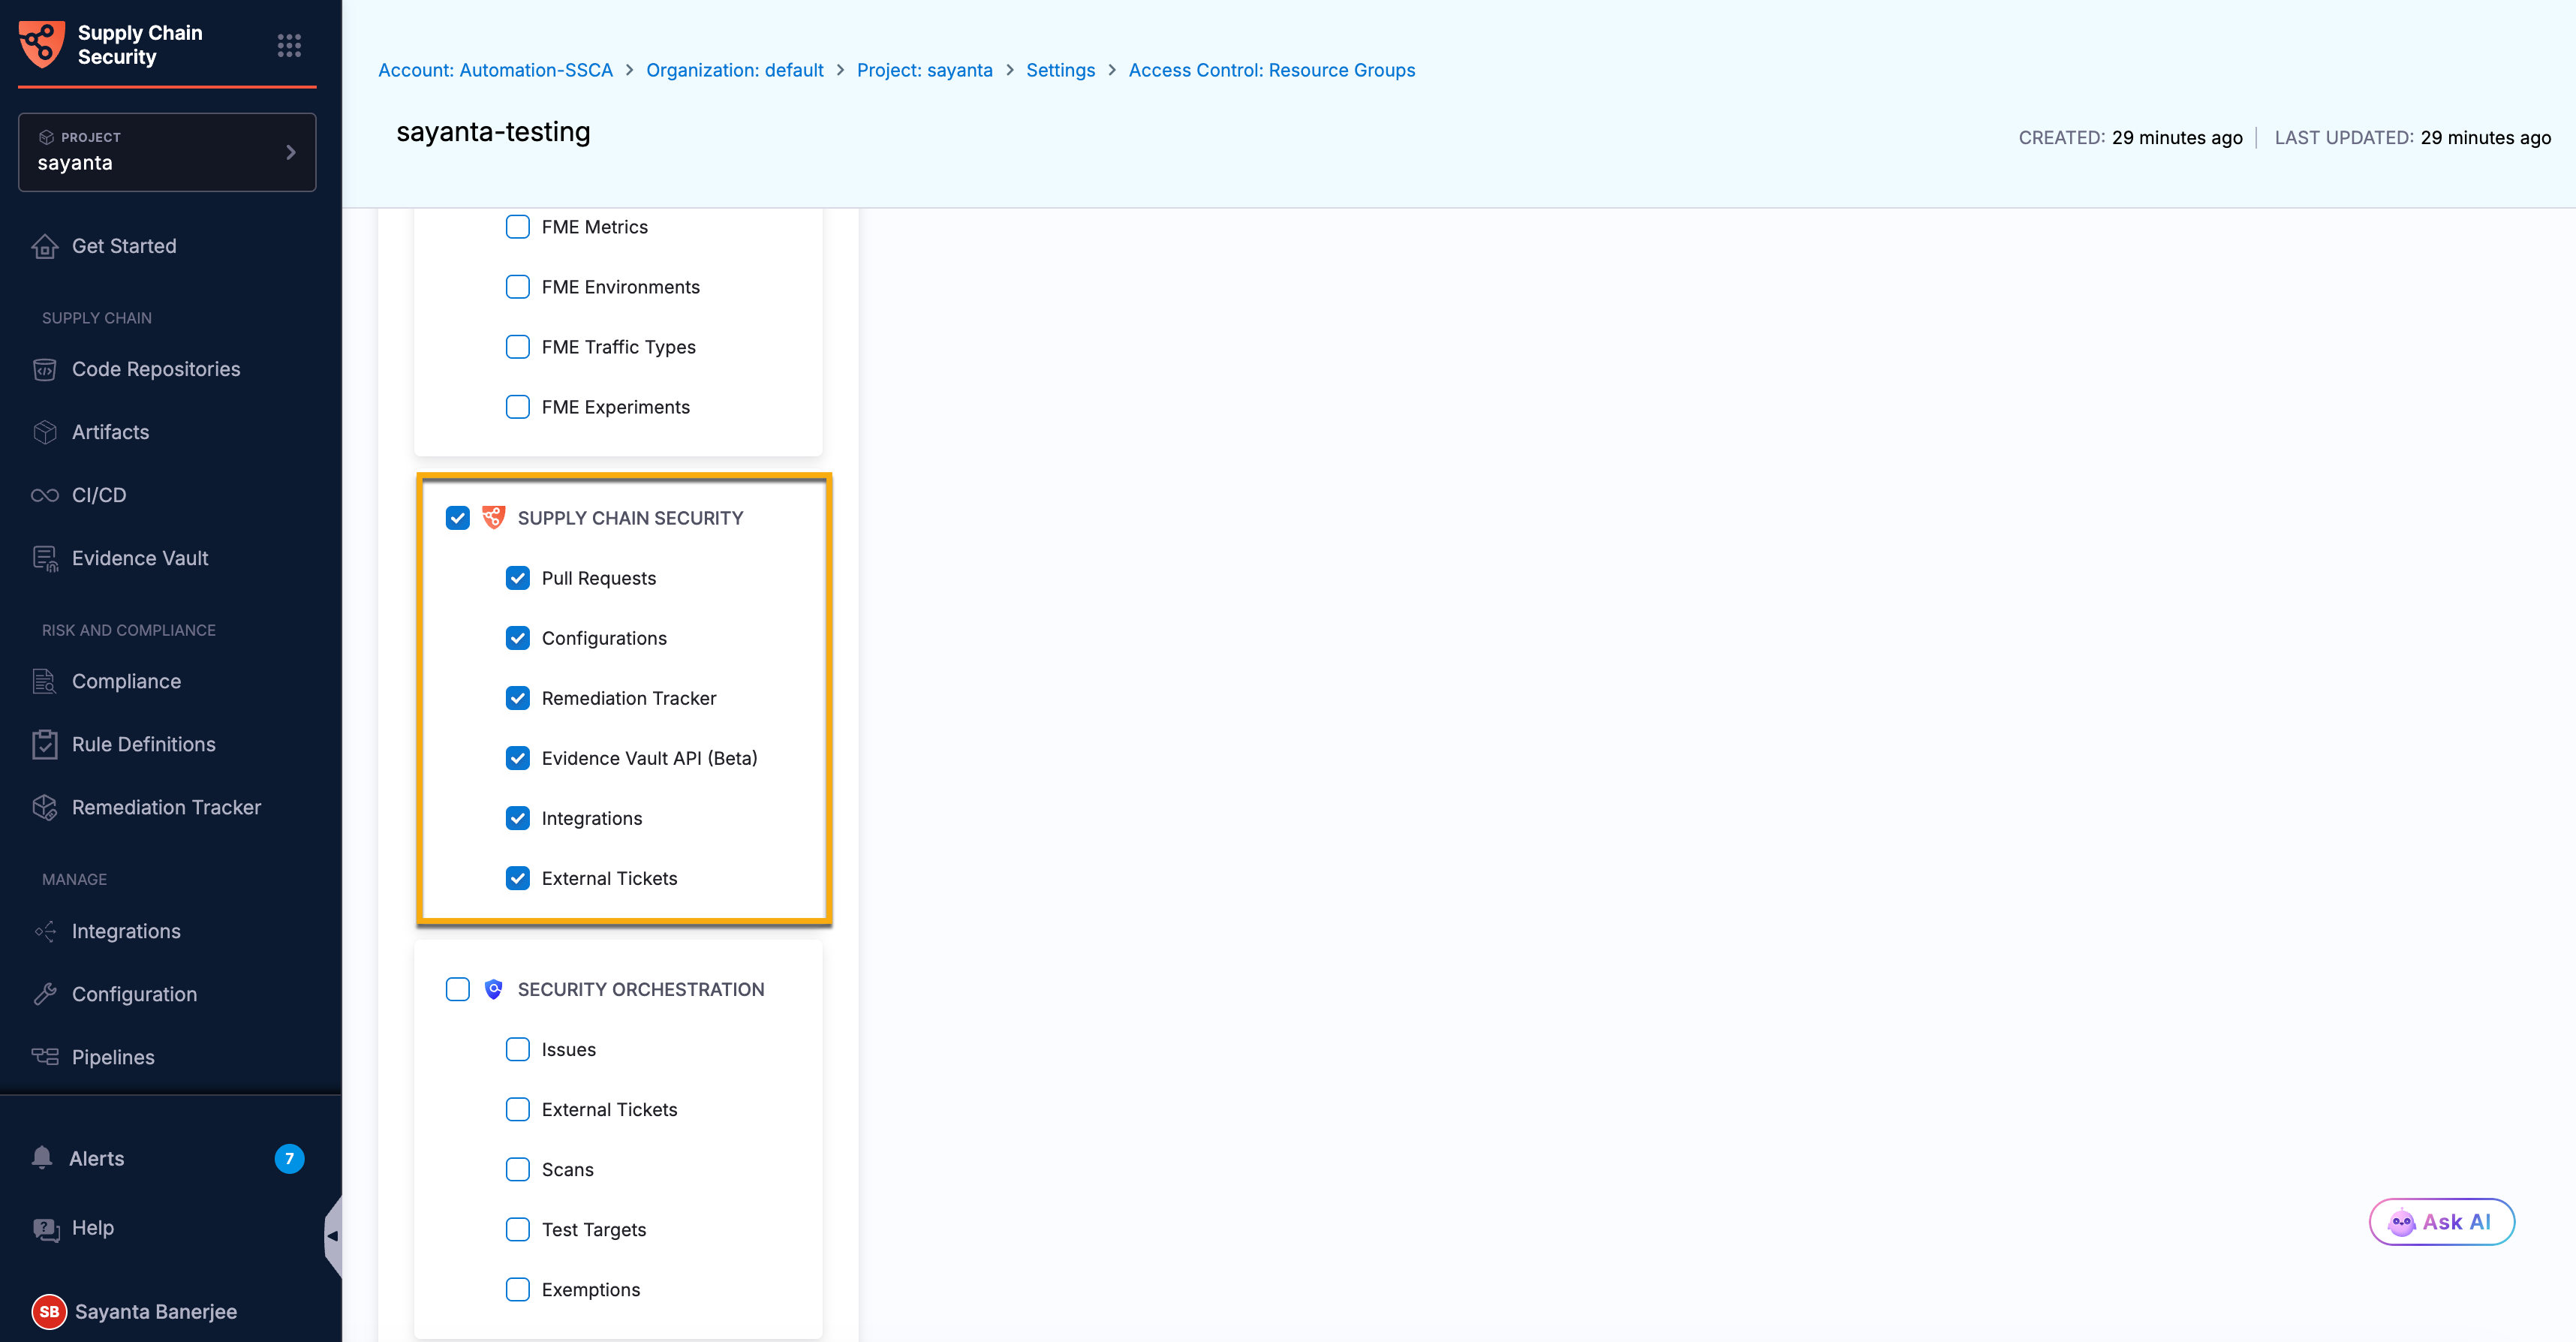
Scroll down through the different resource types and resources under Resources to locate Supply Chain Security.
-
Select the Supply Chain Security resource type checkbox to include all associated resources, or select individual resource checkboxes to include only specific resources in the resource group.
The available options are Pull Requests, Configurations, Remediation Tracker, Integrations, and External Tickets. You can also drag across the Supply Chain Security resource type to automatically select all associated resources.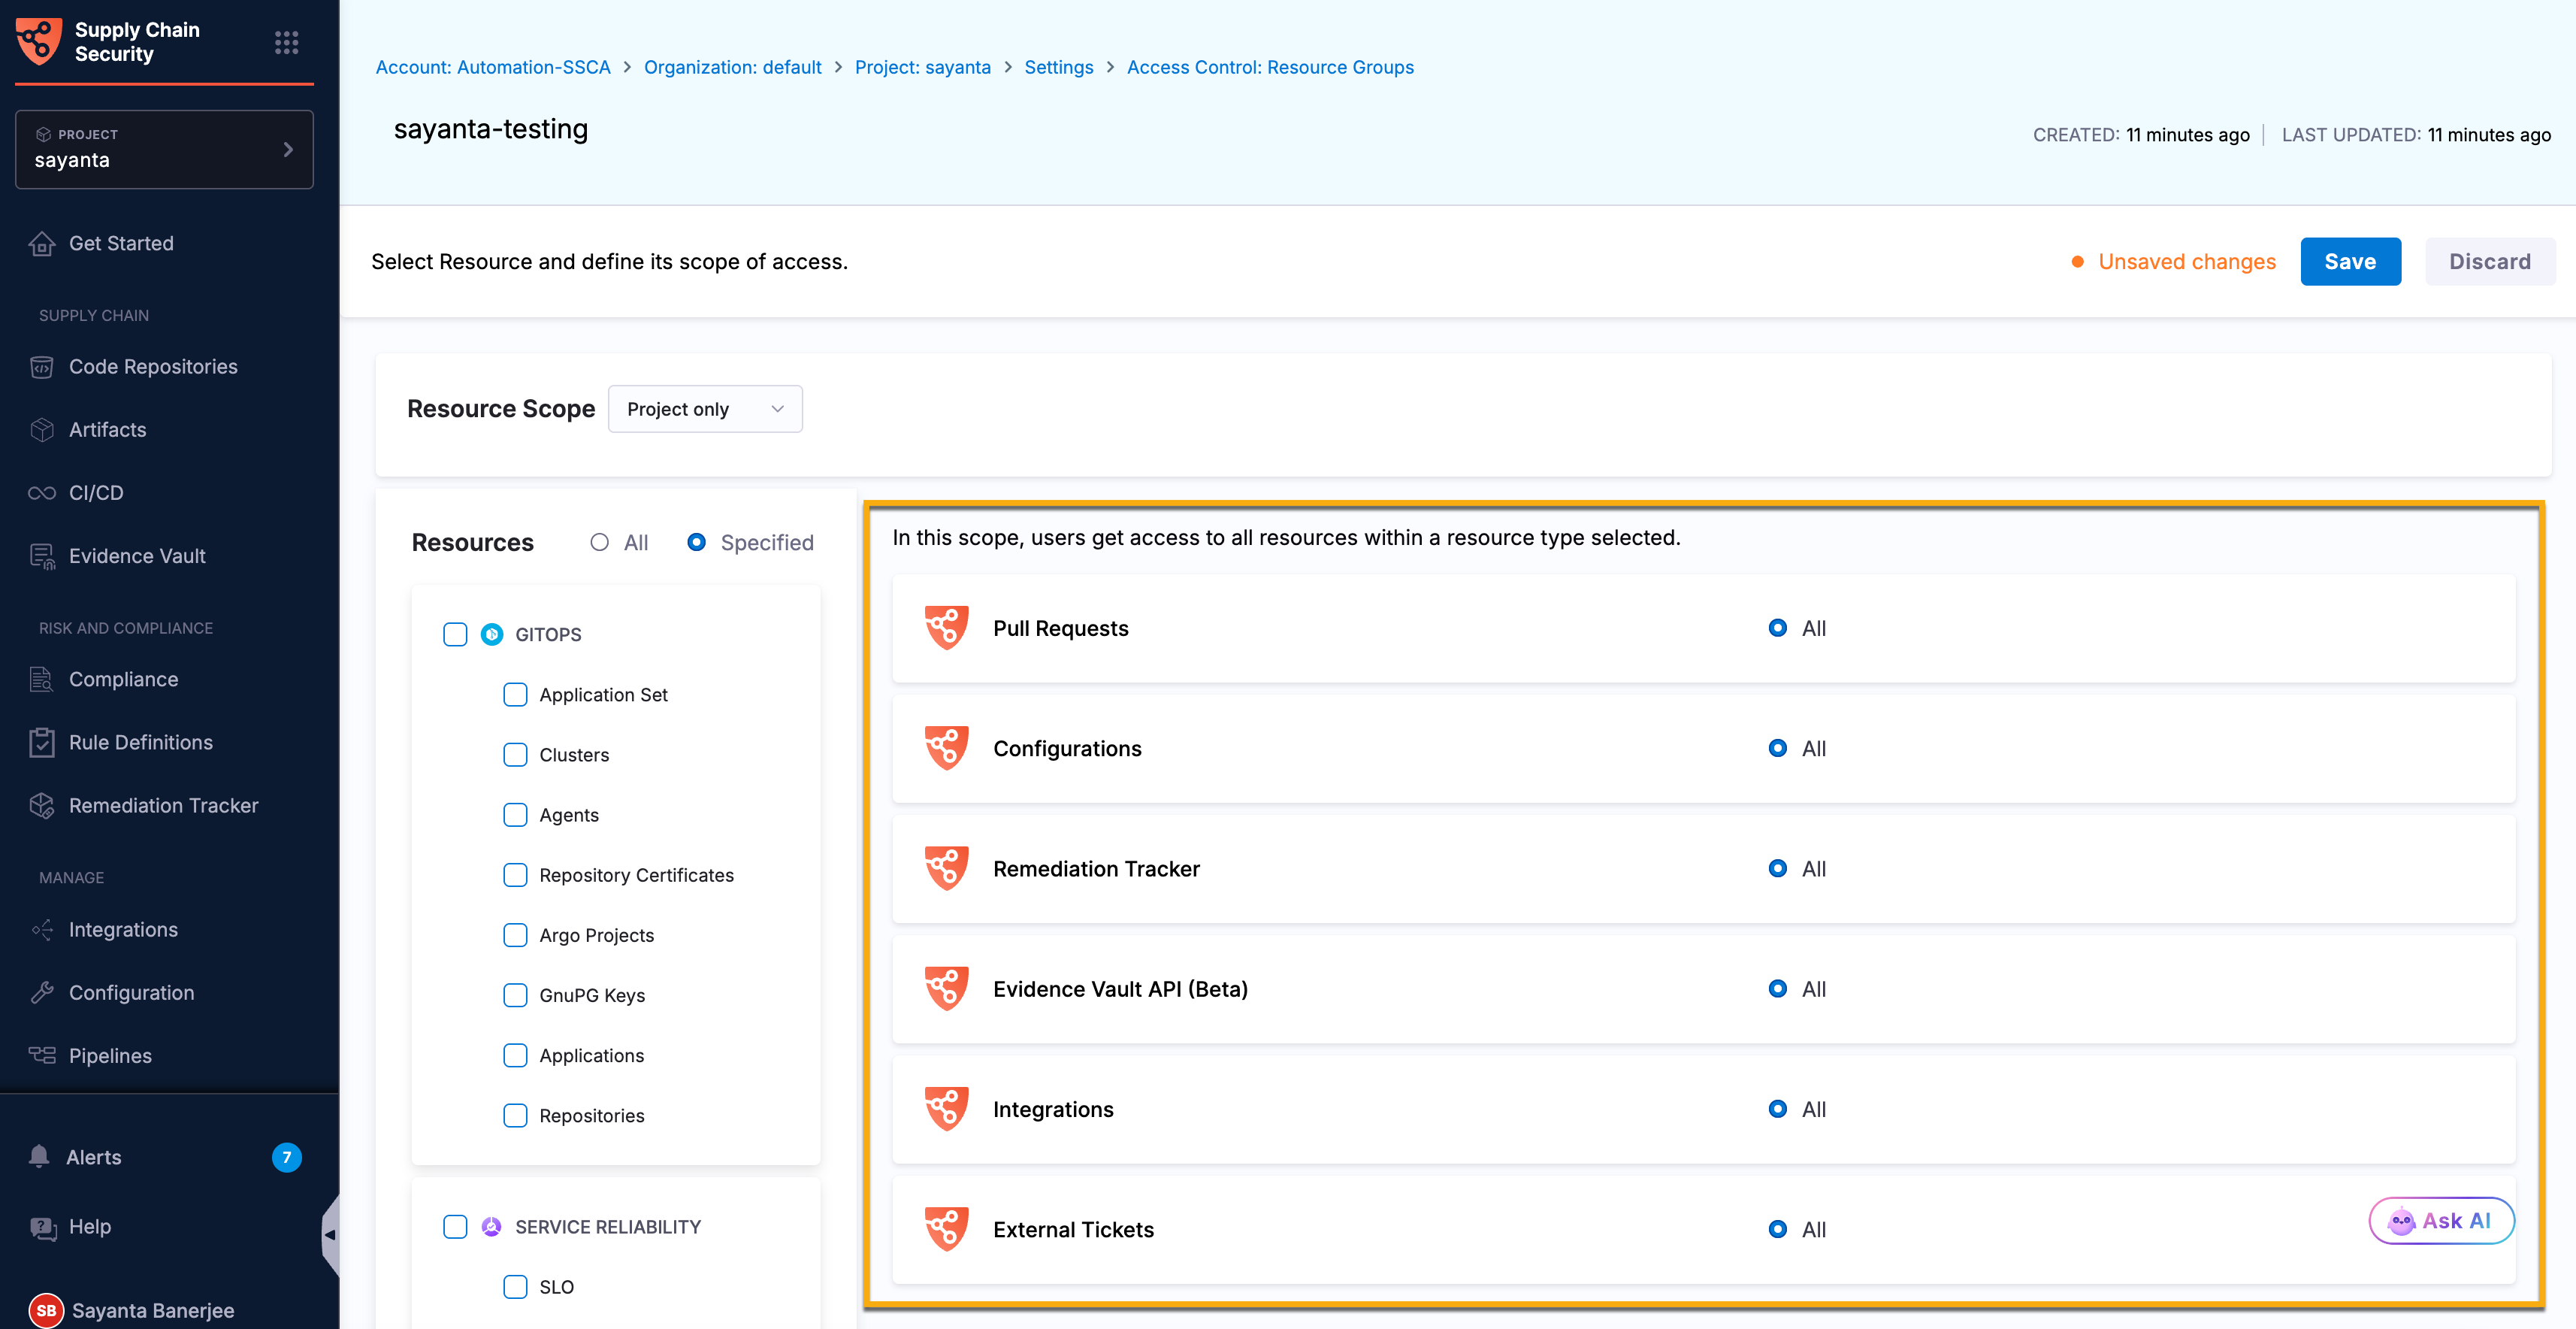
-
Scroll up to the top of the page and click Save.
Once done, the Resource Group updated successfully toaster message will appear at the top, indicating the successful assignment of resources to the resource group.
You can assign the newly created resource group to a new or existing user. For more information on assigning users to custom resource groups, see Assign users to custom resource groups
Modify/Delete an existing resource group
Modifying an existing resource group allows administrators to update its name, description, tags, and assigned SCS permissions, while deleting an existing resource group removes it from SCS.
Modify SCS resources or resource scope for an existing resource group
Modify the SCS resources or resource scope in an existing resource group to update the resources that users and service accounts can access. You can add or remove SCS resources or update the resource scope as your access requirements change.
Navigate to the Resource Groups page for the scope where the resource group was created. Select the resource group that you want to modify, and then follow the steps in Create a new resource group to update the resource scope or SCS resources.
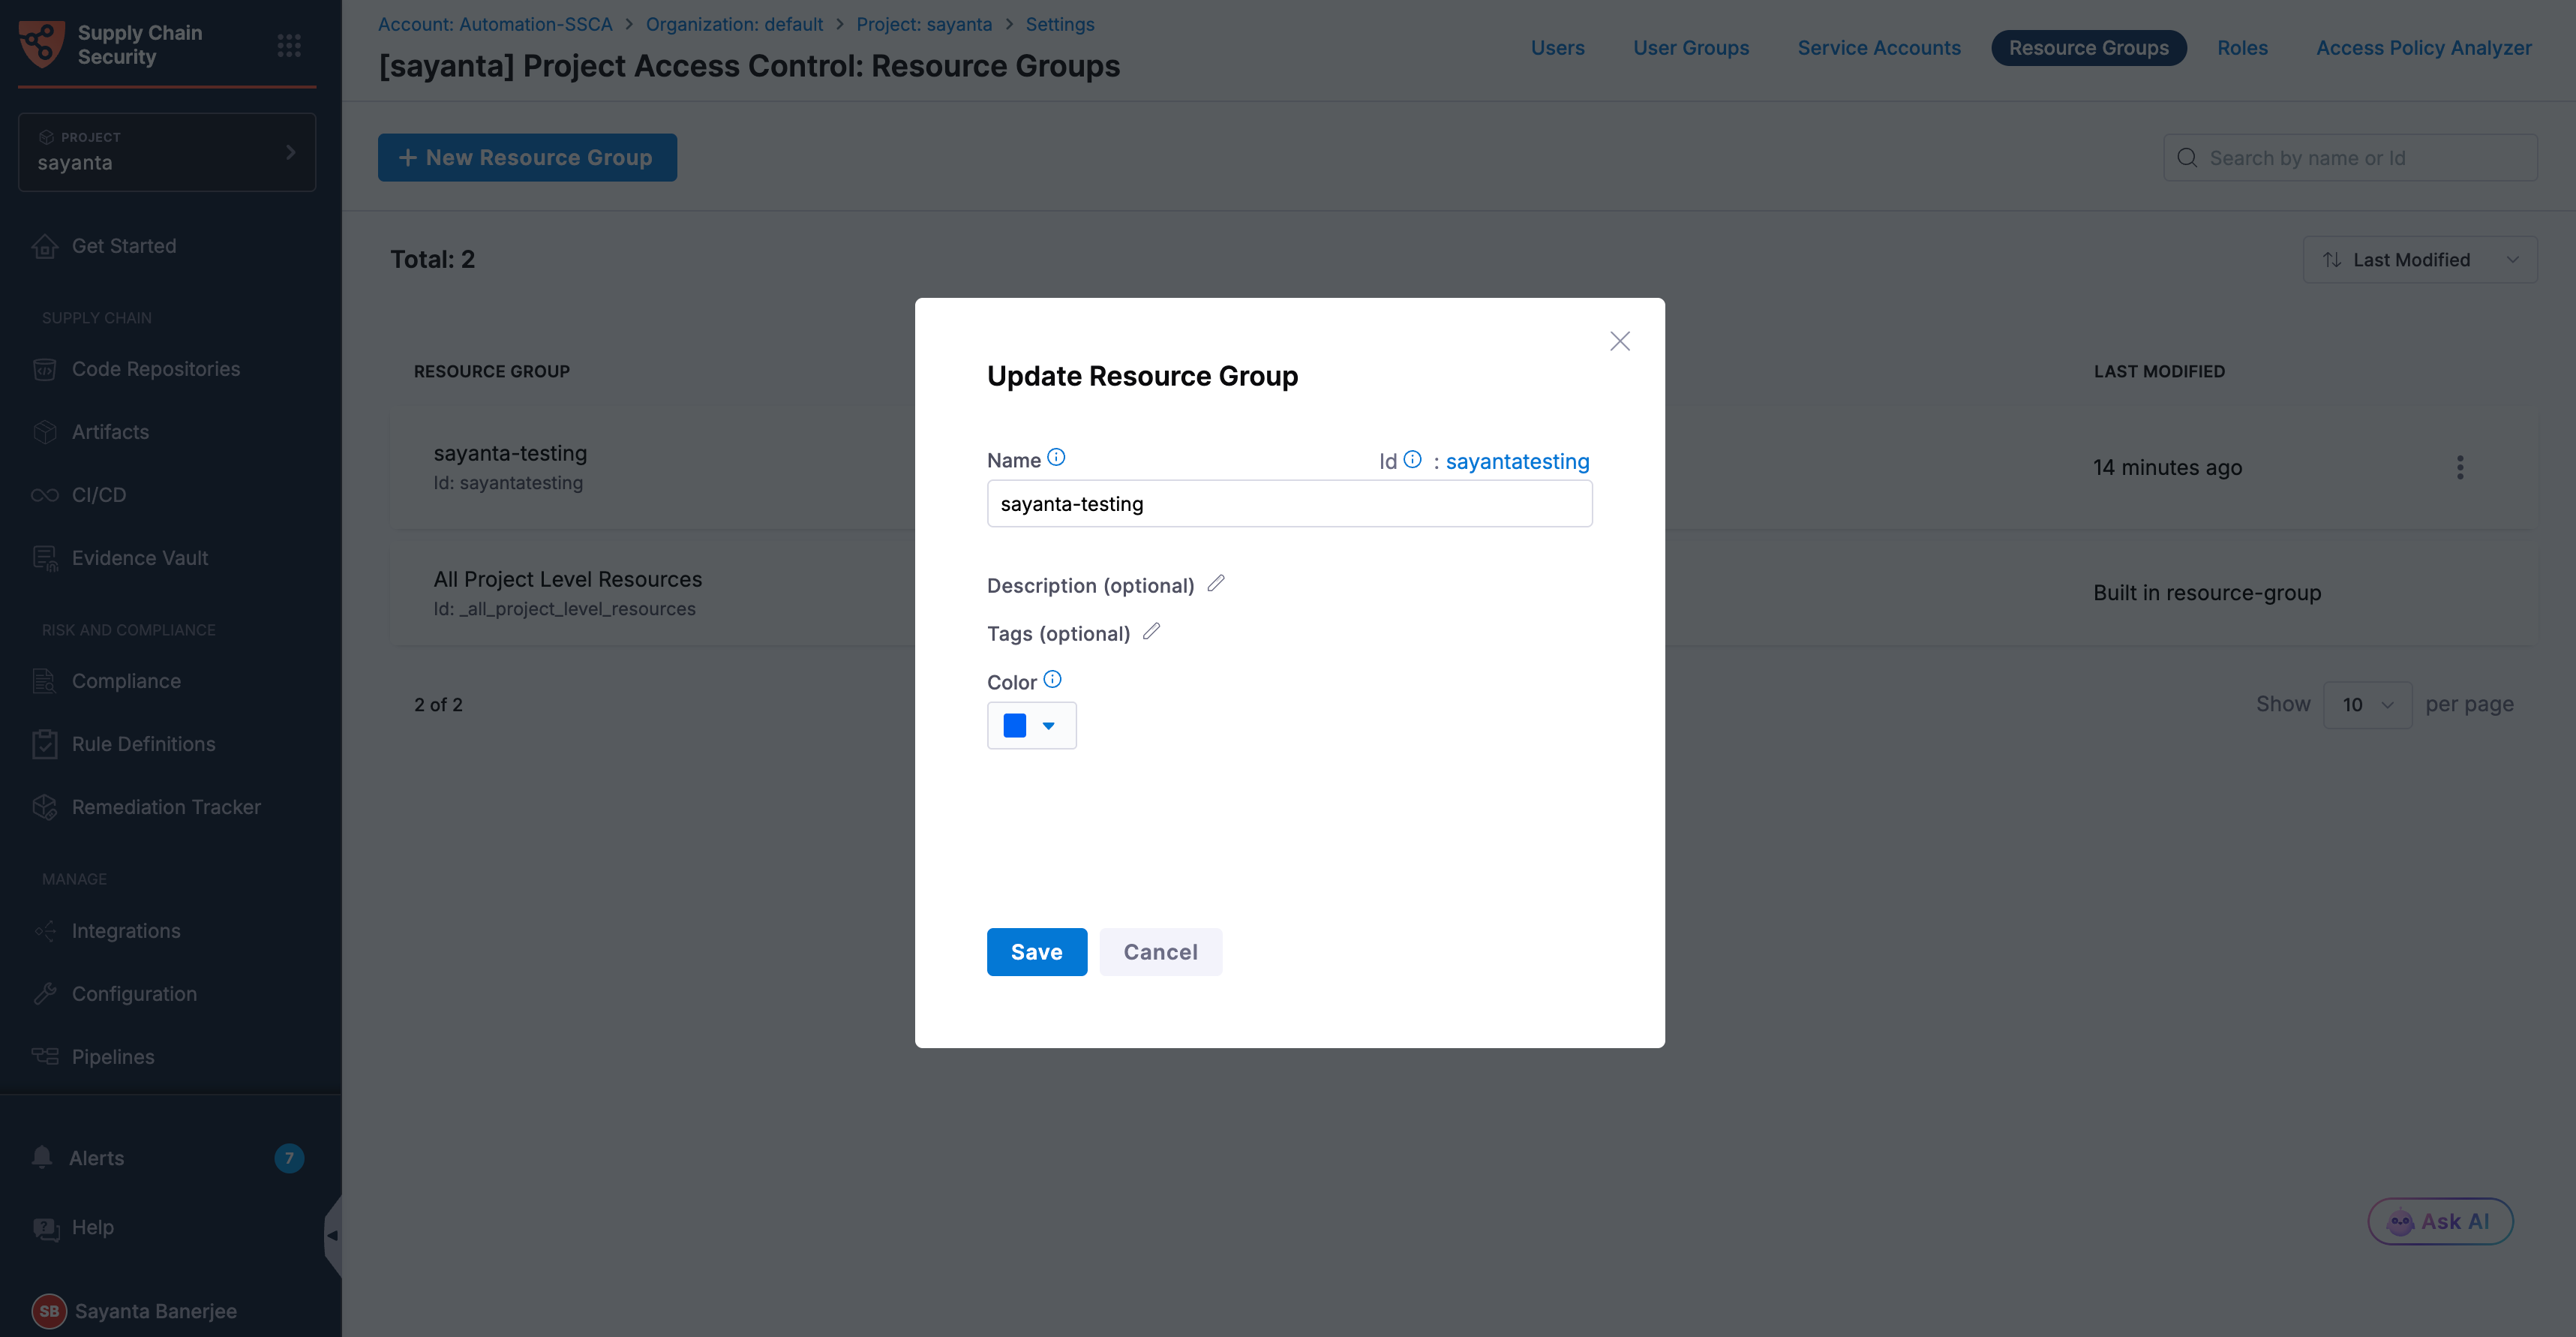
Modify the resource group name, description, or tags for an existing resource group
Modifying an existing resource group allows administrators to update its name, description, or tags to reflect changing organizational and access management requirements. For more information, see Edit a resource group.
Delete an existing resource group
Deleting an existing resource group allows administrators to remove groups that are no longer required or in use within the organization. For more information, see Delete a resource group.
For more information on managing resource groups, see Manage resource groups.
Next Steps
- OSS Risks Remediation: Learn how to remediate vulnerabilities and OSS risks in direct dependencies through manual or automated pull requests.
- Remediation Tracker: Learn how to track vulnerable artifacts and respond to zero-day exploits across deployed environments and pipelines.
- Open Source Security and Risk Management: Learn how to assess SBOM components against OWASP Top 10 OSS risks such as outdated, unmaintained, or malicious packages.