> For the complete documentation index, see [llms.txt](https://developer.harness.io/llms.txt). Markdown versions of documentation pages are available by appending `.md` to page URLs; this page is available as [Markdown](https://developer.harness.io/ai-test-automation/best-practices-and-resources/ait-how-to-guides/capture-response-data.md).
# Capture Response Data
Learn how to capture and use response data from network calls in your tests.
Capturing response data from network calls allows you to extract dynamic values generated during test execution and use them in subsequent test steps. This powerful feature enables you to validate what's happening behind the UI, chain test steps together, and create more robust, data-driven tests.
The **Capture Response Data** option is available under **Advanced Options** in user action steps. You can access it when configuring:
* **Click** action
* **Navigate** action
* **Write** action
For this guide, we'll focus on using capture response data with **Click** actions.
### Why Use Capture Response Data?
Capturing network responses provides several key advantages:
* **Validate AI output** - Verify that backend systems are generating correct responses, not just checking UI elements
* **Enable step-to-step chaining** - Use data from one step as input for subsequent steps, creating dynamic test flows
* **Improve traceability for debugging** - Access raw network data to understand exactly what the application is doing
* **Allow rule-based value validations** - Apply assertions and validations on response data before it's displayed in the UI
### Overview
This guide demonstrates how to capture network response data and use it in subsequent test steps. The workflow involves:
1. Creating a URL for JSON data by clicking a button
2. Capturing the generated URL from the network response (similar to inspecting network calls in browser DevTools)
3. Making a GET API call to fetch the JSON data using the captured URL
4. Verifying the retrieved data by writing it to a notepad
This approach allows you to test the complete data flow from generation to retrieval, ensuring your application correctly handles dynamic content.
{% embed url="" %}
### Step-by-Step Guide
#### Step 1: Capture Response Data from Click Action
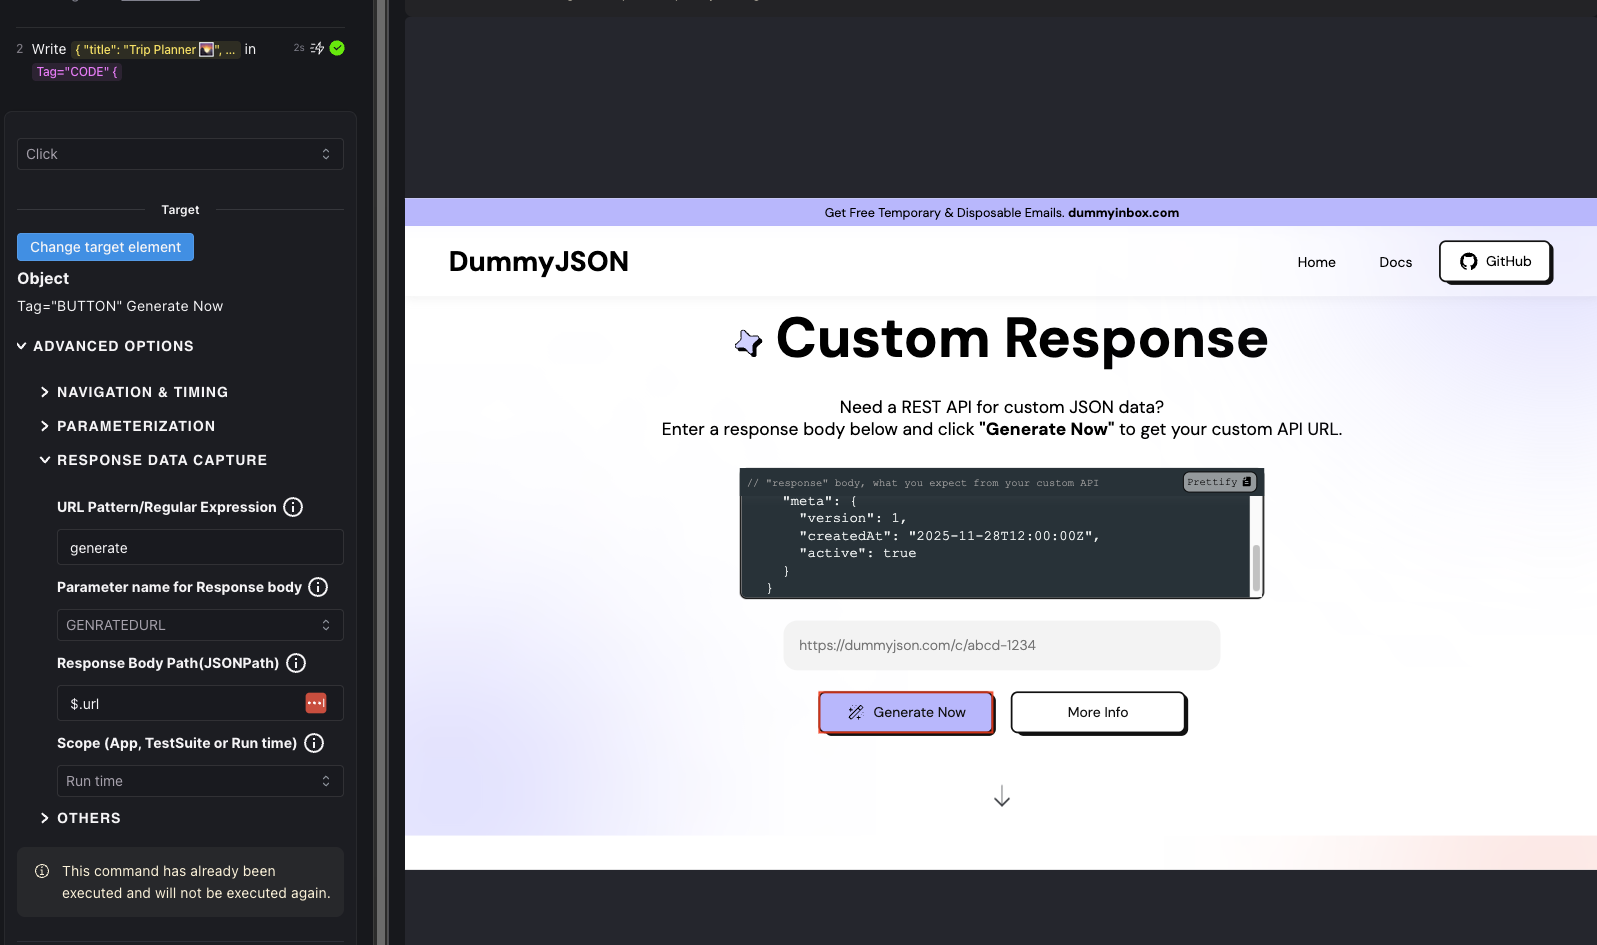
Use a **Click** user action to trigger the button that generates a URL for your JSON data. In the **Advanced Options**, configure the capture response data settings.
Capture Data Response
**Configuration:**
1. Add a Click user action.
2. Open **Advanced Options**
3. Configure **Capture Response Data**:
* Specify the endpoint pattern to match the network request
* Define the variable name to store the captured URL (e.g., `GENERATEDURL`)
* Provide the response body path to extract the URL from the response payload
4. Click the 'Generate' button after that to apply the settings.
* When you click the button, the application makes a network request
* The backend generates a unique URL for your JSON data
* The response contains this URL in the network payload
* Harness captures the URL from the response (similar to viewing network calls in browser DevTools)
* The captured URL is stored in the `GENERATEDURL` variable
#### Step 2: Make a GET API Call with the Captured URL
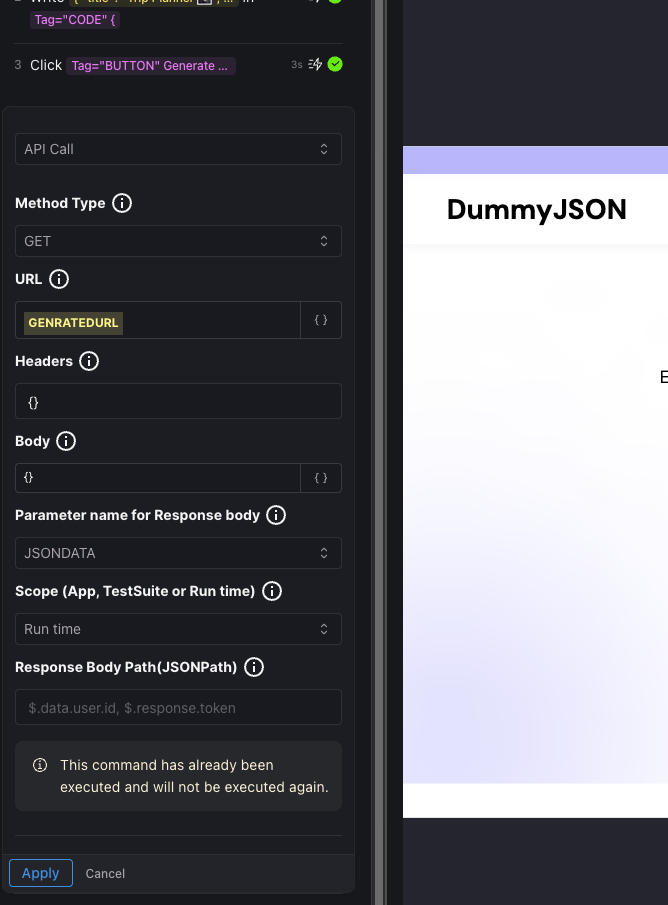
Use the captured URL to fetch the JSON data via an API call user action.
API Call
**What happens:**
* The test makes an HTTP GET request using the variable `GENERATEDURL` from the previous step
* The endpoint returns the JSON data
* The response is saved in the `JSONDATA` variable
#### Step 3: Verify the Data in a Notepad
To confirm you've retrieved the correct data, write it to an online notepad.
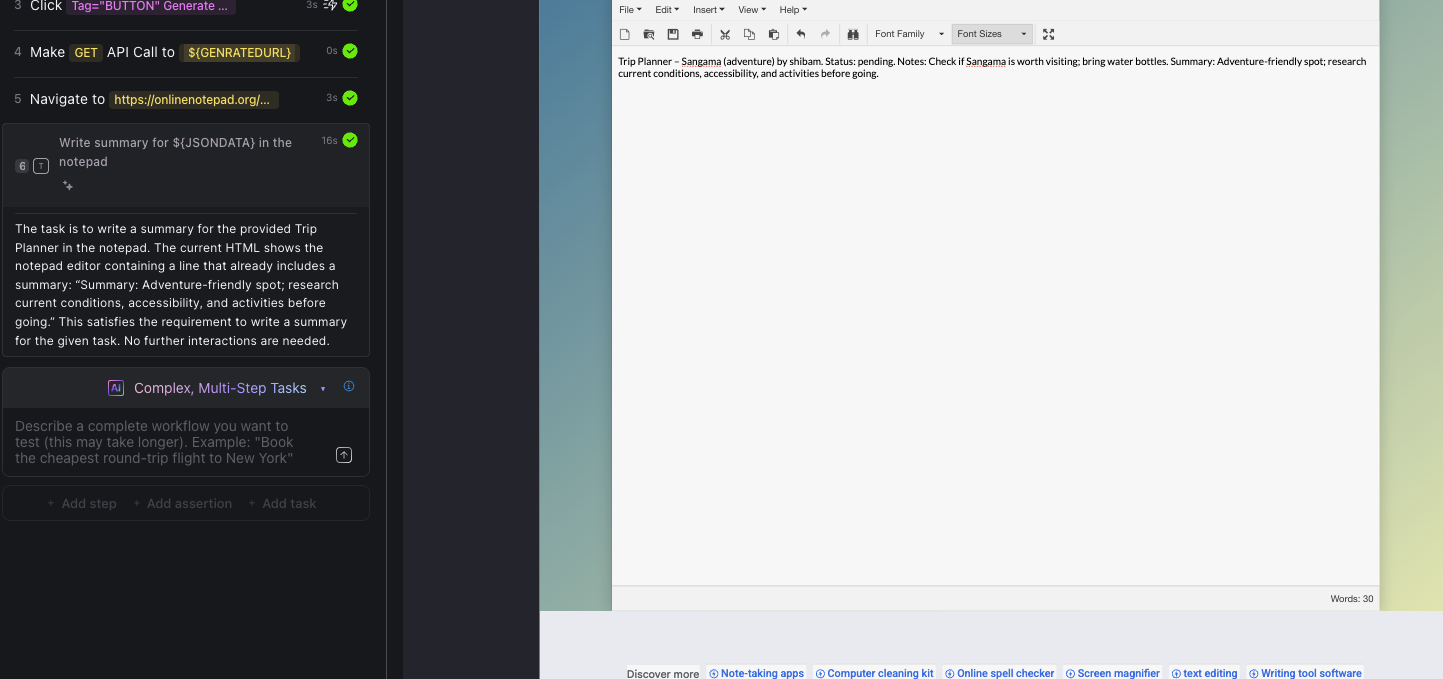
Complex AI
1. Navigate to using the Navigate To action
2. Use complex MultiStep AI task to pass the prompt of : Write summary for `${JSONDATA}` in the notepad.
* The screen navigates to the online notepad
* The AI writes the summary of JSON data from the `JSONDATA` variable
* You can visually verify that the data matches what you expected
This confirms the complete workflow: from generating a URL, capturing it from the network response, fetching the data, and displaying it.
{% @harness-feedback/feedback %}