> For the complete documentation index, see [llms.txt](https://developer.harness.io/llms.txt). Markdown versions of documentation pages are available by appending `.md` to page URLs; this page is available as [Markdown](https://developer.harness.io/artifact-registry/use-artifact-registry/manage-artifacts/artifact-management.md).
# Artifact Management
Learn how to manage your artifacts.
All artifact operations start with the **Setup Client** page found inside your registry at the top right.
***
### Before you begin
* **Harness account with Artifact Registry enabled:** You need **Artifact Registry** entitled on your account. For how to access or create a Harness account, go to [Getting started with Harness Platform](/harness-ai/new-to-harness-platform/get-started.md) to set up account access.
* **Registry permissions:** You need **View** on the registry to pull, download, or copy from it, **Upload Artifact** to push, and **Download Artifact** to pull or download. Copying a version also requires **View** on the source registry and **Create/Edit** on the target registry. To get these, an administrator must assign you a role that includes them. Go to [RBAC in Harness](/harness-ai/use-harness-platform/platform-access-control.md) and [Manage roles](/harness-ai/use-harness-platform/platform-access-control/add-manage-roles.md) to configure roles, or the [Permissions reference](/harness-ai/use-harness-platform/platform-access-control/permissions-reference.md#artifact-management) to review exact permission names.
***
### Login to your registry
1. Click **Setup Client**.
2. Copy the login command shown.
3. Then, open a terminal window and paste the command.
4. When prompted, enter the login information given in the **Setup Client** tab.
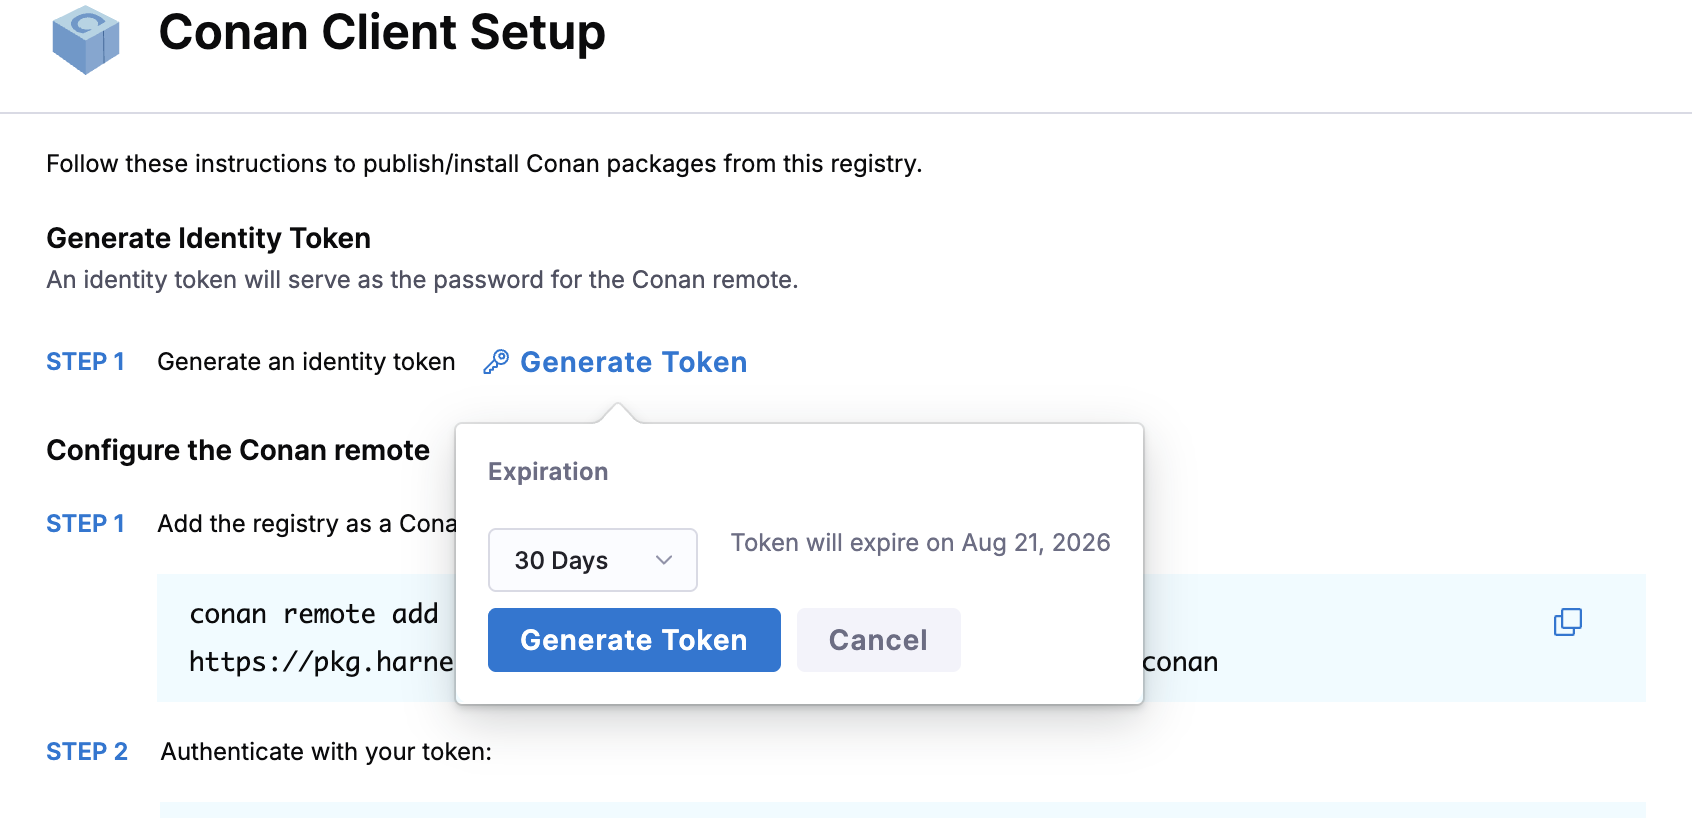
5. If prompted for a password, click **Generate Token** in the **Setup Client** tab. Use this token as your password.
Select an expiration period from the dropdown before you generate the token. The dialog shows the exact date the token will expire.
Choose an expiration period that matches how you plan to use the token, for example 7, 30, or 90 days. Shorter expiration periods reduce the risk if a token is leaked or committed to a repository by mistake.
After a token expires, any client authenticated with it can no longer push or pull artifacts. Generate a new token from the **Setup Client** tab and update your credentials to restore access.
***
### Pull an artifact
1. Open the **Setup Client** tab in your registry.
2. Scroll to the bottom and find the **Pull** section.
3. Copy the pull command. It should look something like this:
4. Run the command in terminal but replace `` and `` with the name and tag of the image you want to pull.
An upstream proxy lets your registry fetch artifacts from an external source when they are not already stored locally. This first attempts to pull the image from your registry and then any upstream proxies if they exist.
If you have multiple upstream proxies, Harness pulls the image from the top most proxy that has the image in the list.
***
### Push an artifact
1. Open the **Setup Client** tab in your registry.
2. Find the **Push** section.
3. Copy the push command. You will need to replace anything with brackets (`<>`) with the relevant artifact information. For example, replace `` with the artifact version or tag that you want.
4. Run the command in terminal.
Now, you should see the artifact appear in your registry as well as the **Artifacts** tab in the left navigation panel.
***
### Quarantine an artifact
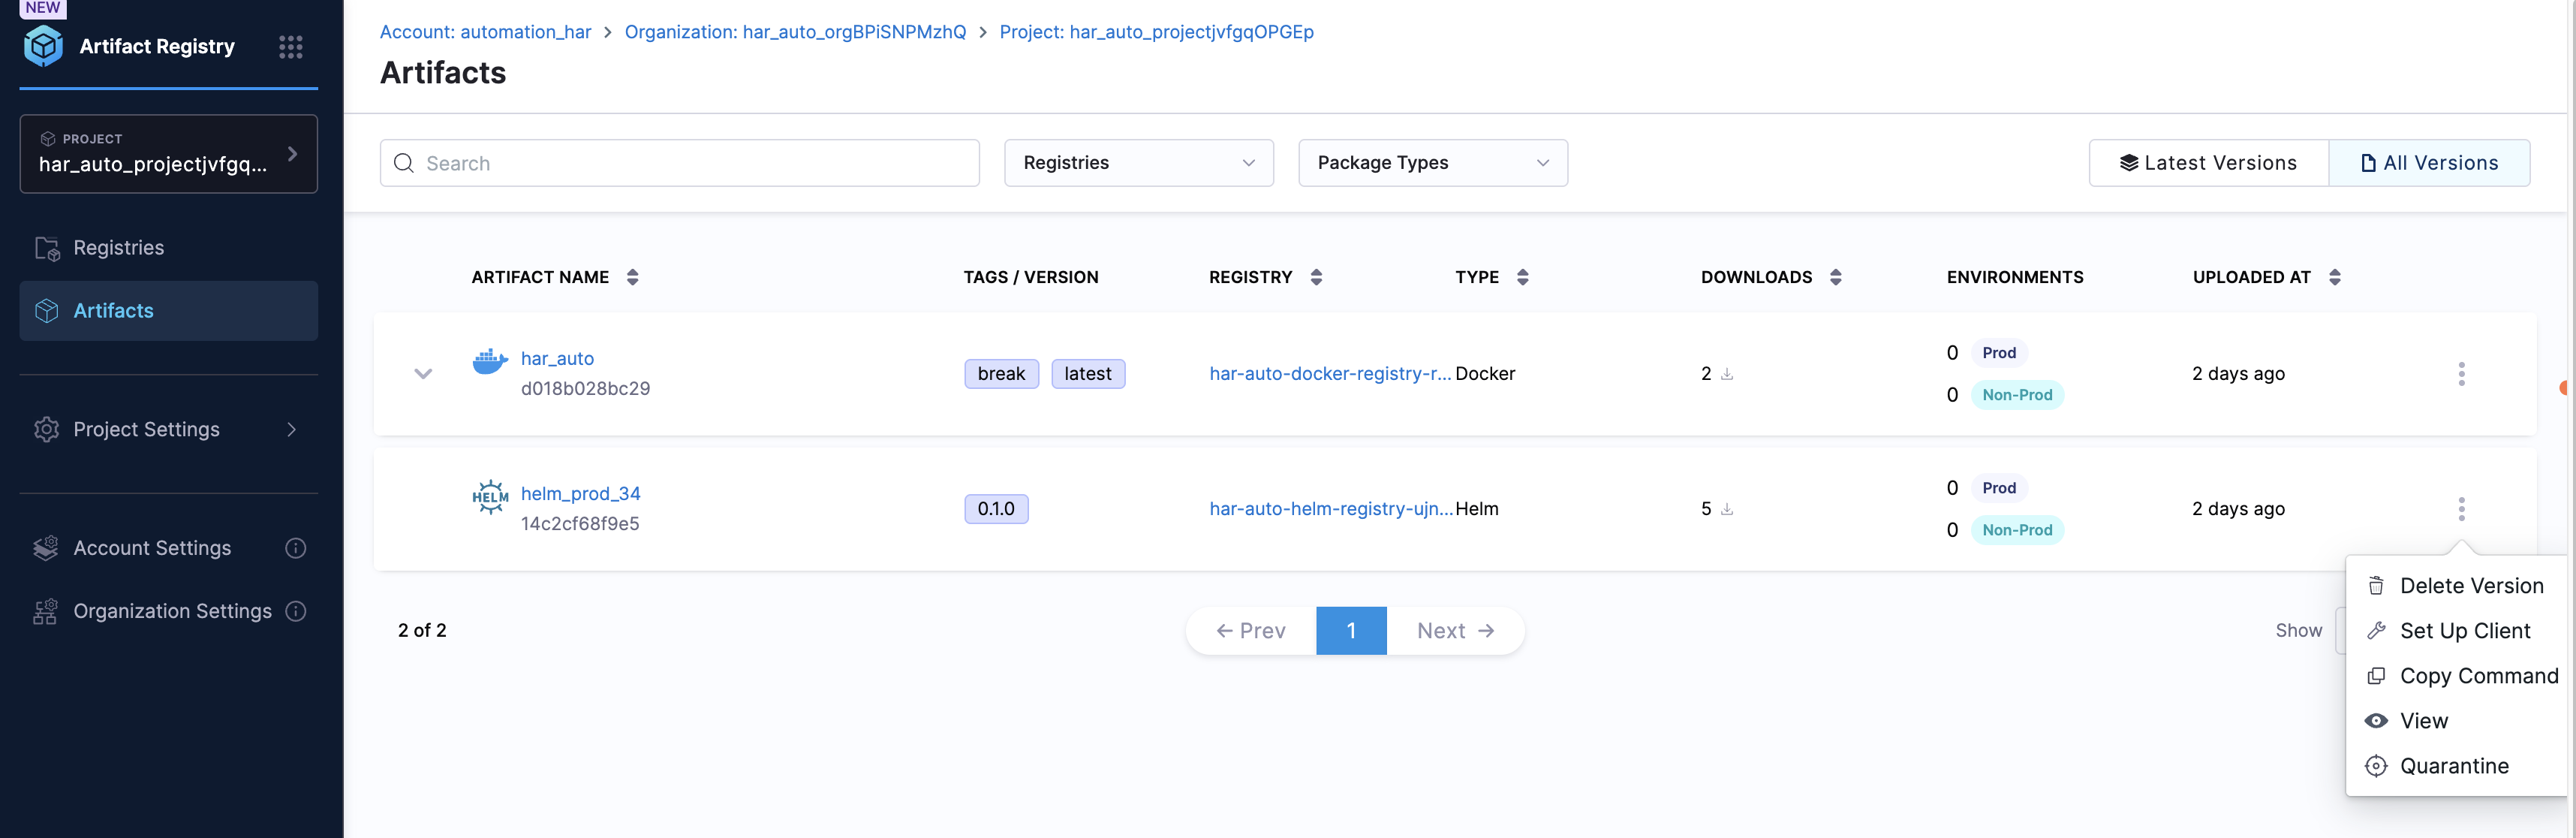
You can quarantine an artifact to prevent it from being used in your pipelines and block it from being pulled or downloaded by other users.
To quarantine an artifact:
1. Navigate to the **Artifacts** tab in the left navigation panel.
2. Select the artifact you want to quarantine.
3. Click the three-dot menu (**⋮**) next to the artifact name.
4. Select **Quarantine**.
You are prompted to provide a reason for quarantining the artifact. Enter your reason and click **Quarantine** to confirm.
You can remove a quarantined artifact by selecting the artifact and clicking **Remove from Quarantine**.
***
### Re-evaluate artifact versions
{% hint style="info" %}
This feature is only available for cached artifact versions in upstream proxy registries with Dependency Firewall enabled.
{% endhint %}
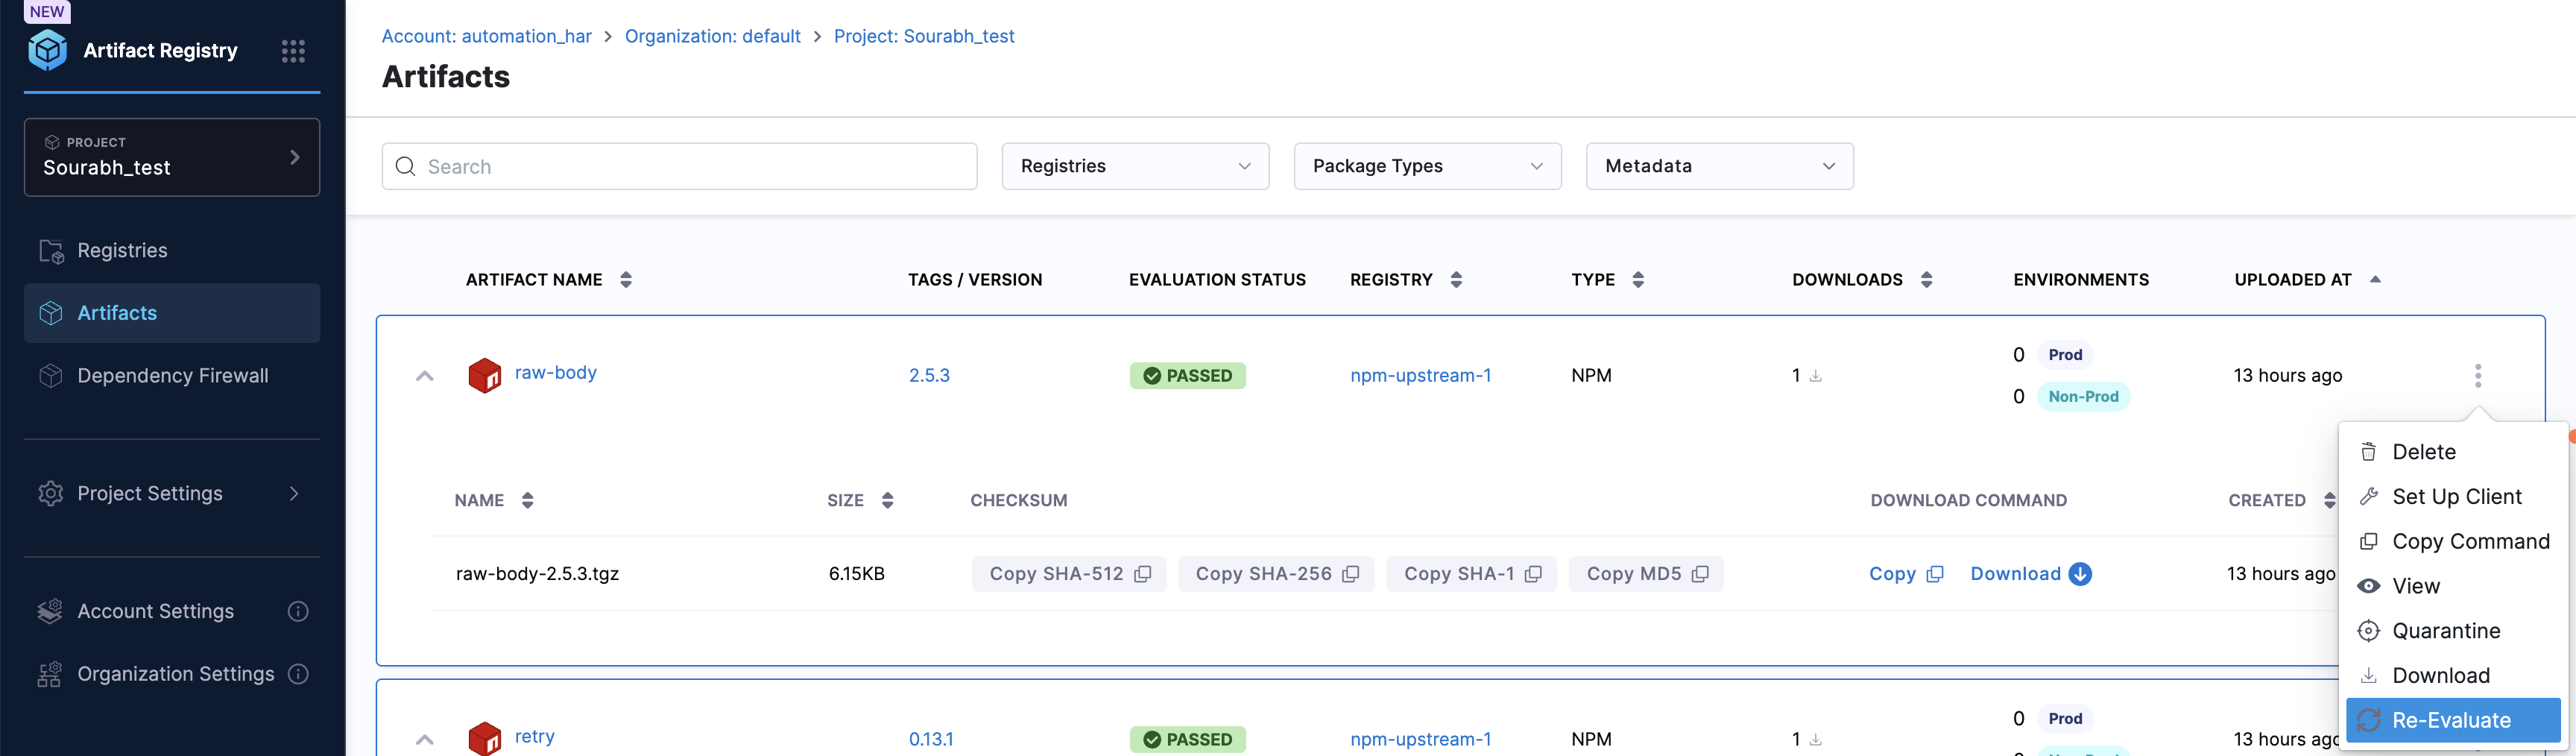
For upstream proxy registries with Dependency Firewall enabled, you can re-evaluate artifact versions against your configured policy sets. This is useful when policies have been updated or when you want to verify if a previously flagged version now passes your security requirements.
When viewing artifacts in an upstream proxy registry, you see an **Evaluation Status** column that displays the policy evaluation result for each version. The status can be **Passed**, **Warning**, or **Blocked**. Note that blocked versions are typically not cached in the registry, but they can appear here if they were already present and someone re-scanned those artifacts.
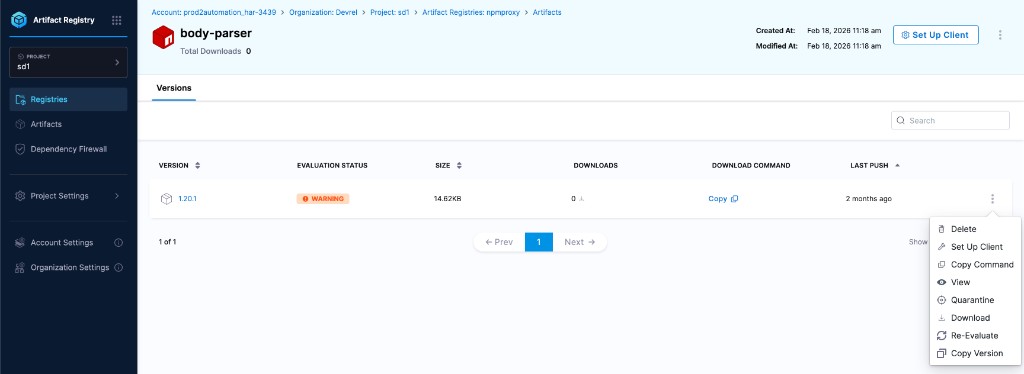
To re-evaluate an artifact version, click the three-dot menu (**⋮**) next to the version of the artifact in an upstream proxy registry and select **Re-Evaluate** from the menu.
The system re-runs the evaluation against all configured policy sets and updates the evaluation status in real time. You can also re-evaluate versions from within the artifact's **Versions** tab, where you see the same evaluation status and re-evaluate option for each individual version.
Go to [Dependency Firewall](/artifact-registry/use-artifact-registry/dependency-firewall.md) to understand how it evaluates artifacts and to view detailed violation information.
***
### Download an artifact
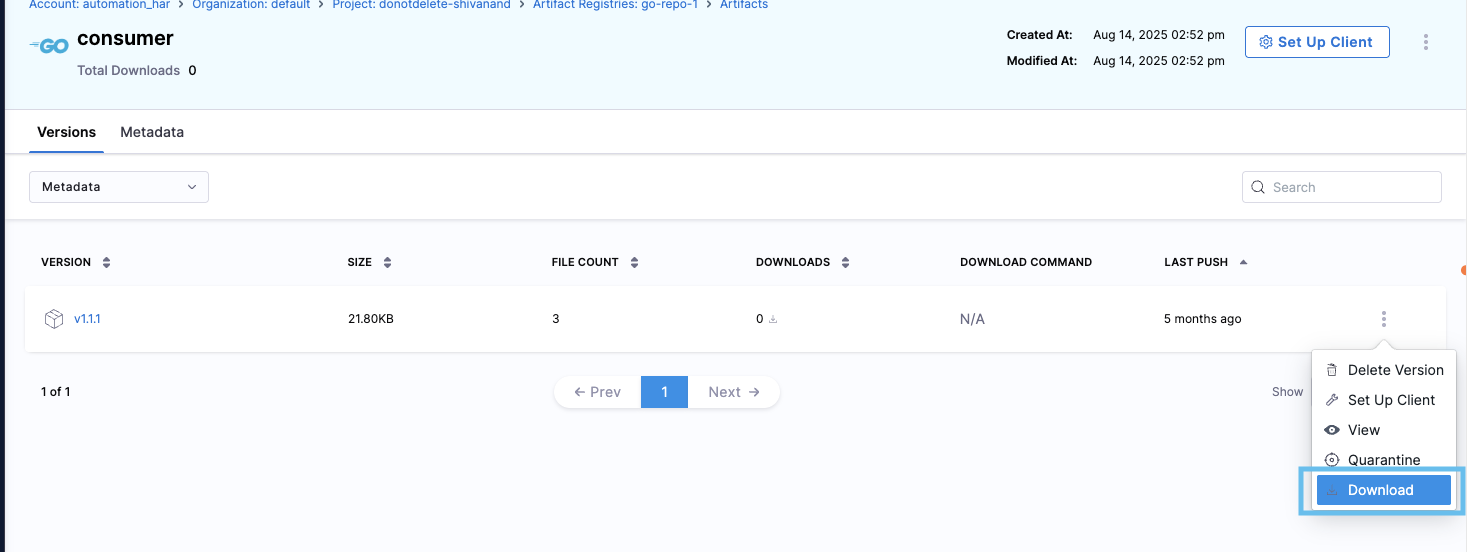
You can download artifacts directly from the Harness Artifact Registry UI. Navigate to the desired level (registry, artifact, or version), click the three-dot menu (**⋮**), and select **Download**.
The system prepares your download and displays a status indicator at the bottom center of the page. Once ready, a green checkmark appears with a **Download** button to save the compressed archive locally.
**Download levels:**
* **Package level:** Downloads all versions of a specific package.
* **Version level:** Downloads a specific version only.
* **Individual files:** In the **Artifact Details** tab under **Files**, click any file to download it directly. No preparation is needed.
{% hint style="info" %}
**IMPORTANT NOTES**
* **Package type support:** Download is available for all supported artifact types, including Docker/OCI images, Maven, npm, PyPI, Generic, and more.
* **Stay on the page:** Do not navigate to another tab or close the browser while the download is being prepared, as this interrupts the process.
* **Download availability:** Once ready, downloads remain available for **24 hours** or until you close the notification.
{% endhint %}
***
### Copy a version
**Copy Version** copies one package version into another Harness registry. Use it when you want the same artifact in a different project or organization without pushing again from your machine.
#### Where to click first
* Open the package, then the **Versions** tab.
* On the row for the version you want, open the three-dot menu (**⋮**) and select **Copy Version**.
The **Copy** link in the **Download command** column only copies that command text to your clipboard. **Copy Command** in the three-dot menu copies the client command for this version. **Copy Version** is different: it opens the dialog where you pick another registry to receive this version.
Versions tab: use the row menu and select Copy Version
#### What you do in the dialog
* The top of the dialog shows the source registry, package, and version (read-only). For Docker and OCI, the version may show as a digest, the unique content hash Docker uses to identify an image, or as a tag.
* Under **Target**, choose organization, project, and registry. Pick organization and project first if the registry dropdown is empty.
* Select **Copy Version** to run the copy, or **Cancel** to leave without changes.
**Permissions:** You need read access on the source registry and write access on the target. Details can vary by registry type.
Go to [Copy artifacts in the Harness CLI](/artifact-registry/use-artifact-registry/artifact-registry-cli/manage-artifacts-registries.md#copy-artifacts) to copy versions from the command line or from automation.
***
### Troubleshooting curl or wget download from a public Harness Artifact Registry fails with 401 or prompts for an API key
Public registries do not require the x-api-key header on downloads. Remove the --header 'x-api-key: \' line from your curl or wget command. The x-api-key header is only required for virtual or private registries. The copy-to-clipboard curl command in the UI file view is generated for the authenticated path, so trim the header when you download from a public registry.
How can I copy images between Harness registries when the UI Copy Version action is unavailable
Use external tools like skopeo. Skopeo is a command-line tool that can copy container images between Harness registries or from external registries to Harness without requiring a Docker daemon. Use it when the UI Copy Version action is unavailable, for bulk copy operations, or in automation. Authenticate to Harness registries using identity tokens from Setup Client with username identity. Go to for installation and usage examples.
Generated identity token does not work as a password for the Setup Client login command
Confirm the token has not expired. Check the expiration date shown when you generated the token in Setup Client, and generate a new token if it has passed.
Push or pull command from Setup Client fails with a permission or authorization error
Confirm your role includes the required Artifact Registry permission for the action, such as Upload Artifact for push or Download Artifact for pull. Ask an account administrator to assign a role with the required permissions.
***
### Next steps
You now know how to log in, push, pull, quarantine, re-evaluate, download, and copy artifacts in Harness Artifact Registry.
* Go to the [Quickstart Guide](/artifact-registry/new-to-artifact-registry/quickstart.md) to learn how to pull and push Docker artifacts in more depth.
* Go to [Dependency Firewall](/artifact-registry/use-artifact-registry/dependency-firewall.md) to configure policy sets for upstream proxy registries.
* Go to [RBAC in Harness](/harness-ai/use-harness-platform/platform-access-control.md) to manage who can access your registries.
{% @harness-feedback/feedback %}