Azure
The procedure to set up CCM for Azure by using Harness Self-Managed Enterprise Edition.
This topic walks you through the steps required to set up CACM for Azure in a self-managed platform.
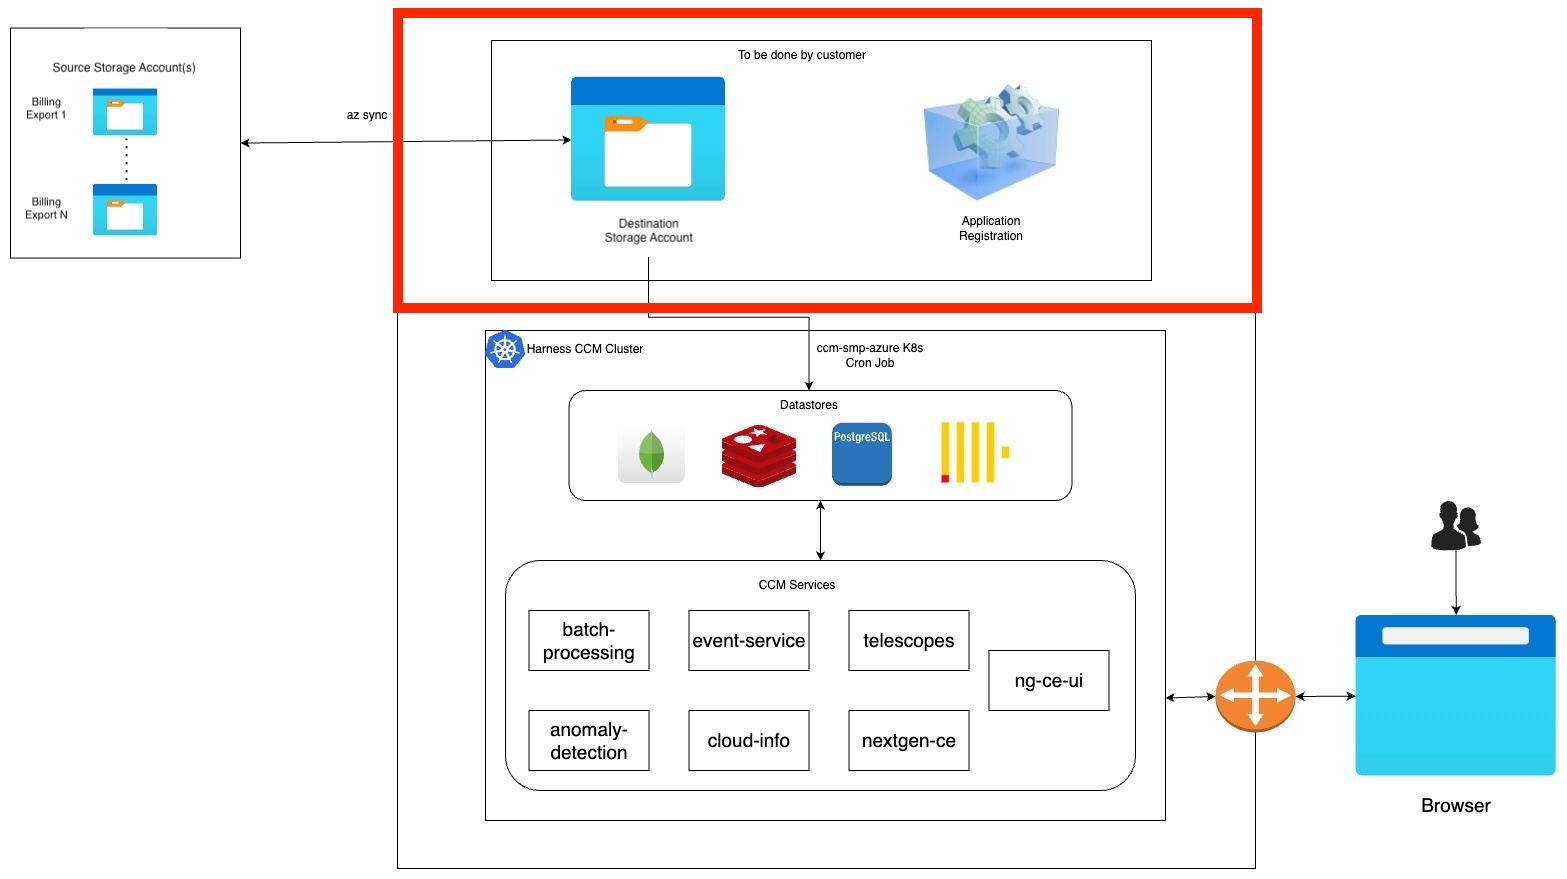
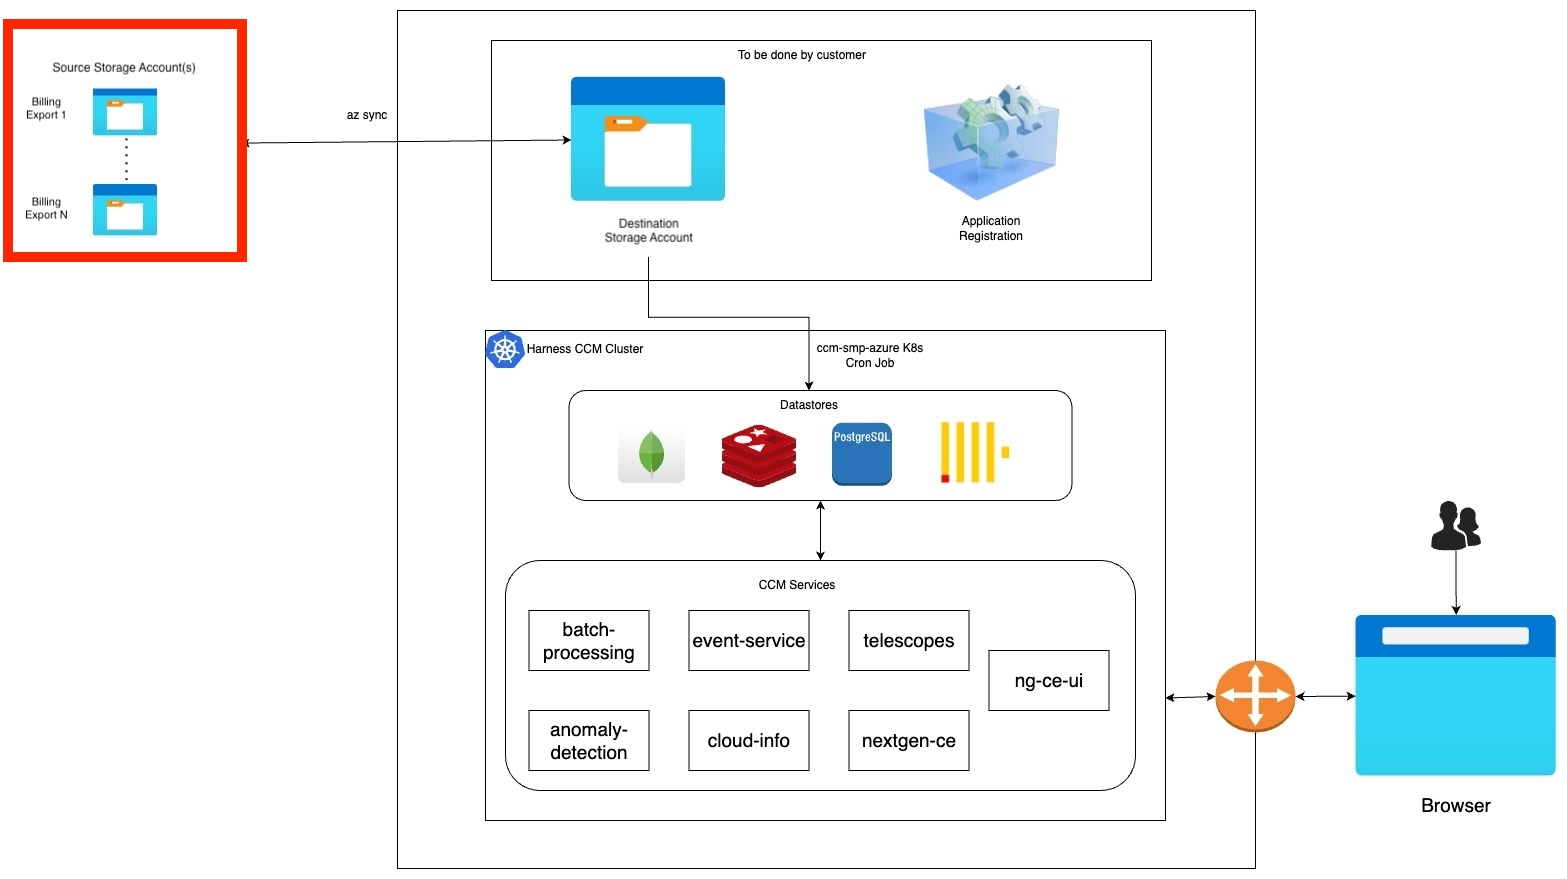
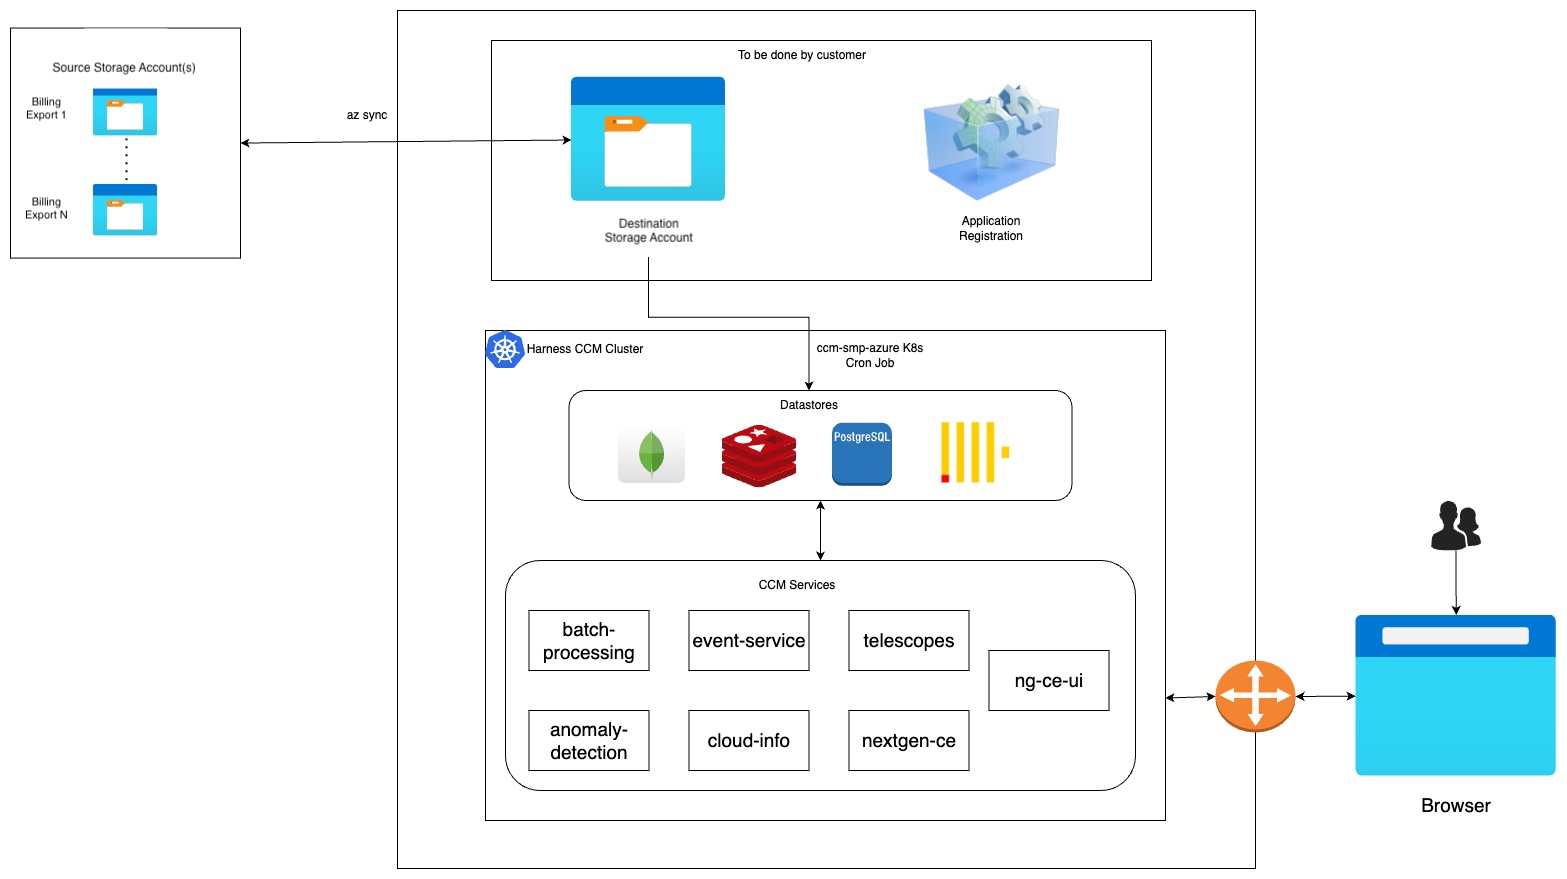
Figure: Azure CACM Self-Managed Enterprise Edition architecture diagram

The flow at a high level works similarly to our SaaS environment. We support syncing data from multiple Azure account exports residing in different source storage accounts into CACM via a destination storage account (staging).
The goal of this particular documentation page is to set up an Azure Destination Storage Account and Application Registration, then configure an existing Harness Self-Managed Enterprise Edition deployment to utilize these components to act as a "staging area" for future Azure Billing Exports to be processed and made available for Harness CACM capabilities.
Figure: Azure CACM Self-Managed Documentation Goal

This goal consists of four tasks. For steps 1, 2, and 3 sign in to your Azure Portal:
Setup a new Application via App Registration
Within your Microsoft Azure WebUI:
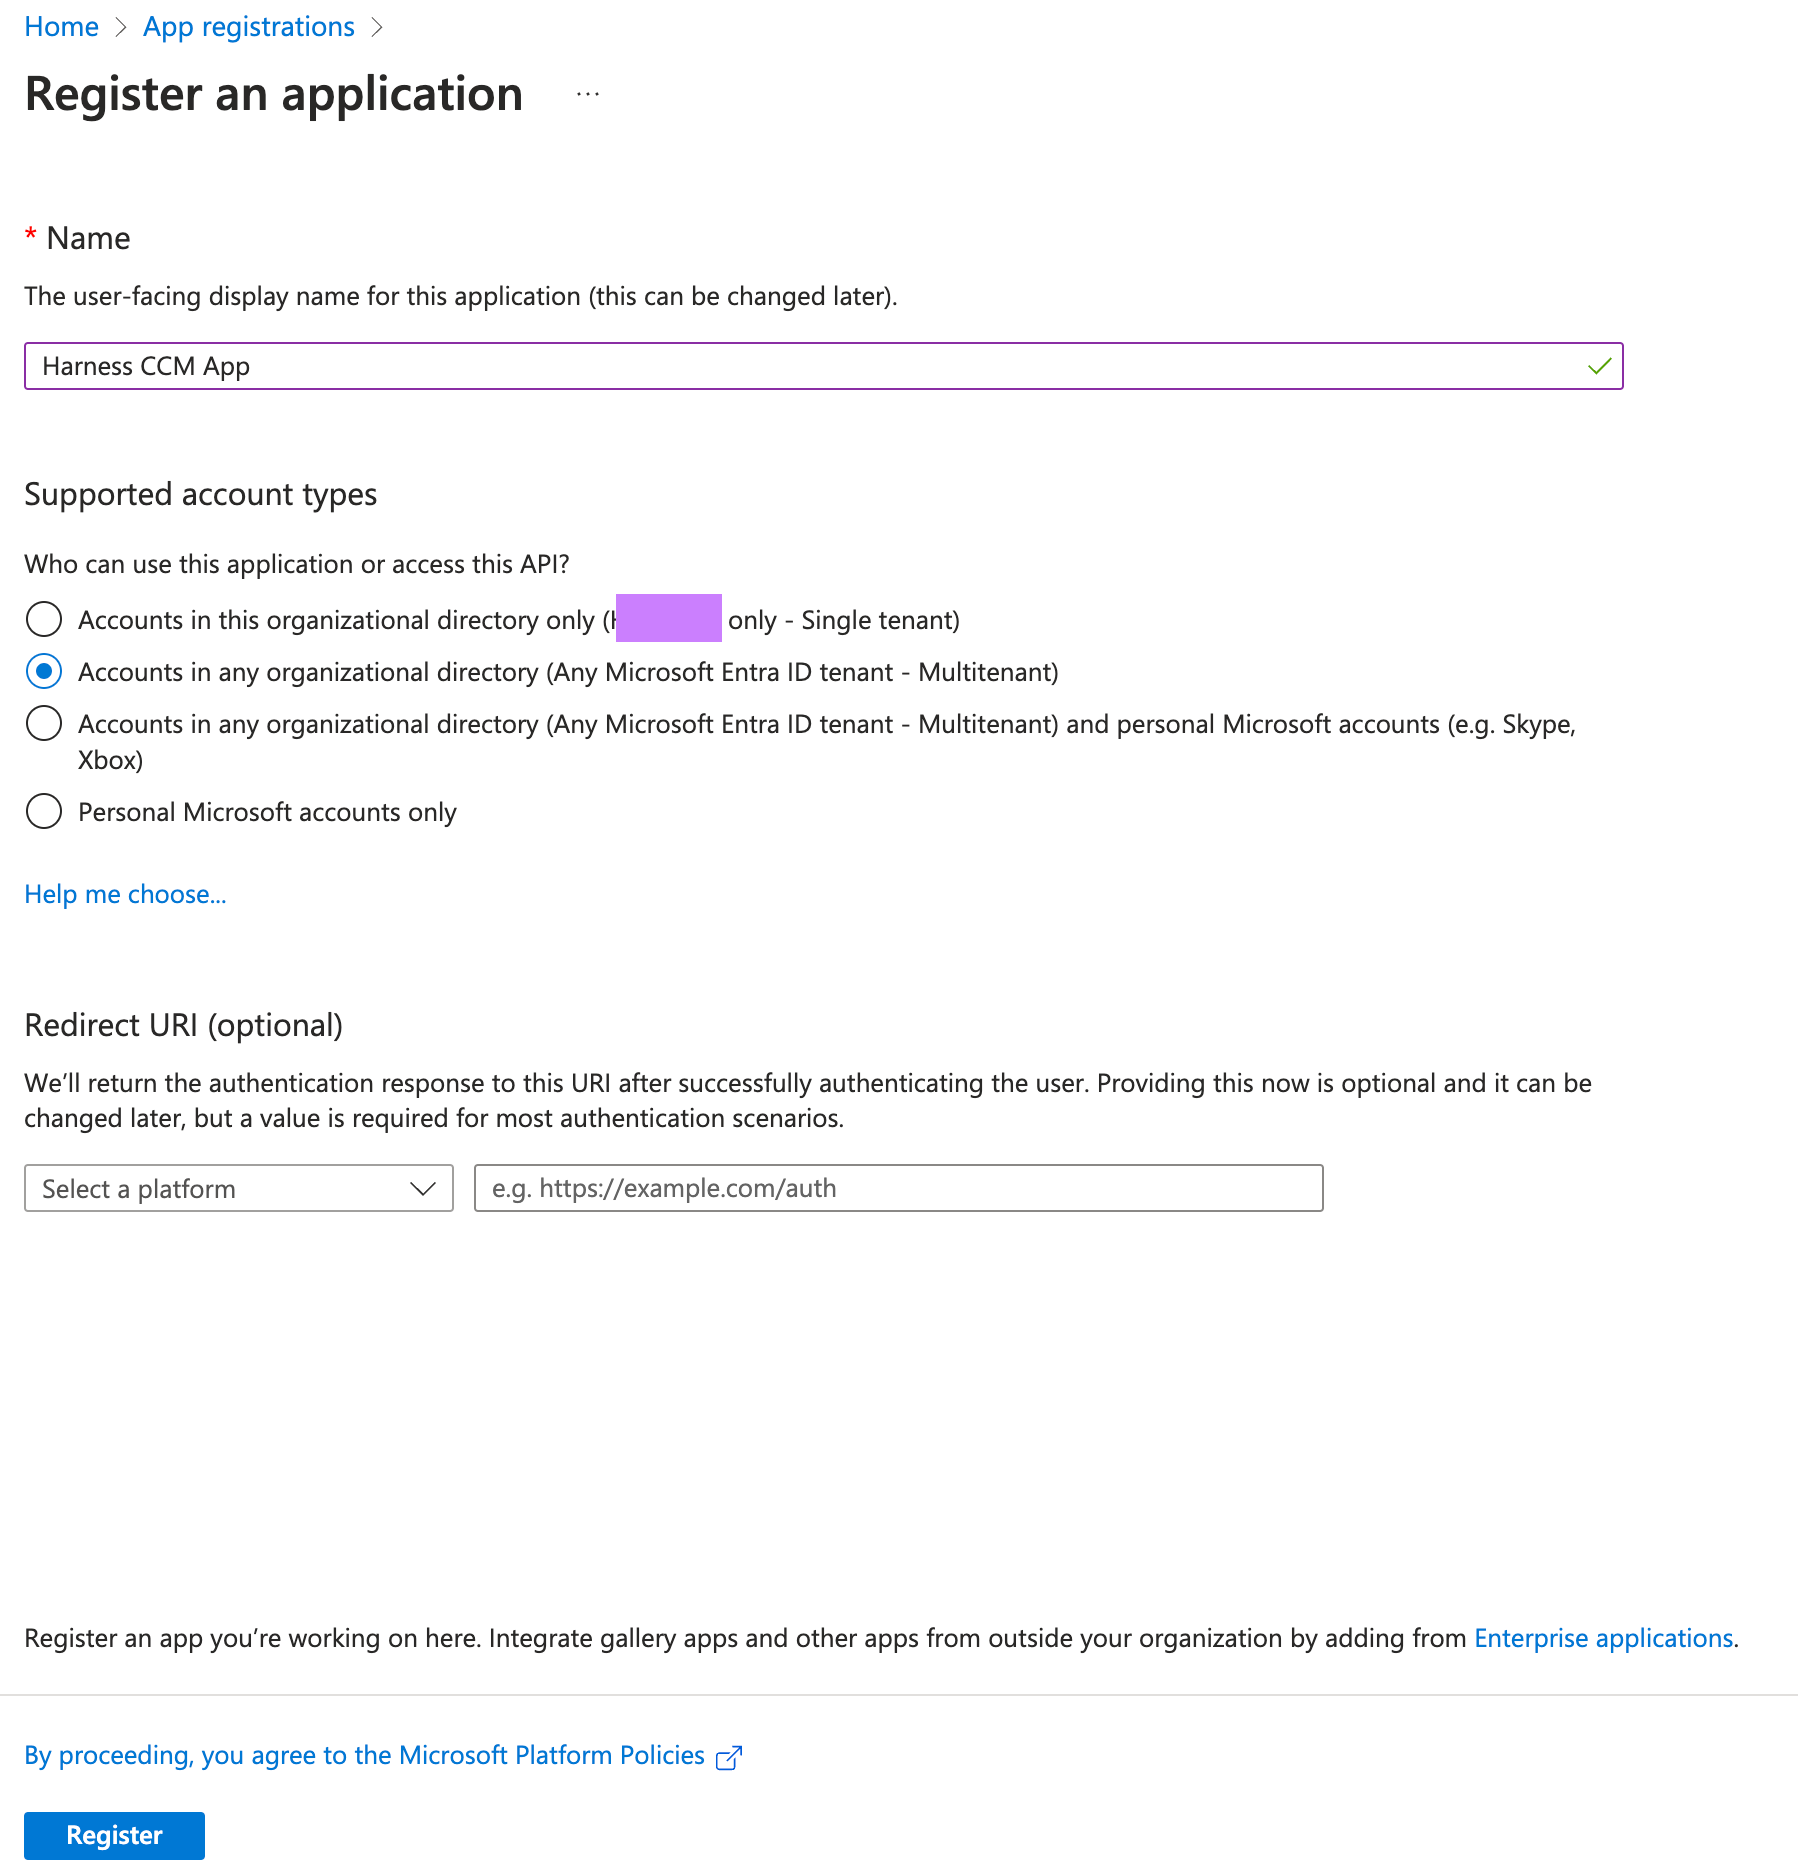
Navigate to App registrations.
Select "New Registration"
Give your App registration a Name like
Harness CACM App.For Supported account types select:
Accounts in any organizational directory (Any Microsoft Entra ID tenant - Multitenant).Click on Register. For more information, go to Quickstart: Register an App.

Create a new Client secret
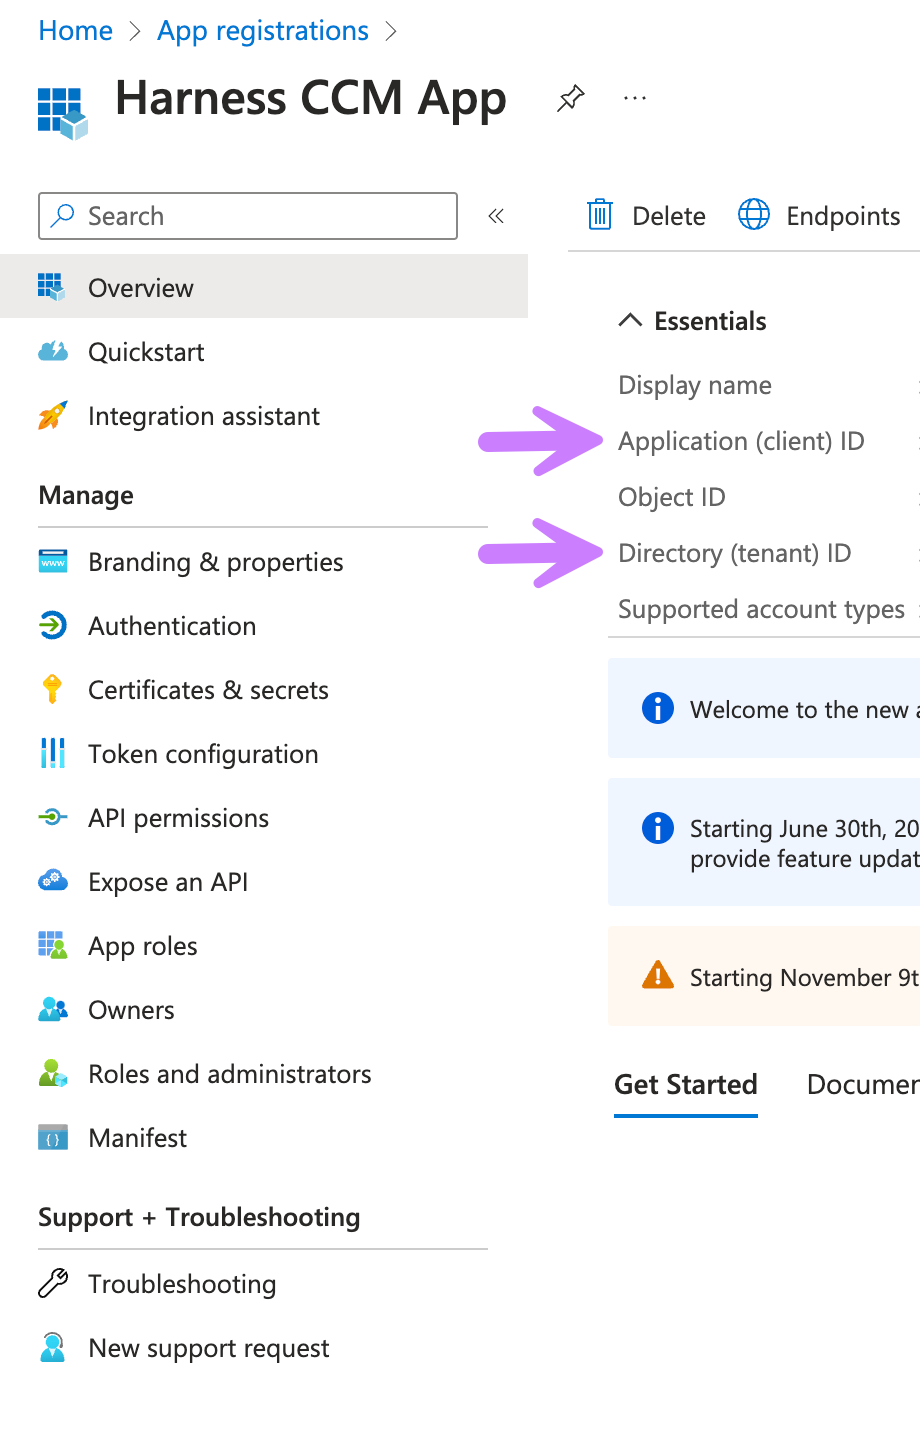
Once you click register, the App Overview Page would be open.
From the overview page, make a note and the save the following from it:
Note & Save Directory (tenant) ID →
tenantIdNote & Save Application (client) ID →
clientId.
Click to view full size image
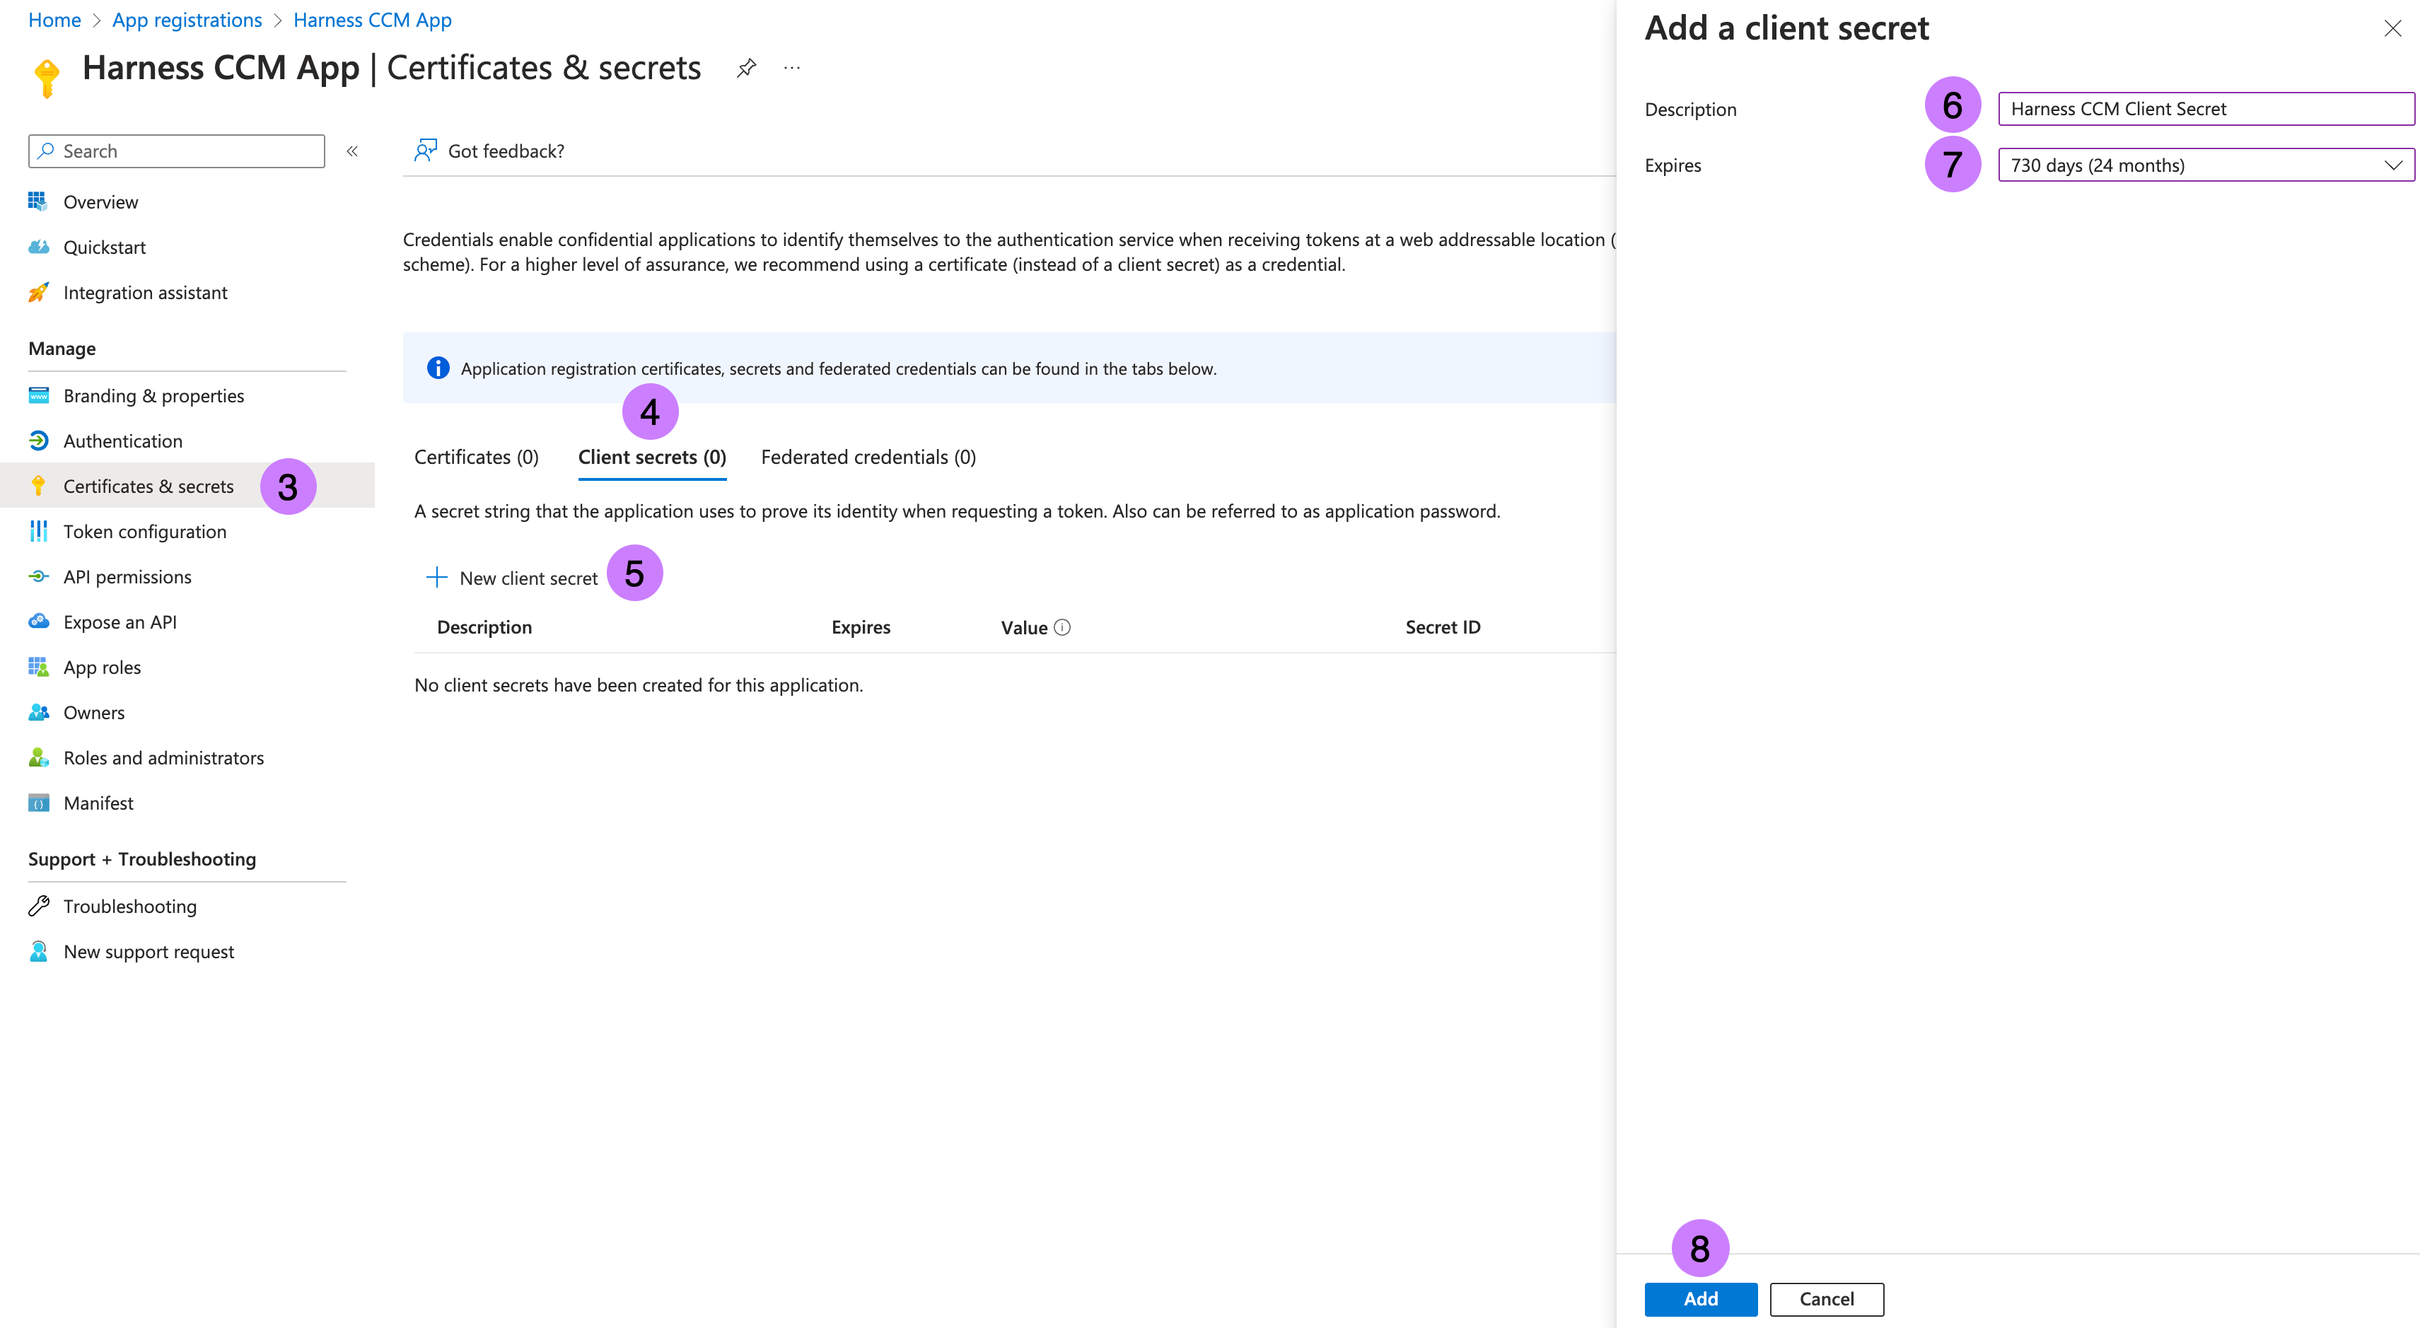
Now click on Certificates & secrets in the left panel.
Go to Client secrets (0) tab.
Click on New client secret.
Enter Description
Harness CACM Client Secret.Select Expires from the drop down select
730 days (24 months)(or the maximum allowed time).Click Add Button.

From the new Client secret, Note & Save Value →
clientSecret. For more information, go to Add credentials.
Create a new Destination Storage Account and a new Storage Container
This Storage Account will act as a staging area for CACM to sync data from multiple billing exports originating from other Storage Accounts.
Select Create within the Storage Accounts page.
Select a Subscription you intend to use from the drop down.
Select a Resource Group you intend to use from the drop down.
Enter Storage account name
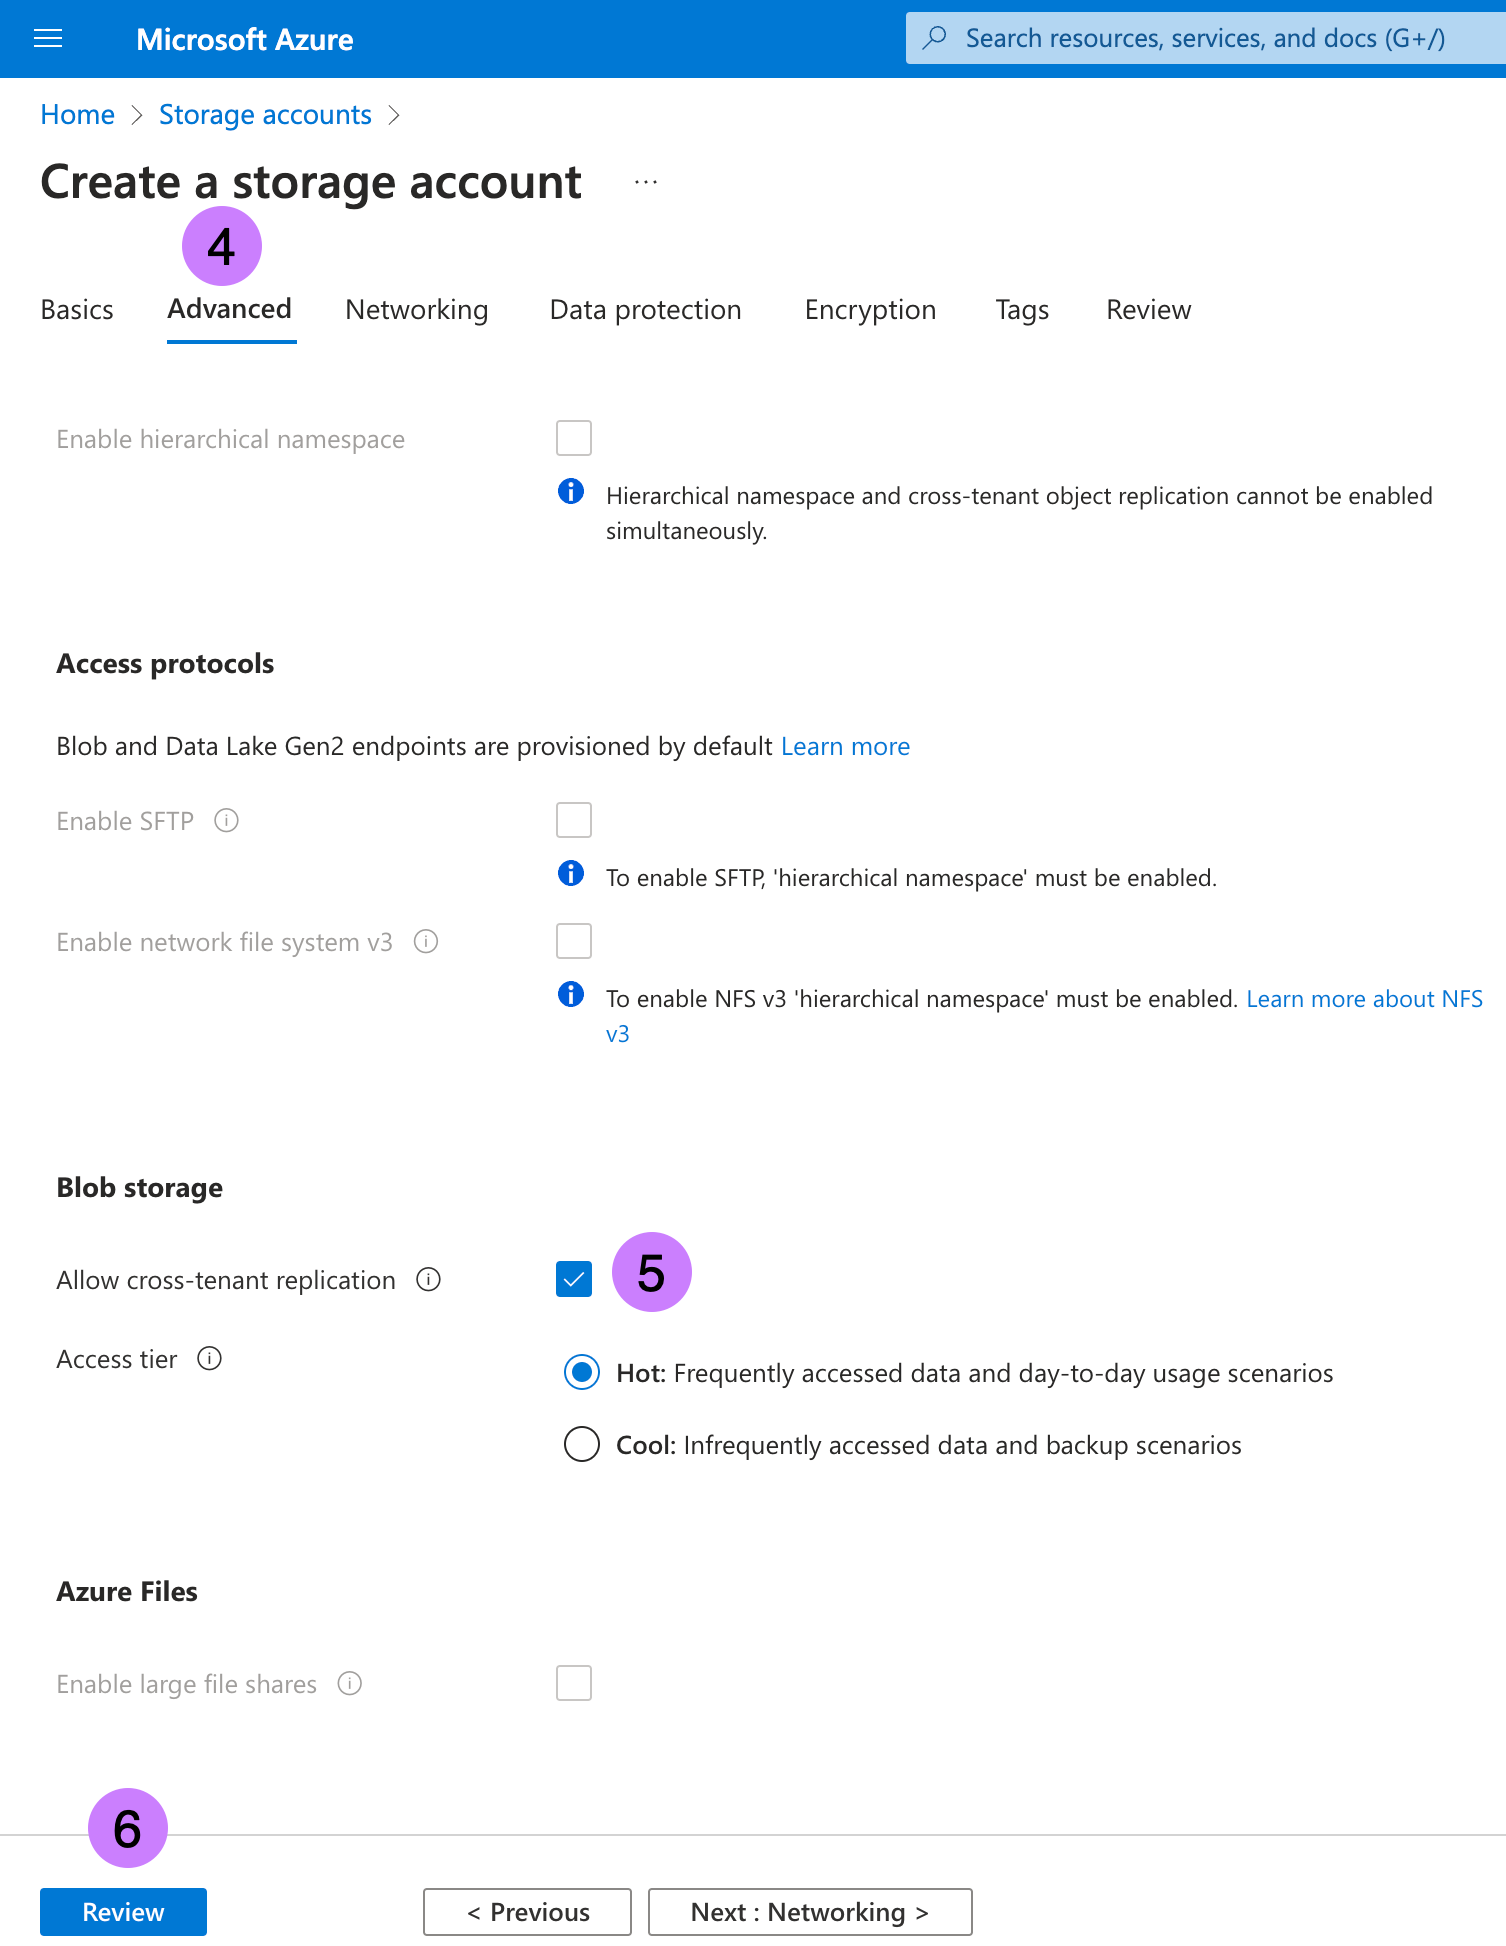
ccmbillingdatasmp. Note this as →storageNameMove to Advanced Tab.
In Blob storage section, enable
Allow cross-tenant replicationClick on Review + create.

Click on Create. For more information, go to Create a storage account.
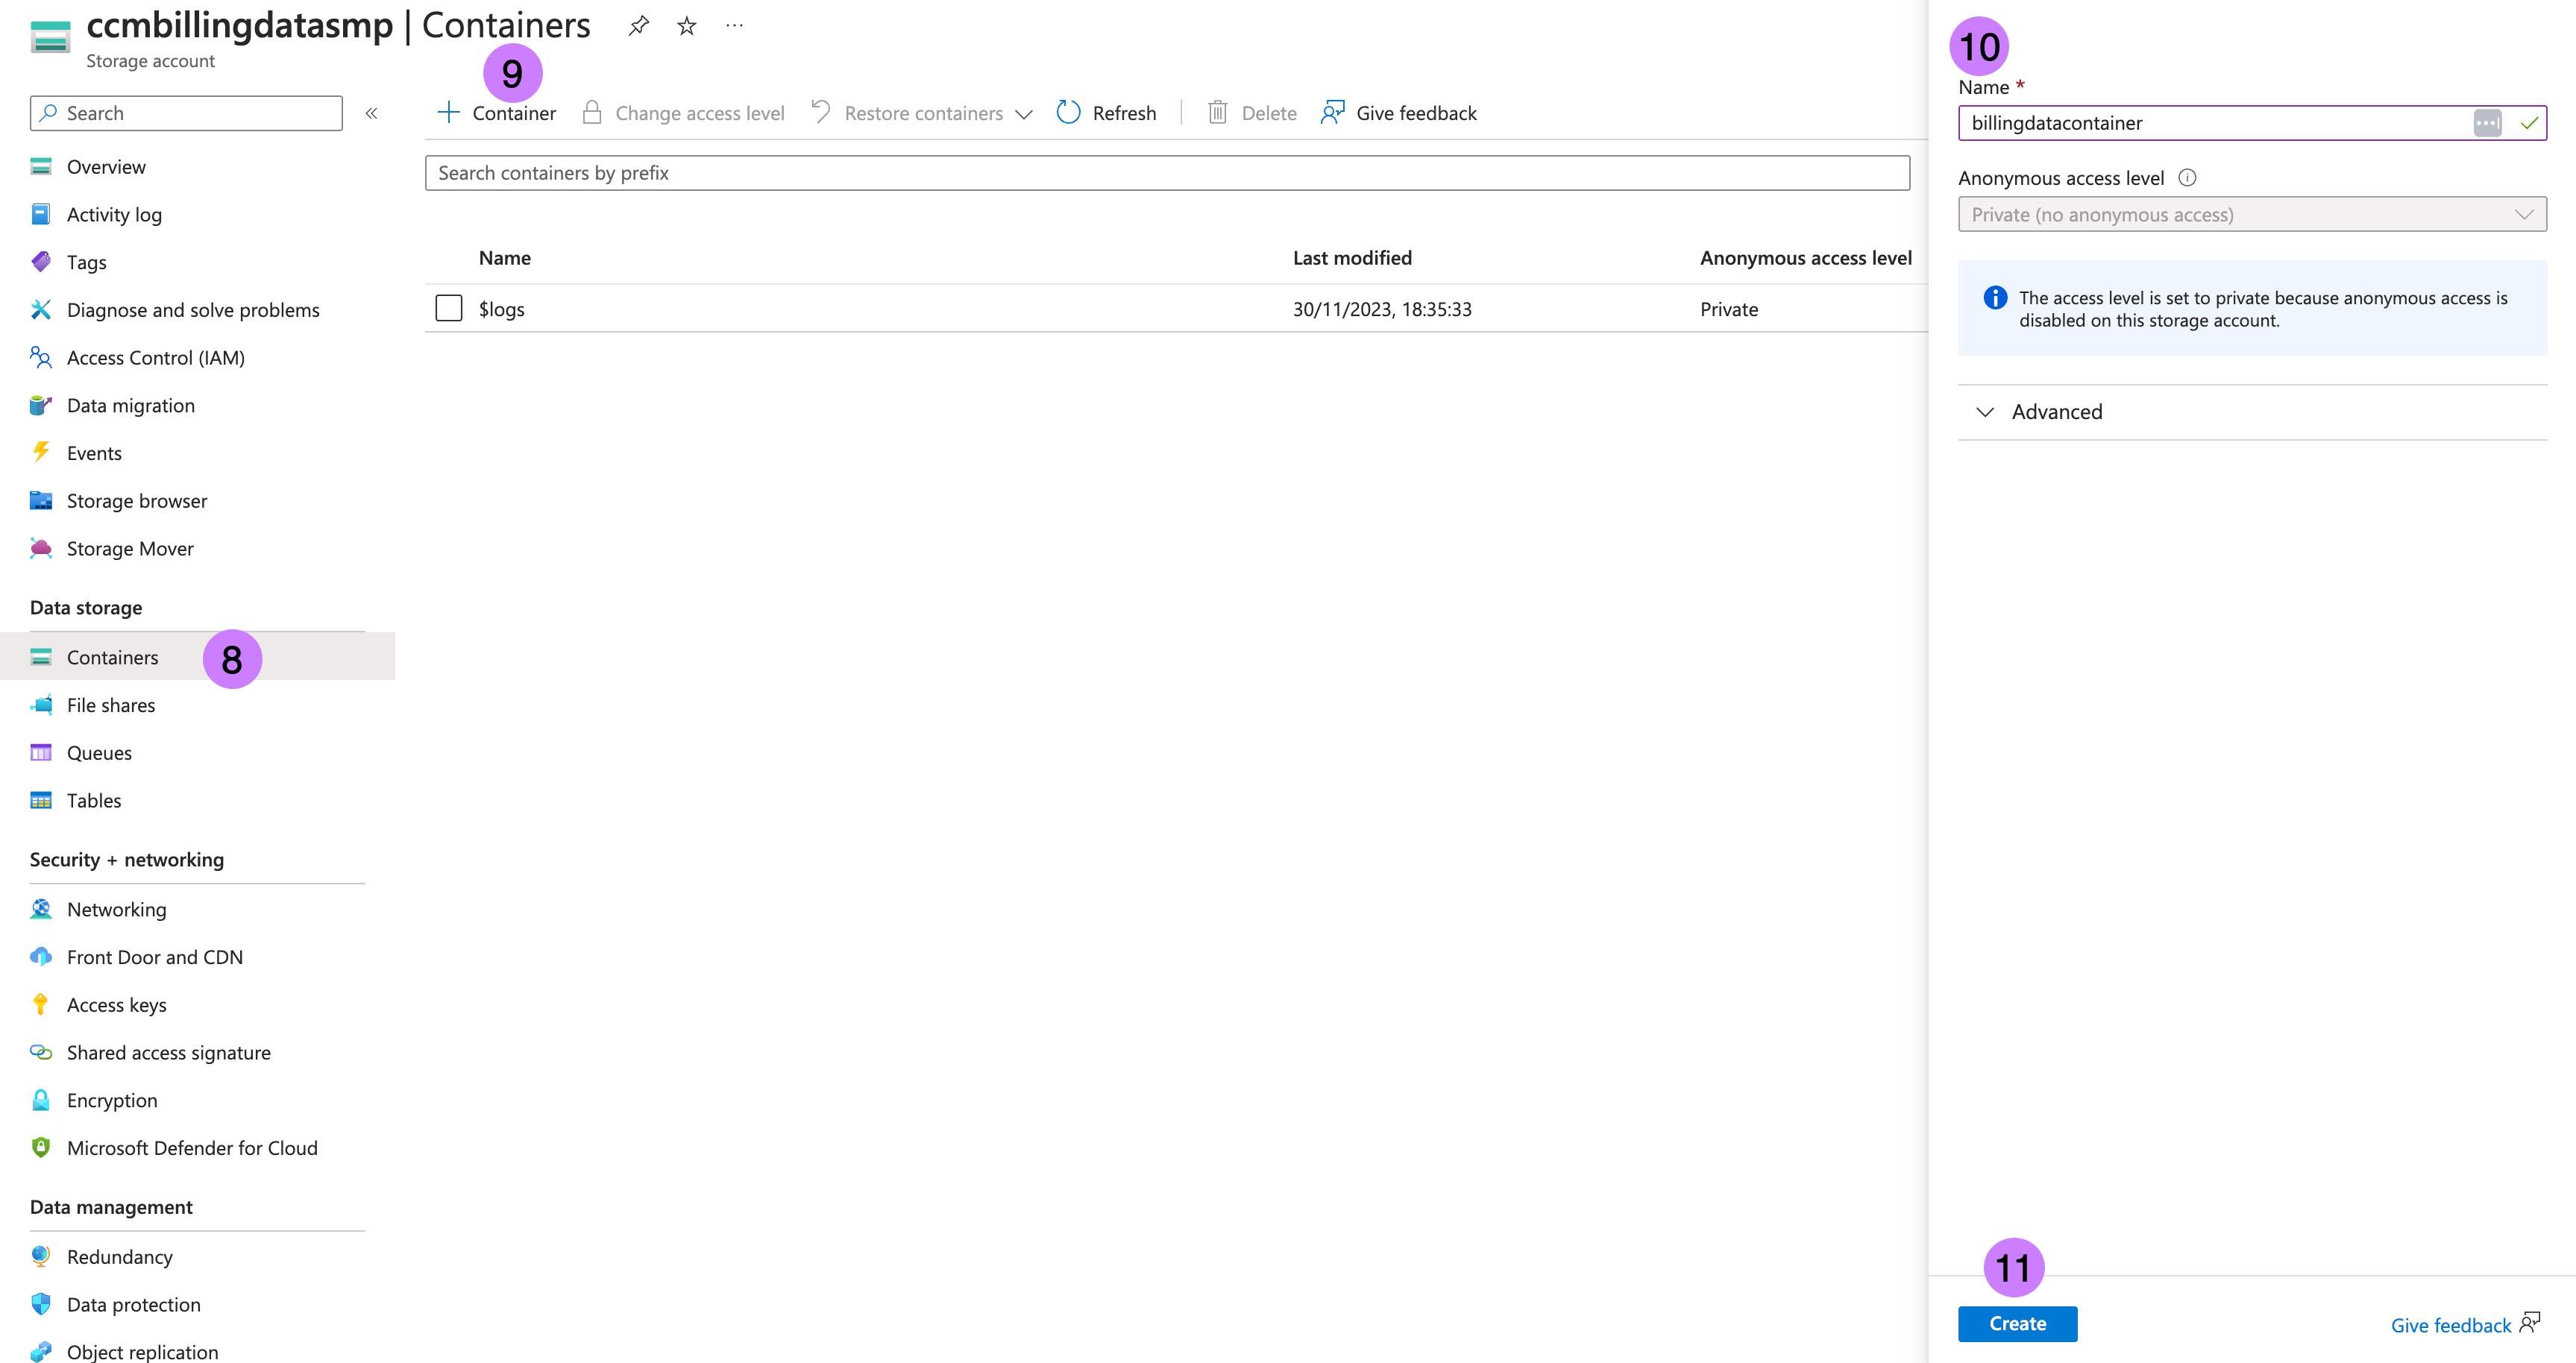
Once the storage account is created, navigate to the storage account then to Containers in left panel.
Click on + Container.
Enter Name as
billingdatacontainer. Note Name as →containerNameClick on Create. For more information, go to Create a container.

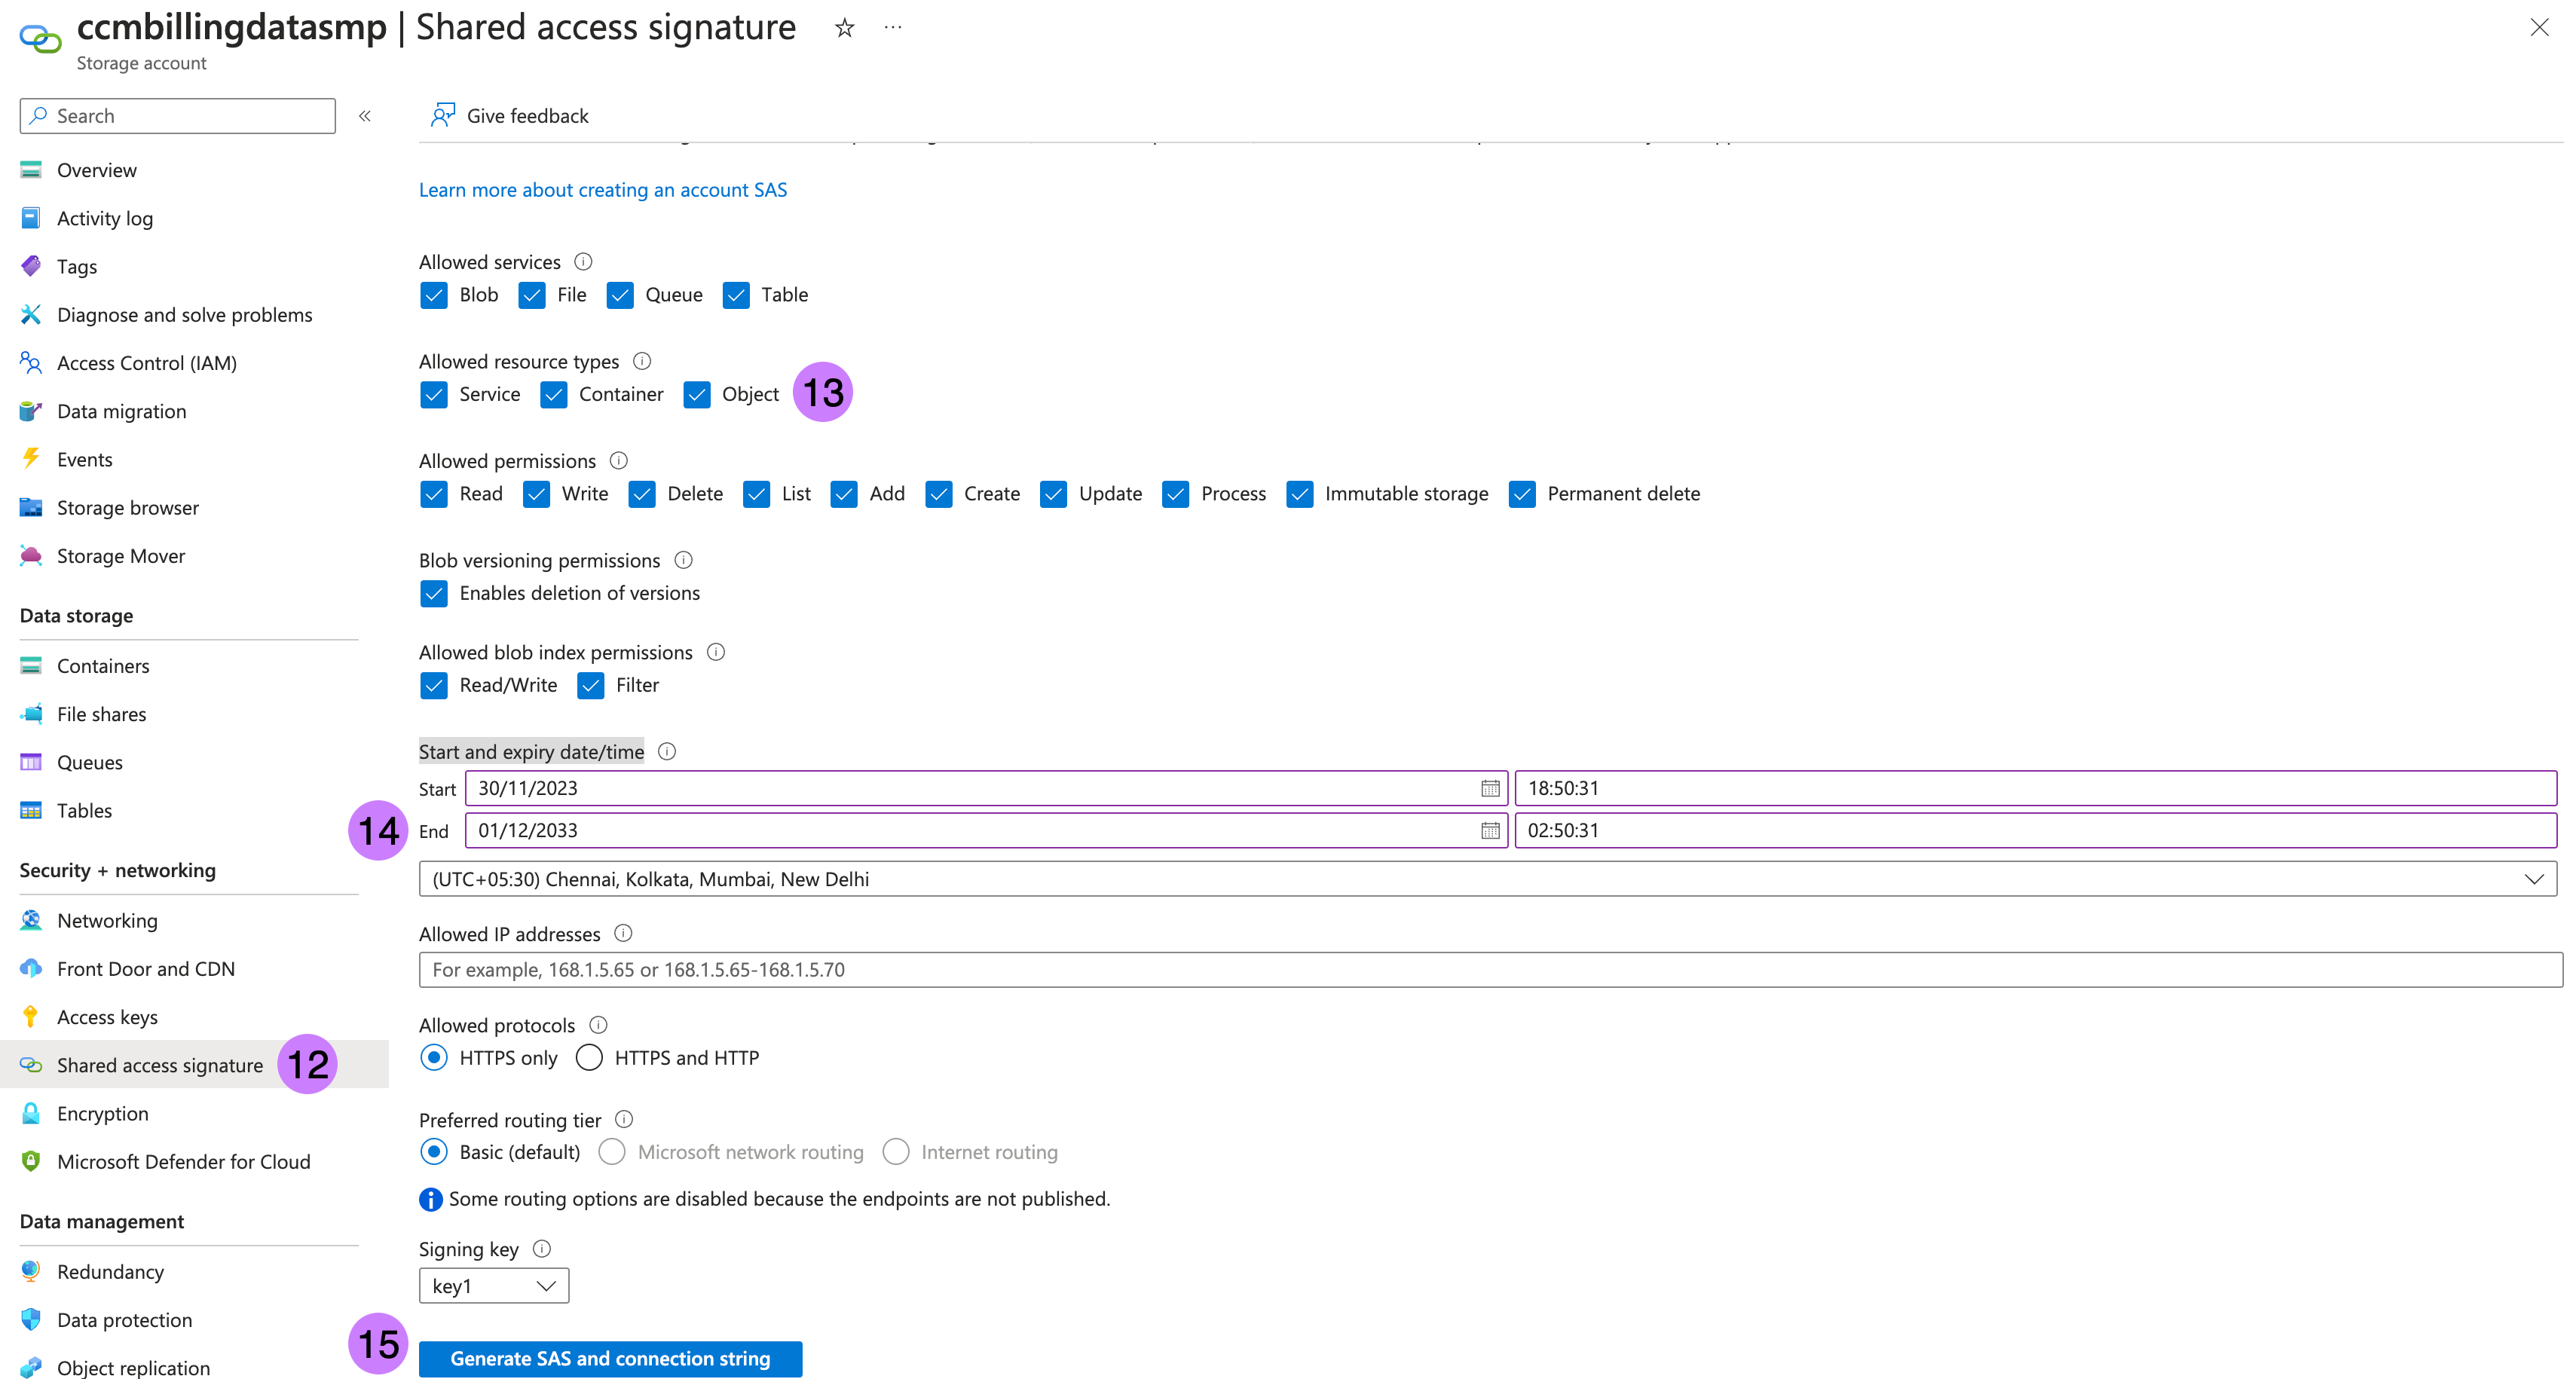
Go to Shared access signature in left panel.
Check all Allowed resource types which are
Service,ContainerandObject.Add 10 years to End in Start and expiry date/time.
Click on Generate SAS and connection string. This is required to sync data from multiple source account to destination storage account.
Note SAS token as →
sasTokenstarting fromsv=, ignore?in beginning. For more information, go to Create your SAS tokens.

Deploy workloads via Helm charts
From here, we will use the values we've noted from previous steps to update our Harness SMP deployment.
Clone the chart repository if you have not already.
Upgrade charts if you're already using Harness Self-managed Enterprise Edition services. Perform the following steps to update the override files:
Retrieve the current override values provided during the installation or upgrade of the Helm charts.
After obtaining the override file, you can make necessary modifications as mentioned below, replacing values in brackets with the values noted from the Azure interface.
After making the necessary updates to the override file, you can proceed with the Helm chart upgrade.
Handling Kubernetes secrets
When installing or upgrading the Helm charts, Kubernetes secrets with default values are created within the cluster. These generated secrets should be updated with the values mentioned above.
Before updating the secrets, you need to convert the secret into base64 encoded format. For example, if your HARNESS_CE_AZURE_CLIENTID value is "clientId", it would be stored as Y2xpZW50SWQ== after encoding. Please
After changing secrets, we will provide directives to kubectl delete the corresponding pods in order for your release to inherit new changes.
The following are the secrets specific to CACM services:
batch-processing
After these secrets are implemented, please kubectl delete the batch-processing pod for this release to start a newly configured pod.
cloud-info-secret-mount [config-file]
After these secrets are implemented, please `kubectl delete` the `cloud-info` pod for this release to start a newly configured pod.
nextgen-ce
After these secrets are implemented, please kubectl delete the nextgen-ce pods for this release to start a newly configured pod.
The following are some secrets from platform-service that you need to update:
smtp-secret - Required to support budget alerts email.
After these secrets are implemented, please kubectl delete any pods related to platform-service and batch-processing for this release to start newly configured pods.
Next steps
At this point, your "staging area" for future Microsoft Azure Billing Exports is ready and we can follow our standard methodologies for onboarding these assets.
Figure: Azure CACM Self-Managed Documentation Next Steps

Use Azure connector setup to set up Azure Billing Exports and push them to our configured destination storage account.
Use Kubernetes connector setup to expand visibility and reporting for Azure Kubernetes and other Kubernetes clusters hosted in Azure.
Troubleshooting
If in case the K8s secrets expire, the secrets will have to be set again. First you would have to update the secrets in respective secret.yaml and then delete the pod. We recommend to `kubectl delete`` the following pods:
batch-processingce-nextgencloud-info
and then follow the same steps to set the keys. After the new keys are set, verify the changes by looking at the configs for the pods. Please refer to the steps below for a faster execution.
batch-processing:
kubectl exec -it -n <namespace> batch-processing cat batch-processing-config.yml | grep -E 'awsAccessKey|awsSecretKey
cloud-info:
kubectl exec -it -n <namespace> cloud-info cat config/config.toml | grep -E 'accessKey|secretKey'
nextgen-ce:
kubectl exec -it -n <namespace> nextgen-ce cat config.yml | grep -E 'accessKey|secretKey|harnessAwsAccountId|destinationBucket:|awsConnectorTemplate'
Last updated
Was this helpful?