> For the complete documentation index, see [llms.txt](https://developer.harness.io/llms.txt). Markdown versions of documentation pages are available by appending `.md` to page URLs; this page is available as [Markdown](https://developer.harness.io/cloud-cost-management/integrations/cloud-providers/azure.md).
# Azure
Connect Azure to bring your cloud spend into Cloud & AI Cost Management.
### Before You Start
To ensure a smooth and error-free setup experience, set up Azure billing Export before launching the Harness wizard. This will allow you to progress through the setup without delays or missing prerequisites.
| Required Info | Where to Find It | Why It’s Needed |
| ----------------------------------- | -------------------------------------------- | ----------------------------------------------------- |
| **Storage Account Name** | Azure Portal → Storage accounts | Source location of exported billing data. |
| **Subscription ID** | Azure Portal → Subscriptions | Identifies the subscription being monitored. |
| **Storage Container** | Azure Portal → Storage accounts → Containers | Target location for billing export data. |
| **Storage Directory & Export Name** | When configuring Billing Export in Azure | Required to locate and identify billing data exports. |
#### Set Up Azure Billing Export
1. Go to **Azure Portal → Cost Management → Exports**.
2. Click **+ Create** to create a new export.
3. Configure your export:
* 📝 **Name**: Enter a descriptive name (e.g., `ccm-harness-export`)
* 📊 **Type**: Choose **Actual cost** or **Amortized cost**
* 🕒 **Frequency**: Set to **Daily**
4. Set up storage destination:
* Choose your **Storage account** (or create new)
* Specify **Container** and **Directory path**
* 📄 **Format**: CSV (recommended)
* 🗜️ **Compression**: Gzip
5. Click **Create** to complete setup.
{% hint style="info" %}
**CHOOSE YOUR BILLING TYPE**
Harness supports two billing types:
* **Actual**: Reflects real-time incurred charges.
* **Amortised**: Spreads out charges (e.g., reserved instances) evenly over usage.
Choose the one that aligns best with your internal reporting strategy. This cannot be changed later.
{% endhint %}
{% hint style="warning" %}
**TIME FOR DATA DELIVERY**
It may take up to **24 hours** for Azure to begin delivering cost and usage data. You can still proceed through the wizard, but the connection test may fail if data isn’t yet available.
In the meantime, explore the optional requirements and feature integrations available in Harness CACM, these will be available to select in your **Choose Requirements** step of the connection wizard:
* [Resource Inventory Management](/cloud-cost-management/cost-reporting/bi-dashboards/overview.md).
* [Optimization by AutoStopping](/cloud-cost-management/cost-optimization/autostopping-rules/1-auto-stopping-rules.md).
* [Cloud Governance](/cloud-cost-management/cost-governance/asset-governance/1-asset-governance.md).
{% endhint %}
***
### Interactive Guide
Connect your Azure account to Harness using the connector wizard. Watch the walkthrough below, or follow the [Step-by-Step Guide](#step-by-step-guide) for the full detail on each step.
{% embed url="" %}
Add Azure Cloud Cost Connector in Harness
{% endembed %}
### Step-by-Step Guide
#### Step 1: Overview
1. Launch the wizard and select **Azure** as the cloud provider.
2. Provide the following required information:
* **Name**: Enter a descriptive name for your connector
* **Azure Tenant ID**: Find your [Azure Tenant ID](https://learn.microsoft.com/en-us/azure/azure-portal/get-subscription-tenant-id#find-your-microsoft-entra-tenant)
* **Azure Subscription ID**: Find your [Azure Subscription ID](https://learn.microsoft.com/en-us/azure/azure-portal/get-subscription-tenant-id#find-your-azure-subscription)
* (Optional)**Description**: Add a description for your connector
3. Click **Continue** to proceed to the next step.
#### Step 2: Azure Billing Exports
1. If you have not created a Billing Export, follow the [instructions to create a Billing Export](https://learn.microsoft.com/en-us/azure/cost-management-billing/costs/tutorial-export-acm-data).
2. Enter the following:
| Required Info | Where to Find It | Why It’s Needed |
| ----------------------------------- | -------------------------------------------- | ----------------------------------------------------- |
| **Storage Account Name** | Azure Portal → Storage accounts | Source location of exported billing data. |
| **Subscription ID** | Azure Portal → Subscriptions | Identifies the subscription being monitored. |
| **Storage Container** | Azure Portal → Storage accounts → Containers | Target location for billing export data. |
| **Storage Directory & Export Name** | When configuring Billing Export in Azure | Required to locate and identify billing data exports. |
4. Select your **Metric (Billing Type)**:
* `Actual` or `Amortised`
5. Click **Continue**.
#### Step 3: Choose Requirements
1. **Cost Visibility** is selected by default.
2. (Optional) You can enable any of the following features (they can also be added later):
* Resource Inventory Management
* Optimization by AutoStopping. If selected, you can select granular permissions for AutoStopping by clicking **Continue**
* Cloud Governance
3. Click **Continue**.
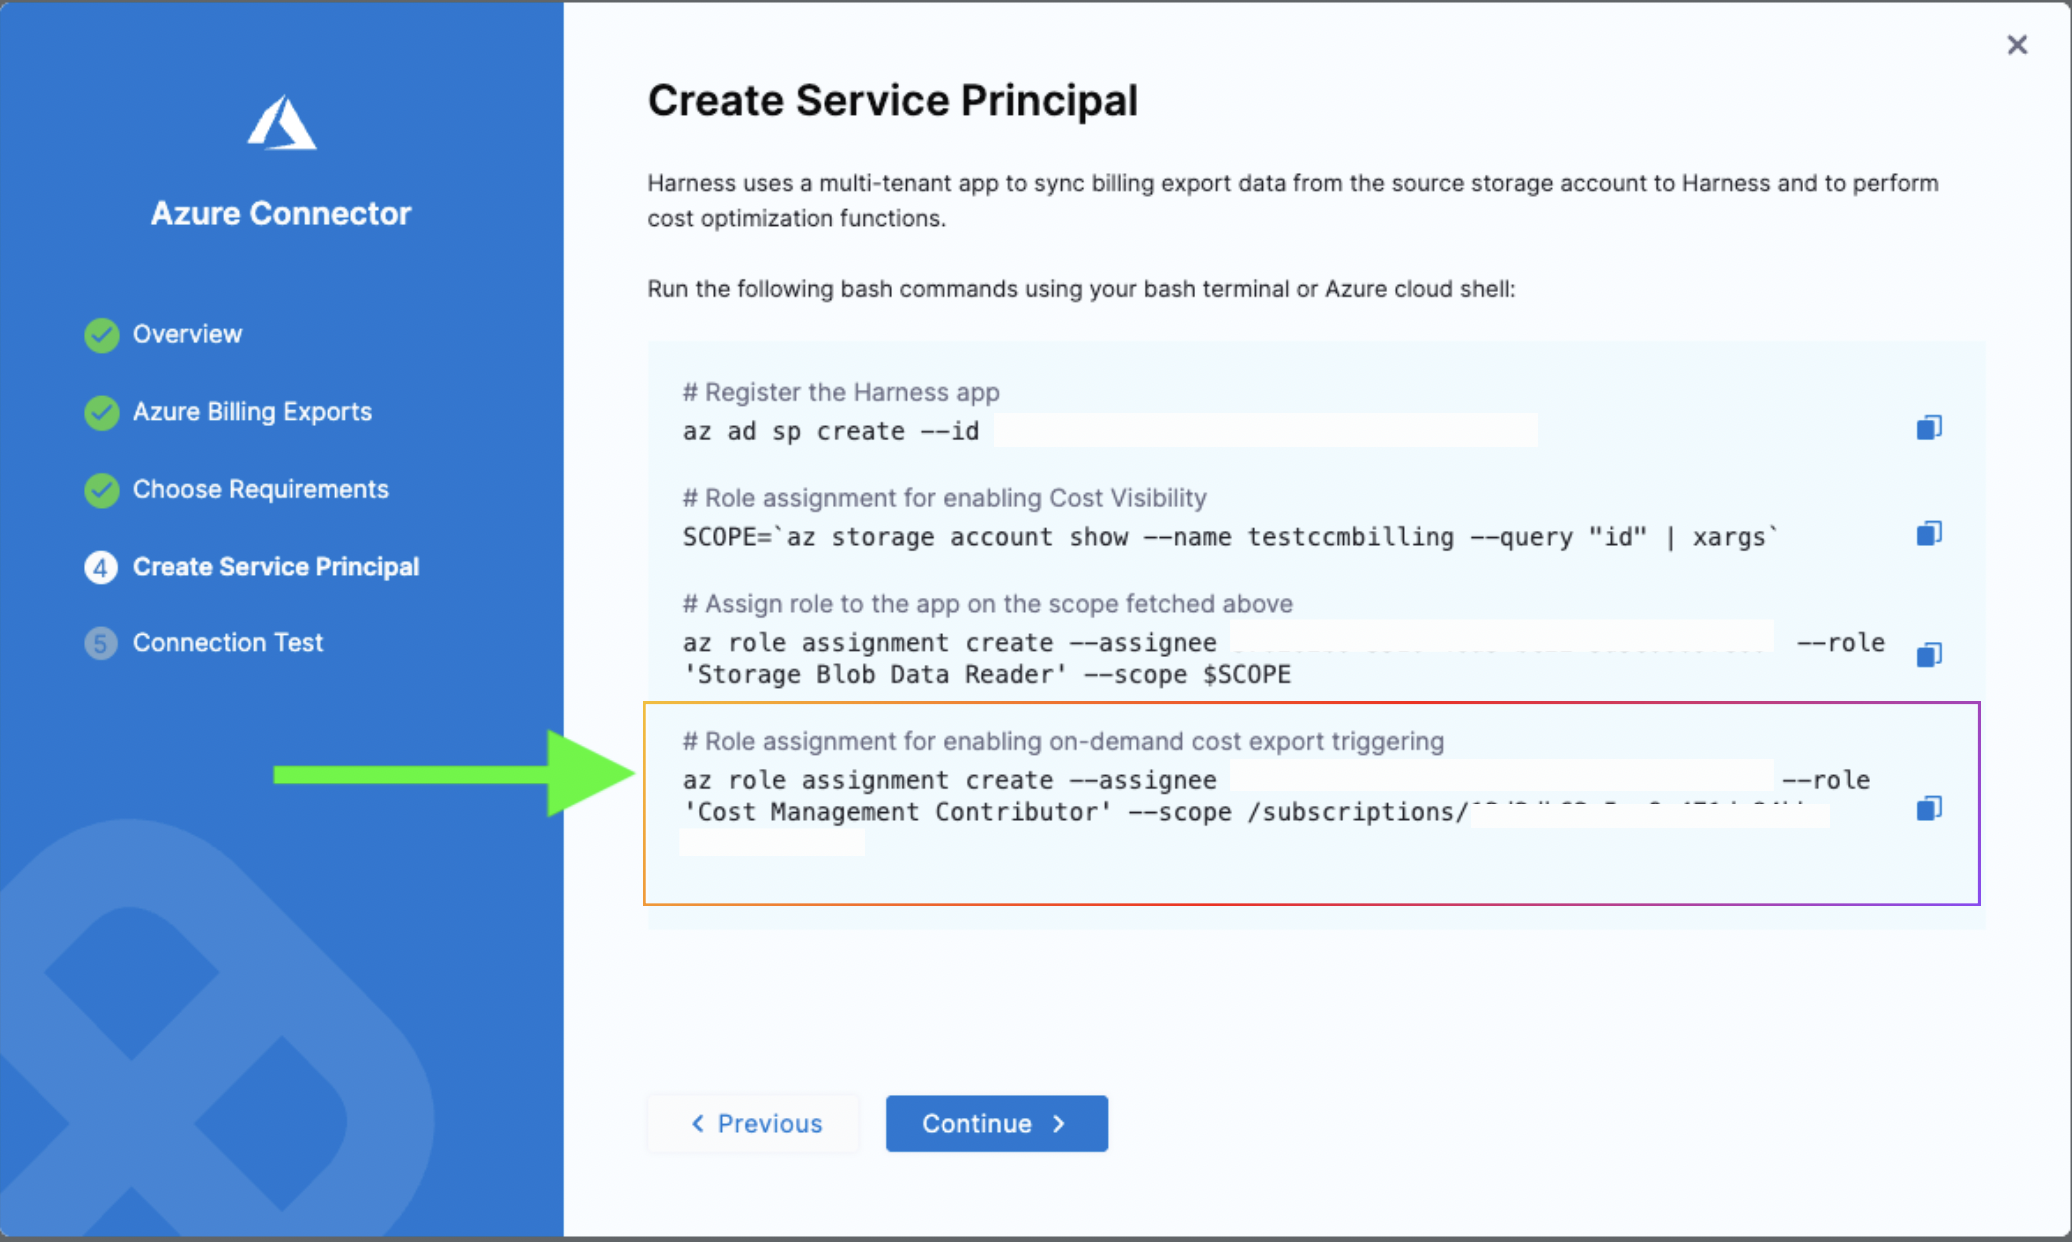
#### Step 4: Create Service Principal
Harness uses a multi-tenant application to securely access your billing data and enable the features you selected.
1. The wizard displays customized Azure CLI commands based on your feature selections from **Step 3: Choose Requirements**.
2. Copy and execute these commands in **Azure Cloud Shell** or your local terminal with Azure CLI.
3. After successful execution, click **Continue**.
{% hint style="info" %}
The displayed commands are dependent on your specific feature selections. Always use the commands shown in your wizard interface.
{% endhint %}
{% hint style="info" %}
Review [Feature Permissions](/cloud-cost-management/resources/feature-permissions.md) for CACM to understand the minimum roles or permissions needed for every CACM feature.
{% endhint %}
#### Step 5: Verify the Connection
1. Harness will attempt to validate the connection using your inputs.
2. If this step fails, it's usually because Azure has not yet delivered the first billing export.
* Wait up to **24 hours** after setting up the billing export before trying again.
3. Once validated, click **Finish Setup**.
***
🎉 You’ve now connected your Azure account and enabled cost visibility in Harness.
***
### On-Demand Cost Export Triggering (Enterprise)
Harness CACM can trigger Azure Cost Management exports on demand to provide fresher billing data. By default, Azure only updates cost exports once per day. With on-demand triggering enabled, Harness can request new export files multiple times per day, allowing more fresher billing data for current month.
{% hint style="info" %}
**AVAILABILITY**
This feature requires **Enterprise** edition. Contact your Harness account team to enable it.
{% endhint %}
#### Prerequisites
* **Harness CACM Enterprise plan**
* Azure connector configured with billing export
#### Assigning the Role via Azure CLI
Run the following command in Azure Cloud Shell or Azure CLI:
```bash
az role assignment create \
--assignee \
--role "Cost Management Contributor" \
--scope /subscriptions/
```
Replace:
* `` — The App ID shown in the Harness connector setup wizard
* `` — Your Azure subscription ID
#### Assigning the Role via Azure Portal
1. Navigate to **Subscriptions** → Select your subscription
2. Go to **Access control (IAM)** → **Add** → **Add role assignment**
3. Search for and select **Cost Management Contributor**
4. Click **Next**, then **Select members**
5. Search for the Harness service principal by its App ID
6. Select it and click **Review + assign**
#### Connector Setup
When creating or editing an Azure CACM connector with billing enabled, the setup wizard automatically displays the required CLI commands. For Enterprise accounts, you'll see an additional command for the Cost Management Contributor role:
```bash
# Register the Harness app
az ad sp create --id
# Role assignment for enabling Cost Visibility
SCOPE=`az storage account show --name --query "id" | xargs`
az role assignment create --assignee --role 'Storage Blob Data Reader' --scope $SCOPE
# Role assignment for enabling on-demand cost export triggering
az role assignment create --assignee --role 'Cost Management Contributor' --scope /subscriptions/
```
#### Data Freshness Expectations
| Scenario | Expected Data Latency |
| --------------- | ---------------------------------------------------------------------------------------- |
| Without feature | Consumes exports available at source with default export frequency of once a day |
| With feature | Consumes exports three times a day. Thus giving more fresher cost data for current month |
***
### Next Steps
Once your Azure billing data is flowing into Harness, explore these features to enhance your cloud & AI cost management:
* [View and Create Perspectives](https://developer.harness.io/docs/cloud-cost-management/use-ccm-cost-reporting/ccm-perspectives/creating-a-perspective) to visualize cloud usage and trends.
* Create [Budgets and Alerts](/cloud-cost-management/cost-governance/budgets/create-a-budget.md) to monitor spend thresholds.
* Use [BI Dashboards](/cloud-cost-management/cost-reporting/bi-dashboards/overview.md) to visualize cloud usage and trends.
* Revisit optional integrations:
* [Resource Inventory Management](/cloud-cost-management/cost-reporting/bi-dashboards/overview.md).
* [Optimization by AutoStopping](/cloud-cost-management/cost-optimization/autostopping-rules/1-auto-stopping-rules.md).
* [Cloud Governance](/cloud-cost-management/cost-governance/asset-governance/1-asset-governance.md).
Turn visibility into action and unlock cost efficiency across your Azure cloud infrastructure.
{% @harness-feedback/feedback %}