> For the complete documentation index, see [llms.txt](https://developer.harness.io/llms.txt). Markdown versions of documentation pages are available by appending `.md` to page URLs; this page is available as [Markdown](https://developer.harness.io/continuous-delivery/use-continuous-delivery/cd-building-blocks/cd-steps/ticketing-systems/servicenow-multi-config-items.md).
# Add multiple configuration items to ServiceNow change requests
Assign multiple config items as part of the change request.
Harness enables you to add multiple existing configuration items to an existing change request in ServiceNow.
To set up the pipeline, you use two Harness ServiceNow Create steps. The first step creates the change request and obtains a `sys_id`. The second step uses the `sys_id` to get the task and add the config items.
This topic walks you through the setup procedure.
## What you will learn from this topic
* How to use the [pipeline example YAML](#pipeline-example-yaml) as a reference.
* How to [add the first ServiceNow Create step](#add-the-first-servicenow-create-step-to-a-pipeline-stage) and [the second ServiceNow Create step](#add-the-second-servicenow-create-step-to-a-pipeline-stage).
* How to [add a matrix looping strategy](#add-a-matrix-looping-strategy) and [run the pipeline](#run-the-pipeline) to add multiple config items to a change request.
***
## Before you begin
The following prerequisites apply to this topic:
* **ServiceNow connector**: You need a [Harness ServiceNow connector](/harness-platform/use-harness-platform/connectors/ticketing-systems/connect-to-service-now.md) to connect to your ServiceNow server. You can create one during step setup.
* **Stage**: You need a pipeline stage of type Deploy, Custom, or Approval.
***
## Pipeline example YAML
You can use the following pipeline YAML as an example of how to set up this solution. Expand the following block to view it.
Pipeline example YAML
```yaml
pipeline:
projectIdentifier: myproject
orgIdentifier: default
tags: {}
stages:
- stage:
name: stage
identifier: stage
description: ""
type: Custom
spec:
execution:
steps:
- step:
type: ServiceNowCreate
name: create
identifier: create
spec:
useServiceNowTemplate: false
connectorRef: account.service_now_connector
ticketType: change_request
fields: []
timeout: 10m
- step:
type: ServiceNowCreate
name: ServiceNowCreate_1
identifier: ServiceNowCreate_1
spec:
useServiceNowTemplate: false
connectorRef: account.service_now_connector
ticketType: task_ci
fields:
- name: ci_item
value: <+matrix.ci_item>
- name: task
value: <+pipeline.stages.stage.spec.execution.steps.create.ticket.fields.sys_id>
timeout: 10m
strategy:
matrix:
ci_item:
- 9ea9e3491bb971100269a608624bcb85
- 43b89fa11b6139100269a608624bcb6f
maxConcurrency: 2
tags: {}
identifier: mypipeline
name: mypipeline
```
***
## Assign multiple config items as part of the change request
Use the following sections to set up the pipeline and ServiceNow Create steps.
### Add the first ServiceNow Create step to a pipeline stage
Perform the following steps to add the first step:
1. In your pipeline stage (Deploy, Custom, or Approval), add a ServiceNow Create step.
2. In **ServiceNow Connector**, create or select a [Harness ServiceNow connector](/harness-platform/use-harness-platform/connectors/ticketing-systems/connect-to-service-now.md) to connect to your ServiceNow server.
3. In **Ticket Type**, select **Change Request**.
4. Select **Apply Changes**.
When you run the pipeline, this step outputs a `sys_id`. You use a Harness expression to reference this value in the **Task** setting of the next ServiceNow Create step.
The expression follows this format:
```
<+pipeline.stages.stage.spec.execution.steps.STEP_ID.ticket.fields.sys_id>
```
For example:
```
<+pipeline.stages.stage.spec.execution.steps.create.ticket.fields.sys_id>
```
### Add the second ServiceNow Create step to a pipeline stage
Perform the following steps to add the second step:
1. In your pipeline stage (Deploy, Custom, or Approval), add a ServiceNow Create step.
2. In **ServiceNow Connector**, create or select a [Harness ServiceNow connector](/harness-platform/use-harness-platform/connectors/ticketing-systems/connect-to-service-now.md) to connect to your ServiceNow server.
3. In **Ticket Type**, select the type or enter a custom type. The YAML example earlier in this topic uses a custom table named `task_ci`.
4. In **Configure Fields**, select **Fields**.
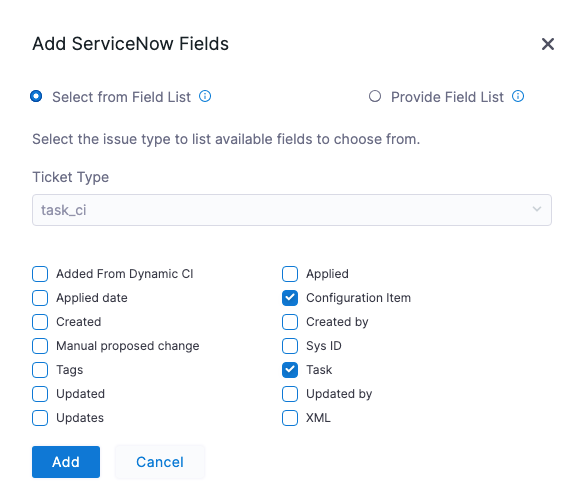
5. In **Add ServiceNow Fields**, select **Configuration Item** and **Task**, and select **Add**.
Click to view full size image
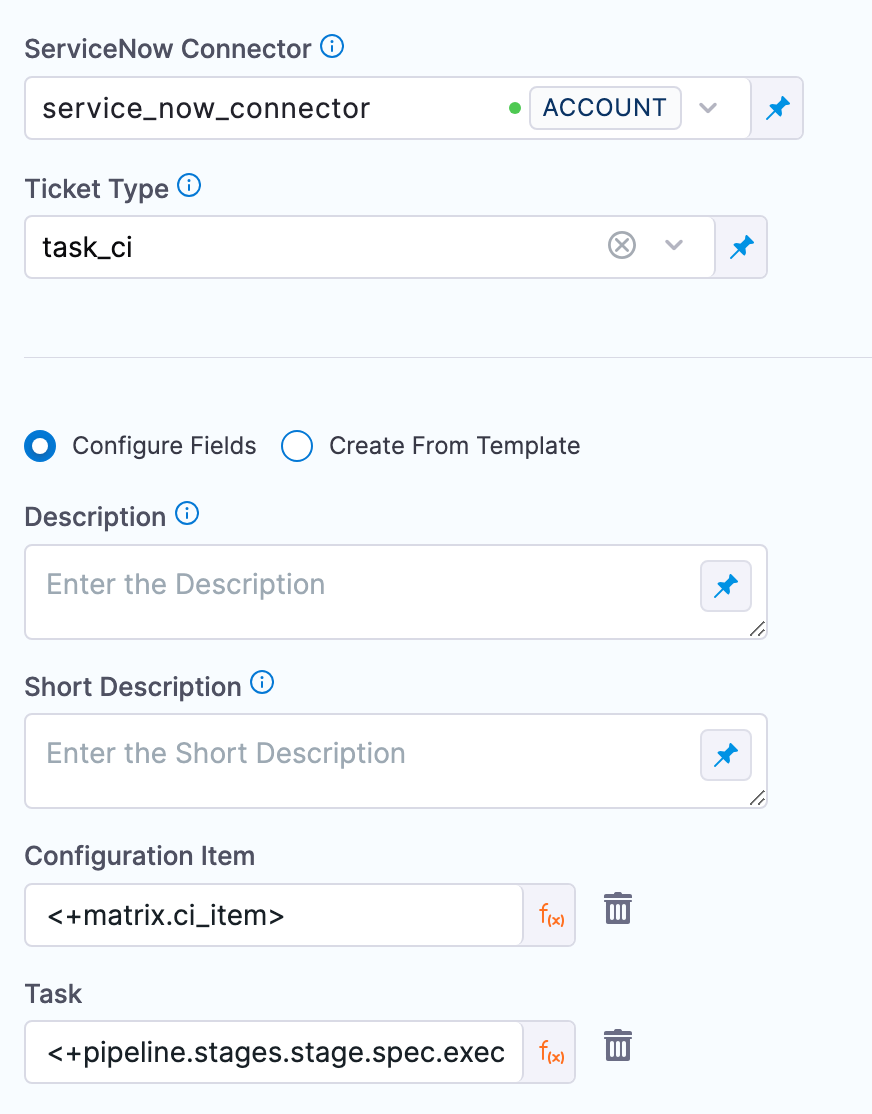
6. In **Configuration Item**, select **Expression**, and then enter `<+matrix.ci_item>`. This expression references the step's looping strategy that you add later.
7. In **Task**, select **Expression**, and then enter the expression that references the sys\_id in the previous ServiceNow Create step, using the format `<+pipeline.stages.stage.spec.execution.steps.STEP_ID.ticket.fields.sys_id>`. For example, `<+pipeline.stages.stage.spec.execution.steps.create.ticket.fields.sys_id>`.
This expression references the `sys_id` value returned when the step is run.
Click to view full size image
Next, add the looping strategy for the step.
### Add a matrix looping strategy
The matrix looping strategy loops through the config items. Perform the following steps to add it:
1. In the ServiceNow Create step, select **Advanced**.
2. In **Looping Strategy**, enter the following:
```yaml
matrix:
ci_item:
- Config item Id
- Config item Id
- etc
maxConcurrency: number of items
```
For example:
```yaml
matrix:
ci_item:
- 9ea9e3491bb971100269a608624bcb85
- 43b89fa11b6139100269a608624bcb6f
maxConcurrency: 2
```
3. Select **Apply Changes**.
***
## Run the pipeline
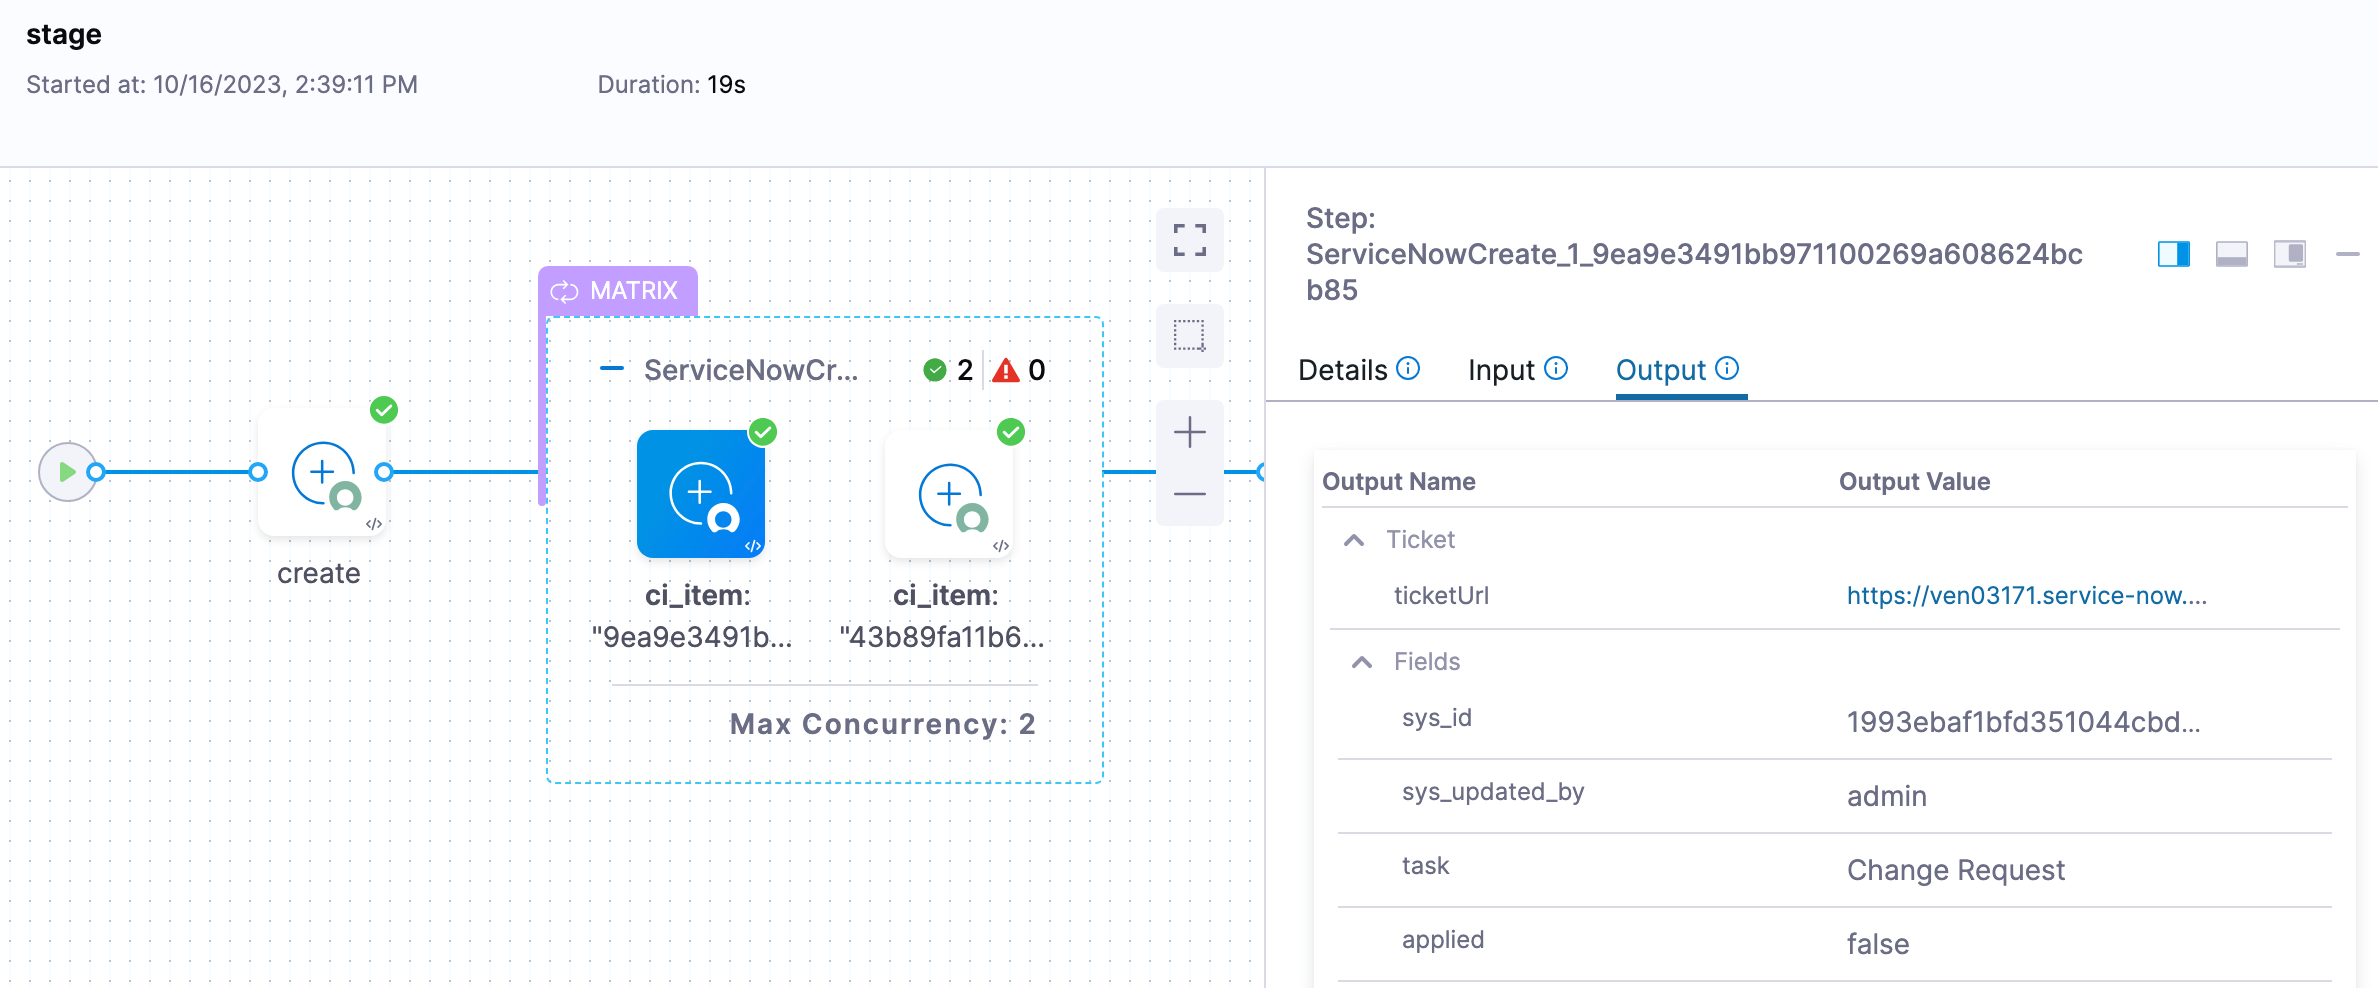
When you run the pipeline, you can see the looping strategy run for each config item Id in the step's matrix.
Click to view full size image
Select the link in the **ticketUrl** field on the step **Output** tab to open a new browser tab and view the config item.
***
## Next steps
* [Create ServiceNow tickets in CD stages](/continuous-delivery/use-continuous-delivery/cd-building-blocks/cd-steps/ticketing-systems/create-service-now-tickets-in-cd-stages.md): Configure the ServiceNow Create step in more detail.
* [Update ServiceNow tickets in CD stages](/continuous-delivery/use-continuous-delivery/cd-building-blocks/cd-steps/ticketing-systems/update-service-now-tickets-in-cd-stages.md): Update ServiceNow tickets from a pipeline step.
{% @harness-feedback/feedback %}