> For the complete documentation index, see [llms.txt](https://developer.harness.io/llms.txt). Markdown versions of documentation pages are available by appending `.md` to page URLs; this page is available as [Markdown](https://developer.harness.io/continuous-delivery/use-gitops/gitops-entities/environment.md).
# Environments
Learn how to create and manage GitOps environments in Harness.
This topic describes how to create and manage Harness GitOps environments. Environments represent your deployment targets and are used in ApplicationSets and PR pipelines to organize and track your GitOps deployments.
***
## What you will learn from this topic
* Understand what a [GitOps environment](#what-is-a-gitops-environment) is and how it fits into your deployments.
* How to [create a GitOps environment](#create-a-gitops-environment) and add GitOps clusters to it.
* How to configure and use [environment variables](#configure-environment-variables) in PR pipelines.
* How to [manage and delete GitOps environments](#manage-gitops-environments).
***
## What a GitOps environment is
A GitOps environment in Harness represents a deployment target (such as dev, staging, or production) and is associated with one or more GitOps clusters. Environments help you:
* Organize deployments by lifecycle stage (development, staging, production)
* Associate clusters with specific deployment targets
* Track application deployments across different environments
* Enable environment-specific configurations in PR pipelines
***
## Before you begin
Before creating a GitOps environment, ensure you have the following:
* **GitOps cluster**: At least one GitOps cluster configured. Go to [GitOps cluster quickstart](/continuous-delivery/use-gitops/get-started/harness-cd-git-ops-quickstart.md#step-3-add-a-harness-gitops-cluster) to add one.
* **Permissions**: Appropriate RBAC permissions to create environments.
***
## Create a GitOps environment
Perform the following steps to create a GitOps environment.
### Navigate to environments
1. In your Harness project, go to **Deployments** -> **Environments**.
2. Click **New Environment**.
### Configure environment details
1. **Name**: Enter a unique name for your environment (for example, `dev`, `staging`, `prod`).
2. **Environment Type**: Select the deployment type:
* **Production**: For production environments.
* **Pre-Production**: For development, staging, or testing environments.
3. Click **Save**.
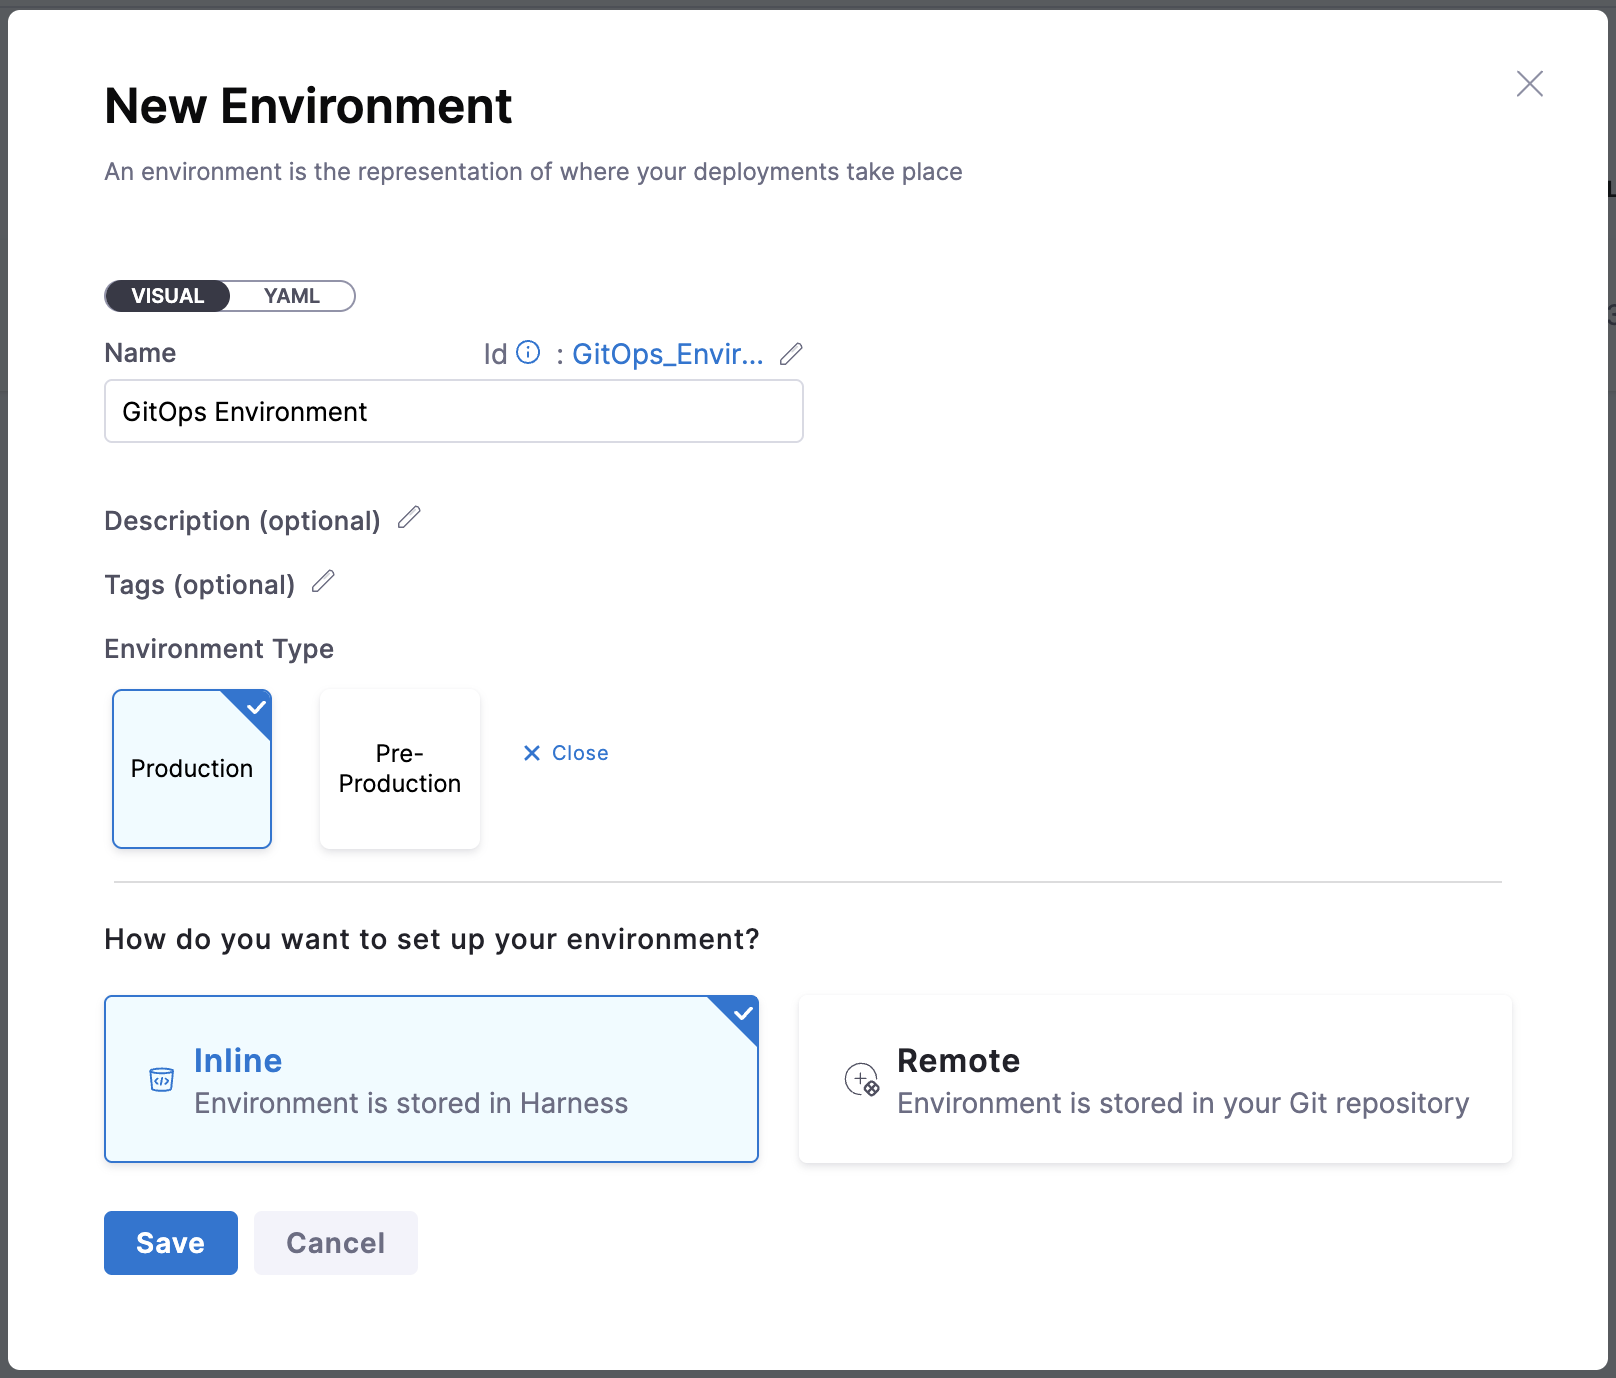
The environment is now created.
### Add GitOps clusters
1. In the environment details page, select the **GitOps Clusters** tab.
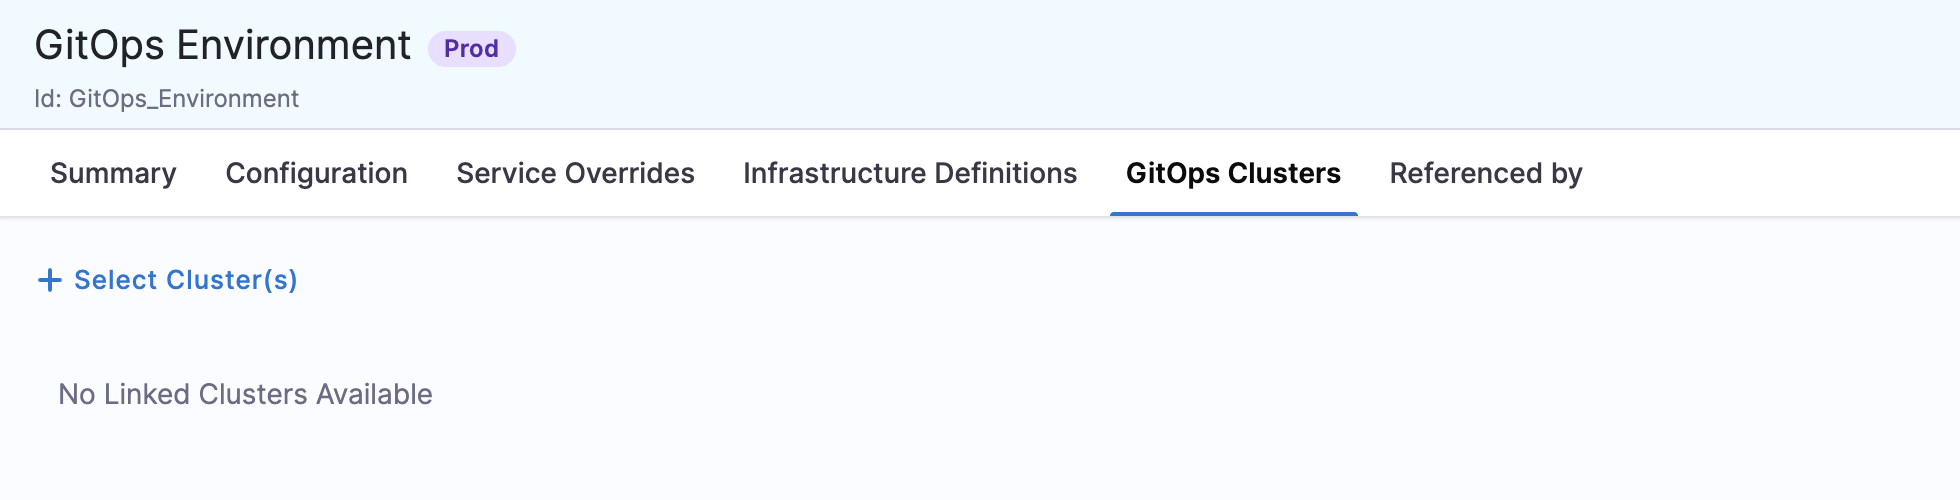
2. Click **Cluster** to add a cluster to this environment.
3. In the cluster selection dialog, you see all available clusters based on:
* **Project level**: Clusters created in the current project.
* **Organization level**: Clusters shared at the organization level.
* **Account level**: Clusters shared at the account level.
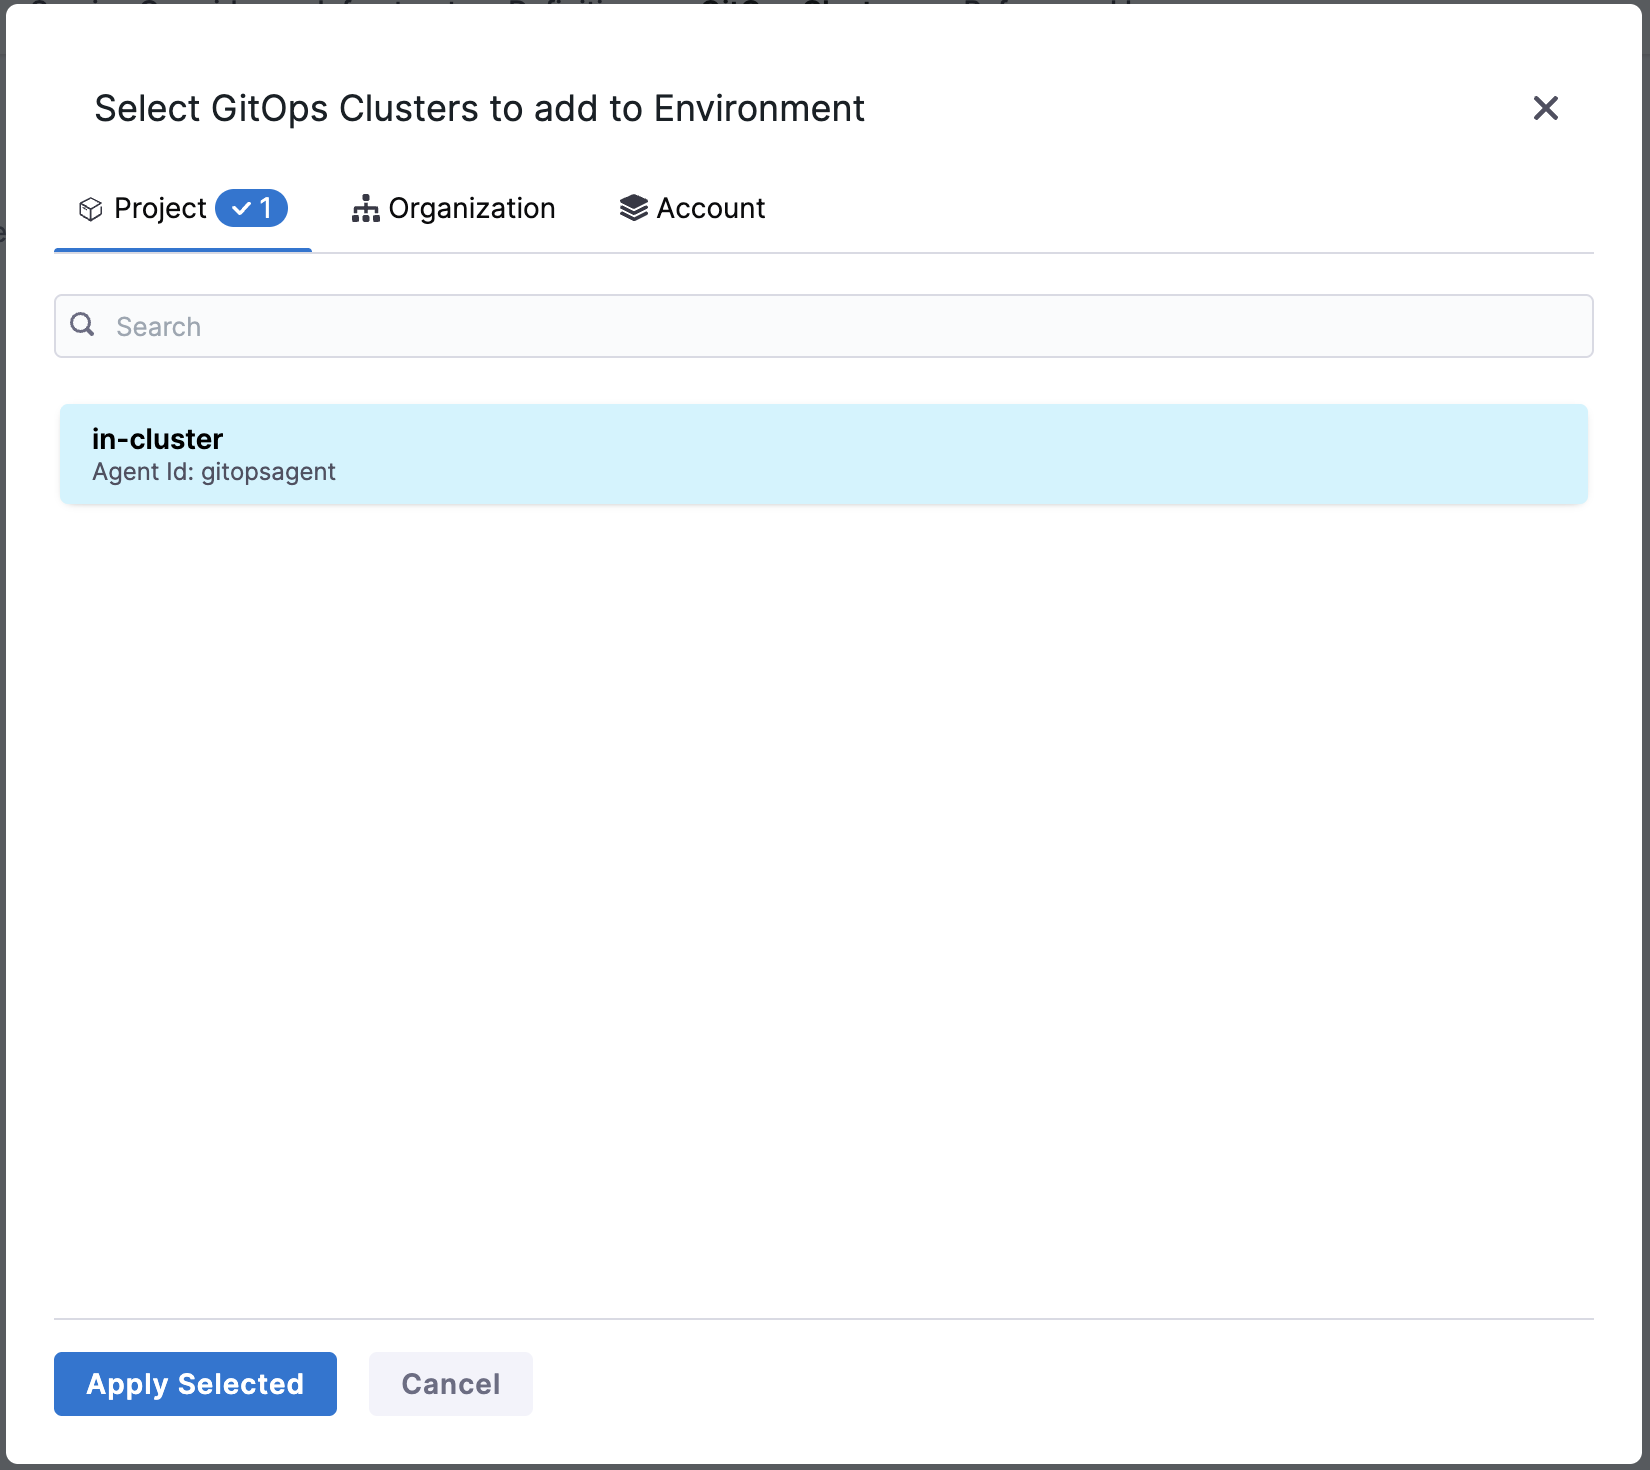
4. Select the clusters you want to associate with this environment.
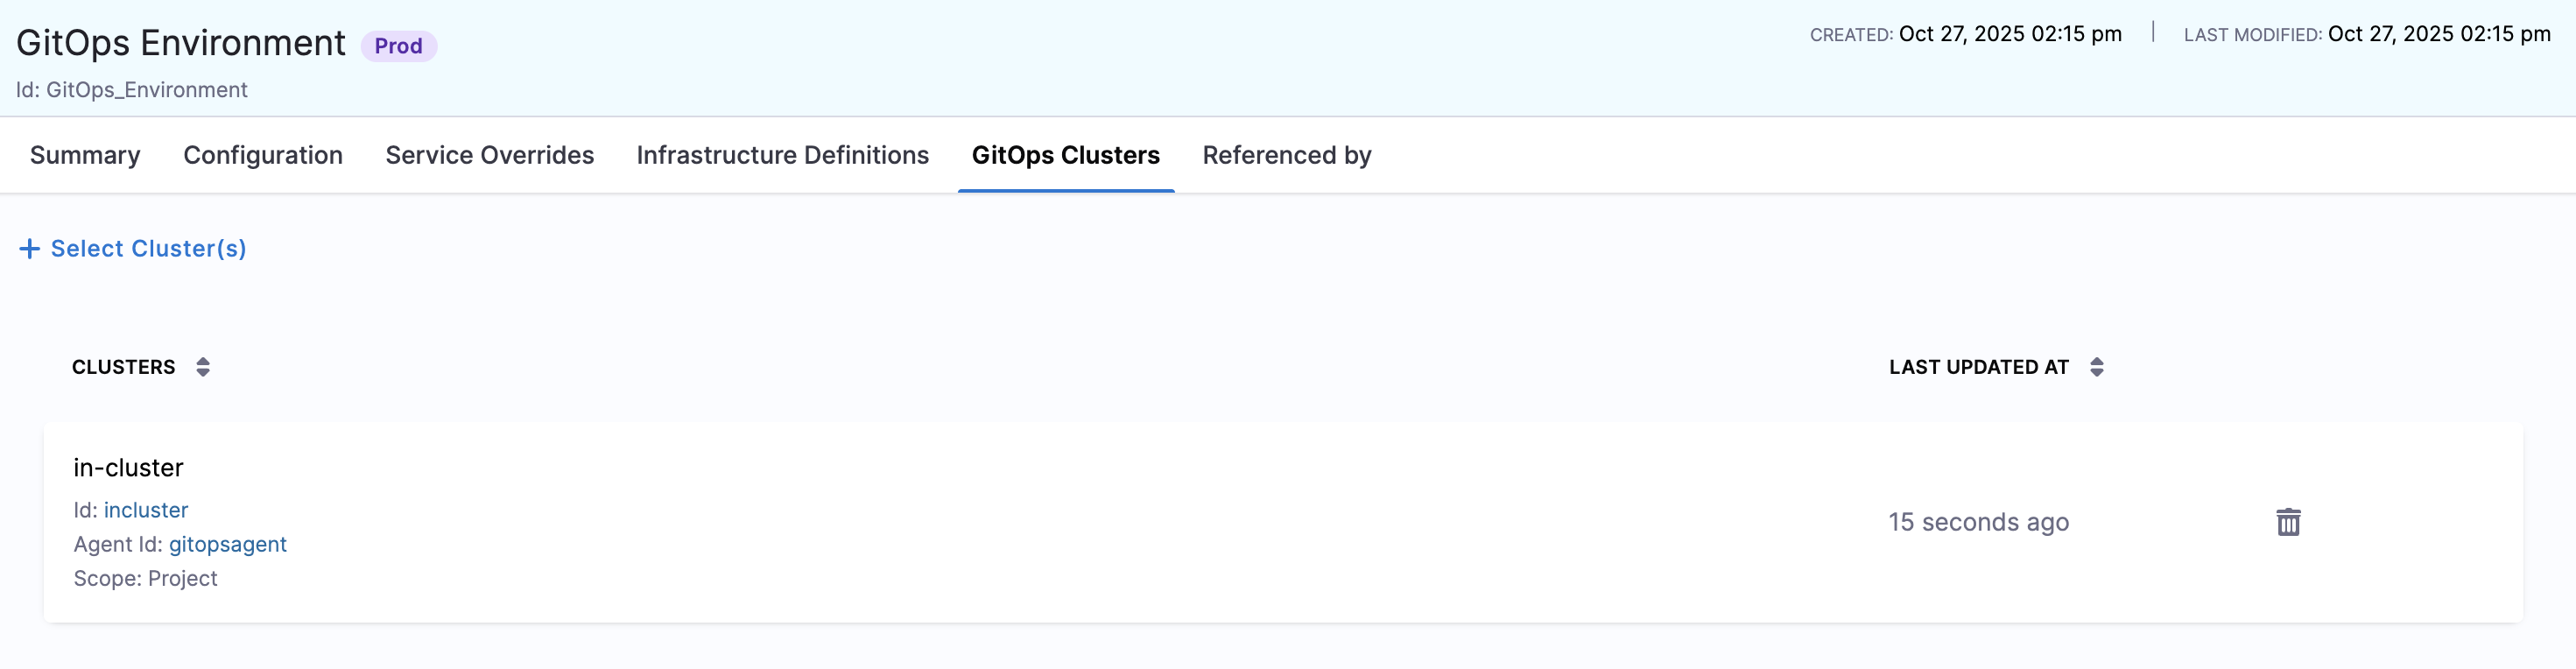
5. Click **Save**.
Your GitOps environment is ready to use.
***
## Configure environment variables
Environment variables allow you to define configuration values that you can use in PR pipelines to update application configuration files dynamically.
### Create environment variables
1. In the environment details page, select the **Configuration** tab.
2. Under **Advanced**, click **Variables** -> **New Variable Override**.
3. Enter the following details:
* **Name**: Enter the variable name (for example, `asset_id`, `image_tag`, `replicas`).
* **Type**: Select the variable type (String, Number, Secret).
* **Value**: Enter a default value, or select **Runtime Input** to provide the value during pipeline execution.
4. Click **Save**.
{% hint style="info" %}
**Variable usage in PR pipelines**
Environment variables are particularly useful in PR pipelines where you want to update specific key-value pairs in configuration files (like `config.json` or `config.yaml`). When you set a variable value as **Runtime Input**, Harness prompts you to provide the value when running the pipeline.
For example, if your `config.json` contains an `asset_id` key, you can create an environment variable with the same name and update it dynamically through the PR pipeline.
{% endhint %}
### Variable override priority
When using environment variables in PR pipelines:
* Values specified in the **Update Release Repo** step have the highest priority.
* Environment variables override service variables.
* Service variables have the lowest priority.
By default, the Update Release Repo step writes service and environment variables into the Release Repository file. To insert only the variables defined in the step, enable **Don't Propagate Pipeline Variables**. Go to [Update Release Repo](/continuous-delivery/use-gitops/pr-pipelines/pr-pipelines-basics.md#update-release-repo) to configure this option.
Go to [Service overrides](/continuous-delivery/use-continuous-delivery/cd-building-blocks/environments/service-overrides.md#override-priority) to review the full override priority behavior.
***
## Use GitOps environments
### In ApplicationSets
When creating an ApplicationSet, you select an environment in the **Overview** step. This automatically adds the `harness.io/envRef` label to your ApplicationSet, enabling:
* Environment-based tracking and filtering
* RBAC policies based on environments
* Integration with PR pipelines
### In PR pipelines
Environments play a key role in PR pipelines by enabling environment-specific configuration updates. When you configure a service with dynamic paths using the `<+env.name>` expression, Harness resolves this to the selected environment name at runtime.
**Environment name resolution**
For example, if your Git repository structure looks like this:
```
cluster-config/
├── engineering/
│ ├── dev/
│ │ └── config.json
│ └── prod/
│ └── config.json
```
And your service manifest path is configured as:
```
cluster-config/engineering/<+env.name>/config.json
```
When you run a PR pipeline and select the `dev` environment, Harness resolves the path to:
```
cluster-config/engineering/dev/config.json
```
This allows you to update configuration files for specific environments without creating separate services or pipelines for each environment.
{% hint style="info" %}
**Match environment names to Git paths**
Name your Harness environments to match your Git directory structure. This makes the `<+env.name>` expression resolution straightforward and reduces configuration errors.
{% endhint %}
***
## Manage GitOps environments
### View environment details
1. Go to **Deployments** -> **Environments**.
2. Select an environment to view its details.
3. The **GitOps Clusters** tab shows all clusters associated with this environment.
### Add or remove clusters
1. Go to the environment details page.
2. Select the **GitOps Clusters** tab.
3. To add a cluster, click **Cluster** and select from the available clusters.
4. To remove a cluster, click the **Delete** icon next to the cluster name.
### Delete an environment
1. Go to **Deployments** -> **Environments**.
2. Find the environment you want to delete.
3. Click the **More** icon next to the environment.
4. Select **Delete**.
5. Confirm the deletion.
{% hint style="warning" %}
**Associated resources are not deleted**
Deleting an environment does not delete the associated clusters or applications. However, ApplicationSets and pipelines referencing this environment may be affected.
{% endhint %}
***
## Best practices
Follow these recommendations to keep GitOps environments consistent and easy to manage.
* **Use descriptive names**: Name environments clearly (for example, `dev`, `staging`, `prod`) to avoid confusion.
* **Match environment names with Git paths**: If using dynamic paths in services, ensure environment names match your Git repository structure.
* **Organize by lifecycle**: Use Pre-Production for dev and staging, and Production for prod environments.
* **Associate appropriate clusters**: Only add clusters that are meant for that specific environment.
* **Use consistent naming**: Use the same environment naming convention across projects for easier management.
***
## Next steps
* [Create a GitOps service](/continuous-delivery/use-gitops/gitops-entities/service/service.md): Configure a service for GitOps deployments.
* [Create an ApplicationSet](/continuous-delivery/use-gitops/applicationsets/harness-git-ops-application-set-tutorial.md): Automate application generation across multiple clusters and repositories.
* [PR pipelines](/continuous-delivery/use-gitops/pr-pipelines/pr-pipelines-basics.md): Use pull request-based pipelines to manage GitOps deployments.
{% @harness-feedback/feedback %}