> For the complete documentation index, see [llms.txt](https://developer.harness.io/llms.txt). Markdown versions of documentation pages are available by appending `.md` to page URLs; this page is available as [Markdown](https://developer.harness.io/continuous-integration/troubleshooting-and-resources/tutorials-and-code-samples/mobile/e2e-ios-tutorial.md).
# Tutorial - React Native and iOS pipeline
Build and publish a React Native iOS app to TestFlight using Fastlane in Harness CI.
[Harness CI Cloud](/continuous-integration/use-harness-ci/use-harness-ci/set-up-build-infrastructure/use-harness-cloud-build-infrastructure.md) offers Mac infrastructure that you can use to build, test, and publish iOS applications.
[React Native](https://reactnative.dev/) is an open source UI framework from [Meta](https://www.meta.com/). React Native enables developers to write natively-rendered Android and iOS applications in the [React](https://react.dev/) framework.
This tutorial covers how to build, test, and publish a React Native iOS app to Apple's [TestFlight](https://testflight.apple.com/) service with [Fastlane](https://fastlane.tools/).
### Prerequisites
For this tutorial, you need the following:
* A Harness account with Harness CI Cloud Mac infrastructure enabled.
* Access to a Git provider.
* An Apple account enrolled in the [Apple Developer Program](https://developer.apple.com/support/compare-memberships/) or admin access to [App Store Connect](https://developer.apple.com/help/app-store-connect/get-started/app-store-connect-homepage) for an existing account.
{% hint style="info" %}
Currently, macOS platforms for Harness Cloud are behind a feature flag with limited availability. You can [submit a request to enable the feature](https://forms.gle/CWCcuE3nxqEdFJcZ6).
{% endhint %}
### Create React Native app
{% hint style="info" %}
Some of the steps demonstrated in this tutorial are also available in the [React Native quickstart guide](https://reactnative.dev/docs/environment-setup?guide=native). More details are provided for those who are new to React Native.
{% endhint %}
1. Generate a sample project with the [react-native-cli](https://github.com/react-native-community/cli/tree/v12.3.6?tab=readme-ov-file#creating-a-new-react-native-project).
```
npx react-native@0.73.6 init --package-name PACKAGE_NAME APP_NAME
```
Passing `--package-name PACKAGE_NAME` ensures a unique [Bundle ID](https://developer.apple.com/documentation/appstoreconnectapi/bundle_ids) for the application. `PACKAGE_NAME` should be in reverse-DNS format.
For example, since Apple owns [apple.com](http://apple.com/), all Apple [bundle IDs](https://support.apple.com/en-gb/guide/deployment/depece748c41/web) are prefixed with `com.apple.`.
Your app's bundle ID must be a [uniform type identifier](https://developer.apple.com/documentation/uniformtypeidentifiers) (UTI) and case insensitive.
`APP_NAME` is the name of your application, it must be alphanumeric and less than 30 characters.
2. Answer the necessary prompts.
### iOS simulator
1. Change to the application directory
```
cd APP_NAME
```
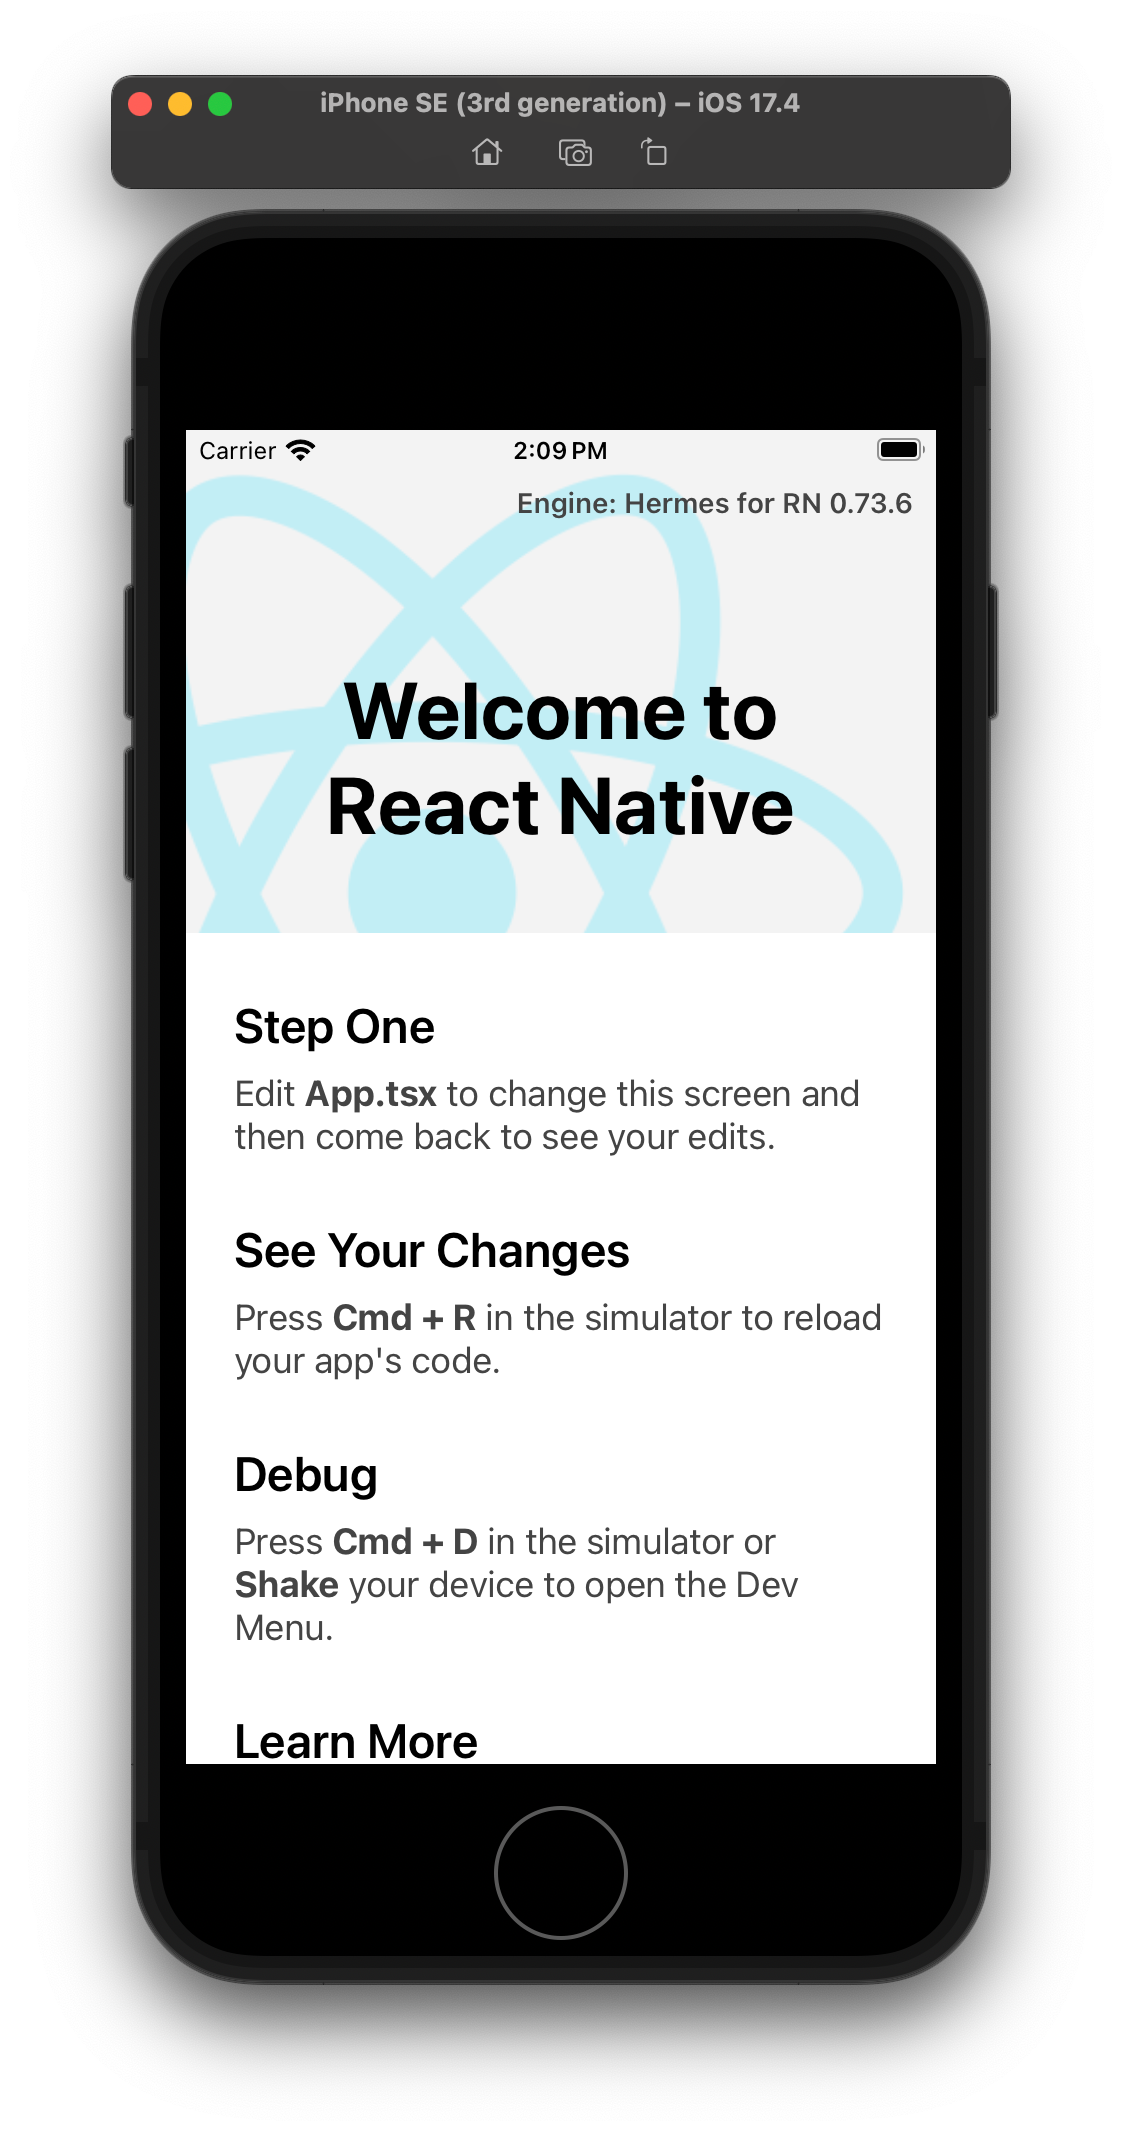
2. Run your app in the iOS Simulator.
```
npm run ios
```
The app takes a few minutes to build and install the app in the simulator.
Changes to the `App.tsx` file are immediately reflected in the simulator.
### Git repository
1. Create a new repository in your Git provider, and then commit and push the contents of your application.
### App icons
This sample application will not have an [app icon](https://developer.apple.com/design/human-interface-guidelines/app-icons); however, an icon is required to submit the app to TestFlight.
1. Open `ios/APP_NAME.xcodeproj` in Xcode, and then select **Images** and **AppIcon**.

2. Generate a set of icons with a service like [appicon.co](http://appicon.co/), and then drag each generated icon into the appropriate location.
3. Commit and push these changes to your Git repository.
### Fastlane
[Fastlane](https://fastlane.tools/) is a command line tool that helps automate beta deployments and releases for mobile applications.
1. Follow the [setup guide](https://docs.fastlane.tools/getting-started/ios/setup/) to configure Fastlane in your app's `ios` directory. When running `fastlane init`, choose the "Manual setup" option. This creates a `fastlane` directory with two files: `Appfile` and `Fastfile`.
#### Appfile
1. At a minimum, you must set `app_identifier` and `apple_id` in `fastlane/Appfile`.
`app_identifier` is the Bundle ID of the app (referred to as `PACKAGE_NAME` in the `init` command in [Create React Native app](#create-react-native-app)).
`apple_id` is the Apple email address used to authenticate when publishing the app.
These values can be hard-coded or they can passed as environment variables, for example:
```
app_identifier ENV["APP_BUNDLE_ID"]
apple_id ENV["APPLE_USERNAME"]
```
2. If you have different credentials for App Store Connect and the Apple Developer, you must set `team_id` and `itc_team_id`.
Go to [Fastlane's Appfile documentation](https://docs.fastlane.tools/advanced/Appfile/#appfile) for details on writing this file for your App Store Connect account.
3. Commit and push all changes to your Git repository.
#### Match
Fastlane has an [action](https://docs.fastlane.tools/actions/) called [match](https://docs.fastlane.tools/actions/match/) that makes it easier to share signing credentials across teams and to your Harness pipeline.
`match` creates the required certificates and provisioning profiles, and then stores them in a separate Git repository, Google Cloud storage, or Amazon S3 bucket. Every team member with access to the selected storage can use those credentials for code signing.
1. Follow the [setup guide](https://docs.fastlane.tools/actions/match/#setup) to configure match in your app project's `ios` directory. This creates the `fastlane/Matchfile` file.
{% hint style="info" %}
The next step requires **Developer** permissions in your App Store Connect account.
{% endhint %}
2. When using a Git repository for storage, you are prompted for a password to encrypt all files in the repository. **Securely store this password**, and then [create a Harness text secret](/harness-platform/use-harness-platform/secrets/add-use-text-secrets.md) named `MATCH_PASSWORD` containing this password in your project.
3. Commit and push all changes to your Git repository.
#### App Store Connect API Key
1. Follow Apple's documentation to [Create API Keys for App Store Connect API](https://developer.apple.com/documentation/appstoreconnectapi/creating_api_keys_for_app_store_connect_api) to create a *Team Key*. An *Individual Key* will not work.
{% hint style="info" %}
This step requires **Admin** permissions in your App Store Connect account.
{% endhint %}
2. Store the *Issuer ID* as a [text secret](/harness-platform/use-harness-platform/secrets/add-use-text-secrets.md) named `APPLE_API_KEY_ISSUER_ID` in your project.
3. Store the *Key ID* as a [text secret](/harness-platform/use-harness-platform/secrets/add-use-text-secrets.md) named `APPLE_API_KEY_ID` in your project.
The API key itself is a file, so it must be base64 encoded before it can be stored as a secret.
4. Save the API key to a file (such as `api-key.p8`), and then encode it using your terminal. For example:
```
cat api-key.p8 | base64
```
5. Save the encoded string as a [text secret](/harness-platform/use-harness-platform/secrets/add-use-text-secrets.md) named `APPLE_API_KEY_CONTENT` in your project.
#### Fastfile
The `fastlane/Fastfile` file stores the automation configuration that you can run with Fastlane. The file consists of [lanes](https://docs.fastlane.tools/advanced/lanes/#lanes) that define each step in your app's workflow.
In this example, you will create lanes to build and sign the app, and then publish it to Apple's [TestFlight](https://developer.apple.com/testflight/) service with a unique build number based on the Harness pipeline execution ID.
Your `fastlane/Fastfile` currently looks like this:
```ruby
default_platform(:ios)
platform :ios do
desc "Description of what the lane does"
lane :custom_lane do
# add actions here: https://docs.fastlane.tools/actions
end
end
```
Modify this file to add lanes to the `platform: ios` section.
1. Add a lane to run an action that [loads the Apple Store Connect API key information](https://docs.fastlane.tools/actions/app_store_connect_api_key/):
```ruby
desc "Load ASC API Key information to use in subsequent lanes"
lane :load_asc_api_key do
app_store_connect_api_key(
key_id: ENV["APPLE_API_KEY_ID"],
issuer_id: ENV["APPLE_API_KEY_ISSUER_ID"],
key_content: ENV["APPLE_API_KEY_CONTENT"],
is_key_content_base64: true,
in_house: false
)
end
```
2. Add a lane to run the [match action](https://docs.fastlane.tools/actions/match/):
```ruby
desc "Uses match to pull in developer profile and certificates from git repo specified in Matchfile"
lane :prep_build_release do
api_key = lane_context[SharedValues::APP_STORE_CONNECT_API_KEY]
match(type: "appstore", api_key: api_key)
end
```
3. Add a lane to run the [deliver action](https://docs.fastlane.tools/actions/deliver/) to upload the app to TestFlight:
```ruby
desc "Upload to TestFlight / ASC"
lane :deliver_to_testflight do
api_key = lane_context[SharedValues::APP_STORE_CONNECT_API_KEY]
deliver(
api_key: api_key,
skip_screenshots: true,
skip_metadata: true,
skip_app_version_update: true,
force: true,
run_precheck_before_submit: false
)
end
```
4. Add a lane to run all lanes and publish the app to TestFlight. This lane uses the [update\_code\_signing\_settings](https://docs.fastlane.tools/actions/update_code_signing_settings/), [increment\_build\_number](https://docs.fastlane.tools/actions/increment_build_number/), and [build\_app](https://docs.fastlane.tools/actions/build_app/) actions.
```ruby
desc "Push a new beta build to TestFlight"
lane :beta do
setup_ci if ENV['CI']
load_asc_api_key
prep_build_release
# Read app_identifier from Appfile
app_identifier = CredentialsManager::AppfileConfig.try_fetch_value(:app_identifier)
profile_name = "match AppStore PACKAGE_NAME"
output_name = "APP_NAME"
# turn off automatic signing, signing is handled by 'match'
update_code_signing_settings(
use_automatic_signing: false,
targets: ["APP_NAME"],
code_sign_identity: "Apple Distribution",
bundle_identifier: app_identifier,
profile_name: profile_name,
build_configurations: ["Release"],
team_id: "TEAM_ID"
)
# Set the build number based on the Harness pipeline execution ID
increment_build_number(
build_number: ENV["HARNESS_BUILD_ID"],
)
build_app(
workspace: "APP_NAME.xcworkspace",
scheme: "APP_NAME",
output_name: output_name,
configuration: "Release",
export_options: {
method: "app-store"
}
)
deliver_to_testflight
end
```
Replace instances of `APP_NAME` and `PACKAGE_NAME` with the values from the [init command](#create-react-native-app).
Replace `TEAM_ID` with your App Store Connect team ID.
5. Add a lane that builds, but does not publish, the app. You can use this lane in pull request pipelines to ensure the app can be built successfully.
```ruby
desc "Build without code sign. Just to see if the build is working."
lane :build do
build_app(
workspace: "APP_NAME.xcworkspace",
scheme: "APP_NAME",
skip_package_ipa: true,
skip_archive: true,
skip_codesigning: true,
silent: true,
clean: true
)
end
```
Replace instances of `APP_NAME` with the value from the [init command](#create-react-native-app).
6. Commit and push all changes to your Git repository.
### Create Harness pipeline
1. In your Harness account, select a Harness project, then select the Continuous Integration module.
2. Use the **Get Started** wizard to connect your Git provider, activate your iOS app repository, and create an initial pipeline.
#### Add security scans stage
1. Add a Build stage to your pipeline named `Security`.
2. On the stage **Infrastructure** tab, select the Harness CI Cloud **Linux** platform.
3. Switch to the YAML editor using the switch at the top of the Pipeline Studio.
4. In the pipeline YAML editor, add a `Run` step named `NPM Install`:
```yaml
- step:
type: Run
name: NPM Install
identifier: NPM_Install
spec:
shell: Sh
command: |-
mkdir $HOME/nodejs
curl -L https://nodejs.org/dist/v${NODE_VERSION}/node-v${NODE_VERSION}-linux-x64.tar.xz | tar xJ -C $HOME/nodejs
export PATH=$HOME/nodejs/node-v${NODE_VERSION}-linux-x64/bin:$PATH
npm install --global yarn
yarn
envVariables:
NODE_VERSION: 18.16.0
```
5. Add [parallel](/harness-platform/use-harness-platform/pipelines/looping-strategies/looping-strategies-matrix-repeat-and-parallelism.md) steps for [Owasp](/security-testing-orchestration/use-sto/sto-scanner-configuration/owasp-scanner-reference.md) and [Gitleaks](/security-testing-orchestration/use-sto/sto-scanner-configuration/gitleaks-scanner-reference.md) scans.
```yaml
- parallel:
- step:
type: Owasp
name: Owasp
identifier: Owasp
spec:
mode: orchestration
config: default
target:
type: repository
name: iOS app
variant: main
advanced:
log:
level: info
fail_on_severity: none
- step:
type: Gitleaks
name: Gitleaks
identifier: Gitleaks
spec:
mode: orchestration
config: default
target:
type: repository
detection: auto
advanced:
log:
level: info
fail_on_severity: low
```
#### Add unit tests
You will make some code changes related to unit tests. Your project will have a `tests/App.test.tsx` file with one [Jest](https://jestjs.io/) unit test.
1. Run the tests from the root of your repository.
```
npm test
```
You will get the following output:
```
> io.harness.exampleapp@0.0.1 test
> jest
PASS __tests__/App.test.tsx
✓ renders correctly (97 ms)
Test Suites: 1 passed, 1 total
Tests: 1 passed, 1 total
Snapshots: 0 total
Time: 0.495 s, estimated 1 s
Ran all test suites.
```
Harness supports test results that are in [JUnit XML format](/continuous-integration/use-harness-ci/use-harness-ci/run-tests/test-report-ref.md), which is supported by jest-junit.
1. Install jest-junit.
```
npm install --save-dev jest-junit
```
2. Edit the file `jest.config.js`.
```
module.exports = {
preset: 'react-native',
reporters: [ "default", "jest-junit" ],
};
```
3. Run the tests again.
```
npm test
```
The tests generate a `junit.xml` file that Harness can ingest.
4. Optionally, you can optionally add `junit.xml` to your repository's `.gitignore` file.
There is no need to check this file into your repository, since it is automatically generated.
5. Commit and push all changes to your Git repository.
#### Build stage
1. Add a Build stage to your pipeline named `Build`.
2. On the stage **Infrastructure** tab, select the Harness CI Cloud **macOS** platform.
3. Switch to the YAML editor using the switch at the top of the Pipeline Studio.
4. In the pipeline YAML editor, add a `Run` step named `Run NPM Tests`.
```yaml
- step:
type: Run
name: Run NPM Tests
identifier: Run_NPM_Tests
spec:
shell: Sh
reports:
type: JUnit
spec:
paths:
- junit.xml
command: |
yarn
npm test
```
5. Add a `Run` step named `Install Build Dependencies`.
```yaml
- step:
identifier: Install_Build_Dependencies
type: Run
name: Install Build Dependencies
spec:
shell: Sh
envVariables:
BUNDLE_JOBS: "4"
BUNDLE_RETRY: "3"
command: |-
cd ios
gem update --system
gem install bundler
bundle install
gem install cocoapods
chmod 0600 /Users/anka/.netrc
pod install
```
6. Add a `Run` step named `Build`.
```yaml
- step:
identifier: Build
type: Run
name: Build
spec:
shell: Bash
envVariables:
CI: "true"
APPLE_USERNAME: <+secrets.getValue("APPLE_USERNAME")>
APPLE_API_KEY_ID: <+secrets.getValue("APPLE_API_KEY_ID")>
APPLE_API_KEY_ISSUER_ID: <+secrets.getValue("APPLE_API_KEY_ISSUER_ID")>
APPLE_API_KEY_CONTENT: <+secrets.getValue("APPLE_API_KEY_CONTENT")>
MATCH_PASSWORD: <+secrets.getValue("MATCH_PASSWORD")>
MATCH_USERNAME: APPLE_ID_USERNAME
command: |-
cd ios
# Pin Xcode version
sudo xcode-select -switch /Applications/Xcode_15.2.app
if [ "$CI_BUILD_EVENT" == "pull_request" ]; then
FASTLANE_LANE=build
else
FASTLANE_LANE=beta
fi
bundle exec fastlane $FASTLANE_LANE
```
Replace `APPLE_ID_USERNAME` with your Apple ID username.
For example, if you are storing your certificates in Git, you will also need to pass MATCH_GIT_BASIC_AUTHORIZATION.
### Trigger pipeline
1. Save and run the pipeline.
2. Observe the [build logs](/continuous-integration/use-harness-ci/use-harness-ci/viewing-builds.md) while the pipeline runs.
Here is an example of the **Security Scans** stage execution:

And this is an example of the **Build** stage execution:

When complete, Fastlane prints a success message:
```
fastlane.tools finished successfully 🎉
```
3. To see your published build:
1. Login to `https://appstoreconnect.apple.com`.
2. Select **Apps**.
3. Select your app from the list.
4. Select the **TestFlight** tab.
5. Your app's build appears in the list.
### Next steps
* Learn about [TestFlight](https://testflight.apple.com/), and install your app on your iOS devices.
* [Invite testers](https://developer.apple.com/help/app-store-connect/test-a-beta-version/invite-external-testers/) to try your app on their devices.
* Learn how to [submit your app for review](https://developer.apple.com/help/app-store-connect/manage-submissions-to-app-review/submit-for-review/).
{% @harness-feedback/feedback %}