runner-delegate-aws
Prerequisites
- Ensure you've enabled the feature flag
CDE_HYBRID_ENABLEDin your Harness account since Self Hosted Gitspaces are currently available behind this feature flag. Contact Harness Support to enable this feature flag. - Ensure you’ve read through the Overview & Key Concepts of Self Hosted Gitspaces. This will help you gain a deeper understanding of the basic concepts and setup steps.
- Please make sure you have completed the steps mentioned in Configuring the Harness Gitspaces terraform module. This step is a mandatory prerequisite as this step sets up the AWS infrastructure and generates the
pool.yamlfile which is required to host and setup the VM Runner. - Only users with powerUserAccess permissions as an AWS user can configure self hosted Gitspaces in your AWS infrastructure. Go to PowerUserAccess to learn more about the same.
Key Concepts
-
Amazon EC2 Instance: An Amazon EC2 instance is a virtual server in the AWS cloud environment. You'll need an EC2 instance to setup the VM runner and install Harness Delegate. Follow the steps in the given documentation to create an EC2 instance with specific configuration as mentioned. This EC2 instance uses a private VPC and subnet and doesn't allow any public IPs to ensure data is always secure and private with no route to the internet gateway. Read more about Amazon EC2 Instances.
-
Security Group: A Security Group acts as a virtual firewall for your EC2 instances to control inbound and outbound traffic. Inbound rules control the incoming traffic to your instance, and outbound rules control the outgoing traffic from your instance. Read more about Amazon EC2 Security Groups.
-
Target Group: A Target Group is a set of resources (in this case EC2 instances) registered as Targets. This is used to define the targets that a Load Balancer will send traffic to. In this case, we'll be using a Network Load Balancer to send traffic to the EC2 instance. Thus we will register the EC2 instance created in this target group and will define the specific protocol and port for the target. Read more about Amazon EC2 Target Groups.
-
Listener: A Listener is configured on the Load Balancer, it is used to listen for the incoming connections on the defined port/protocol. When you create a listener, you specify a target group for its default action. Traffic is forwarded to the target group specified in the listener rule. Read more about Amazon EC2 Listeners.
Setting up Runner & Installing Delegate
1. Create an AWS EC2 Instance
To host the VM Runner and Harness Delegate, an EC2 instance is required. Follow the steps mentioned here to learn more on how to launch an AWS EC2 Instance.
You'll need to configure the Network configuration to the following configuration:
- Key Pair: Under Key pair (login), for Key pair name, choose an existing key pair or choose Create new key pair to create your first key pair.
- VPC: Select the VPC network for your EC2 instance. You'll be able to find a VPC with your infrastructure name given while provisioning the AWS cloud infrastructure via Harness UI. For example, if the infrastructure name is
aws-infra-1you'll be able to find a VPC with the nameaws-infra-1-network. - Subnet: From the given options, select the
private-subnetto ensure the network interface is located in a private subnet. - Auto-assign Public IP:
Disablethis field to ensure that no public IP is automatically assigned to the primary network interface of the instance. - Firewall (Security Group): Select the
gateway-sgsecurity group to ensure only specific traffic is allowed to reach the instance. You'll be able to find one with the same infrastructure name given while provisioning the AWS cloud infrastructure via Harness UI. For example, if the infrastructure name isaws-infra-1you'll be able to find a security group with the nameaws-infra-1-gateway-sg. - IAM Instance Profile: This profile is required for the instance. You'll be able to find a profile with your infrastructure name details given while provisioning the AWS cloud infrastructure via Harness UI. For example, if the infrastructure name is
aws-infra-1you'll be able to find a profile with the nameaws-infra-1-provisioner-instance-profile.
Launch an AWS EC2 instance with the above network configuration, you can choose and customise the other details required accordingly.
2. Create an AWS Target Group
You'll have to create a Target Group for the Load Balancer. This target group will have EC2 Instances as the target type. Follow the steps mentioned here to learn more on how to create a new Target Group. Use the following configuration to create one:
- Target Type: Select
Instancesfor the target type. - Protocol: This is the protocol required for load balancer-to-target communication. Enter
TCPhere to allow the load balancer to communicate with the target instance. - Port: This is the port number where targets receive traffic. Enter
22to allow SSH traffic. - VPC: This is the field where VPC with the instances to be included in the target group is required. Select the VPC configured earlier during EC2 instance creation.
- Add Targets: If the target type is Instances, select one or more instances, enter one or more ports, and then choose Include as pending below.
Create a Target Group with the above configuration and save the details.
3. Add a Listener in Load Balancer
You'll have to add a Listener in the Load Balancer to allow traffic to reach the target group. Follow the steps mentioned here to learn more on how to add a listener. Use the following configuration to add one:
- Load Balancer: From the Load Balancers screen, select the NLB load balancer.
- Listener Protocol & Port: A listener checks for connection requests using the protocol and port that you configure here. Select
TCPas the protocol and enter any port number as the port. - Default Action: Traffic received by a Network Load Balancer listener is forwarded to the selected target group. Select the target group you created in the previous step.
Create a Listener with the above configuration and save the details.
4. Update Security Group Rules
You'll have to update the gateway-sg security group rules (the one selected earlier while creating an EC2 instance) to allow traffic to reach the Load Balancer. Follow the steps mentioned here to learn more on how to update the security group rules. Use the following configuration to update one:
- Inbound Rules: Add a new rule to allow traffic on the port used by the Load Balancer.
- Type: Select Custom TCP in the Inbound Rule Type.
- Port Range: Enter the port number used for creating the Listener on the Load Balancer.
Save the inbound rules for the security group.
5. SSH into the AWS EC2 Instance
Now that your Instance is up and running, all you have to do is connect to your instance using a SSH client. Refer to the documentation to connect to your instance. To use a ssh client, you need to use the following ssh command to connect to your instance:
ssh -i <PATH TO YOUR PRIVATE KEY> ec2-user@<REGION_SUBDOMAIN> -p <LISTENER_PORT_NUMBER>
6. Install Docker
You'll need Docker installed in your AWS VM instance to configure self hosted Gitspaces. Refer to this installation guide on how to install Docker in your VM instance.
7. Start the VM Runner
Now that you're into the VM instance and you've installed Docker, follow the given steps to start the Runner:
- Create a
/runnerdirectory on your VM instance andcdinto it:
mkdir -p /runner

cd /runner
- In the
/runnerdirectory, create a new file calledpool.yamlin your instance and copy the same YAML file content as you had when you configured the Terraform Module. Refer to Setup Terraform Module to learn more about the same. - Run the following command to create a new network:
docker network create harness
- Run the following command to start a Runner in your VM instance, make sure you have changed the
pool.yamlfile name as the same name you have saved the file with:
docker run -d \
  --network harness \
  --hostname vm-runner \
  -v /runner:/runner \
  -p 3000:3000 \
  --platform linux/amd64 \
  drone/drone-runner-aws:latest \
  delegate \
  --pool /runner/<POOL.YAML FILE>
This starts a VM Runner in your VM which will interact with the Harness Delegate to complete all the various tasks involved in connecting the Harness Control Plane to your self hosted Infrastructure.
8. Install the Delegate
Now that you have the VM Runner setup and started, you can continue and install Harness Docker Delegate in your VM instance to be able to establish a seamless connection between the Harness Control Plane and your GCP infrastructure. To learn more about delegates and delegate installation, go to Delegate installation overview. Please refer to the detailed steps below to install the Delegate:
Please ensure you are installing the Docker Delegate in your VM instance. For now, Self Hosted Gitspaces will only work with Delegates created at the Account level.
-
In Harness, go to Account Settings, select Account Resources, and then select Delegates.
-
Select New Delegate or Install Delegate.
-
Select Docker.
-
Enter a Delegate Name.
-
Copy the Delegate install command and run it in your GCP VM.
-
You can customise the
cpusandmemoryfields and increase the spec based on the expected load. -
Make sure the
ACCOUNT_IDandDELEGATE_TOKENare filled in the given command. These are mandatory parameters. -
DELEGATE_TAGSis a mandatory parameter. Make sure to add the tags to the delegate install command. -
Add the
RUNNER_URLby adding this snippet into your delegate install command:-e RUNNER_URL="http://vm-runner:3000/" \to ensure the delegate has the runner url. -
Ensure the
MANAGER_HOST_AND_PORTis filled in with the latest delegate version.
Your final install command will look something like this:
docker run -d \
  --network harness \
  --cpus=1 \
  --memory=2g \
  -e DELEGATE_NAME=docker-delegate \
  -e DEPLOY_MODE=KUBERNETES_ONPREM \
  -e NEXT_GEN="true" \
  -e DELEGATE_TYPE="DOCKER" \
  -e ACCOUNT_ID=<ACCOUNT_ID_COPIED_FROM_THE_UI_COMMAND> \
  -e DELEGATE_TOKEN=<DELEGATE_TOKEN_COPIED_FROM_THE_UI_COMMAND>= \
  -e DELEGATE_TAGS=<TAGS TO BE ADDED> \
  -e RUNNER_URL="http://vm-runner:3000/" \
  -e MANAGER_HOST_AND_PORT=https://app.harness.io \
  us-west1-docker.pkg.dev/gar-setup/docker/delegate:25.03.85504
Once your Delegate is up and running, you have successfully setup the infrastructure and established a successful connection between the Harness Control Plane and your infrastructure.
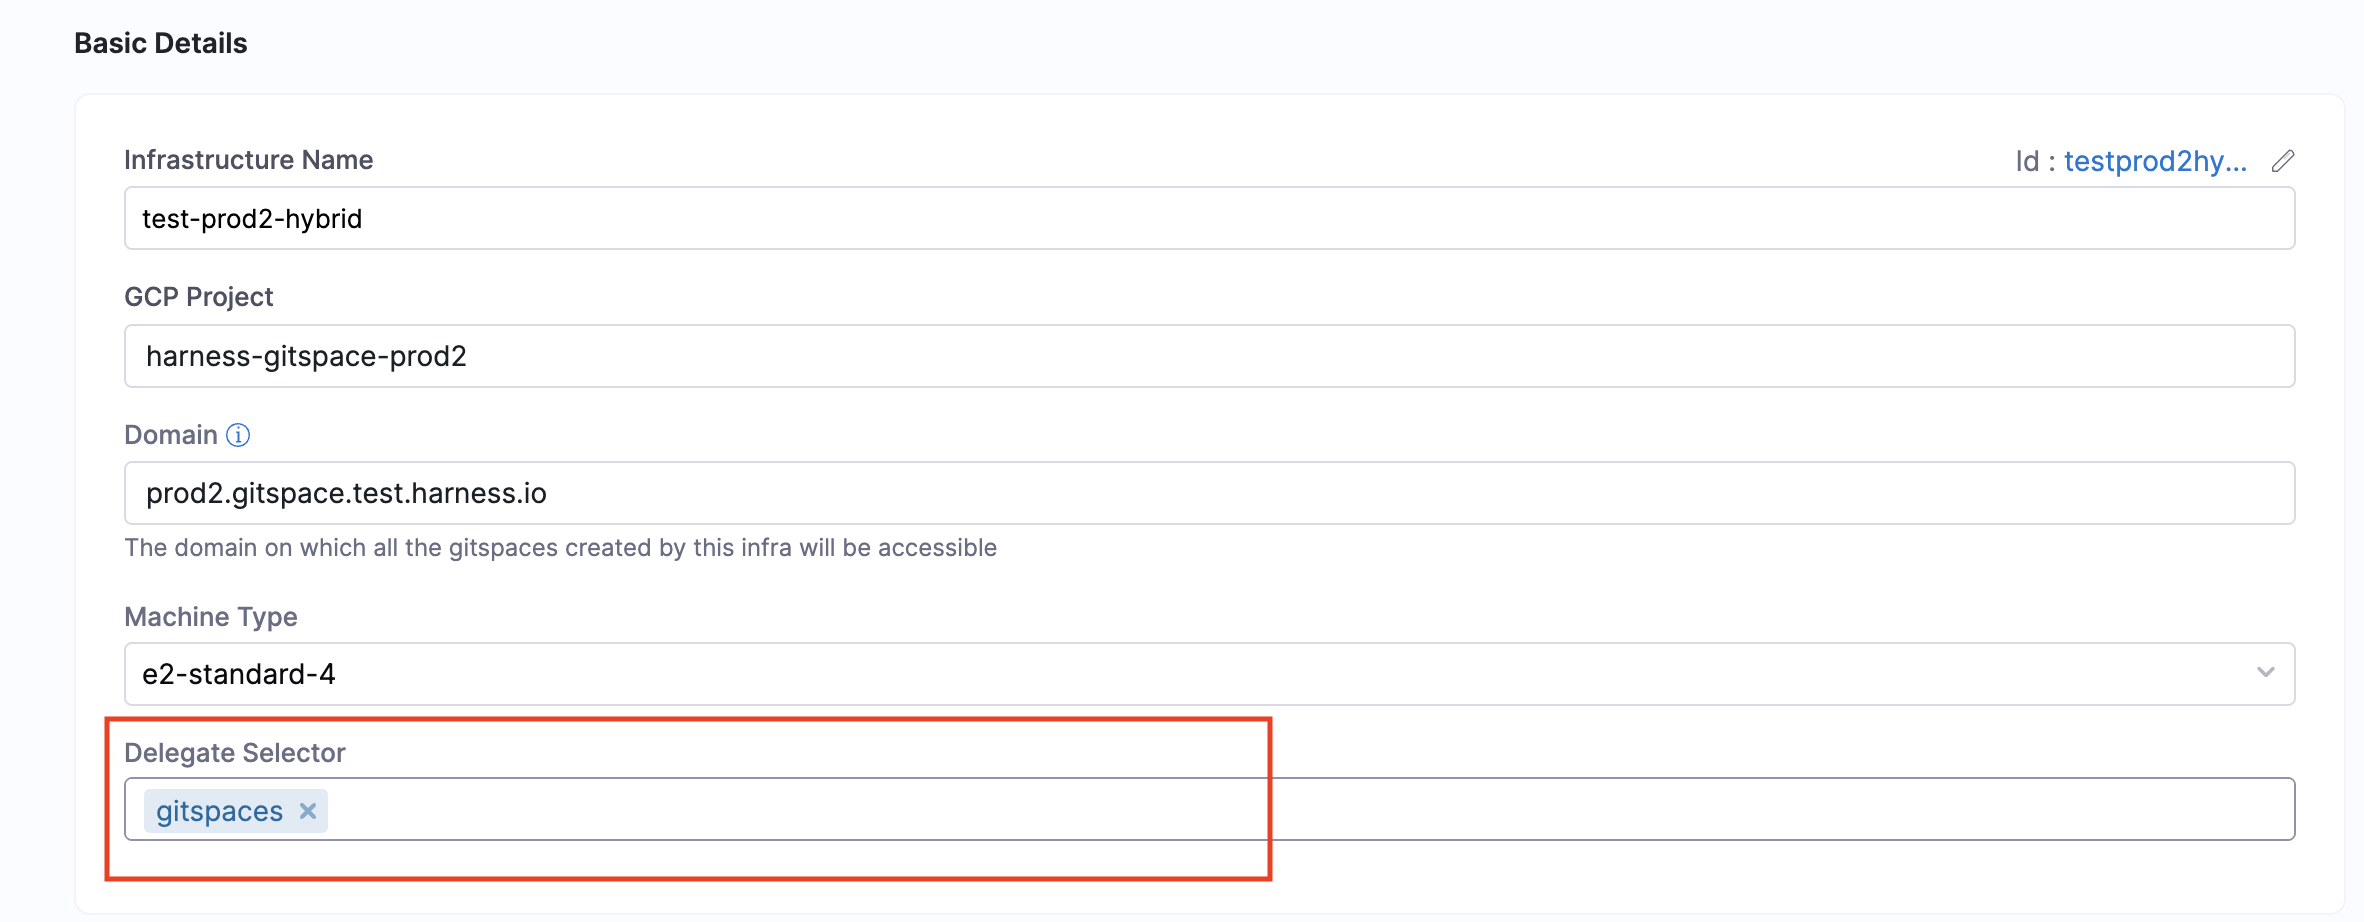
9. Update the Delegate Selector
Once you’ve installed and set up your Delegate, enter the specific Delegate Name in the Delegate Selector field within your Gitspace Infrastructure UI. You can either add it while configuring the Gitspace Infra UI or once you've setup everything, you can edit the infrastructure and add a specific Delegate. Read more about how to use Delegate Selector.
You can also select Delegates in the Delegate Selector field using Delegate Tags. Read more about Delegate Tags.
Next Steps
Now that you’ve successfully installed and configured the Delegate, you’re ready to create machines and self hosted Gitspaces within your AWS cloud infrastructure. Proceed to the Create Machines guide to get started.