runner-delegate-gcp
Prerequisites
- Ensure you've enabled the feature flag
CDE_HYBRID_ENABLEDin your Harness account since Self Hosted Gitspaces are currently available behind this feature flag. Contact Harness Support to enable this feature flag. - Ensure you’ve read through the Overview & Key Concepts of Self Hosted Gitspaces. This will help you gain a deeper understanding of the basic concepts and setup steps.
- Please make sure you have completed the steps mentioned in Configuring the Harness Gitspaces terraform module. This step is a mandatory prerequisite as this step sets up the GCP infrastructure, creates a GCP VM instance in your infra and generates the
pool.yamlfile which is required to host and setup the VM Runner. - Ensure you have the GCP VM instance active and running in your GCP project. (This VM instance is created while your terraform configuration is configured and setup.) Please refer to this documentation to understand more about configuring this Terraform Module.
Setting up VM Runner and Delegate
You can follow this detailed guide (as described below) to setup Runner and install Harness Delegate in your infrastructure:
1. SSH into the GCP VM Instance
To connect to a VM with SSH, you'll need your SSH Key to propogate into your VM. Make sure you have a fully functioning SSH Key added into your GCP Console. Refer to this guide to learn more on how to add a SSH Key to VMs.
You'll have to SSH into your GCP VM instance to host your Runner and Delegate there. In order to do that, you can follow the given steps:
- Go to your GCP Console and go to VM Instances. You can find your specific VM instance created as per the details you entered while configuring your infrastructure in the Harness UI. Click on that instance and head over to the Details page.
- Click on SSH and select View gcloud command. This is your command to SSH into the instance from your machine. Run this command in your local terminal.
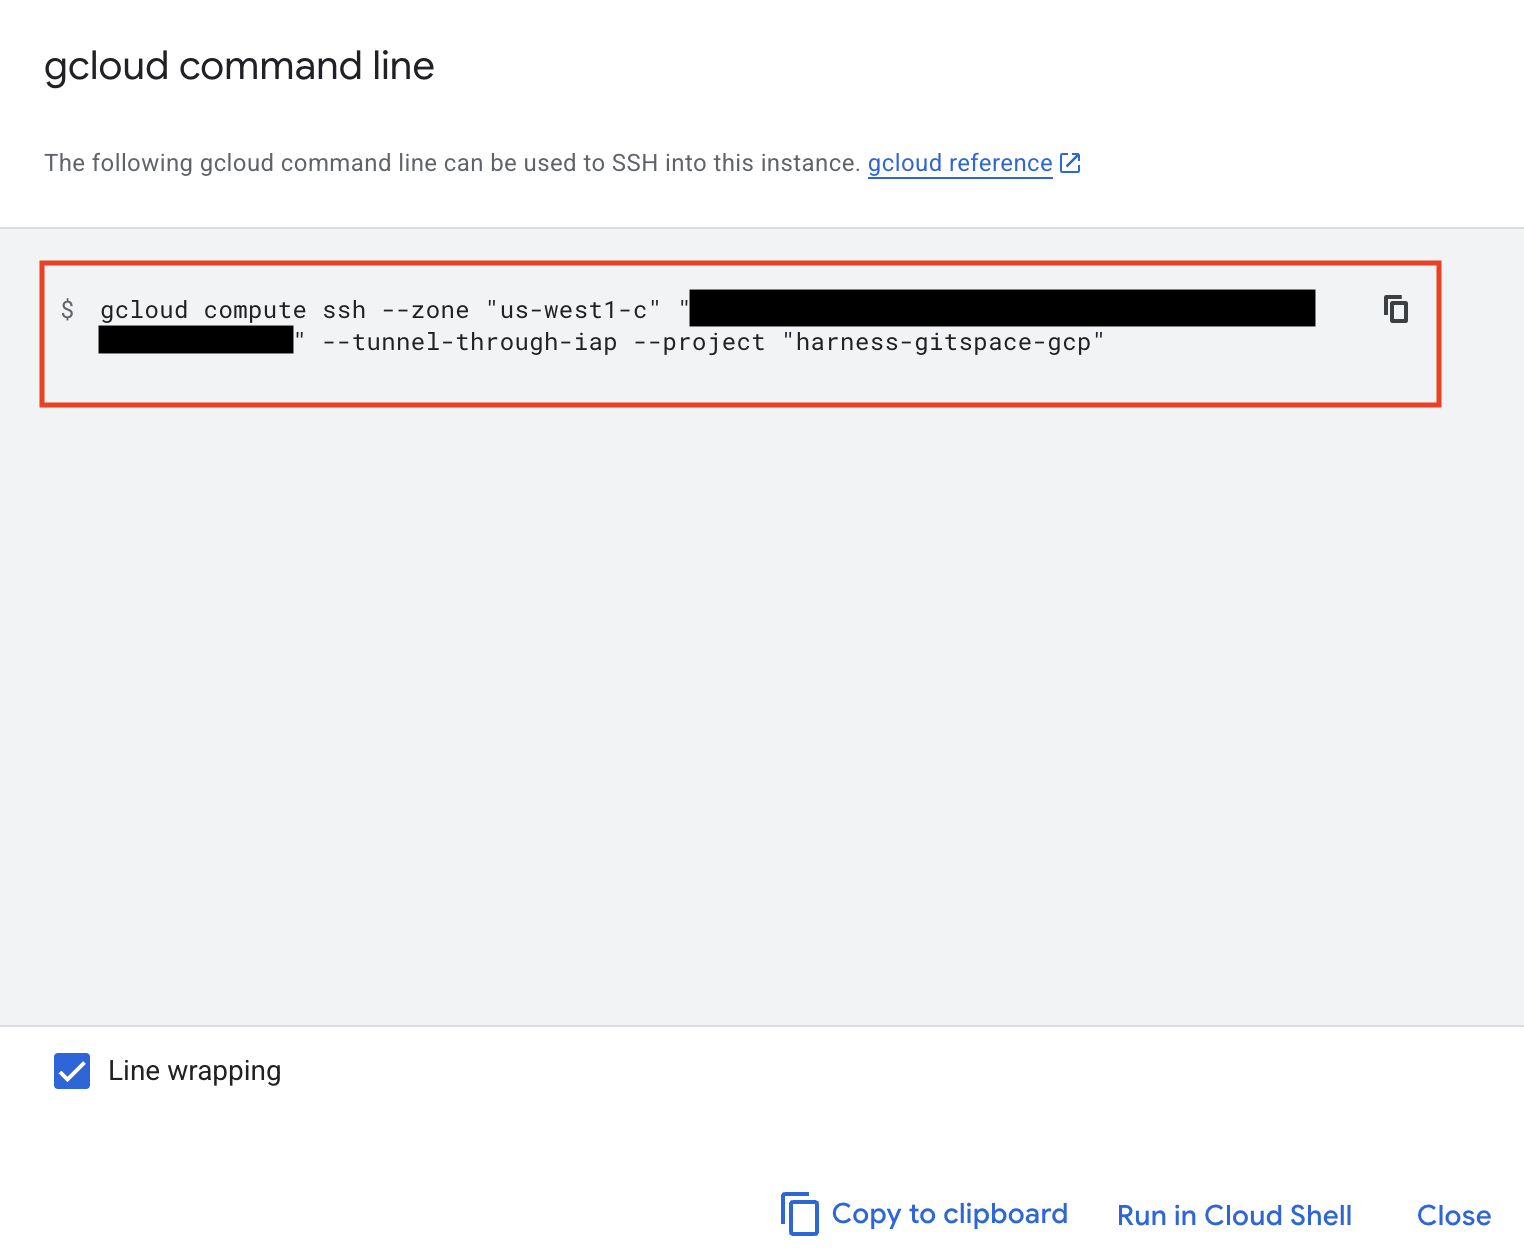
Once you are into the VM Instance, you can continue and complete the following steps.
2. Install Docker
You'll need Docker installed in your GCP VM instance to configure self hosted Gitspaces. Refer to this installation guide on how to install Docker in your VM instance.
3. Start the VM Runner
Now that you're into the VM instance and you've installed Docker, follow the given steps to start the Runner:
- Create a
/runnerdirectory on your VM instance andcdinto it:
mkdir -p /runner

cd /runner
- In the
/runnerdirectory, create a new file calledpool.yamlin your instance and copy the same YAML file content as you had when you configured the Terraform Module. Refer to Setup Terraform Module to learn more about the same. - Run the following command to create a new network:
docker network create harness
- Run the following command to start a Runner in your VM instance, make sure you have changed the
pool.yamlfile name as the same name you have saved the file with:
docker run -d \
  --network harness \
  --hostname vm-runner \
  -v /runner:/runner \
  -p 3000:3000 \
  --platform linux/amd64 \
  drone/drone-runner-aws:latest \
  delegate \
  --pool /runner/<POOL.YAML FILE>
This starts a VM Runner in your VM which will interact with the Harness Delegate to complete all the various tasks involved in connecting the Harness Control Plane to your self hosted Infrastructure.
4. Install the Delegate
Now that you have the VM Runner setup and started, you can continue and install Harness Docker Delegate in your VM instance to be able to establish a seamless connection between the Harness Control Plane and your GCP infrastructure. To learn more about delegates and delegate installation, go to Delegate installation overview. Please refer to the detailed steps below to install the Delegate:
Please ensure you are installing the Docker Delegate in your VM instance. For now, Self Hosted Gitspaces will only work with Delegates created at the Account level.
-
In Harness, go to Account Settings, select Account Resources, and then select Delegates.
-
Select New Delegate or Install Delegate.
-
Select Docker.
-
Enter a Delegate Name.
-
Copy the Delegate install command and run it in your GCP VM.
- You can customise the
cpusandmemoryfields and increase the spec based on the expected load. - Make sure the
ACCOUNT_IDandDELEGATE_TOKENare filled in the given command. These are mandatory parameters. DELEGATE_TAGSis a mandatory parameter. Make sure to add the tags to the delegate install command.- Add the
RUNNER_URLby adding this snippet into your delegate install command:-e RUNNER_URL="http://vm-runner:3000/" \to ensure the delegate has the runner url. - Ensure the
MANAGER_HOST_AND_PORTis filled in with the latest delegate version.
Your final install command will look something like this:
docker run -d \
  --network harness \
  --cpus=1 \
  --memory=2g \
  -e DELEGATE_NAME=docker-delegate \
  -e DEPLOY_MODE=KUBERNETES_ONPREM \
  -e NEXT_GEN="true" \
  -e DELEGATE_TYPE="DOCKER" \
  -e ACCOUNT_ID=<ACCOUNT_ID_COPIED_FROM_THE_UI_COMMAND> \
  -e DELEGATE_TOKEN=<DELEGATE_TOKEN_COPIED_FROM_THE_UI_COMMAND>= \
  -e DELEGATE_TAGS=<TAGS TO BE ADDED> \
  -e RUNNER_URL="http://vm-runner:3000/" \
  -e MANAGER_HOST_AND_PORT=https://app.harness.io \
  us-west1-docker.pkg.dev/gar-setup/docker/delegate:25.03.85504
Once your Delegate is up and running, you have successfully setup the infrastructure and established a successful connection between the Harness Control Plane and your infrastructure.
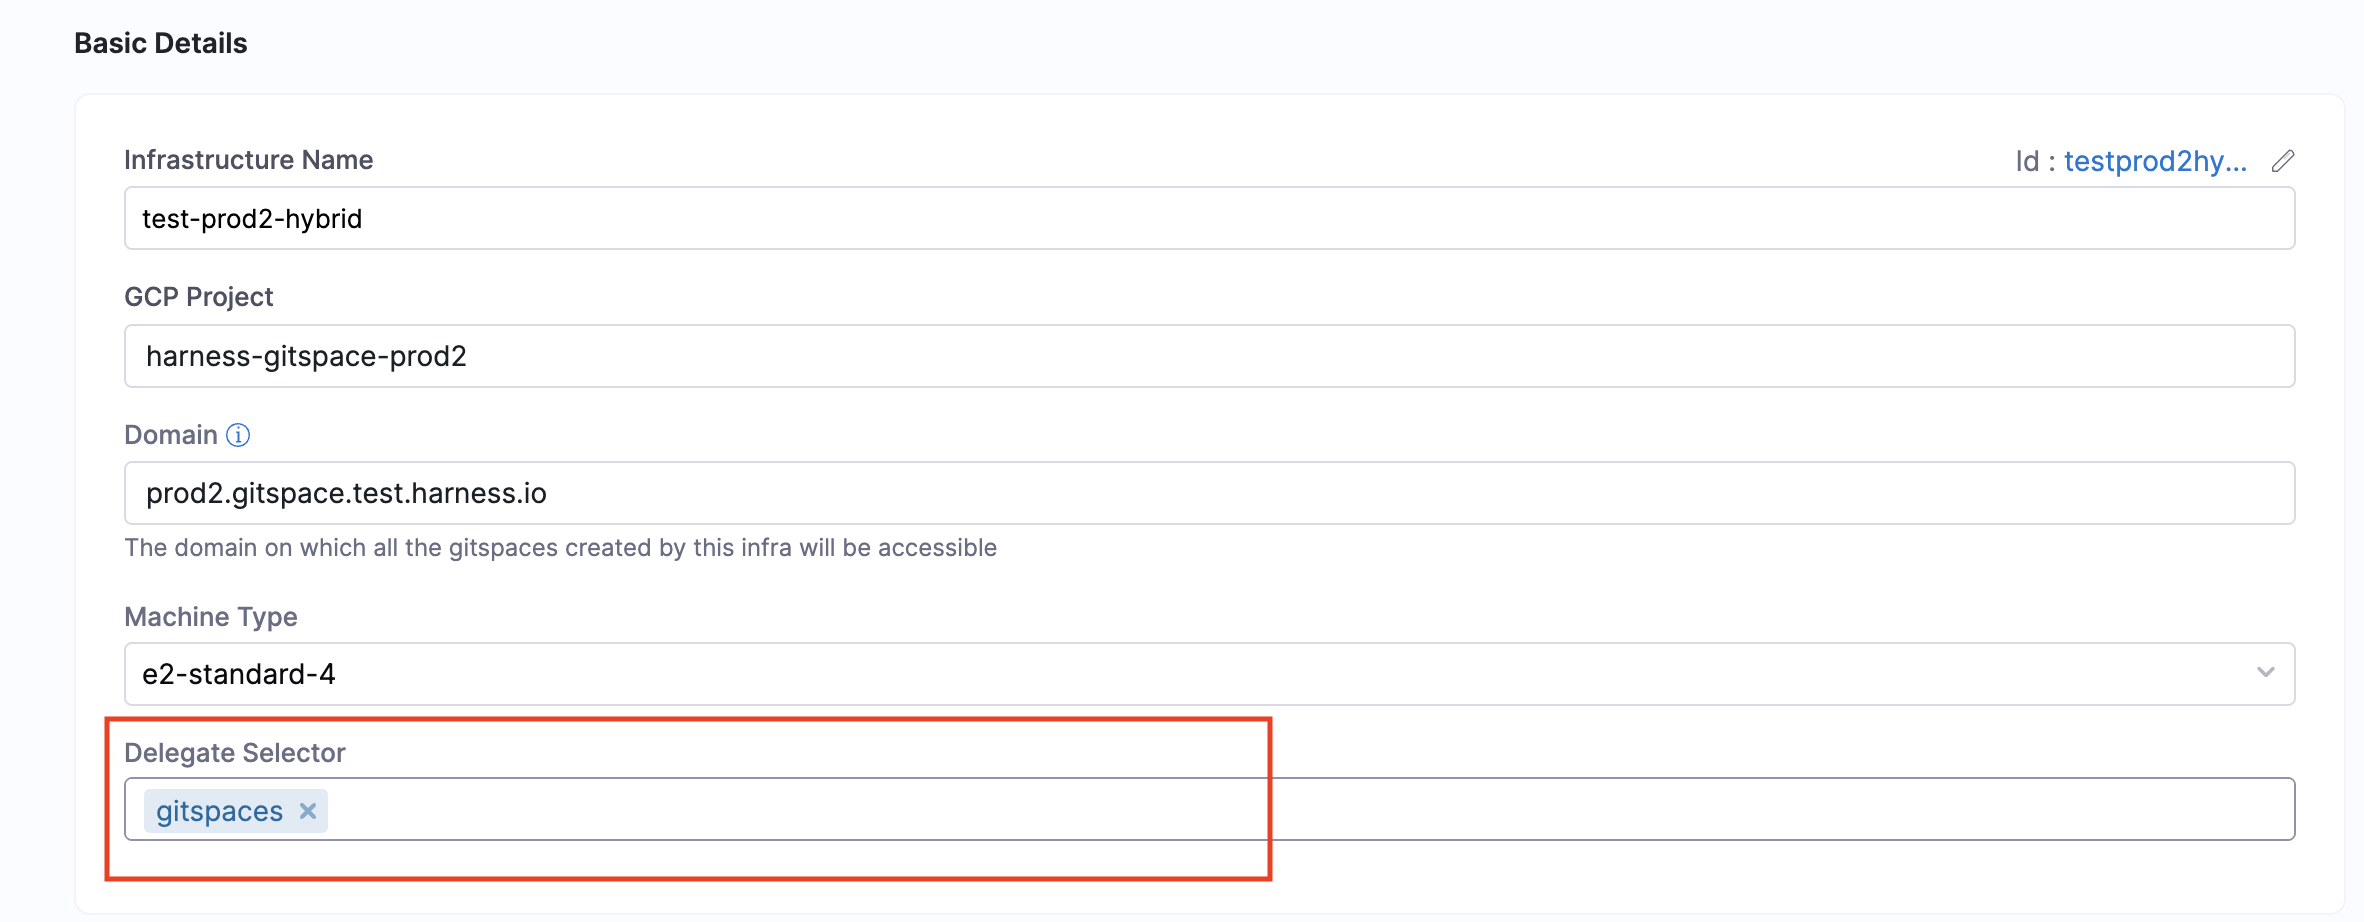
5. Update the Delegate Selector
Once you’ve installed and set up your Delegate, enter the specific Delegate Name in the Delegate Selector field within your Gitspace Infrastructure UI. You can either add it while configuring the Gitspace Infra UI or once you've setup everything, you can edit the infrastructure and add a specific Delegate. Read more about how to use Delegate Selector.
You can also select Delegates in the Delegate Selector field using Delegate Tags. Read more about Delegate Tags.
Next Steps
Now that you’ve successfully installed and configured the Delegate, you’re ready to create machines and self hosted Gitspaces within your GCP infrastructure. Proceed to the Create Machines guide to get started.