Add container images as artifacts for Kubernetes deployments
This topic covers adding container image locations as Harness artifacts and referencing them in your Values files.
If a public Docker image location is hardcoded in your Kubernetes manifest (for example, image: nginx:1.14.2), then you can simply add the manifest to Harness and the Harness Delegate will pull the image during deployment.
Alternatively, you can add the image location to Harness as an artifact in the Service Definition. This allows you to reference the image in your manifests and elsewhere using the Harness expression <+artifacts.primary.image>.
When you deploy, Harness connects to your repo and you select which image and version/tag to deploy.
With a Harness artifact, you can template your manifests, detaching them from a hardcoded location. This makes your manifests reusable and dynamic.
Before you begin
Make sure you've reviewed and set up the following:
Artifacts and manifests in Harness
There are several scenarios to consider before you use artifacts and manifests in the Harness stage:
Public artifact hardcoded in the manifest
If the image location is hardcoded in your Kubernetes manifest (for example, image: nginx:1.14.2), you do not need to use the Artifacts settings in the Harness Service Definition. The Harness Delegate will pull the image at runtime. You simply need to ensure that the Delegate can connect to the public repo.
Public artifact is not hardcoded in the manifest
In this scenario, you'll use the Artifacts settings in the Harness Service Definition to identify the artifact to use and select the image and tag in Harness at runtime.
- Primary artifact: In your manifest, you can refer to the primary artifact you set up in Harness using the expression,
<+artifacts.primary.image>:image: <+artifacts.primary.image>. - Sidecar artifacts: In your manifest, you can refer to the sidecar artifact you set up in Harness using the expression,
<+artifacts.sidecars.[sidecar_identifier].imagePath>.
In this example,[sidecar_identifier]is the sidecar identifier you specified when you added the sidecar artifact to Harness.
Example output for all artifact expressions
Here's an example where we use a Shell Script step to echo all the artifact expressions.
echo "artifacts.primary.image: "<+artifacts.primary.image>
echo "artifacts.primary.connectorRef: "<+artifacts.primary.connectorRef>
echo "artifacts.primary.digest: "<+artifacts.primary.digest>
echo "artifacts.primary.identifier: "<+artifacts.primary.identifier>
echo "artifacts.primary.imagePath: "<+artifacts.primary.imagePath>
echo "artifacts.primary.imagePullSecret: "<+artifacts.primary.imagePullSecret>
echo "artifacts.primary.label: "<+artifacts.primary.label>
echo "artifacts.primary.metadata: "<+artifacts.primary.metadata>
echo "artifacts.primary.primaryArtifact: "<+artifacts.primary.primaryArtifact>
echo "artifacts.primary.tag: "<+artifacts.primary.tag>
echo "artifacts.primary.type: "<+artifacts.primary.type>
Here's the output:
Executing command ...
artifacts.primary.image: index.docker.io/johndoe/tweetapp:21
artifacts.primary.connectorRef: Docker_Hub_with_Pwd
artifacts.primary.digest: null
artifacts.primary.identifier: primary
artifacts.primary.imagePath: johndoe/tweetapp
artifacts.primary.imagePullSecret: 123abc
artifacts.primary.metadata: {image=index.docker.io/johndoe/tweetapp:21, tag=21}
artifacts.primary.primaryArtifact: true
artifacts.primary.tag: 21
artifacts.primary.type: DockerRegistry
Command completed with ExitCode (0)
Private repo artifact
In some cases, your Kubernetes cluster might not have the permissions needed to access a private repository (GCR, etc). For these cases, you use the expression, <+artifacts.primary.imagePullSecret> in the Values file and reference it in the Secret and Deployment objects in your manifest.
This key will import the credentials from the Docker credentials file in the artifact.
Example Manifests
Service account of the Kubernetes Delegate can pull from the private repo
If the Kubernetes service account used by the Connector or Delegate has permission to pull from the private repo, you do not need to use the Artifacts settings in the Harness Service Definition. You can hardcode the image location in the manifest, and the Delegate will pull it at runtime.
If multiple Delegates are selected, make sure that all of their service accounts have permission to pull from the private repo.
Sidecar artifacts
Sidecar artifacts follow the same rules as primary artifacts.
If you do not hardcode the sidecar image location in the manifest, you will use the Artifacts settings in the Harness Service Definition to identify the sidecar artifact to use and select the image and tag in Harness at runtime.
As explained above, in your Values file, refer to the sidecar artifact you set up in Harness using the expression, <+artifacts.sidecars.[sidecar_identifier].imagePath>:<+artifacts.sidecars.[sidecar_identifier].tag>.
In this example, [sidecar_identifier] is the sidecar identifier you specified when you added the sidecar artifact.
Container registry support
Harness supports all of the popular container registries. You can add your container registry account as a Harness Connector.
The Connector can be added in line when you select your artifacts or separately in Project Setup (for Projects) or Account Resources (for accounts).
For more information, go to CD artifact sources.
Primary and sidecar artifacts
You can add a primary artifact and multiple sidecar artifacts. The sidecars are treated the same as the primary artifact. Both are deployed to the target infrastructure in the Infrastructure Definition.
You don't need to create a separate Service for a sidecar artifact. Both are added in the Service Definition. The steps for adding them are the same.
You must select artifact versions at deployment runtime for all primary and sidecar artifacts.
Add deploy stage
- When you add a stage, select Deploy.
- Name the stage, and select what you'd like to deploy. For example, select Service.
- Click Set Up Stage. The new stage's settings appear.
- Click Next or Service.
Create the Harness service
In Service, you can define/select the Service and Service Definition.
Let's take a moment and review Harness Services and Service Definitions (which are explained below). Harness Services represent your microservices/apps logically.
You can add the same Service to as many stages are you need. Service Definitions represent your artifacts, manifests, and variables physically. They are the actual files and variable values.
By separating Services and Service Definitions, you can propagate the same Service across stages and change artifacts, manifests, and variables with each stage.Select or create the Service.
To add your container image, go to Artifacts in the Service Definition.
Add the artifact source
-
In Artifacts, you add connections to the images in their repos. To demonstrate how to add the Artifact Source, we use a Docker image from a Docker Registry Connector.
-
In Artifacts, click Add Primary Artifact.
-
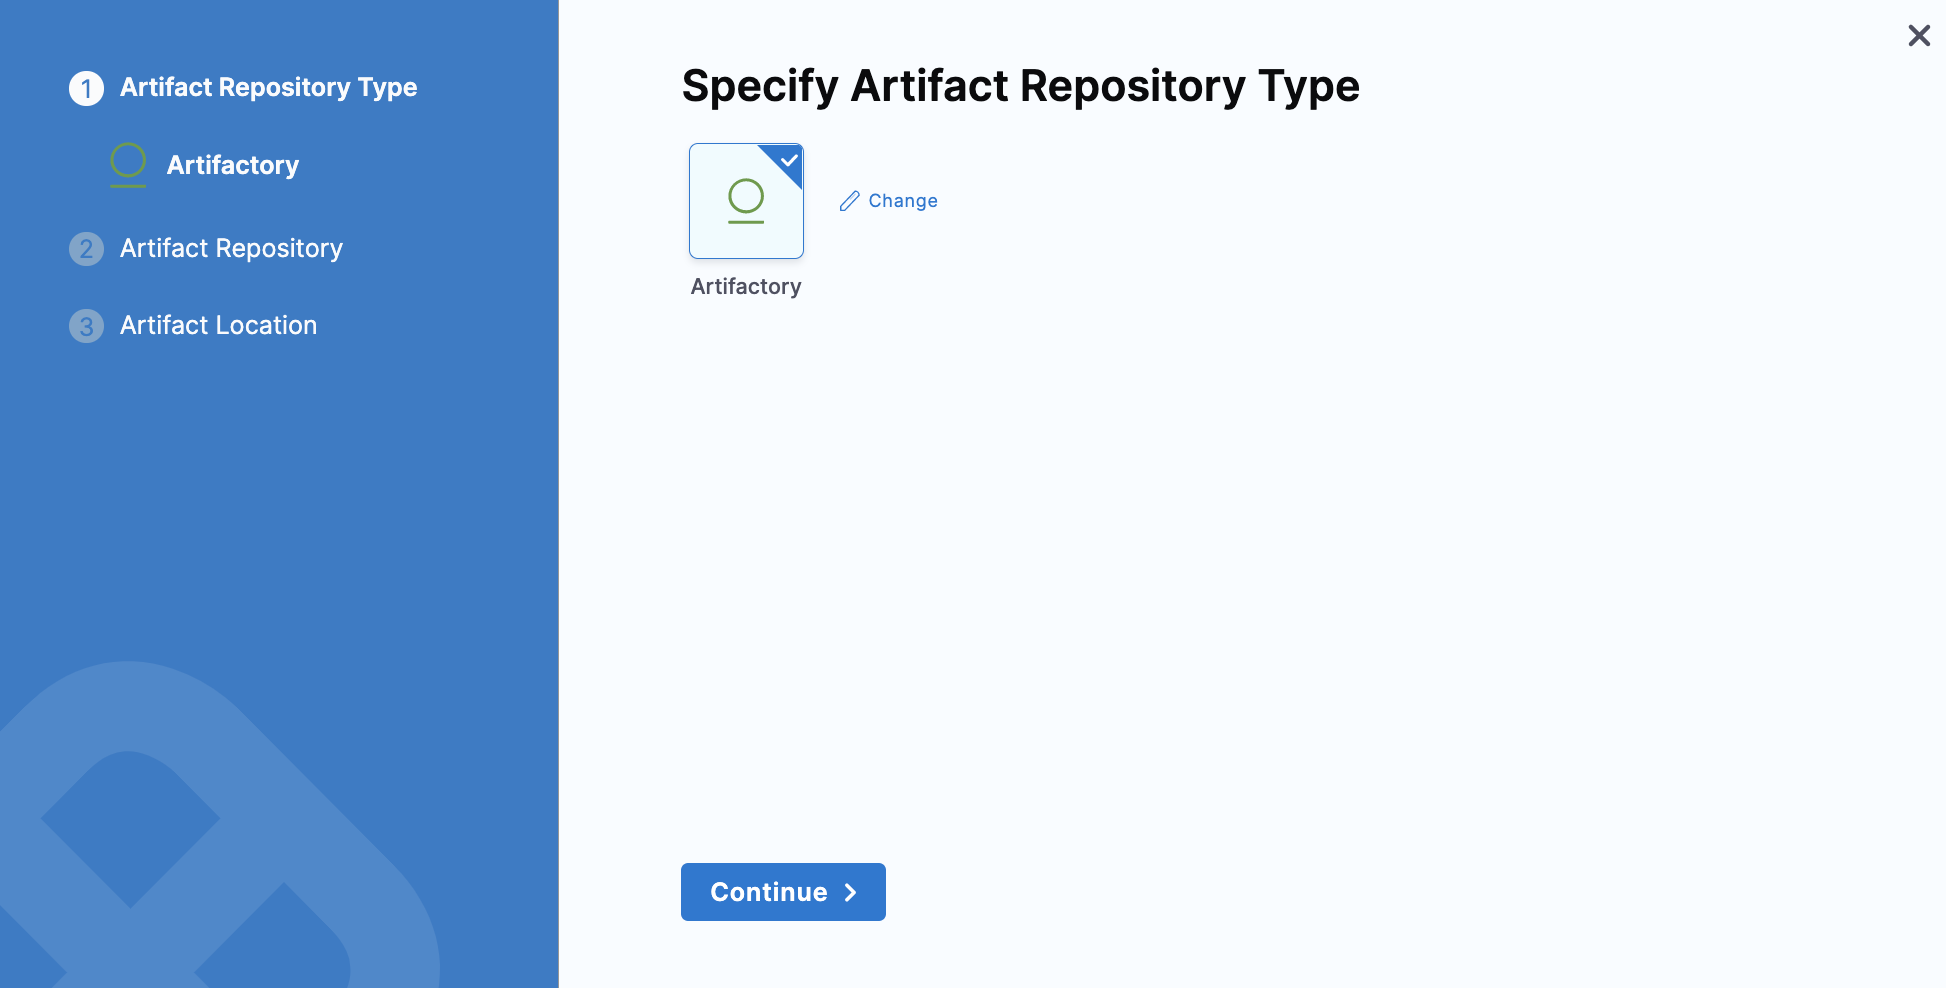
Select the Artifact Repository Type.
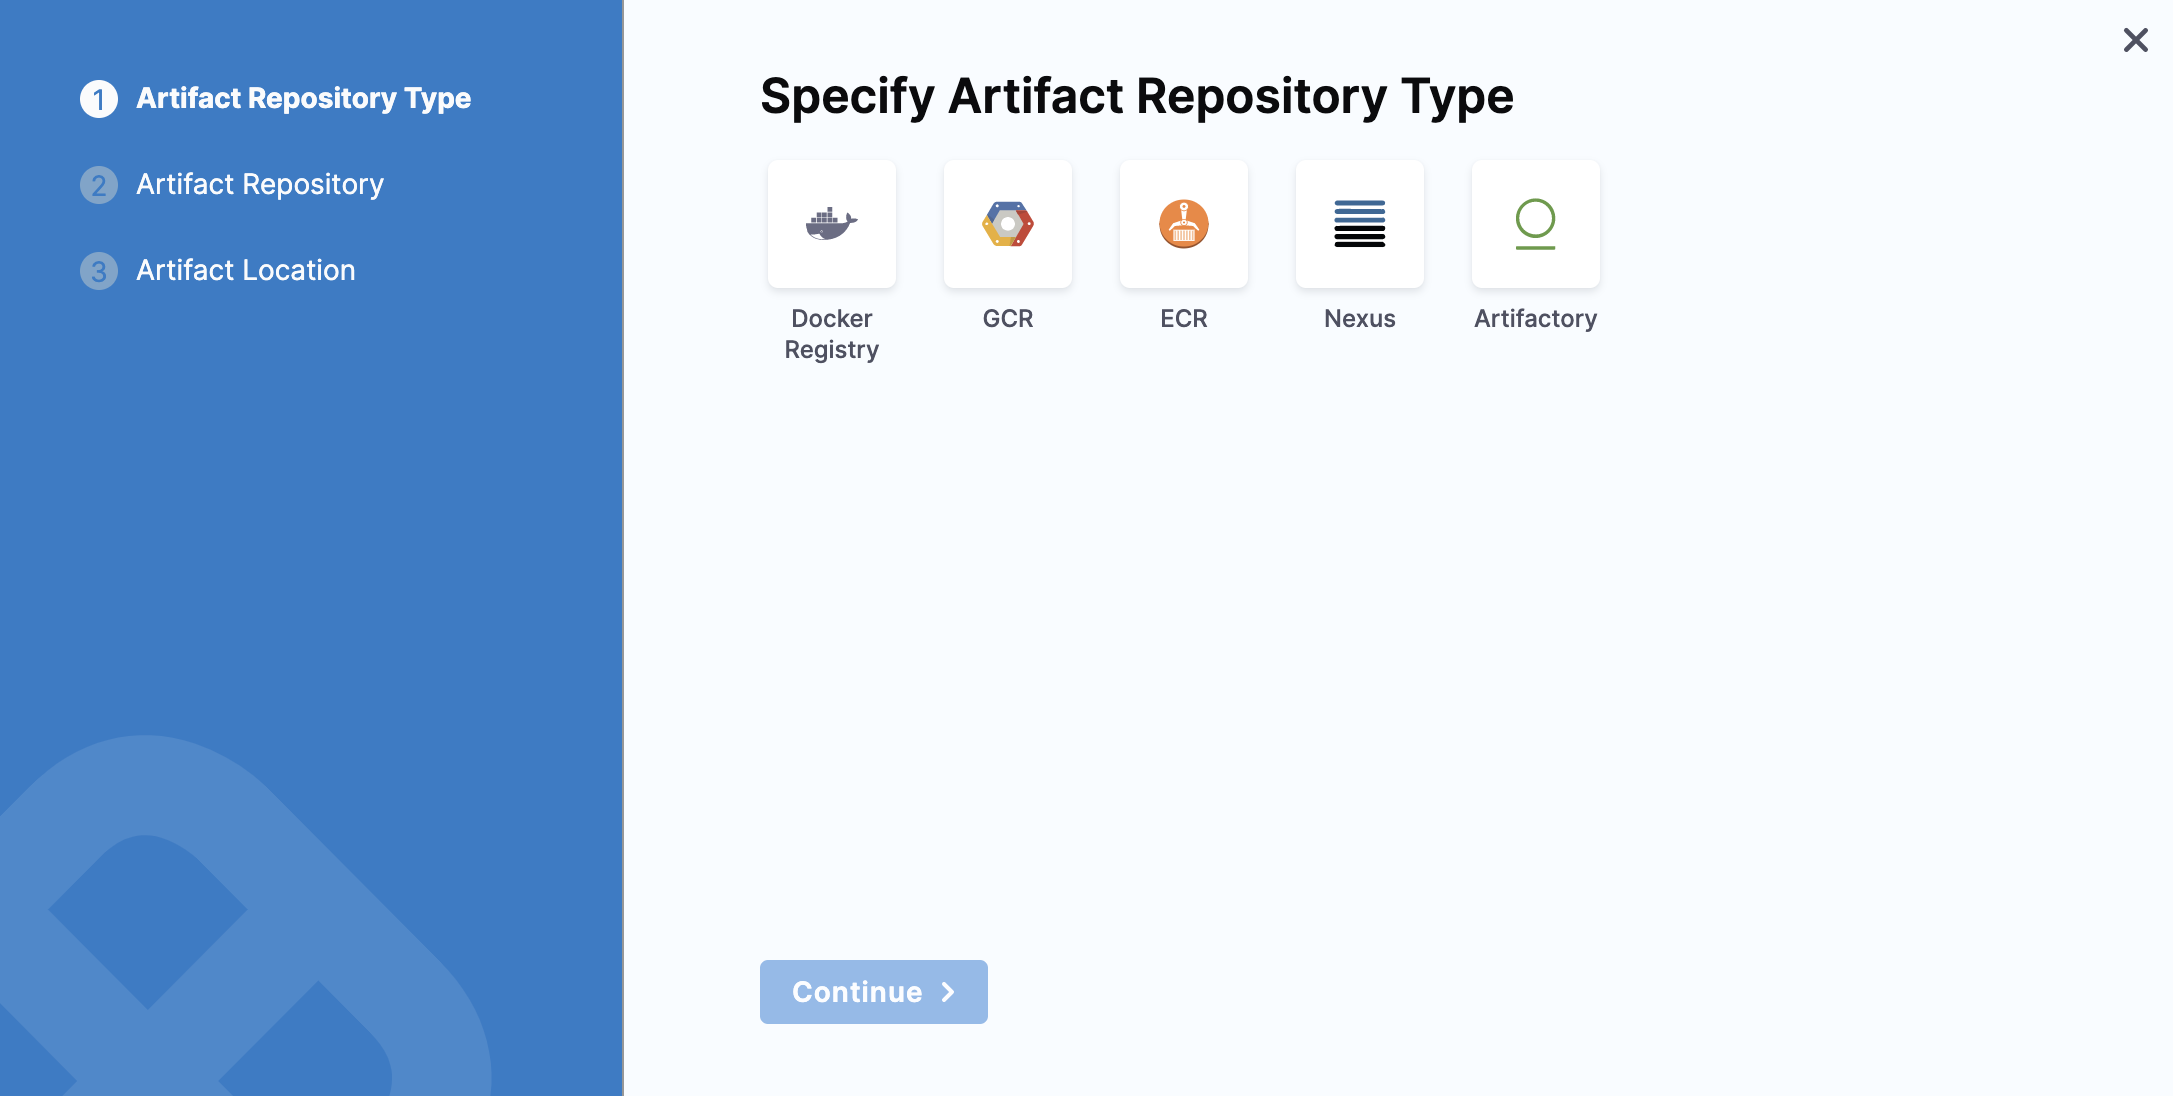
- Docker Registry
- Nexus
- Artifactory
- Custom
- Select Docker Registry, and click Continue.
- The Docker Registry settings appear.
- Select a Docker Registry Connector or create a new one.
- In your Docker Registry Connector, to connect to a public Docker registry like Docker Hub, use
https://registry.hub.docker.com/v2/. To connect to a private Docker registry, usehttps://index.docker.io/v2/.Click Continue. - In Image path, enter the name of the artifact you want to deploy, such as library/nginx.
- In Tag, enter the Docker image tag for the image.
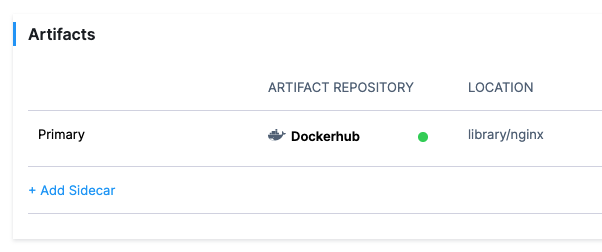
- Click Submit.
The Artifact is added to the Service Definition.
Currently, this feature is behind the Feature Flag NG_NEXUS_ARTIFACTORY. Contact Harness Support to enable the feature.
-
Select Nexus, and click Continue.
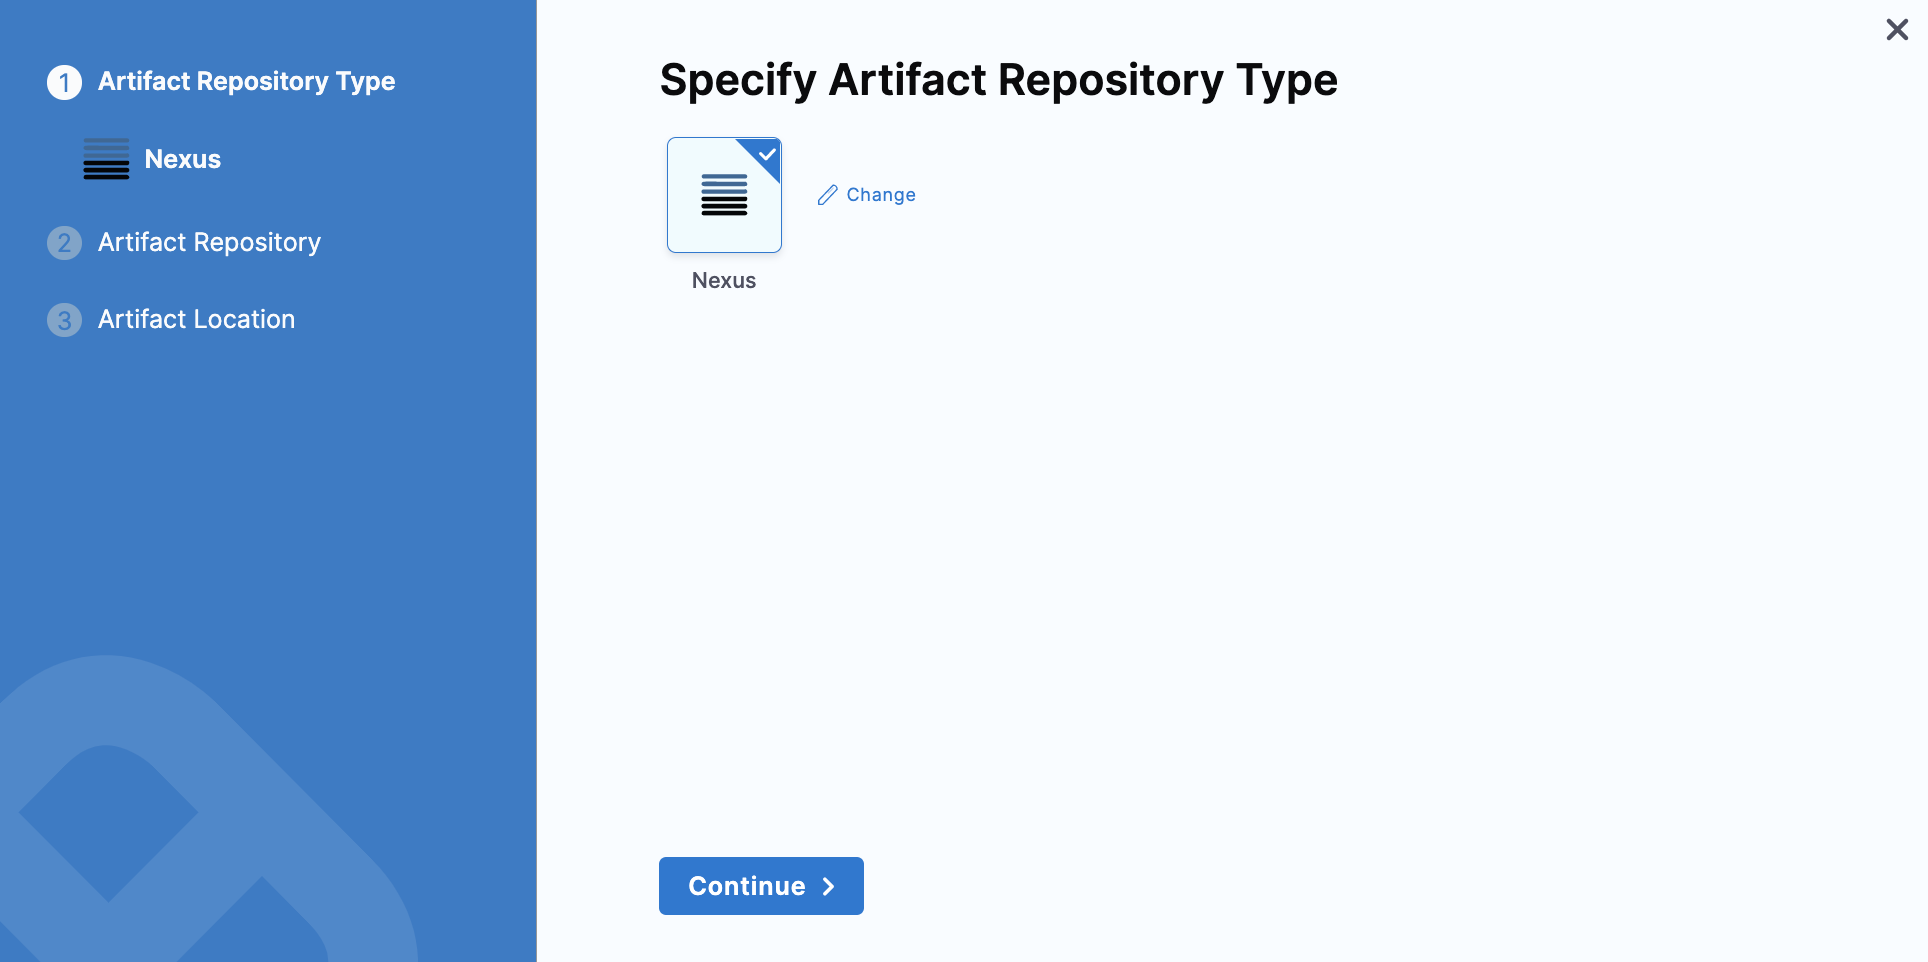
-
Select a Nexus Connector or create a new one.
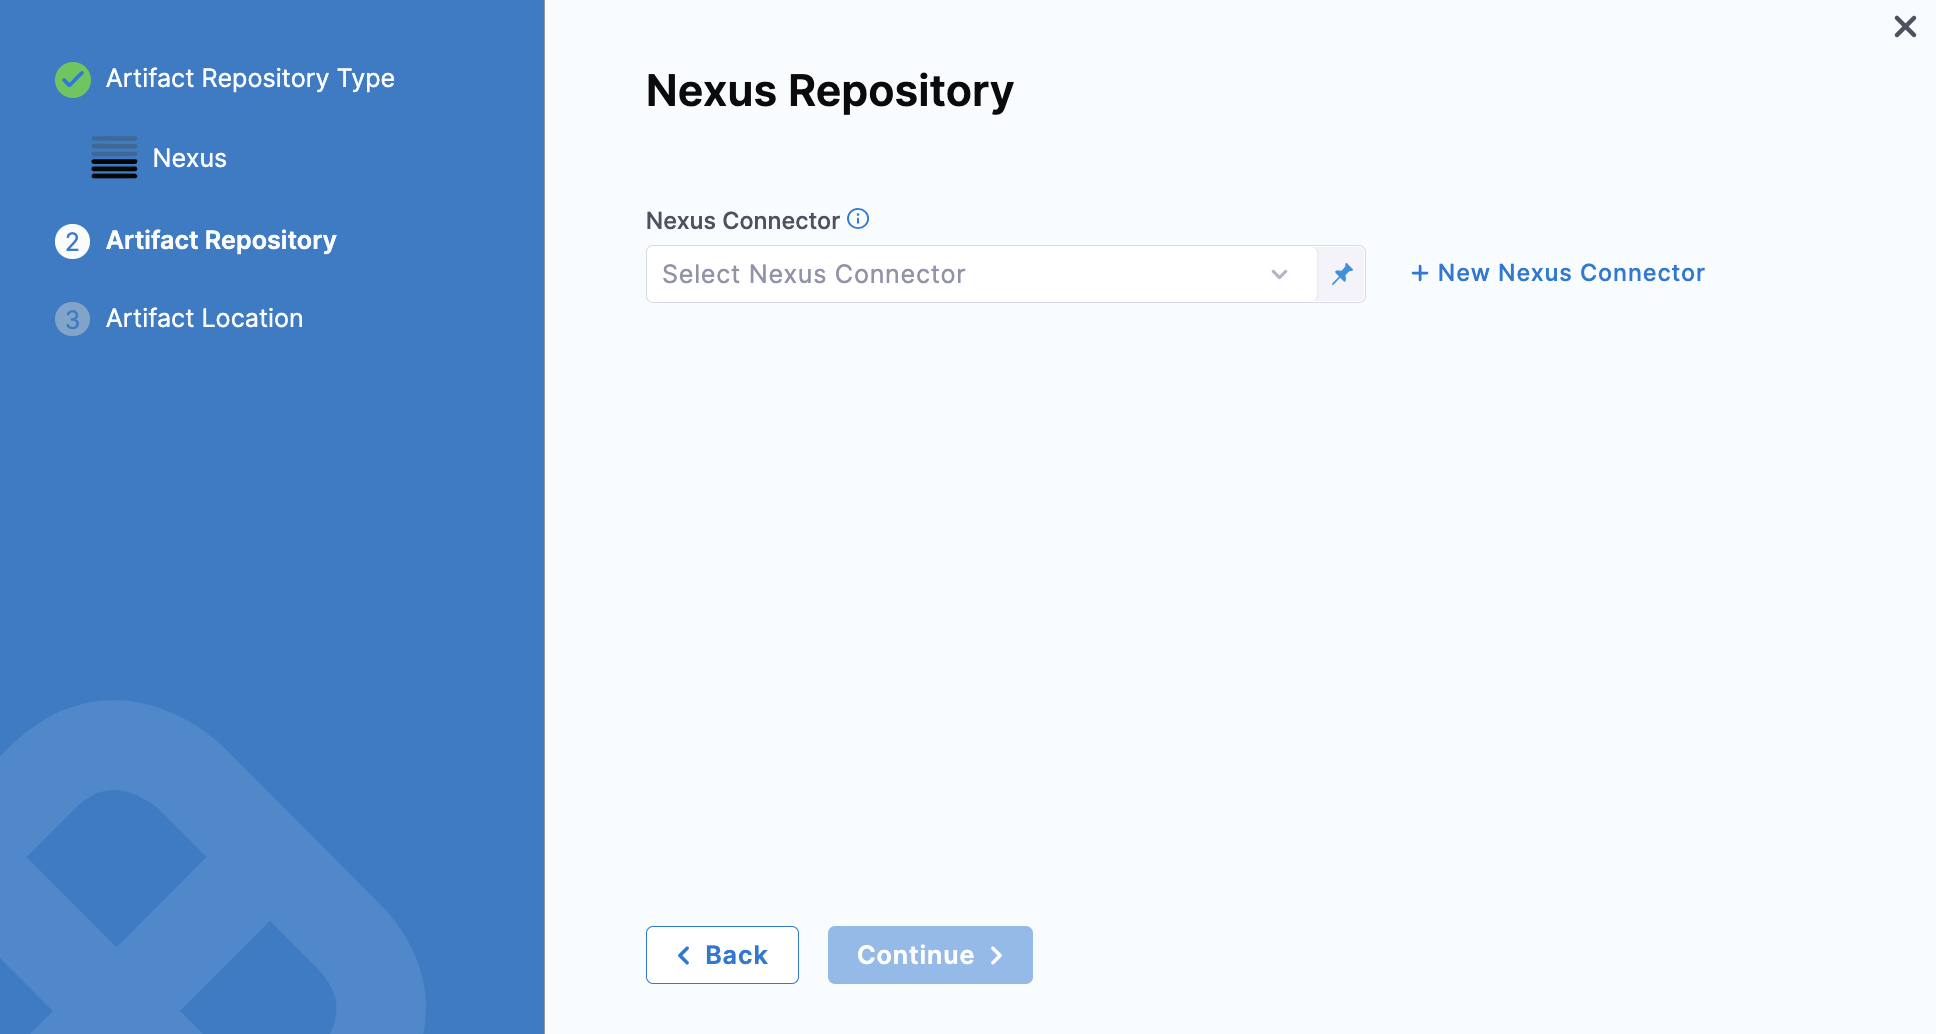
-
Click Continue. The Artifact Details settings appear.
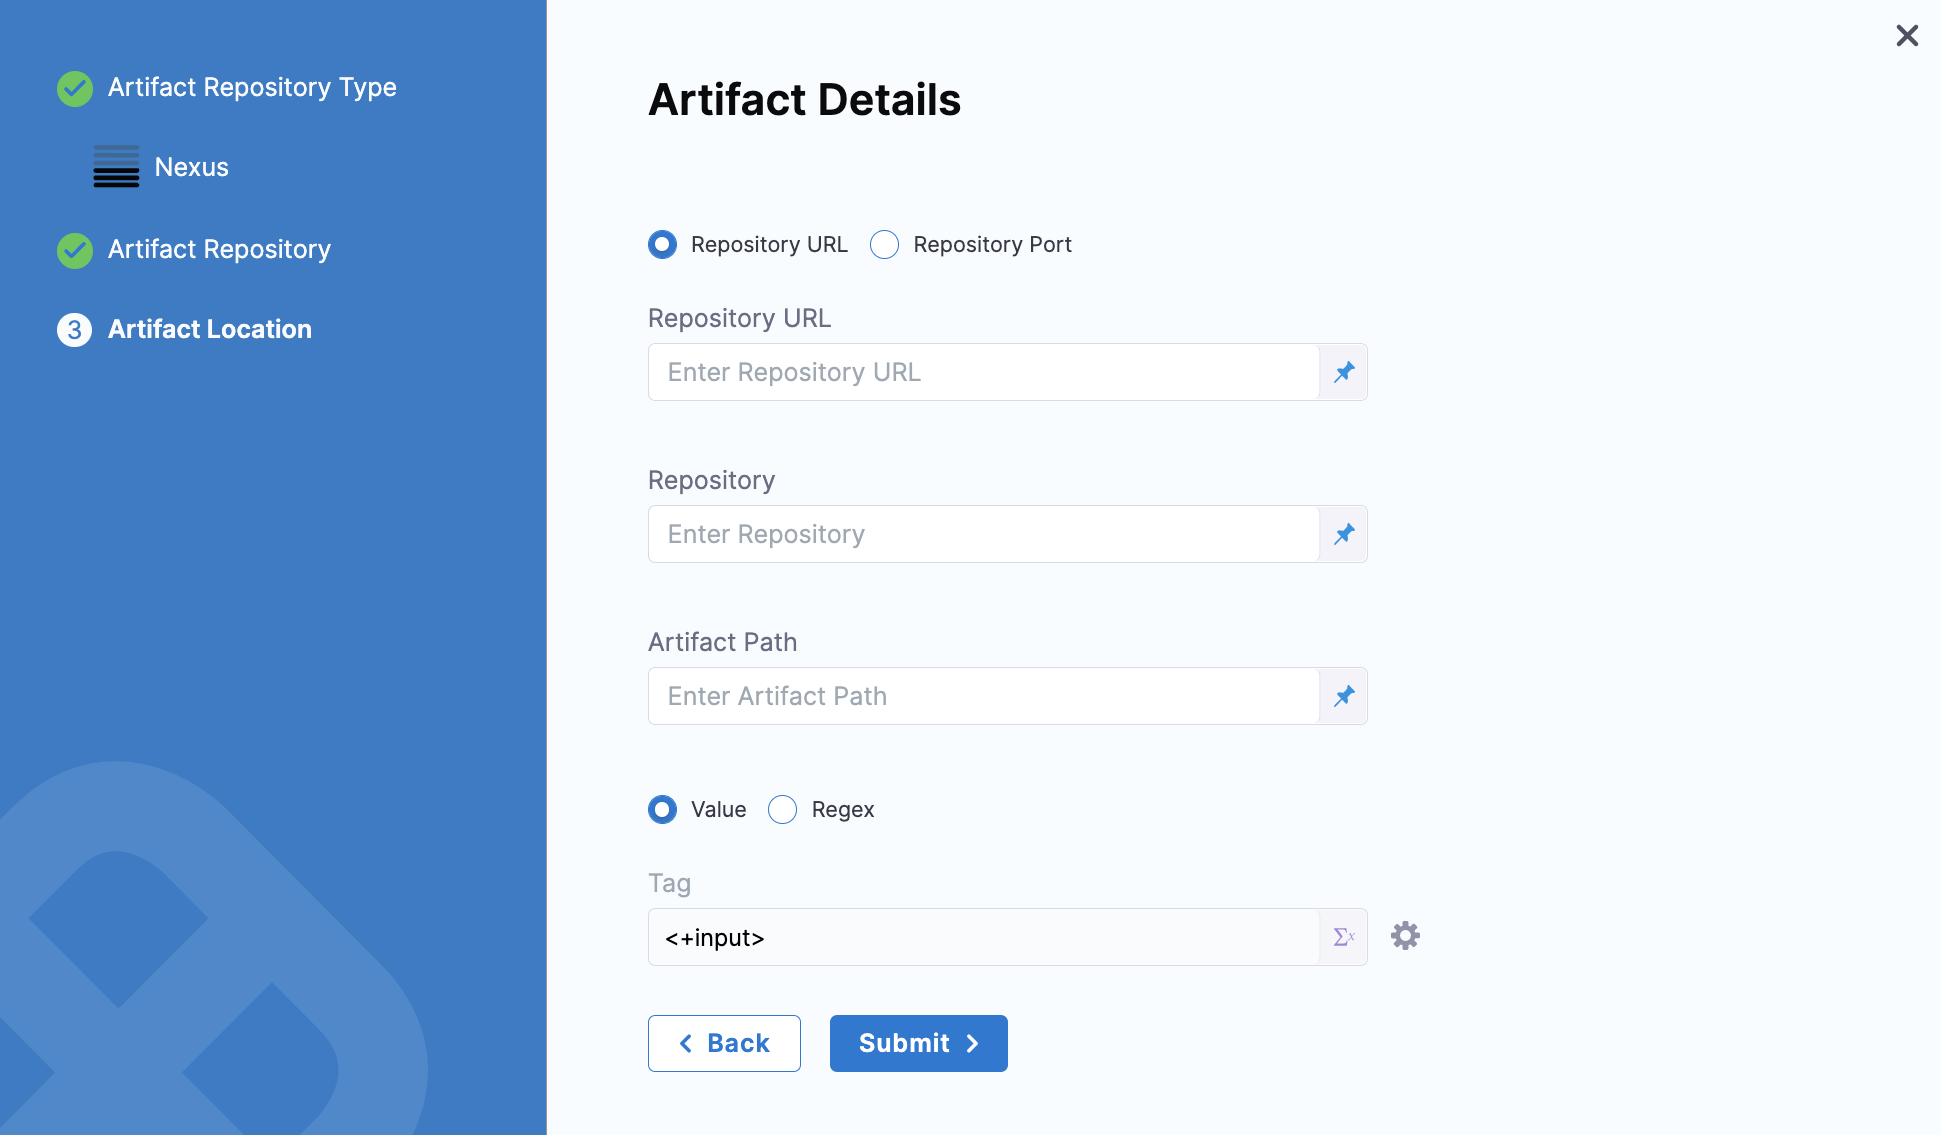
Based on your server and network configuration, choose one of the following and fill in the details:
-
Repository URL - You can choose this for custom infrastructure with a specific hostname and/or port.
Enter the URL you would use in the Docker login to fetch the artifact. This is the same as the domain name and port you use fordocker login hostname:port.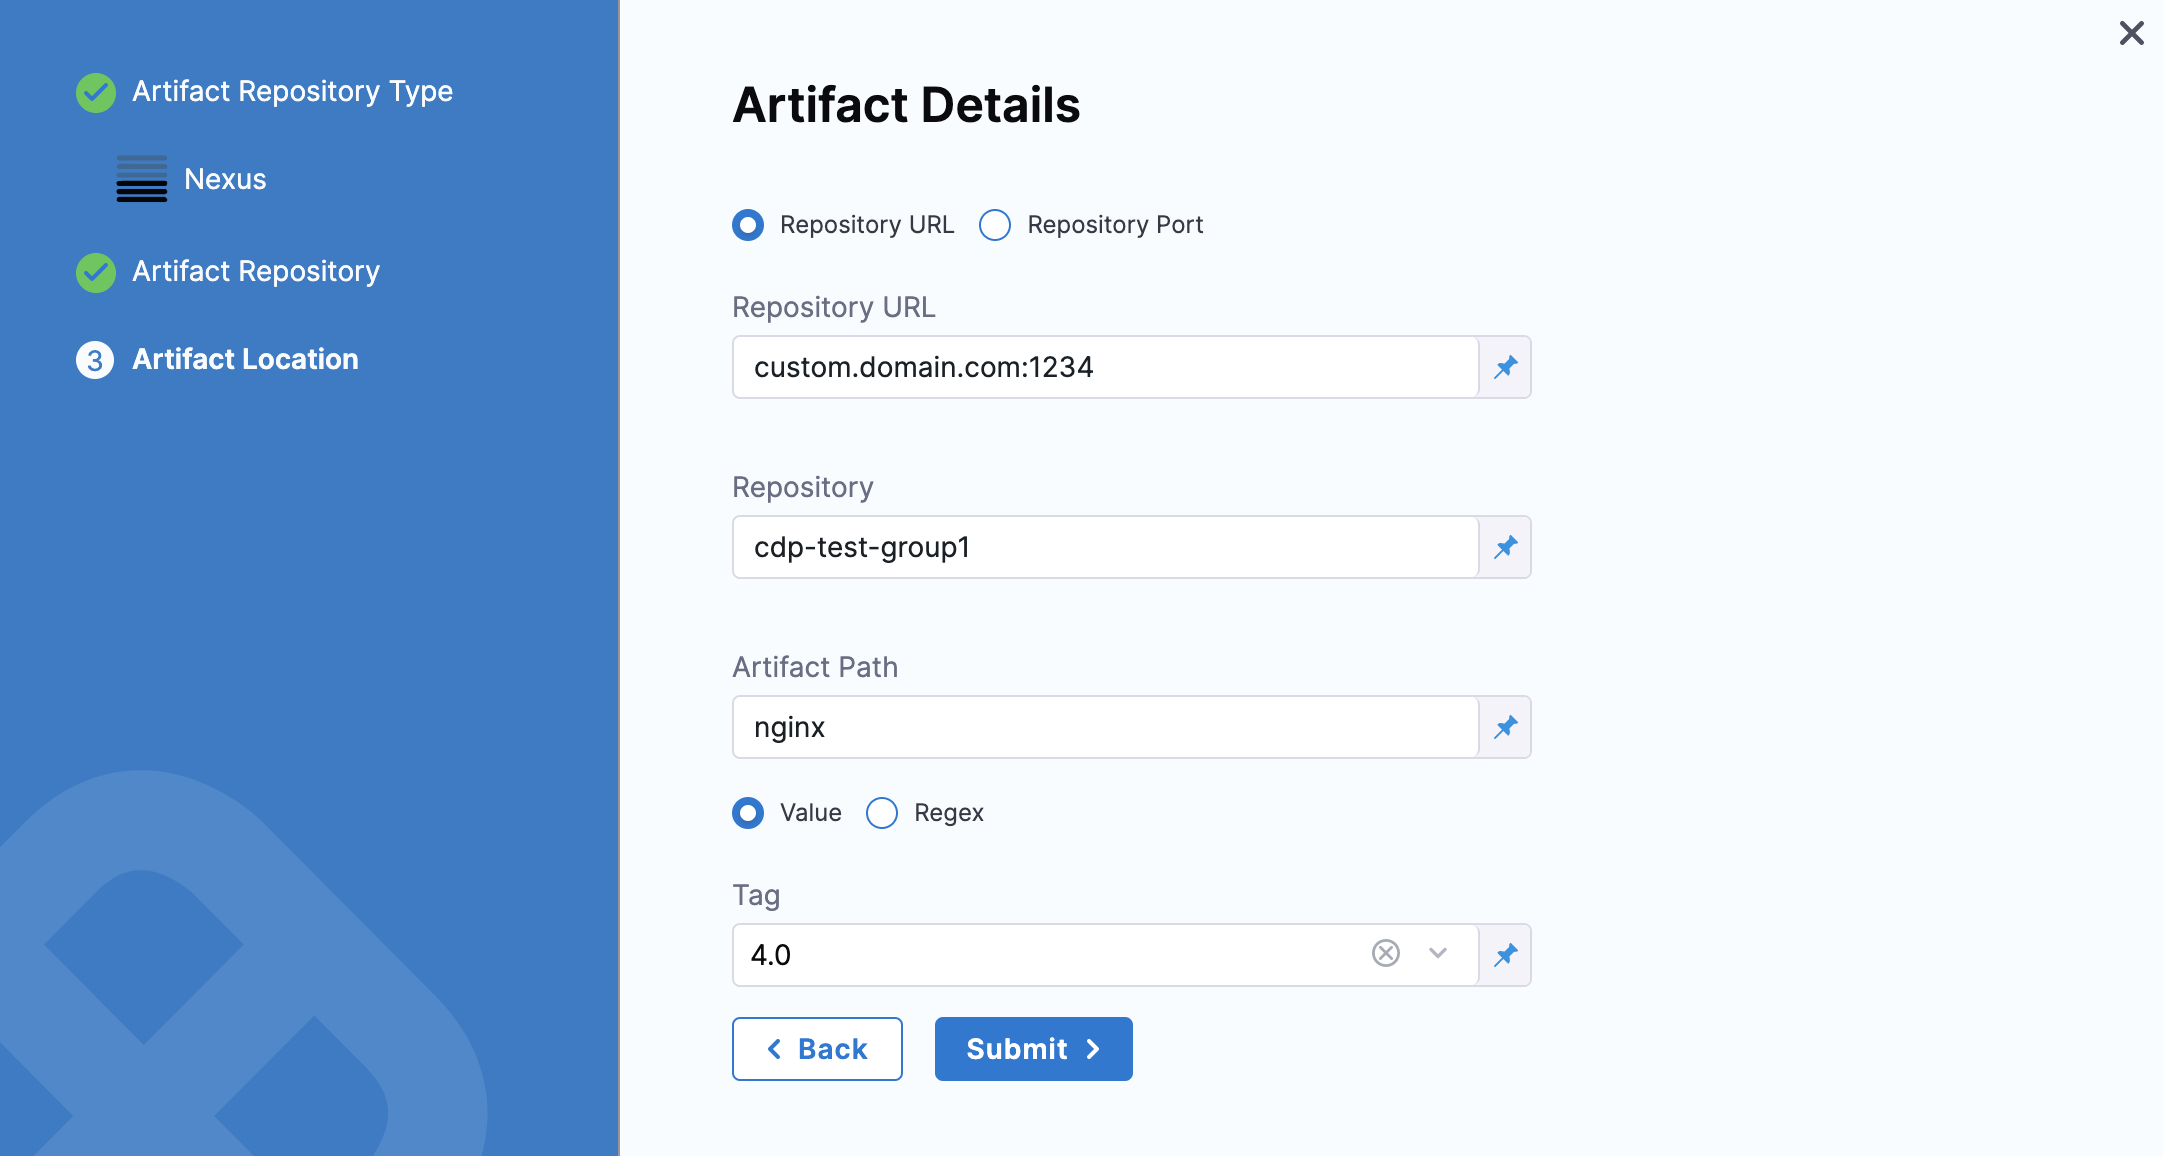
-
Repository Port - You can choose this for standard Nexus 3 installation without any additional infrastructure.
Enter the port you use fordocker login hostname:port.
The port you enter will be used along with the domain, username, and password provided in the Nexus Connector.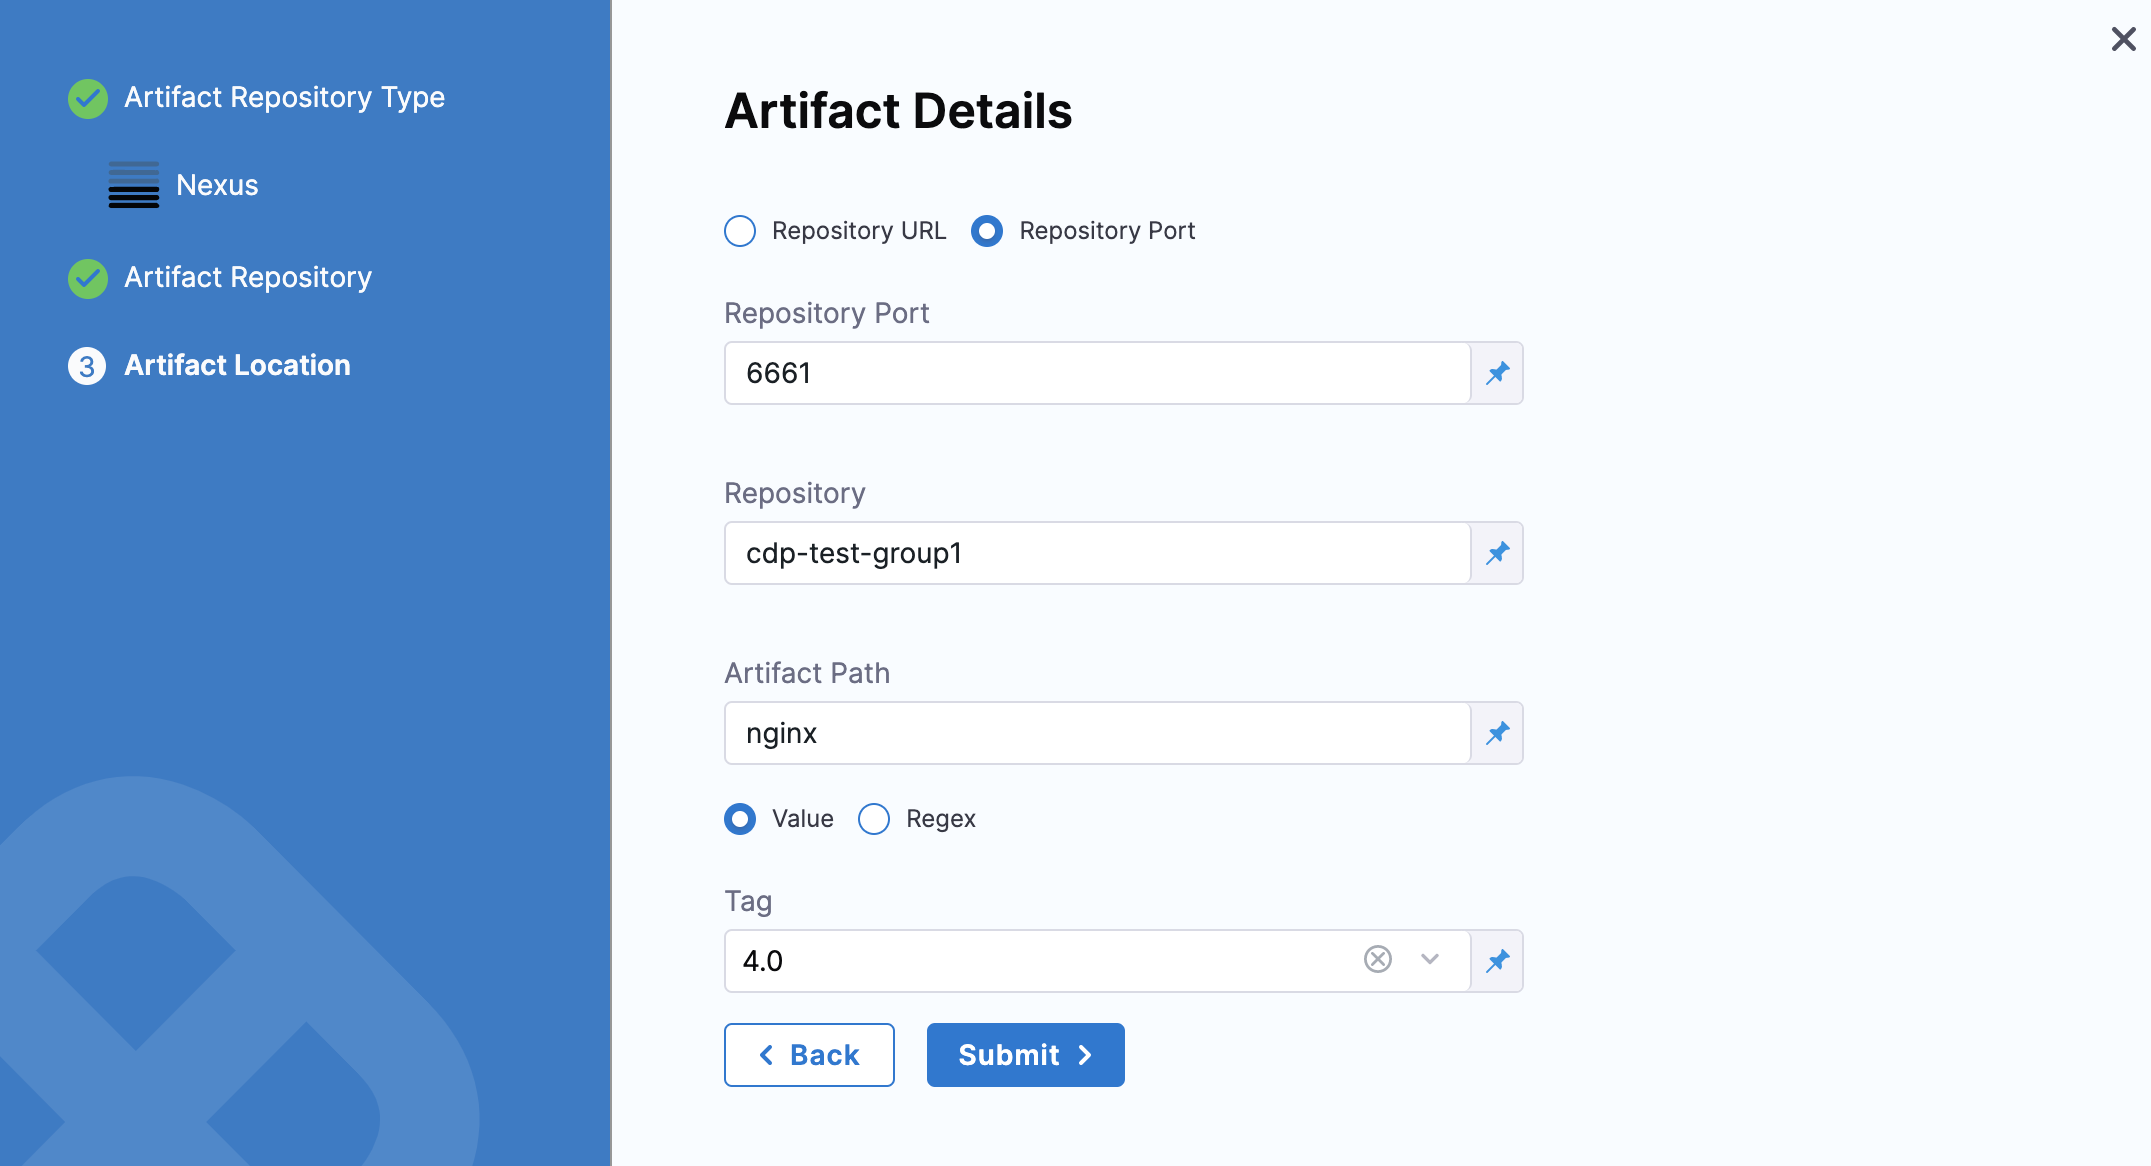
-
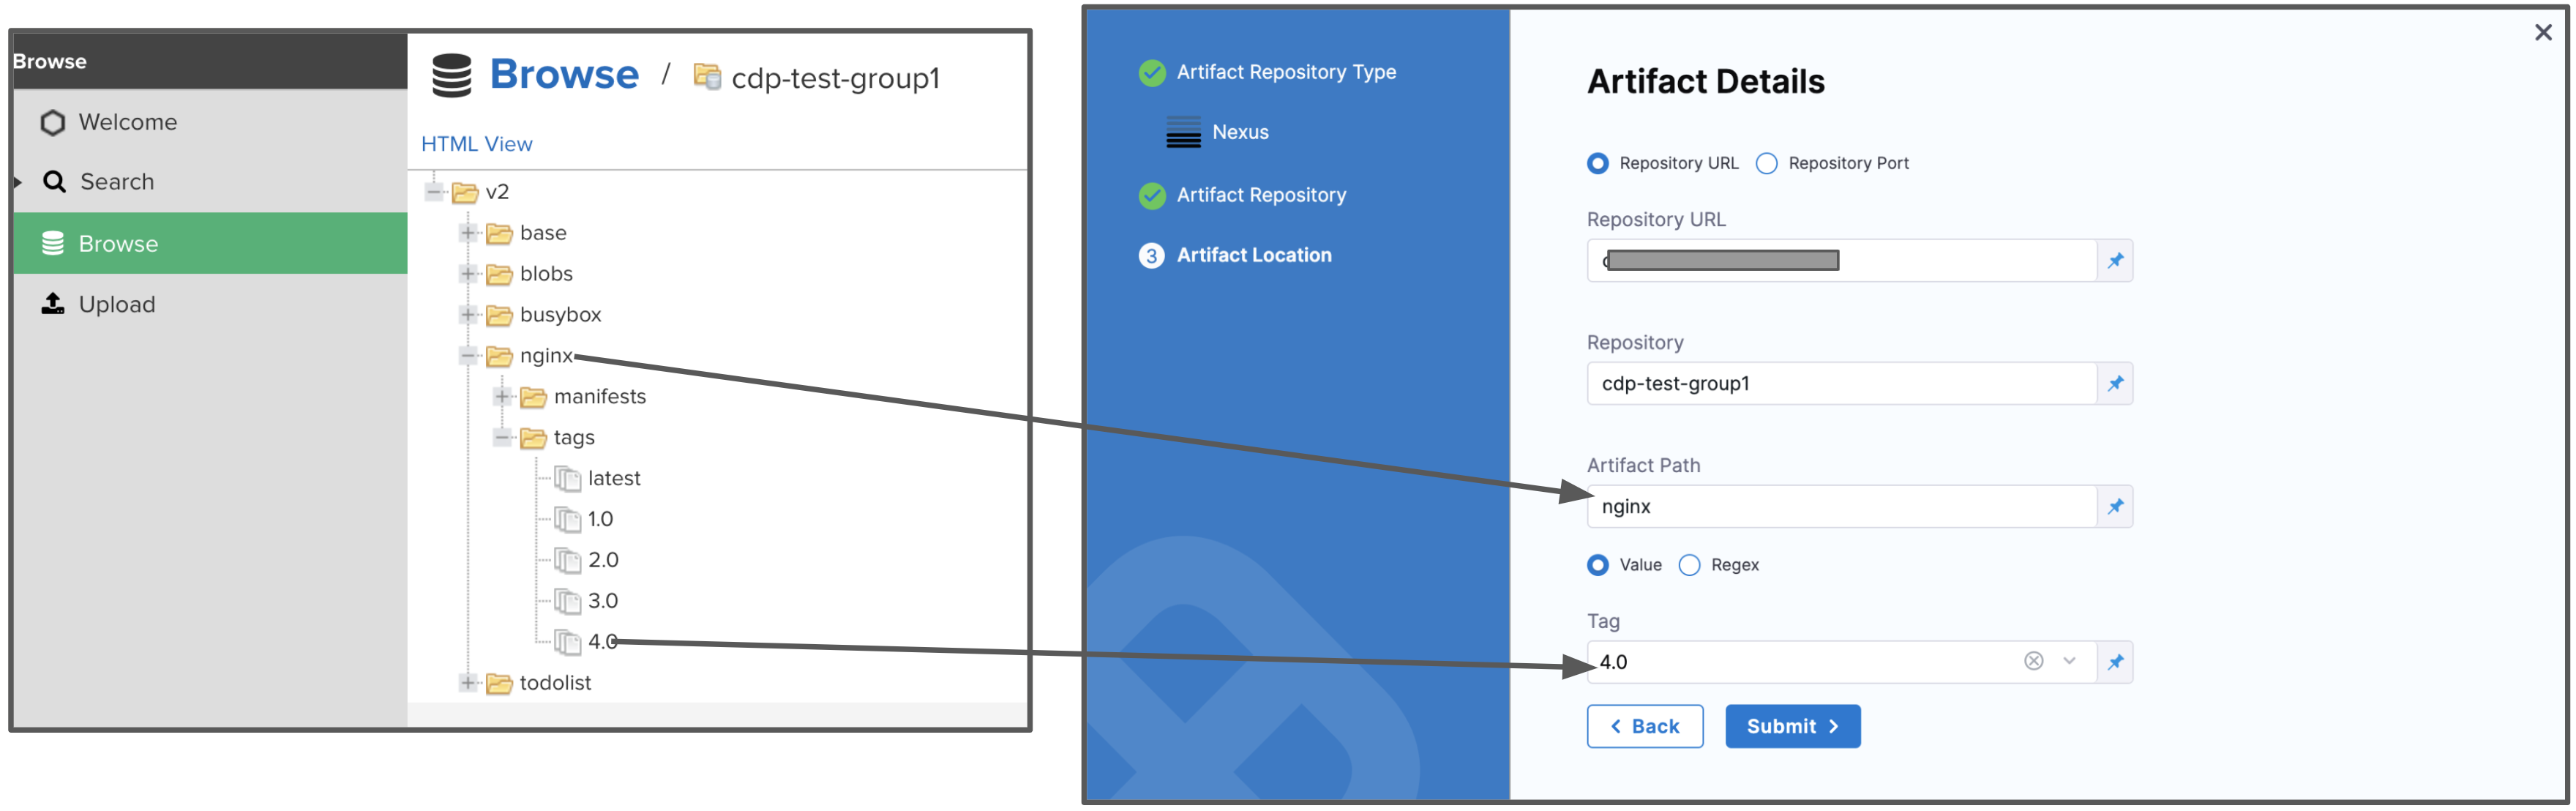
In Repository, enter the name of the repository where the artifact is located.
Harness supports only the Docker repository format as the Artifact source for the Nexus 3 Artifact registry. In Artifact Path, enter the name of the artifact you want to deploy. For example
nginx,private/nginx,public/org/nginx. -
In Tag, select the tag for the image/artifact.
For details on the settings, see Nexus Connector Settings Reference.
You can optionally add validations to Tags. To do this, click the settings icon and select the validation type.
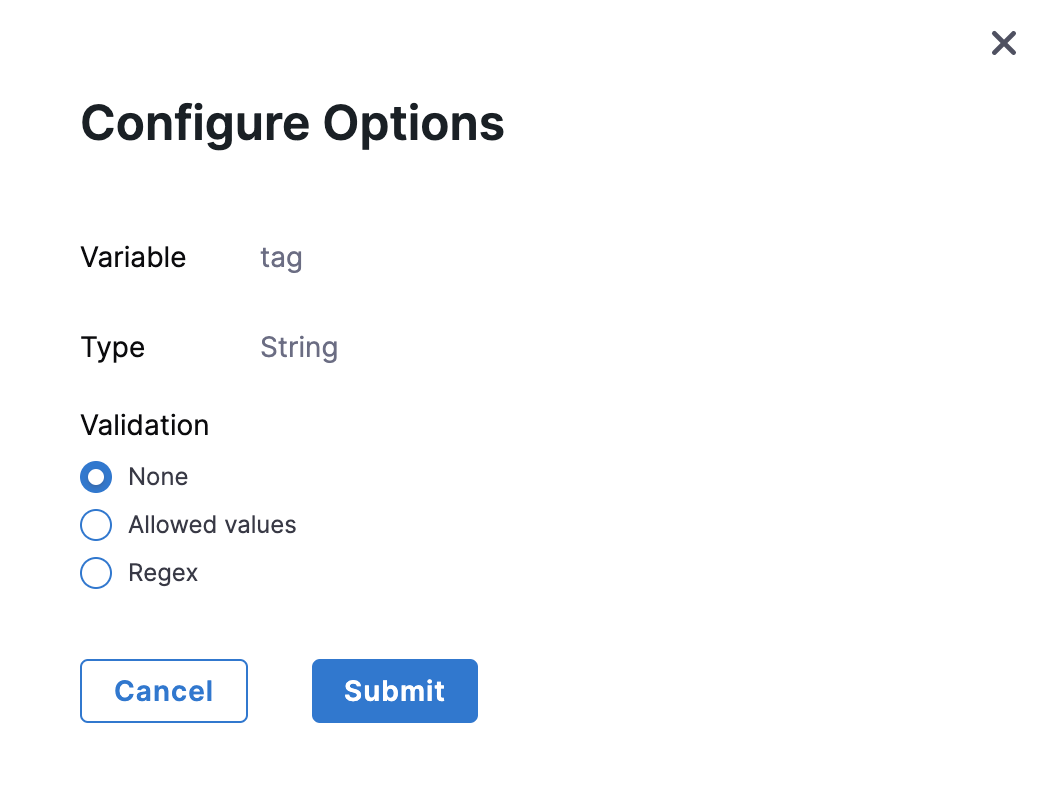
-
Click Submit.
The Artifact is added to the Service Definition.
- Select an Artifactory Connector or create a new one.
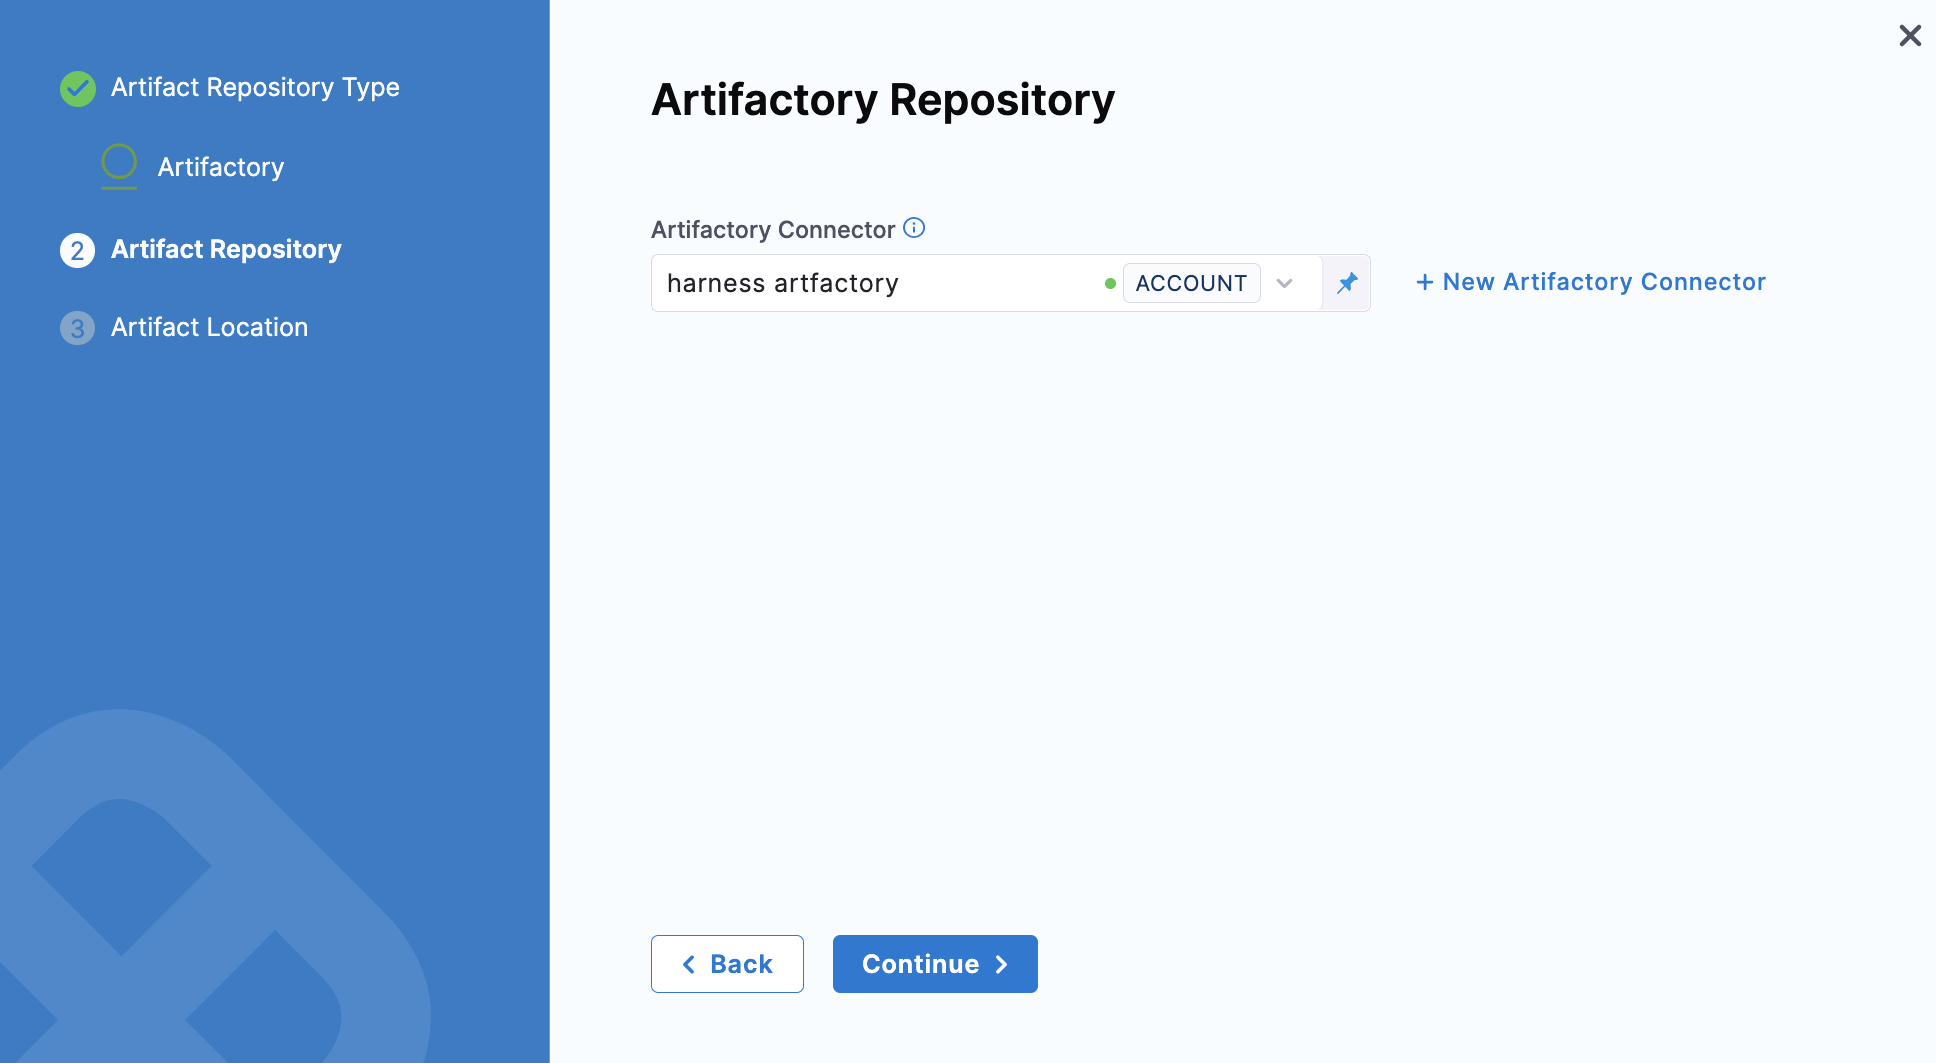
-
Click Continue. The Artifact Details settings appear.
-
In Repository URL, enter the URL you would use in the Docker login to fetch the artifact. This is the same as the domain name and port you use for
docker login hostname:port. For more information, see Artifactory Connector Settings Reference. -
In Repository, enter the name of the repository where the artifact is located.
-
In Artifact Path, enter the name of the artifact you want to deploy. For example
nginx,private/nginx,public/org/nginx. -
In Tag, select the tag for the image/artifact. For more information, see Artifactory Connector Settings Reference.
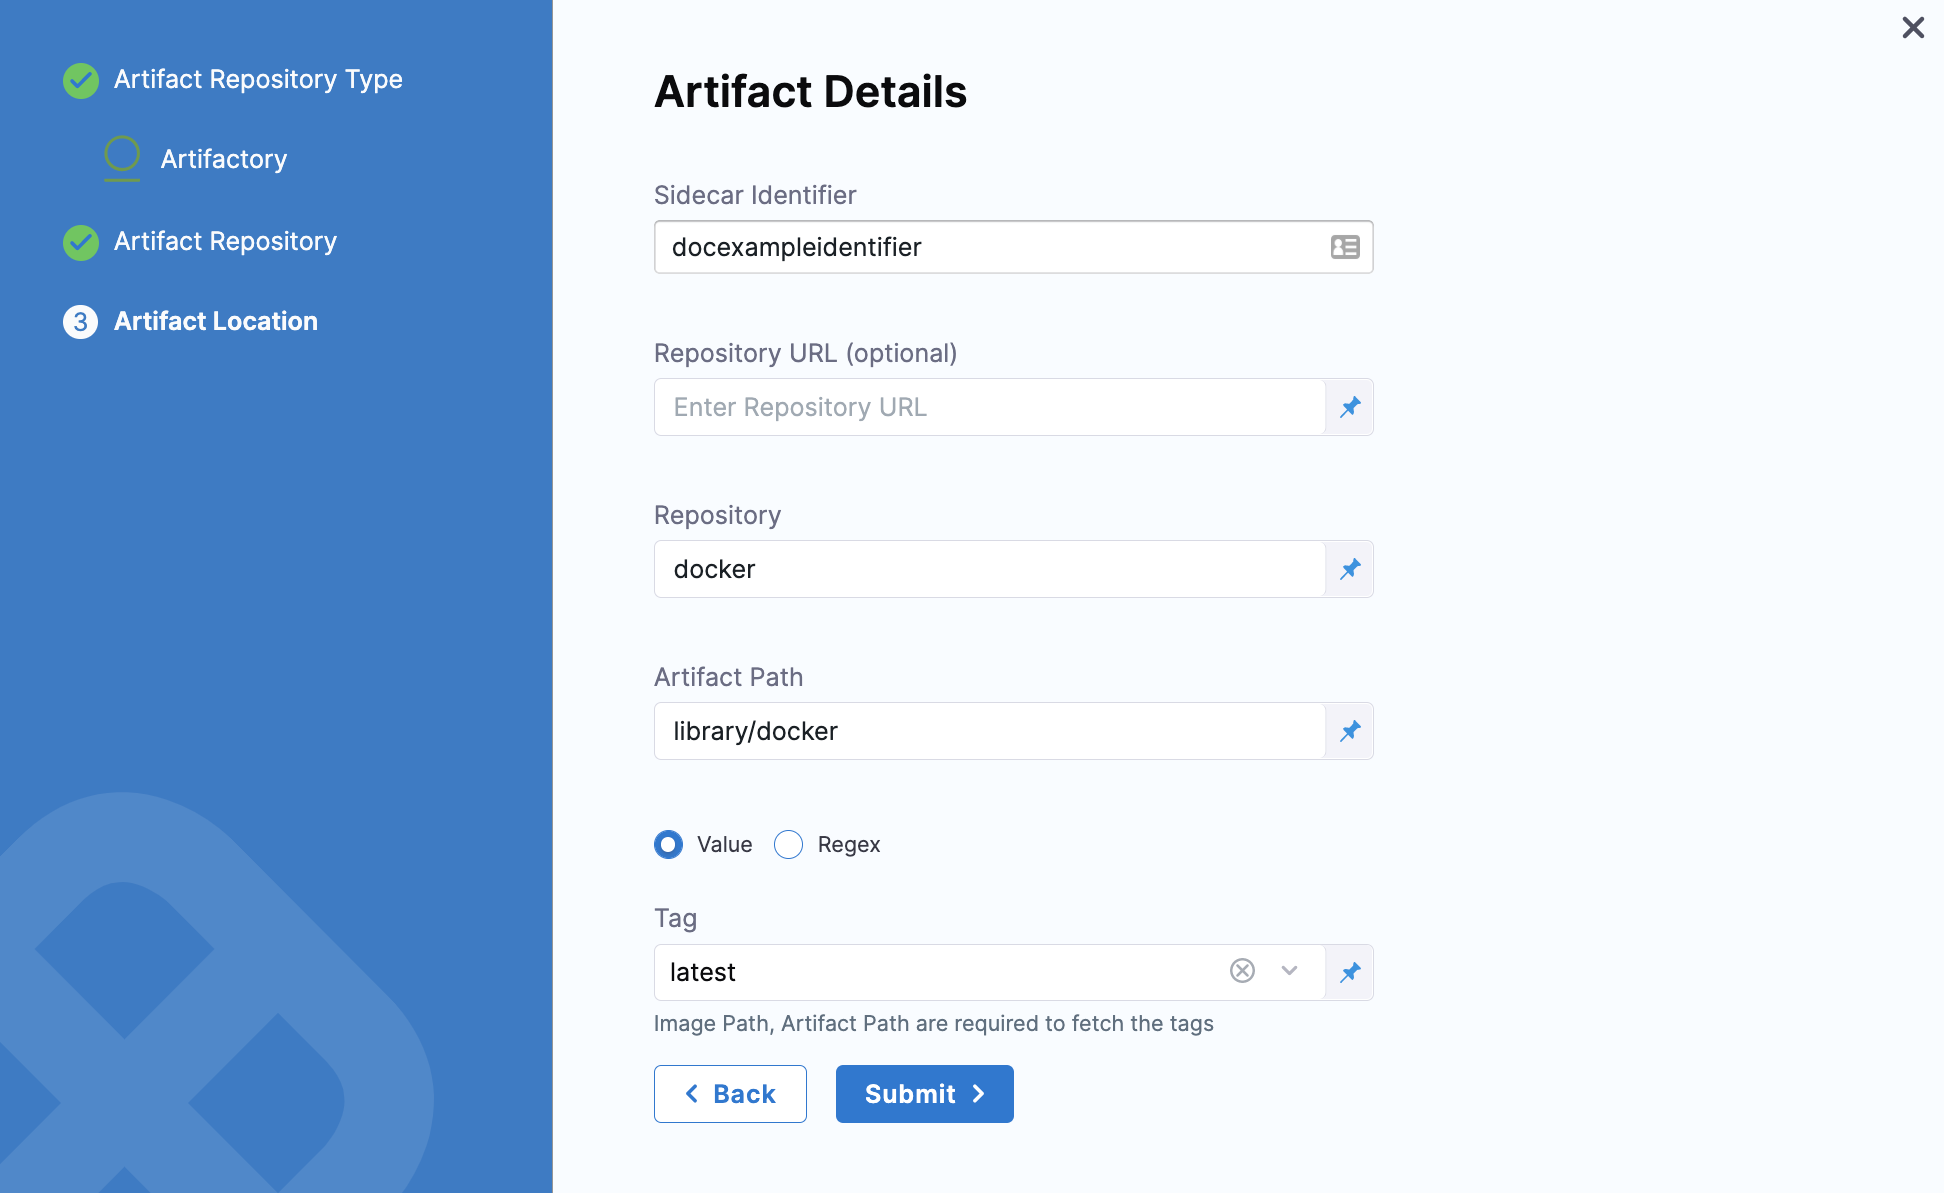
-
Click Submit.
The Artifact is added to the Service Definition.
You can add sidecar artifacts the same way.
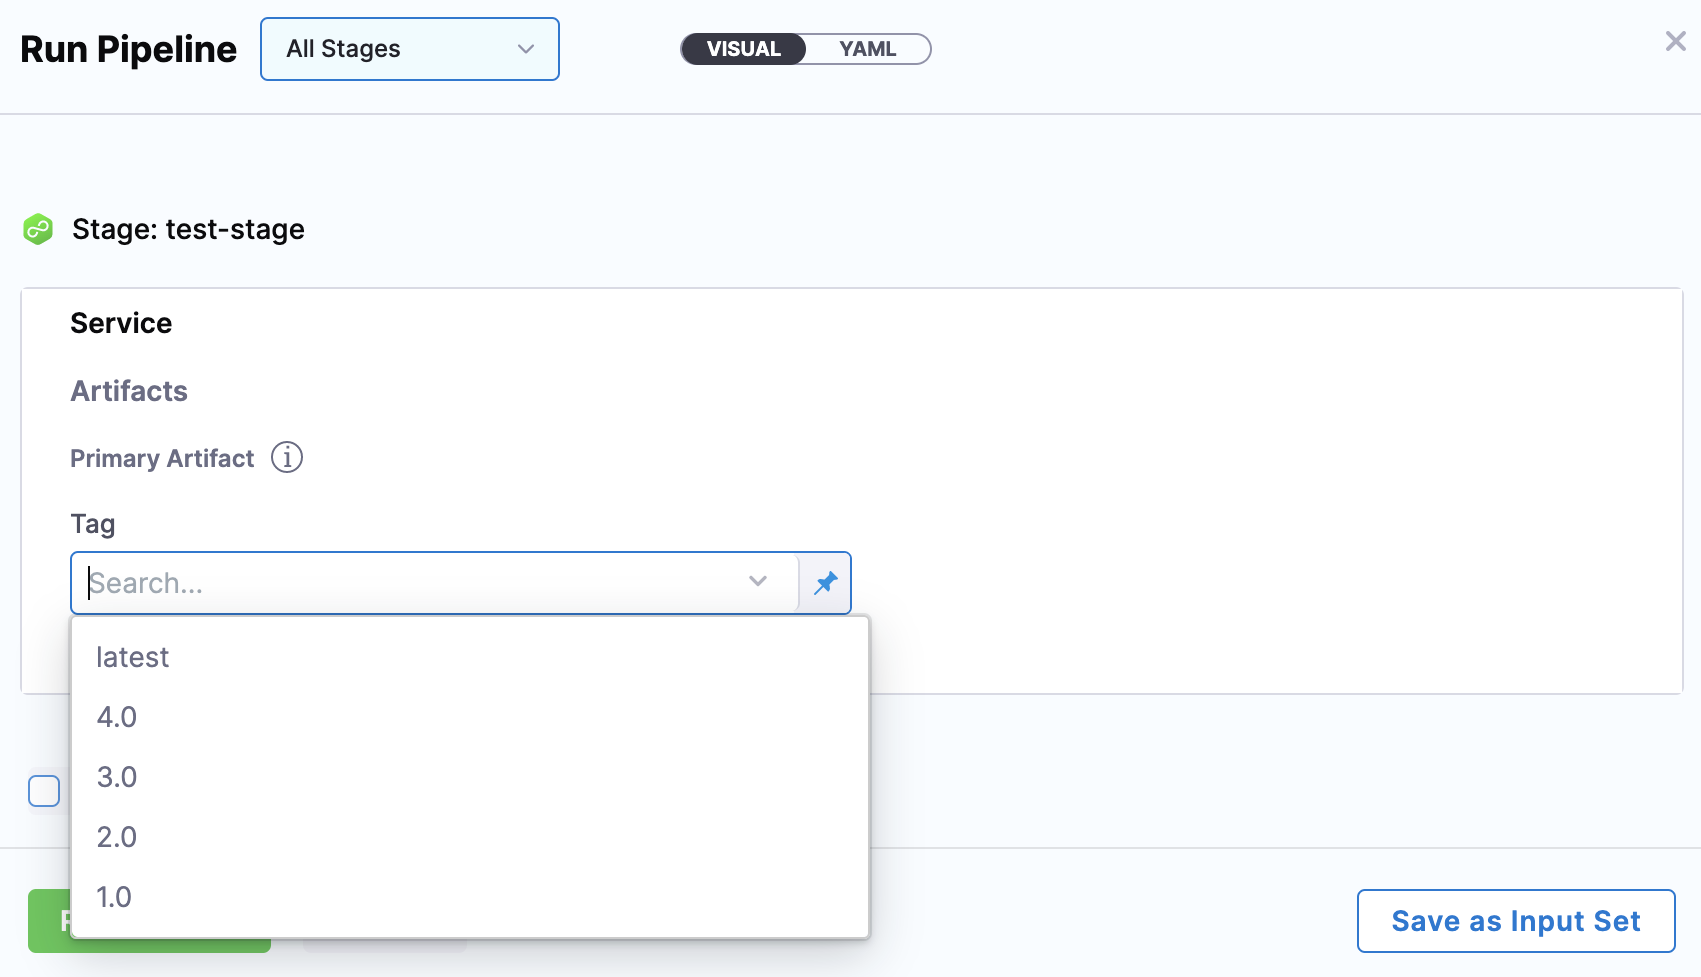
When you run the Pipeline, select the build of the artifact(s) to use.
Currently, this feature is behind the Feature Flag CUSTOM_ARTIFACT_NG. Contact Harness Support to enable the feature.
You can select a Custom Artifact Source to add your custom repository.
-
Select Custom and click Continue.

The Artifact Details settings appear.
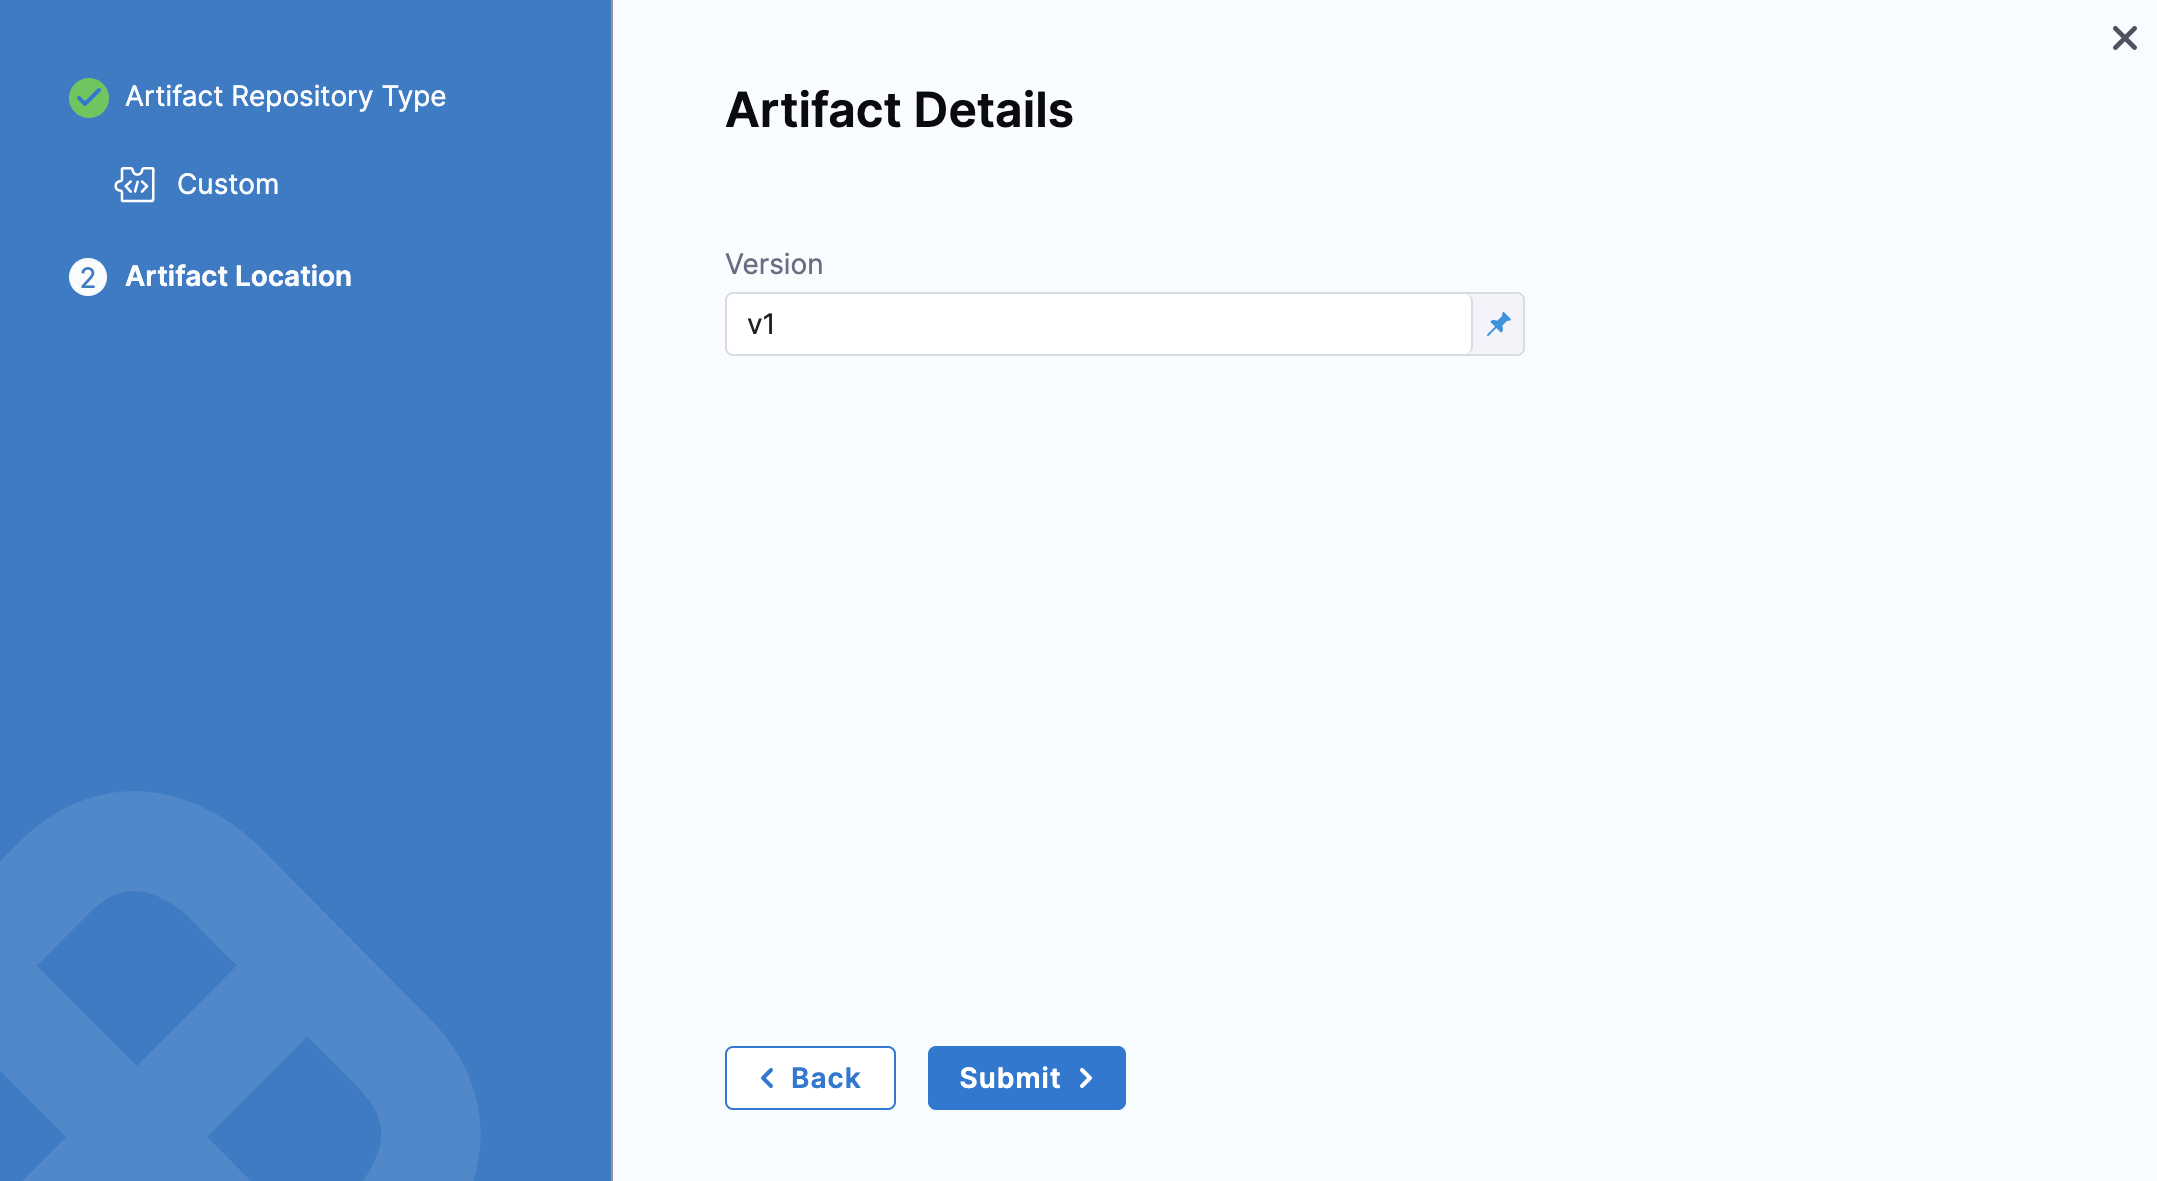
-
In Version, enter your artifact version.
-
Click Submit.
You can only set an Artifact version number when using a Custom Artifact Source. The version you select determines the Artifact context for the deploy stage. You may refer to it anywhere in the stage by using the expression
<+artifact.version>.
Reference the artifact in your values.yaml file
In this example, the public artifact isn't hardcoded in the manifest and we reference the image in the Service Definition Artifacts section using the variable, <+artifacts.primary.image>.
For example, here's a reference in a Values file:
...
name: <+stage.variables.name>
replicas: 2

image: <+artifacts.primary.image>
dockercfg: <+artifacts.primary.imagePullSecret>
...
That <+artifacts.primary.image> will reference the Primary artifact.
In your manifests, you simply use the Go template reference to the image value ({{.Values.image}}):
apiVersion: apps/v1
kind: Deployment
...
    spec:
      {{- if .Values.dockercfg}}
      imagePullSecrets:
      - name: {{.Values.name}}-dockercfg
      {{- end}}
      containers:
      - name: {{.Values.name}}
        image: {{.Values.image}}
...
Add your manifests
Once your manifests and Values file are configured to use the artifact reference <+artifacts.primary.image>, you can add them to the Service.
See Define Kubernetes Manifests.
Add infrastructure and execution
Next, you'll add the target infrastructure and execution steps to your stage.
We won't cover those here, but see the Kubernetes CD Quickstart for a summary.
Example manifests
Below are some examples of manifests using the Harness expression for the artifact you added in Artifacts (<+artifacts.primary.image>).
Basic values YAML and manifests for public image
This is a simple example using the Artifact reference, <+artifacts.primary.image>. It can be used whenever the public image isn't hardcoded in manifests.
We use Go templating with a values.yaml file and manifests for deployment, namespace, and service. The manifests for deployment, namespace, and service are in a templates folder that is a peer of the values.yaml file.
values.yaml
This file uses the image: <+artifacts.primary.image> to identify the primary artifact added in Artifacts.
It also uses name: <+stage.variables.name> to reference a Stage variable name, and namespace: <+infra.namespace> to reference the namespace entered in the Stage's Infrastructure Definition. Service type and ports are hardcoded.
The name, image, and namespace values are referenced in the manifests described later.
name: <+stage.variables.name>
replicas: 2

image: <+artifacts.primary.image>
# dockercfg: <+artifacts.primary.imagePullSecret>

createNamespace: true
namespace: <+infra.namespace>

# Service Type allow you to specify what kind of service you want.
# Possible values for ServiceType are:
# ClusterIP | NodePort | LoadBalancer | ExternalName
serviceType: LoadBalancer

# A Service can map an incoming port to any targetPort.
# targetPort is where application is listening on inside the container.
servicePort: 80
serviceTargetPort: 80

# Specify all environment variables to be added to the container.
# The following two maps, config and secrets, are put into a ConfigMap
# and a Secret, respectively.
# Both are added to the container environment in podSpec as envFrom source.
env:
  config:
    key1: value10
  secrets:
    key2: value2
templates/deployment.yaml
The deployment manifest references the name and image values from values.yaml. The manifest also contains the ConfigMap and Secret objects.
{{- if .Values.env.config}}
apiVersion: v1
kind: ConfigMap
metadata:
  name: {{.Values.name}}
data:
{{.Values.env.config | toYaml | indent 2}}
---
{{- end}}

{{- if .Values.env.secrets}}
apiVersion: v1
kind: Secret
metadata:
  name: {{.Values.name}}
stringData:
{{.Values.env.secrets | toYaml | indent 2}}
---
{{- end}}

{{- if .Values.dockercfg}}
apiVersion: v1
kind: Secret
metadata:
  name: {{.Values.name}}-dockercfg
  annotations:
    harness.io/skip-versioning: true
data:
  .dockercfg: {{.Values.dockercfg}}
type: kubernetes.io/dockercfg
---
{{- end}}

apiVersion: apps/v1
kind: Deployment
metadata:
  name: {{.Values.name}}-deployment
spec:
  replicas: {{int .Values.replicas}}
  selector:
    matchLabels:
      app: {{.Values.name}}
  template:
    metadata:
      labels:
        app: {{.Values.name}}
    spec:
      {{- if .Values.dockercfg}}
      imagePullSecrets:
      - name: {{.Values.name}}-dockercfg
      {{- end}}
      containers:
      - name: {{.Values.name}}
        image: {{.Values.image}}
        {{- if or .Values.env.config .Values.env.secrets}}
        envFrom:
        {{- if .Values.env.config}}
        - configMapRef:
            name: {{.Values.name}}
        {{- end}}
        {{- if .Values.env.secrets}}
        - secretRef:
            name: {{.Values.name}}
        {{- end}}
        {{- end}}
templates/namespace.yaml
The namespace manifest references the namespace value from values.yaml.
{{- if .Values.createNamespace}}
apiVersion: v1
kind: Namespace
metadata:
  name: {{.Values.namespace}}
{{- end}}
templates/service.yaml
The service manifest references the hardcoded service type and ports from values.yaml.
apiVersion: v1
kind: Service
metadata:
  name: {{.Values.name}}-svc
spec:
  type: {{.Values.serviceType}}
  ports:
  - port: {{.Values.servicePort}}
    targetPort: {{.Values.serviceTargetPort}}
    protocol: TCP
  selector:
    app: {{.Values.name}}
Private artifact
When the image is in a private repo, you use the expression <+artifacts.primary.imagePullSecret> in the Secret and Deployment objects in your manifest.
This key will import the credentials from the Docker credentials file in the artifact.
It's much simpler to use the <+artifacts.primary.imagePullSecret> expression in the values.yaml file, and then reference it in other manifests.
Using the values.yaml file above, we simply remove the comment in front of dockercfg: <+artifacts.primary.imagePullSecret>:
name: <+stage.variables.name>
replicas: 2

image: <+artifacts.primary.image>
dockercfg: <+artifacts.primary.imagePullSecret>

createNamespace: true
namespace: <+infra.namespace>
...
You don't need to make changes to the deployment manifest from earlier. It uses Go templating to check for the dockercfg value in values.yaml and applies it to Secret and Deployment.
If using the condition {{- if .Values.dockercfg}} to check for dockercfg in values.yaml.
...
{{- if .Values.dockercfg}}
apiVersion: v1
kind: Secret
metadata:
  name: {{.Values.name}}-dockercfg
  annotations:
    harness.io/skip-versioning: true
data:
  .dockercfg: {{.Values.dockercfg}}
type: kubernetes.io/dockercfg
---
{{- end}}

apiVersion: apps/v1
kind: Deployment
metadata:
  name: {{.Values.name}}-deployment
spec:
  replicas: {{int .Values.replicas}}
  selector:
    matchLabels:
      app: {{.Values.name}}
  template:
    metadata:
      labels:
        app: {{.Values.name}}
    spec:
      {{- if .Values.dockercfg}}
      imagePullSecrets:
      - name: {{.Values.name}}-dockercfg
      {{- end}}
      containers:
      - name: {{.Values.name}}
        image: {{.Values.image}}
...
Notes
- Harness Variables and Expressions may be added to Values files (for example values.yaml), not the manifests themselves. This provides more flexibility.
- The Values file used in a Harness Service Definition doesn't support Helm templating, only Go templating. Helm templating is fully supported in the remote Helm charts you add to your Harness Service Definition. See Helm CD Quickstart.
- Harness uses Go template version 0.4.5. If you are used to Helm templating, you can download Go template and try it out locally to find out if your manifests will work. This can help you avoid issues when adding your manifests to Harness.
- You can install Go template version 0.4.5 locally to test your manifests.
-
Mac OS:
- AMD64:
curl -O https://app.harness.io/public/shared/tools/go-template/release/v0.4.5/bin/darwin/amd64/go-template - ARM64:
curl -O https://app.harness.io/public/shared/tools/go-template/release/v0.4.5/bin/darwin/arm64/go-template
- AMD64:
-
Linux:
- AMD64:
curl -O https://app.harness.io/public/shared/tools/go-template/release/v0.4.5/bin/linux/amd64/go-template - ARM64:
curl -O https://app.harness.io/public/shared/tools/go-template/release/v0.4.5/bin/linux/arm64/go-template
- AMD64:
-
Windows:
curl -O https://app.harness.io/public/shared/tools/go-template/release/v0.4.5/bin/windows/amd64/go-template.exeAfter installing Go template, you can run the
./go-templatecommand from your local machine to view the template usage. Here's a sample output:Usage:
Template: ./go-template <-t templateFilePath> [-f valuesFilePath] [-s variableOverride] [-o outputFolder]
Version : ./go-template -v
-
- Harness uses an internal build of Go templating. It cannot be upgraded. Harness uses Spring templates functions, excluding those functions that provide access to the underlying OS (env, expandenv) for security reasons. In addition, Harness uses the functions ToYaml, FromYaml, ToJson, FromJson.