Sync GitOps applications
Sync is a process that ensures that the live state of a system matches its desired state by applying a declarative description. This process involves synchronizing the desired Git state with the live cluster state.
Sync for Single Sources application.
To sync applications from the Applications page:
-
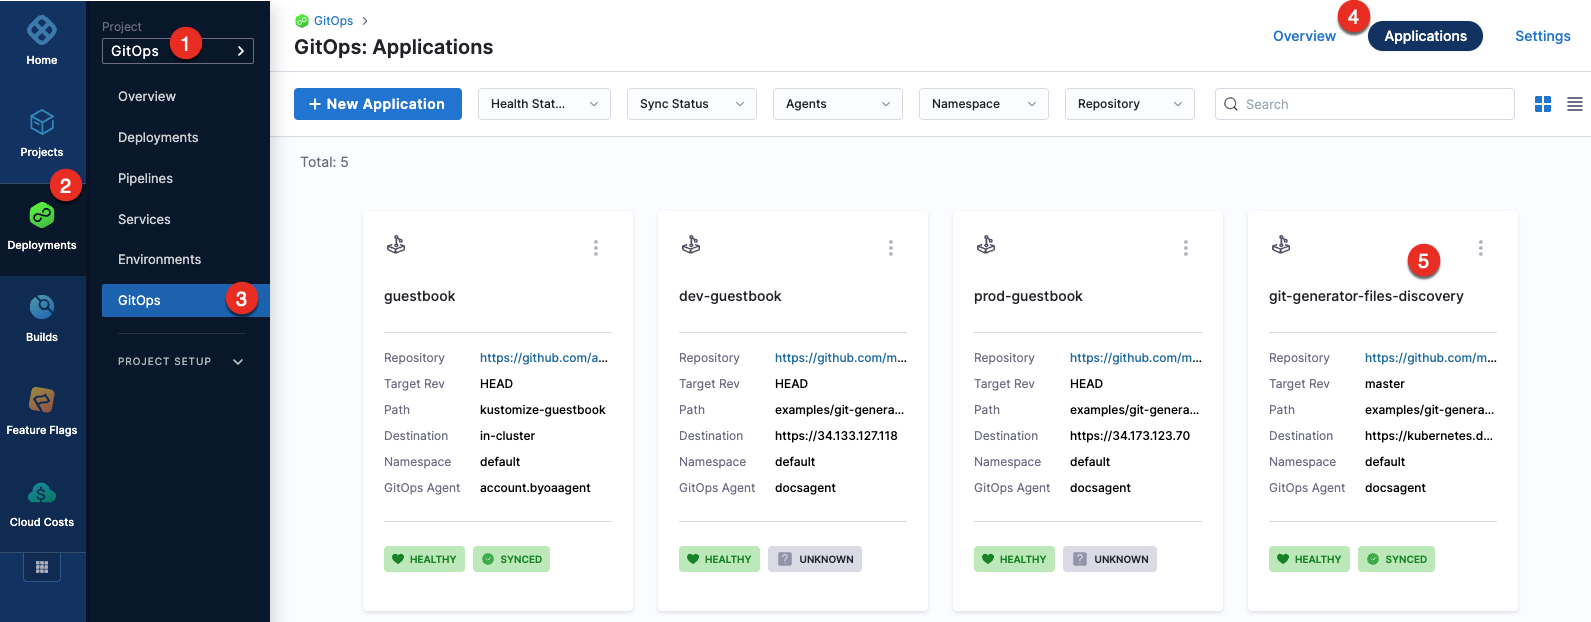
In your GitOps project, go to Deployments > GitOps > Applications, and then select your application.
-
To sync the selected application:
-
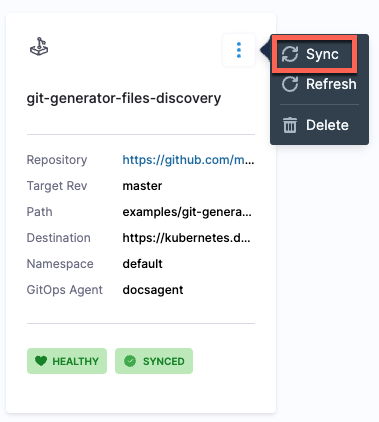
Select the more options icon, and then select Sync.
-
Select the application, and then select SYNC.

-
-
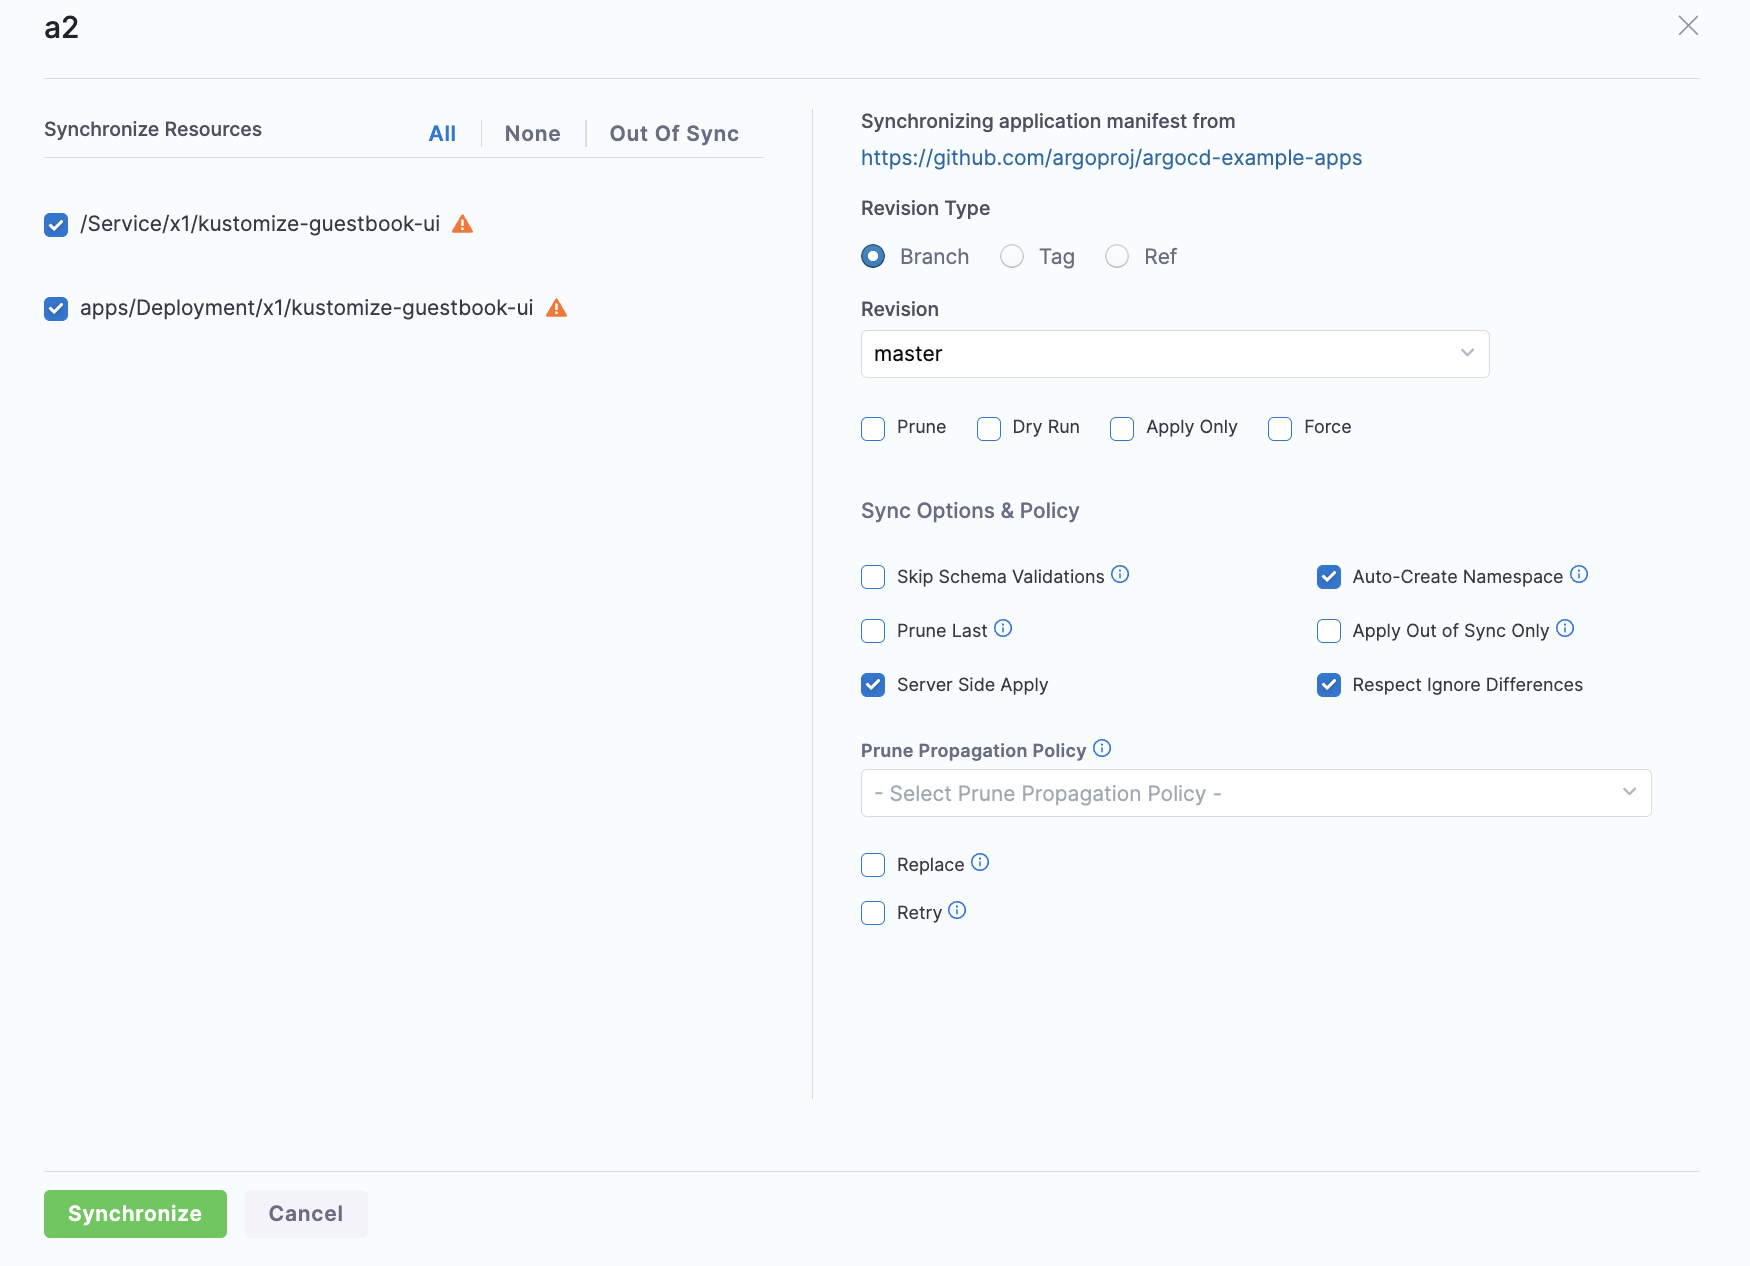
Configure the sync options, and then select Synchronize.
When synchronizing the application, you have the option to apply a specific revision. By default, target revision of the application is selected.
The Branch and Tag options display a list of available branches and tags, allowing you to make a selection. Additionally, the Ref option enables synchronization of branches, tags, and commit hashes.
To sync applications using the GitOpsSync step:
-
Select a pipeline and go to the Execution tab of a deploy stage.
infoMake sure that the service, environment, and cluster selected in the pipeline matches the service, environment, and cluster in the application.
-
Select Add Step, and then select the GitOpsSync step.
-
Select the GitOpsSync step to configure step parameters.
-
Optionally, click on the Wait until healthy checkbox, if you would like the step to run until the application reaches it's Healthy state.
-
Optionally, if you enabled Wait until healthy you can enable Fail If Step Times Out. This will cause the step to fail if it times out while waiting for the health check to pass.
tipFor example, if this option is enabled, the step may sync successfully but fail if a healthy state is not achieved before the timeout period expires. In contrast, with this option disabled, the step will always be marked as successful if the sync is successful, regardless of the healthy state.
-
In Advanced Configuration, select the application you want to sync and configure the sync options. You can either can either choose an application or applications manually, or you can match up to 1000 applications using a regex filter.

-
Select Apply Changes.
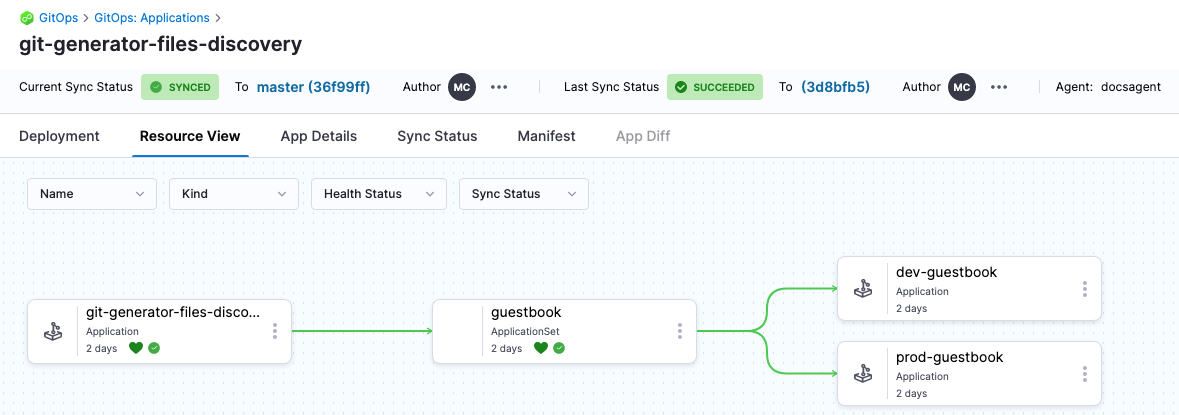
Here is how the resources would look in Harness after the sync process is complete.
Sync for Multiple Sources application
For more information on creating a multi-source application, refer to the Support for Multiple Sources documentation
Currently, Support for Multiple Sources is behind the feature flag GITOPS_MULTI_SOURCE_ENABLED. Please contact Harness support to enable this feature.
After the application with multiple source is created, you can also choose which source to sync with the application during the sync operation. By default, all applications will be synced.
To sync a specific source:
- Click the Sync button in the top right corner of the Applications page.
- Under Synchronizing application manifest from, select the source tab from which you want to sync your application.
- Check the Sync Source checkbox. The tab for the selected source, where the checkbox is enabled, will be highlighted in green.
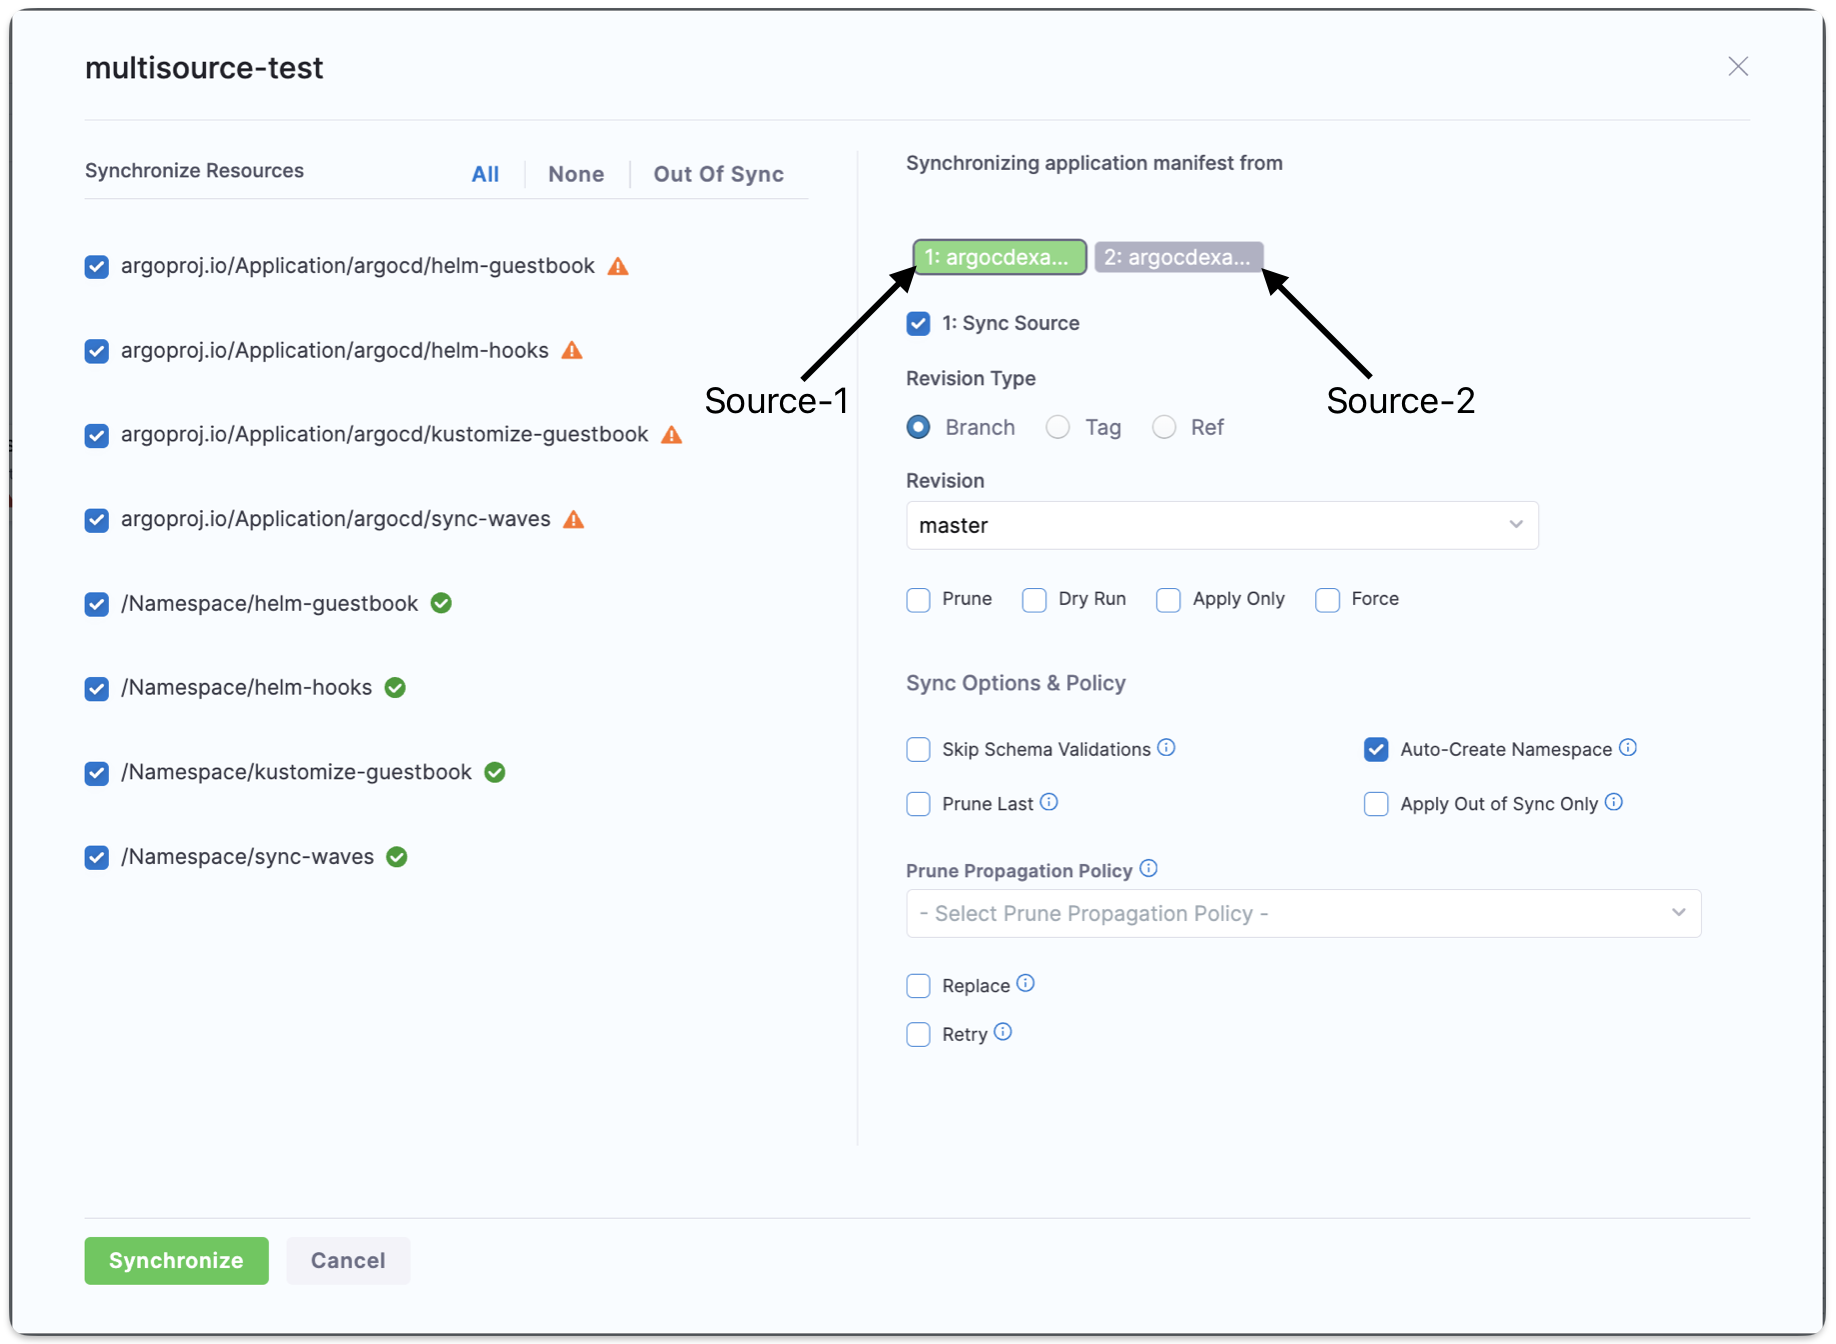
Terminate sync
To terminate an in-progress sync, go to the application for the syncing app and locate the Terminate Sync button in the top right corner of the UI. Replace the Sync button when a sync is in progress.

Bulk Sync and Refresh
This feature is behind the feature flag GITOPS_BULK_ACTIONS_ENABLED. Contact Harness Support to enable it.
This feature requires GitOps agent version of 0.93 or higher. Please ensure you have the correct agent version.
Having the incorrect version will result in your bulk syncs timing out after three minutes.
You can bulk sync or refresh your applications from the application page. In your GitOps project, go to Deployments > GitOps > Applications to get to your applications page.
Click the Bulk Sync button in the top left to sync many applications at once or click Refresh in the top right. The following screen will appear for bulk sync, and a very similar screen will appear for refresh:
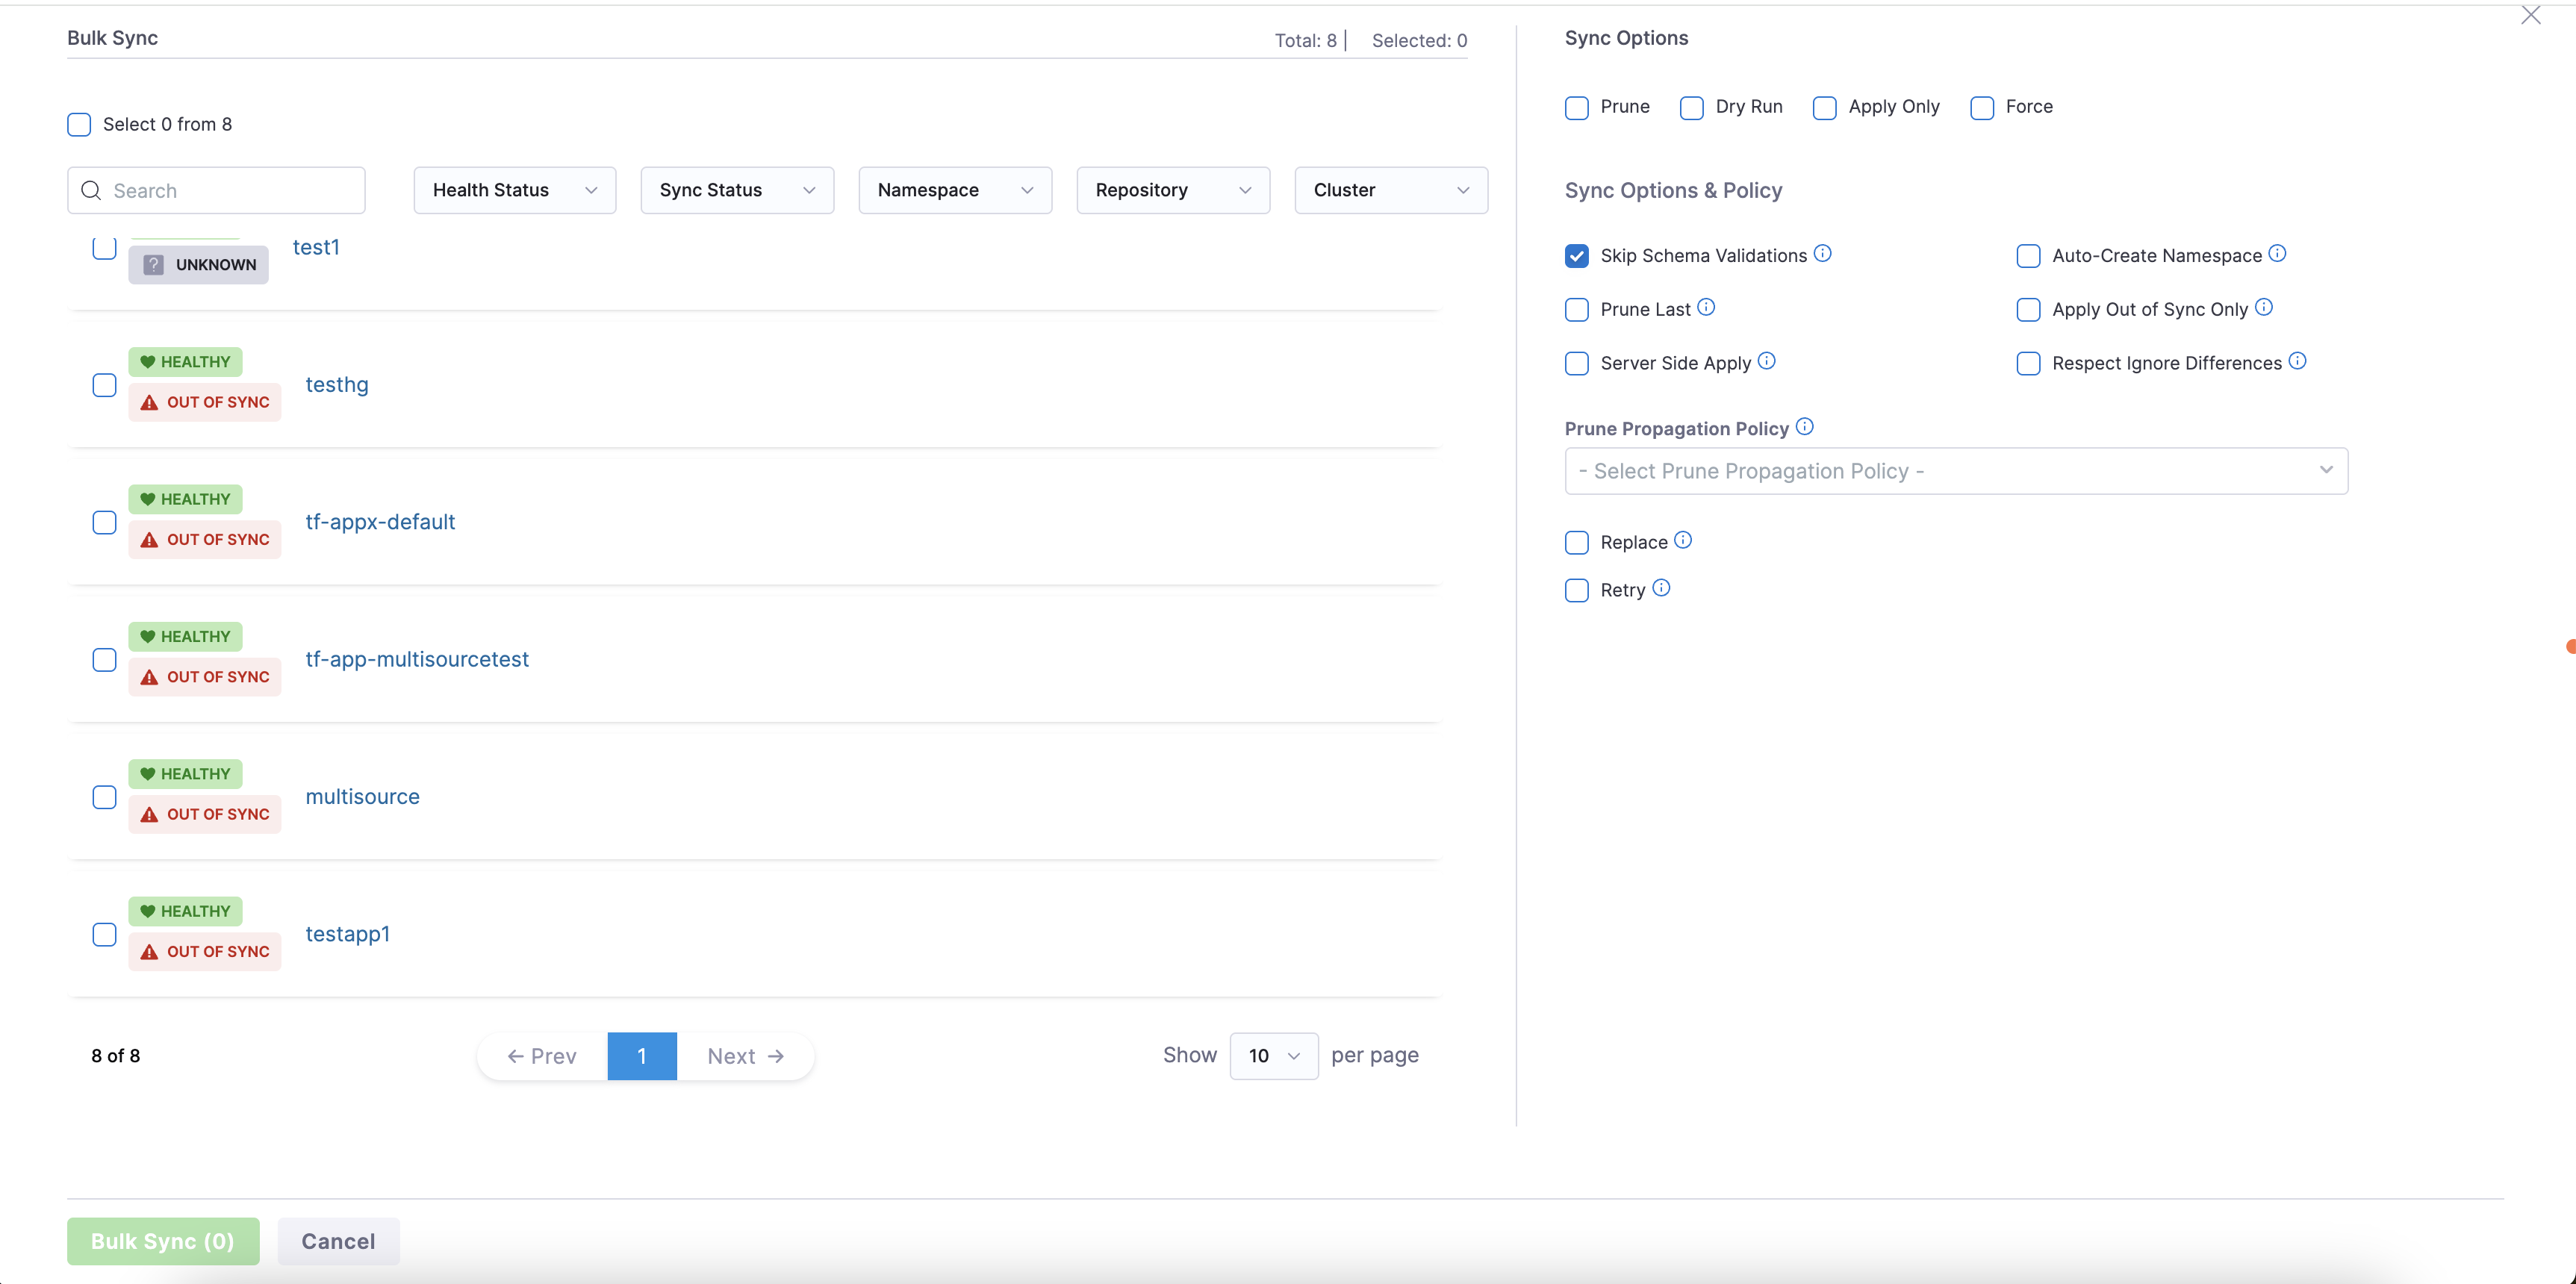
In the top left you can select all the applications on the page, or you can select applications individually from the list shown.
On the right you can modify your sync or refresh options. These options will apply to all the applications selected.
Once you've selected your applications and options, click Bulk Sync or Bulk Refresh.
The recommended batch size is 100 applications. To sync more than 100 applications, increase the GITOPS_AGENT_NUM_PROCESSORS value in the config by 1 for every additional 100 applications. For example, set it to 2 for 200 applications.
Required Permissions
- Bulk Sync: User must have the
gitops app syncpermission. - Bulk Refresh: User must have the
gitops app viewpermission.