Harness GitOps pipeline steps
This topic shows you how to configure your Harness GitOps pipeline steps. Few of these steps are specifically meant to be used with PR pipelines, but others can be used directly in your GitOps pipeline stages.
PR Pipeline Steps
This topic describes how to use Harness GitOps PR pipeline steps in your Harness PR pipeline. Please refer to that topic before venturing into this one.
Harness automatically adds multiple steps to the PR pipelines that you create in Harness. These steps and other PR pipeline steps are described in this section.
Steps that Harness adds to the PR pipeline:
- Update Release Repo step
- Merge PR step
- Fetch Linked Apps step
Other steps that you can add to the PR pipeline:
- Revert PR step
You don't have to edit anything in the Update Release Repo, Merge PR and Fetch Linked Apps steps. The steps are ready for use, but you can apply optional configurations specified below.
Update Release Repo step
Only one Update Release Repo or Revert PR step can run per GitHub token reference at a time. This adheres to GitHub's best practices to prevent secondary rate limits during pull request creation.
This step fetches JSON or YAML files, updates them with your changes, performs a commit and push, and then creates the PR.
You can also enter variables in this step to update key-value pairs in the config file you are deploying.
In this step, you can do the following:
-
Provide a custom PR title. If you don't provide a PR title, Harness creates the PR with the title Harness: Updating config overrides.
-
Specify hierarchical variables. If you specify a dot-separated variable in this step, the step creates or updates a nested variable. For example, if you specify the key-value pair of a variable as
a.b:val, it creates or updates the config file with the following JSON object:{
"a": {
"b": "val"
}
...
// other existing config.json values
} -
Use variables to update values in a list. For example, if you had the following yaml:
spec:
  template:
    metadata:
      labels:
        app: "bbguestbook-ui"
        execution: "8"
    spec:
      containers:
      - image: "gcr.io/heptio-images/ks-guestbook-demo:0.2"
You can change the first container image by updating the variable spec.template.spec.containers[0].image.
You can only update values that are present in a list. You cannot create or remove items in the list.
-
If a variable name used in this step matches a variable in the Harness service or environment used in this pipeline, the variable entered in this step overrides the service or environment variable.
-
If an empty or blank value is provided for a variable, the variable is disregarded, and no updates are made to the JSON or YAML file for that specific variable.
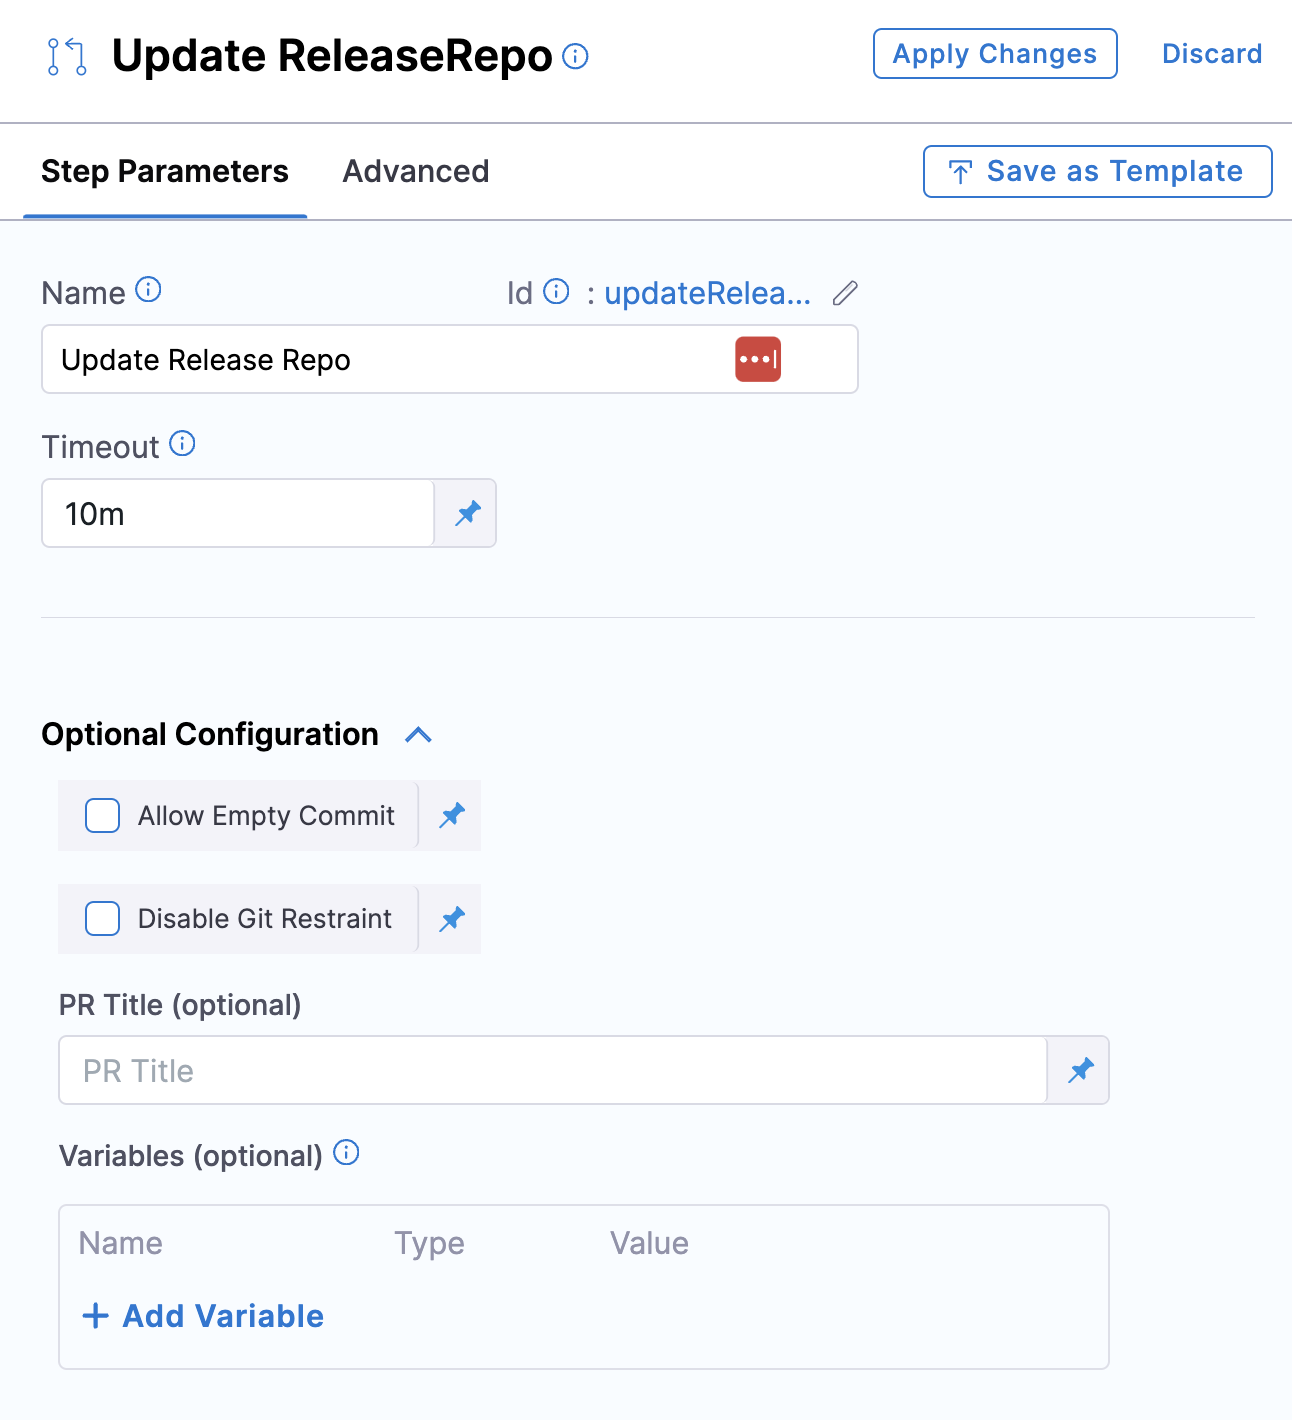
Additionally, in the Optional Configuration, you can configure the following:
- Allow Empty Commit: Use the
allowEmptyCommitfield to push an empty commit.
When set to true, the step will proceed with a commit even if no changes are detected, failing only on actual errors.
When set to false, the step will fail if no changes are detected and display the message: No files were committed. Hence not creating a pull request.
Harness Delegate version 84600 or later is required for the Allow Empty Commit feature.
- Disable Git Restraint: Use the Disable Git Restraint option to allow multiple pipelines to simultaneously modify the same Git repository using a single connector.
When set to true, it disables the Git locking mechanism, removing constraints and enabling concurrent operations on the repository.
Merge PR step
You can create a maximum of two Merge PR steps in a stage.
Currently, Git connectors authenticated through OAuth are not supported in the Merge PR step.
This step merges a PR.
Fetch Linked Apps step
The Fetch Linked Apps step provides app information, such as the app name, agent identifier, and URL to the Harness GitOps apps which are generated via ApplicationSet.
Multiple ApplicationSet Support
This feature requires the feature flag GITOPS_APPLICATIONSET_FIRST_CLASS_SUPPORT to be enabled. Contact Harness Support to enable this feature.
With the first-class ApplicationSet support, you can now configure multiple ApplicationSets at the service level. The Fetch Linked Apps step will fetch all applications generated by these ApplicationSets.
ApplicationSets can be referenced directly even if they exist in different GitOps agents. The step will fetch applications across all agents where the ApplicationSets are deployed.
Filter Applications per Configured Service/Environment
The Fetch Linked Apps step includes a Filter applications per configured service/env checkbox that controls which applications are fetched:
-
Checkbox Unchecked (Default - Recommended): Fetches only applications that match both:
- The service definition configured in the pipeline
- The cluster(s) linked to the environment specified in the pipeline
This is the recommended setting as it ensures you only fetch applications relevant to your pipeline's service and environment configuration.
-
Checkbox Checked: Attempts to fetch all applications in the cluster that are part of the environment specified in the pipeline, regardless of service configuration.
warningIf you have a large number of applications in the cluster that is part of the specified environment, enabling this option may cause the fetch to fail due to timeout or resource constraints. Leave this checkbox unchecked unless you have a specific use case requiring all applications.
Step Output
The following image shows information that is displayed on the Output tab of the step:
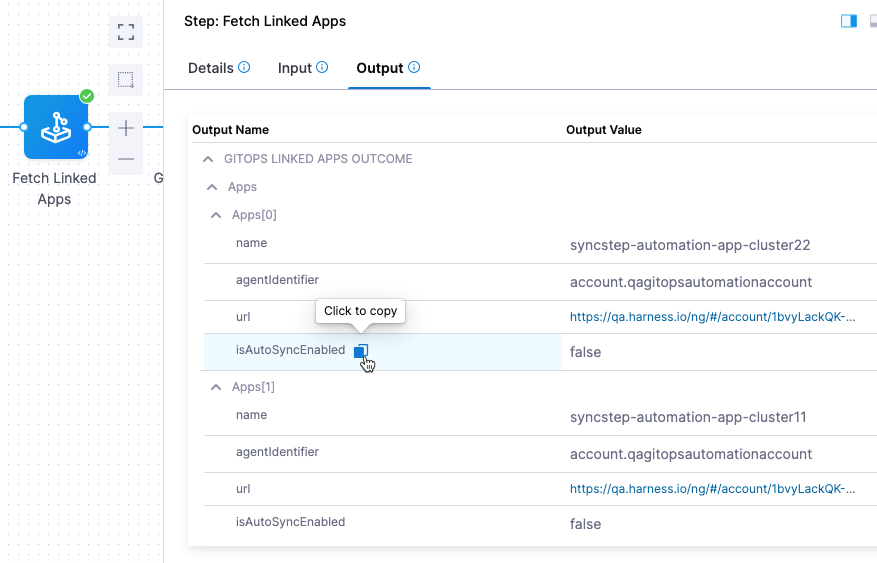
You can copy the expression for any output in the Output Name column and use it to reference the output value in a subsequent Shell Script step or step setting.
Prerequisites
Configuring the Deployment Repo manifest in your service is required for this step to execute correctly. For services with first-class ApplicationSet support, ensure ApplicationSets are properly referenced in the service configuration.
Example Output
Harness fetches the ApplicationSet YAML file from its file store and identifies the related Harness GitOps app(s). For example:
Starting Git Fetch Files
Git connector Url: https://github.com/wings-software/gitops-automation.git
Branch: syncstepautomation

Fetching following Files :
- helm2/app1/appset.yaml

Successfully fetched following files:
- helm2/app1/appset.yaml


Git Fetch Files completed successfully.
App set Name: helm-k8s-app
Found linked app: syncstep-automation-app-cluster22. Link - https://app.harness.io/ng/#/account/1bvyLackQK-Hapk25-Ry4w/cd/orgs/default/projects/DoNotDeleteGitopsAutomationSyncStep/gitops/applications/syncstep-automation-app-cluster22?agentId=account.qagitopsautomationaccount
Found linked app: syncstep-automation-app-cluster11. Link - https://app.harness.io/ng/#/account/1bvyLackQK-Hapk25-Ry4w/cd/orgs/default/projects/DoNotDeleteGitopsAutomationSyncStep/gitops/applications/syncstep-automation-app-cluster11?agentId=account.qagitopsautomationaccount
Revert PR step
Only one Update Release Repo or Revert PR step can run per GitHub token reference at a time. This adheres to GitHub's best practices to prevent secondary rate limits during pull request creation.
This step reverts the commit passed and creates a new PR. Use this step if you want to run any tests or automation on the pipeline and then revert the commit done by the Update Release Repo step.
The Revert PR step uses the commitId from the Update Release Repo step as input. The commitId can be an expression, runtime input, or a static value. For example,
<+pipeline.stages.deploy.spec.execution.steps.updateReleaseRepo.updateReleaseRepoOutcome.commitId>
The Revert PR step creates a new branch and creates a commit to revert the changes made by the commit in the Update Release Repo step.
You can create another Merge PR step to merge the PR created by the Revert PR step. In this scenario, the Merge PR step reaches its maximum limit for a stage.
Additional Harness GitOps Pipeline Steps
For these steps, ensure that the service, environment, and cluster selected in the pipeline matches the service, environment and cluster, respectively, in the application.
Update GitOps App step
You can use the Update GitOps App step only once in a stage.
This step updates a GitOps application through a PR Pipeline. Use this step if you have an existing GitOps application and want to update its target revision (branch or tag), Helm, or Kustomize overrides.
A common Git-based use case bases production deployments on Git tags because tags are immutable. In this use case, to deploy a new version, you can use the Update GitOps App step to update your GitOps application to a new tag.
You can use this step to override your Kustomize application configuration from the pipeline.
From this step, you can also provide Helm overrides (parameters, file parameters, or values files) from the pipeline. Helm parameters and file parameters represent individual value overrides for your Helm application, while values files represent an existing set of overrides already present in the repository.
Existing Helm parameters and file parameters are merged with the values provided in the PR pipeline. Other parameters remain unchanged. A parameter and a file parameter are not merged with each other.
If a parameter is specified both in the values file and as a parameter or file parameter override, the latter takes precedence.
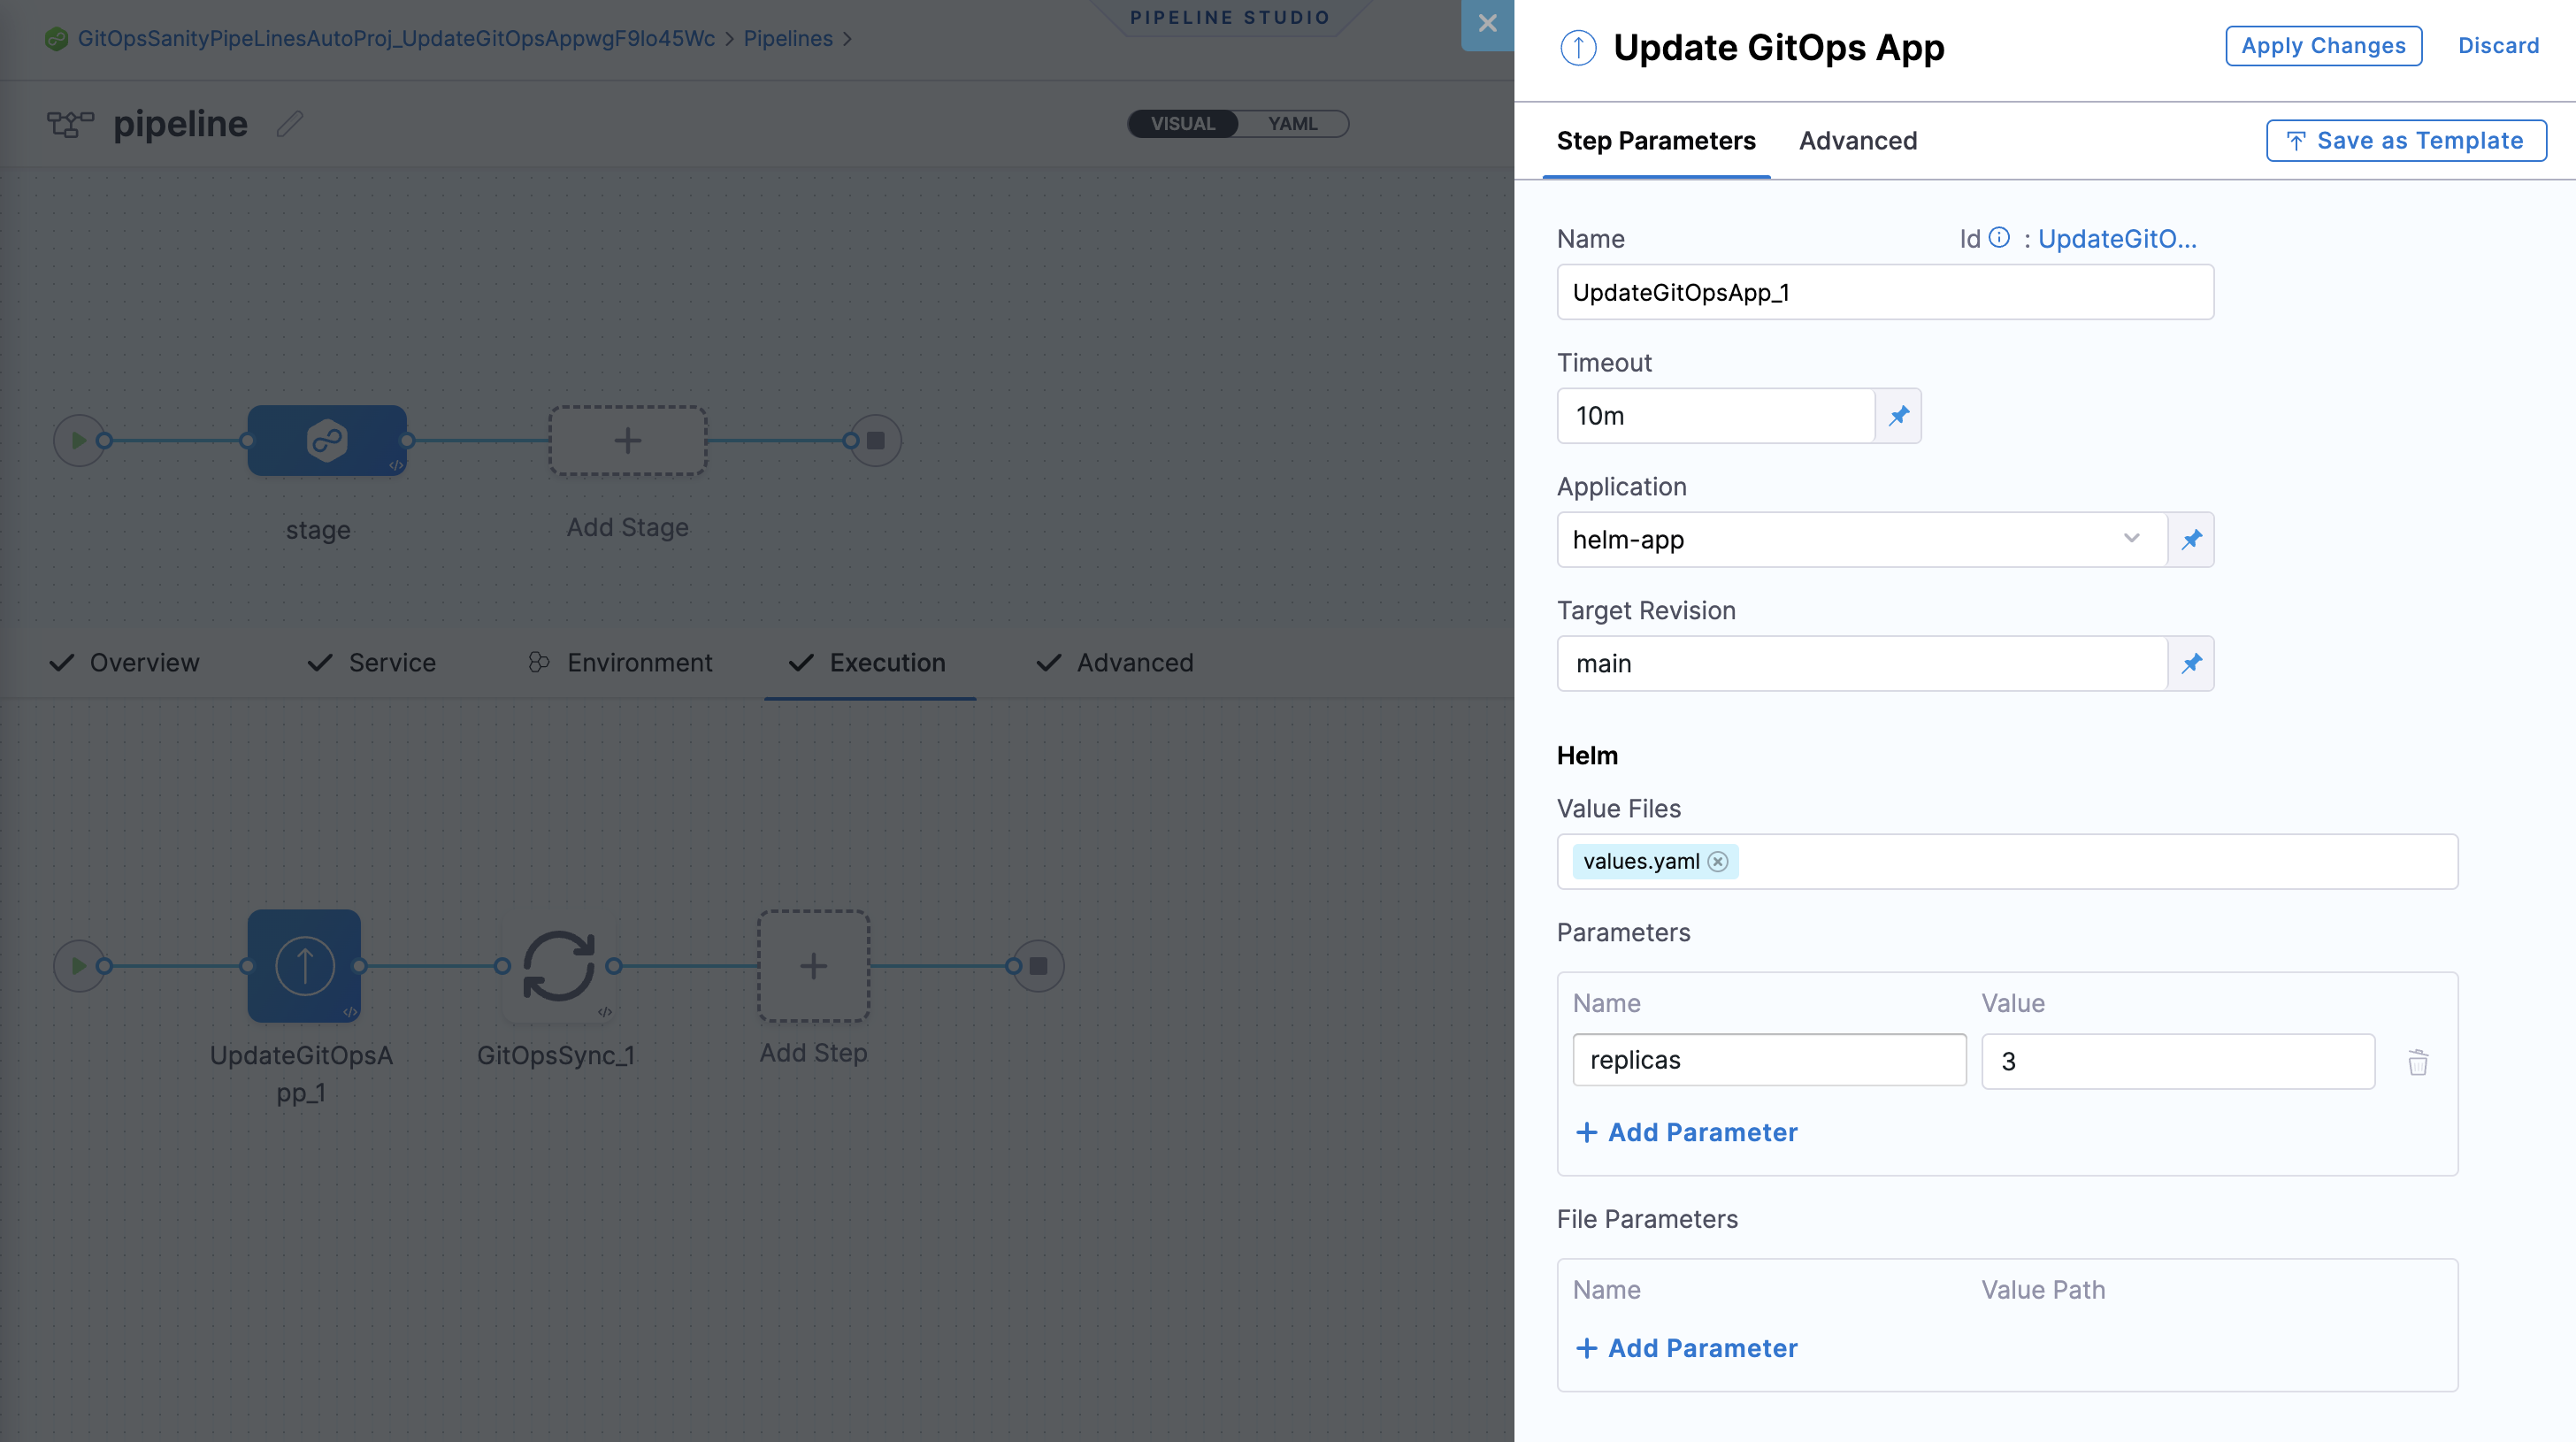
Once your GitOps application is updated, you can use the GitOps Sync step to deploy your changes.
Rollback for Update GitOps App Step
This feature is behind the feature flag CDS_GITOPS_ENABLE_UPDATE_GITOPS_APP_ROLLBACK. Contact Harness Support to enable this flag.
In order to rollback this step, you will need to add another Update GitOps App Step to the rollback phase of this stage.
- Click on the Execution / Rollback toggle in the top right of the studio.

-
Add a Update GitOps App Step. This step does not need to be configured and will not use step parameters; it will automatically call the last successful revision and update the manifest accordingly.
-
Add a GitOps Sync step. This will sync the application to match the manifest that was updated during the rollback in the previous step.
Update GitOps App step for multi-source applications
Currently, support for multi-source applications are behind the feature flag GITOPS_MULTI_SOURCE_ENABLED. Please contact Harness support to enable this feature.
With this feature enabled, you can select your multi-source application in the Application field. This will populate the step with all the sources for the selected application.
From there, you can update each source individually as you would for a single source application and described above.
GitOps Sync step
This step triggers a sync for your existing or updated GitOps application.
Optionally, click on the Wait until healthy checkbox, if you would like the step to run until the application reaches it's "Healthy" state.
In Advanced Configuration, select the application(s) you want to sync and configure the sync options. You can choose one of the following:
- Application name – Select specific applications manually.
- Application regex – Match up to 1000 applications using a regular expression.
- Application labels – Filter applications by their labels.
-
Exact match (Key:Value)
- If you want to match specific applications, you can do an exact match using Key:value in the labels.
- You can add labels to an application in the App Details page.
-
Partial match (Key or Value)
- Search using a key or value.
- Partial matches are supported. For example, if a label key is
teamor a value ispayment-service, searching forteaorpaywill return that application. - The search also considers the Service name and Environment name associated with the GitOps application as labels, and will match them in partial searches.
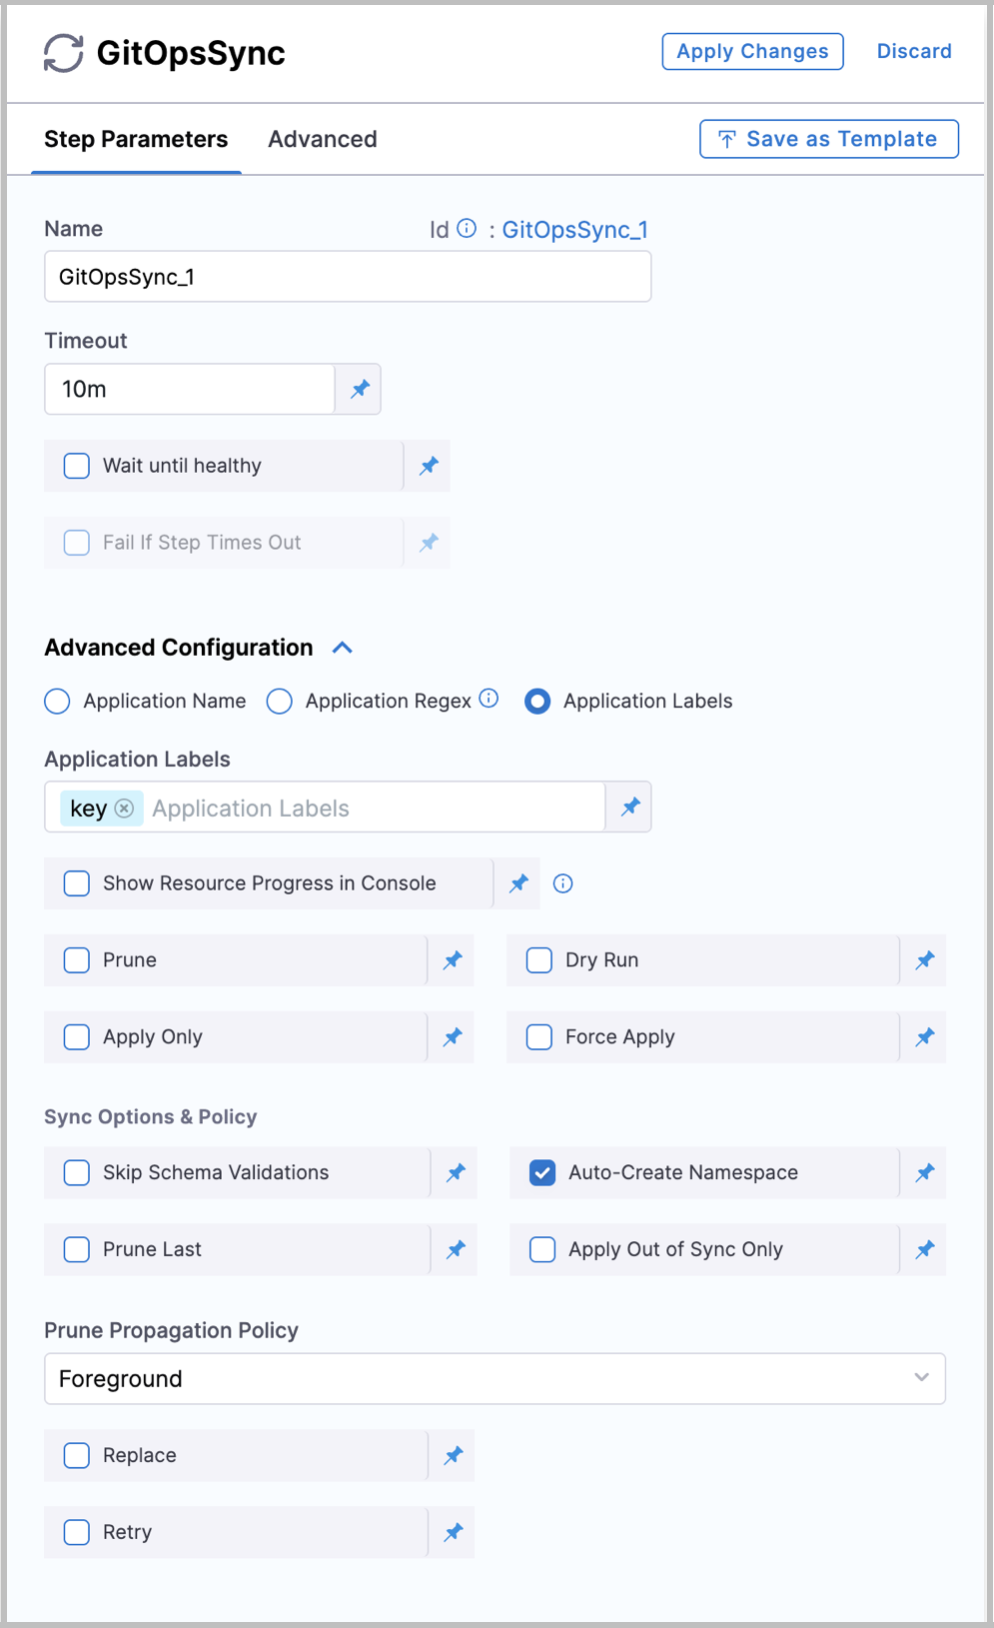
The sync options provided are the same options you receive while syncing an application in GitOps directly.
Using Expressions with Application Labels
When using applicationLabels as a pipeline variable, it represents a list of strings. Since this is not a native variable type in Harness expressions, you need to use specific methods to properly pass the list values.
You can use one of the following approaches to handle application labels in expressions:
JSON List Functor
Use the JSON list functor to parse the labels:
<+json.list("$", <+pipeline.variables.labels>)>
Format your labels variable as:
- Single value:
["cluster"] - Multiple values:
["cluster", "list"]
For more information, go to JSON and XML functors.
Split Function
Use the split function for comma-separated values:
<+pipeline.variables.labels.split(",")>
Input examples:
cluster(single label)cluster,list(multiple labels)
GitOps Get App Details step
This step fetches the details and status of your application.
Currently, Get App Details step is behind the feature flag GITOPS_GET_APP_DETAILS_STEP. Contact Harness Support to enable the feature.
If Hard Refresh is enabled, the application status will be hard refreshed when retrieving the information.
You can choose on how the application can be fetched.
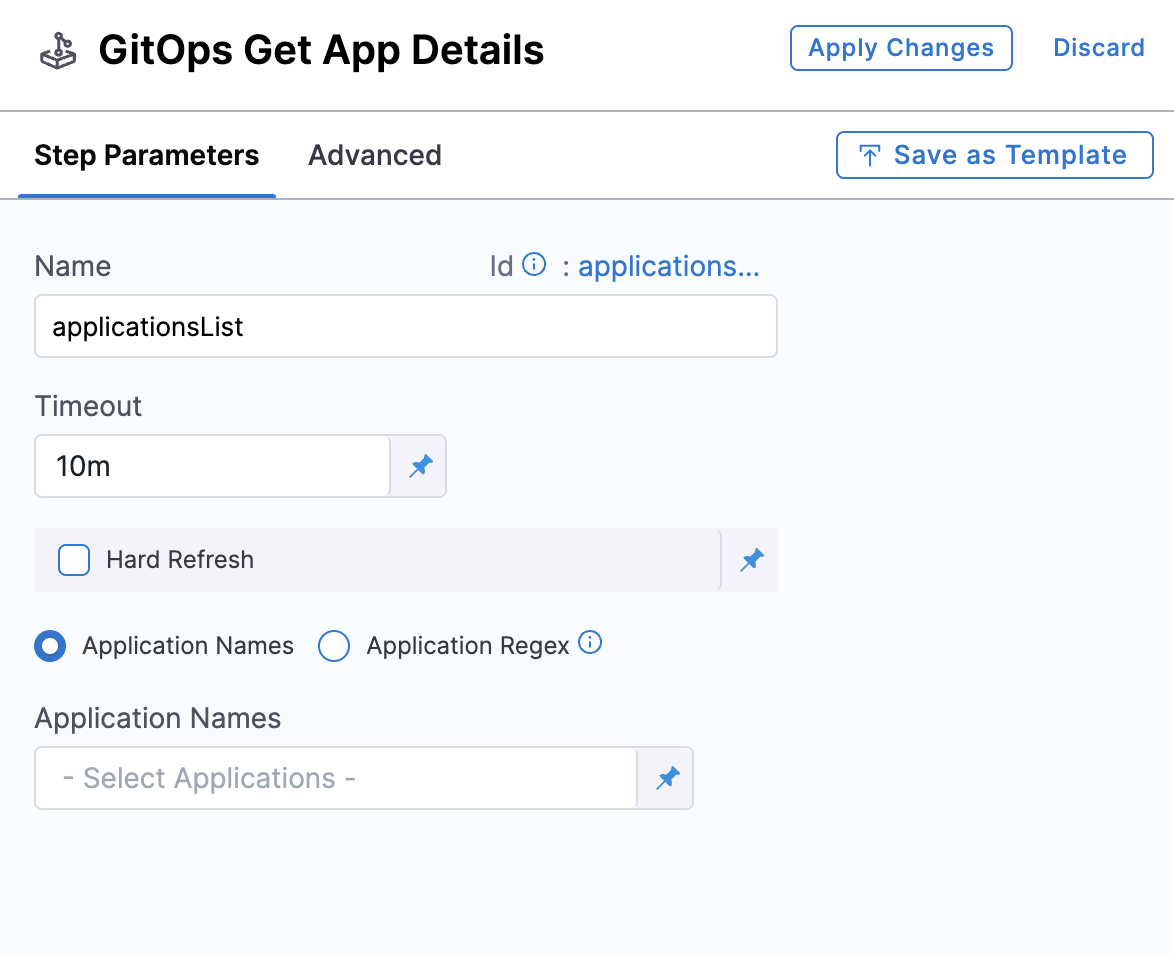
Choose Application Names to select the application names from the dropdown. You can also provide the application name when you start the pipeline execution by selecting the Runtime input option.
You can also fetch up to 1000 applications by choosing Application Regex. You can provide a regex expression as a Fixed value, or provide it as a run-time input or Expression.
Applications are included in the step’s outcome only if the serviceId, envId, and clusterId match the values provided in the pipeline.
If no matching applications are found, the step will fail.
The applicationRegex must be a valid regex, or the step will fail.
You can fetch up to 1000 applications in a single step, provided the final JSON string remains under 512kB.
To stay within the 512kB size limit, certain fields in the response are trimmed or excluded. These include .app.spec.ignoreDifferences, .app.spec.info, .app.status.resources, and .app.status.operationstate.syncresult.resources
The data will be returned as a JSON payload that will be parsed by the step. The response can be referenced using Harness expressions in subsequent steps.
Example response of one application fetched: {"applications":[{app1}]}
Example response of multiple application fetched: {"applications:[{app1},{app2}]}
This completes all the configurable steps for GitOps in Harness pipelines. Happy Deploying!