Tutorial - End-to-end MLOps CI/CD pipeline with Harness and AWS
MLOps tackles the complexities of building, testing, deploying, and monitoring machine learning models in real-world environments.
Integrating machine learning into the traditional software development lifecycle poses unique challenges due to the intricacies of data, model versioning, scalability, and ongoing monitoring.
In this tutorial, you'll create an end-to-end MLOps CI/CD pipeline that will:
- Build and push an ML model to AWS ECR.
- Run security scans and tests.
- Deploy the model to AWS Lambda.
- Add policy enforcement and monitoring for the model.
The story
This tutorial uses a fictional bank called Harness Bank. Assume that this fictional bank recently launched a website where clients can apply for a credit card. Based on the information provided in the form, the customer's application is approved or denied in seconds. This online credit card application is powered by a machine learning (ML) model trained on data that makes the decision accurate and unbiased.
Assume that the current process to update this hypothetical ML model is manual. A data scientist builds a new image locally, runs tests, and manually ensures that the model passes the required threshold for accuracy and fairness.
In this tutorial, you'll automate the model maintenance process and increase the build and delivery velocity.
Design and architecture
Before diving into the implementation, review the MLOps architecture.
For this tutorial, assume you are given a Python data science project, and you are requested to do the following:
- Build and push an image for this project.
- Run security scans on the container image.
- Upload model visualization data to S3.
- Publish model visualization data within the pipeline.
- Run test on the model to find out accuracy and fairness scores.
- Based on those scores, use Open Policy Agent (OPA) policies to either approve or deny the model.
- Deploy the model.
- Monitor the model and ensure the model is not outdated.
- Trigger the pipeline based on certain git events.
- (Optional) Add approval gates for production deployment.
For this tutorial, assume that the data is already processed.
Prerequisites
This tutorial requires:
- A Harness account with access to the Continuous Integration, Continuous Delivery, and Security Testing Orchestration modules. If you are new to Harness, you can sign up for free.
- An AWS account, credentials, and a Harness AWS connector.
- A GitHub account, credentials, and a Harness GitHub connector.
Prepare AWS
You need an AWS account with sufficient permissions to create/modify/view resources used in this tutorial.
-
Prepare AWS credentials.
This tutorial requires two sets of AWS credentials. One set is for a Harness AWS connector, and the other is for the AWS ECR scanner for STO.
You can use an AWS Vault plugin to generate AWS credentials for the AWS connector, and you can use the AWS console to generate the AWS Access Key ID, AWS Secret Access Key, and AWS Session Token, which are valid for a shorter time.
Save these credentials securely and make a note of your AWS account ID and AWS region.
tipIf you are using a personal, non-production AWS account for this tutorial, you can initially grant admin access for these credentials. Once the demo works, reduce access to adhere to the principle of least privilege.
-
Create ECR repos. From your AWS console, navigate to Elastic Container Registry (ECR) and create two private repositories named
ccapprovalandccapproval-deploy. Under Image scan settings, enable Scan on Push for both repositories. -
Create an S3 bucket. Navigate to S3 and create a bucket named something like
mlopswebapp. You'll use this bucket to host a static website for the credit card approval application demo, along with a few other artifacts.Make sure all options under Block public access (bucket settings) are unchecked, and then apply the following bucket policy:
{"Version": "2012-10-17","Statement": [{"Effect": "Allow","Principal": "*","Action": "s3:GetObject","Resource": "arn:aws:s3:::YOUR_S3_BUCKET_NAME/*"}]}After making the bucket public, your bucket page should show a
Publicly accessibleflag.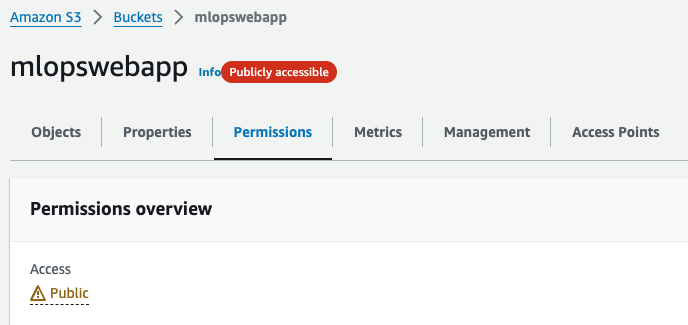
-
From your AWS console, go to AWS Lambda, select Functions, and create a function from a container image using the following configuration:
- Name:
creditcardapplicationlambda - Container image URI: Select Browse images and find the
ccapproval-deployimage. You can choose any image tag. - Architecture:
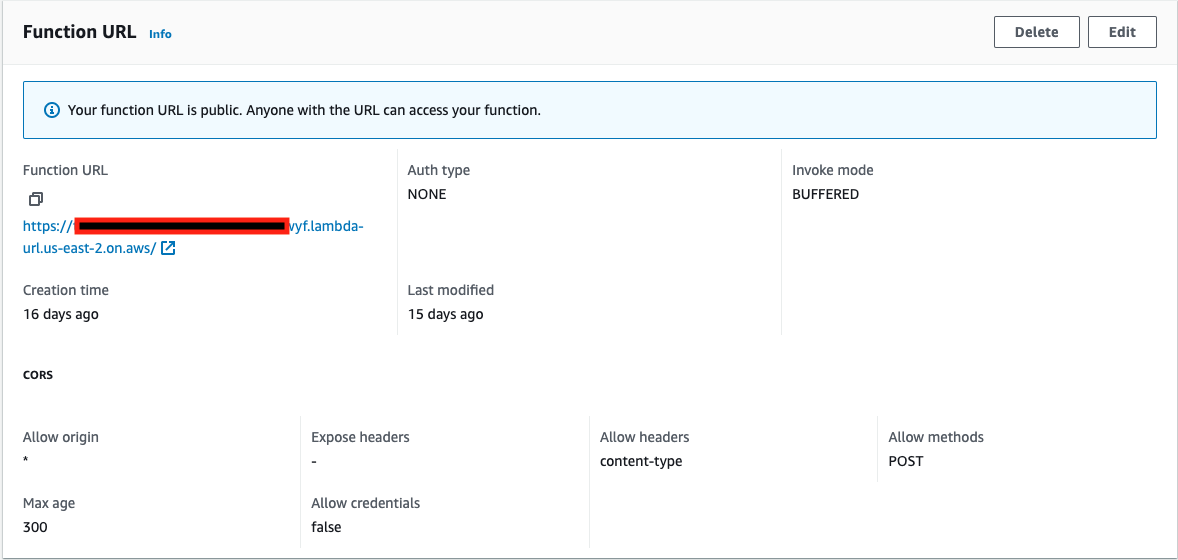
x86_64 - From Advanced: Select Enable function URL to make the function URL public. Anyone with the URL can access your function. For more information, go to the AWS documentation on Lambda function URLs.
- Name:
-
Select Create function to create the function. You'll notice an info banner confirming that the function URL is public.
Prepare GitHub
This tutorial uses a GitHub account for source control management.
-
Fork the MLops sample app repository into your GitHub account.
-
Create a GitHub personal access token with following permissions on your forked repository:
- repo/content: read+write
- repo/pull requests: read
- repo/webhooks: read+write
Create Harness secrets
Store your GitHub and AWS credentials as secrets in Harness.
-
In your Harness account, create or select a project to use for this tutorial.
-
In your project settings, select Secrets, select New Secret, and then select Text.
-
Create the following Harness text secrets:
git_pat- GitHub personal access tokenaws_access_key_id- Generated from AWS consoleaws_secret_access_key- Generated from AWS consoleaws_session_token- Generated from AWS consoleaws_vault_secret- Secret access key generated by Vault plugin
Make sure the Name and ID match for each secret, because you reference secrets by their IDs in Harness pipelines.
Create AWS and GitHub connectors
Create Harness connectors to connect to your AWS and GitHub accounts.
-
In your Harness project settings, go to Connectors.
-
Select New Connector, select the AWS connector, and then create an AWS connector with the following configuration:
- Name:
mlopsawsconnector - Access Key: AWS Vault plugin generated
- Secret Key: Use your
aws_vault_secretsecret - Connectivity Mode: Connect through Harness Platform
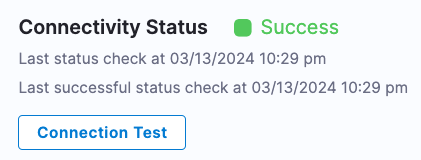
Leave all other settings as is, and make sure the connection test passes.
- Name:
-
Create another connector. This time, select the GitHub connector and and use the following configuration:
- Name:
mlopsgithubconnector - URL Type:
Repository - Connection Type:
HTTP - GitHub Repository URL: Enter the URL to your fork of the demo repo, such as
https://github.com/:gitHubUsername/mlops-creditcard-approval-model - Username: Enter your GitHub username
- Personal Access Token: Use your
git_patsecret - Connectivity Mode: Connect through Harness Platform
- Name:
Create the Harness pipeline
In Harness, you create pipeline to represent workflows. Pipeline can have multiple stages, and each stage can have multiple steps.
- In your Harness project, create a pipeline named
Credit Card Approval MLops. - Add a Build stage named
Train Model. - Make sure Clone Codebase is enabled.
- Select Third-party Git provider, and then select your
mlopsgithubconnectorGitHub connector. The repository name should populate automatically. - Select Set Up Stage.
In the following sections of this tutorial, you'll configure this stage to build and push the data science image, and you'll add more stages to the pipeline to meet the tutorial's objectives.
You can find a sample pipeline for this tutorial in the demo repo. If you use this pipeline, you must replace the placeholder and sample values accordingly.
Build, push, and scan the image
Configure your Train Model stage to build and push the data science image and then retrieve the ECR scan results.
-
Select the Infrastructure tab and configure the build infrastructure for the
Train Modelstage:- Select Cloud to use Harness Cloud build infrastructure.
- For Platform, select Linux.
- For Architecture, select AMD64.
-
Select the Execution tab to add steps to the stage.
-
Select Add Step, select the Build and Push to ECR step, and configure the step as follows:
- For Name, enter
Harness Training. - For AWS Connector, select your
mlopsawsconnectorAWS connector. - For Region, enter your AWS region.
- For Account ID, enter your AWS account ID.
- For Image Name, enter
ccapproval. - For Tags, enter
<+pipeline.executionId>. You can select the Input type icon to change the input type to expression (f(x)). - For Dockerfile (under Optional Configuration), enter
Dockerfile_Training_Testing.
- For Name, enter
-
Select Apply Changes to save the step, and then select Save to save the pipeline.
Next, you'll add steps to your build stage to retrieve the results of the ECR repo security scan.
Because scanning is enabled on your ECR repositories, each image pushed to the repo by the Build and Push to ECR step is scanned for vulnerabilities. In order to successfully retrieve the scan results, your pipeline needs to wait for the scan to finish and then request the results.
-
Before adding the step to retrieve the scan result, use a Run step to add a 15-second wait to ensure that the scan is complete before the pipeline requests the scan results.
- Select Add Step after the
Harness Trainingstep, and select the Run step. - For Name, enter
Wait for ECR Image Scan. - For Command, enter the following, and then select Apply Changes to save the step.
echo "ECR Image Scan In Progress..."sleep 15 - Select Add Step after the
-
Add an AWS ECR Scan step to get the scan results.
- Select Add Step after the
Waitstep, and select the AWS ECR Scan step. - For Name, enter
Security Scans for ML Model. - For Target/Name, enter
ccapproval-ecr-scan. - For Variant, enter
<+pipeline.executionId>. You can select the Input type icon to change the input type to expression (f(x)). - For Container Image/Name, enter
ccapproval. - For Container Image/Tag, enter
<+pipeline.executionId>. - For Region, enter your AWS region.
- Under Authentication, use Harness expressions referencing your AWS credential secrets:
- For Access ID, enter
<+secrets.getValue("aws_access_key_id")>. - For Access Token, enter
<+secrets.getValue("aws_secret_access_key")>. - For Access Region, enter your AWS region.
- For Log Level, enter
Info.
- For Access ID, enter
- Select Add Step after the
- Under Settings, add the following key-value pair:
AWS_SESSION_TOKEN: <+secrets.getValue("aws_session_token")>
- Select Apply Changes to save the step, and then select Save to save the pipeline.
At this point, you can run the pipeline to test the Build stage.
- Select Run Pipeline to test the Build stage. For Git Branch, enter
main. - Wait while the pipeline runs, and then check your
ccapprovalECR repository to find an image with a SHA matching the pipeline execution ID. Select Copy URI to copy the image URI; you'll need it in the next section. - Make sure the image scan also ran. In the Harness Build details, you can find the scan results in the AWS ECR Scan step logs. For example:
Scan Results: {
    "jobId": "xlf06YX6a8AupG_5igGA6I",
    "status": "Succeeded",
    "issuesCount": 10,
    "newIssuesCount": 10,
   "issuesBySeverityCount": {
        "ExternalPolicyFailures": 0,
        "NewCritical": 0,
        "NewHigh": 1,
        "NewMedium": 5,
        "NewLow": 4,
        "NewInfo": 0,
        "Unassigned": 0,
        "NewUnassigned": 0,
        "Critical": 0,
        "High": 1,
        "Medium": 5,
        "Low": 4,
        "Info": 0,
        "Ignored": 0
    }
}
You've successfully completed the first part of this tutorial: Configuring a Build stage that builds, pushes, and scans a trained data science image.
Continue the tutorial in the next sections and continue building your MLOps pipeline.
Test and upload artifacts
Add another Build stage to your pipeline that will run tests, build a Lambda image, and upload artifacts to S3.
-
Edit your MLOps pipeline and add another Build stage after the
Train Modelstage. Name the stageRun test and upload artifactsand make sure Clone Codebase is enabled. -
On the stage's Overview tab, locate Shared Paths, and add
/harness/output. -
On the Infrastructure tab, select Propagate from existing stage, and select your
Train Modelstage. -
On the Execution tab, add a Run step to run pytest on the demo copebase. Select Add Step, select the Run step, and configure it as follows:
- For Name, enter
pytest. - For Shell, select Sh.
- For Command, enter:
pytest --nbval-lax credit_card_approval.ipynb --junitxml=report.xml- Under Optional Configuration, locate Container Registry, and select your
mlopsawsconnectorAWS connector. - Under Optional Configuration, locate Image, and enter the image URI from your
Train Modelstage execution with the image tag replaced with<+pipeline.executionId>. For example:
AWS_ACCOUNT_ID.dkr.ecr.AWS_REGION.amazonaws.com/AWS_ECR_REPO_NAME:<+pipeline.executionId> - For Name, enter
The data science project includes two Dockerfiles: One for building the source and one for AWS Lambda deployment. Next, you'll add a step to build and push the image using the Dockerfile designed for AWS Lambda deployment.
-
Select Add Step and add a Build and Push to ECR step configured as follows:
- For Name, enter
Build and Push Lambda Deployment Image. - For AWS Connector, select your
mlopsawsconnectorAWS connector. - For Region, enter your AWS region.
- For Account ID, enter your AWS account ID.
- For Image Name, enter
ccapproval-deploy. - For Tags, enter
<+pipeline.executionId>. - Under Optional Configuration, locate Dockerfile, and enter
Dockerfile_Inference_Lambda.
- For Name, enter
The pytest command from the Run step generates an HTML file with some visualizations for the demo ML model. Next, add steps to upload the visualizations artifact to your AWS S3 bucket and post the artifact URL on the Artifacts tab of the Build details page.
-
Select Add Step, and add an Upload Artifacts to S3 step configured as follows:
- For Name, enter
Upload artifacts to S3. - For AWS Connector, select your
mlopsawsconnectorAWS connector. - For Region, enter your AWS region.
- For Bucket, enter your S3 bucket name.
- For Source Path, enter
/harness/output/model_metrics.html. This is where the model visualization file from thepyteststep is stored.
- For Name, enter
-
Use the Artifact Metadata Publisher plugin to post the visualization artifact URL on the build's Artifacts tab.
- Add a Plugin step after the Upload Artifacts to S3 step.
- For Name, enter
Publish ML model visualization. - For Container Registry, select the built-in Harness Docker Connector.
- For Image, enter
plugins/artifact-metadata-publisher. - Under Optional Configuration, locate Settings, and add the following key-value pairs:
file_urls: https://S3_BUCKET_NAME.s3.AWS_REGION.amazonaws.com/harness/output/model_metrics.htmlartifact_file: artifact.txt
In addition to the model visualization, the pytest command also generates a shared_env_variables.txt file to export the model's accuracy and fairness metrics. However, this data is lost when the build ends because Harness stages run in isolated containers. Therefore, you must add a step to export the ACCURACY and EQUAL_OPPORTUNITY_FAIRNESS_PERCENT values as output variables.
-
After the Plugin step, add a Run step configured as follows:
- For Name, enter
Export accuracy and fairness variables. - For Shell, select Sh.
- For Commmand, enter:
# File pathFILE_PATH="/harness/output/shared_env_variables.txt"# Read the file and export variableswhile IFS='=' read -r key value; docase $key inACCURACY)export ACCURACY="$value";;EQUAL_OPPORTUNITY_FAIRNESS_PERCENT)export EQUAL_OPPORTUNITY_FAIRNESS_PERCENT="$value";;*)echo "Ignoring unknown variable: $key";;esacdone < "$FILE_PATH"echo $ACCURACYecho $EQUAL_OPPORTUNITY_FAIRNESS_PERCENT- Under Optional Configuration, locate Output Variables, and add the following two output variables:
ACCURACYEQUAL_OPPORTUNITY_FAIRNESS_PERCENT - For Name, enter
-
Save the pipeline, and then run it. Again, use
mainfor the Git Branch. -
Wait while the pipeline runs, and then make sure:
- Your
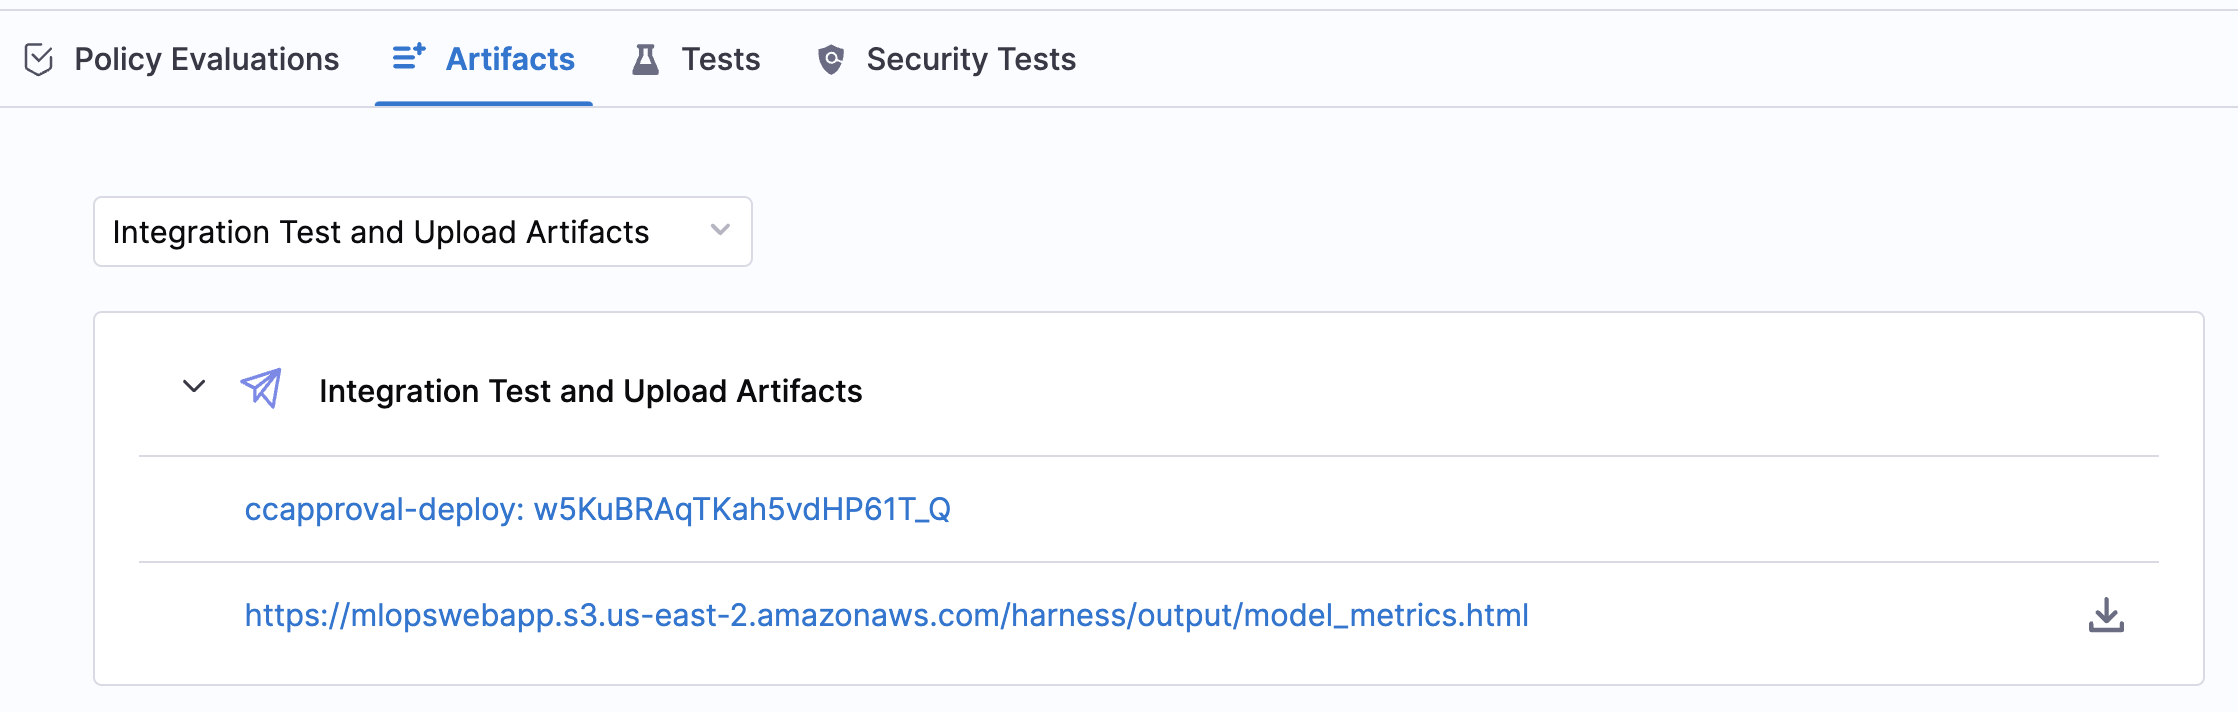
ccapprovalandccapproval-deployECR repositories have images with SHAs matches the pipeline execution ID. - Your S3 bucket has
/harness/output/model_metrics.html. - The URL to the
model_metricsartifact appears on the Artifacts tab in Harness.
- The output variable values are in the log for the
Export accuracy and fairness variablesstep, such as:
0.92662
20.799999999999997
Congratulations! So far, you've completed half the requirements for this MLOps project:
- Build and push an image for this project.
- Run security scans on the container image.
- Upload model visualization data to S3.
- Publish model visualization data within the pipeline.
- Run test on the model to find out accuracy and fairness scores.
- Based on those scores, use Open Policy Agent (OPA) policies to either approve or deny the model.
- Deploy the model.
- Monitor the model and ensure the model is not outdated.
- Trigger the pipeline based on certain git events.
- (Optional) Add approval gates for production deployment.
Continue on with policy enforcement in the next section.
Add ML model policy checks
In this section, you'll author OPA policies in Harness and use a Custom stage to add policy enforcement to your pipeline.
Harness Policy As Code uses Open Policy Agent (OPA) as the central service to store and enforce policies for the different entities and processes across the Harness platform. You create individual policies, add them to policy sets, and select the entities (such as pipelines) to evaluate those policies against.
For this tutorial, the policy requirements are that the model accuracy is over 90% and the fairness margin for equal opportunity is under 21%.
-
In your Harness project settings, go to Policies, select the Policies tab, and then select New Policy.
-
For Name, enter
Check fairness and accuracy scores. -
For How do you want to setup your Policy, select Inline.
-
Enter the following policy definition, and then select Save.
package maindefault allow = falseallow {input.accuracy >= 0.9input.fairnessScoreEqualOpportunity <= 21}deny[msg] {not allowmsg = "Deny: Accuracy less than 90% or fairness score difference greater than 21%"} -
Select the Policy Sets tab, and then select New Policy Set. Use the following configuration:
- For Name, enter
Credit Card Approval Policy Set. - For Entity Type that this policy set applies to, select Custom.
- For On what event should the policy set be evaluated, select On Step.
- Select Add Policy, and select your
Check fairness and accuracy scorespolicy. - For What should happen if a policy fails?, select Warn and Continue.
- Select Finish, and make sure the Enforced switch is enabled.
- For Name, enter
-
Edit your MLOps pipeline, and add a Custom stage after the second Build stage. Name the stage
Model Policy Checks. -
Select a Harness Delegate to use for the Custom stage.
The Build stages run on Harness Cloud build infrastructure, which doesn't require a Harness Delegate. However, Custom stages can't use this build infrastructure, so you need a Harness Delegate.
If you don't already have one, install a delegate. Then, on the Custom stage's Advanced tab, select your delegate in Define Delegate Selector.
-
Add a Shell Script step to relay the accuracy and fairness output variables from the previous stage to the current stage. Configure the Shell Script step as follows:
-
For Name, enter
Accuracy and Fairness. -
For Timeout, enter
10m. -
For Script Type, select Bash.
-
For Select script location, select Inline.
-
For Script, enter the following:
accuracy=<+pipeline.stages.Harness_Training.spec.execution.steps.Export_accuracy_and_fairness_variables.output.outputVariables.ACCURACY>fairness_equalopportunity=<+pipeline.stages.Harness_Training.spec.execution.steps.Export_accuracy_and_fairness_variables.output.outputVariables.EQUAL_OPPORTUNITY_FAIRNESS_PERCENT> -
Under Optional Configuration, locate Script Output Variables, and add the following two variables:
accuracy- String -accuracyfairness_equalopportunity- String -fairness_equalopportunity
infoWhile you can feed the output variables directly into Policy steps, this Shell Script step is a useful debugging measure that ensures the accuracy and fairness variables are populated correctly.
-
-
Add a Policy step after the Shell Script step.
-
For Name, enter
Enforce Fairness and Accuracy Policy. -
For Timeout, enter
10m. -
For Entity Type, select Custom.
-
For Policy Set, select your
Credit Card Approval Policy Set. -
For Payload, enter the following:
{"accuracy": <+execution.steps.Accuracy_and_Fairness.output.outputVariables.accuracy>,"fairnessScoreEqualOpportunity": <+execution.steps.Accuracy_and_Fairness.output.outputVariables.fairness_equalopportunity>}
-
-
Save the pipeline.
The next time the pipeline runs, the policy is enforced to check if the model accuracy and fairness margins are within the acceptable limits. If not, the pipeline produces a warning and then continues (according to the policy set configuration). You could also configure the policy set so that the pipeline fails if there is a policy violation.
If you want to test the response to a policy violation, you can modify the policy definition's allow section to be more strict, such as:
allow {
    input.accuracy >= 0.95
    input.fairnessScoreEqualOpportunity <= 19
}
Since the model accuracy is around 92% and the fairness margin is around 20%, this policy definition should produce a warning. Make sure to revert the change to the policy definition once you're done experimenting.
Deploy AWS Lambda function
In Harness, you can specify the location of a function definition, artifact, and AWS account, and then Harness deploys the Lambda function and automatically routes traffic from the old version of the Lambda function to the new version on each deployment. In this part of the tutorial, you'll update an existing Lambda function by adding a Deploy stage with service, environment, and infrastructure definitions.
-
Edit your MLOPs pipeline, and add a Deploy stage named
lambdadeployment. -
Deployment Type, select AWS Lambda, and then select Continue.
-
Create a service definition for the Lambda deployment.
- Select Add Service.
- For Name, enter
creditcardapproval-lambda-service. - For Set up service, select Inline.
- For Deployment Type, select AWS Lambda.
- Under AWS Lambda Function Definition, for Manifest Identifier, enter
lambdadefinition, and for File/Folder Path, enter/lambdamanifest.
-
After creating the manifest under Harness File Store, add the following to the service manifest, and select Save:
functionName: `creditcardapplicationlambda`role: LAMBDA_FUNCTION_ARNReplace
LAMBDA_FUNCTION_ARNwith your Lambda function's ARN. You can find the Function ARN when viewing the function in the AWS console.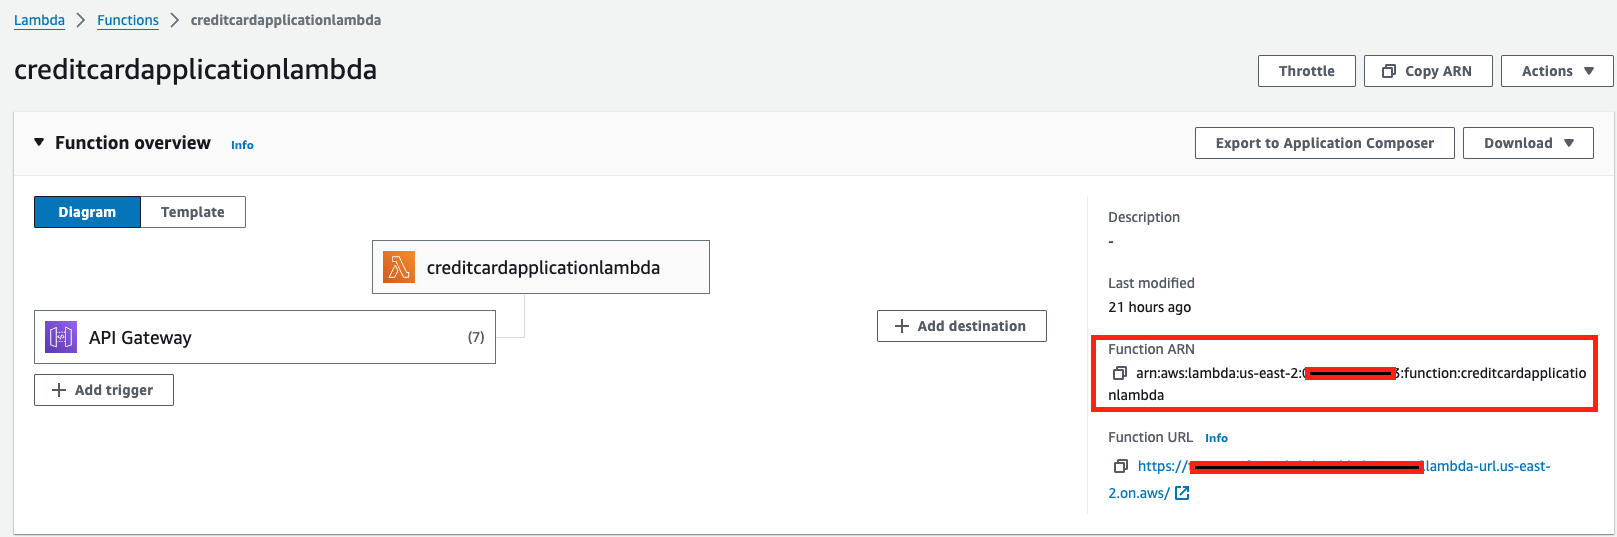
-
Under the Artifacts section for the service definition, provide the artifact details to use for the lambda deployment:
- Artifact Source Identifier:
ccapprovaldeploy - Region: YOUR_AWS_REGION
- Image Path:
ccapproval-deploy - Value - Tag:
<+input>(runtime input)
- Artifact Source Identifier:
-
Create environment and infrastructure definitions for the Lambda deployment. On the Deploy stage's Environment tab, select New Environment, and use the following environment configuration:
name: lambda-envtype: PreProduction -
From the
lambda-env, go to the Infrastructure Definitions tab, and add an infrastructure definition with the following configuration:name: `aws-lambda-infra`deploymentType: `AwsLambda`type: AwsLambdaspec:connectorRef: `mlopsawsconnector`region: YOUR_AWS_REGION -
Select Save to save the infrastructure definition.
-
On the Deploy stage's Execution tab, add an AWS Lambda Deploy step named
Deploy Aws Lambdafor the name. No other configuration is necessary. -
Save and run the pipeline. For Git Branch, enter
main, and for Tag, enter<+pipeline.executionId>, and then select Run Pipeline.
You need to provide the image tag value because the service definition's Tag setting uses runtime input (<+input>).
While the pipeline runs, you can observe the build logs showing the lambda function being deployed with the latest artifact that was built and pushed from the same pipeline.
- Test the response from the lambda function.
- In your AWS console, go to AWS Lambda, select Functions, and select your
creditcardapplicationlambdafunction. - On the Test tab, select Create new event, and create an event named
testmodelwith the following JSON:
{
  "Num_Children": 2,
  "Income": 500000,
  "Own_Car": 1,
  "Own_Housing": 1
}
- Select Test to execute the function with your
testmodeltest event. Once the function finishes execution, you'll get the result with a Function URL.
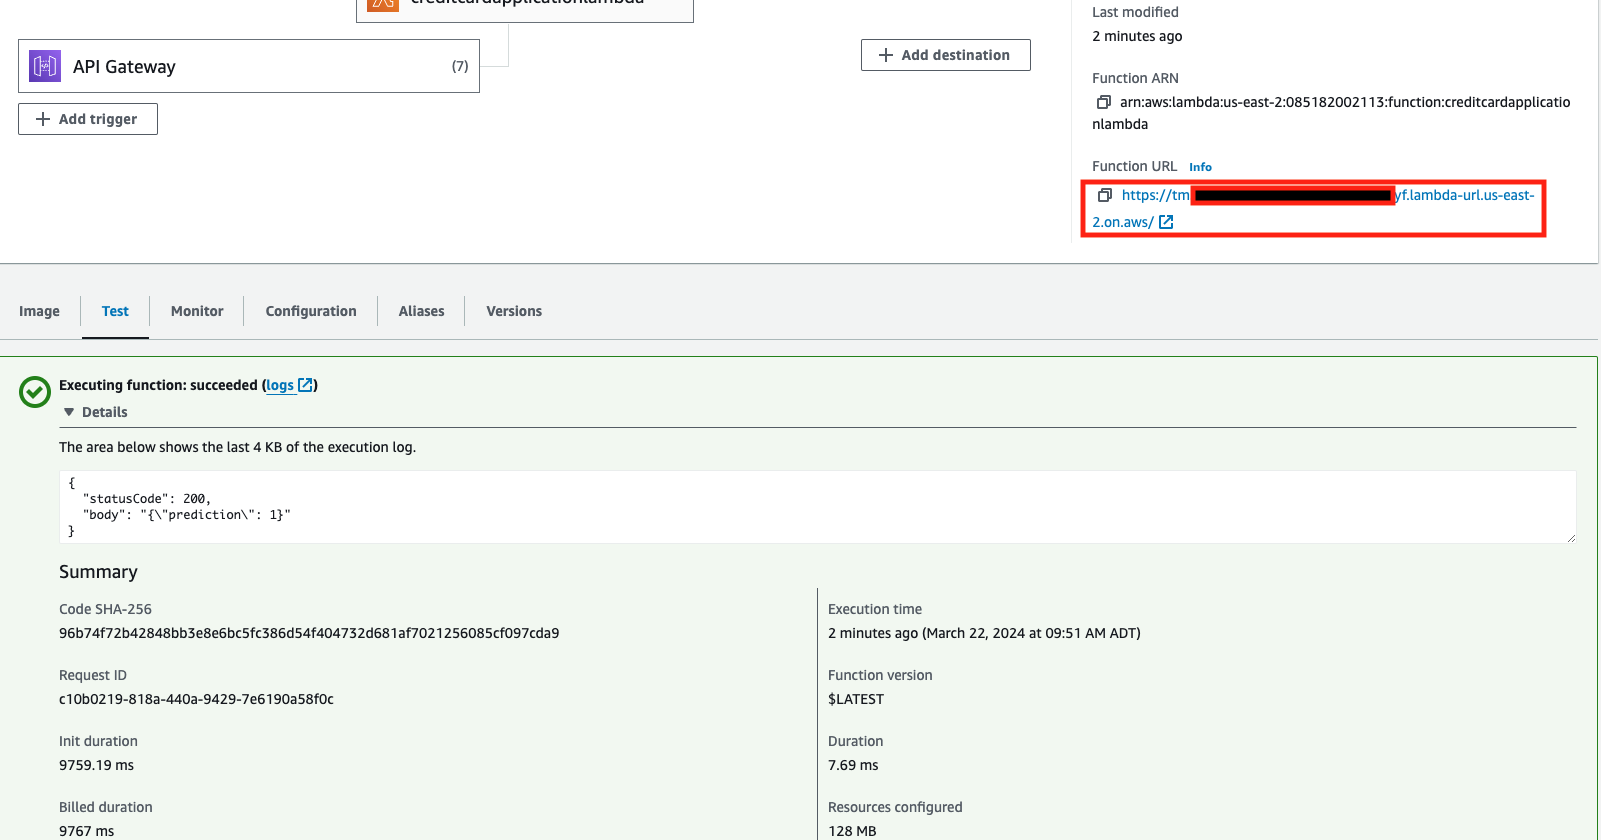
- Note the Function URL resulting from the lambda function test. This is the endpoint that your ML web application would call. Depending on the prediction of
0or1, the web application either approves or denies the demo credit card application.
Monitor the model
There are many ways to monitor ML models. In this tutorial, you'll monitor if the model was recently updated. If it hasn't been updated recently, Harness sends an email alerting you that the model might be stale.
-
Edit your MLOPs pipeline, and add a Build stage after the Deploy stage.
- For Name, enter
Monitor Model stage. - Disable Clone Codebase.
- On the Infrastructure tab, select Propagate from existing stage and select the first Build stage.
- For Name, enter
-
Add a Run step to find out when the model was last updated.
- For Name, enter
Monitor Model step. - For Shell, select Sh.
- For Command, enter:
# GitHub repository ownerOWNER="YOUR_GITHUB_USERNAME"# GitHub repository nameREPO="mlops-creditcard-approval-model"# Path to the file you want to check (relative to the repository root)FILE_PATH="credit_card_approval.ipynb"# GitHub Personal Access Token (PAT)TOKEN=<+secrets.getValue("git_pat")># GitHub API URLAPI_URL="https://api.github.com/repos/$OWNER/$REPO/commits?path=$FILE_PATH&per_page=1"# Get the current dateCURRENT_DATE=$(date -u +"%Y-%m-%dT%H:%M:%SZ")# Calculate the date 7 days agoSEVEN_DAYS_AGO=$(date -u -d "7 days ago" +"%Y-%m-%dT%H:%M:%SZ")# Get the latest commit date for the fileLATEST_COMMIT_DATE=$(curl -s -H "Authorization: token $TOKEN" $API_URL | jq -r '.[0].commit.committer.date')# Check if the file has been updated in the last 7 daysif [ "$(date -d "$LATEST_COMMIT_DATE" +%s)" -lt "$(date -d "$SEVEN_DAYS_AGO" +%s)" ]; thenexport model_stale=trueelseexport model_stale=falsefi- Under Optional Configuration, add
model_staleto Output Variables.
- For Name, enter
-
After the
Monitor Modelstage, add a Custom stage namedEmail notification. This stage will send the email notification if the model is stale. -
Add an Email step to the last Custom stage.
- For Name, enter
Email. - For Timeout, enter
10m. - For To, enter the email address to receive the notification, such as the email address for your Harness account.
- For Subject, enter
Credit card approval ML model has not been updated in a week. - For Body, enter
It has been 7 days since the credit card approval ML model was updated. Please update the model. - On the step's Advanced tab, add a conditional execution so the Email step only runs if the
model_stalevariable (from theMonitor Modelstep) istrue:-
For Execute this step, select If the stage executes successfully up to this point.
-
Select And execute this step only if the following JEXL Condition evaluates to true.
-
Enter the following JEXL condition:
<+pipeline.stages.Monitor_Model_Stage.spec.execution.steps.Monitor_Model_Step.output.outputVariables.model_stale> == true
-
- For Name, enter
-
Save and run the pipeline. For Git Branch, enter
main, and for Tag, enter<+pipeline.executionId>.
Trigger pipeline based on Git events
So far, this tutorial used manually triggered builds. However, as the number of builds and pipeline executions grow, it's not scalable to manually trigger builds. In this part of the tutorial, you'll add a Git event trigger.
Assume your team has a specific requirement where they want the MLOps pipeline to run only if there's an update to the Jupyter notebook in the codebase.
-
In your MLOps pipeline, select Triggers at the top of the Pipeline Studio, and then select New Trigger.
-
Select the GitHub webhook trigger.
-
On the trigger's Configuration tab:
- For Name, enter
trigger_on_notebook_update. - For Connector, select your
mlopsgithubconnectorGitHub connector. - The Repository URL should automatically populate.
- For Event, select Push.
- For Name, enter
-
Select Continue to go to the Conditions tab.
- For Branch Name, select the Equals operator, and enter
mainfor the Matches Value. - For Changed Files, select the Equals operator, and enter
credit_card_approval.ipynbfor the Matches Value.
- For Branch Name, select the Equals operator, and enter
-
Select Continue to go to the Pipeline Input tab.
- The Git Branch should automatically populate.
- For Primary Artifact, enter
ccapprovaldeploy. - For Tag, enter
<+pipeline.executionId>.
-
Select Create Trigger.
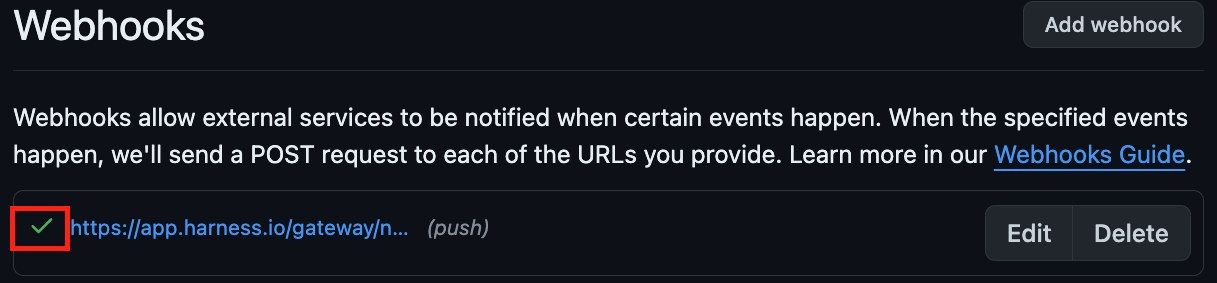
The trigger webhook should automatically register in your GitHub repository. If it doesn't, you'll need to manually register the webhook:
- On the list of triggers in Harness, select the Link icon to copy the webhook URL for the trigger.

- In your GitHub repository, navigate to Settings, select Webhook, and then select Add Webhook.
- Paste the webhook URL in Payload URL.
- Set the Content type to
application/json. - Select Add webhook.
A green checkmark in the GitHub webhooks list indicates that the webhook connected successfully.
With the trigger in place, whenever you push a change to the credit_card_approval.ipynb file on the main branch, the MLOps pipeline runs. In the trigger settings, you could adjust or remove the Conditions (branch name, changed files, and so on) according to your requirements, if you wanted to use a Git event trigger in a live development or production scenario.
Add an approval gate before prod deployment
Your organization might require an approval gate for your CI/CD pipeline before an artifact is deployed to production. Harness offers built-in approval steps for Jira, ServiceNow, or Harness approvals.
Assume that you have a different image for production, and a different AWS Lambda function is deployed based on that container image. In your MLOps pipeline, you can create another AWS Lambda deployment stage with another AWS Lambda deploy step for the production environment and use the approval gate prior to running that production deployment stage.
-
To add the approval gate, add an Approval stage immediately prior to the Deploy stage that requires approval.
- For Name, enter
approval-to-prod. - For Approval Type, select Harness Approval.
- For Name, enter
-
Add an Approval step to the Approval stage.
- For Name, enter
approval-to-prod. - For Timeout, enter
1d. - Use the default Message.
- For User Groups, select Select User Groups, select Project, and select All Project Users.
- For Name, enter
-
Save the pipeline.
Next time you run the pipeline, someone from the Harness project must approve the promotion of artifact to the production environment before the final Deploy stage runs.
Use the model in a web application
In a live MLOps scenario, the ML model would likely power a web application. While this app development is outside the scope of this tutorial, the following animation demonstrates a simple web application developed using plain HTML/CSS/JS. The outcome of the credit card application uses the response from the public AWS Lambda function URL invocation.
Conclusion
Congratulations! Here's what you've accomplished in this tutorial:
- Build and push an image for this project.
- Run security scans on the container image.
- Upload model visualization data to S3.
- Publish model visualization data within the pipeline.
- Run test on the model to find out accuracy and fairness scores.
- Based on those scores, use Open Policy Agent (OPA) policies to either approve or deny the model.
- Deploy the model.
- Monitor the model and ensure the model is not outdated.
- Trigger the pipeline based on certain git events.
- (Optional) Add approval gates for production deployment.
Now that you've built an MLOps pipeline on Harness and used the Harness platform to train the model, check out the following guides to learn how you can integrate other popular ML tools and platforms into your Harness CI/CD pipelines: