Configure OIDC with GCP WIF for Harness Cloud
GCP connectors that use OpenID Connect (OIDC) allow Harness to communicate directly with GCP through OIDC. This option uses OIDC authentication to access public cloud resources without secrets or credentials. If accessing Google cloud resources, you can use workload identity federation (WIF) to grant short term access to the Harness GCP connector.
To configure OIDC with GCP WIF for builds on Harness Cloud build infrastructure, you need to:
- Set up a GCP workload identity provider.
- Set up a Harness GCP connector.
- Set up your pipelines to use your OIDC-enabled connector.
This topic assumes you have experience with GCP workload identity providers.
Set up the GCP workload identity provider
Identity Provider and Pool configuration
Set up an identity provider in the workload identity federation (WIF) with the following configuration:
- Name: Enter any name.
- Issuer:
https://app.harness.io/ng/api/oidc/account/YOUR_HARNESS_ACCOUNT_ID>. See below for more details, depending on the environment cluster your account resides in. - Attribute mapping:
Google.subject = assertion.subattribute.account_id = assertion.account_id
You can get your Harness account ID from any Harness URL, such as https://app.harness.io/ng/#/account/ACCOUNT_ID/home/get-started.
Issuer URL
The Issuer Format will need to be modified depending on the environment cluster in which your account resides. In Account Settings -> Account Details, you can see the Harness Cluster that your account resides in.
The Issuer URL format should follow https://<HOSTNAME>/ng/api/oidc/account/<YOUR_HARNESS_ACCOUNT_ID>.
The hostname should be as follows, even if a Vanity URL is set up for an account.
| Cluster | HostName |
|---|---|
| Prod1/Prod2 | app.harness.io |
| Prod3 | app3.harness.io |
| Prod0/Prod4 | accounts.harness.io |
| EU clusters | accounts.eu.harness.io |
You can also test connectivity to the Issuer URL by running a cURL to the URL
curl https://<HOSTNAME>/ng/api/oidc/account/<YOUR_HARNESS_ACCOUNT_ID>/.well-known/openid-configuration
Which should return valid information from the endpoint, such as:
{"issuer":"https://<HOSTNAME>/ng/api/oidc/account/<YOUR_HARNESS_ACCOUNT_ID>","jwks_uri":"https://<HOSTNAME>/ng/api/oidc/account/<YOUR_HARNESS_ACCOUNT_ID>/.wellknown/jwks","subject_types_supported":["public","pairwise"],"response_types_supported":["id_token"],"claims_supported":["sub","aud","exp","iat","iss","account_id"],"id_token_signing_alg_values_supported":["RS256"],"scopes_supported":["openid"]}%
Grant Access to the Service Account
Grant access using the connected service accounts for GAR:
- Select the service account that has push/pull permissions for GAR. (or any other necessary permissions)
- Select principles (identities that can access the service account). Select Only identities matching the filter, and then select
account_id = YOUR_HARNESS_ACCOUNT_ID.
Set up the GCP connector
-
Create or edit a Harness GCP connector.
-
In the connector's Details settings, select OIDC authentication, and provide the OIDC WIF details:
- Workload Pool ID: This identifies the workload pool created in GCP, and it is the
Pool IDvalue. - Provider ID: This identifies the OIDC provider configured in GCP, and it is the
Provider IDvalue. - Project ID: The project number of the GCP project that is used to create the workload identity federation.
- Service Account Email: This is the service account that you linked to your workload identity pool in Set up the GCP workload identity provider.
For information about these values, go to the GCP documentation on Managing workload identity pools, Managing workload identity pool providers, and Creating and managing projects.

- Workload Pool ID: This identifies the workload pool created in GCP, and it is the
-
In the connector's Connectivity Mode settings, select Connect through Harness Platform for OIDC workflow.
-
Select Save and Continue to run the connection test. If the test succeeds, select Finish.
The connection test confirms that your connector's configuration is minimally valid.
For troubleshooting guidance, go to Troubleshoot GCP connector errors.
After configuring the OIDC connection and role, when you run a build that uses your OIDC-enabled GCP connector, Harness can retrieve the temporary credentials from the GCP Security Token Service (STS).
Set up your pipelines to use OIDC
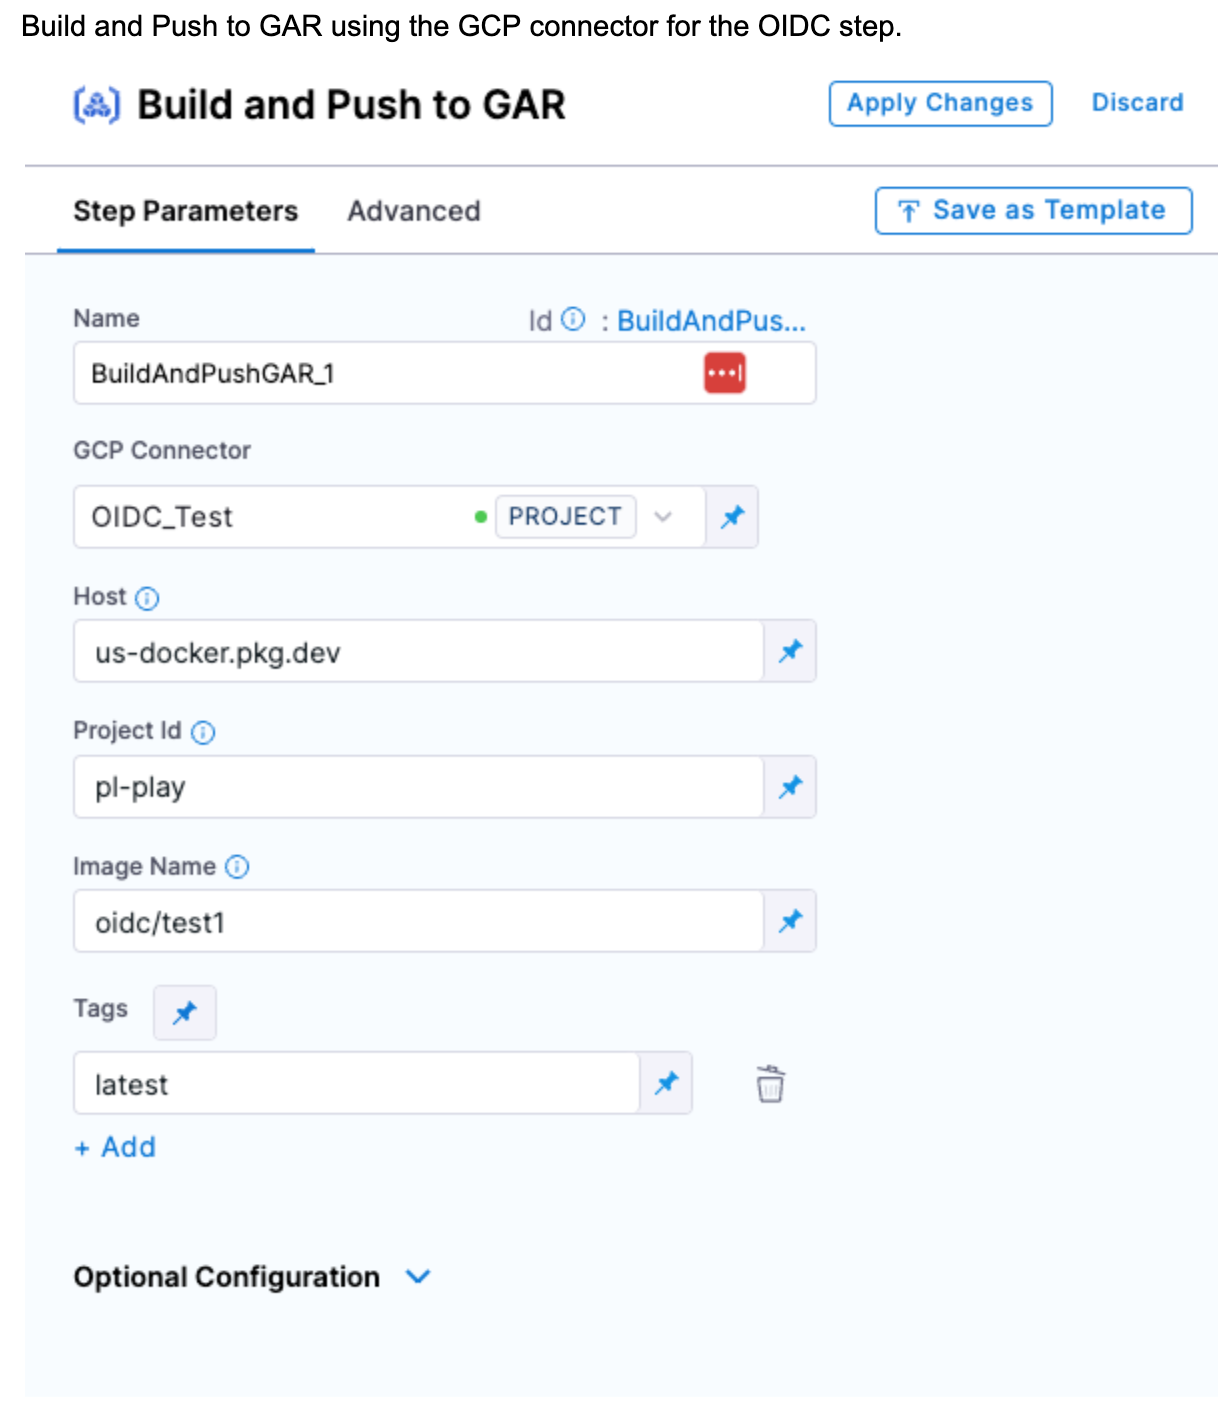
Configure your CI pipelines to use your OIDC-enabled GCP connector. To do this, select your OIDC-enabled GCP connector anywhere that you would normally use a GCP connector, such as in a Build and Push to GAR step.
For example:
-
Configure the Build stage to use Harness Cloud build infrastructure.
-
Add a Build and Push to GAR step to the Build stage.
For the step's GCP Connector, select your OIDC-enabled GCP connector.
-
Save and run the pipeline.
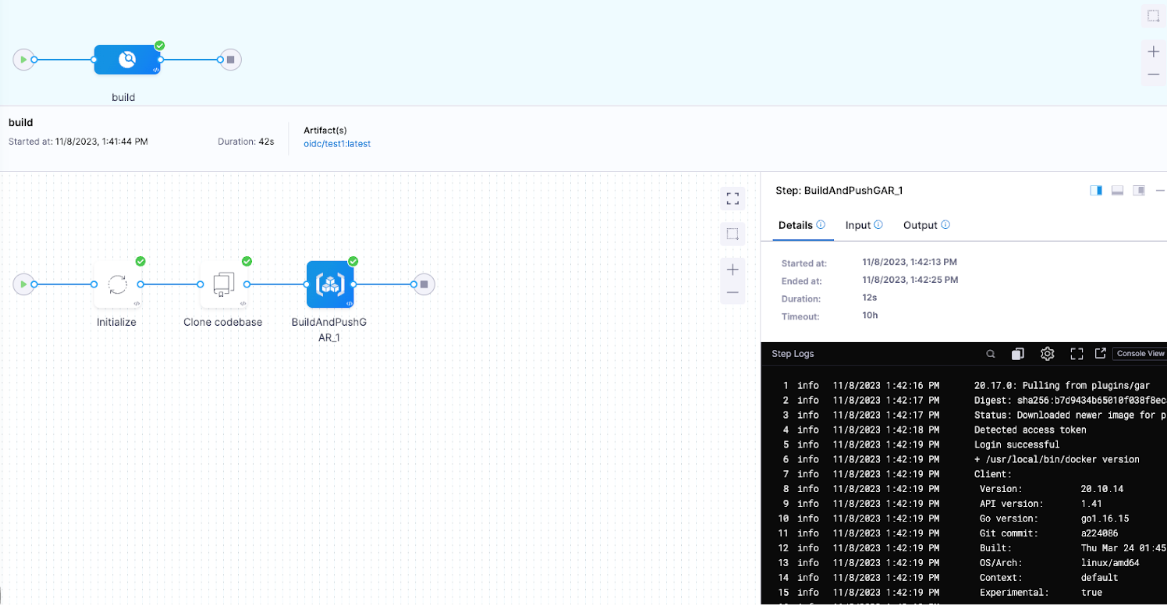
The Build and Push step's logs show that the pipeline uses Google STS to exchange tokens and access GAR.