Create a segment
The Segments page in Harness Feature Management & Experimentation (FME) provides a centralized list view for searching and managing your segmentsSegments are groups of users defined by specific attributes or behaviors. They allow you to target feature flags and experiments to specific subsets of your user base.. You can search, filter, and organize segments before drilling into an individual segment's definition.
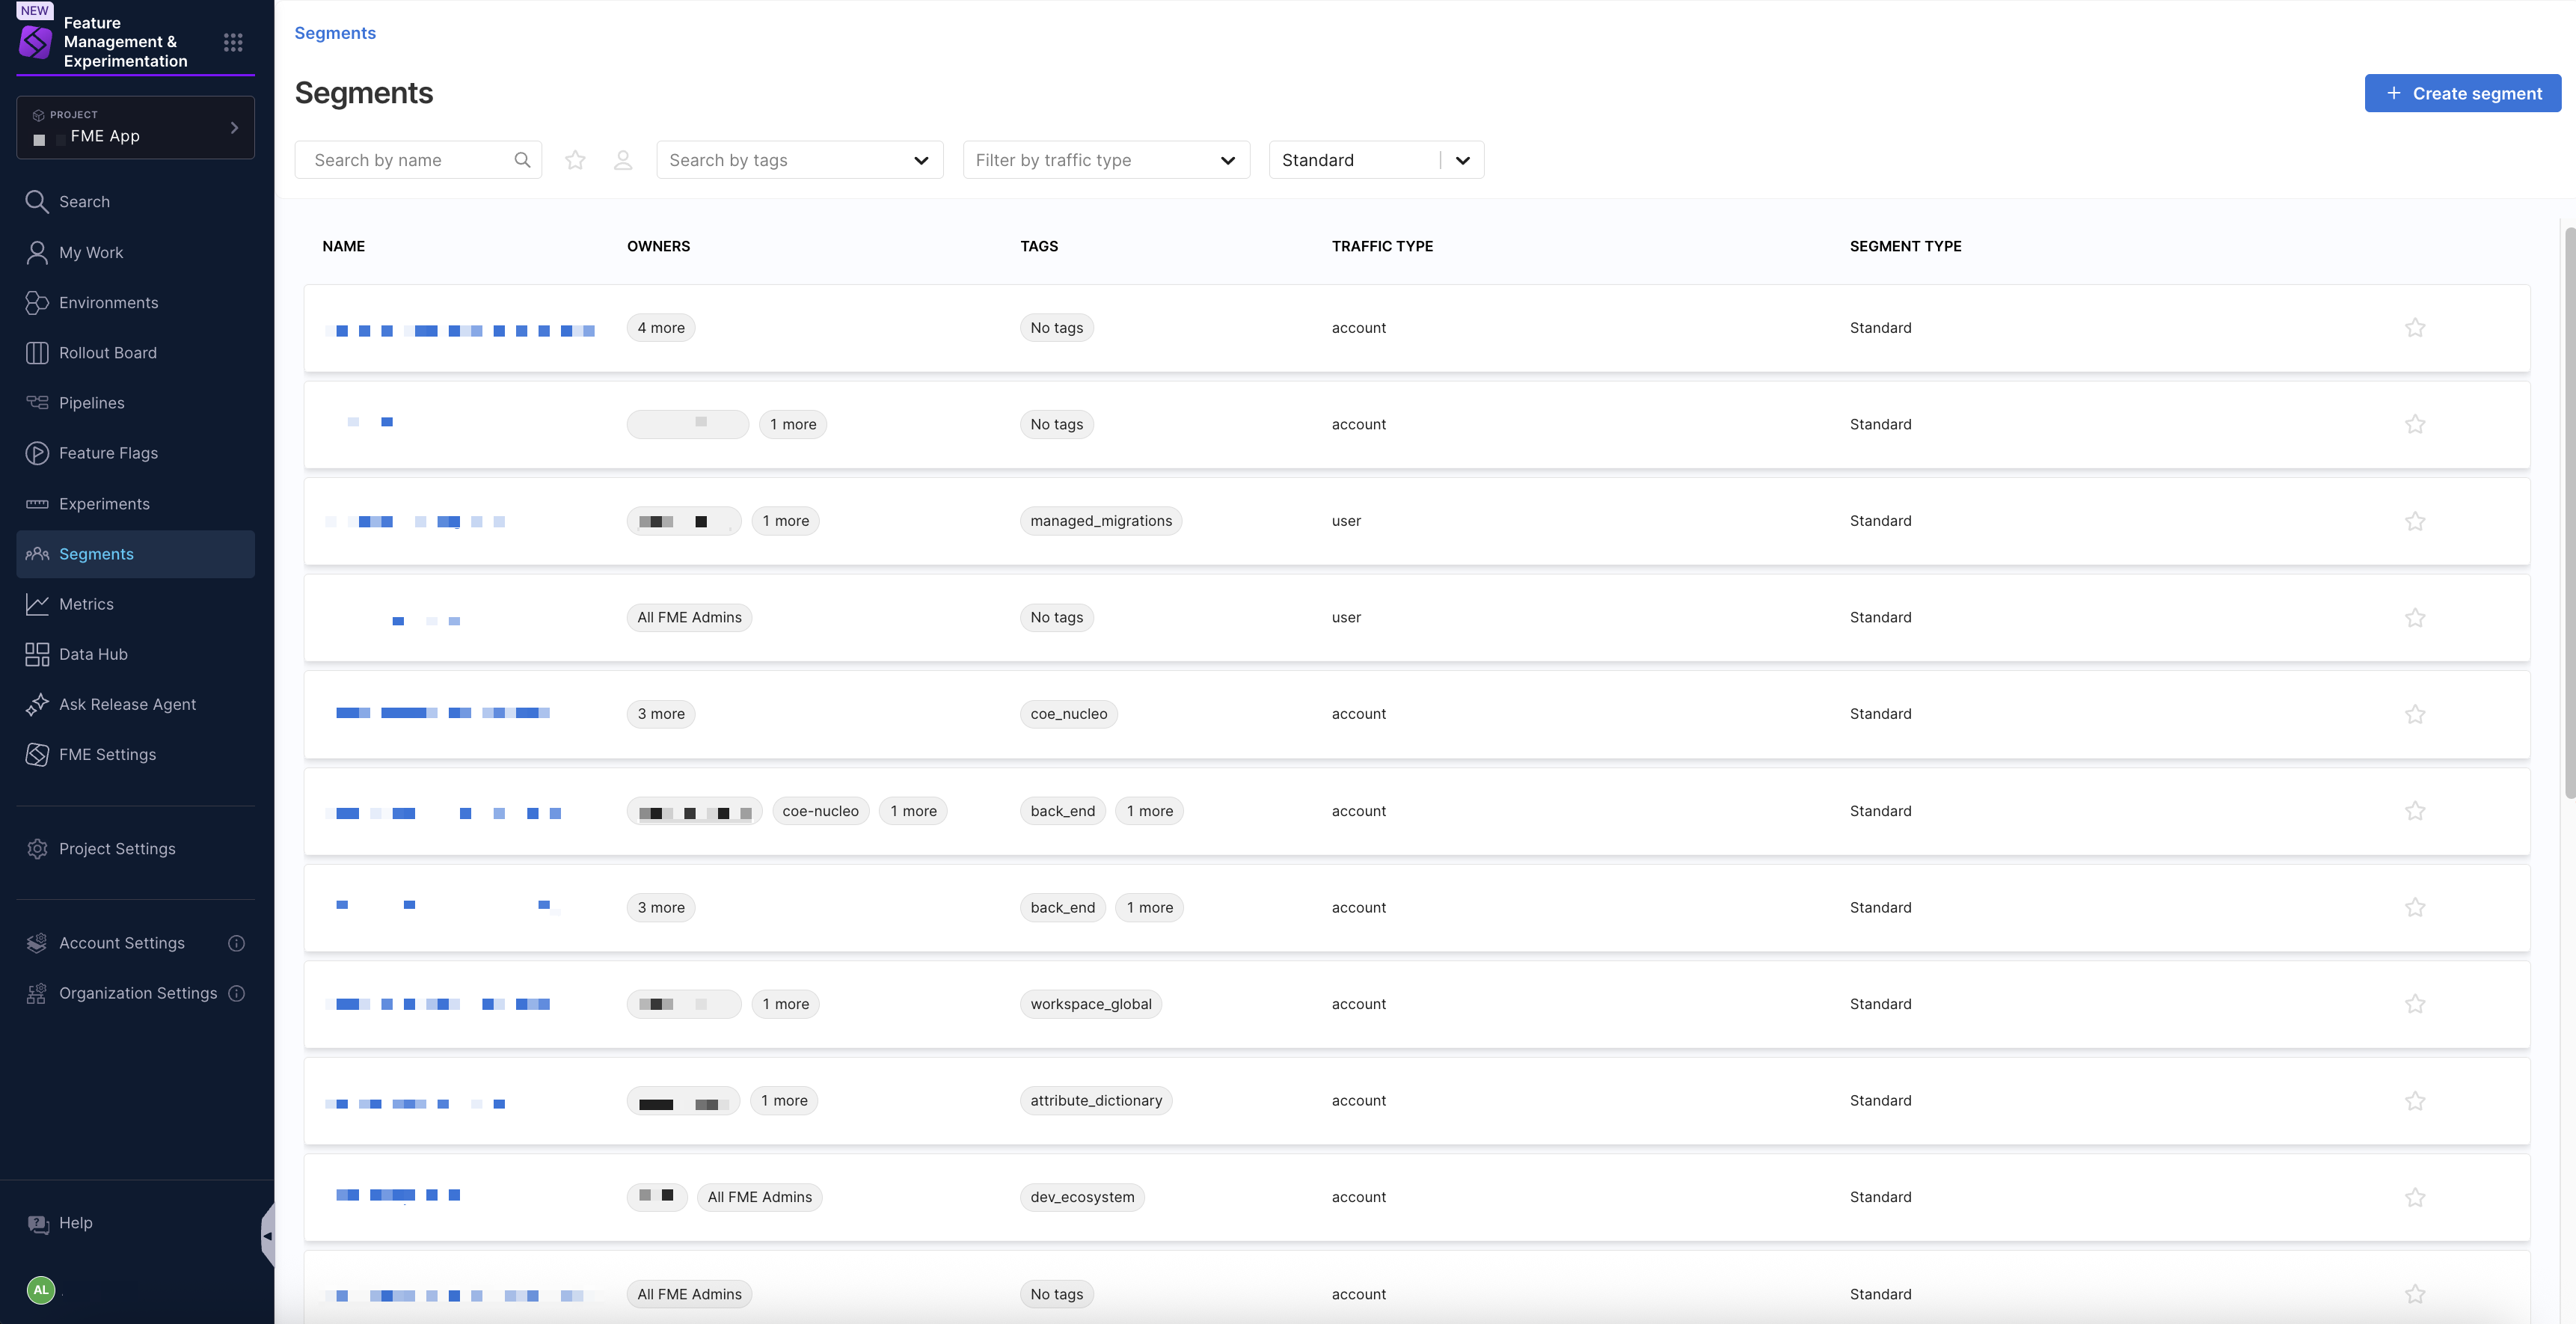
You can click the ⭐ Star icon next to any segment to add it to your Starred segments, making it easier to return to frequently used segments.
Each segment appears as a row in the list with the following information:
| Column name | Description |
|---|---|
| Name | The segment name. |
| Owners | The users responsible for managing the segment. |
| Tags | Labels used to categorize segments. |
| Traffic Type | The traffic type the segment applies to. |
| Segment Type | Whether the segment is Standard, Large, or Rule-based. |
Search and manage segments
You can find the segments you're interested in by using the following search and filter options:

- Search by name: Search for segments by name.
- Starred: Show only segments you’ve starred.
- Owned by me: Show segments you created or where you are listed as an owner.
- Search by tags: Filters segments by one or more tag values.
- Filter by traffic type: Narrows results by traffic types such as
user,account, oranonymous. - Segment type filter: Use the Standard dropdown to filter by
Standard,Large, orRule-basedsegments.
Selecting a segment from the list open its details, including the following tabs:
- Segment definition, where you can define and manage user membership for each environment
- Audit logs, where you can review changes made to a segment over time
Segments represent groups of users that feature flags can target across environments. In Harness FME, standard and large segments define membership explicitly; rule-based segments dynamically include users based on targeting rules that are evaluated at runtime. Segments can be managed in Harness or programmatically using the Split Admin API, and can optionally sync with any Amplitude Cohort.
Segments help you organize and target users for feature releases, testing, and experimentation across your environments. For feature releases, you can use segments to:
- Ensure quality testing. Release to your internal or outsourced QA team by creating a
qa_teamsegment. - Target employees for internal testing. Release to your entire company to test a feature or gather feedback by creating an
employeessegment. - Plan your release strategy. Release to a group of customers who have expressed interest in a particular feature by creating a
beta_testersegment.
These examples demonstrate how segments help you safely and effectively target users during feature releases.
Segment types
Choose a segment type based on the number of users you need to target and how you manage segment membership.
Harness FME supports the following segment types:
- Standard segments: Contain up to 100,000 user IDs. Standard segments are fully downloaded by server-side SDKs. Segments with a higher number of user IDs can increase SDK initialization time.
- Large segments: Contain up to 1,000,000 user IDs (limit can be increased upon request). Designed for high-scale targeting use cases.
- Rule-based segments: Dynamically include user IDs based on targeting rules.
Large segment behavior
Large segments differ from standard segments in how they are created and accessed:
- Updated externally (for example, by uploading a full user list using the Admin API).
- Individual user IDs can be searched, but the full list is not accessible in the UI.
Server-side SDKs do not support Large segments. Evaluations of feature flags targeting Large segments return control.
If you need this capability, contact Harness Support or open a feature request.
Creating a segment
When creating a segment, the segment name, description, owners, and tags can help you and your team later manage your segment. This information can be customized to your team's workflow.
To create a segment:
-
From the navigation bar, click Create segment. The Create a segment page appears.
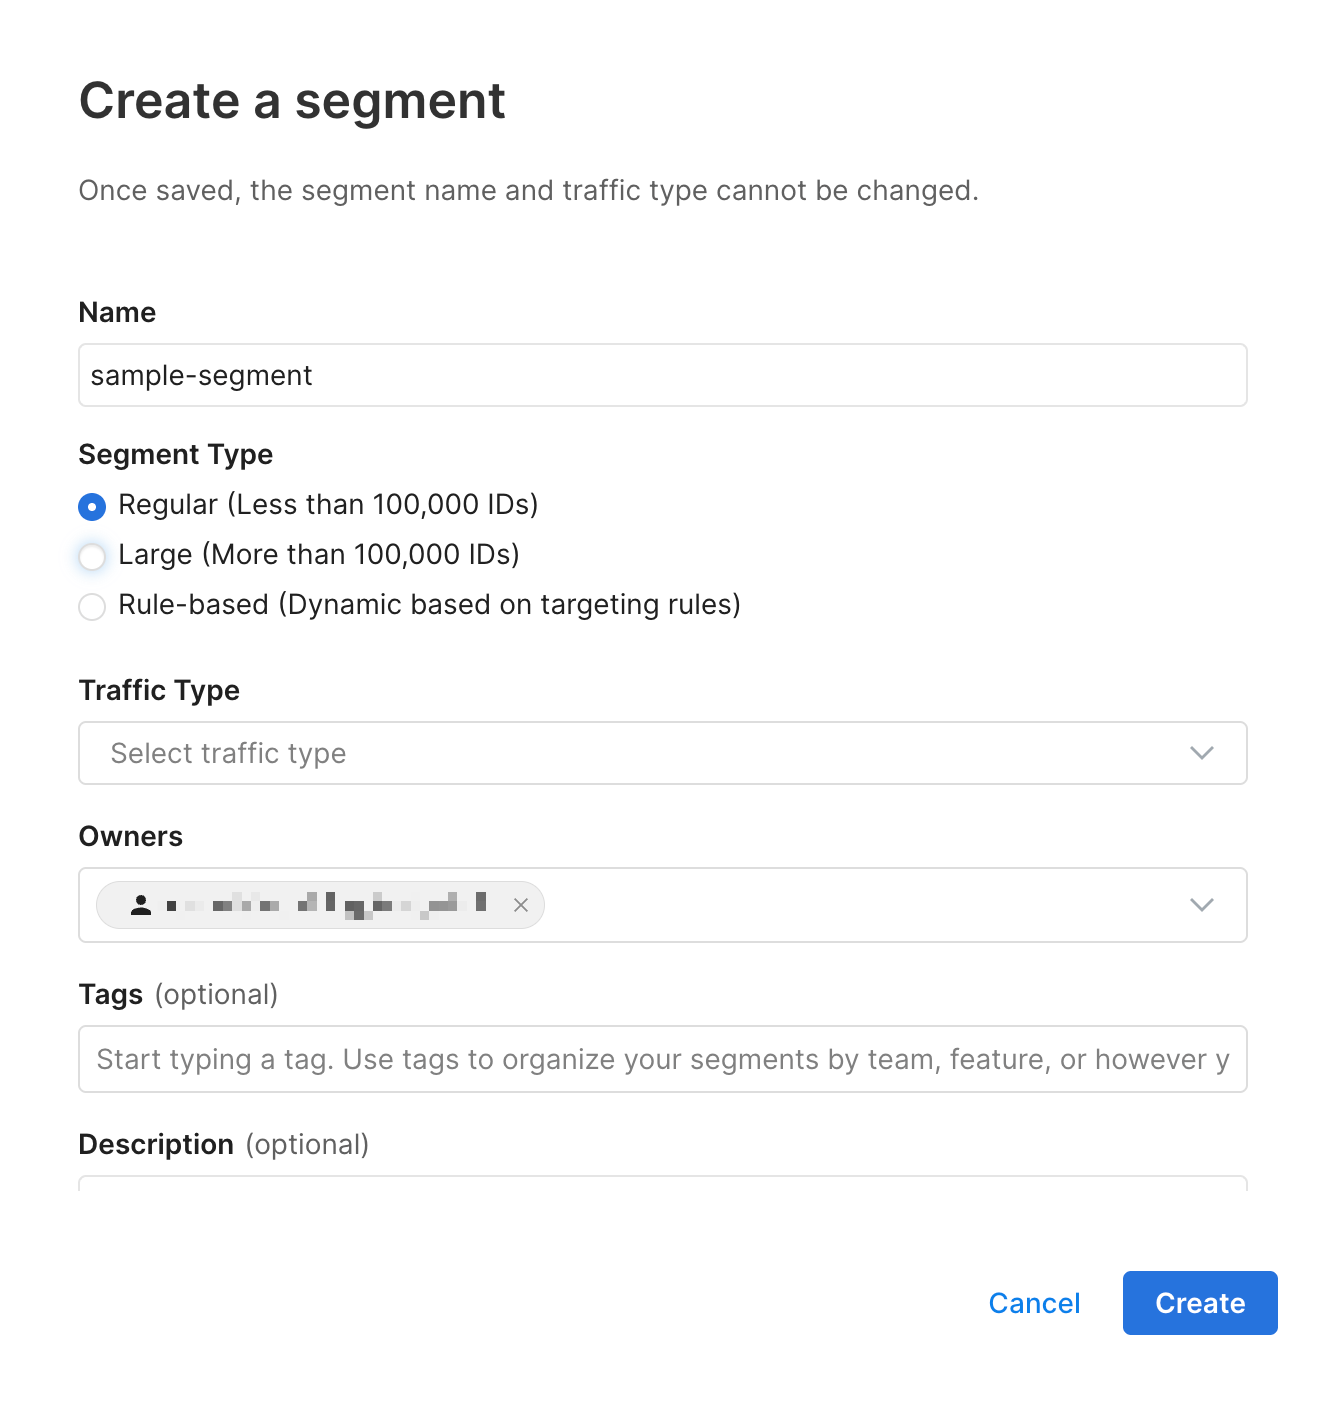
-
Fill in the fields as follows:
-
Name. Give your segment an easily recognizable name.
Segment name requirementsSegment names must start with a letter and can contain the characters - _ a-z A-Z 0-9. Segment names are case sensitive. Note that segment names cannot specifically be called datetime, string, or integer.
-
Segment type. Select a segment type.
-
Traffic type. Select a traffic type for this segment. The feature flags that target this segment must be assigned the same traffic type.
-
Owners. Add one or more owners to your segment. Use owners to isolate segments in the list to those owned by me.
-
Tags. Optionally add one or more tags to help you categorize the segment. Use tags to isolate to a particular team or feature release (e.g. reporting team, front end, or geo search release).
-
Description. Optionally, provide a description of the segment. This helps your team members understand the segment's purpose.
- Click Create to create your new segment. This takes you to the segment details page with the Definition and Audit Logs tabs.
- Standard and Large
- Rule-based
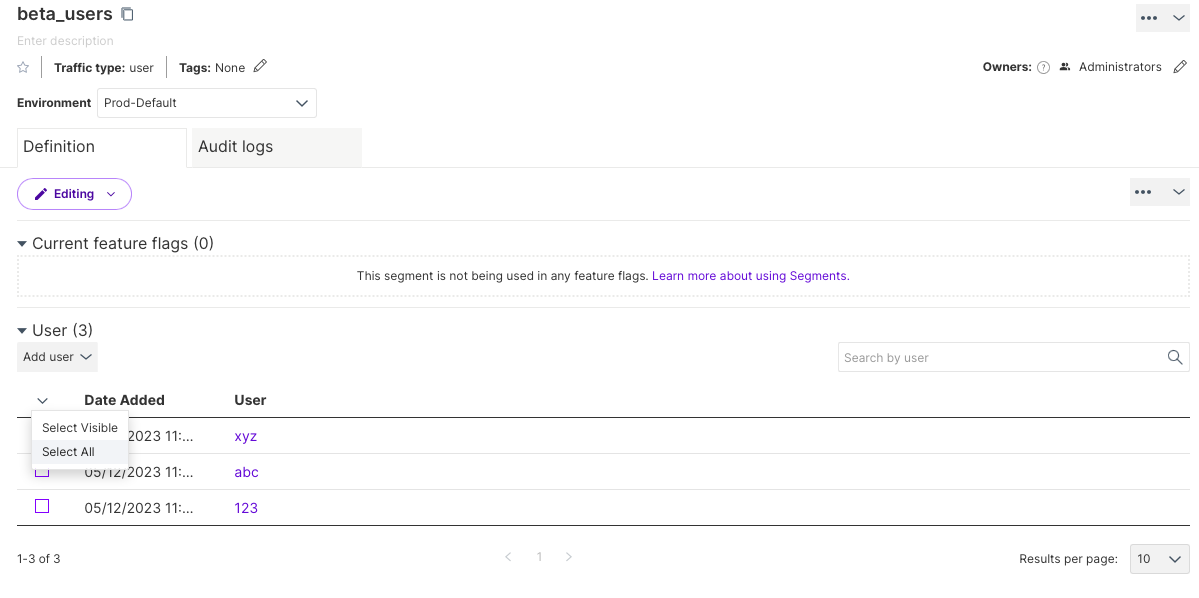
Adding user IDs to a segment
You need to add a segment definition for a given environment (this creates an empty segment in that environment) and then add user IDs to the segment. This is done as follows:
-
Select a segment in the Segments pane to open the segment page.
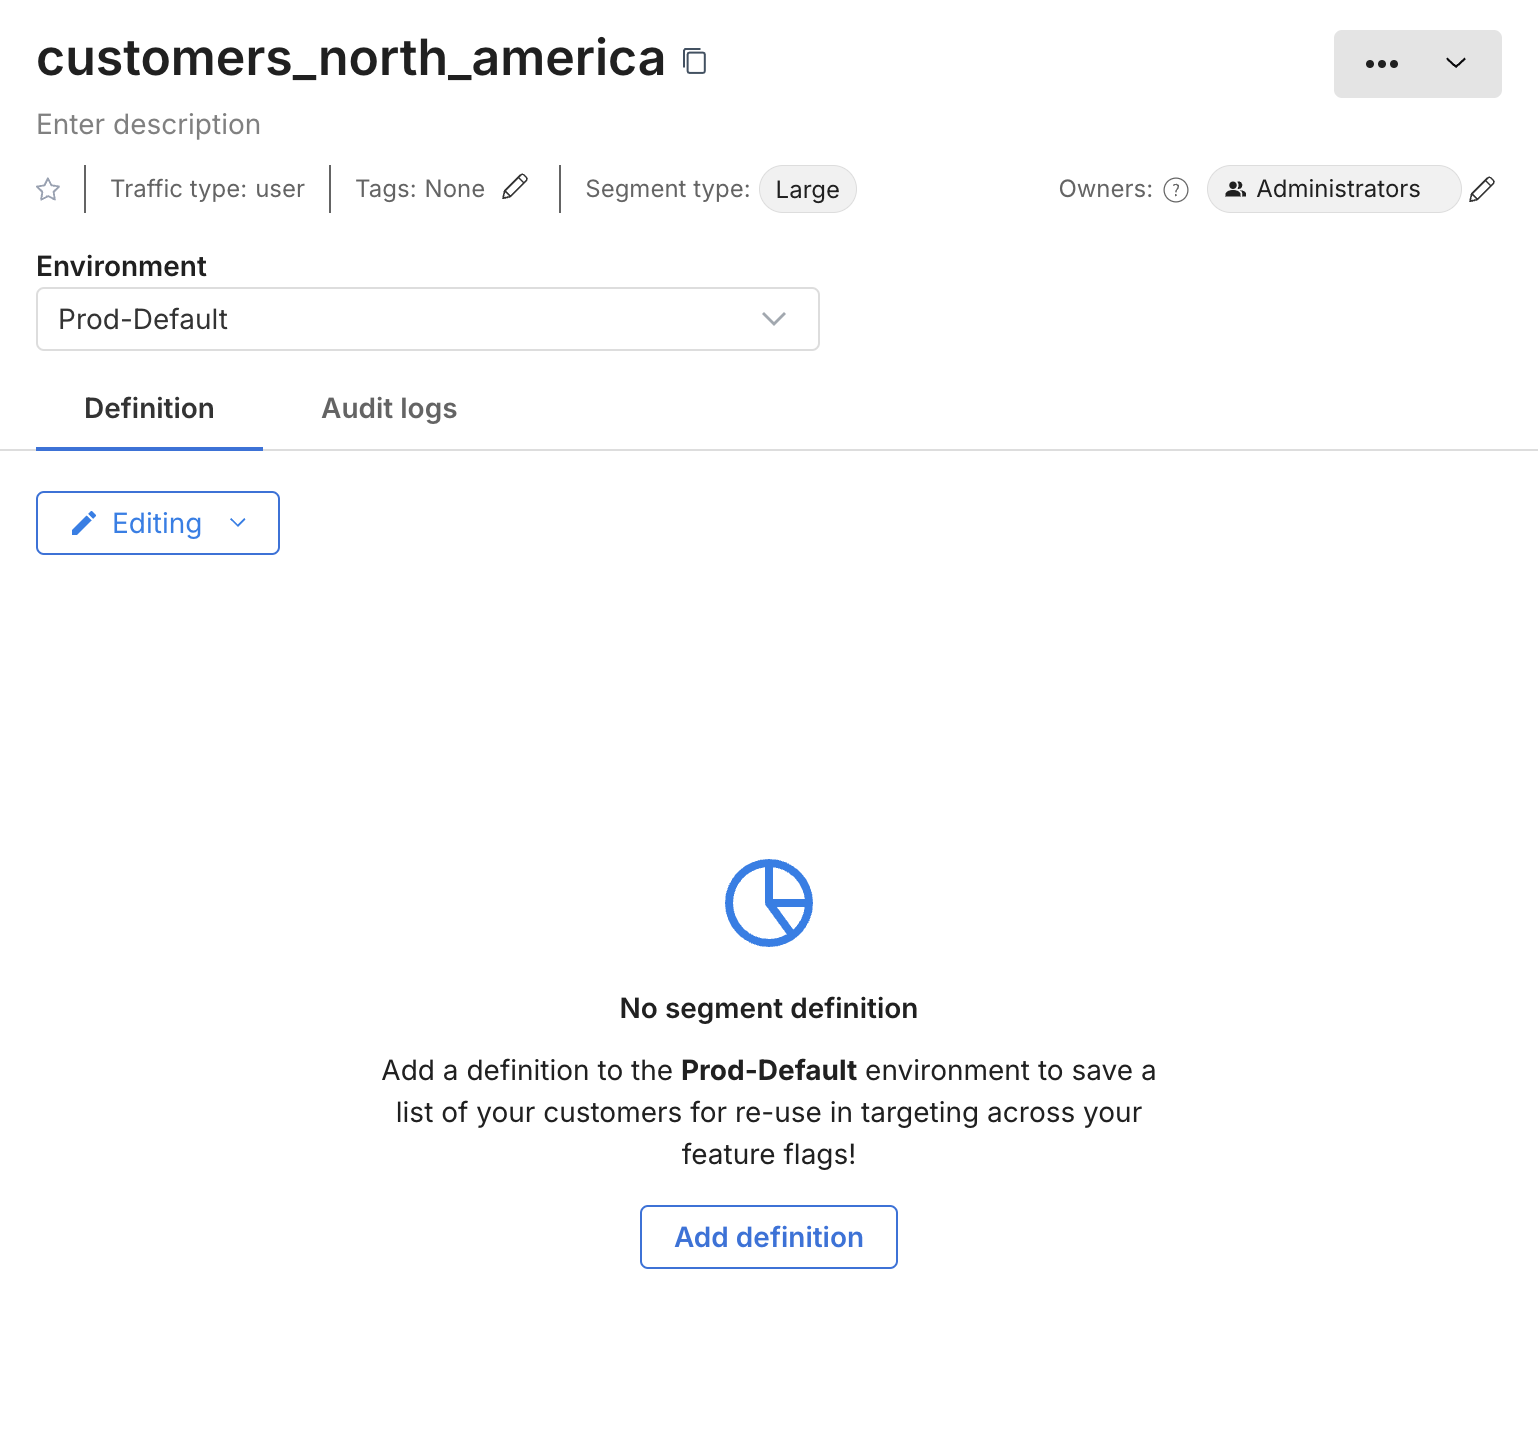
-
In the Environment dropdown, select a Harness FME environment where the segment will be defined.
-
Click Add definition. A new blank definition for the segment (for the selected environment) appears.
-
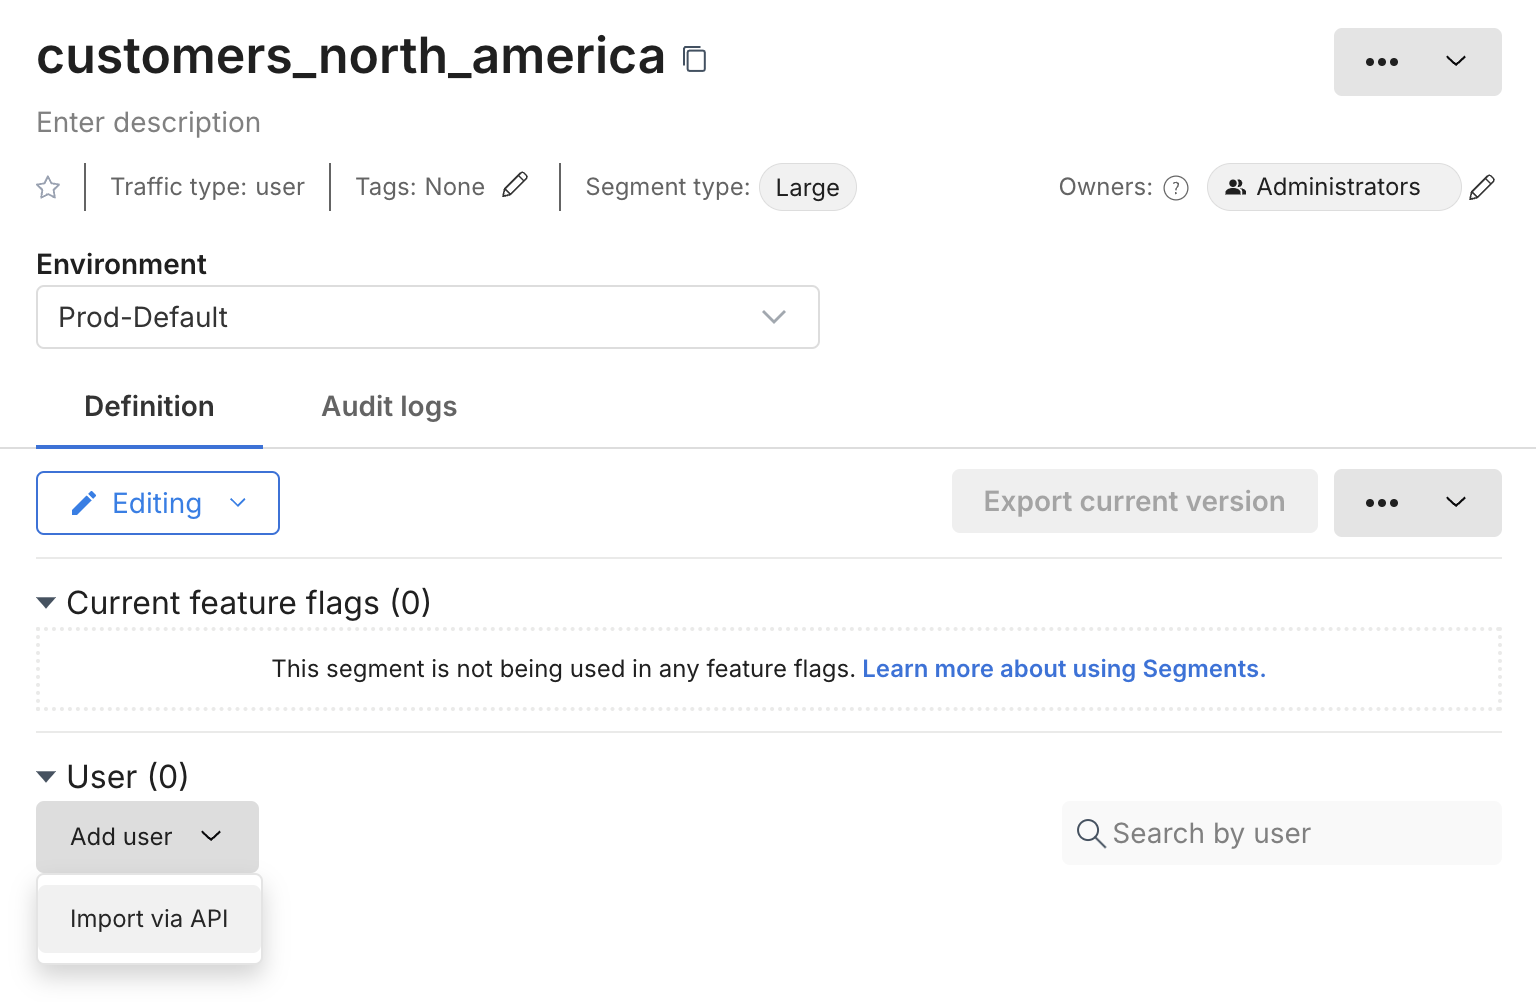
In the User section, click Add user.
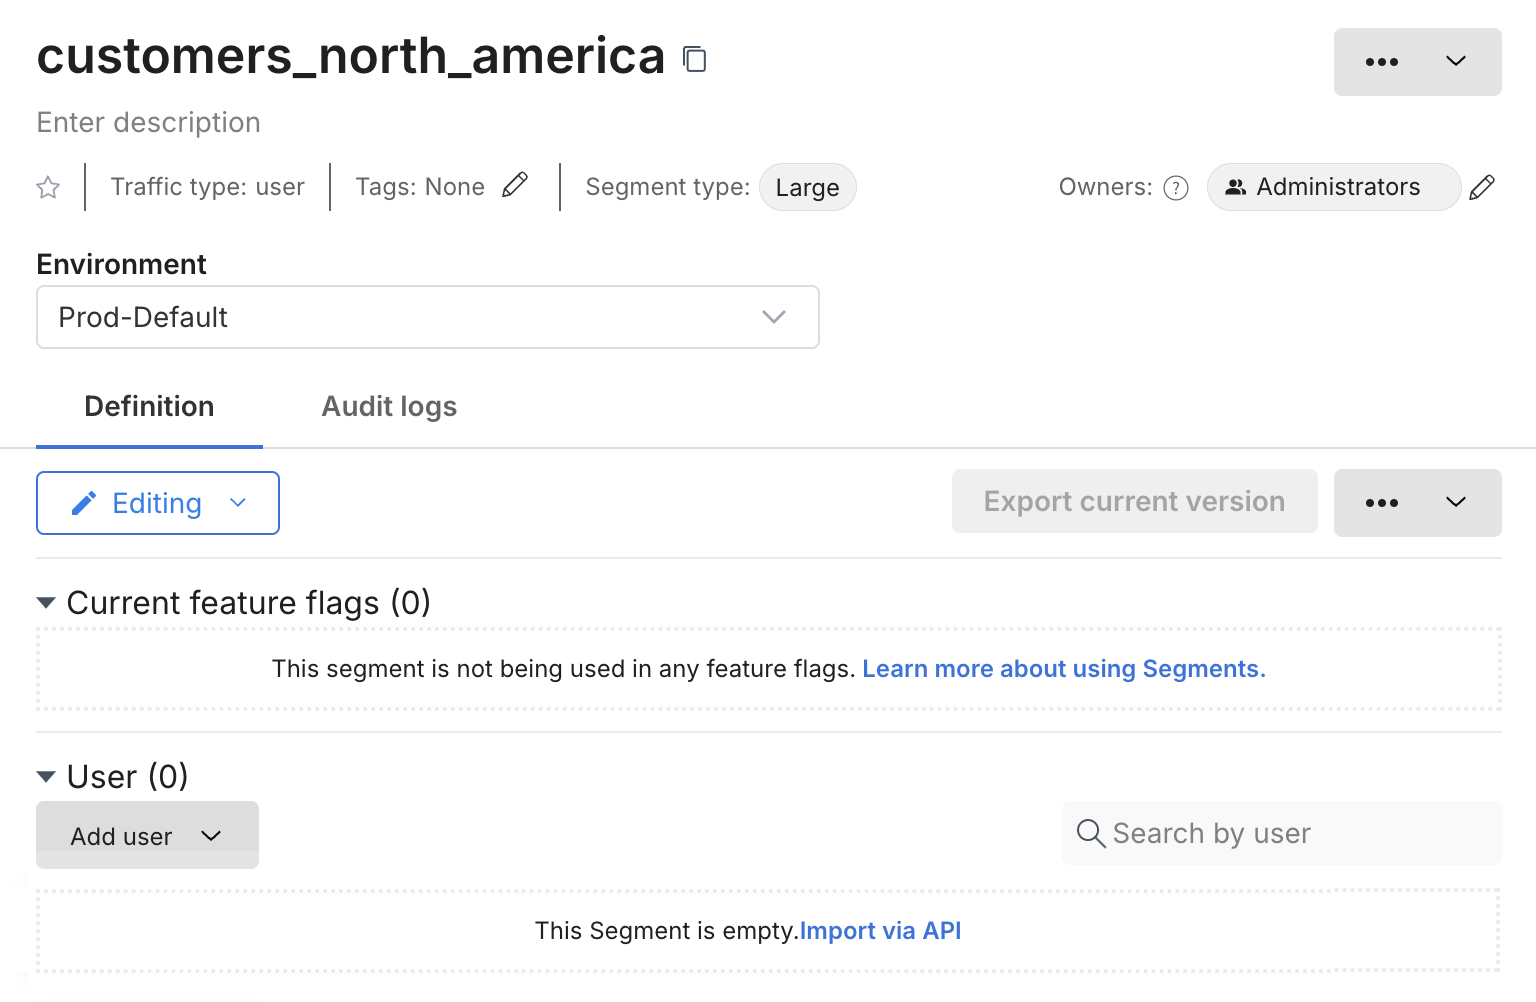
For Standard segments you can choose to individually add user IDs or to add them via file import.
For Large segments user IDs are added via file import using Split API.
For details about the import file contents, see the CSV import file format section below.
File import for Standard segments
When using file import for a Standard segment, the user IDs listed in the file are added to the IDs already in the segment. Duplicate IDs are not added. This means that you can repeatedly import up to 10,000 user IDs at a time until the 100,000 limit is reached. (This is different from the way file import works for Large segments.)
File import for Large segments
When using file import for a Large segment, the list of user IDs in the file will replace all the IDs that were already in the segment. The import file contents represent the new segment version and overwrite the previous segment version.
To import user IDs into a Large segment you need to prepare a CSV import file. Then do the following:
-
On the segment page, click Add user and select Import via API.
-
On the Change summary page, click Save to generate an upload URL.
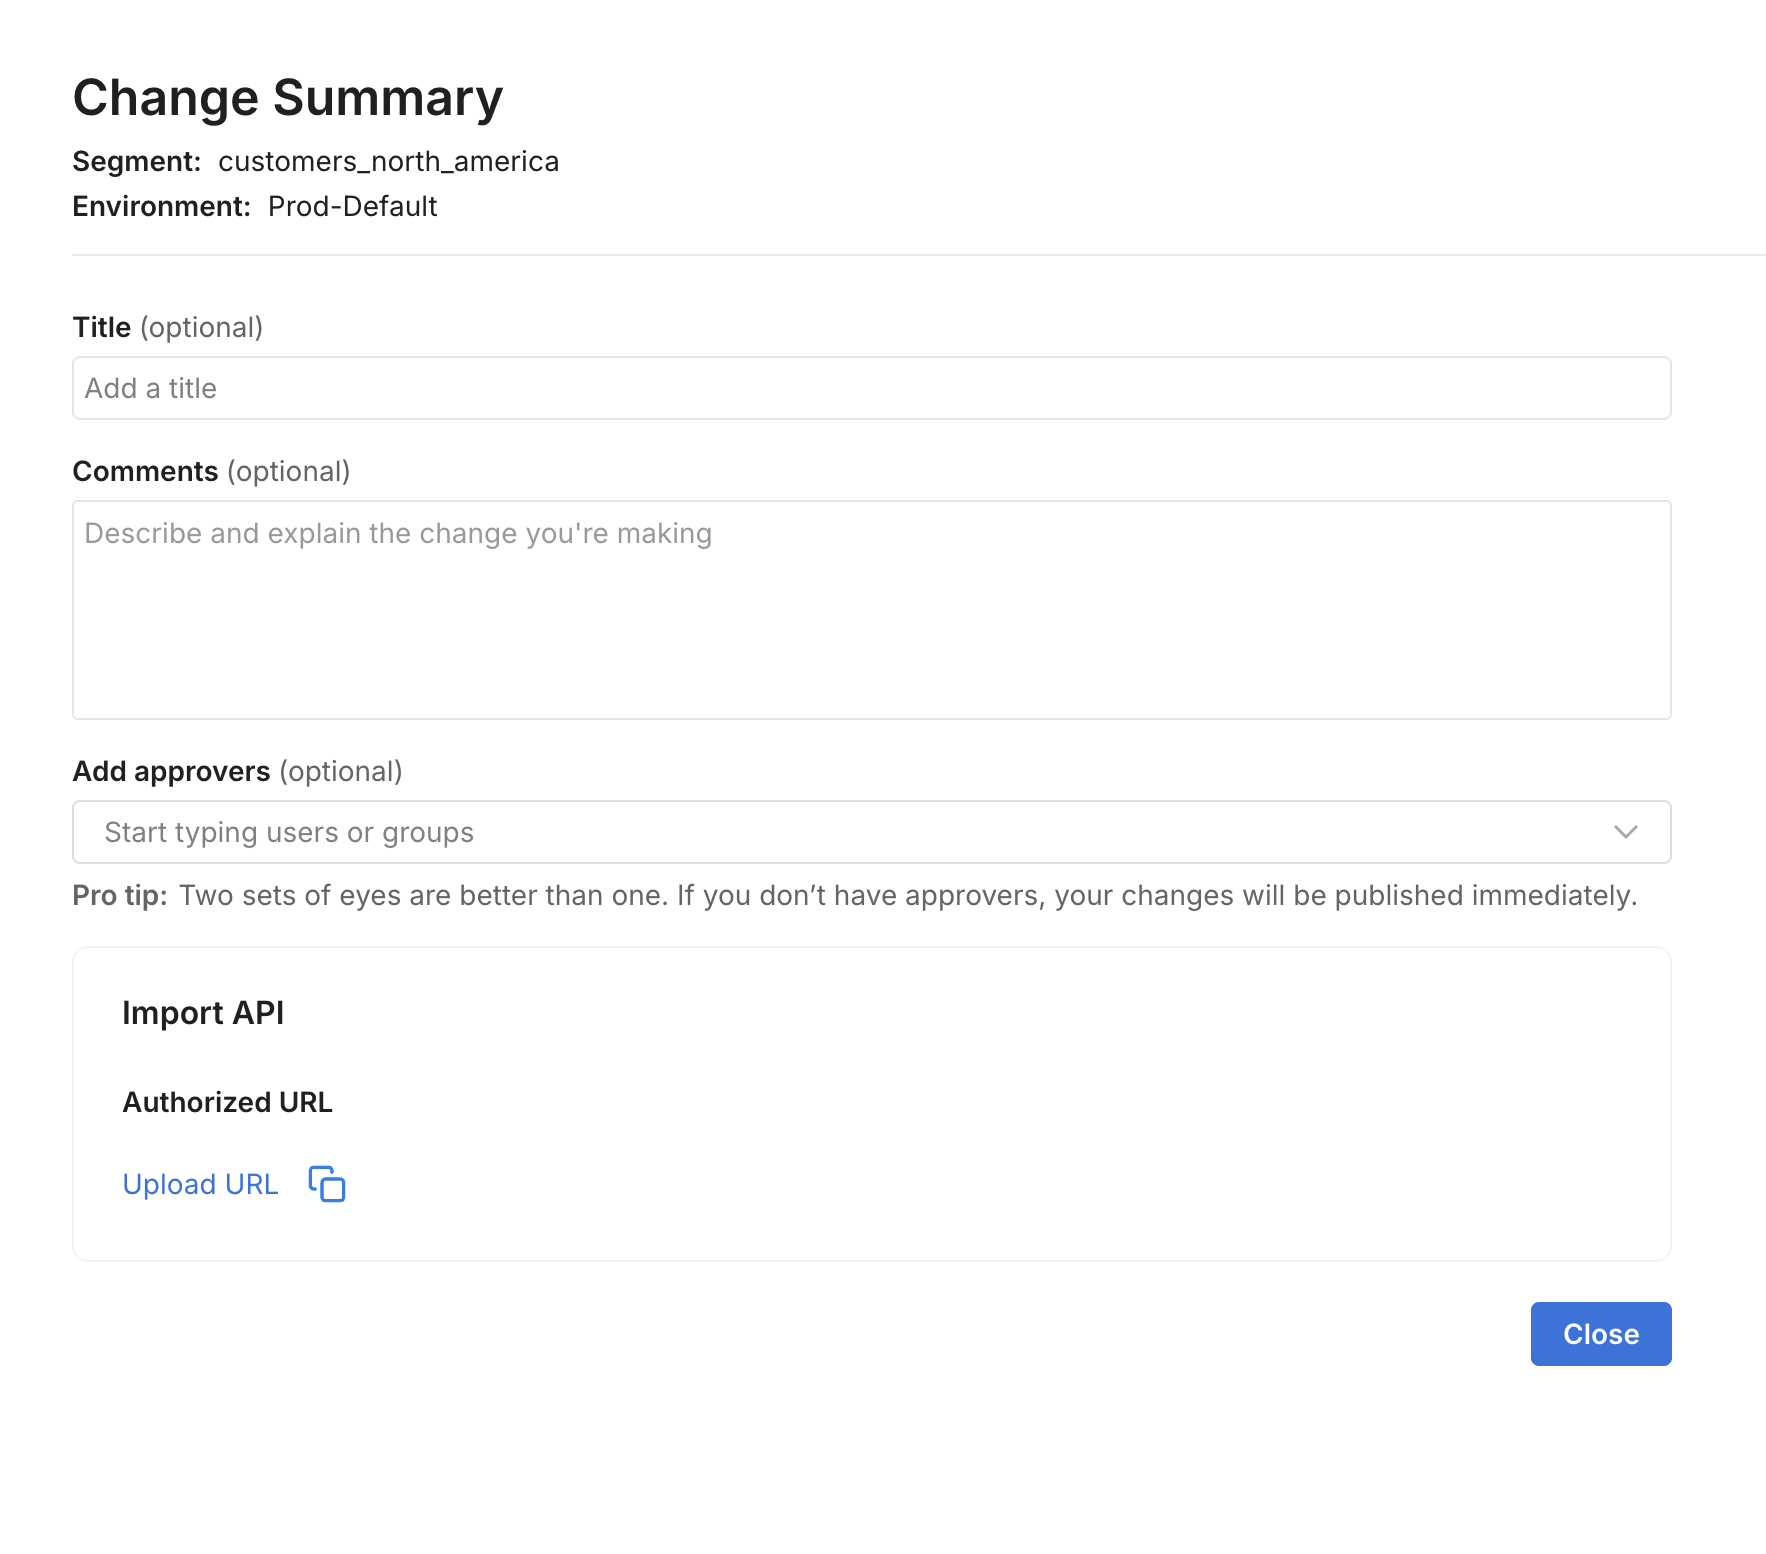
The upload URL will time out after 5 minutes, and the Large segment change request will be automatically withdrawn if the upload URL was not used.
-
Copy the Upload URL by clicking the copy icon. You are actually copying a curl command to upload a CSV file using a Split API endpoint. The command has the following format:
curl -XPUT -H 'Host: split-large-segments-....' \
   'https://split-large-segments-...' \
   -T filename.csv
Replace filename.csv with the name of your CSV file.
-
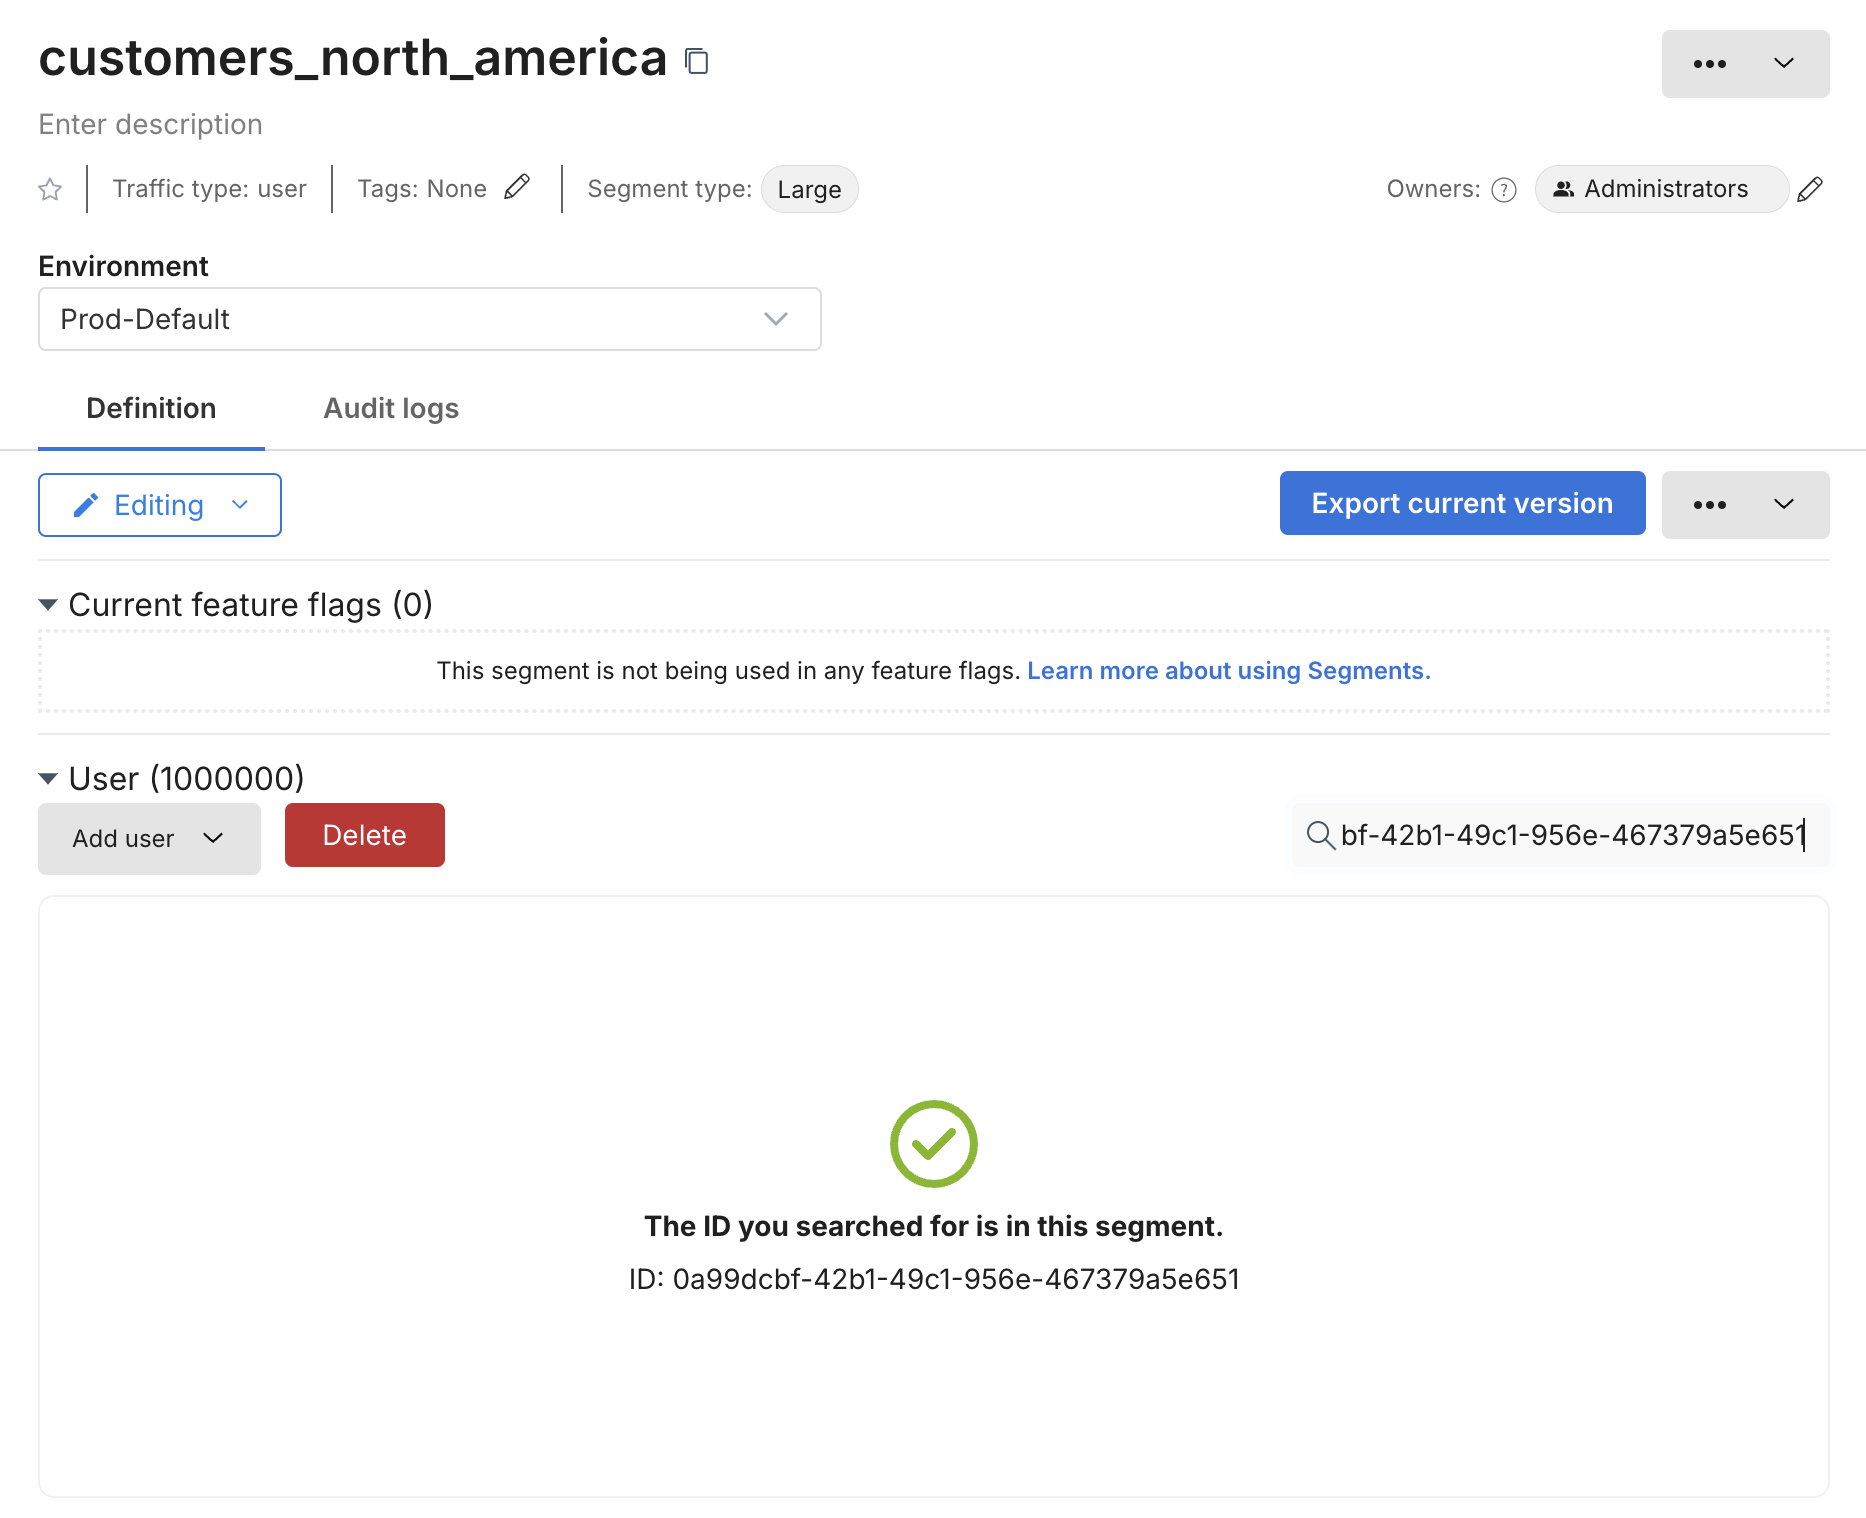
Run the curl command from the location of your CSV file. You may need to wait a moment for the command to complete. During this time, the segment will show pending changes in Harness.

-
Refresh the Segment page to see the segment size updated. You can search for a user ID to confirm that it is in the Large segment.
Append user IDs to a Large segment
A segment is a list of user IDs. To append new user IDs to an existing list for a Large segment:
- Export the user IDs in the Large segment.
You can export past versions of a Large segment: Click into a change on the Segment page Audit logs tab, and then click an Export link to download a CSV file. (Past versions are stored for 90 days.)
-
Edit the exported CSV file and insert the new user IDs.
-
Upload the edited CSV file using the File import for Large segments steps.
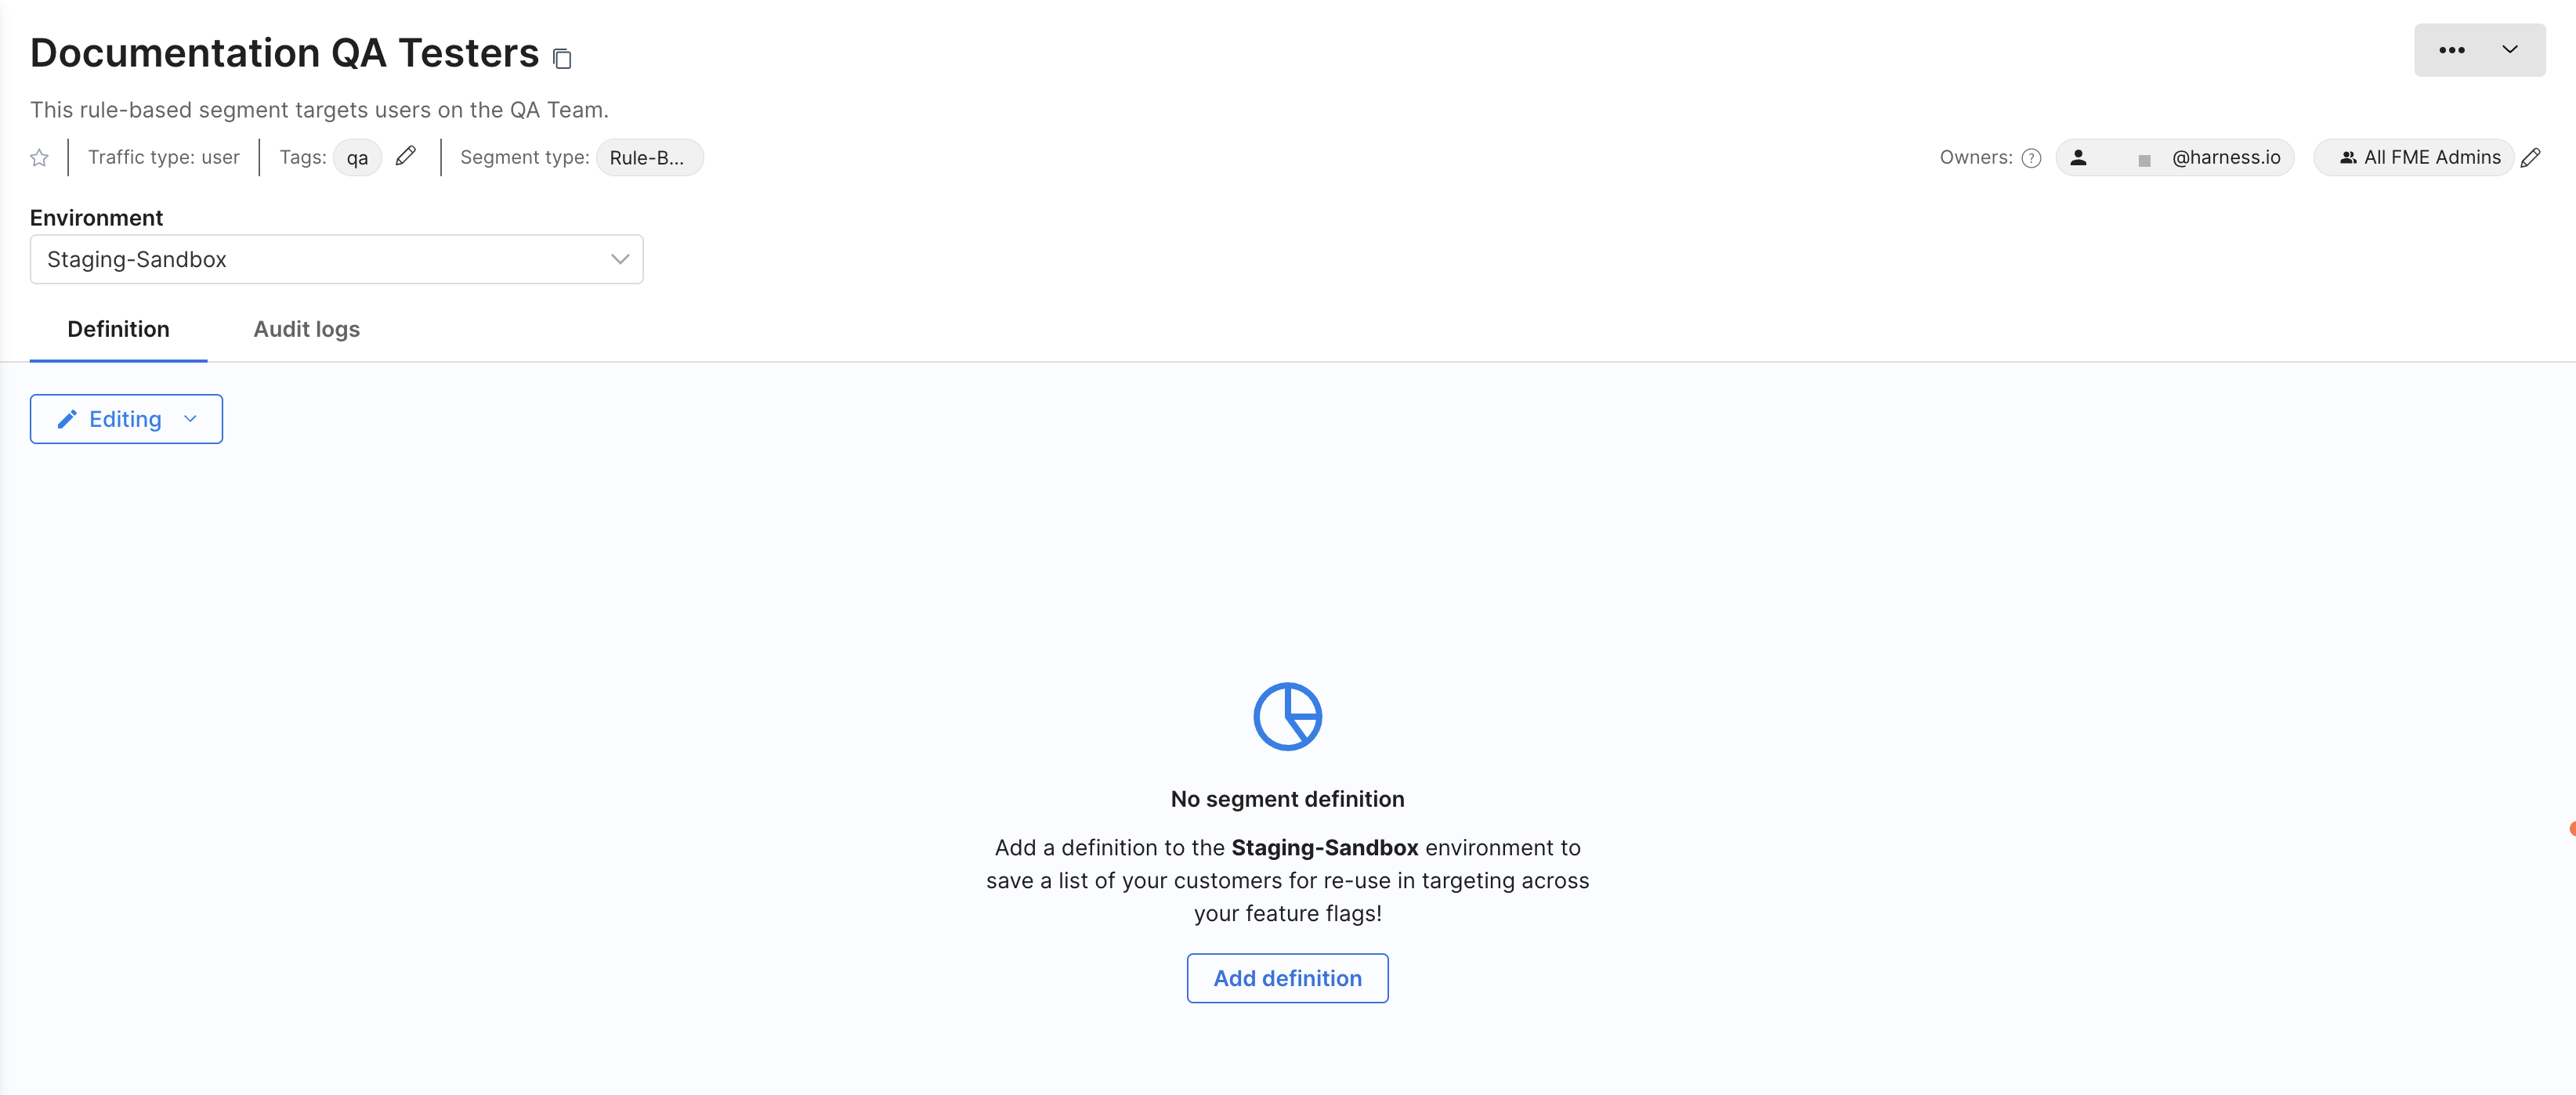
Rule-based segments define membership dynamically using targeting rules, rather than a fixed list of user IDs. While the creation flow is similar to Standard and Large segments, the segment definition is configured using targeting rules instead of user IDs.
To define a rule-based segment:
-
Select the appropriate environment for the segment definition from the dropdown menu, for example:
ProdorStaging. -
In the Definition tab of a segment, click Add definition.
-
In the Targeting section, click + Add new rule.
-
Add a targeting rule to be evaluated at runtime. For each rule, you can configure an
IFcondition using user attributes or the followingUseroptions: Is in segment, Is not in segment, Is in list, and Is not in list.
Once you've selected a condition, select or enter a corresponding segment, list, or attribute value. To refine a rule, click + to add additional conditions. All conditions in an
ANDblock must be satisfied for the rule to match.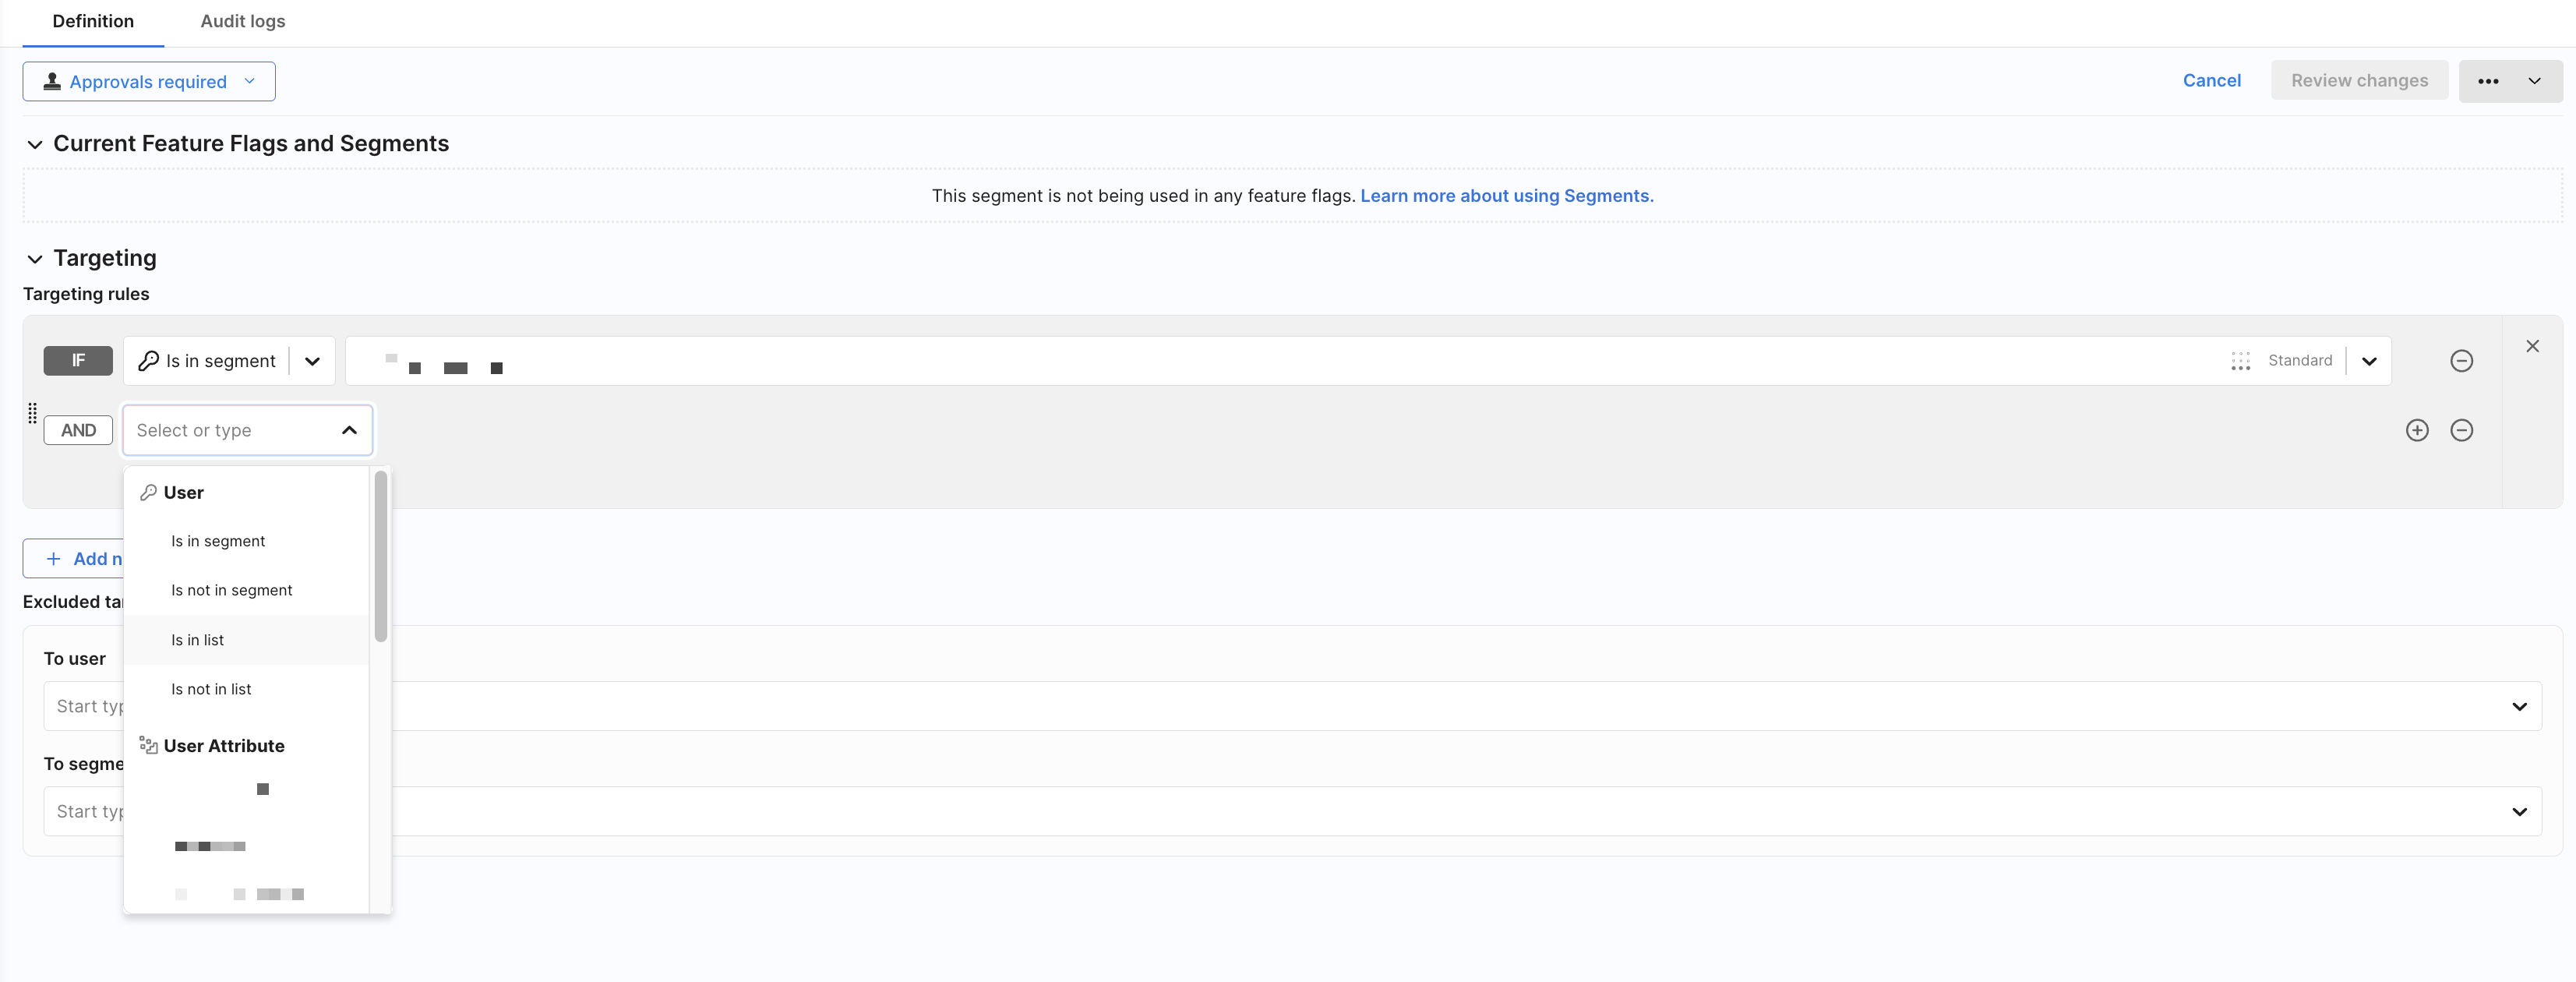
To define additional branches, click + Add new rule to create an
ELSE IFrule. Rules are evaluated in order, from top to bottom. -
In the Excluded targets section, you can exclude users or segments from the segment definition, even if they match the targeting rules. Excluded targets are always removed from the final segment membership.

- Add users to exclude in the
To userfield. - Select the segments to exclude in the
To segmentsfield.
- Add users to exclude in the
-
Click Review changes to submit a change request.
-
Add a title, a description of your change, and optionally, include approvers.
-
Click Save.
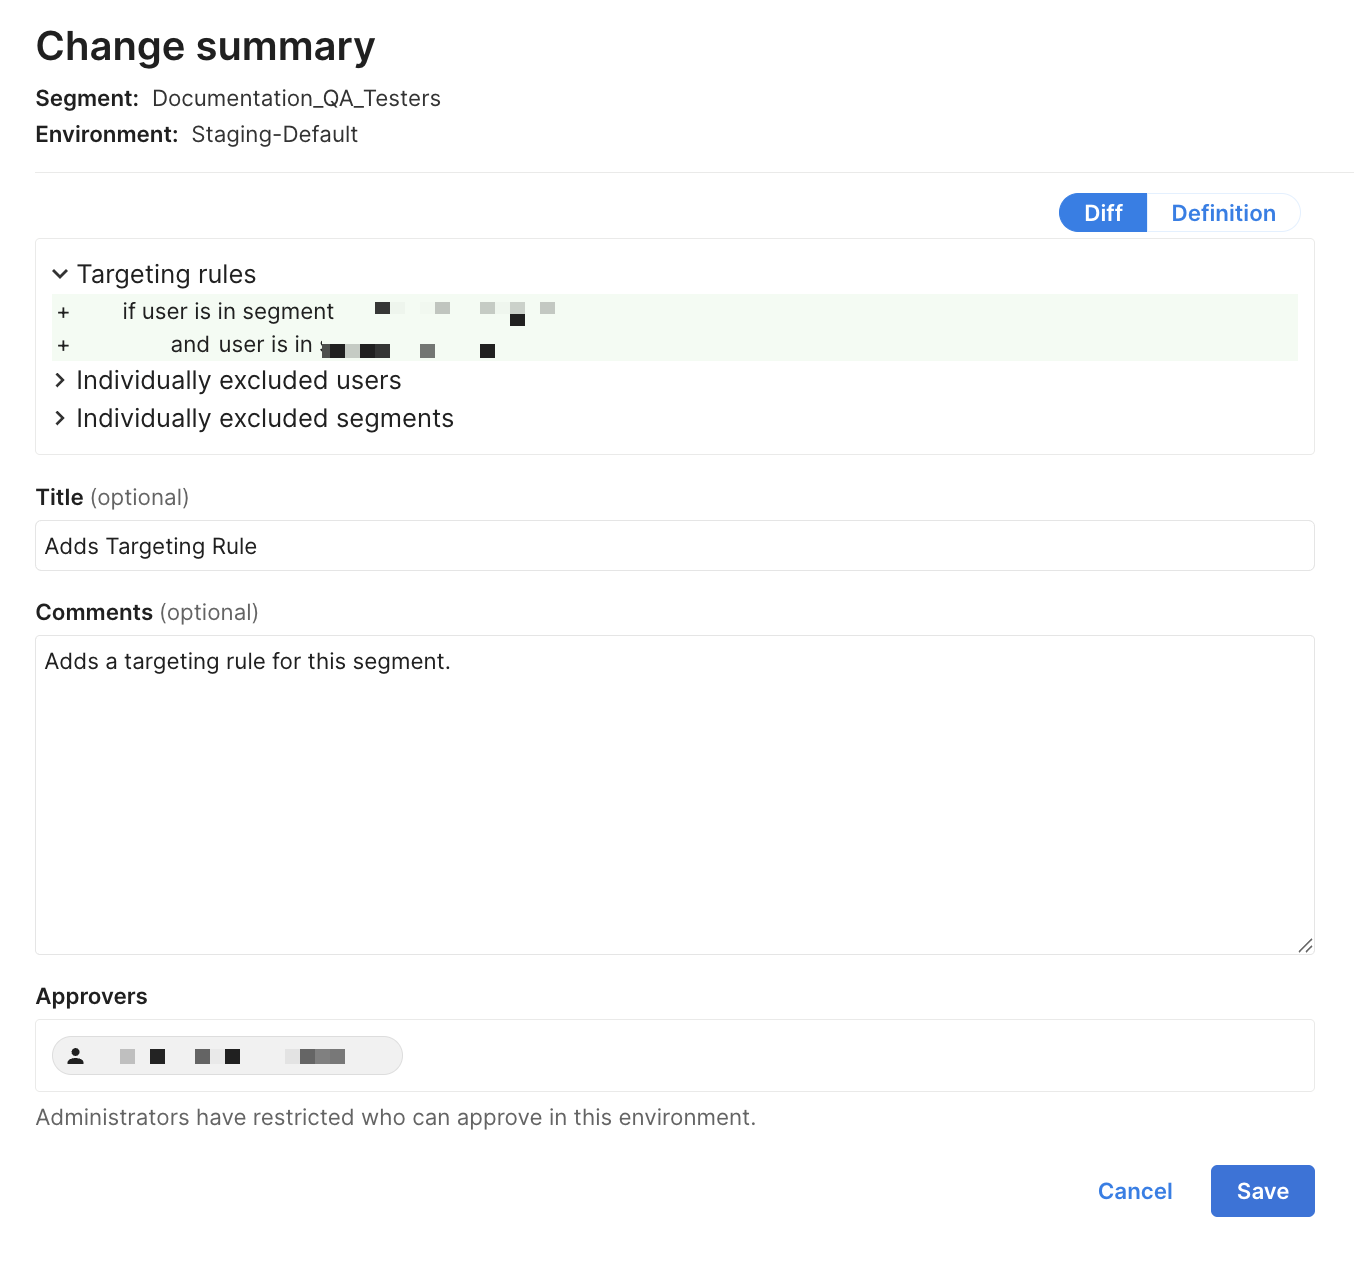
After saving, your changes are recorded in the Audit logs tab.
- In environments that require a change request, the changes appear as an entry once the request is approved.
- In environments without a change request workflow, changes are saved immediately and appear.

You can use the Filter by dropdown menu to filter the entries by:
| Filter type | Options |
|---|---|
| Change type | Created, Added user, Removed user, Updated tags, Updated owners |
| Change status | Published, Rejected, Requested, Withdrawn |
Deleting a segment
You can delete a segment with all of its keys instead of deleting each segment key individually.
Follow these steps to delete all keys from the segment and delete the segment:
-
Locate the down arrow on top of the checkboxes column.
-
Click on it to display two menu items.
-
Select all records from there. The Delete button appears.
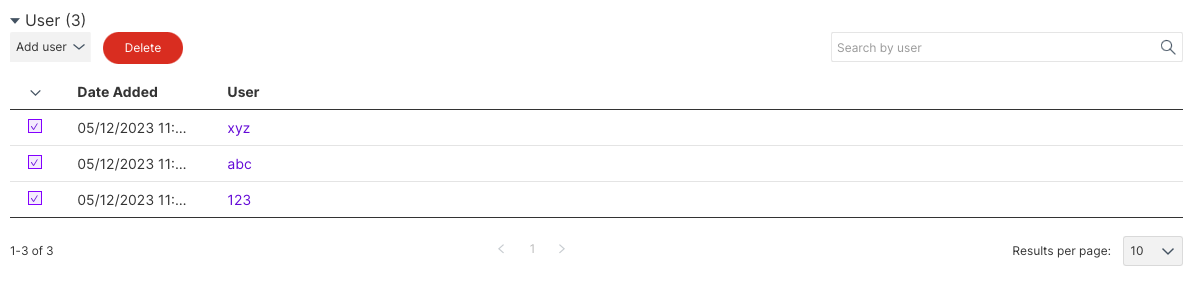
-
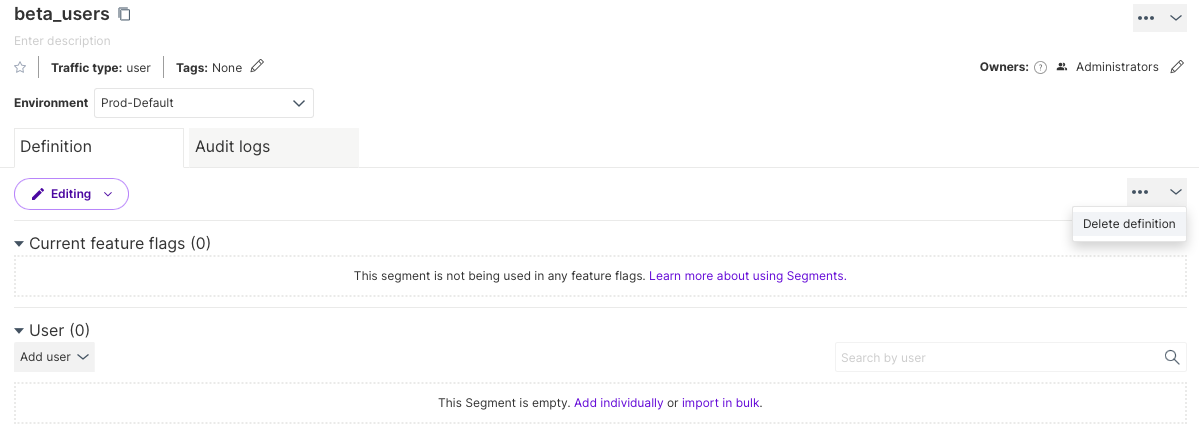
Once the keys are deleted, delete the segment definition by clicking on the Ellipses icon in the Definition section and selecting Delete definition.
-
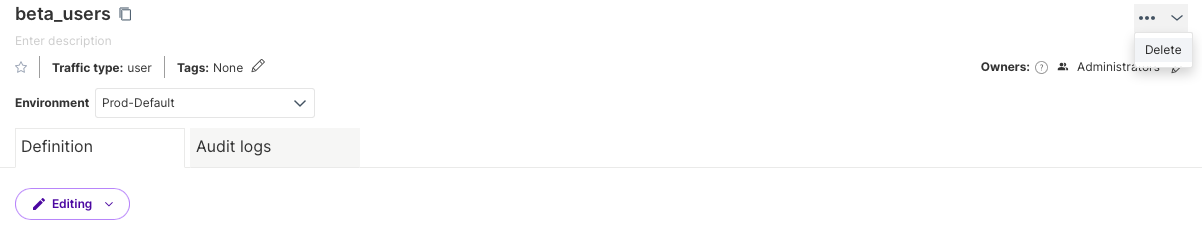
Click on the Ellipses icon above Owners and select Delete.
CSV import file format
When adding user keys to a segment by importing them from a file, use a CSV file (a file with .csv extension) that lists the user IDs in a single column with no header. User IDs containing commas, line breaks, or any other special character need to be wrapped in double quotes. Duplicate user IDs are ignored.
Example CSV file content:
id1
id2
id3
Uploading user IDs with commas in CSV files
When uploading CSV files with user IDs that contain commas, do not manually add double quotes around the IDs. The CSV import automatically treats each line as a unique user ID and adds any necessary quotes during import. For example, instead of:
"user1, key1"
"user2, key2"
use:
user1, key1
user2, key2
This ensures the user IDs are imported correctly into the segment.
Checking if a user is in a segment
The Admin API does not include an endpoint to check if a user ID (or key) exists in a specific segment. Instead, you can use the mobile and browser SDK's memberships endpoint, which returns the list of segment names associated with a given user key.
When calling this endpoint, use a Browser API key:
curl -H "Authorization: Bearer [Browser API Key]" \
     -H "Accept: application/json" \
     https://sdk.split.io/api/memberships/[user_id]
For example:
curl -H "Authorization: Bearer ebj1kXXXXXXXXXXXXXXXXX" \
     -H "Accept: application/json" \
     https://sdk.split.io/api/memberships/testing4321
The example response returns the following:
{
  // "ms" is short for "mySegments".
  // In this case, the user is only a member of the "First_Class_Users" regular segment.
  "ms": {
    "k": [{
      "id": "460f69f0-f426-11e8-92e6-0ed4073e2658",
      "n": "First_Class_Users"
    }]
  },
  // "ls" is short for "myLargeSegments".
  // In this case, the user is not a member of any large segments.
  "ls": {
    "k": []
  }
}
This approach is faster and more efficient than fetching all keys for all segments via the Admin API and looping through them.