Catalog Info Yaml Integration
The Catalog Info Yaml integration discovers catalog-info.yaml files in your GitHub repositories (supports GitHub Enterprise too) and imports them into your IDP Catalog. It converts Backstage-format entity definitions (apiVersion: backstage.io/v1alpha1 or apiVersion: scaffolder.backstage.io/v1beta3) into Harness IDP catalog entities, so you can onboard your services to IDP without recreating entity definitions from scratch.
If you have already onboarded your catalog to IDP (for example, using GitHub catalog population script or the Bitbucket catalog population script), you need not reuse this integration.
Before you begin
-
IDP_INTEGRATIONS flag: Must be enabled for your account. Contact Harness Support to enable it.
-
Harness GitHub connector: Read access to your GitHub account or GitHub Enterprise organization. If you wish to use Git Sync, your GitHub connector must have write access to your org repos with
Enable API accessturned on. -
RBAC permissions: Requires the view, create, edit, and delete permissions on the
IDP_INTEGRATIONresource type. Go to RBAC in Harness to configure roles.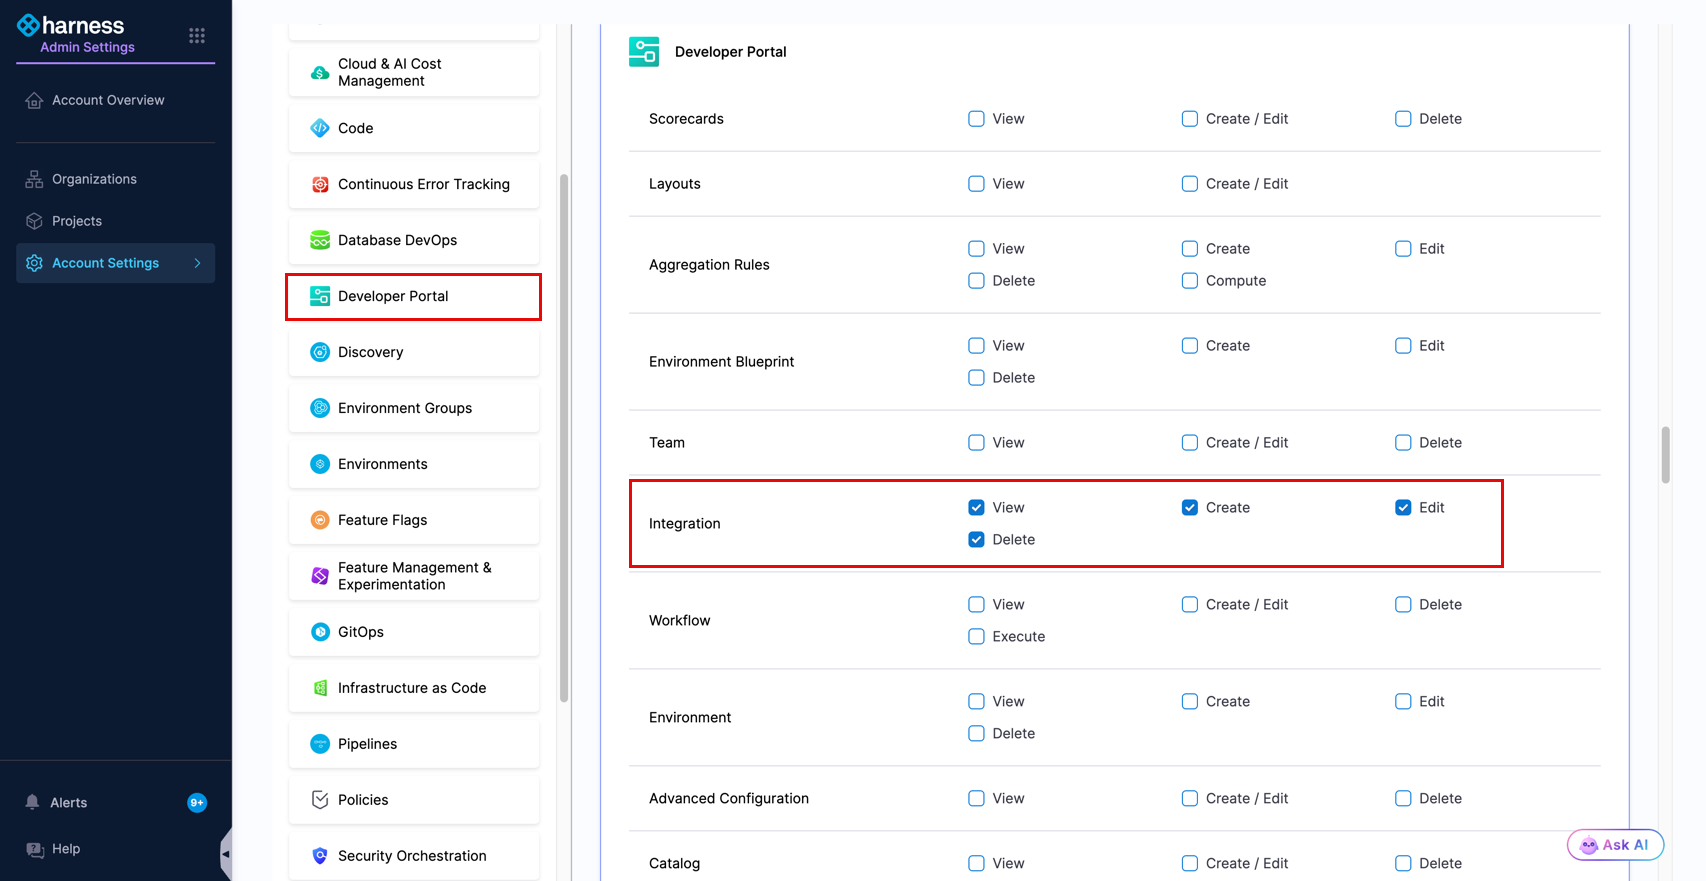
- Accepted apiVersions: Only files with
apiVersion: backstage.io/v1alpha1orapiVersion: scaffolder.backstage.io/v1beta3are ingested. Files with any other apiVersion (includingharness.io/v1) will be silently dropped. - Excluded kinds: The
LocationandDomainkinds are not ingested. - File limits: The integration ingests around 5,000 files per scan. If your repositories contain more than 5,000 files and some are missing after the first scan, click Sync on your integration view page to ingest the remaining files. Any individual file larger than 1 MB is skipped.
- Single-document YAML only: Each
catalog-info.yamlfile must contain a single YAML document. Files that contain multiple YAML documents separated by---are skipped entirely. - Kind mapping: Some Backstage kinds are imported under a different kind in IDP.
Groupentities are imported asTeamentities, andTemplateentities are imported asWorkflowentities.
Create a Catalog Info Yaml integration
1. Navigate to the integrations page
-
In Harness, open the Internal Developer Portal.
-
From the left sidebar, click Configure.
-
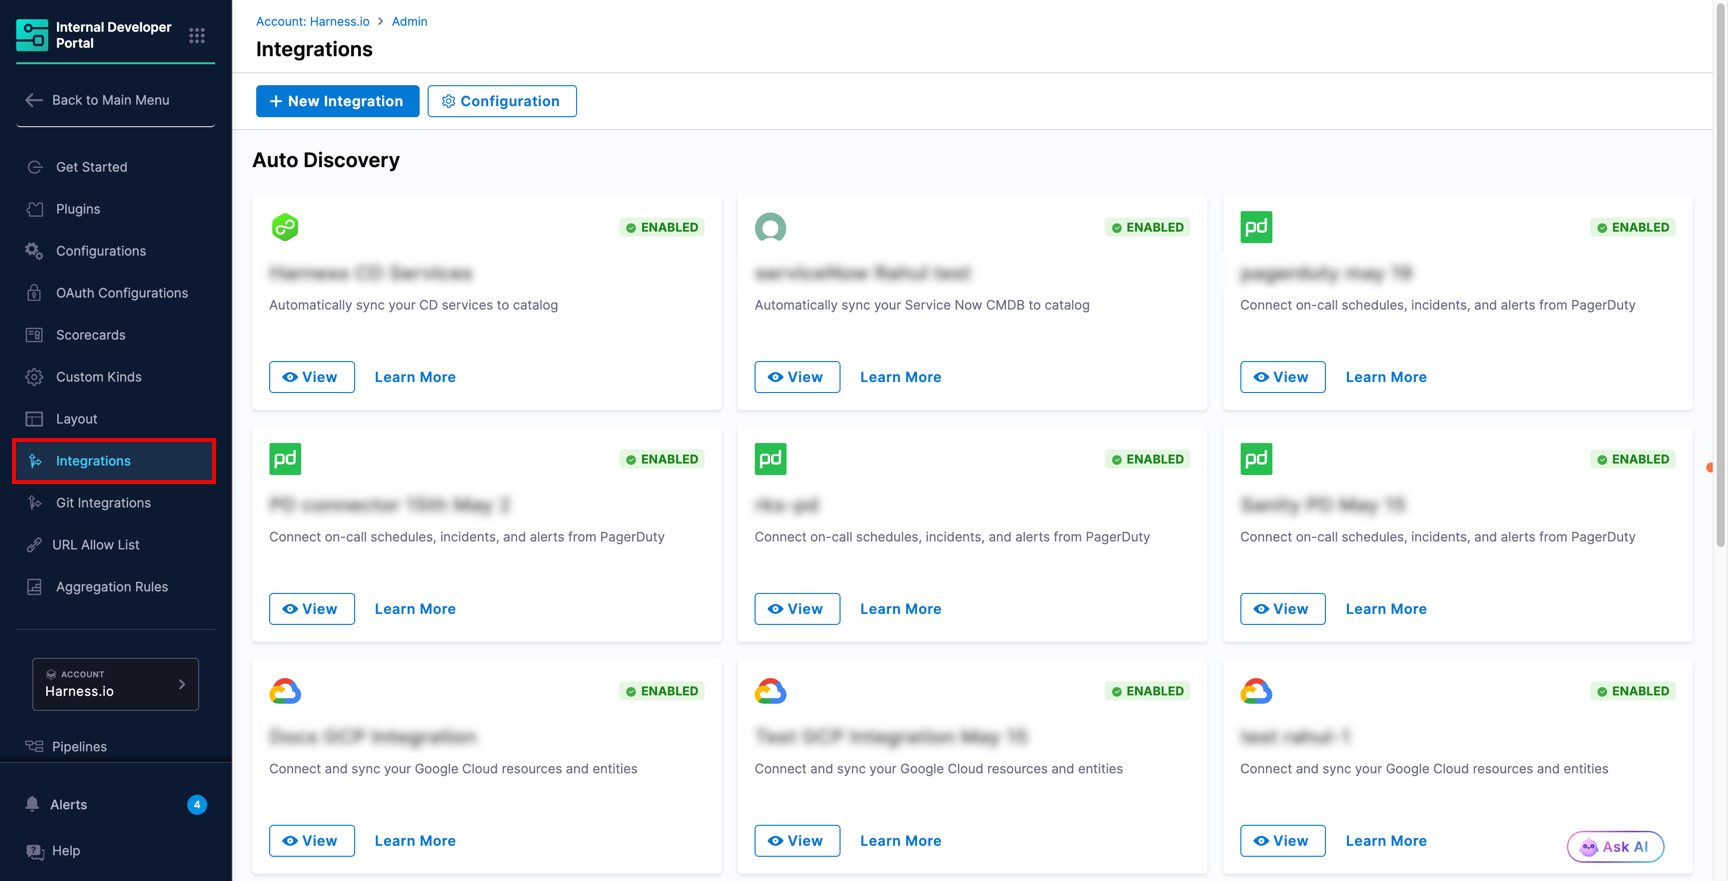
In the left navigation menu, click Integrations.
-
On the Integrations page, click + New Integration at the top.
-
Select Catalog Info Yaml from the integration type picker.
2. Configure setup and connectivity
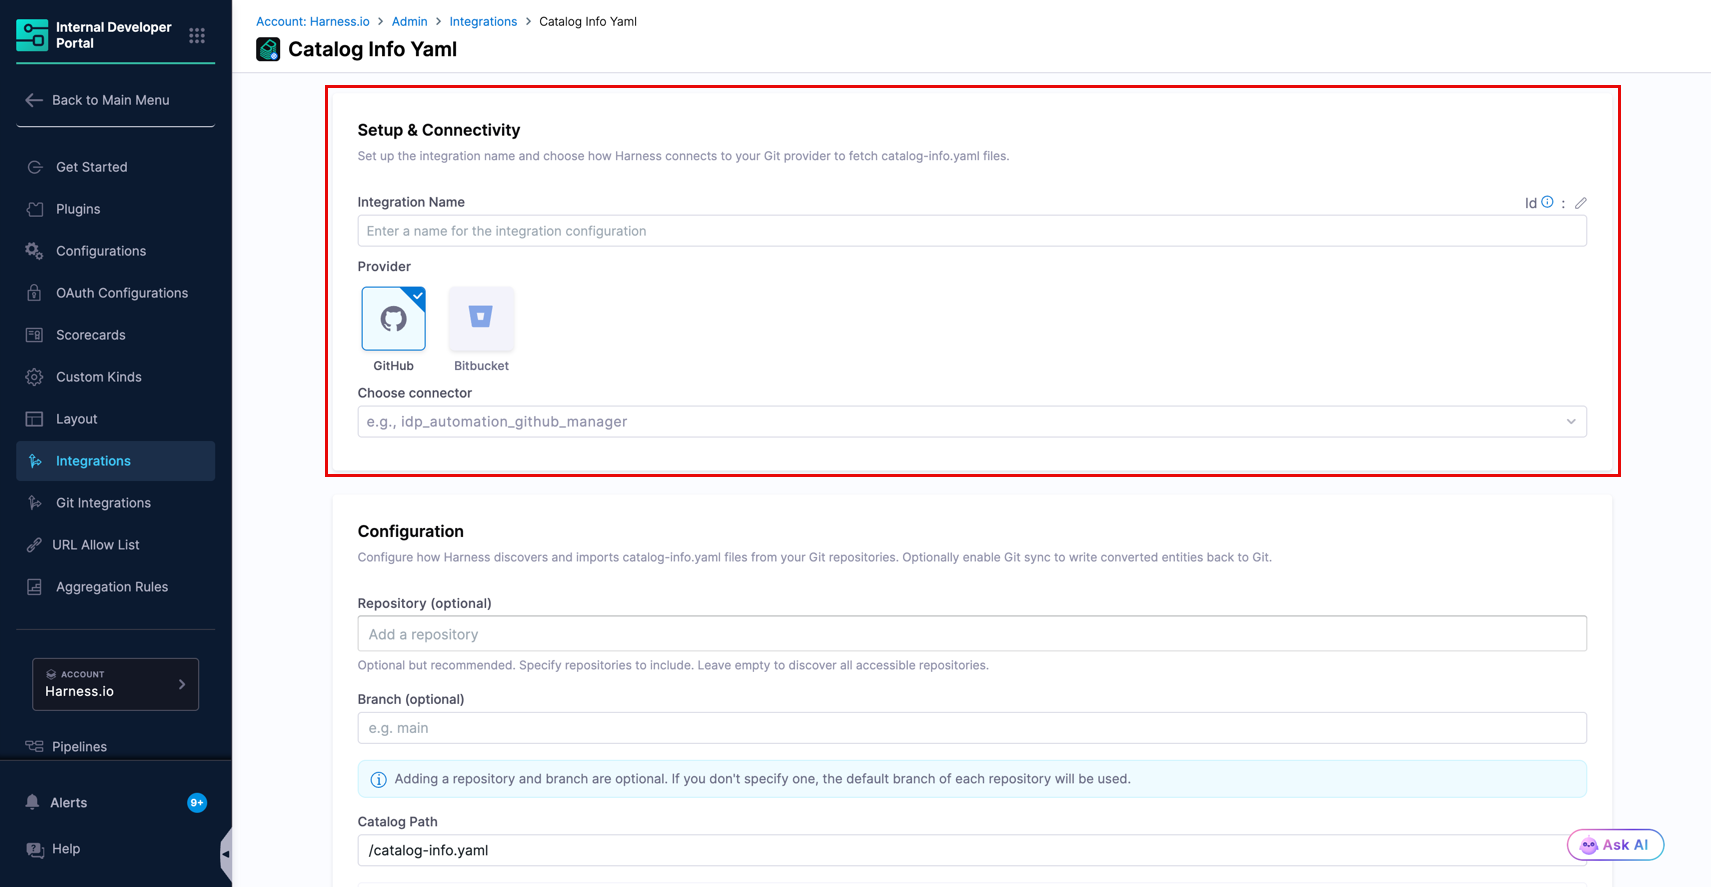
This section connects Harness IDP to your Git provider so it can read catalog-info.yaml files from your repositories.
-
Enter a name in the Integration Name field. This name appears on the integration card on the Integrations page.
-
Under Provider, select GitHub.
-
Click the Choose connector dropdown and select the connector to use for reading files from your repositories.
Two connector fields in this integrationThis integration has two connector fields: one here under Setup & Connectivity for reading
catalog-info.yamlfiles, and one in the Git Sync section for writing converted entity files back to Git.You may use same or separate connectors. If you maintain separate read-only and write-only Harness connectors for your repo, use the read connector here and the write connector in the Git Sync section.
3. Configure the integration
This section defines which repositories, branches, and directory paths to scan for your existing catalog files.
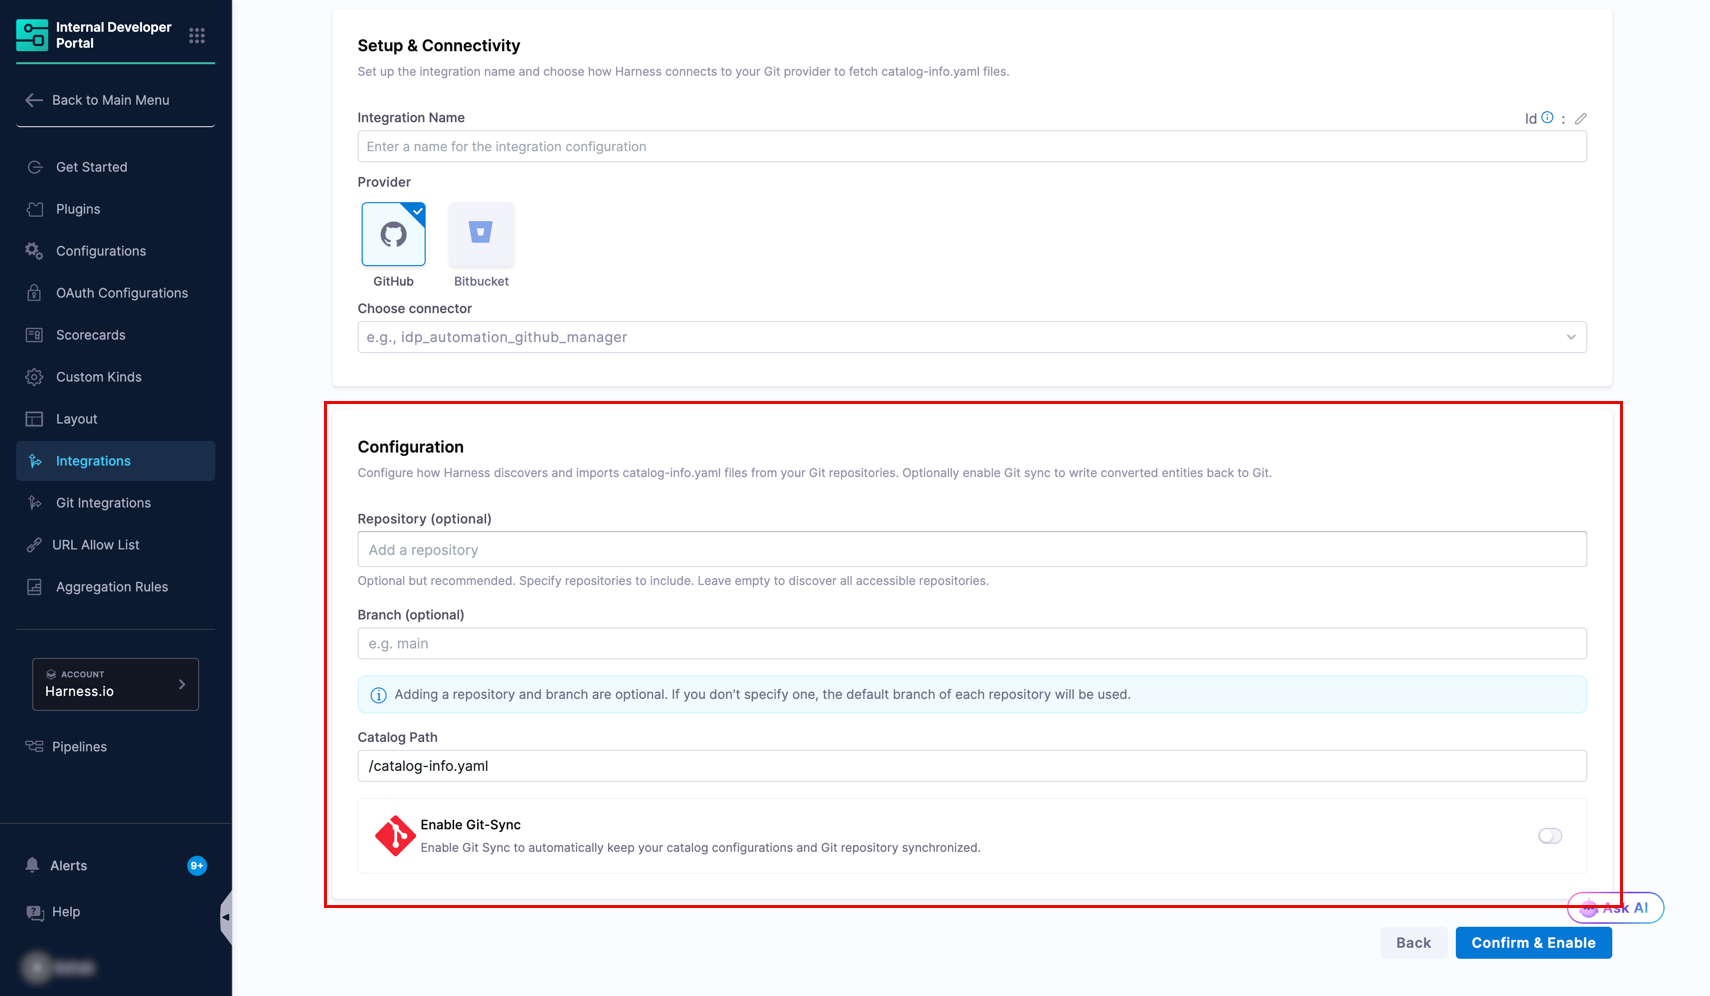
| Field | Required | Default | Description |
|---|---|---|---|
| Repository | Optional (recommended) | All repositories accessible to the connector in the git org | You may specify multiple repositories by a given Git provider or keep it blank. |
| Branch | Optional | The default branch configured on each repository (for example, main, develop, master, or any other branch set as default) | Branch to scan within each matched repository. |
| Catalog Path | Required | /catalog-info.yaml | Path within each repository where catalog-info.yaml files are located. Supports wildcards: for example, /services/**/*.yaml scans all subdirectories under services/ for any YAML file. |
4. Enable Git Sync (optional)
Git Sync pushes the converted entity files to a Git repository. Your original catalog-info.yaml files are not modified. The sync connector must have Enable API access turned on.
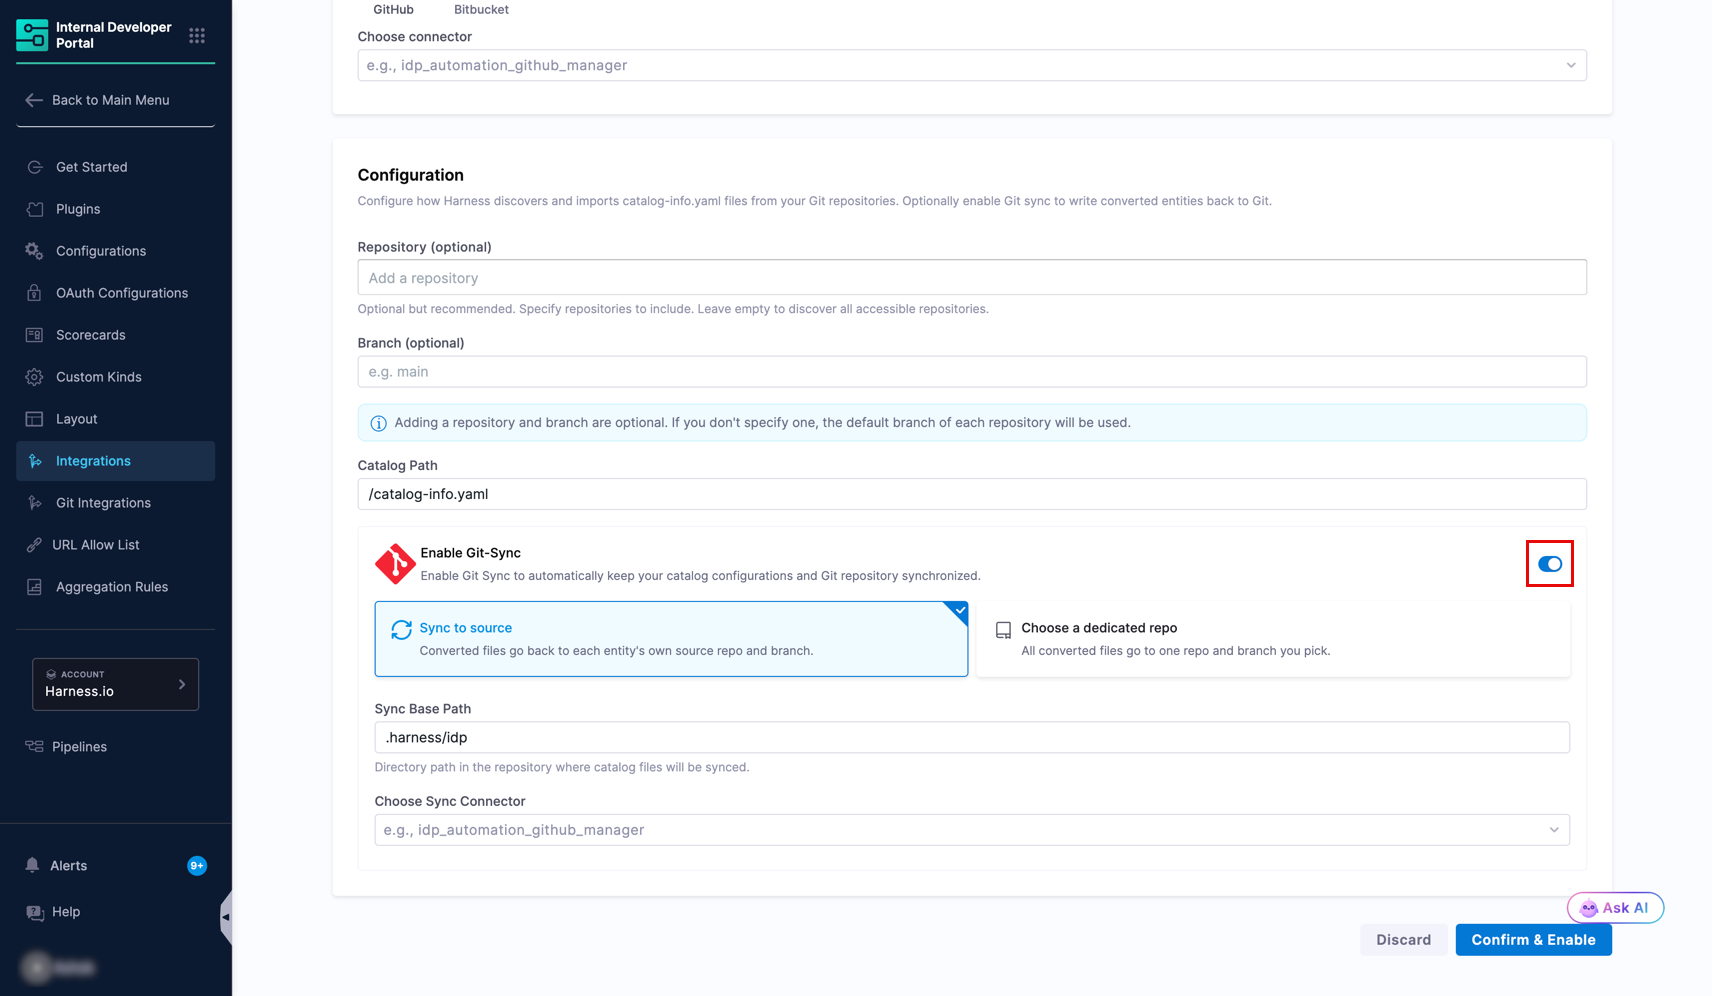
-
Toggle Enable Git-Sync on.
-
Choose a sync mode:
Sync mode When to use it Where converted files are written Write access the sync connector needs Sync to source Each service owns its own repository The same repository and branch where the original catalog-info.yamlwas foundEvery source repository from which entities were discovered Choose a dedicated repo You want all converted entity files centralized in one location The repository and branch you specify Only the repository you specify -
In the Sync Base Path field, enter the directory path within the repository where converted files are stored. The default is
.harness/idp.The path where converted files are written in the repo depends on the scope at which the integration was created:
Integration scope Output path Account <base-path>/<kind>/<identifier>.yamlOrganization <base-path>/<kind>/orgs/<org-identifier>/<identifier>.yamlProject <base-path>/<kind>/orgs/<org-identifier>/projects/<project-identifier>/<identifier>.yamlHere,
<identifier>is the entity identifier generated once Backstage YAML is imported to the IDP catalog.For example, given these values:
- Base path:
.harness/idp - Entity kind:
component - Identifier:
payment-service - Integration scope:
Project(org =my-org, project =my-project)
The converted file is written to
.harness/idp/component/orgs/my-org/projects/my-project/payment-service.yamlin the repo. - Base path:
-
If you selected Choose a dedicated repo:
- Enter the destination repository name in Sync Repository.
- Enter the destination branch in Sync Branch.
-
Click the Choose Sync Connector dropdown and select the connector to use for writing converted files back to Git. See the table above for the write access this connector needs.
5. Confirm and enable
Click Confirm & Enable. The integration runs and begins discovering catalog-info.yaml files from the configured repositories.
Discover and import entities
After enabling the integration, Harness IDP scans your repositories for catalog-info.yaml files. The integration detail page has three tabs for monitoring and managing the results.
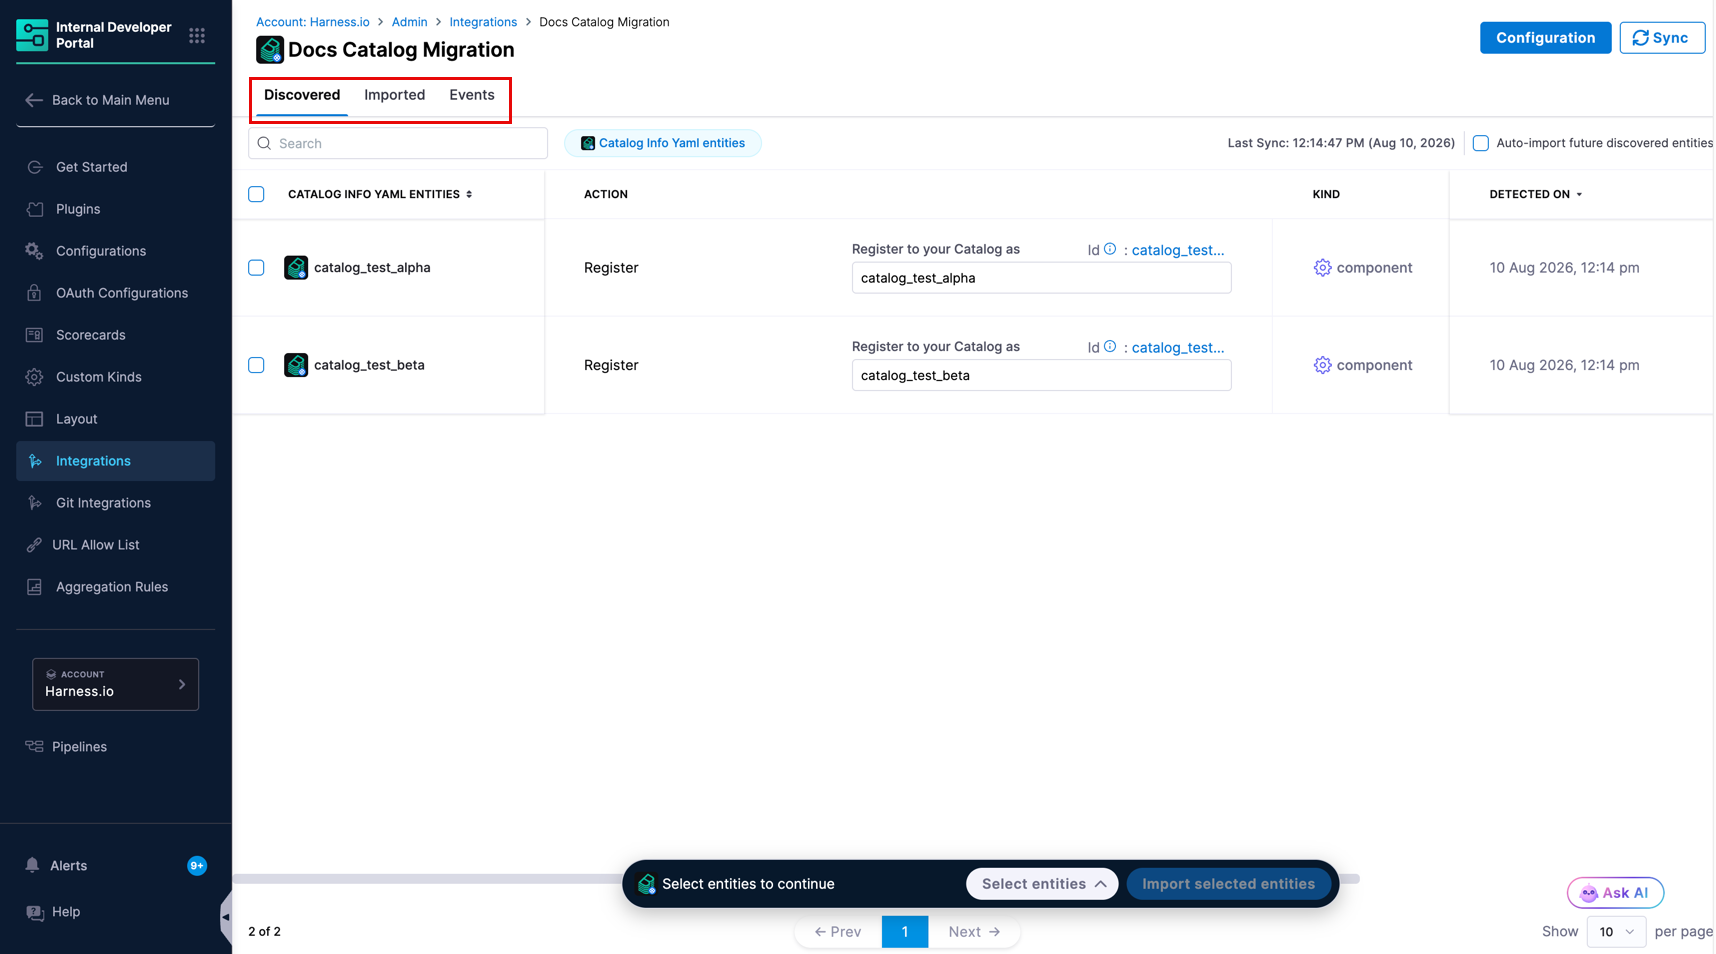
Discovered tab
The Discovered tab shows all entities found in your repositories that have not yet been imported into the IDP Catalog. If entities do not appear after enabling, click Sync at the top right to manually trigger a refresh. The Last Sync timestamp shows when the most recent scan completed.
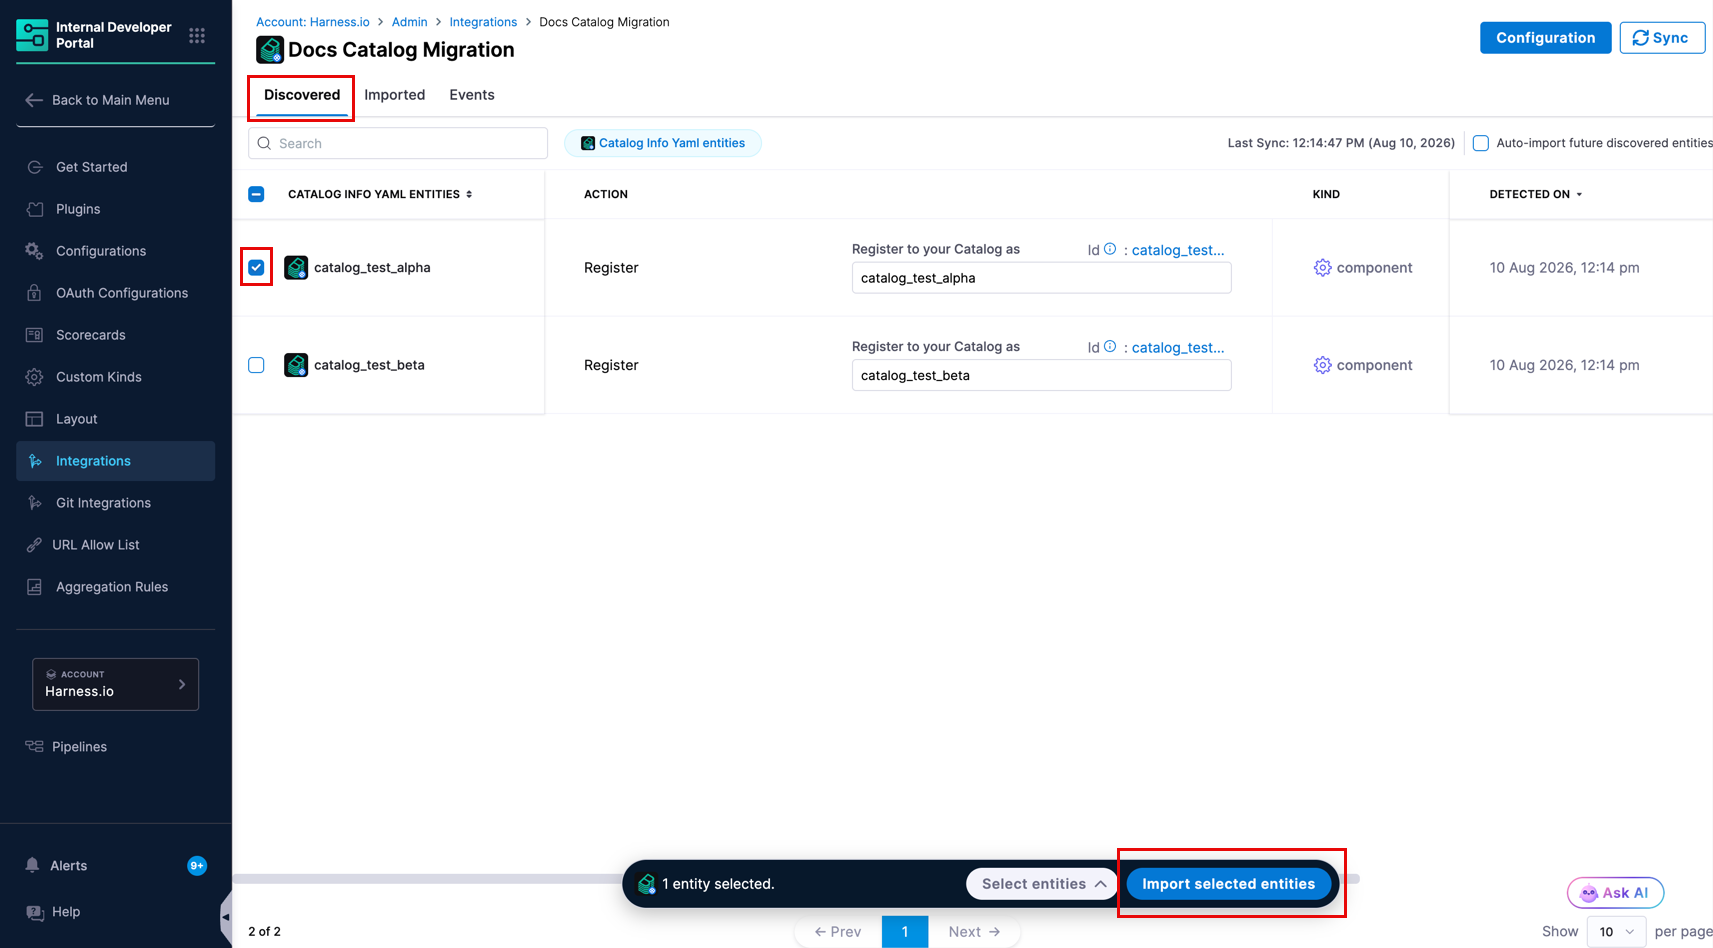
To import individual entities, select them from the list and choose Register. This will create new catalog entities from the discovered data.
To skip manual review, enable Auto-import future discovered entities. When turned on, all entities found in subsequent syncs are automatically imported into the catalog without requiring manual action.
Imported tab
The Imported tab shows entities that have been brought into the IDP Catalog from this integration. It displays the relationship between each source catalog-info.yaml record and its corresponding catalog entity.
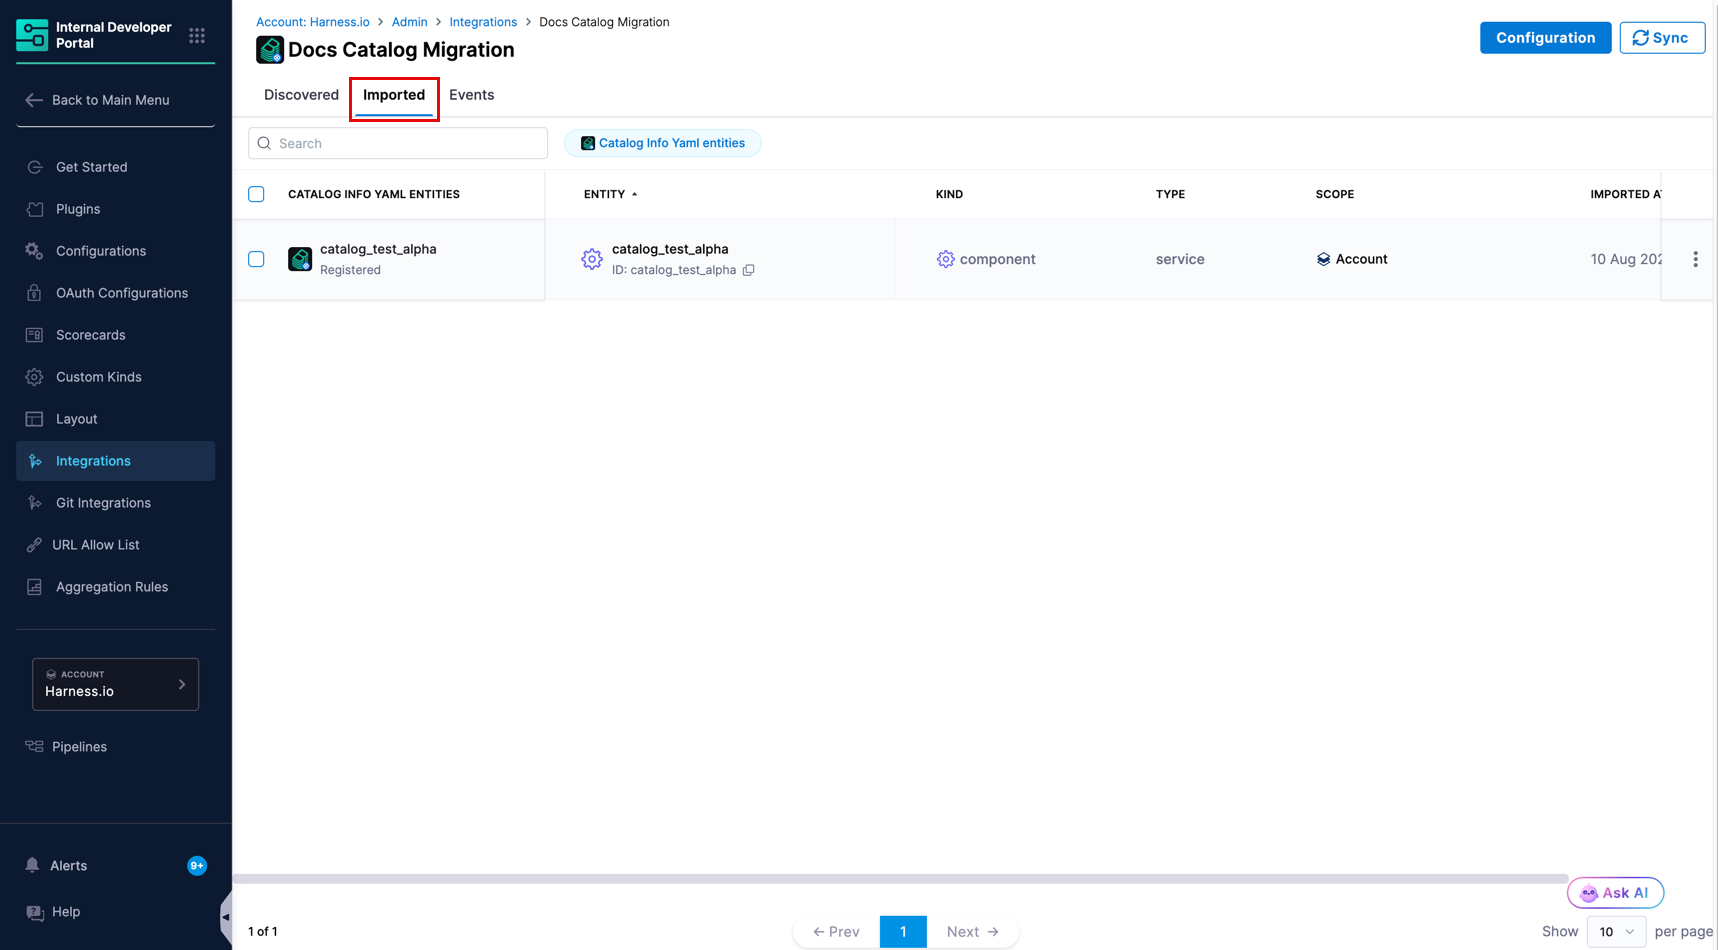
To stop syncing a specific entity without deleting the catalog entity, use the three-dot menu on any row and select Unlink Entity. This stops sync updates while keeping the IDP entity and its existing data intact.
Events tab
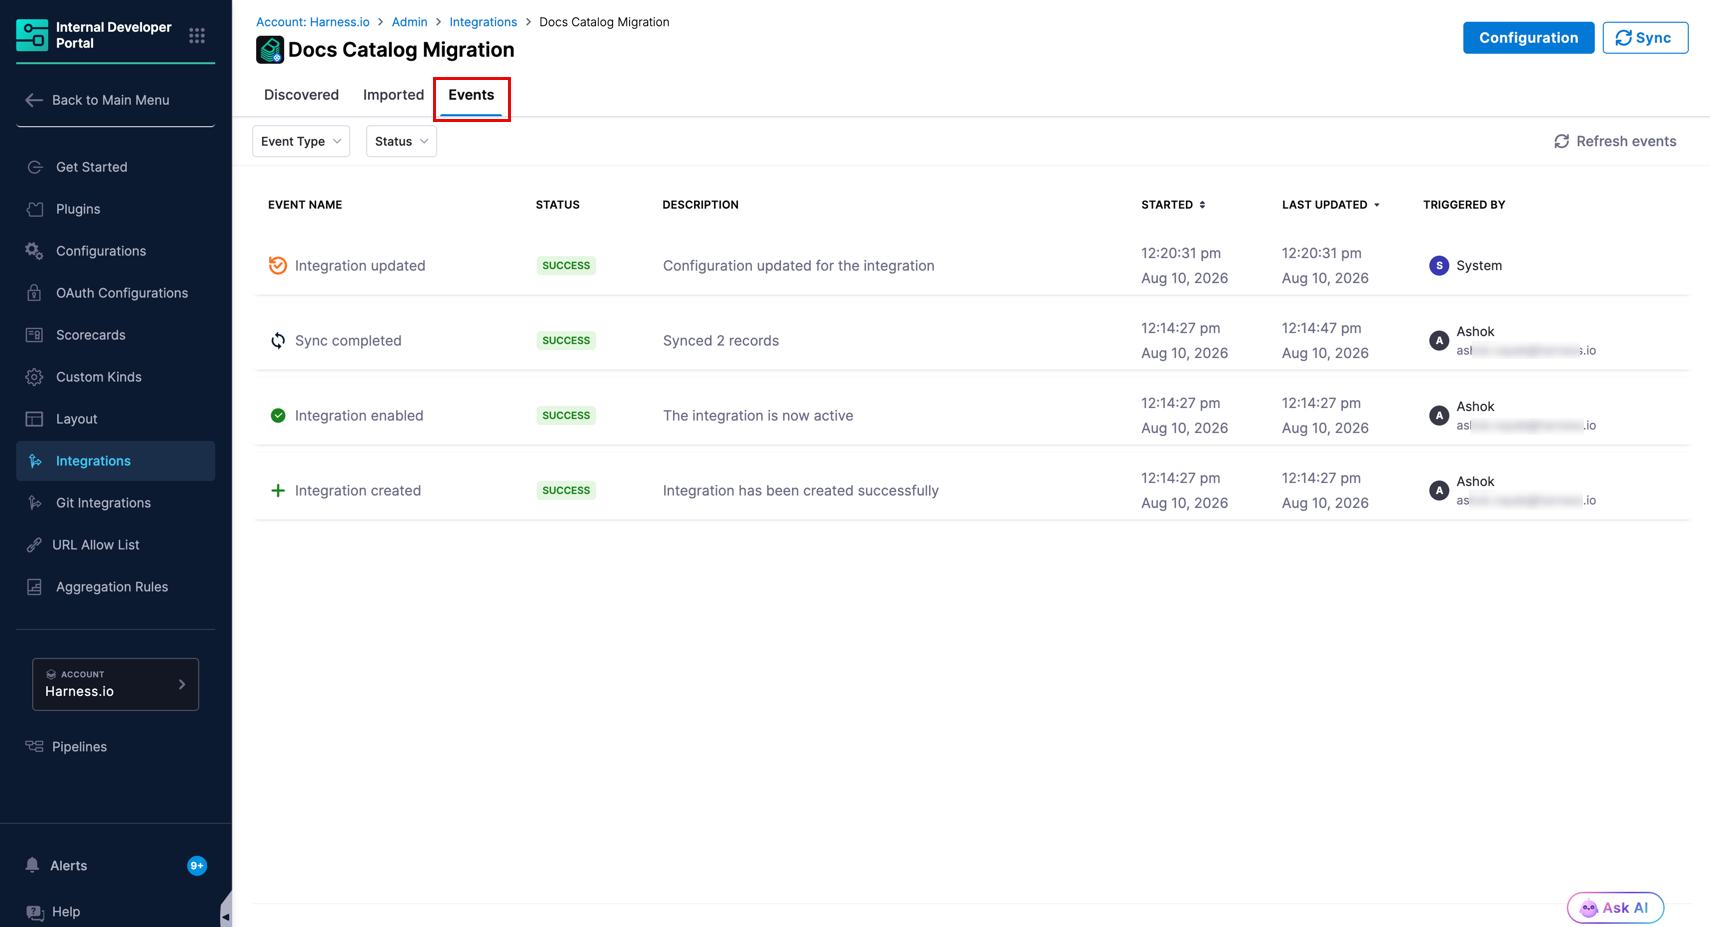
The Events tab logs all sync runs, configuration changes, import operations, and entity unlink events for this integration. It also includes output logs for each sync run. Use it to monitor sync health and investigate failures. For the full event type reference, go to Integration Events.
View converted entities in the catalog
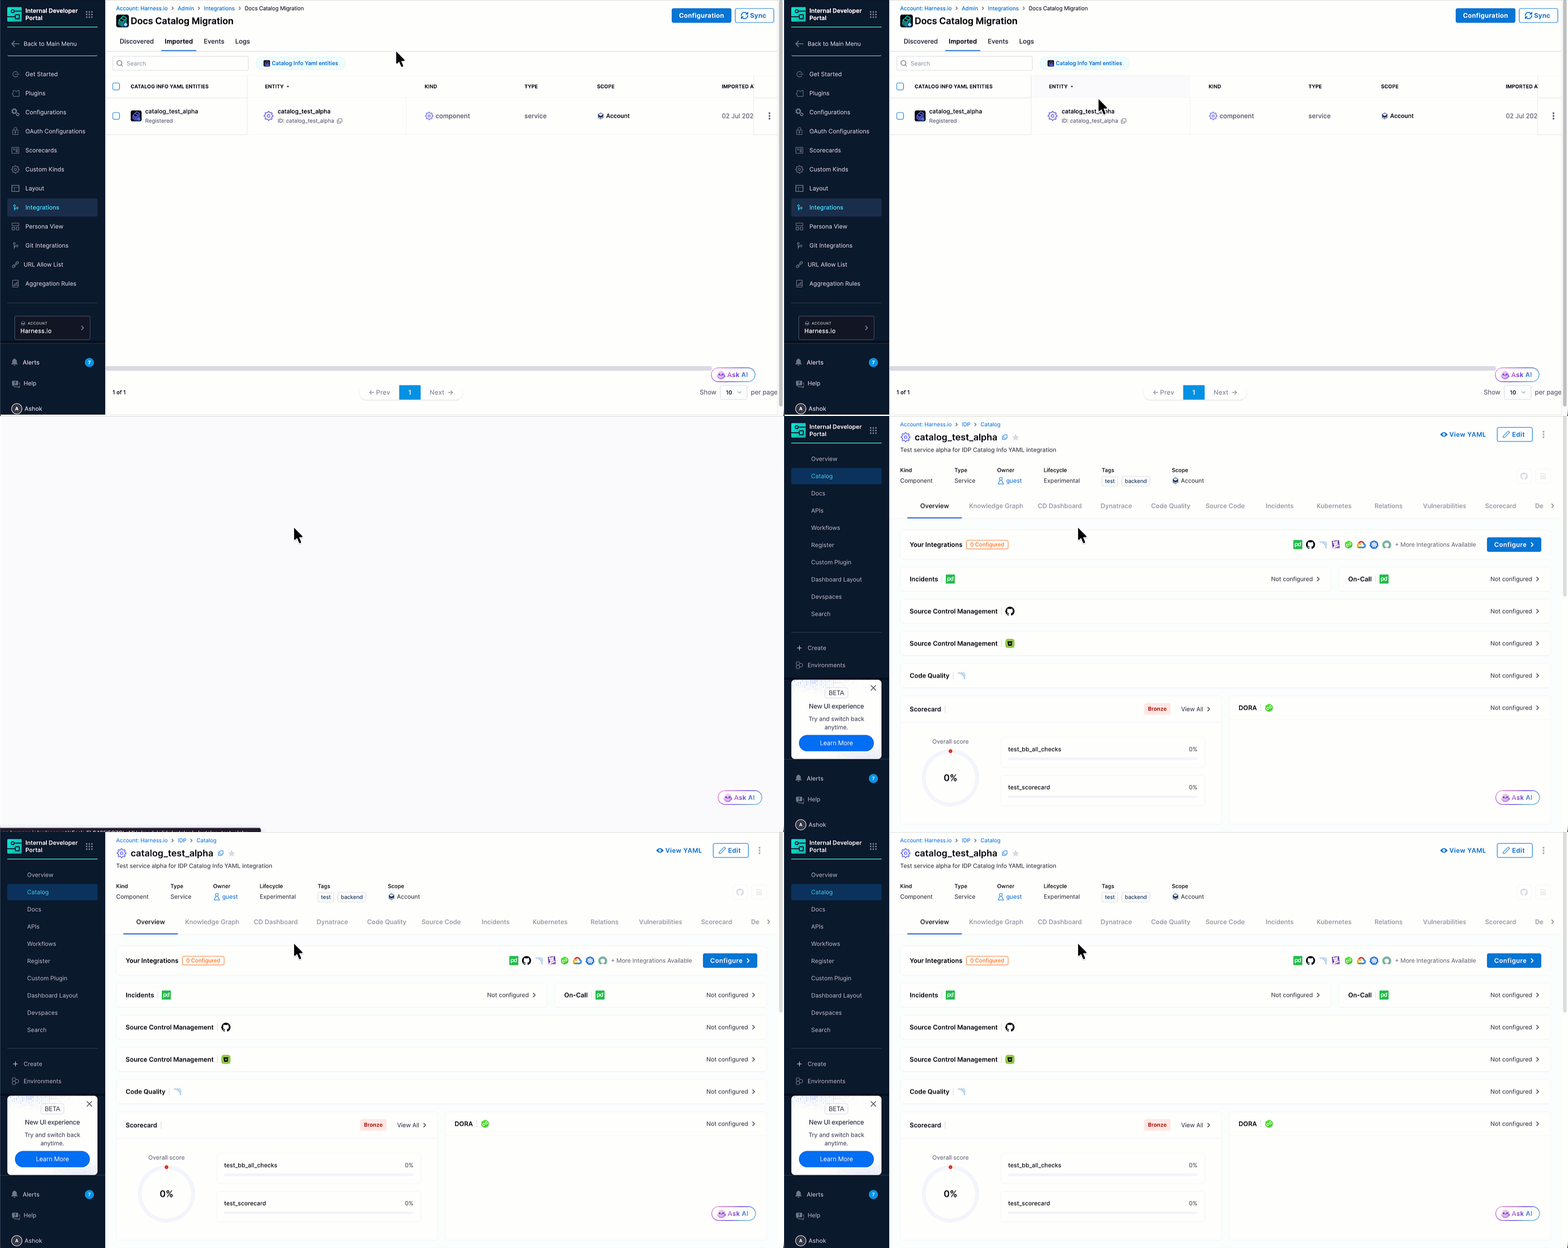
Once imported, your converted entities are available in the Catalog section of IDP as standard catalog entities.
View Git sync in action
The below video shows how Git sync works between the imported catalog entity and its yaml file in your Git repo.
Manage the Catalog Info Yaml integration
Edit the integration
To update the integration name or change the configuration settings, navigate to the Integrations page, find your Catalog Info Yaml integration card, and click View. From there, click Configuration to open the edit screen.
Note that you cannot change or edit the configured provider and connector.
Suspend auto-discovery
If auto-discovery is suspended, new entities will not appear in the Discovered tab. Existing imported entities remain unchanged in the catalog and sync between catalog-info.yaml file(s) in the repo(s) and their corresponding IDP entities will stop.
To suspend auto-discovery:
- Go to Integrations and open your integration using the View button.
- Click Configuration at the top.
- In the Danger Zone section, click Suspend.
- Confirm the action.
You may re-enable it at any time by returning to the configuration page and clicking Confirm & Enable.