Managing Teams
Once your Teams exist, the Teams page is where you browse them, and the Team details page is where you manage members, sub-teams, and the entities each Team owns.
Browse Teams
Go to Teams in the IDP sidebar. Two views are available (List and Hierarchy), and you can switch between them using the toggle on the right.
List view
The List view is a flat table of every Team you have access to. Each row shows the Team name, type, parent, email, and member count. Use this view when you know the name of the Team you are looking for.
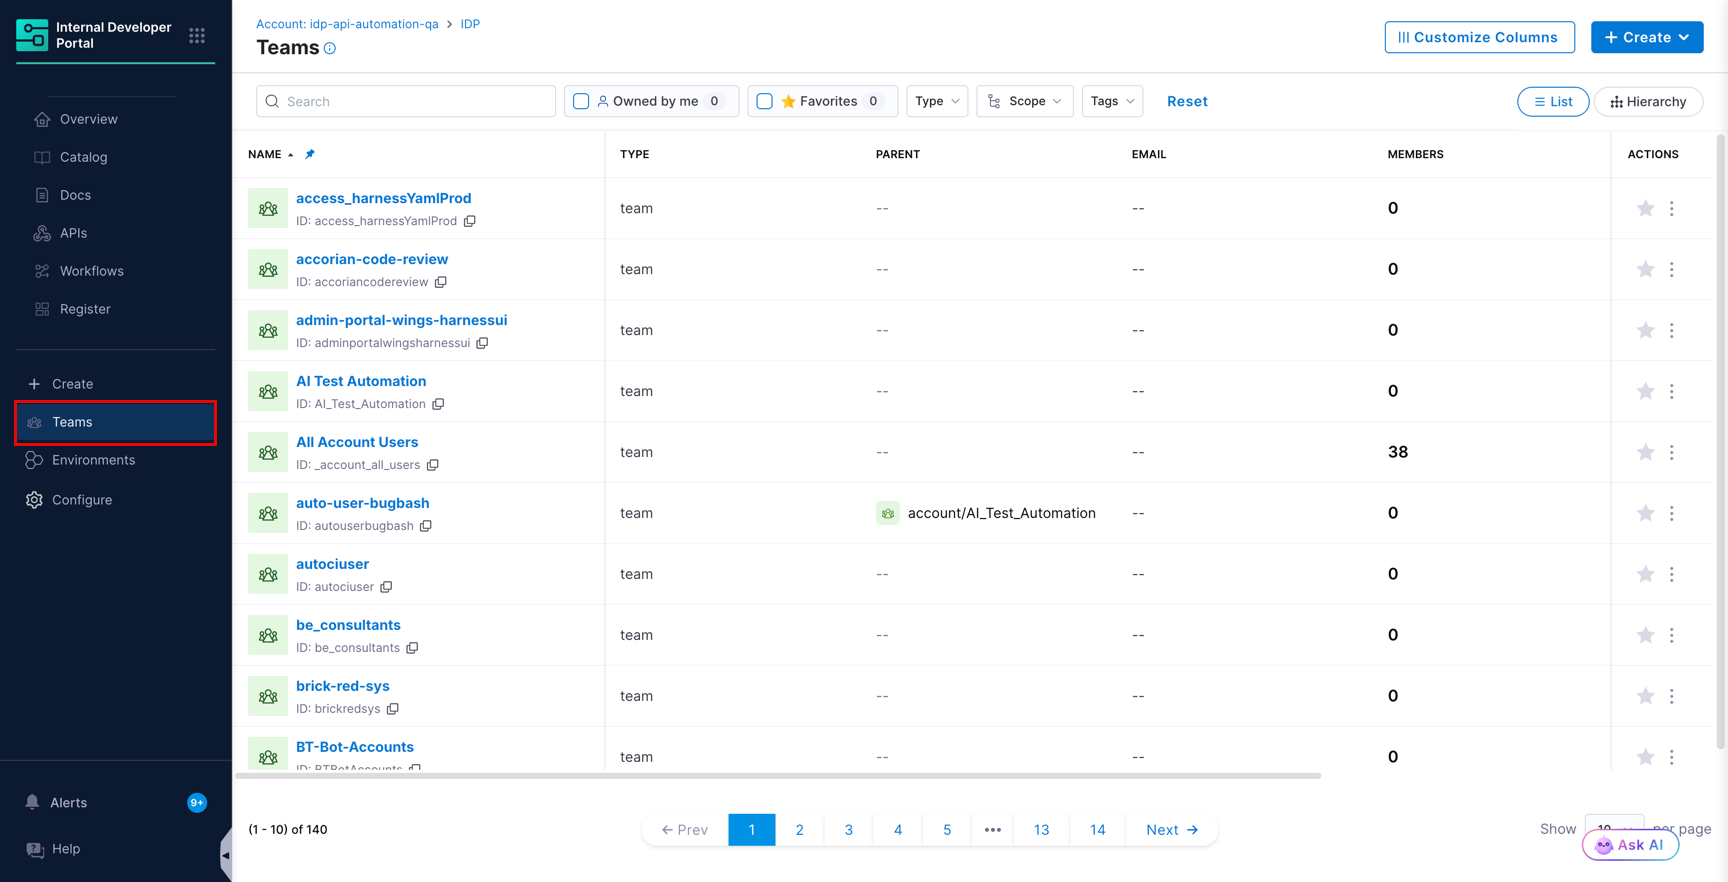
Filter the list using the following controls.
| Filter | What it does |
|---|---|
| Owned by me | Shows only the Teams you own. |
| Favorites | Shows only the Teams you have starred. |
| Type | Limits the list to Teams of a given type, for example team. |
| Scope | Limits the list to Teams at the Account, Organization, or Project scope. |
| Tags | Limits the list to Teams carrying the selected tags. |
Click Reset to clear all filters.
Hierarchy view
The Hierarchy view shows Teams as a tree, with sub-teams nested under their parents. The number in brackets next to a Team name is its count of direct sub-teams. Expand a row to walk down the tree. This view also shows the scope each Team belongs to and the number of entities it owns.
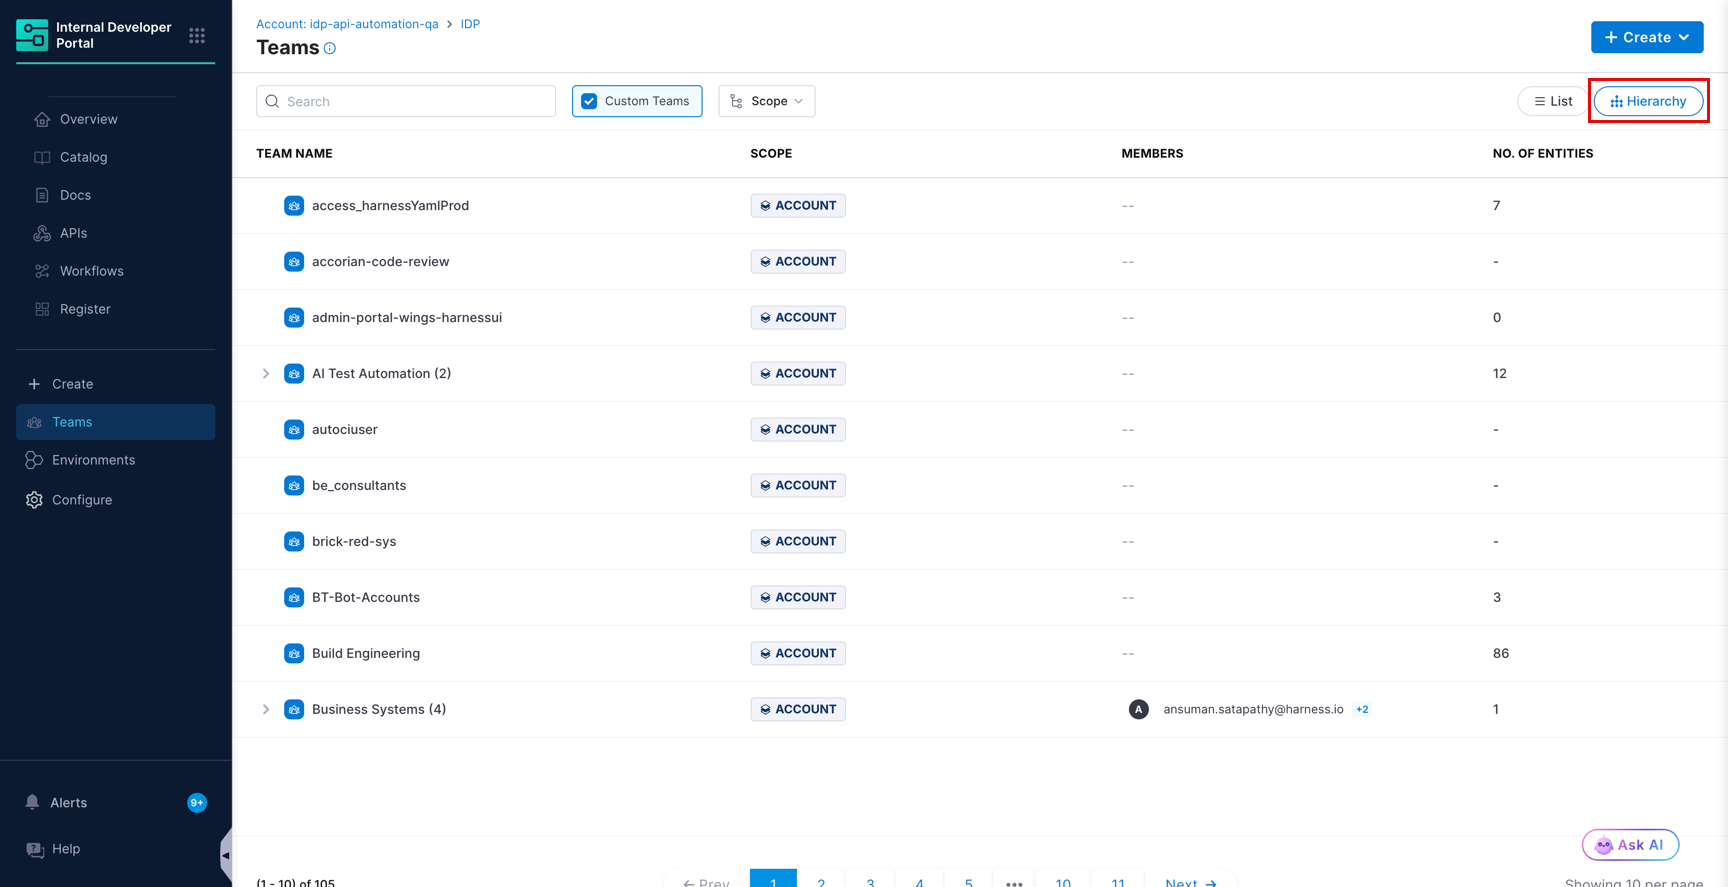
The Hierarchy view offers two filters.
| Filter | What it does |
|---|---|
| Custom Teams | Shows only the Teams created inside IDP, and hides Teams synced from your identity provider. This filter is selected by default. |
| Scope | Shows the root Teams at the Account, Organization, or Project scope. |
In the Hierarchy view, search matches Teams at the top level of the hierarchy only. To find a nested sub-team, expand its parent, or switch to the List view and search there.
Customize the Teams table
In the List view, click Customize Columns, then Manage Columns, to choose which properties appear as columns and in what order.
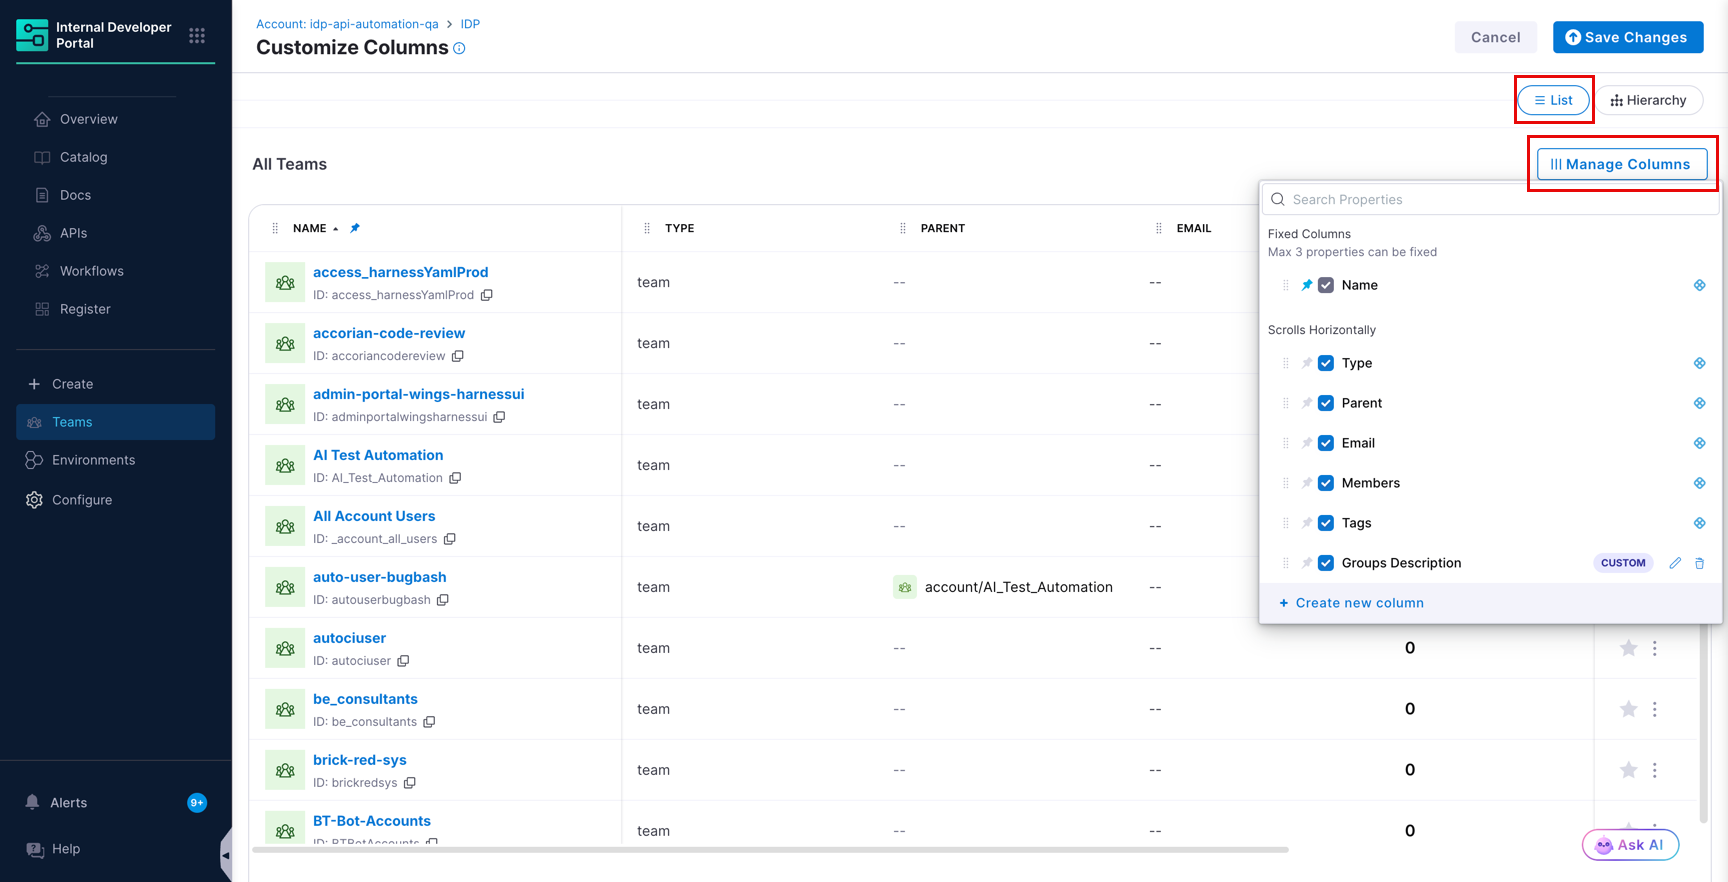
- Pin up to three properties as fixed columns. The remaining columns scroll horizontally.
- Click Create new column to add a column driven by a metadata property on your Teams.
- Click Save Changes to apply the layout.
Read the Team details page
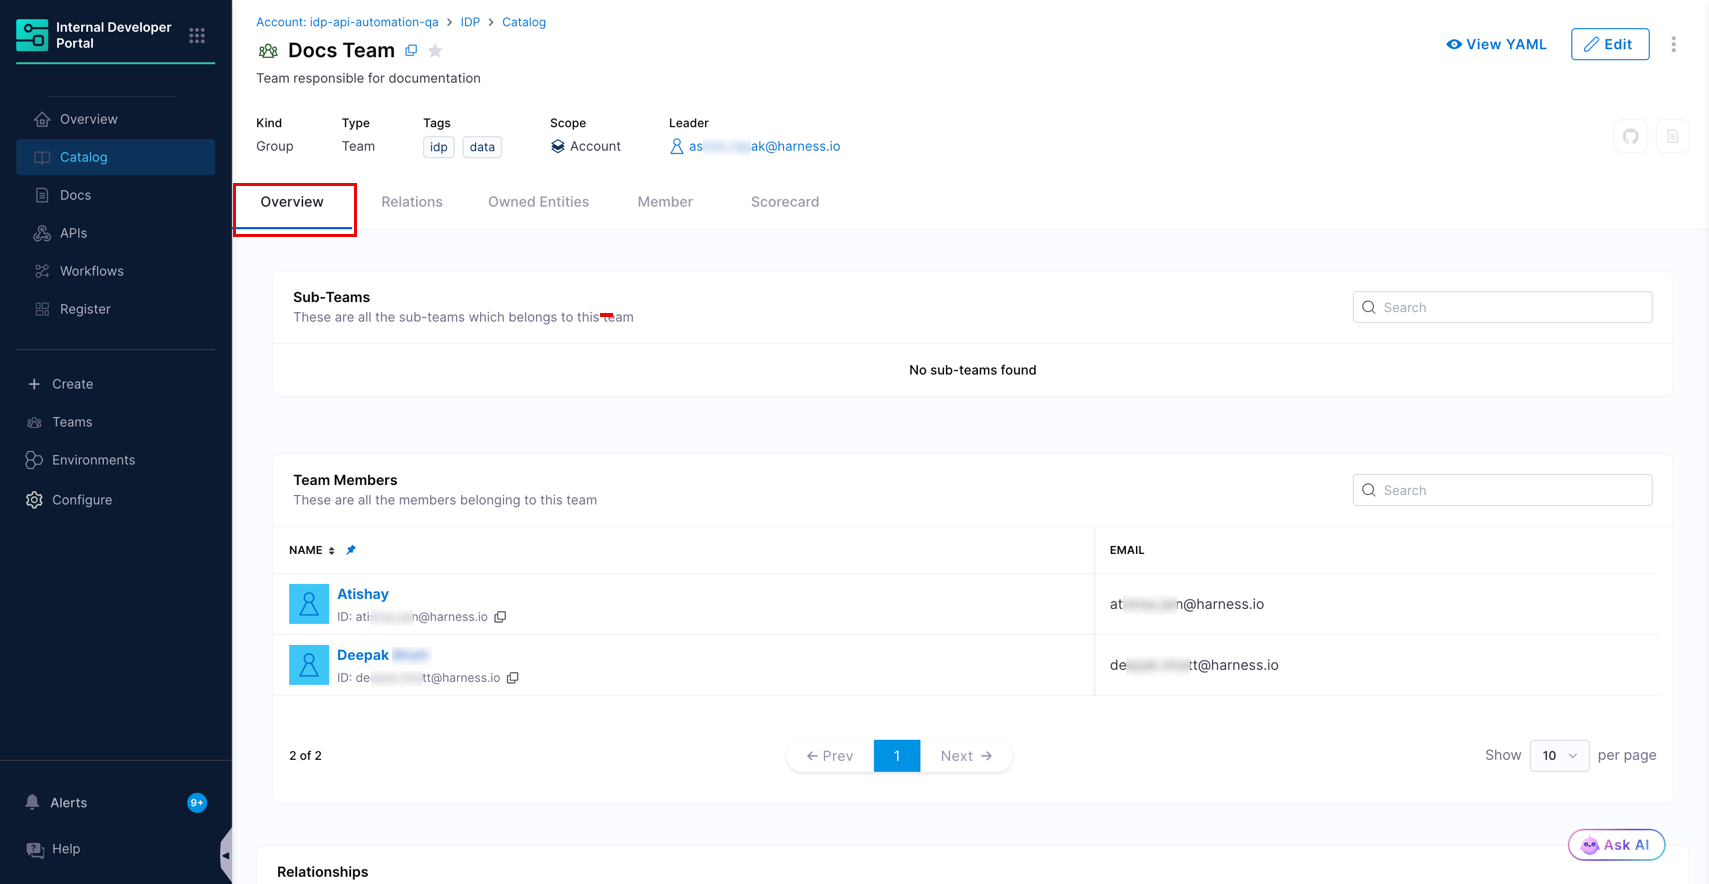
Click any Team to open its details page. The header shows the Kind, the Type, any tags, and the Scope.
| Tab | What it shows |
|---|---|
| Overview | The Sub-Teams table, the Team Members table, and the Relationships graph for this Team. |
| Relations | The full interactive relationship graph, including sub-teams, members, and the scope the Team is a child of. Filter the graph by kind and type. |
| Owned Entities | Every Catalog entity owned by this Team and by its sub-teams. |
| Member | The sub-teams and the individual members belonging to this Team. |
| Scorecard | Scorecard results for this Team. This tab appears only after you add it to the Team layout. |
The tabs on a Team page are controlled by the layout configured for this entity kind. Go to Team entity layouts to add or remove tabs and cards.
To inspect the underlying definition, click View YAML. The Raw YAML panel shows the stored entity, and the Ingested Properties panel shows the properties added through the Catalog Ingestion API.
Assign entities to a Team
Marking a Team as the owner of a Catalog entity records responsibility, and it also grants access. Go to Team access control to understand what ownership unlocks.
A Team can be named as the owner of an entity only if the entity is in the same scope as the Team, or in one of the Team's child scopes. A Team at the Organization scope can own entities in that organization and in its projects, but it cannot own entities at the Account scope.
There are two ways to set ownership.
- From the entity - Set the Owner field on the Catalog entity to the Team. The owner list is scope-aware and shows the Teams available at the entity's scope. In YAML, set
spec.ownerto agroup:<scope>/<team-identifier>reference. Go toownerto review the supported reference and scope formats. - From the Team - Add one or many entities to the Team in a single action, as described below.
Add entities from the Team page
- Open the Team and go to the Owned Entities tab.
- Click + Add entities.
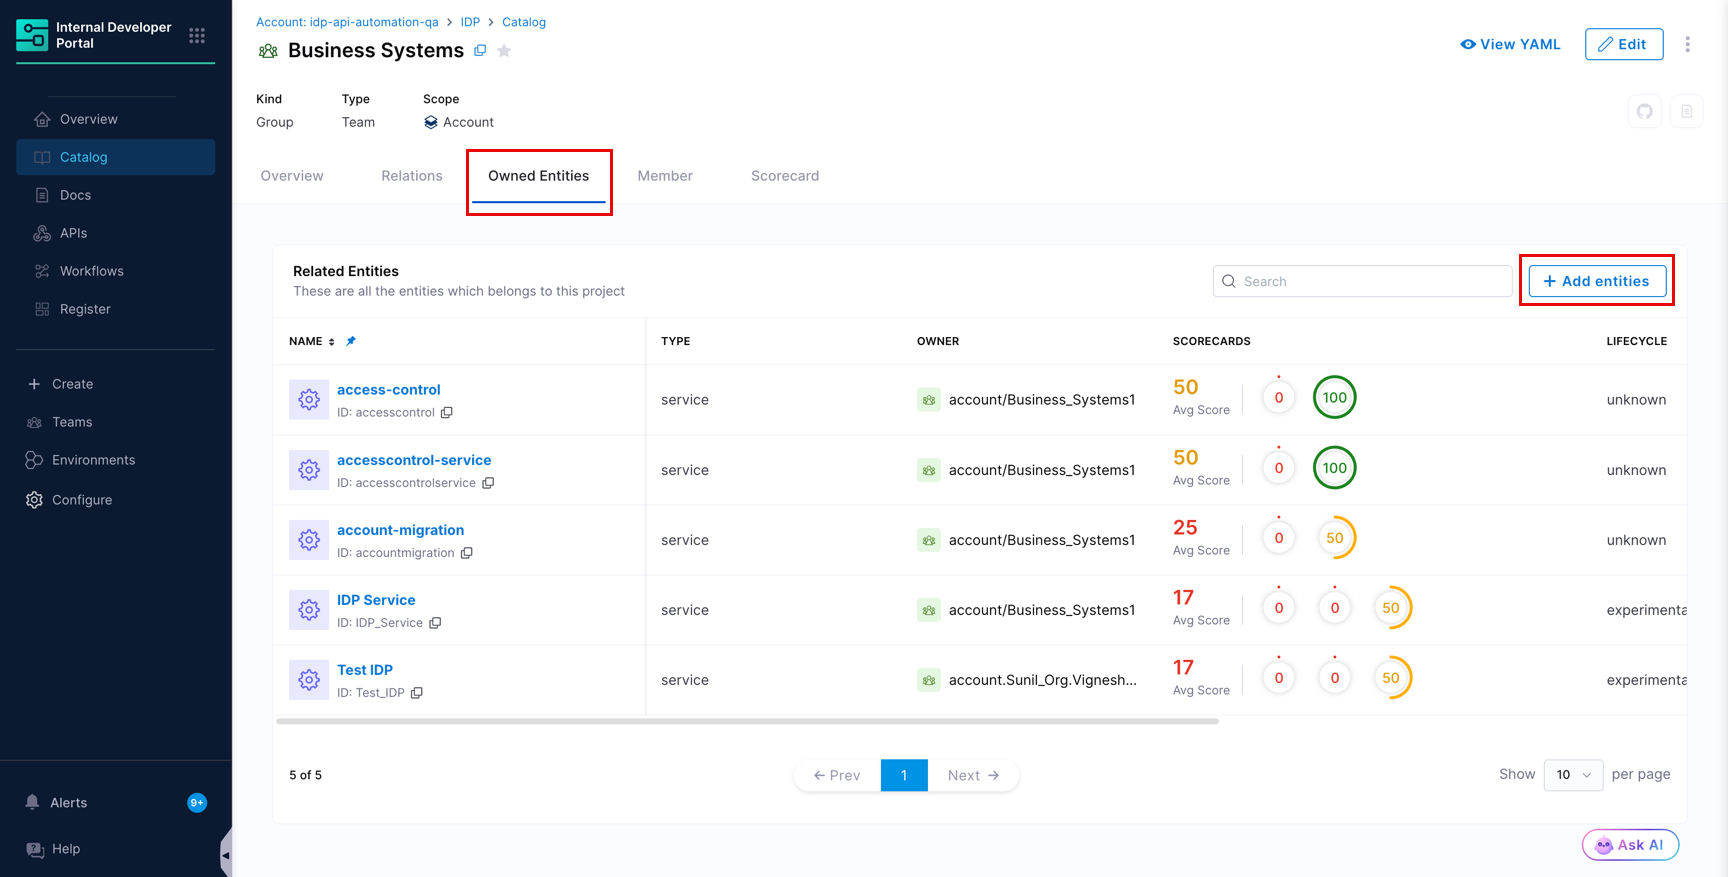
- In the Add entities to team dialog, use the Kind, Type, Scope, and Tags filters, or the search field, to find what you need.
- Select the entities and click Add entities.
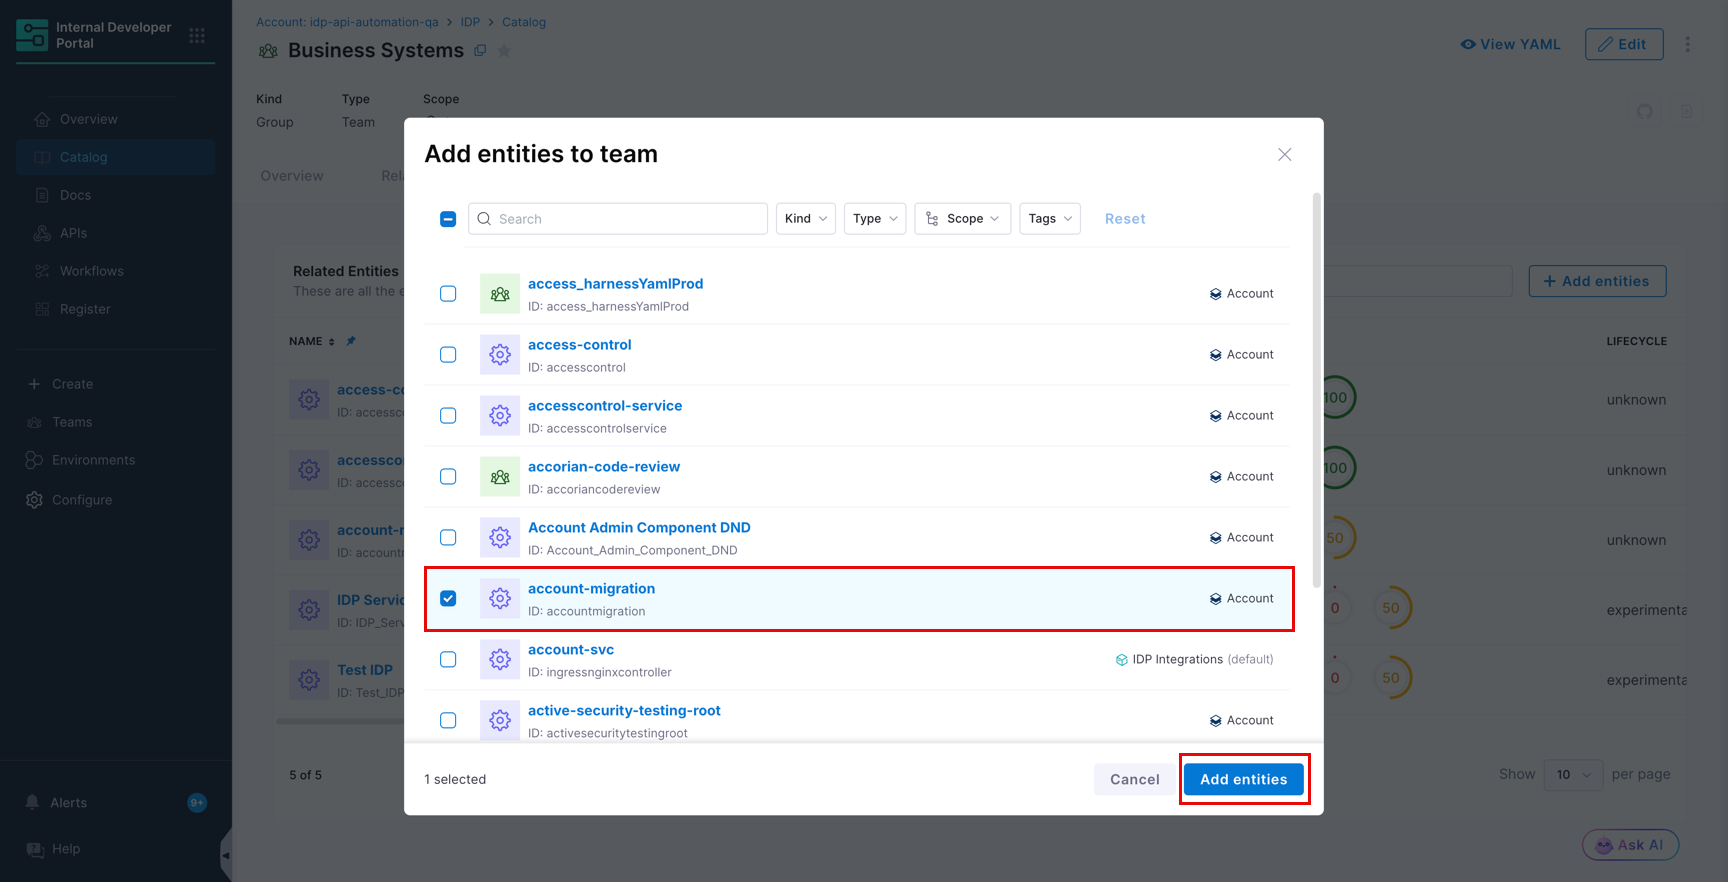
Harness IDP confirms the action with an Entities added successfully message.
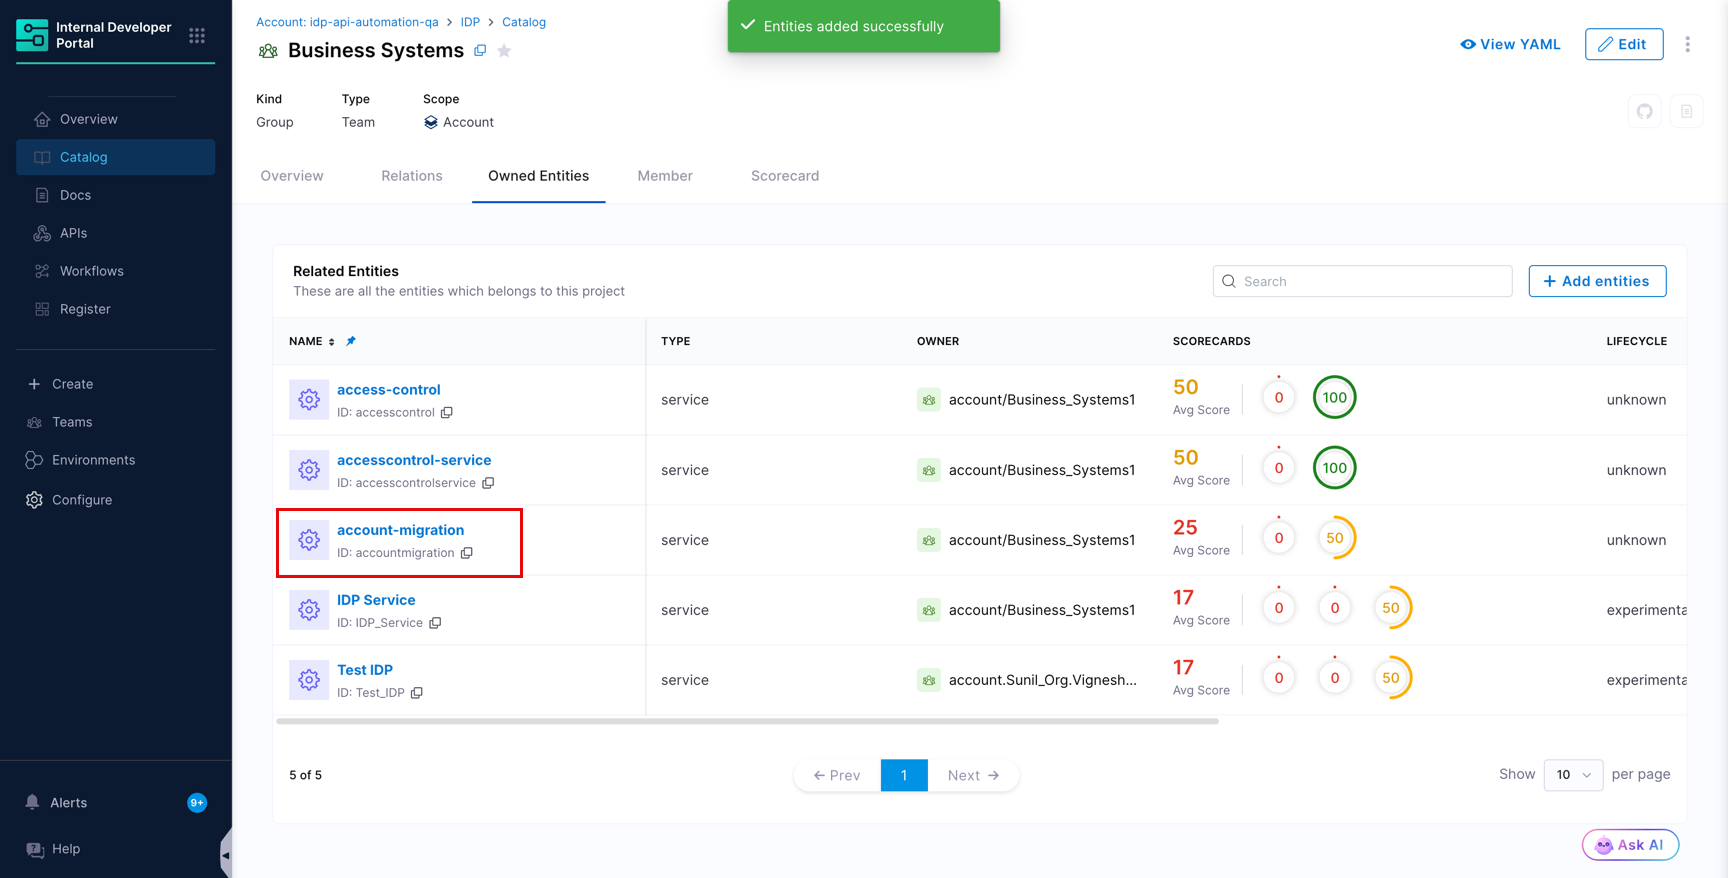
Ownership is applied in the background. If a newly added entity does not appear immediately in the Owned Entities list, refresh the page after a moment.
An entity has a single owner. If you add an entity that is already owned by another Team, the previous ownership relation is removed and replaced by the new Team. Check the Owner column before you add entities that may already be assigned.
Understand the Owned Entities list
The Owned Entities tab lists the entities owned by the Team and the entities owned by its sub-teams. The Owner column tells you which Team in the hierarchy actually owns each row, so a parent Team gives you a complete rollup of everything its part of the organization is responsible for.
The Owned Entities list cannot yet be filtered by sub-team. To see the entities owned by one sub-team only, open that sub-team and view its own Owned Entities tab.
Edit and delete a Team
Open the Team and click Edit in the header to change its details.
The three-dot menu next to Edit offers two further actions.
- Copy URL: Copies a direct link to the Team page, which you can share with anyone who has access to it.
- Delete: Removes the Team from the Catalog.
Deleting a Team removes the ownership relations it held, so the Catalog entities it owned are left without an owner. Reassign ownership before you delete a Team.