Setup GitHub Repository Onboarding with Harness IDP
This tutorial shows you how to create a self-service GitHub repository onboarding workflow using Harness IDP. The workflow allows developers to create and configure new GitHub repositories automatically through a simple UI form interface. This eliminates manual repository setup and ensures consistency across all projects.
Goals of the workflow
By the end of this tutorial, you will have a working workflow that delivers:
- Automated Repository Creation: New GitHub repositories are created instantly with proper configuration
- Automated Creation of Branch and Files: New branches and files are created and pushed to the repository automatically without any manual intervention.
- Security Best Practices: Branch protection rules are automatically applied to enforce code reviews
- CI/CD Integration: Webhooks are configured to trigger automated pipelines on specific changes
- Self-Service Experience: Developers can create repositories without platform team intervention
Workflow components
The GitHub repository onboarding workflow consists of two main components that work together:
1. Harness pipeline
This orchestration pipeline contains all the automation logic and executes the actual repository creation steps. This Harness IDP pipeline serves as the orchestration backend for our GitHub repository onboarding workflow. Think of it as the engine that powers the automation - when a developer fills out the workflow form (the UI part), this pipeline executes all the technical steps needed to create and configure a GitHub repository.
2. Harness IDP workflow
The Workflow provides a user-friendly interface where developers input the following details and can create a repository without any intervention and runs the above orchestration pipeline in backend to execute the final actions of the Workflow. The Workflow includes validation to ensure proper input format and triggers the above pipeline execution to ensure all the steps are executed successfully.
The following input details are required for the Workflow:
- Repository name and description
- GitHub organization
- Feature branch name
Before you begin
-
Harness IDP enabled for your Account: Ensure you have access to Harness with the Internal Developer Portal (IDP) module enabled.
-
GitHub Connector: A GitHub connector must be set up and configured to authenticate with your GitHub organization. This connector is used by the
CreateRepoandDirectPushsteps to interact with GitHub APIs securely. Go to GitHub Connector to learn more. -
GitHub PAT Token: A Personal Access Token (PAT) with appropriate permissions (
repo,admin:repo_hook,admin:org_hook) is needed for GitHub API operations. The pipeline uses this token in theRunsteps to execute GitHub API calls for branch creation, branch protection setup, and webhook configuration. Go to GitHub PAT to learn more. -
Workflow YAML & Harness IDP Pipeline configuration: Basic familiarity with Workflow YAML syntax and Harness pipeline configuration is recommended. Understanding YAML structure helps in configuring pipeline variables and step parameters correctly. Go to Workflow YAML and Harness IDP Pipeline to learn more.
Create the GitHub repository onboarding pipeline
This Harness IDP pipeline serves as the orchestration backend for our GitHub repository onboarding workflow. In this section, we will go through all the steps required to develop this orchestration pipeline for this Workflow.
Pipeline design
Steps involved in this Pipeline:
The following steps will be executed in this pipeline:
- Step 1: Create a new GitHub repository with proper configuration
- Step 2: Set up a feature branch for development
- Step 3: Create a directory
- Step 4: Create standard project files
- Step 5: Push the files to the feature branch
- Step 6: Configure branch protection rules for security
- Step 7: Set up webhooks for CI/CD integration
Pipeline Execution:
The pipeline is triggered automatically when a developer submits the IDP workflow form. The workflow acts as the user interface, collecting input parameters, while this pipeline handles the backend automation. For more detailed information about Harness IDP pipelines, refer to the Harness IDP Pipeline Documentation.
Get started
Let us walk through setting up this pipeline step by step:
Step 1: Create a new pipeline
- Navigate to your Harness project.
- Go to Pipelines in the left sidebar from Harness IDP.
- Click + Create a Pipeline
- Choose Inline pipeline creation
- Enter the following details:
- Name:
GitHub Repository Onboarding - Description:
Automated GitHub repository creation and configuration pipeline
- Name:
Step 2: Add a developer portal stage
Once you are inside the pipeline editor:
- Click + Add Stage.
- Select Developer Portal as the stage type.
This opens a stage configuration screen with four tabs: Overview, Infrastructure, Execution, and Advanced.
Here’s what you’ll do in each tab:
1. Overview
Give your stage a name (for example, GitHub Repo Onboarding).
You can also add a brief description to explain what this stage handles, such as generating code and registering the service.
2. Infrastructure
Next, choose where the pipeline should run.
- If you want a simple setup, go with Harness Cloud Infrastructure.
- If you prefer running the scripts in your own environment (like Kubernetes or a Docker runner), choose a custom delegate.
3. Execution
This is where you will define the main orchestration logic for the pipeline. You can add execution steps directly in this section.
You don’t need to configure this yet; we’ll walk through each of these steps in the next section.
Advanced (optional)
You can leave this tab as-is unless you need to configure timeouts or failure handling. This is optional.
- Interactive Guide
- YAML
pipeline:
  name: github-repo-onb
  identifier: githubrepoonb
  projectIdentifier: idpprojectsc
  orgIdentifier: neworg
  tags: {}
  stages:
    - stage:
        name: github-repo
        identifier: githubrepo
        description: ""
        type: IDP
        spec:
          platform:
            os: Linux
            arch: Amd64
          runtime:
            type: Cloud
            spec: {}
        tags: {}
Step 3: Configure pipeline variables
Pipeline variables are essential components that make your pipeline reusable and dynamic. These variables serve as inputs to the onboarding pipeline; some will come from the developer via the workflow form, while others are fixed or derived values used internally by the pipeline.
Pipeline Variables:
These variables are used in the GitHub Repository Onboarding pipeline for our Workflow:
| Variable Name | Type | Source | Description | Example Value |
|---|---|---|---|---|
repo_name | String | User Input | Name of the repository to create | my-awesome-project |
org_name | String | User Input | GitHub organization name | my-organization |
repo_branch_name | String | User Input | Feature branch name for initial development | feature/initial-setup |
token | Secret | Fixed | GitHub personal access token for API operations | account.github-token |
webhook_url | String | Fixed | Webhook URL for CI/CD integration | https://app.harness.io/gateway/... |
repo_desc (Optional) | String | User Input | Repository description | A new project created via IDP |
Pipeline Variables Input Types:
In Harness pipelines, every variable is assigned one of the following types, based on how its value is provided or resolved during execution:
- Fixed - These values are hardcoded in the pipeline definition and remain constant for every run.
- Runtime Input - These values are left as
<+input>and are filled in by the developer through the IDP Workflow form when the onboarding process is triggered. - Expression - These values are computed dynamically during pipeline execution using expressions. They may reference other variables, pipeline context, or system values.
These variables will be referenced in your pipeline steps using the <+pipeline.variables.variable_name> syntax, and they ensure flexibility while keeping your pipeline reusable across multiple onboarding requests. Go to Variables & Expressions to learn more.
Runtime Inputs in our Workflow:
In our GitHub Repository Onboarding workflow, most of the pipeline variables are configured as runtime inputs (<+input>) because they originate from user inputs collected through the IDP workflow form.
When a developer executes the workflow, they provide specific details like repository name, organization name, branch name, and webhook URL through the user interface. These user-provided values are then passed to the pipeline as runtime inputs, making each pipeline execution unique and tailored to the developer's requirements. Only the GitHub token remains as a fixed secret value since it is pre-configured in Harness for security purposes.
Configuring Pipeline Variables:
Follow these steps to add the required pipeline variables:
- Navigate to the Variables tab in your pipeline editor.
- For each variable, set the Type and Description
- In the Value field, enter
<+input>for user-provided values - For secrets, reference the secret name (e.g.,
account.github-token) - Mark variables as Required if they are essential for pipeline execution
Note that token and webhook_url are fixed values since they are pre-configured. Provide the value of webhook_url in the variable input as a fixed value. For token configuration, select the variable type as secret and configure the secret from your secret manager. Check out the interactive guide below for detailed steps.
- Interactive Guide
- YAML
variables:
  - name: repo_name
    type: String
    description: "Name of the repository to create"
    required: true
    value: <+input>
  - name: org_name
    type: String
    description: "GitHub organization name"
    required: true
    value: <+input>
  - name: repo_desc
    type: String
    description: "Repository description"
    required: true
    value: <+input>
  - name: repo_branch_name
    type: String
    description: "Feature branch name"
    required: true
    value: <+input>
  - name: token
    type: Secret
    description: "GitHub personal access token"
    required: true
    value: account.github-token
  - name: webhook_url
    type: String
    description: "Webhook URL for CI/CD integration"
    required: true
    value: <+input>
Step 1: Create repository
Purpose: This pipeline step creates a new GitHub repository in the specified organization with the provided repository name and description.
This step will do the following:
- Create a new GitHub repository in the specified organization
- Set up the repository with the provided name and description
Prerequisites for this Step:
- GitHub connector configured in Harness with proper authentication. Go to GitHub Connector to learn more.
- GitHub organization access with repository creation permissions.
- Pipeline variables configured (
repo_name,org_name,repo_desc)
Step Creation Instructions:
-
In the IDP stage, click + Add Step.
-
Select CreateRepo from the step library. A CreateRepo step is used to create a repository with the preferred Git provider. Go to Create Repo Step to learn more about its configuration.
-
Configure the step:
- Step Name:
Create Repository - Identifier:
create_repo - Description:
Creates a new GitHub repository with specified configuration
- Step Name:
-
Configure Repository Settings:
- Git Provider: Select
Third-party Git Provider - Connector Type: Select
Github - Repository Type: Select
public(orprivatebased on your requirements) - Codebase Repo Connector: Choose your configured GitHub connector (e.g.,
account.your_github_connector) - Organization:
<+pipeline.variables.org_name>(since this is a user input, simply paste the variable reference here to pass the Workflow input here as a variable) - Repository:
<+pipeline.variables.repo_name>(since this is a user input, simply paste the variable reference here to pass the Workflow input here as a variable) - Description:
<+pipeline.variables.repo_desc> - Default Branch:
main
- Git Provider: Select
-
Advanced Settings (Optional):
- Initialize with README: Leave unchecked (we will create our own)
- Add .gitignore: Leave unchecked (we will create a custom one)
- Add License: Leave unchecked
- Interactive Guide
- YAML
- step:
    type: CreateRepo
    name: Create Repository
    identifier: create_repo
    spec:
      connectorType: Github
      connectorRef: account.your_github_connector
      organization: <+pipeline.variables.org_name>
      repository: <+pipeline.variables.repo_name>
      repoType: public
      description: <+pipeline.variables.repo_desc>
      defaultBranch: main
Step 2: Create feature branch
Purpose: This step creates a feature branch from the main branch for initial development work and it runs a custom script to do the following:
- Retrieves the default branch information from the repository
- Gets the SHA (commit hash) of the default branch
- Creates a new feature branch pointing to the same commit
- Provides a dedicated branch for initial file commits
Prerequisites for this Step:
- Previous steps completed successfully
- GitHub PAT token with
repopermissions. Go to GitHub PAT to learn more. - Pipeline variables configured (
repo_branch_name,org_name,repo_name,token)
Step Creation Instructions:
-
Add the Step:
- Click + Add Step after the
CreateRepostep - Select Run from the step library. A Run step is used here run scripts in a Pipeline. Go to Run Step Settings to learn more about the same.
- Click + Add Step after the
-
Configure Basic Settings:
- Step Name:
Create Feature Branch - Identifier:
create_branch - Description:
Creates a feature branch for initial development
- Step Name:
-
Configure Container Settings: Container Registry and Image ensure that the build environment has the binaries necessary to execute the commands that you want to run in this step. Go to Container Registry and Image to learn more.
- Container Registry: Select your container registry connector (e.g.,
account.harnessImage) - Image:
node:18(providescurlandbashutilities) - Shell:
Bash
- Container Registry: Select your container registry connector (e.g.,
-
Configure the Script: This script automates the creation of a feature branch from the
mainbranch using GitHub's REST API. Here is what it does:- Validates inputs: Ensures all required variables (branch name, owner, repo, token) are provided
- Retrieves default branch: Gets the repository's default branch name (main/master)
- Gets branch SHA: Fetches the commit hash of the default branch
- Creates new branch: Uses GitHub API to create a new branch pointing to the same commit
- Provides feedback: Confirms successful branch creation
Feature Branch Creation Script
set -e

BRANCH_NAME=<+pipeline.variables.repo_branch_name>
OWNER=<+pipeline.variables.org_name>
REPO=<+pipeline.variables.repo_name>
TOKEN=<+pipeline.variables.token>

if [ -z "$BRANCH_NAME" ] || [ -z "$OWNER" ] || [ -z "$REPO" ] || [ -z "$TOKEN" ]; then
  echo "Usage: $0 <branch_name> <owner> <repo> <github_token>"
  exit 1
fi

# Get the default branch (main/master)
BASE_BRANCH=$(curl -s -H "Authorization: token $TOKEN" \
  "https://api.github.com/repos/$OWNER/$REPO" | grep '"default_branch":' | sed -E 's/.*"([^"]+)".*/\1/')

# Get SHA of default branch
SHA=$(curl -s -H "Authorization: token $TOKEN" \
  "https://api.github.com/repos/$OWNER/$REPO/git/ref/heads/$BASE_BRANCH" | grep '"sha":' | head -n 1 | sed -E 's/.*"([^"]+)".*/\1/')

# Create the new branch
curl -s -X POST -H "Authorization: token $TOKEN" \
  -d "{\"ref\":\"refs/heads/$BRANCH_NAME\",\"sha\":\"$SHA\"}" \
  "https://api.github.com/repos/$OWNER/$REPO/git/refs"

echo "✅ Branch '$BRANCH_NAME' created in $OWNER/$REPO"
- Interactive Guide
- YAML
- step:
    type: Run
    name: Create Feature Branch
    identifier: create_branch
    spec:
      connectorRef: account.harnessImage
      image: node:18
      shell: Bash
      command: |-
        #!/bin/bash
        set -e

        BRANCH_NAME=<+pipeline.variables.repo_branch_name>
        OWNER=<+pipeline.variables.org_name>
        REPO=<+pipeline.variables.repo_name>
        TOKEN=<+pipeline.variables.token>

        echo "🌿 Creating branch '$BRANCH_NAME' in $OWNER/$REPO"

        # Get the default branch SHA
        BASE_BRANCH=$(curl -s -H "Authorization: token $TOKEN" \
          "https://api.github.com/repos/$OWNER/$REPO" | \
          grep '"default_branch":' | sed -E 's/.*"([^"]+)".*/\1/')

        # Get SHA of default branch
        SHA=$(curl -s -H "Authorization: token $TOKEN" \
          "https://api.github.com/repos/$OWNER/$REPO/git/ref/heads/$BASE_BRANCH" | \
          grep '"sha":' | head -n 1 | sed -E 's/.*"([^"]+)".*/\1/')

        # Create the new branch
        curl -s -X POST -H "Authorization: token $TOKEN" \
          -d "{\"ref\":\"refs/heads/$BRANCH_NAME\",\"sha\":\"$SHA\"}" \
          "https://api.github.com/repos/$OWNER/$REPO/git/refs"

        echo "✅ Branch '$BRANCH_NAME' created successfully!"
Step 3: Create directory
Purpose: This step creates a project directory structure for organizing files before pushing to the repository.
- Creates a directory with the repository name
- Provides a workspace for file generation
- Prepares the structure for the
DirectPushstep
Prerequisites for this Step:
- Previous steps completed successfully
- Pipeline variables configured (
repo_name)
Step Creation Instructions:
-
Add the Step:
- Click + Add Step after the Create Feature Branch step
- Select Run from the step library
-
Configure Basic Settings:
- Step Name:
Create Directory - Identifier:
create_directory - Description:
Creates project directory structure
- Step Name:
-
Configure Container Settings:
- Container Registry: Select your container registry connector
- Image:
node:18 - Shell:
Sh(simple shell commands)
-
Configure the Script:
mkdir <+pipeline.variables.repo_name>
ls -la
echo "📁 Directory '<+pipeline.variables.repo_name>' created successfully"
- Interactive Guide
- YAML
- step:
    type: Run
    name: Create Directory
    identifier: create_directory
    spec:
      connectorRef: account.harnessImage
      image: node:18
      shell: Sh
      command: |-
        mkdir -p <+pipeline.variables.repo_name>
        ls -la
        echo "📁 Directory '<+pipeline.variables.repo_name>' created successfully"
Step 4: Generate Project files
Purpose: This step creates standard project files to provide a consistent starting point for all repositories, it runs a custom script to do the following:
- Creates a comprehensive
README.mdwith project information - Generates a
demo.yamlconfiguration file with project metadata - Creates a thorough
.gitignorefile covering common development artifacts - Provides a consistent starting point for all repositories
Prerequisites for this Step:
- Directory created (Step 3 completed)
- Pipeline variables configured (
repo_name,repo_branch_name)
Step Creation Instructions:
-
Add the Step:
- Click + Add Step after the Create Directory step
- Select Run from the step library
-
Configure Basic Settings:
- Step Name:
Generate Project Files - Identifier:
generate_files - Description:
Creates standard project files (README, .gitignore, demo.yaml)
- Step Name:
-
Configure Container Settings:
- Container Registry: Select your container registry connector
- Image:
node:18 - Shell:
Bash
-
Configure the Script:
This script creates three essential project files that provide a standardized foundation for every repository. Here is what each part does:
Script Overview:
- Sets up error handling with
set -eto exit on any command failure - Creates README.md with project documentation template
- Generates demo.yaml with project metadata and feature flags
- Creates comprehensive .gitignore covering multiple development environments
- Provides feedback on successful file creation
Complete Script
Complete Project Files Generation Script
#!/bin/bash
set -e

REPO_NAME=<+pipeline.variables.repo_name>

echo "📝 Creating project files for $REPO_NAME"

# Create README.md
cat > $REPO_NAME/README.md << EOF
# $REPO_NAME

This repository was created using Harness IDP workflow.

## Getting Started
Add your project documentation here.

## Development
1. Clone the repository
2. Switch to the feature branch: \`git checkout <+pipeline.variables.repo_branch_name>\`
3. Start developing your project

## Contributing
1. Create a feature branch
2. Make your changes
3. Submit a pull request
EOF

# Create demo.yaml
cat > $REPO_NAME/demo.yaml << EOF
# Demo configuration file
project:
  name: $REPO_NAME
  version: "1.0.0"
  created_by: "Harness IDP Workflow"
  created_date: "$(date -u +%Y-%m-%dT%H:%M:%SZ)"

settings:
  environment: "development"
  debug: true

features:
  - name: "automated_setup"
    enabled: true
  - name: "branch_protection"
    enabled: true
  - name: "webhook_integration"
    enabled: true
EOF

# Create .gitignore
cat > $REPO_NAME/.gitignore << EOF
# Dependencies
node_modules/
vendor/

# Build outputs
dist/
build/
target/
out/

# Environment files
.env
.env.local
.env.production
.env.staging

# IDE files
.vscode/
.idea/
*.swp
*.swo
*~

# OS files
.DS_Store
Thumbs.db
desktop.ini

# Logs
*.log
logs/
npm-debug.log*
yarn-debug.log*
yarn-error.log*

# Runtime data
pids
*.pid
*.seed
*.pid.lock

# Coverage directory used by tools like istanbul
coverage/
.nyc_output

# Dependency directories
jspm_packages/

# Optional npm cache directory
.npm

# Optional REPL history
.node_repl_history

# Output of 'npm pack'
*.tgz

# Yarn Integrity file
.yarn-integrity
EOF

echo "✅ Project files created successfully!"
echo "📋 Files created:"
ls -la $REPO_NAME/
Script Breakdown:
1. Environment Setup & Variables:
#!/bin/bash
set -e
REPO_NAME=<+pipeline.variables.repo_name>

echo "📝 Creating project files for $REPO_NAME"
- Sets bash error handling to exit on failures
- Gets repository name from pipeline variables
2. README.md Creation:
- Creates a comprehensive README with project name
- Includes getting started instructions
README.md Creation Script
# Create README.md
cat > $REPO_NAME/README.md << EOF
# $REPO_NAME

This repository was created using Harness IDP workflow.

## Getting Started

Add your project documentation here.

## Development

1. Clone the repository
2. Switch to the feature branch: \`git checkout <+pipeline.variables.repo_branch_name>\`
3. Start developing your project

## Contributing

1. Create a feature branch
2. Make your changes
3. Submit a pull request
EOF
3. Demo Configuration File:
- Creates a YAML configuration file with project metadata
- Includes timestamp of creation
- Documents the automated features enabled
Demo Configuration Creation Script
# Create demo.yaml
cat > $REPO_NAME/demo.yaml << EOF
# Demo configuration file
project:
  name: $REPO_NAME
  version: "1.0.0"
  created_by: "Harness IDP Workflow"
  created_date: "$(date -u +%Y-%m-%dT%H:%M:%SZ)"

settings:
  environment: "development"
  debug: true

features:
  - name: "automated_setup"
    enabled: true
  - name: "branch_protection"
    enabled: true
  - name: "webhook_integration"
    enabled: true
EOF
4. Comprehensive .gitignore:
- Covers common dependency directories (Node.js, PHP, etc.)
- Excludes build artifacts and compiled outputs
- Ignores environment and configuration files
- Excludes IDE-specific files and temporary files
- Handles OS-specific files (macOS, Windows)
- Covers logging and runtime data
- Includes coverage reports and package manager files
.gitignore Creation Script
# Create .gitignore
cat > $REPO_NAME/.gitignore << EOF
# Dependencies
node_modules/
vendor/

# Build outputs
dist/
build/
target/
out/

# Environment files
.env
.env.local
.env.production
.env.staging

# IDE files
.vscode/
.idea/
*.swp
*.swo
*~

# OS files
.DS_Store
Thumbs.db
desktop.ini

# Logs
*.log
logs/
npm-debug.log*
yarn-debug.log*
yarn-error.log*

# Runtime data
pids
*.pid
*.seed
*.pid.lock

# Coverage directory used by tools like istanbul
coverage/
.nyc_output

# Dependency directories
jspm_packages/

# Optional npm cache directory
.npm

# Optional REPL history
.node_repl_history

# Output of 'npm pack'
*.tgz

# Yarn Integrity file
.yarn-integrity
EOF
5. Success Confirmation:
echo "✅ Project files created successfully!"
echo "📋 Files created:"
ls -la $REPO_NAME/
- Interactive Guide
- YAML
- step:
    type: Run
    name: Generate Project Files
    identifier: generate_files
    spec:
      connectorRef: account.harnessImage
      image: node:18
      shell: Bash
      command: |-
        #!/bin/bash
        set -e

        REPO_NAME=<+pipeline.variables.repo_name>

        echo "📝 Creating project files for $REPO_NAME"

        # Create README.md
        cat > $REPO_NAME/README.md << EOF
        # $REPO_NAME

        This repository was created using Harness IDP workflow.

        ## Getting Started

        Add your project documentation here.

        ## Development

        1. Clone the repository
        2. Switch to the feature branch: \`git checkout <+pipeline.variables.repo_branch_name>\`
        3. Start developing your project

        ## Contributing

        1. Create a feature branch
        2. Make your changes
        3. Submit a pull request
        EOF

        # Create demo.yaml
        cat > $REPO_NAME/demo.yaml << EOF
        # Demo configuration file
        project:
          name: $REPO_NAME
          version: "1.0.0"
          created_by: "Harness IDP Workflow"
          created_date: "$(date -u +%Y-%m-%dT%H:%M:%SZ)"

        settings:
          environment: "development"
          debug: true

        features:
          - name: "automated_setup"
            enabled: true
          - name: "branch_protection"
            enabled: true
          - name: "webhook_integration"
            enabled: true
        EOF

        # Create .gitignore
        cat > $REPO_NAME/.gitignore << EOF
        # Dependencies
        node_modules/
        vendor/

        # Build outputs
        dist/
        build/
        target/
        out/

        # Environment files
        .env
        .env.local
        .env.production
        .env.staging

        # IDE files
        .vscode/
        .idea/
        *.swp
        *.swo
        *~

        # OS files
        .DS_Store
        Thumbs.db
        desktop.ini

        # Logs
        *.log
        logs/
        npm-debug.log*
        yarn-debug.log*
        yarn-error.log*

        # Runtime data
        pids
        *.pid
        *.seed
        *.pid.lock

        # Coverage directory used by tools like istanbul
        coverage/
        .nyc_output

        # Dependency directories
        jspm_packages/

        # Optional npm cache directory
        .npm

        # Optional REPL history
        .node_repl_history

        # Output of 'npm pack'
        *.tgz

        # Yarn Integrity file
        .yarn-integrity
        EOF

        echo "✅ Project files created successfully!"
        echo "📋 Files created:"
        ls -la $REPO_NAME/
Step 5: Push files to repository
Purpose: This step commits and pushes the generated files to the feature branch in the GitHub repository.
- Commits all generated files to the feature branch
- Pushes the initial project structure to GitHub
- Makes the files available in the repository for development
- Preserves the
mainbranch for branch protection setup
Prerequisites for this Step:
- Project files generated (Step 4 completed)
- GitHub connector with
pushpermissions. Go to GitHub Connector to learn more. - Pipeline variables configured (
org_name,repo_name,repo_branch_name)
Step Creation Instructions:
-
Add the Step:
- Click + Add Step after the Generate Project Files step
- Select DirectPush from the step library under "Git Repository Setup". This step will push all the generated files to the new feature branch. Go to Direct Push Step to learn more.
-
Configure Basic Settings:
- Step Name:
Push Files to Repository - Identifier:
push_files - Description:
Commits and pushes generated files to the feature branch
- Step Name:
-
Configure Push Settings:
- Connector Type: Select
Github - Connector Reference: Choose your GitHub connector
- Organization:
<+pipeline.variables.org_name> - Repository:
<+pipeline.variables.repo_name> - Code Directory:
<+pipeline.variables.repo_name>(the directory containing the files) - Branch:
<+pipeline.variables.repo_branch_name>(push tofeature branch, notmain)
- Connector Type: Select
-
Advanced Settings:
- Force Push: Leave unchecked (false)
- Commit Message: You can customize or leave default
- Interactive Guide
- YAML
- step:
    type: DirectPush
    name: Push Files to Repository
    identifier: push_files
    spec:
      connectorType: Github
      forcePush: false
      connectorRef: account.your_github_connector
      organization: <+pipeline.variables.org_name>
      repository: <+pipeline.variables.repo_name>
      codeDirectory: <+pipeline.variables.repo_name>
      branch: <+pipeline.variables.repo_branch_name>
Step 6: Configure branch protection
Purpose: This step applies security rules to the main branch to enforce code review and CI/CD requirements.
- Protects the
mainbranch from direct pushes - Requires status checks to pass before merging
- Enforces pull request reviews (1 approval required)
- Requires code owner reviews when applicable
- Applies rules to all users including administrators
Prerequisites for this Step:
- Repository created with files pushed (Steps 1-5 completed)
- GitHub PAT token with
admin:repo_hookpermissions - Pipeline variables configured (org_name, repo_name, token)
Step Creation Instructions:
-
Add the Step:
- Click + Add Step after the Push Files step.
- Select Run from the step library.
-
Configure Basic Settings:
- Step Name:
Configure Branch Protection - Identifier:
branch_protection - Description:
Sets up branch protection rules on the main branch
- Step Name:
-
Configure Container Settings:
- Container Registry: Select your container registry connector
- Image:
node:18 - Shell:
Bash
-
Configure the Script: This script configures branch protection rules on the
mainbranch using GitHub's REST API to enforce security and code quality standards. Here is what each part does:
Script Overview:
- Sets up error handling with
set -eto exit on any command failure - Retrieves default branch information from the repository
- Applies comprehensive protection rules via GitHub API
- Validates successful configuration with HTTP status code checking
Complete Script:
Complete Branch Protection Script
#!/bin/bash
set -e

OWNER=<+pipeline.variables.org_name>
REPO=<+pipeline.variables.repo_name>
TOKEN=<+pipeline.variables.token>

echo "🛡️  Setting up branch protection for $OWNER/$REPO"

# Get the default branch to protect
BASE_BRANCH=$(curl -s -H "Authorization: token $TOKEN" \
  "https://api.github.com/repos/$OWNER/$REPO" | \
  grep '"default_branch":' | sed -E 's/.*"([^"]+)".*/\1/')

echo "🔒 Protecting branch: $BASE_BRANCH"

# Set branch protection with proper JSON formatting
RESPONSE=$(curl -s -w "HTTP_CODE:%{http_code}" -X PUT \
  -H "Authorization: token $TOKEN" \
  -H "Accept: application/vnd.github+json" \
  "https://api.github.com/repos/$OWNER/$REPO/branches/$BASE_BRANCH/protection" \
  -d '{
    "required_status_checks": {
      "strict": true,
      "contexts": ["ci/build", "ci/test"]
    },
    "enforce_admins": true,
    "required_pull_request_reviews": {
      "dismiss_stale_reviews": true,
      "require_code_owner_reviews": true,
      "required_approving_review_count": 1
    },
    "restrictions": null
  }')

# Extract HTTP status code
HTTP_CODE=$(echo "$RESPONSE" | grep -o "HTTP_CODE:[0-9]*" | cut -d: -f2)

if [ "$HTTP_CODE" = "200" ]; then
  echo "✅ Branch protection configured successfully!"
  echo "🔐 Protection rules applied:"
  echo "   - Required status checks: ci/build, ci/test"
  echo "   - Required PR reviews: 1 approval"
  echo "   - Dismiss stale reviews: enabled"
  echo "   - Code owner reviews: required"
  echo "   - Admin enforcement: enabled"
else
  echo "❌ Failed to configure branch protection (HTTP $HTTP_CODE)"
  echo "Response: $(echo "$RESPONSE" | sed 's/HTTP_CODE:[0-9]*$//')"
  exit 1
fi
Script Breakdown:
1. Environment Setup & Variables:
#!/bin/bash
set -e

OWNER=<+pipeline.variables.org_name>
REPO=<+pipeline.variables.repo_name>
TOKEN=<+pipeline.variables.token>

echo "🛡️  Setting up branch protection for $OWNER/$REPO"
- Sets bash error handling to exit on failures
- Gets organization, repository name, and GitHub token from pipeline variables
2. Default Branch Detection:
# Get the default branch to protect
BASE_BRANCH=$(curl -s -H "Authorization: token $TOKEN" \
  "https://api.github.com/repos/$OWNER/$REPO" | \
  grep '"default_branch":' | sed -E 's/.*"([^"]+)".*/\1/')

echo "🔒 Protecting branch: $BASE_BRANCH"
- Queries GitHub API to get repository information
- Extracts the default branch name (usually
mainormaster) - Confirms which branch will be protected
3. Branch Protection Configuration:
- Required Status Checks: Enforces CI/CD pipeline success before merging
strict: true- Requires branches to be up-to-date before mergingcontexts: ["ci/build", "ci/test"]- Specific checks that must pass
- Admin Enforcement: Rules apply to repository administrators too
- Pull Request Reviews: Mandatory code review process
dismiss_stale_reviews: true- Invalidates approvals when new commits are addedrequire_code_owner_reviews: true- Requires approval from code ownersrequired_approving_review_count: 1- Minimum number of approvals needed
- Restrictions: Set to
null(no user/team restrictions)
Protection Rules API Call
# Set branch protection with proper JSON formatting
RESPONSE=$(curl -s -w "HTTP_CODE:%{http_code}" -X PUT \
  -H "Authorization: token $TOKEN" \
  -H "Accept: application/vnd.github+json" \
  "https://api.github.com/repos/$OWNER/$REPO/branches/$BASE_BRANCH/protection" \
  -d '{
    "required_status_checks": {
      "strict": true,
      "contexts": ["ci/build", "ci/test"]
    },
    "enforce_admins": true,
    "required_pull_request_reviews": {
      "dismiss_stale_reviews": true,
      "require_code_owner_reviews": true,
      "required_approving_review_count": 1
    },
    "restrictions": null
  }')
4. Response Validation & Feedback:
- Extracts HTTP status code from the API response
- Success (200): Confirms protection rules and lists applied settings
- Failure (non-200): Shows error details and exits with error code
Response Validation Script
# Extract HTTP status code
HTTP_CODE=$(echo "$RESPONSE" | grep -o "HTTP_CODE:[0-9]*" | cut -d: -f2)

if [ "$HTTP_CODE" = "200" ]; then
  echo "✅ Branch protection configured successfully!"
  echo "🔐 Protection rules applied:"
  echo "   - Required status checks: ci/build, ci/test"
  echo "   - Required PR reviews: 1 approval"
  echo "   - Dismiss stale reviews: enabled"
  echo "   - Code owner reviews: required"
  echo "   - Admin enforcement: enabled"
else
  echo "❌ Failed to configure branch protection (HTTP $HTTP_CODE)"
  echo "Response: $(echo "$RESPONSE" | sed 's/HTTP_CODE:[0-9]*$//')"
  exit 1
fi
- Interactive Guide
- YAML
- step:
    type: Run
    name: Configure Branch Protection
    identifier: branch_protection
    spec:
      connectorRef: account.harnessImage
      image: node:18
      shell: Bash
      command: |-
        #!/bin/bash
        set -e

        OWNER=<+pipeline.variables.org_name>
        REPO=<+pipeline.variables.repo_name>
        TOKEN=<+pipeline.variables.token>

        echo "🛡️  Setting up branch protection for $OWNER/$REPO"

        # Get the default branch to protect
        BASE_BRANCH=$(curl -s -H "Authorization: token $TOKEN" \
          "https://api.github.com/repos/$OWNER/$REPO" | \
          grep '"default_branch":' | sed -E 's/.*"([^"]+)".*/\1/')

        echo "🔒 Protecting branch: $BASE_BRANCH"

        # Set branch protection with proper JSON formatting
        RESPONSE=$(curl -s -w "HTTP_CODE:%{http_code}" -X PUT \
          -H "Authorization: token $TOKEN" \
          -H "Accept: application/vnd.github+json" \
          "https://api.github.com/repos/$OWNER/$REPO/branches/$BASE_BRANCH/protection" \
          -d '{
            "required_status_checks": {
              "strict": true,
              "contexts": ["ci/build", "ci/test"]
            },
            "enforce_admins": true,
            "required_pull_request_reviews": {
              "dismiss_stale_reviews": true,
              "require_code_owner_reviews": true,
              "required_approving_review_count": 1
            },
            "restrictions": null
          }')

        # Extract HTTP status code
        HTTP_CODE=$(echo "$RESPONSE" | grep -o "HTTP_CODE:[0-9]*" | cut -d: -f2)

        if [ "$HTTP_CODE" = "200" ]; then
          echo "✅ Branch protection configured successfully!"
          echo "🔐 Protection rules applied:"
          echo "   - Required status checks: ci/build, ci/test"
          echo "   - Required PR reviews: 1 approval"
          echo "   - Dismiss stale reviews: enabled"
          echo "   - Code owner reviews: required"
          echo "   - Admin enforcement: enabled"
        else
          echo "❌ Failed to configure branch protection (HTTP $HTTP_CODE)"
          echo "Response: $(echo "$RESPONSE" | sed 's/HTTP_CODE:[0-9]*$//')"
          exit 1
        fi
Step 7: Setup webhook
Purpose: This step configures a webhook to trigger CI/CD pipelines when code changes occur in the repository.
- Verifies the repository is accessible and ready
- Creates a webhook with comprehensive event coverage
- Configures secure JSON payload delivery
- Enables automatic CI/CD pipeline triggering
Prerequisites for this Step:
- Repository fully configured (Steps 1-6 completed)
- GitHub PAT token with
admin:repo_hookpermissions - Pipeline variables configured (
org_name,repo_name,token,webhook_url) - Valid webhook URL endpoint
Ensure that the webhook_url variable is configured as a fixed value in the pipeline variables definition.
Step Creation Instructions:
-
Add the Step:
- Click + Add Step after the Configure Branch Protection step
- Select Run from the step library
-
Configure Basic Settings:
- Step Name:
Setup Webhook - Identifier:
setup_webhook - Description:
Configures webhook for CI/CD pipeline integration
- Step Name:
-
Configure Container Settings:
- Container Registry: Select your container registry connector
- Image:
node:18 - Shell:
Bash
-
Configure the Script: This script configures a webhook to automatically trigger CI/CD pipelines when code changes occur in the repository. Here is what each part does:
Complete Script:
Complete Webhook Setup Script
#!/bin/bash
set -e

OWNER=<+pipeline.variables.org_name>
REPO=<+pipeline.variables.repo_name>
TOKEN=<+pipeline.variables.token>
WEBHOOK_URL=<+pipeline.variables.webhook_url>

echo "🔗 Setting up webhook for $OWNER/$REPO"
echo "📡 Webhook URL: $WEBHOOK_URL"

# Verify repository exists first
echo "🔍 Verifying repository exists..."
REPO_CHECK=$(curl -s -H "Authorization: token $TOKEN" \
  "https://api.github.com/repos/$OWNER/$REPO")

if echo "$REPO_CHECK" | grep -q '"message": "Not Found"'; then
  echo "❌ Repository not found!"
  exit 1
fi

echo "✅ Repository verified"

# Add delay to ensure repo is ready
echo "⏳ Waiting for repository to be fully ready..."
sleep 5

# Create webhook with comprehensive error handling
echo "🚀 Creating webhook..."
WEBHOOK_RESPONSE=$(curl -s -w "HTTP_CODE:%{http_code}" -X POST \
  -H "Authorization: token $TOKEN" \
  -H "Accept: application/vnd.github+json" \
  "https://api.github.com/repos/$OWNER/$REPO/hooks" \
  -d "{
    \"name\": \"web\",
    \"active\": true,
    \"events\": [\"push\", \"pull_request\", \"release\"],
    \"config\": {
      \"url\": \"$WEBHOOK_URL\",
      \"content_type\": \"json\",
      \"insecure_ssl\": \"0\"
    }
  }")

# Extract HTTP status code and response body
HTTP_CODE=$(echo "$WEBHOOK_RESPONSE" | grep -o "HTTP_CODE:[0-9]*" | cut -d: -f2)
RESPONSE_BODY=$(echo "$WEBHOOK_RESPONSE" | sed 's/HTTP_CODE:[0-9]*$//')

if [ "$HTTP_CODE" = "201" ]; then
  WEBHOOK_ID=$(echo "$RESPONSE_BODY" | grep '"id":' | head -n 1 | sed -E 's/.*"id": ([0-9]+).*/\1/')
  echo "✅ Webhook #$WEBHOOK_ID created successfully!"
  echo "🎯 Configured events:"
  echo "   - push (all branches)"
  echo "   - pull_request (opened, synchronized, closed)"
  echo "   - release (published, edited)"
  echo "🔒 Security: SSL verification enabled"
  echo "📦 Content type: JSON"
else
  echo "❌ Failed to create webhook (HTTP $HTTP_CODE)"
  echo "📝 Response details:"
  echo "$RESPONSE_BODY" | head -10

  # Provide troubleshooting hints
  if [ "$HTTP_CODE" = "422" ]; then
    echo "💡 Troubleshooting: Check if webhook URL is valid and accessible"
  elif [ "$HTTP_CODE" = "404" ]; then
    echo "💡 Troubleshooting: Verify repository exists and token has correct permissions"
  elif [ "$HTTP_CODE" = "403" ]; then
    echo "💡 Troubleshooting: Token may lack admin:repo_hook permissions"
  fi

  exit 1
fi
Script Breakdown:
1. Environment Setup & Variables:
- Sets bash error handling to exit on failures
- Gets all required variables from pipeline configuration
#!/bin/bash
set -e

OWNER=<+pipeline.variables.org_name>
REPO=<+pipeline.variables.repo_name>
TOKEN=<+pipeline.variables.token>
WEBHOOK_URL=<+pipeline.variables.webhook_url>

echo "🔗 Setting up webhook for $OWNER/$REPO"
echo "📡 Webhook URL: $WEBHOOK_URL"
2. Repository Verification:
- Queries GitHub API to confirm repository exists
- Exits with error if repository is not found
- Ensures webhook creation will not fail due to missing repository
# Verify repository exists first
echo "🔍 Verifying repository exists..."
REPO_CHECK=$(curl -s -H "Authorization: token $TOKEN" \
  "https://api.github.com/repos/$OWNER/$REPO")

if echo "$REPO_CHECK" | grep -q '"message": "Not Found"'; then
  echo "❌ Repository not found!"
  exit 1
fi

echo "✅ Repository verified"
3. Webhook Creation: Webhook Configuration Details:
- Events Monitored:
push,pull_request,release - Content Type: JSON for structured payload delivery
- Security: SSL verification enabled (
insecure_ssl: "0") - Status: Active webhook ready to trigger immediately
Webhook Configuration API Call
# Create webhook with comprehensive error handling
echo "🚀 Creating webhook..."
WEBHOOK_RESPONSE=$(curl -s -w "HTTP_CODE:%{http_code}" -X POST \
  -H "Authorization: token $TOKEN" \
  -H "Accept: application/vnd.github+json" \
  "https://api.github.com/repos/$OWNER/$REPO/hooks" \
  -d "{
    \"name\": \"web\",
    \"active\": true,
    \"events\": [\"push\", \"pull_request\", \"release\"],
    \"config\": {
      \"url\": \"$WEBHOOK_URL\",
      \"content_type\": \"json\",
      \"insecure_ssl\": \"0\"
    }
  }")
4. Response Validation & Feedback:
- Success (201): Extracts webhook ID and confirms configuration
- Failure (non-201): Provides specific troubleshooting guidance based on HTTP status code
- Error Codes:
422: Invalid webhook URL or configuration404: Repository not found or insufficient permissions403: Token lacks required webhook permissions
Response Handling Script
# Extract HTTP status code and response body
HTTP_CODE=$(echo "$WEBHOOK_RESPONSE" | grep -o "HTTP_CODE:[0-9]*" | cut -d: -f2)
RESPONSE_BODY=$(echo "$WEBHOOK_RESPONSE" | sed 's/HTTP_CODE:[0-9]*$//')

if [ "$HTTP_CODE" = "201" ]; then
  WEBHOOK_ID=$(echo "$RESPONSE_BODY" | grep '"id":' | head -n 1 | sed -E 's/.*"id": ([0-9]+).*/\1/')
  echo "✅ Webhook #$WEBHOOK_ID created successfully!"
  echo "🎯 Configured events:"
  echo "   - push (all branches)"
  echo "   - pull_request (opened, synchronized, closed)"
  echo "   - release (published, edited)"
  echo "🔒 Security: SSL verification enabled"
  echo "📦 Content type: JSON"
else
  echo "❌ Failed to create webhook (HTTP $HTTP_CODE)"
  echo "📝 Response details:"
  echo "$RESPONSE_BODY" | head -10

  # Provide troubleshooting hints
  if [ "$HTTP_CODE" = "422" ]; then
    echo "💡 Troubleshooting: Check if webhook URL is valid and accessible"
  elif [ "$HTTP_CODE" = "404" ]; then
    echo "💡 Troubleshooting: Verify repository exists and token has correct permissions"
  elif [ "$HTTP_CODE" = "403" ]; then
    echo "💡 Troubleshooting: Token may lack admin:repo_hook permissions"
  fi

  exit 1
fi
Webhook Setup Pipeline Step YAML
- step:
    type: Run
    name: Setup Webhook
    identifier: setup_webhook
    spec:
      connectorRef: account.harnessImage
      image: node:18
      shell: Bash
      command: |-
        #!/bin/bash
        set -e

        OWNER=<+pipeline.variables.org_name>
        REPO=<+pipeline.variables.repo_name>
        TOKEN=<+pipeline.variables.token>
        WEBHOOK_URL=<+pipeline.variables.webhook_url>

        echo "🔗 Setting up webhook for $OWNER/$REPO"
        echo "📡 Webhook URL: $WEBHOOK_URL"

        # Verify repository exists first
        echo "🔍 Verifying repository exists..."
        REPO_CHECK=$(curl -s -H "Authorization: token $TOKEN" \
          "https://api.github.com/repos/$OWNER/$REPO")

        if echo "$REPO_CHECK" | grep -q '"message": "Not Found"'; then
          echo "❌ Repository not found!"
          exit 1
        fi

        echo "✅ Repository verified"

        # Add delay to ensure repo is ready
        echo "⏳ Waiting for repository to be fully ready..."
        sleep 5

        # Create webhook with comprehensive error handling
        echo "🚀 Creating webhook..."
        WEBHOOK_RESPONSE=$(curl -s -w "HTTP_CODE:%{http_code}" -X POST \
          -H "Authorization: token $TOKEN" \
          -H "Accept: application/vnd.github+json" \
          "https://api.github.com/repos/$OWNER/$REPO/hooks" \
          -d "{
            \"name\": \"web\",
            \"active\": true,
            \"events\": [\"push\", \"pull_request\", \"release\"],
            \"config\": {
              \"url\": \"$WEBHOOK_URL\",
              \"content_type\": \"json\",
              \"insecure_ssl\": \"0\"
            }
          }")

        # Extract HTTP status code and response body
        HTTP_CODE=$(echo "$WEBHOOK_RESPONSE" | grep -o "HTTP_CODE:[0-9]*" | cut -d: -f2)
        RESPONSE_BODY=$(echo "$WEBHOOK_RESPONSE" | sed 's/HTTP_CODE:[0-9]*$//')

        if [ "$HTTP_CODE" = "201" ]; then
          WEBHOOK_ID=$(echo "$RESPONSE_BODY" | grep '"id":' | head -n 1 | sed -E 's/.*"id": ([0-9]+).*/\1/')
          echo "✅ Webhook #$WEBHOOK_ID created successfully!"
          echo "🎯 Configured events:"
          echo "   - push (all branches)"
          echo "   - pull_request (opened, synchronized, closed)"
          echo "   - release (published, edited)"
          echo "🔒 Security: SSL verification enabled"
          echo "📦 Content type: JSON"
        else
          echo "❌ Failed to create webhook (HTTP $HTTP_CODE)"
          echo "📝 Response details:"
          echo "$RESPONSE_BODY" | head -10

          # Provide troubleshooting hints
          if [ "$HTTP_CODE" = "422" ]; then
            echo "💡 Troubleshooting: Check if webhook URL is valid and accessible"
          elif [ "$HTTP_CODE" = "404" ]; then
            echo "💡 Troubleshooting: Verify repository exists and token has correct permissions"
          elif [ "$HTTP_CODE" = "403" ]; then
            echo "💡 Troubleshooting: Token may lack admin:repo_hook permissions"
          fi

          exit 1
        fi
Pipeline YAML configuration
Below is the complete pipeline YAML configuration that you can copy and paste directly into your Harness pipeline. Make sure to replace the placeholder values with your specific configuration details.
Pipeline YAML Configuration
pipeline:
name: GitHub Repository Onboarding
identifier: github_repo_onboarding
projectIdentifier: <YOUR_PROJECT_ID>
orgIdentifier: <YOUR_ORG_ID>
tags: {}
stages:
- stage:
name: Repository Setup
identifier: repository_setup
description: "Automated GitHub repository creation and configuration"
type: IDP
spec:
execution:
steps:
# Step 1: Create Repository
- step:
type: CreateRepo
name: Create Repository
identifier: create_repo
spec:
connectorType: Github
connectorRef: <YOUR_GITHUB_CONNECTOR>
organization: <+pipeline.variables.org_name>
repository: <+pipeline.variables.repo_name>
repoType: public
description: <+pipeline.variables.repo_desc>
defaultBranch: main
# Step 2: Create Feature Branch
- step:
type: Run
name: Create Feature Branch
identifier: create_branch
spec:
connectorRef: <YOUR_CONTAINER_REGISTRY_CONNECTOR>
image: node:18
shell: Bash
command: |-
#!/bin/bash
set -e
BRANCH_NAME=<+pipeline.variables.repo_branch_name>
OWNER=<+pipeline.variables.org_name>
REPO=<+pipeline.variables.repo_name>
TOKEN=<+pipeline.variables.token>
if [ -z "$BRANCH_NAME" ] || [ -z "$OWNER" ] || [ -z "$REPO" ] || [ -z "$TOKEN" ]; then
echo "Usage: $0 <branch_name> <owner> <repo> <github_token>"
exit 1
fi
# Get the default branch (main/master)
BASE_BRANCH=$(curl -s -H "Authorization: token $TOKEN" \
"https://api.github.com/repos/$OWNER/$REPO" | grep '"default_branch":' | sed -E 's/.*"([^"]+)".*/\1/')
# Get SHA of default branch
SHA=$(curl -s -H "Authorization: token $TOKEN" \
"https://api.github.com/repos/$OWNER/$REPO/git/ref/heads/$BASE_BRANCH" | grep '"sha":' | head -n 1 | sed -E 's/.*"([^"]+)".*/\1/')
# Create the new branch
curl -s -X POST -H "Authorization: token $TOKEN" \
-d "{\"ref\":\"refs/heads/$BRANCH_NAME\",\"sha\":\"$SHA\"}" \
"https://api.github.com/repos/$OWNER/$REPO/git/refs"
echo "✅ Branch '$BRANCH_NAME' created in $OWNER/$REPO"
# Step 3: Create Directory
- step:
type: Run
name: Create Directory
identifier: create_directory
spec:
connectorRef: <YOUR_CONTAINER_REGISTRY_CONNECTOR>
image: node:18
shell: Sh
command: |-
mkdir -p <+pipeline.variables.repo_name>
ls -la
echo "📁 Directory '<+pipeline.variables.repo_name>' created successfully"
# Step 4: Generate Project Files
- step:
type: Run
name: Generate Project Files
identifier: generate_files
spec:
connectorRef: <YOUR_CONTAINER_REGISTRY_CONNECTOR>
image: node:18
shell: Bash
command: |-
#!/bin/bash
set -e
REPO_NAME=<+pipeline.variables.repo_name>
echo "📝 Creating project files for $REPO_NAME"
# Create README.md
cat > $REPO_NAME/README.md << EOF
# $REPO_NAME
This repository was created using Harness IDP workflow.
## Getting Started
Add your project documentation here.
## Development
1. Clone the repository
2. Switch to the feature branch: \`git checkout <+pipeline.variables.repo_branch_name>\`
3. Start developing your project
## Contributing
1. Create a feature branch
2. Make your changes
3. Submit a pull request
EOF
# Create demo.yaml
cat > $REPO_NAME/demo.yaml << EOF
# Demo configuration file
project:
name: $REPO_NAME
version: "1.0.0"
created_by: "Harness IDP Workflow"
created_date: "$(date -u +%Y-%m-%dT%H:%M:%SZ)"
settings:
environment: "development"
debug: true
features:
- name: "automated_setup"
enabled: true
- name: "branch_protection"
enabled: true
- name: "webhook_integration"
enabled: true
EOF
# Create .gitignore
cat > $REPO_NAME/.gitignore << EOF
# Dependencies
node_modules/
vendor/
# Build outputs
dist/
build/
target/
out/
# Environment files
.env
.env.local
.env.production
.env.staging
# IDE files
.vscode/
.idea/
*.swp
*.swo
*~
# OS files
.DS_Store
Thumbs.db
desktop.ini
# Logs
*.log
logs/
npm-debug.log*
yarn-debug.log*
yarn-error.log*
# Runtime data
pids
*.pid
*.seed
*.pid.lock
# Coverage directory used by tools like istanbul
coverage/
.nyc_output
# Dependency directories
jspm_packages/
# Optional npm cache directory
.npm
# Optional REPL history
.node_repl_history
# Output of 'npm pack'
*.tgz
# Yarn Integrity file
.yarn-integrity
EOF
echo "✅ Project files created successfully!"
echo "📋 Files created:"
ls -la $REPO_NAME/
# Step 5: Push Files to Repository
- step:
type: DirectPush
name: Push Files to Repository
identifier: push_files
spec:
connectorType: Github
connectorRef: <YOUR_GITHUB_CONNECTOR>
organization: <+pipeline.variables.org_name>
repository: <+pipeline.variables.repo_name>
codeDirectory: <+pipeline.variables.repo_name>
branch: <+pipeline.variables.repo_branch_name>
# Step 6: Configure Branch Protection
- step:
type: Run
name: Configure Branch Protection
identifier: branch_protection
spec:
connectorRef: <YOUR_CONTAINER_REGISTRY_CONNECTOR>
image: node:18
shell: Bash
command: |-
#!/bin/bash
set -e
OWNER=<+pipeline.variables.org_name>
REPO=<+pipeline.variables.repo_name>
TOKEN=<+pipeline.variables.token>
echo "🛡️ Setting up branch protection for $OWNER/$REPO"
# Get the default branch to protect
BASE_BRANCH=$(curl -s -H "Authorization: token $TOKEN" \
"https://api.github.com/repos/$OWNER/$REPO" | \
grep '"default_branch":' | sed -E 's/.*"([^"]+)".*/\1/')
echo "🔒 Protecting branch: $BASE_BRANCH"
# Set branch protection with proper JSON formatting
RESPONSE=$(curl -s -w "HTTP_CODE:%{http_code}" -X PUT \
-H "Authorization: token $TOKEN" \
-H "Accept: application/vnd.github+json" \
"https://api.github.com/repos/$OWNER/$REPO/branches/$BASE_BRANCH/protection" \
-d '{
"required_status_checks": {
"strict": true,
"contexts": ["ci/build", "ci/test"]
},
"enforce_admins": true,
"required_pull_request_reviews": {
"dismiss_stale_reviews": true,
"require_code_owner_reviews": true,
"required_approving_review_count": 1
},
"restrictions": null
}')
# Extract HTTP status code
HTTP_CODE=$(echo "$RESPONSE" | grep -o "HTTP_CODE:[0-9]*" | cut -d: -f2)
if [ "$HTTP_CODE" = "200" ]; then
echo "✅ Branch protection configured successfully!"
echo "🔐 Protection rules applied:"
echo " - Required status checks: ci/build, ci/test"
echo " - Required PR reviews: 1 approval"
echo " - Dismiss stale reviews: enabled"
echo " - Code owner reviews: required"
echo " - Admin enforcement: enabled"
else
echo "❌ Failed to configure branch protection (HTTP $HTTP_CODE)"
echo "Response: $(echo "$RESPONSE" | sed 's/HTTP_CODE:[0-9]*$//')"
exit 1
fi
# Step 7: Setup Webhook
- step:
type: Run
name: Setup Webhook
identifier: setup_webhook
spec:
connectorRef: <YOUR_CONTAINER_REGISTRY_CONNECTOR>
image: node:18
shell: Bash
command: |-
#!/bin/bash
set -e
OWNER=<+pipeline.variables.org_name>
REPO=<+pipeline.variables.repo_name>
TOKEN=<+pipeline.variables.token>
WEBHOOK_URL=<+pipeline.variables.webhook_url>
echo "🔗 Setting up webhook for $OWNER/$REPO"
echo "📡 Webhook URL: $WEBHOOK_URL"
# Verify repository exists first
echo "🔍 Verifying repository exists..."
REPO_CHECK=$(curl -s -H "Authorization: token $TOKEN" \
"https://api.github.com/repos/$OWNER/$REPO")
if echo "$REPO_CHECK" | grep -q '"message": "Not Found"'; then
echo "❌ Repository not found!"
exit 1
fi
echo "✅ Repository verified"
# Add delay to ensure repo is ready
echo "⏳ Waiting for repository to be fully ready..."
sleep 5
# Create webhook with comprehensive error handling
echo "🚀 Creating webhook..."
WEBHOOK_RESPONSE=$(curl -s -w "HTTP_CODE:%{http_code}" -X POST \
-H "Authorization: token $TOKEN" \
-H "Accept: application/vnd.github+json" \
"https://api.github.com/repos/$OWNER/$REPO/hooks" \
-d "{
\"name\": \"web\",
\"active\": true,
\"events\": [\"push\", \"pull_request\", \"release\"],
\"config\": {
\"url\": \"$WEBHOOK_URL\",
\"content_type\": \"json\",
\"insecure_ssl\": \"0\"
}
}")
# Extract HTTP status code and response body
HTTP_CODE=$(echo "$WEBHOOK_RESPONSE" | grep -o "HTTP_CODE:[0-9]*" | cut -d: -f2)
RESPONSE_BODY=$(echo "$WEBHOOK_RESPONSE" | sed 's/HTTP_CODE:[0-9]*$//')
if [ "$HTTP_CODE" = "201" ]; then
WEBHOOK_ID=$(echo "$RESPONSE_BODY" | grep '"id":' | head -n 1 | sed -E 's/.*"id": ([0-9]+).*/\1/')
echo "✅ Webhook #$WEBHOOK_ID created successfully!"
echo "🎯 Configured events:"
echo " - push (all branches)"
echo " - pull_request (opened, synchronized, closed)"
echo " - release (published, edited)"
echo "🔒 Security: SSL verification enabled"
echo "📦 Content type: JSON"
else
echo "❌ Failed to create webhook (HTTP $HTTP_CODE)"
echo "📝 Response details:"
echo "$RESPONSE_BODY" | head -10
# Provide troubleshooting hints
if [ "$HTTP_CODE" = "422" ]; then
echo "💡 Troubleshooting: Check if webhook URL is valid and accessible"
elif [ "$HTTP_CODE" = "404" ]; then
echo "💡 Troubleshooting: Verify repository exists and token has correct permissions"
elif [ "$HTTP_CODE" = "403" ]; then
echo "💡 Troubleshooting: Token may lack admin:repo_hook permissions"
fi
exit 1
fi
infrastructure:
type: KubernetesDirect
spec:
connectorRef: <YOUR_K8S_CONNECTOR>
namespace: <YOUR_NAMESPACE>
automountServiceAccountToken: true
nodeSelector: {}
os: Linux
variables:
- name: repo_name
type: String
description: "Name of the repository to create"
required: true
value: <+input>
- name: org_name
type: String
description: "GitHub organization name"
required: true
value: <+input>
- name: repo_desc
type: String
description: "Repository description"
required: true
value: <+input>
- name: repo_branch_name
type: String
description: "Feature branch name"
required: true
value: <+input>
- name: token
type: Secret
description: "GitHub personal access token"
required: true
value: <YOUR_GITHUB_TOKEN_SECRET>
- name: webhook_url
type: String
description: "Webhook URL for CI/CD integration"
required: true
value: <YOUR_WEBHOOK_URL>
Pipeline completion
After completing all 7 steps, your pipeline will:
- ✅ Create Repository - New GitHub repo with proper configuration
- ✅ Create Feature Branch - Dedicated branch for initial development
- ✅ Create Directory - Organized workspace structure
- ✅ Generate Project Files - Standard README, .gitignore, and demo files
- ✅ Push Files - Initial project structure committed to feature branch
- ✅ Configure Branch Protection - Security rules enforced on main branch
- ✅ Setup Webhook - CI/CD integration enabled
Build the Harness IDP workflow
Now that we have created the pipeline, we need to create the IDP Workflow that will serve as the user interface. This workflow will collect input from developers and trigger our GitHub Repository Onboarding pipeline.
Before you begin
Before creating the workflow, ensure you have:
- Pipeline Created: The GitHub Repository Onboarding pipeline must be created and saved.
- Pipeline URL: Note down your pipeline URL for the workflow configuration.
- Harness Account Access: Permissions to create workflows in your Harness project.
- Project Details: Your account ID, organization ID, and project ID.
Workflow overview
🔤 Inputs Required:
- Repository Information: Organization name, repository name, and description
- Branch Configuration: Feature branch name for initial development
- Authentication: Secure token handling for all Workflow requests (automatically generated)
⚡ Actions Performed:
- Pipeline Triggering: Initiates the GitHub Repository Onboarding pipeline with user inputs
- Parameter Mapping: Converts form inputs to pipeline variables seamlessly
📊 Outputs Provided:
- Execution Tracking: Direct link to monitor pipeline progress in real-time
- Status Updates: Immediate feedback on workflow submission and pipeline initiation
Create the workflow
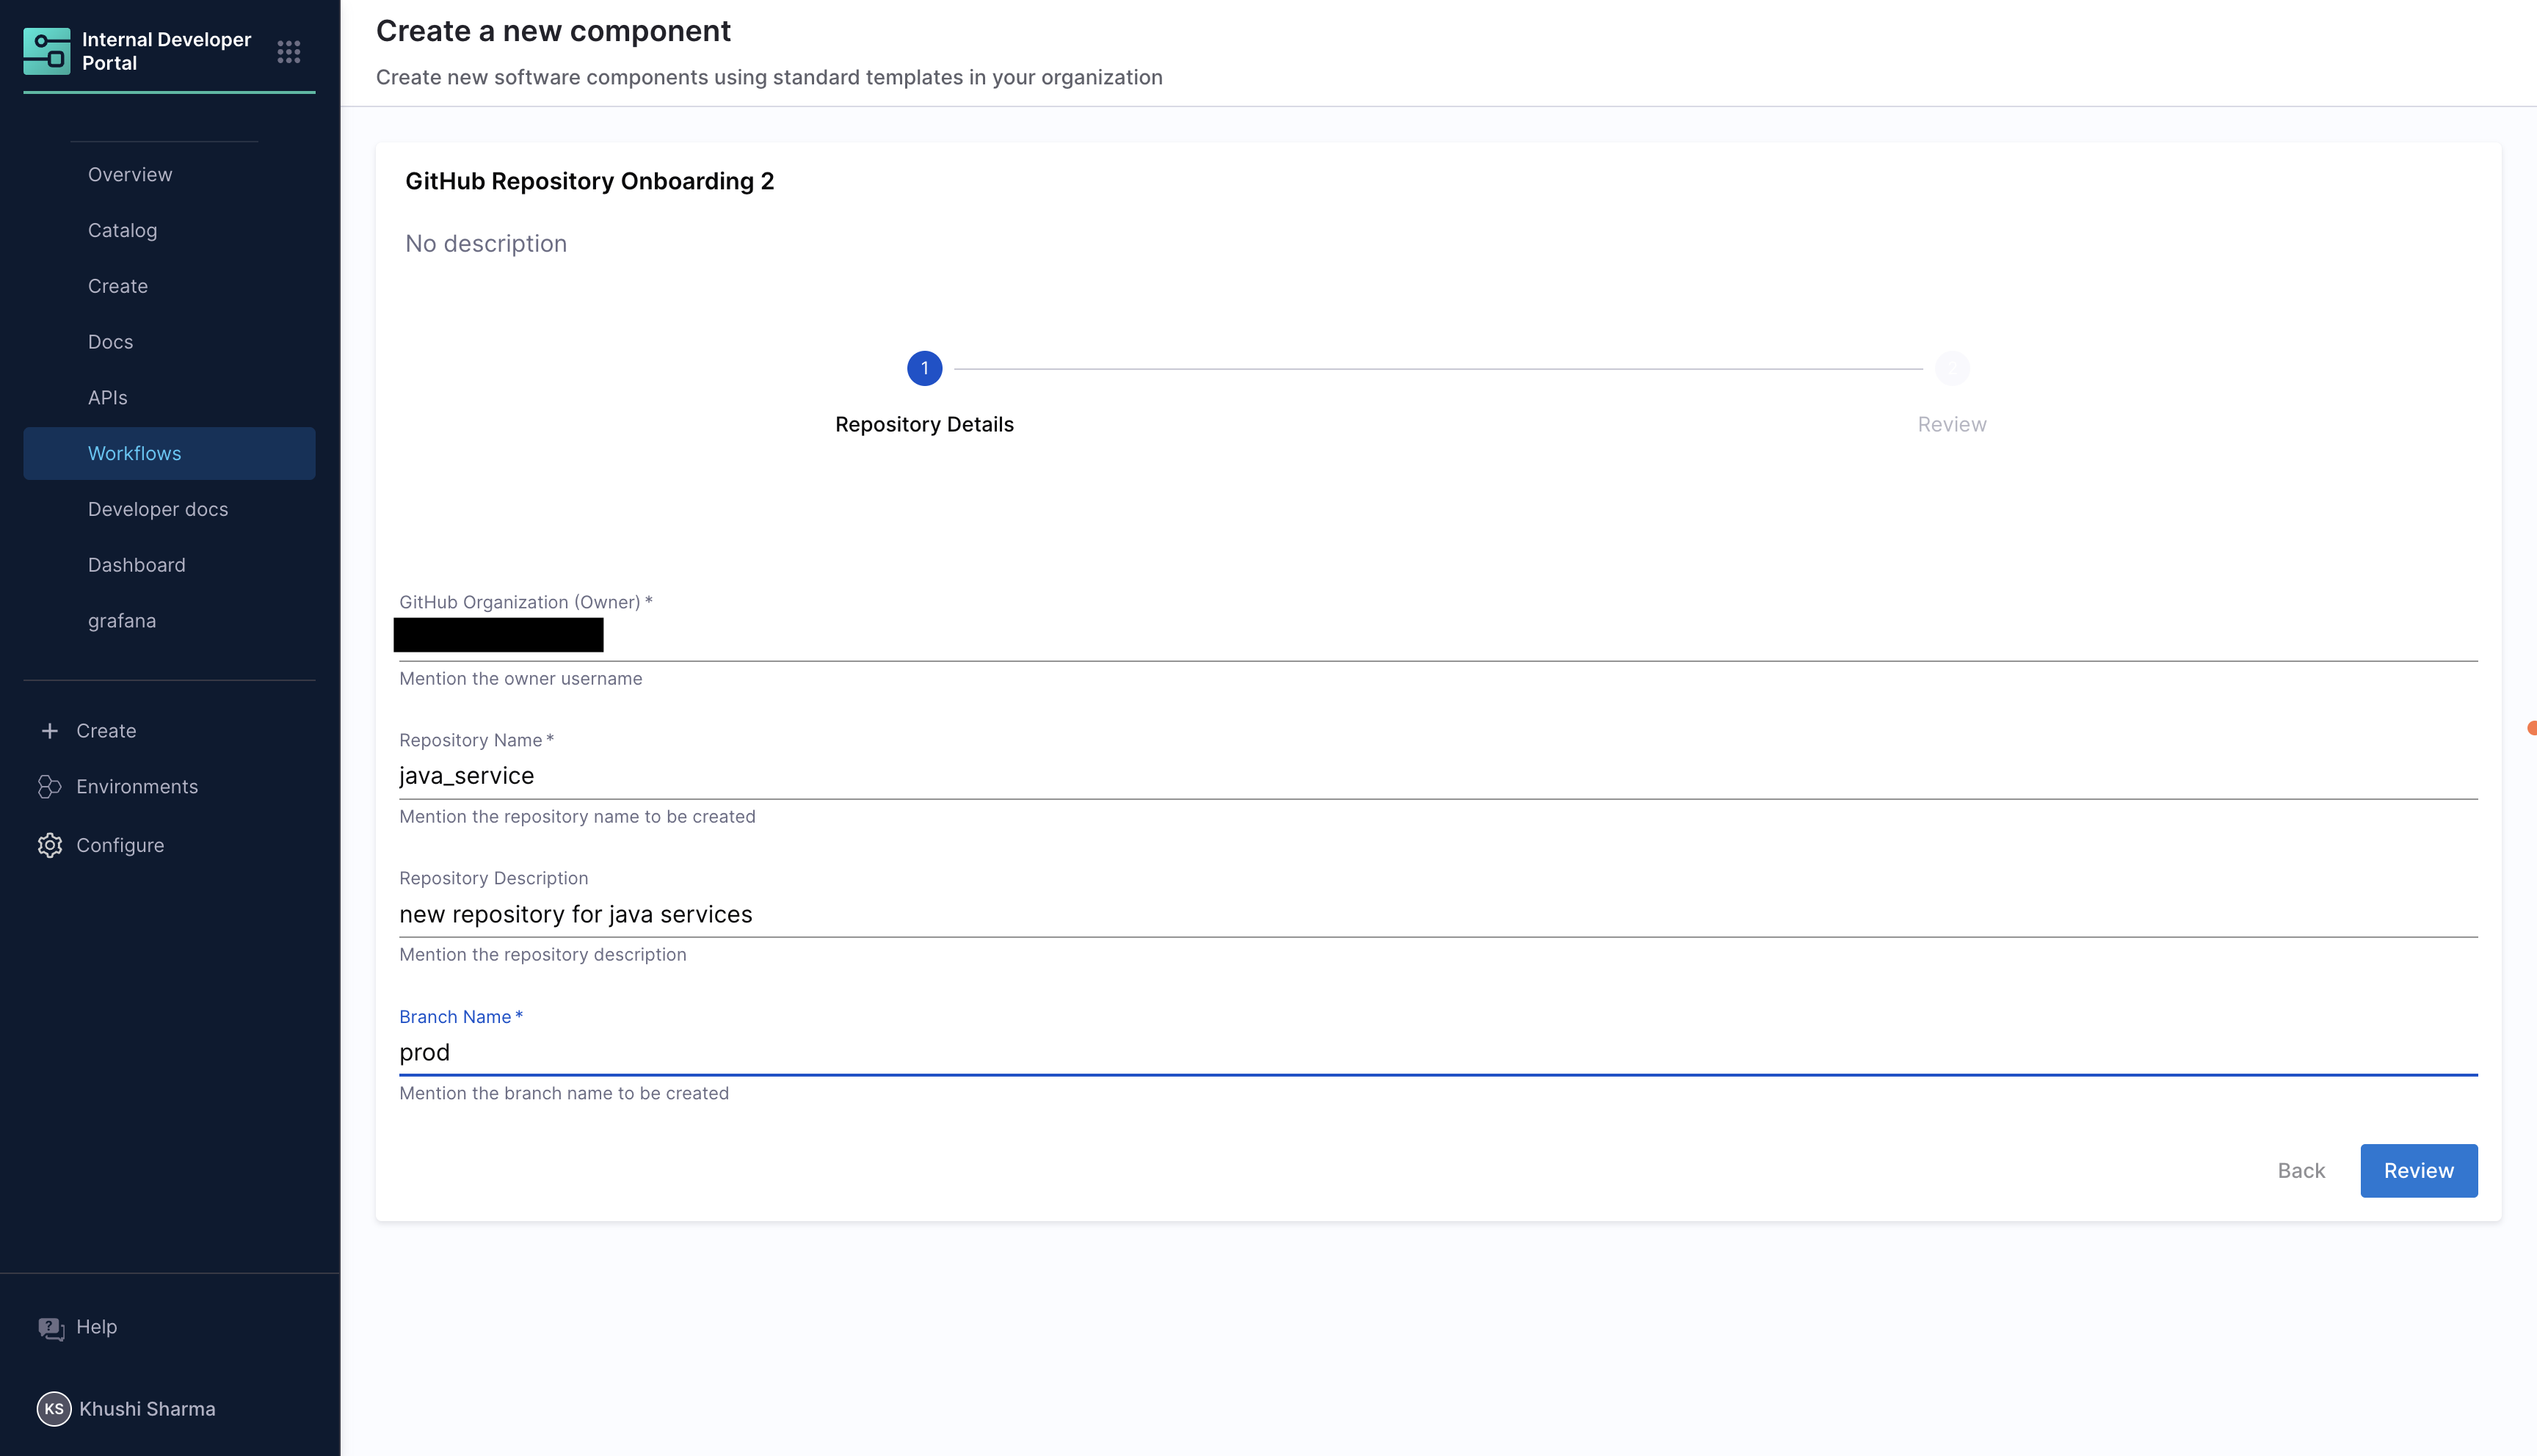
Step 1: Navigate to IDP workflows
- Go to Harness IDP in your Harness account
- Navigate to Workflows in the left sidebar
- Click "Create Workflow" to start creating a new workflow
Step 2: Configure basic workflow settings
- Workflow Name:
GitHub Repository Onboarding - Identifier:
GitHub_Repository_Onboarding - Description:
Self-service workflow for creating GitHub repositories with automated setup - Owner: Set to your username or team
Step 3: Configure the workflow YAML
Use the following YAML configuration for your workflow:
apiVersion: harness.io/v1
kind: Workflow
name: GitHub Repository Onboarding
identifier: GitHub_Repository_Onboarding
type: workflow
owner: khushi
metadata: {}
spec:
  output:
    links:
      - title: Pipeline Details
        url: ${{ steps.trigger.output.PipelineUrl }}
  lifecycle: production
  parameters:
    - title: Repository Details
      required:
        - orgName
        - repoName
        - branchName
      properties:
        token:
          title: Harness Token
          type: string
          ui:widget: password
          ui:field: HarnessAuthToken
        orgName:
          title: GitHub Organization (Owner)
          type: string
          description: Mention the owner username
        repoName:
          title: Repository Name
          type: string
          description: Mention the repository name to be created
        repoDesc:
          title: Repository Description
          type: string
          description: Mention the repository description
        branchName:
          title: Branch Name
          type: string
          description: Mention the branch name to be created
  steps:
    - id: trigger
      name: Creating your new repository
      action: trigger:harness-custom-pipeline
      input:
        url: <PIPELINE-URL>
        inputset:
          org_name: ${{ parameters.orgName }}
          repo_name: ${{ parameters.repoName }}
          repo_desc: ${{ parameters.repoDesc }}
          repo_branch_name: ${{ parameters.branchName }}
        apikey: ${{ parameters.token }}
Understand the workflow configuration
1️⃣ Input parameters section
The parameters section in the Workflow YAML defines the form fields that developers will fill out:
Required Fields:
- orgName: GitHub organization where the repository will be created.
- repoName: Name of the new repository.
- branchName: Initial feature branch name.
Optional Fields:
- repoDesc: Description for the repository
Authentication:
- token: Harness API token for pipeline execution (automatically handled)
2️⃣ Steps section
The Workflow contains one main step:
trigger Step:
- Purpose: Triggers the GitHub Repository Onboarding pipeline
- Action:
trigger:harness-custom-pipeline - Input Mapping: Maps input form parameters to pipeline variables
3️⃣ Output section
Pipeline Details Link:
- Provides a direct link to view the pipeline execution
Workflow YAML configuration
Workflow YAML Configuration
apiVersion: harness.io/v1
kind: Workflow
name: GitHub Repository Onboarding
identifier: GitHub_Repository_Onboarding
type: workflow
owner: khushi
metadata: {}
spec:
  output:
    links:
      - title: Pipeline Details
        url: ${{ steps.trigger.output.PipelineUrl }}
  lifecycle: production
  parameters:
    - title: Repository Details
      required:
        - orgName
        - repoName
        - branchName
      properties:
        token:
          title: Harness Token
          type: string
          ui:widget: password
          ui:field: HarnessAuthToken
        orgName:
          title: GitHub Organization (Owner)
          type: string
          description: Mention the owner username
        repoName:
          title: Repository Name
          type: string
          description: Mention the repository name to be created
        repoDesc:
          title: Repository Description
          type: string
          description: Mention the repository description
        branchName:
          title: Branch Name
          type: string
          description: Mention the branch name to be created
  steps:
    - id: trigger
      name: Creating your new repository
      action: trigger:harness-custom-pipeline
      input:
        url: <PIPELINE-URL>
        inputset:
          org_name: ${{ parameters.orgName }}
          repo_name: ${{ parameters.repoName }}
          repo_desc: ${{ parameters.repoDesc }}
          repo_branch_name: ${{ parameters.branchName }}
        apikey: ${{ parameters.token }}
Tutorial outcome
This tutorial creates a complete self-service GitHub repository onboarding system. Here is what happens when a developer uses your workflow:
🚀 Developer experience (in a nutshell)
- Developer Action: Fills out a simple form in Harness IDP with repository details
- Workflow Execution: Submits the form and receives immediate confirmation
- Pipeline Automation: 7-step pipeline executes automatically in the background
- Repository Ready: Fully configured repository appears in your GitHub organization
Automated outcomes in your GitHub organization
When the pipeline completes successfully, the following will be automatically created and configured in your GitHub organization:
Repository Structure:
- ✅ New GitHub repository with the specified name and description
- ✅ Feature branch created for initial development work
- ✅ Standard project files generated and committed:
README.mdwith project documentation templatedemo.yamlwith project metadata and configuration.gitignorewith comprehensive exclusion rules
Security Configuration:
- ✅ Branch protection rules applied to the main branch:
- Requires pull request reviews (1 approval minimum)
- Dismisses stale reviews when new commits are added
- Requires code owner reviews when applicable
- Enforces status checks (ci/build, ci/test) before merging
- Applies rules to administrators as well
CI/CD Integration:
- ✅ Webhook configured for automated pipeline triggering:
- Monitors
push,pull_requestandreleaseevents - Sends JSON payloads to your specified webhook URL
- Monitors
End result
Developers can now create production-ready repositories in minutes instead of hours, with all security and CI/CD configurations applied automatically. The platform team maintains control over standards while enabling developer self-service at scale.