Provision Infrastructure using IDP and IaCM
This tutorial is designed to help a platform engineer to get started with Harness IDP. We will create a basic infrastructure provisioning pipeline using IaCM that takes input from software template and provisions an ec2 instance for a developer. After you create the software template, developers can choose the template on the Workflow page and enter details such as a the owner user-group and the Git repository. The IaCM pipeline handles change management by creating a JIRA ticket followed by the IaCM stage containing the terraform scripts. Once the infra is provisioned we do the Governance Management using the OPA.
Users (developers) must perform a sequence of tasks to provision the infrastructure. First, they interact with a software template. A software template is a form that collects a user's requirements. After a user submits the form, IDP executes a Harness IaCM pipeline that provisions the new ec2 instance.
Prerequisites
Before you begin this tutorial, make sure that you have completed the following requirements:
- Enable Harness IDP and Harness IaCM for your account.
- Make sure you are assigned the IDP Admin Role or another role that has full access to all IDP resources along with the IACM Workspace.
- Create a Service Now and JIRA connector with access to the projects where you want to create the tickets for provisioning the pipeline.
- Create a Connector for AWS.
- Create a connector for git provider
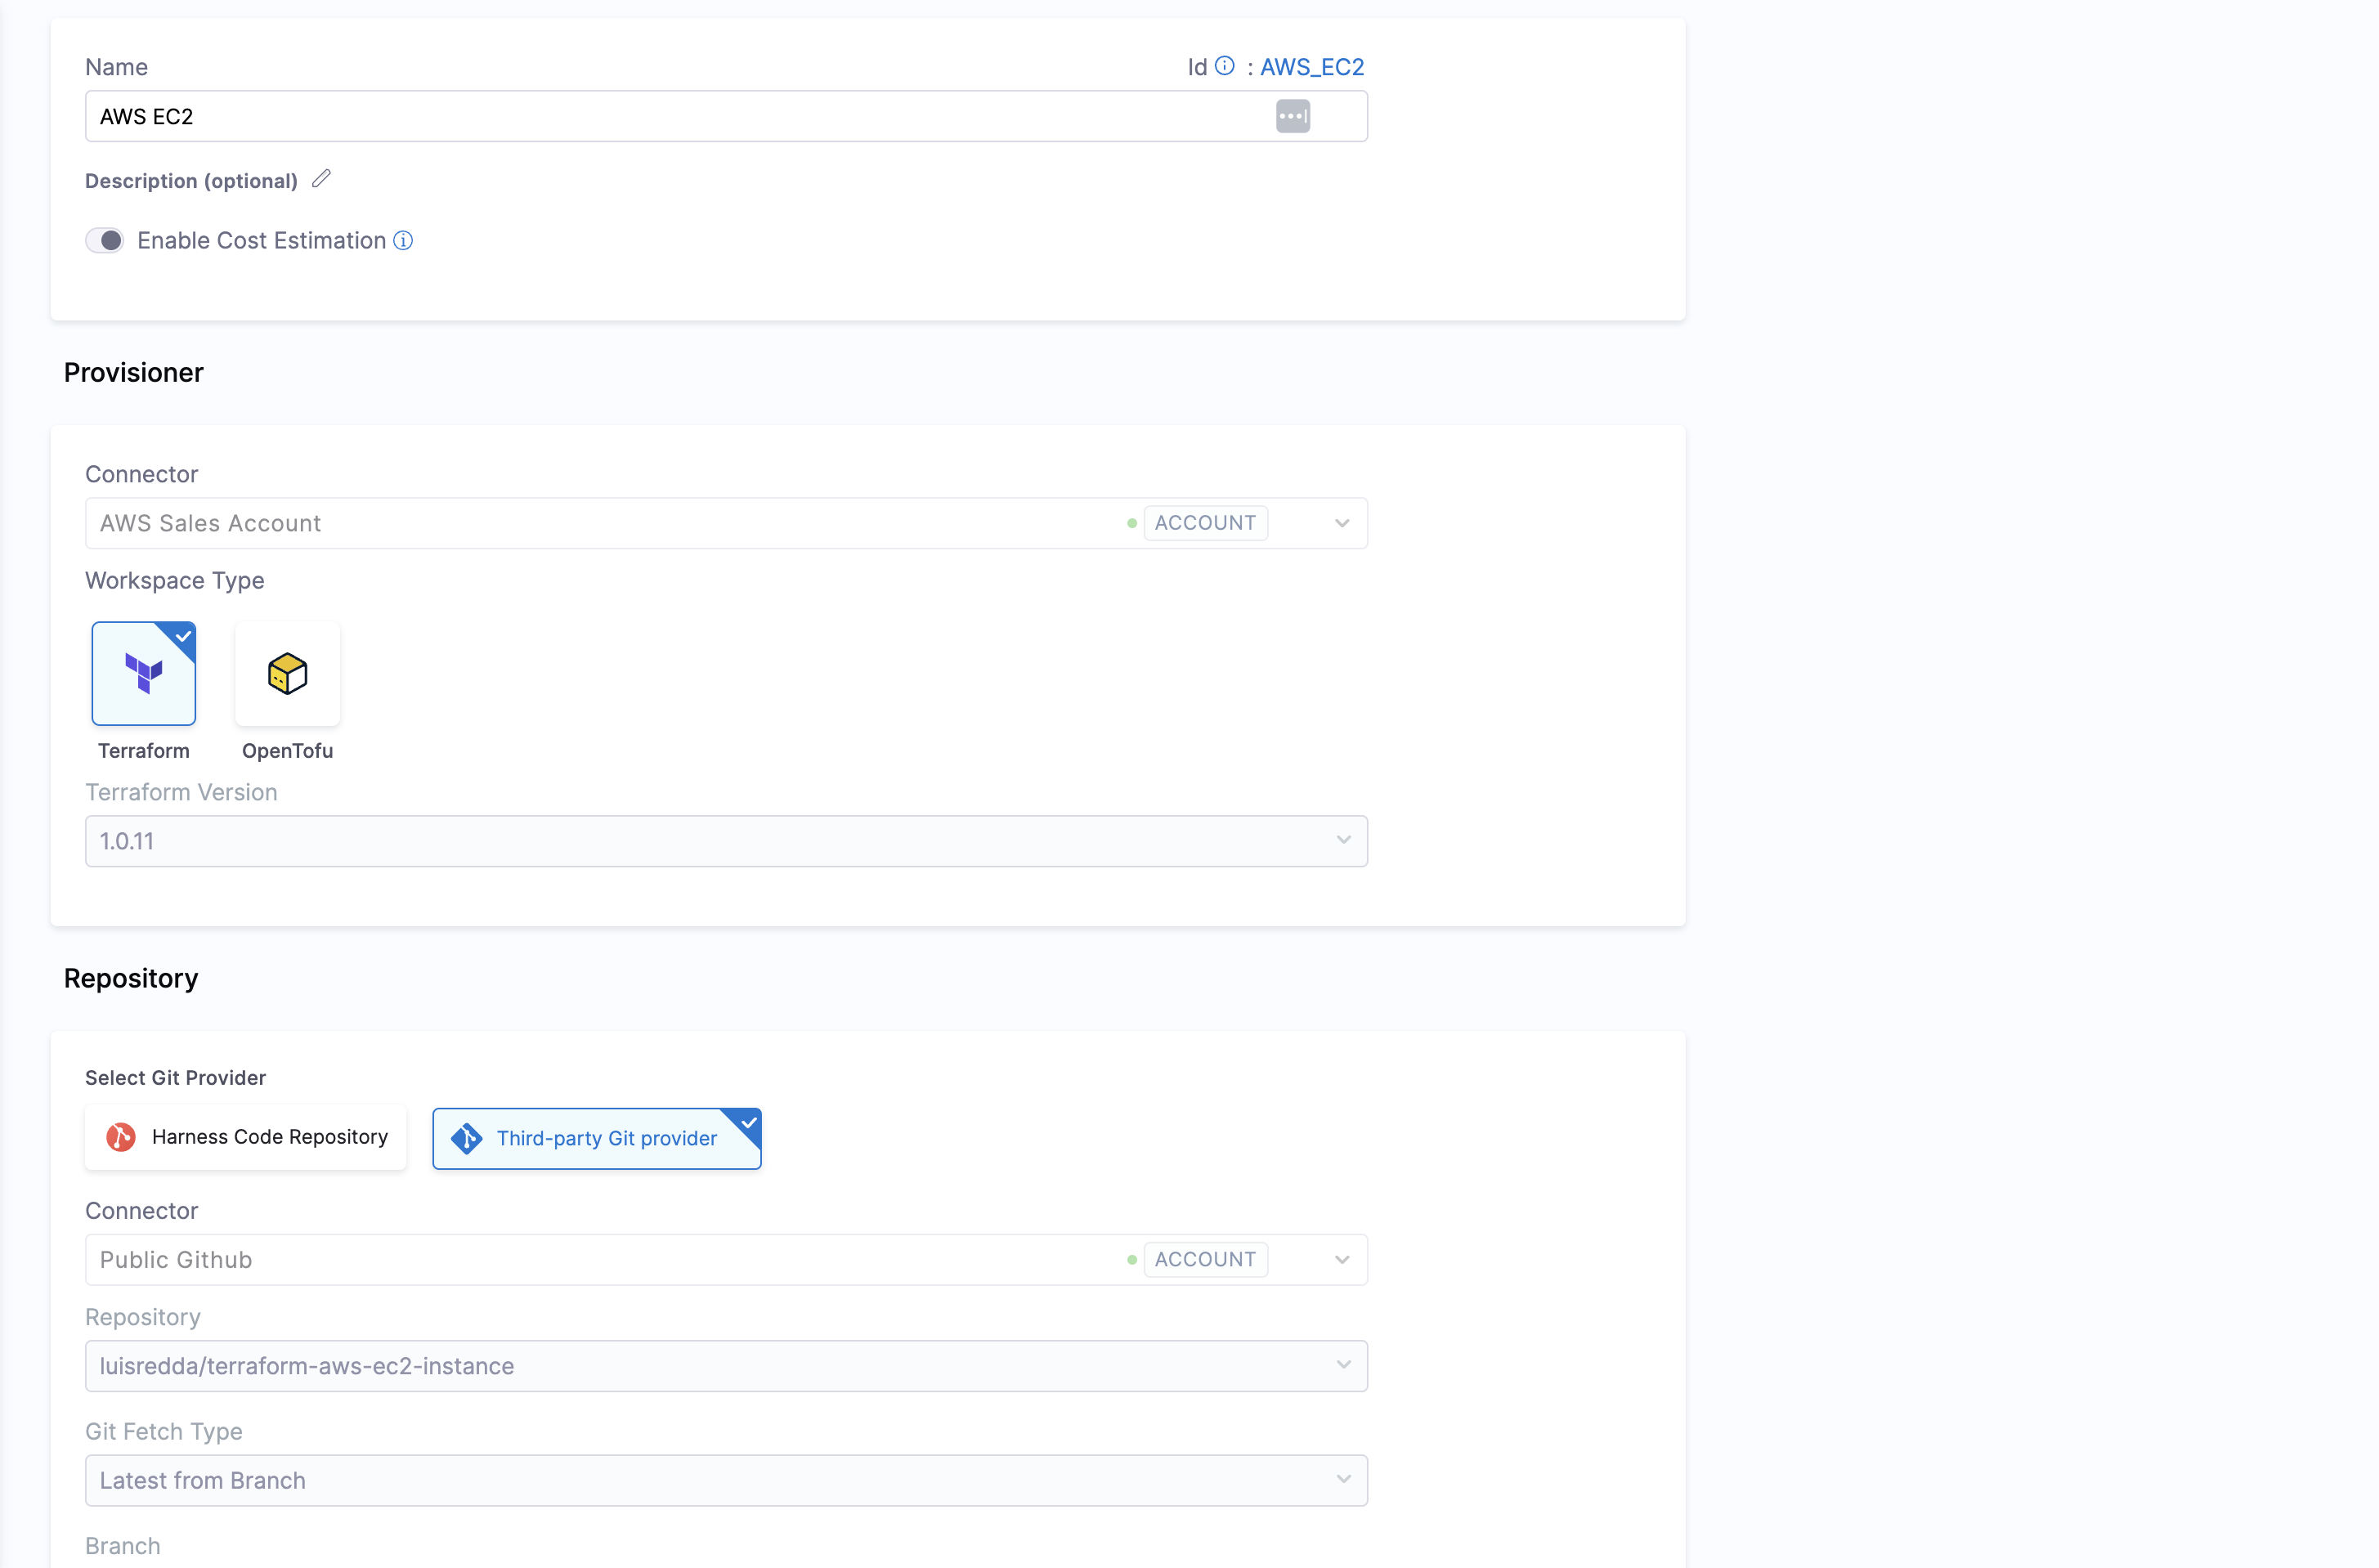
- Create a Workspace using the AWS Connector created above. Also use the following repository for the workspace and add the branch as
masterand file path as.
Create a Pipeline
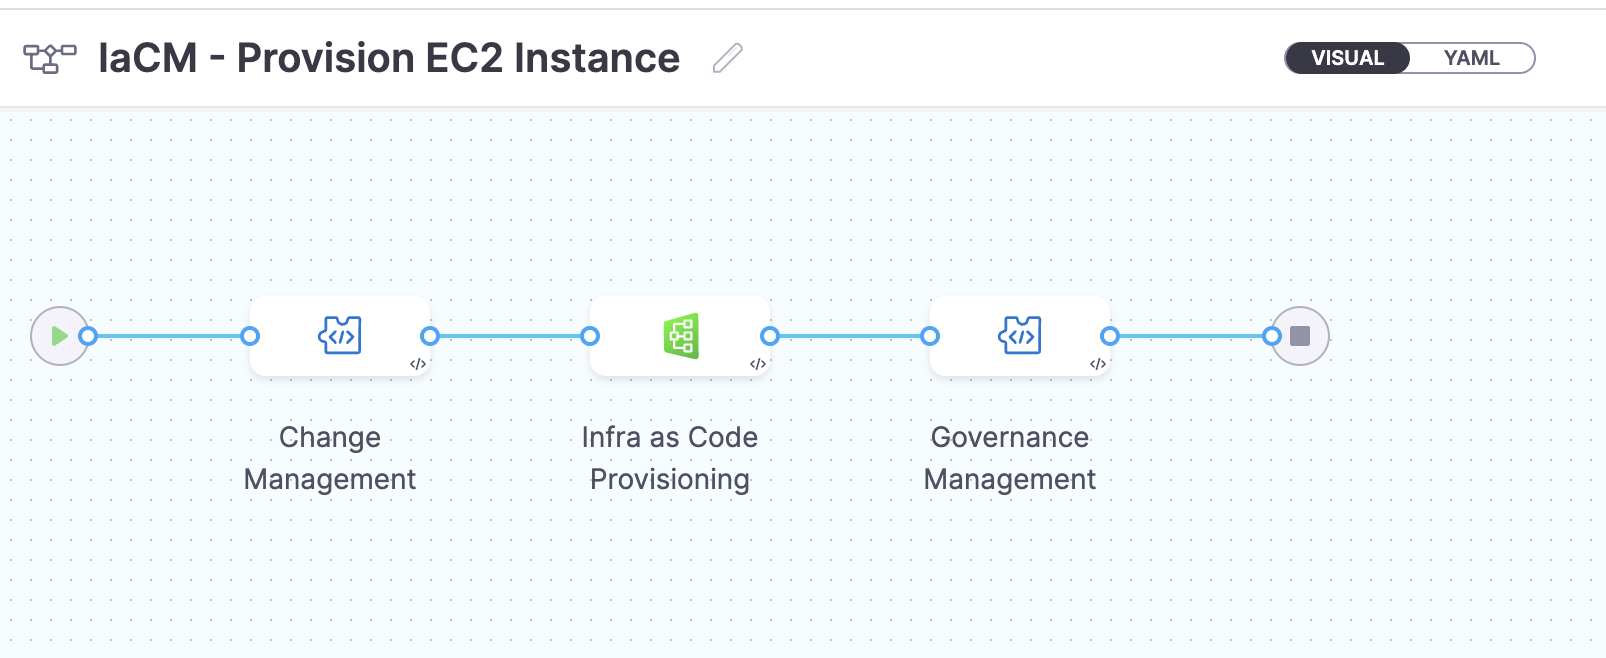
Begin by creating a pipeline for provisioning infrastructure
To create a Developer Portal stage, perform the following steps:
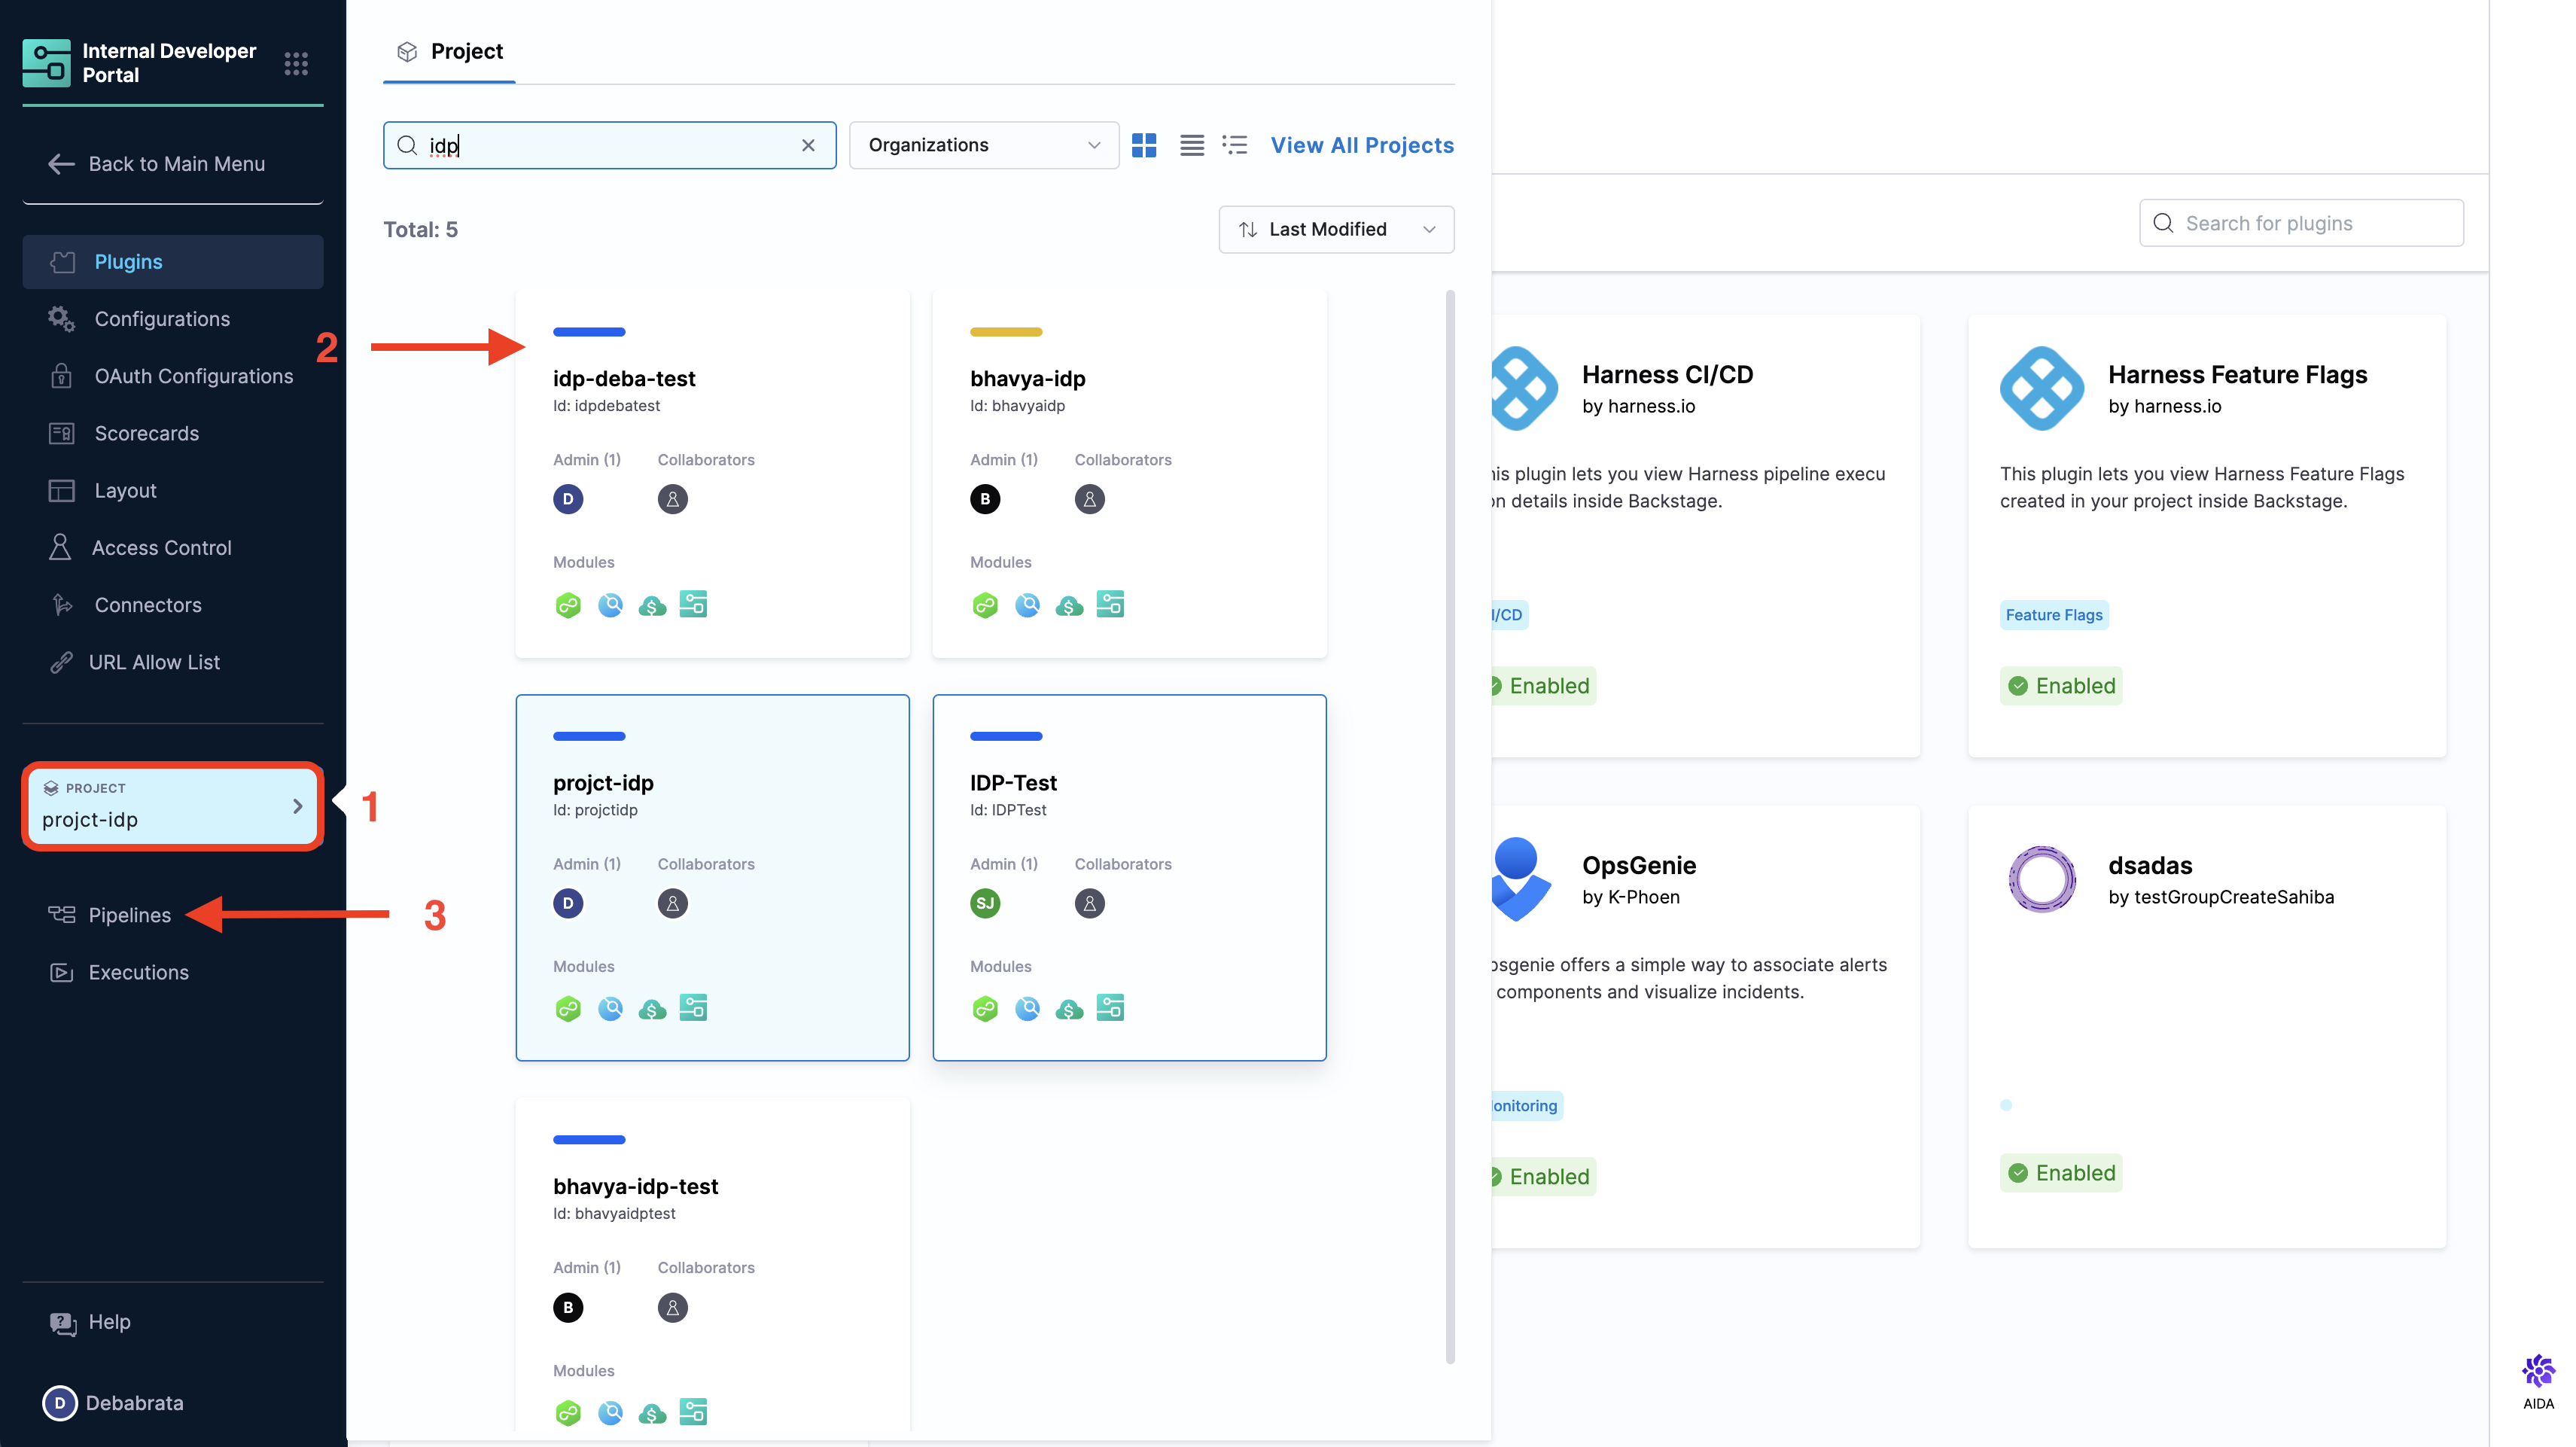
- Go to Admin section under IDP, select Projects, and then select a project.
You can also create a new project for the service onboarding pipelines. Eventually, all the users in your account should have permissions to execute the pipelines in this project. For information about creating a project, go to Create organizations and projects.
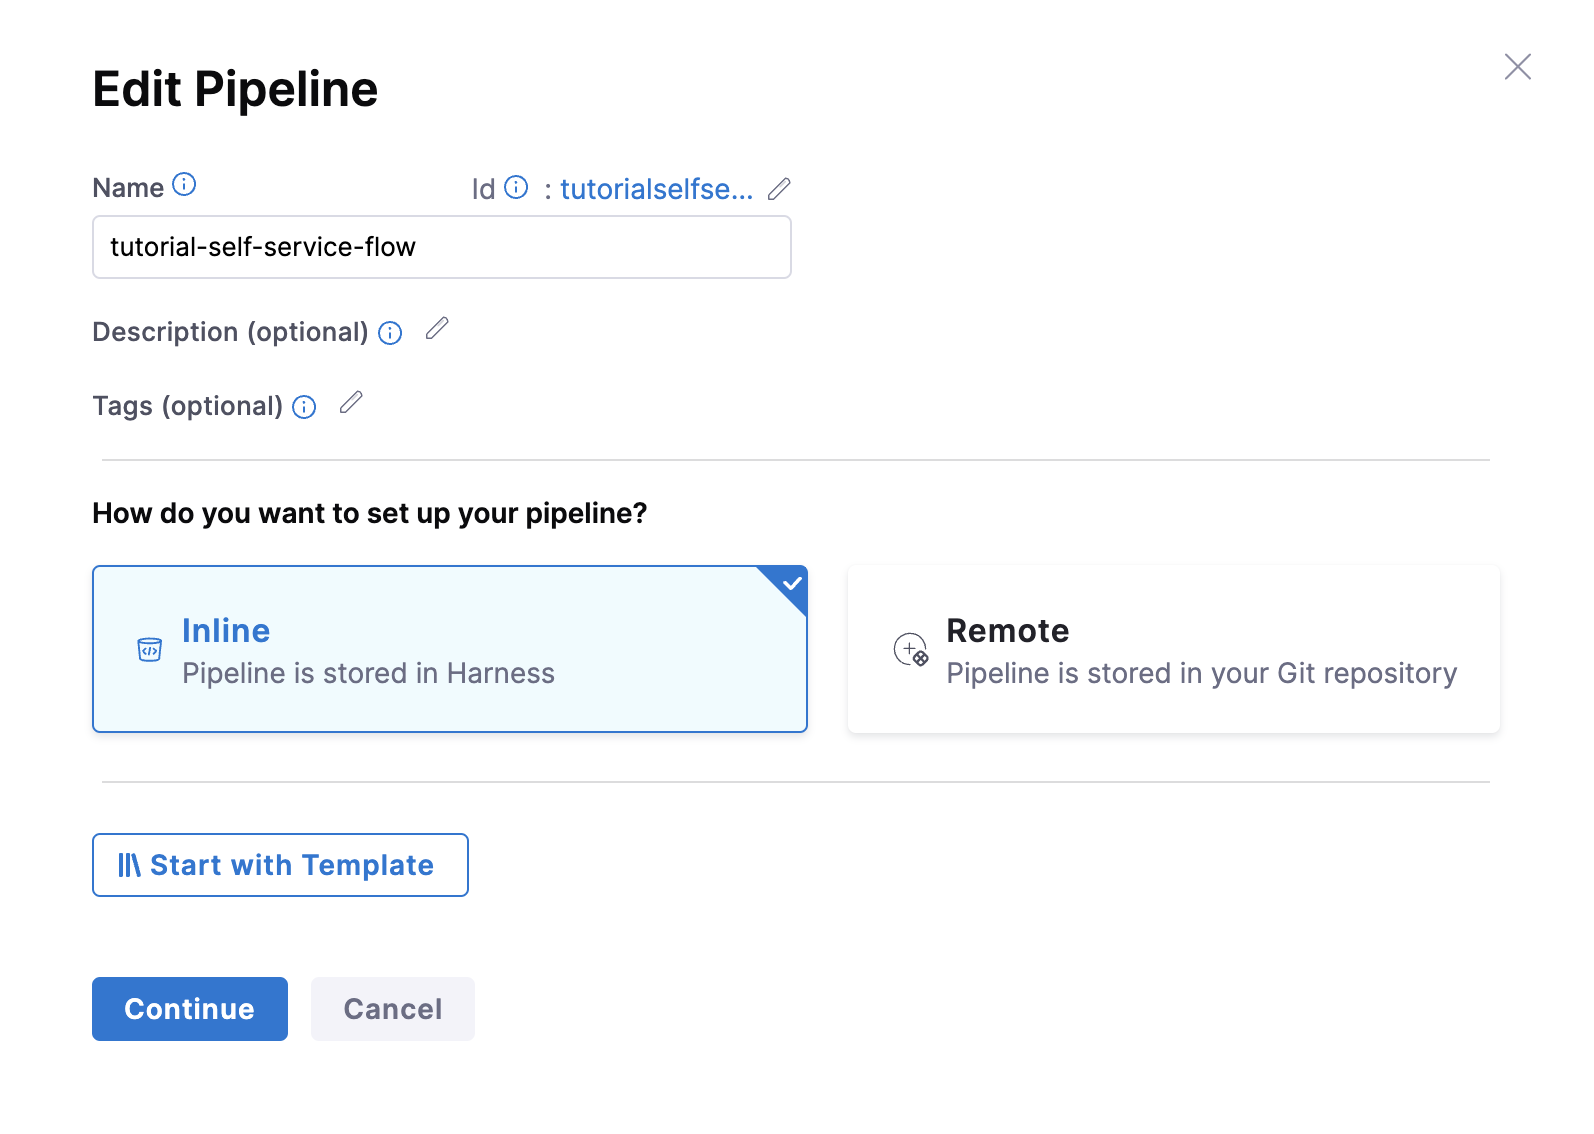
- Then select Create a Pipeline, add a name for the pipeline and select the type as Inline
- The YAML below defines an IaCM stage with a number of steps as described here that will perform the actions provision the infrastructure. Copy the YAML below, then in the Harness Pipeline Studio go to the YAML view and paste below the existing YAML.
You need to have completed all the steps under PreRequisites for the below given YAML to work properly
Please update the connectorRef: <the_connector_name_you_created_under_prerequisites> for all the steps it's used.
pipeline:
  name: IaCM - Provision EC2 Instance
  identifier: IaCM_Provision_EC2_Instance
  projectIdentifier: IDP_TEST
  orgIdentifier: default
  tags: {}
  stages:
    - stage:
        name: Change Management
        identifier: Change_Management
        description: ""
        type: Custom
        spec:
          execution:
            steps:
              - step:
                  type: JiraCreate
                  name: Create JIRA Ticket
                  identifier: Create_JIRA_Ticket
                  spec:
                    connectorRef: <the_connector_name_you_created_under_prerequisites>
                    projectKey: <the_project_id_where_you want_to>
                    issueType: Task
                    fields:
                      - name: Summary
                        value: Provisioning EC2 Machine
                  timeout: 10m
              - step:
                  type: ServiceNowCreate
                  name: Create ServiceNow Change Task
                  identifier: Create_ServiceNow_Change_Task
                  spec:
                    connectorRef: <the_connector_name_you_created_under_prerequisites>
                    ticketType: change_task
                    fields:
                      - name: description
                        value: Provisioning EC2 Instance
                      - name: short_description
                        value: <+pipeline.stages.Infra_as_Code_Provisioning.name>
                    createType: Normal
                  timeout: 10m
                  when:
                    stageStatus: Success
                    condition: "false"
          platform:
            os: Linux
            arch: Amd64
          runtime:
            type: Cloud
            spec: {}
        tags: {}
    - stage:
        name: Infra as Code Provisioning
        identifier: Infra_as_Code_Provisioning
        description: ""
        type: IACM
        spec:
          platform:
            os: Linux
            arch: Amd64
          runtime:
            type: Cloud
            spec: {}
          workspace: <NAME_OF_THE_WORKSPACE_YOU_CREATED>
          execution:
            steps:
              - step:
                  type: IACMTerraformPlugin
                  name: init
                  identifier: init
                  timeout: 10m
                  spec:
                    command: init
              - parallel:
                  - step:
                      type: Plugin
                      name: tflint
                      identifier: tflint
                      spec:
                        uses: https://github.com/urischeiner/tflint-iacm.git
                  - step:
                      type: Plugin
                      name: tfsec
                      identifier: tfsec
                      spec:
                        uses: https://github.com/urischeiner/tfsec-iacm.git
                  - step:
                      type: IACMTerraformPlugin
                      name: detect-drift
                      identifier: detectdrift
                      spec:
                        command: detect-drift
                      timeout: 10m
                      failureStrategies:
                        - onFailure:
                            errors:
                              - Unknown
                            action:
                              type: MarkAsSuccess
              - step:
                  type: IACMTerraformPlugin
                  name: plan
                  identifier: plan
                  timeout: 10m
                  spec:
                    command: plan
              - step:
                  type: Run
                  name: Export Plan
                  identifier: Export_Plan
                  spec:
                    shell: Bash
                    command: |+
                      tfplan=$(cat <+pipeline.stages.Infra_as_Code_Provisioning.spec.execution.steps.plan.output.outputVariables.parsedPlan> | sed -E 's/"(secret_key|access_key)":\{"value":"[^"]*"\}/"\1":{"value":""}/g')


                    outputVariables:
                      - name: tfplan
              - step:
                  type: IACMApproval
                  name: Approval
                  identifier: Approval
                  spec:
                    autoApprove: false
                  timeout: 1h
                  failureStrategies:
                    - onFailure:
                        errors:
                          - Timeout
                        action:
                          type: MarkAsSuccess
                  when:
                    stageStatus: Success
              - step:
                  type: IACMTerraformPlugin
                  name: apply
                  identifier: apply
                  timeout: 10m
                  spec:
                    command: apply
        tags: {}
    - stage:
        name: Governance Management
        identifier: Update_Change_Management
        description: ""
        type: Custom
        spec:
          execution:
            steps:
              - step:
                  type: Policy
                  name: Terraform OPA Compliance Check
                  identifier: Terraform_OPA_Compliance_Check
                  spec:
                    policySets:
                      - account.Terraform_EC2_Compliance
                    type: Custom
                    policySpec:
                      payload: <+pipeline.stages.Infra_as_Code_Provisioning.spec.execution.steps.Export_Plan.output.outputVariables.tfplan>
                  timeout: 10m
              - step:
                  type: JiraUpdate
                  name: Update JIRA Ticket
                  identifier: Update_JIRA_Ticket
                  spec:
                    connectorRef: account.Harness_JIRA
                    issueKey: <+pipeline.stages.Change_Management.spec.execution.steps.Create_JIRA_Ticket.issue.key>
                    transitionTo:
                      transitionName: ""
                      status: Approved
                    fields:
                      - name: Comment
                        value: "New EC2 Instance Provisioned by Harness. \\\\ Please find below the instance details: \\\\ Id: <+pipeline.stages.Infra_as_Code_Provisioning.spec.execution.steps.apply.output.outputVariables.id> \\\\ Instance Count: <+pipeline.stages.Infra_as_Code_Provisioning.spec.execution.steps.apply.output.outputVariables.instance_count> \\\\ State: <+pipeline.stages.Infra_as_Code_Provisioning.spec.execution.steps.apply.output.outputVariables.instance_state> \\\\ Private Ip: <+pipeline.stages.Infra_as_Code_Provisioning.spec.execution.steps.apply.output.outputVariables.private_ip> \\\\ Public Ip: <+pipeline.stages.Infra_as_Code_Provisioning.spec.execution.steps.apply.output.outputVariables.public_ip> \\\\ Tags: <+pipeline.stages.Infra_as_Code_Provisioning.spec.execution.steps.apply.output.outputVariables.tags> \\\\ \\\\ OPA Policy Status: <+pipeline.stages.Update_Change_Management.spec.execution.steps.Terraform_OPA_Compliance_Check.output.policySetDetails.get(\"account.Terraform_EC2_Compliance\").policyDetails.get(\"account.AWS_Required_Tags\").status> \\\\ Messages: <+pipeline.stages.Update_Change_Management.spec.execution.steps.Terraform_OPA_Compliance_Check.output.policySetDetails.get(\"account.Terraform_EC2_Compliance\").policyDetails.get(\"account.AWS_Required_Tags\").denyMessages> \\\\"
                  timeout: 10m
          platform:
            os: Linux
            arch: Amd64
          runtime:
            type: Cloud
            spec: {}
        tags: {}
  variables:
    - name: owner
      type: String
      description: ""
      required: false
      value: <+input>.default(Field_Engineering)
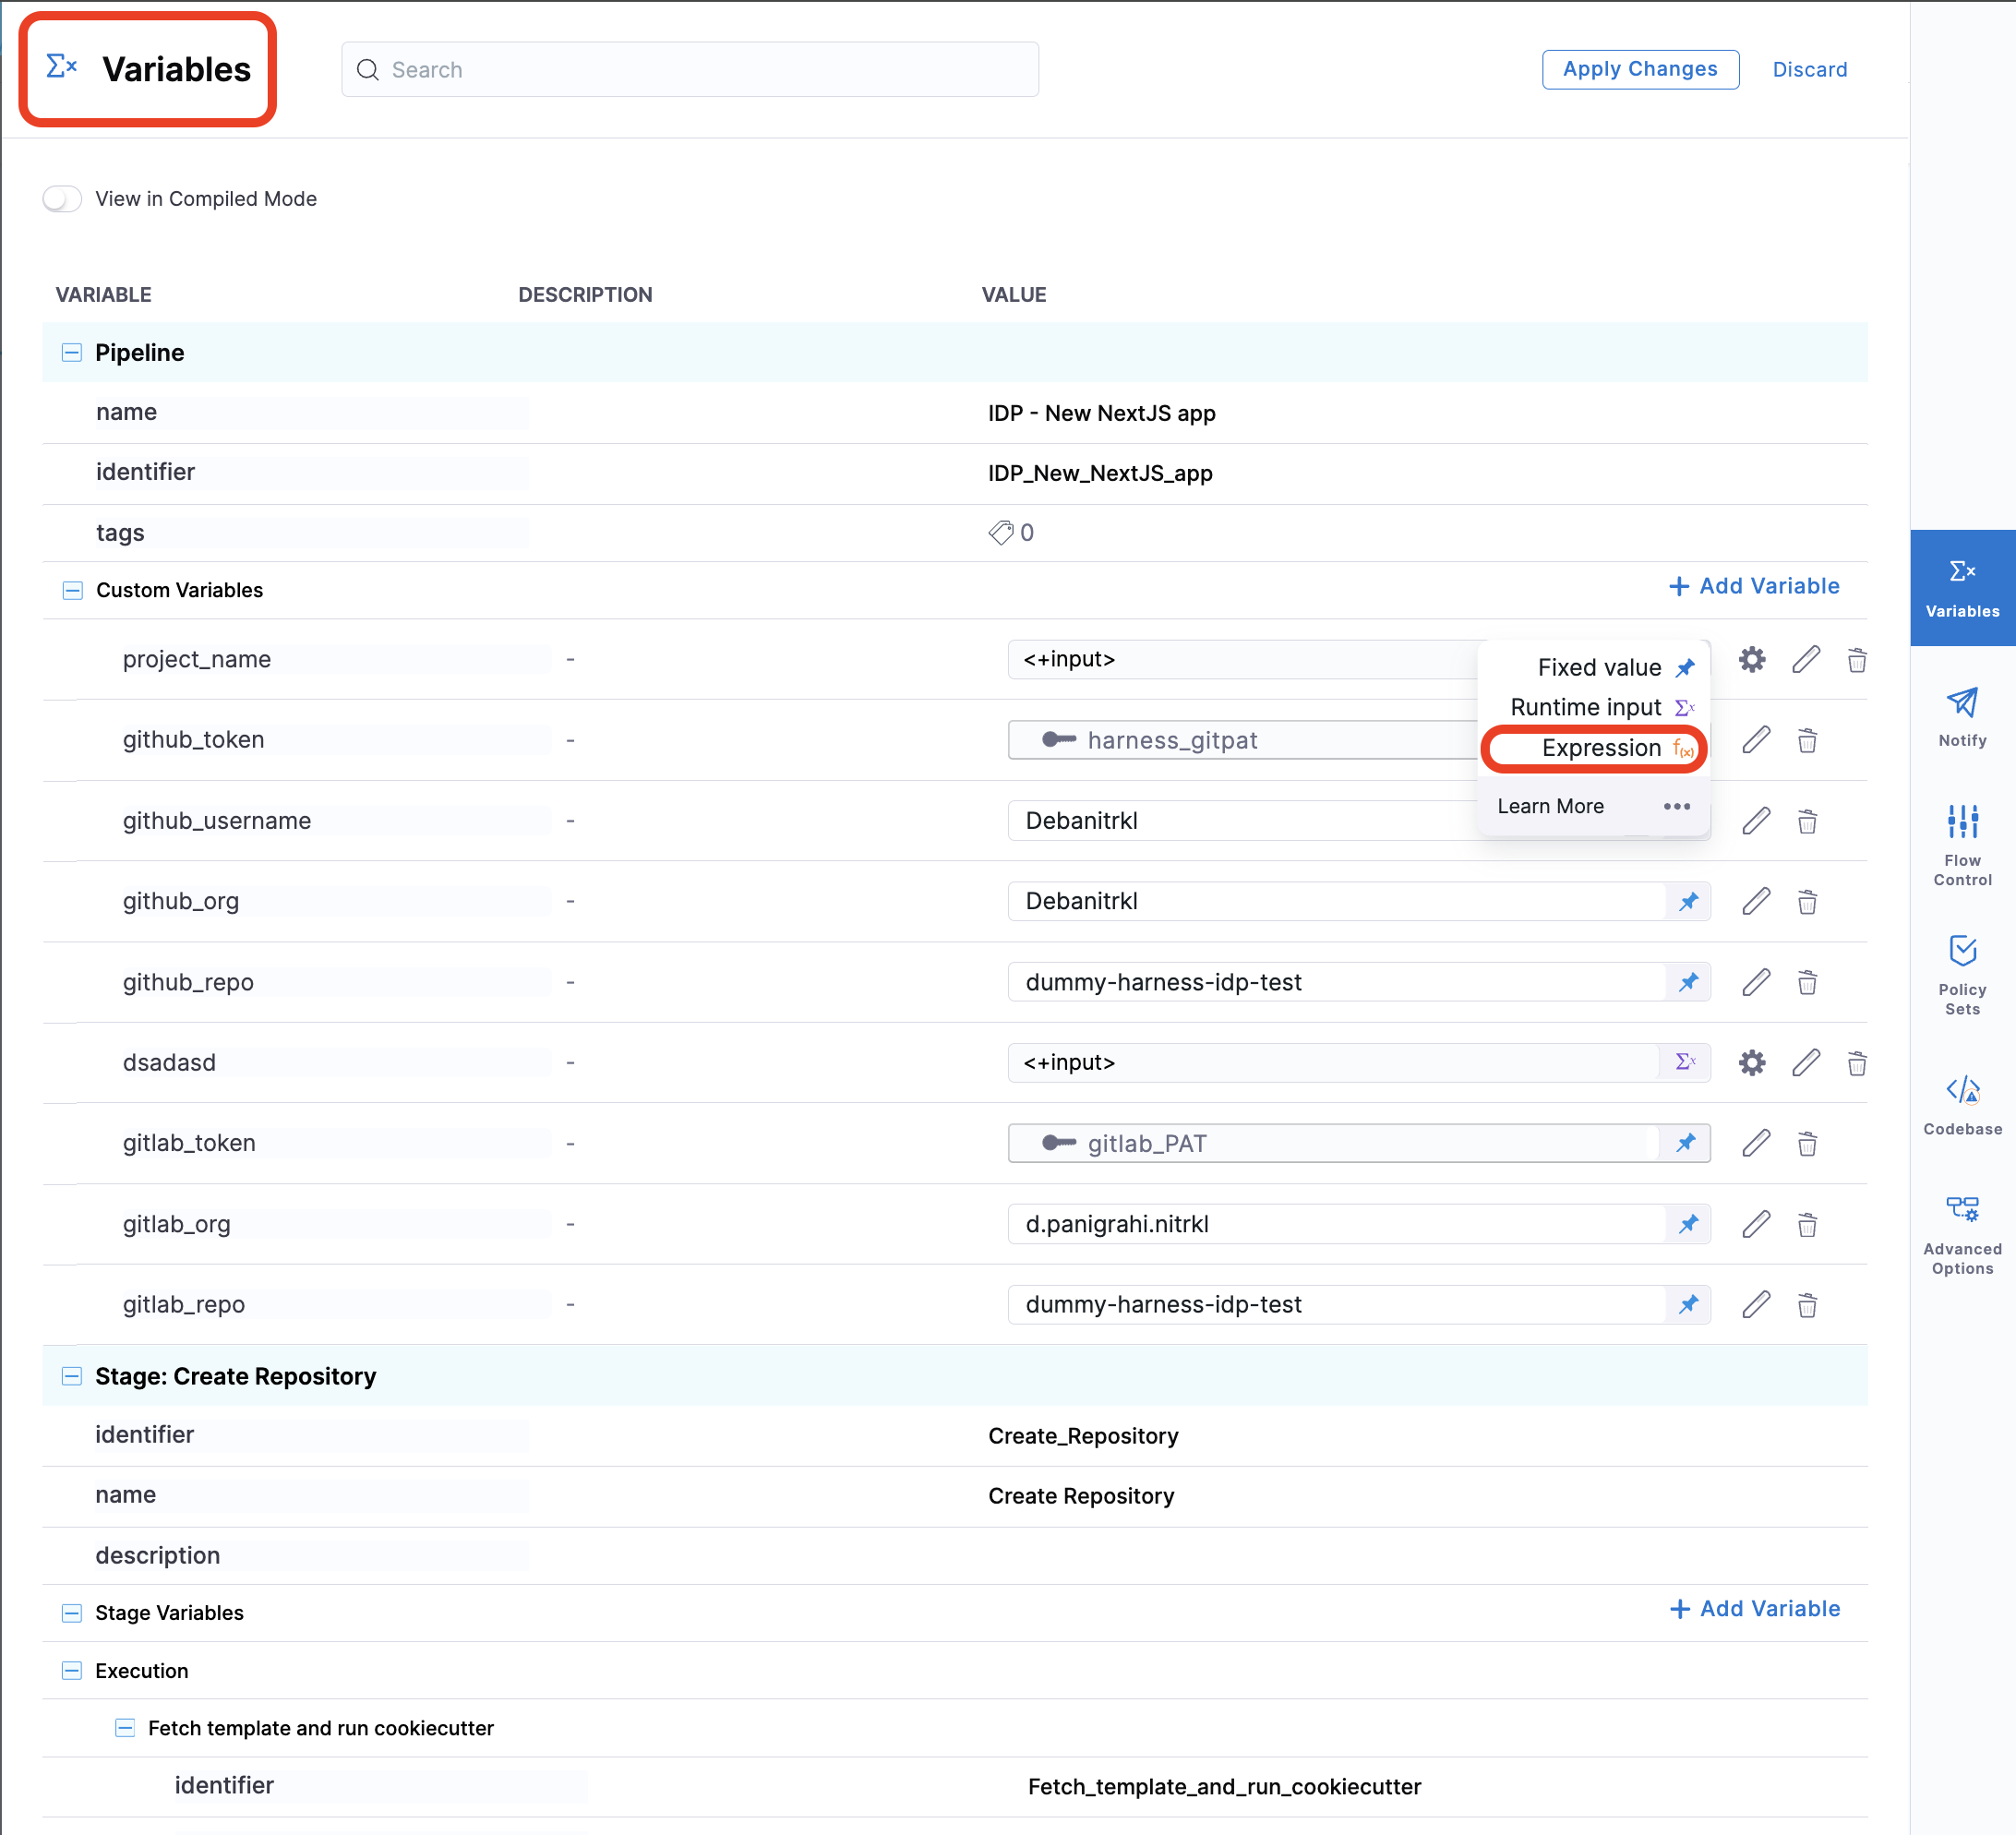
- Now Save the pipeline.
All inputs, except for pipeline input as variables, must be of fixed value.
Create a Workflow
Now that our pipeline is ready to execute when a project name and a GitHub repository name are provided, let's create the UI counterpart of it in IDP. Create a workflow.yaml file anywhere in your Git repository.
In the following workflow.yaml we have added few enums to choose from the available list of options like for the instance_type, ami, subnet and vpc. Team responsible for infrastructure provisioning is expected to fill this enums with available possibilities for the ease of developers to just select form the available options.
apiVersion: scaffolder.backstage.io/v1beta3
kind: Template
metadata:
  name: harness_iac
  title: Create Infra via Harness IaCM
  description: Uses Harness-IaCM to dynamically provision any required infrastructure.
  tags:
    - tf
    - aws
    - gcp
    - azure
spec:
  owner: iacm_team
  type: environment
  parameters:
    - title: Project and Repo Details
      required:
        - owner
        - github_repo
      properties:
        owner:
          title: Choose the Owner
          type: string
          ui:field: OwnerPicker
          ui:options: null
        github_repo:
          title: What App/Repo will this infra be associated with?
          type: string
          description: someRepoName
        token:
          title: Harness Token
          type: string
          ui:widget: password
          ui:field: HarnessAuthToken
    - title: Infrastructure Details
      properties:
        cloud_provider:
          title: Choose a cloud provider
          type: string
          enum:
            - GCP
            - AWS
            - Azure
            - OCI
          default: AWS
        tech_stack:
          title: Choose the Underlying Infra
          type: string
          enum:
            - K8s
            - VM
            - ECS
            - Lambda
          default: VM
        instance_type:
          title: Chose the Instance Type
          type: string
          enum:
            - t2.micro
            - t2.large
            - t3.2xlarge
            - other
          default: t2.micro
        ami:
          title: Choose desired AMI
          type: string
          enum:
            - ami-***************
            - ami-***************
          default: ami-***************
        subnet:
          title: Choose desired subnet
          type: string
          enum:
            - Create New
            - subnet-***************
            - subnet-***************
          default: subnet-***************
        vpc:
          title: Choose VPC security group
          type: string
          enum:
            - Create New
            - sg-***************
            - sg-***************
          default: sg-***************
        count:
          title: Choose desired instance count (i.e. How many VMs?)
          type: string
          default: "1"
  steps:
    - id: trigger
      name: Provisioning your Infrastructure
      action: trigger:harness-custom-pipeline
      input:
        url: YOUR PIPELINE URL HERE
        inputset:
          owner: ${{ parameters.owner }}
          instancetype: ${{ parameters.instance_type }}
          ami: ${{ parameters.ami }}
          subnet: ${{ parameters.subnet }}
          vpc: ${{ parameters.vpc }}
        apikey: ${{ parameters.token }}
  output:
    links:
      - title: Pipeline Details
        url: ${{ steps.trigger.output.PipelineUrl }}
Replace the YOUR PIPELINE URL HERE with the pipeline URL that you created.

This YAML code is governed by Backstage. You can change the name and description of the software template.
Authenticating the Request to the Pipeline
The Workflow contains a single action which is designed to trigger the pipeline you created via an API call. Since the API call requires authentication, Harness has created a custom component to authenticate based of the logged-in user's credentials.
The following YAML snippet under spec.parameters.properties automatically creates a token field without exposing it to the end user.
token:
  title: Harness Token
  type: string
  ui:widget: password
  ui:field: HarnessAuthToken
The token property we use to fetch Harness Auth Token is hidden on the Review Step using ui:widget: password, but for this to work the token property needs to be mentioned under the first page in-case you have multiple pages.
# example workflow.yaml
...
parameters:
  - title: <PAGE-1 TITLE>
    properties:
      property-1:
        title: title-1
        type: string
      property-2:
        title: title-2
    token:
      title: Harness Token
      type: string
      ui:widget: password
      ui:field: HarnessAuthToken
  - title: <PAGE-2 TITLE>
    properties:
      property-1:
        title: title-1
        type: string
      property-2:
        title: title-2
  - title: <PAGE-n TITLE>
...
That token is then used as part of steps as apikey
  steps:
    - id: trigger
      name: ...
      action: trigger:harness-custom-pipeline
      input:
        url: ...
        inputset:
          key: value
          ...
        apikey: ${{ parameters.token }}
Register the Workflow in IDP
Use the URL to the workflow.yaml created above and register it by using the same process for registering a new software component.
Use the Self Service Workflows
Now navigate to the Workflows page in IDP. You will see the newly created Workflow appear. Click on Choose, fill in the form, click Next Step, then Create to trigger the automated pipeline. Once complete, you should be able to see the EC2 instance provisioned.