Policy as Code for Overrides
Harness provides governance using Open Policy Agent (OPA), Policy Management, and Rego policies.
You can create a policy and apply it to all overrides in your Account, Org, or Project. The policy is evaluated on override-level events:
- On Save — evaluated when an override is created or updated.
For more details, see the Harness Governance Quickstart.
Prerequisites
- Harness Governance Overview
- Harness Governance Quickstart
- Policies use the OPA authoring language Rego. For more information, see OPA Policy Authoring.
Step 1: Add a policy
-
In Harness, go to Account Settings → Policies → New Policy.
-
Enter a Name for your policy and click Apply.
-
Add your Rego policy in the editor.
You can write your own Rego policy or use a sample from the Library panel. Select the Library tab, choose Entity: Override from the dropdown, and pick one of the built-in samples:
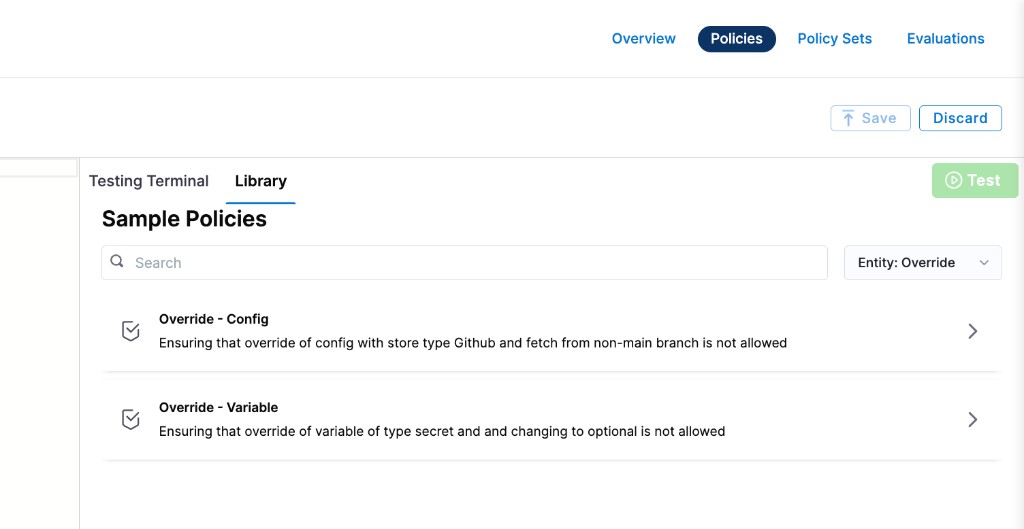
Harness ships two sample policies for overrides:
- Override – Config: Ensures that overriding config files with store type GitHub or fetching from a non-main branch is not allowed.
- Override – Variable: Ensures that overriding a variable of type Secret or changing it to optional is not allowed.
Below are the Rego policies for both samples.
Block config file overrides from GitHub or non-main branches
This policy prevents overriding config files when the store type is GitHub, and also blocks fetching config files from any branch other than main.
package override

deny[msg] {
  input.overrideEntity.configFiles[_].configFile.spec.store.type == "Github"
  msg := "Cannot override config files to fetch from Github"
}

deny[msg] {
  input.overrideEntity.configFiles[_].configFile.spec.store.spec.branch != "main"
  msg := "Cannot override config files to fetch from non main branch"
}
Block variable overrides that are optional or of type Secret
This policy prevents overriding variables to make them optional, and blocks overriding variables of type Secret.
package override

deny[msg] {
  input.overrideEntity.variables[_].required == false
  msg := "Cannot override variables to optional"
}

deny[msg] {
  input.overrideEntity.variables[_].type == "Secret"
  msg := "Cannot override secret variable type"
}
- Click Save.
Step 2: Add the policy to a policy set
After creating your policy, add it to a Policy Set before it can be enforced on overrides.
-
Go to Policies → Policy Sets → New Policy Set.
-
Enter a Name and optional Description for the Policy Set.
-
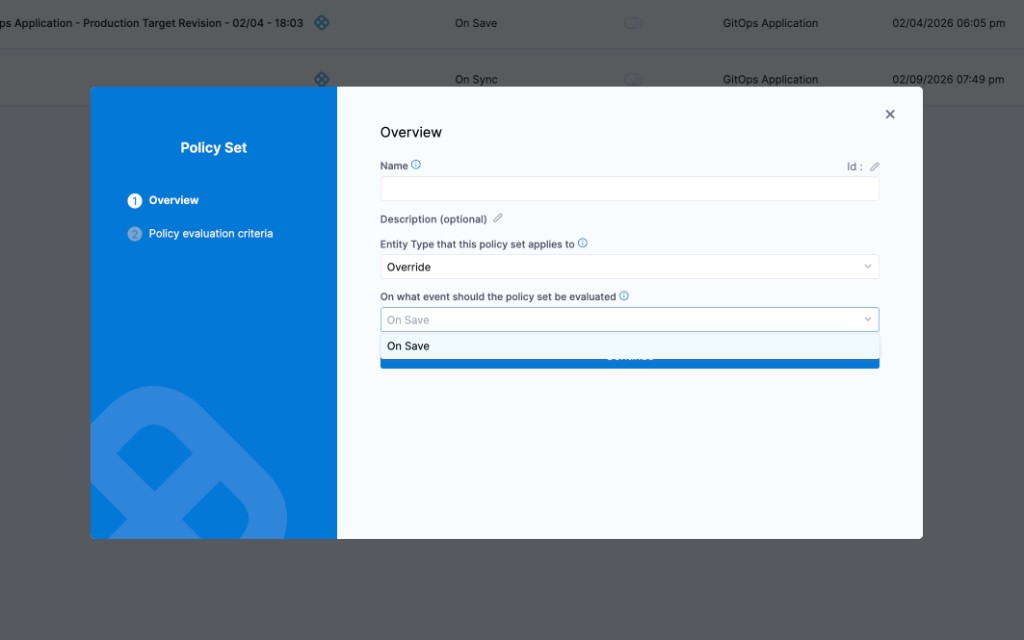
In Entity type, select Override.
-
In On what event should the Policy Set be evaluated, select On Save.
-
Click Continue.
noteExisting overrides are not automatically evaluated against new policies. Policies are applied only when an override is saved (created or updated).
-
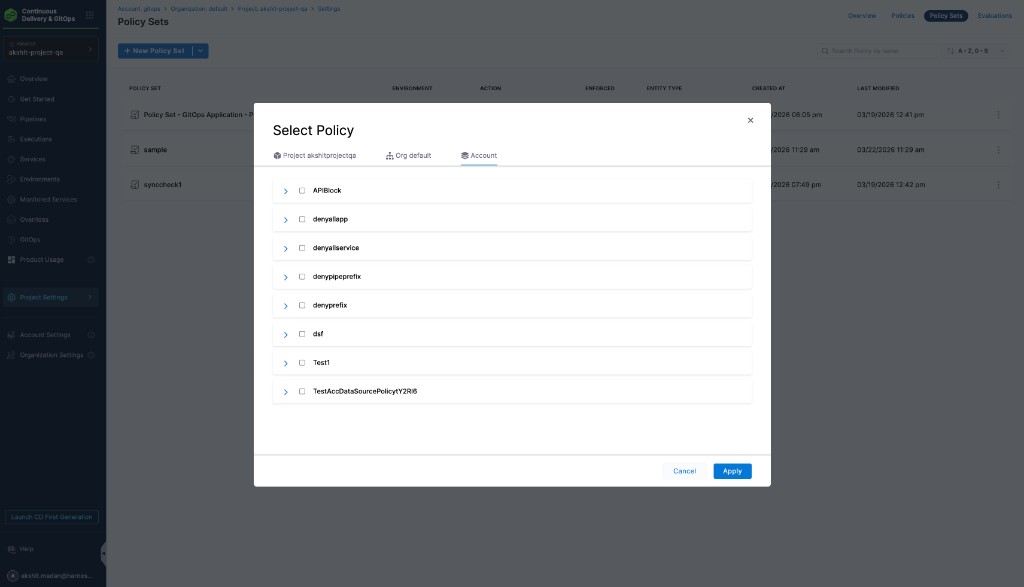
In Policy evaluation criteria, click Add Policy.
-
In the Select Policy dialog, choose the scope (Project, Org, or Account) and select the policy you created.
-
Select the severity and action for policy violations:
- Warn & continue — a warning is displayed if the policy is not met, but the override is saved and you can proceed.
- Error and exit — an error is displayed and the override is not saved if the policy is not met.
-
Click Apply, then click Finish.
-
The Policy Set is automatically set to Enforced. To disable enforcement, toggle off the Enforced button.
Step 3: Apply the policy to an override
After creating and enforcing your Policy Set, it is automatically evaluated whenever an override is saved.
-
Go to Deployments → Environments → select an environment → Service Overrides (or configure overrides at the appropriate scope).
-
Create or edit an override and click Save.
-
Based on your selection in the Policy Evaluation criteria:
- If the override meets the policy, it is saved successfully.
- If the override violates the policy and the severity is Warn & continue, it is saved with a warning.
- If the override violates the policy and the severity is Error and exit, the save is blocked and an error is displayed.