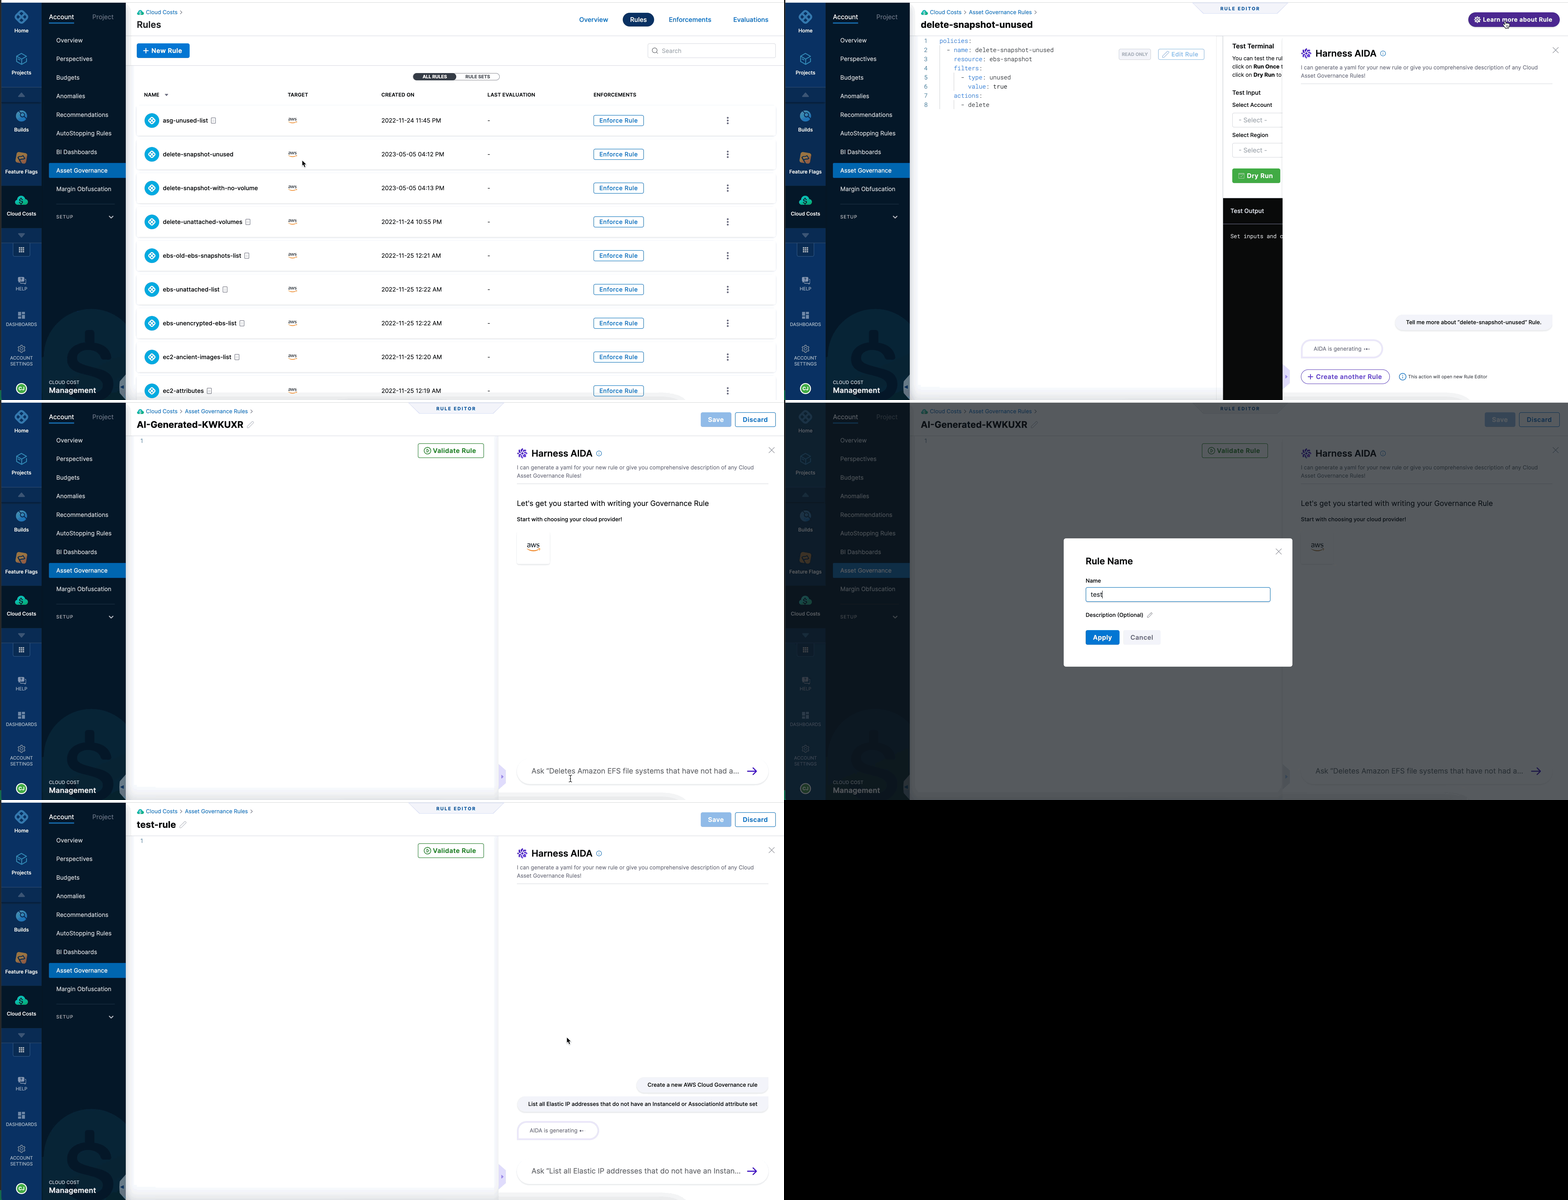
Optimize cloud costs using Harness AI
By enforcing governance rules, asset governance policies play a crucial role in governing cloud assets and optimizing costs. At times, authoring these policies can be challenging and confusing. In such situations, the Harness AI can assist with creating policies. Harness AI offers a user-friendly interface and serves as an excellent starting point for establishing the necessary policies. By leveraging this tool, you can streamline the process of policy development and ensure that the required policies are effectively implemented.
Harness AI offers comprehensive support with the following functionalities:
-
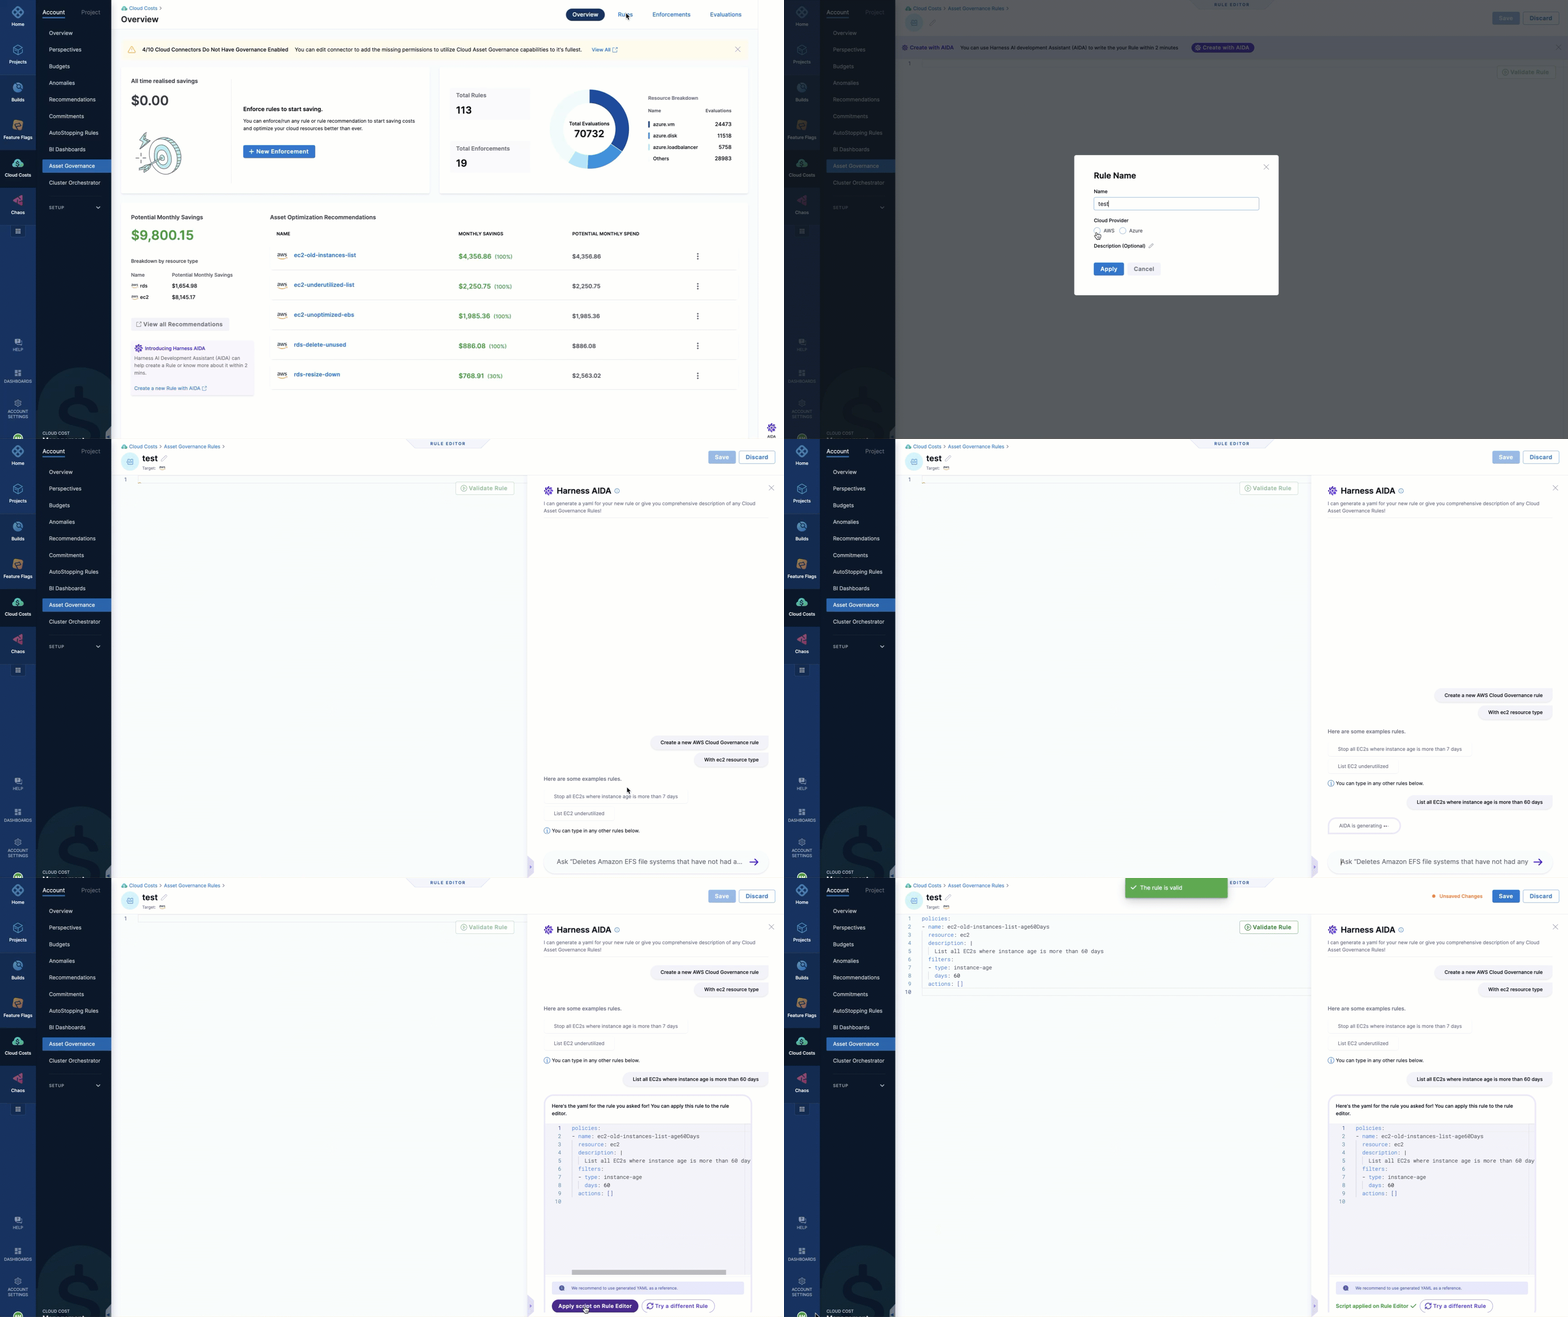
Assist with writing rules: Harness AI helps you formulate rules tailored to your specific requirements. It understands your requirements and generates customized rules to align with your governance objectives.
-
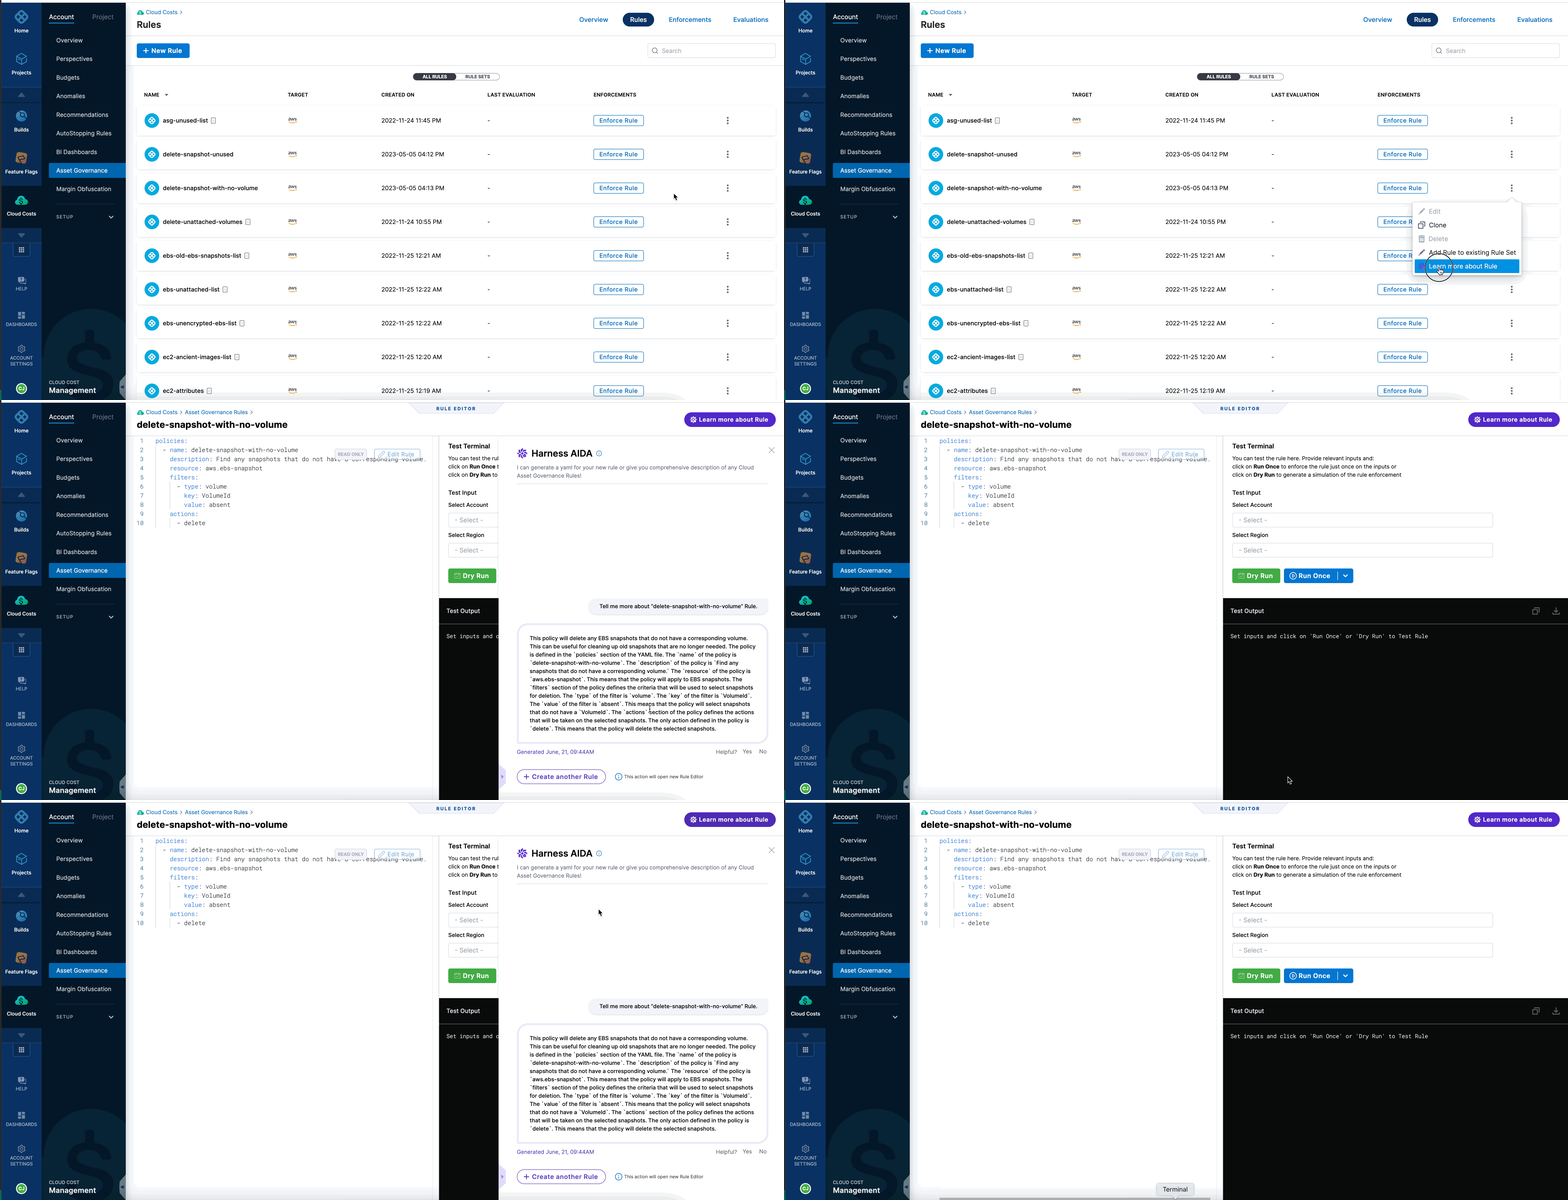
Describe existing rules: Harness AI offers detailed descriptions of built-in rules. This feature enables you to understand the purpose, scope, and implications of each rule, thereby facilitating informed decision-making during the policy creation process.
Harness recommends using the rules generated with AI as references to build your policies.
For more information about using AI to create rules and view comprehensive information about out-of-the-box and custom rules, go to Create rules with Harness AI.
For more information about the AI legal terms and data privacy, review the following Harness legal pages:
Create a rule by using Harness AI
To create a rule by using the Harness AI, perform the following steps:
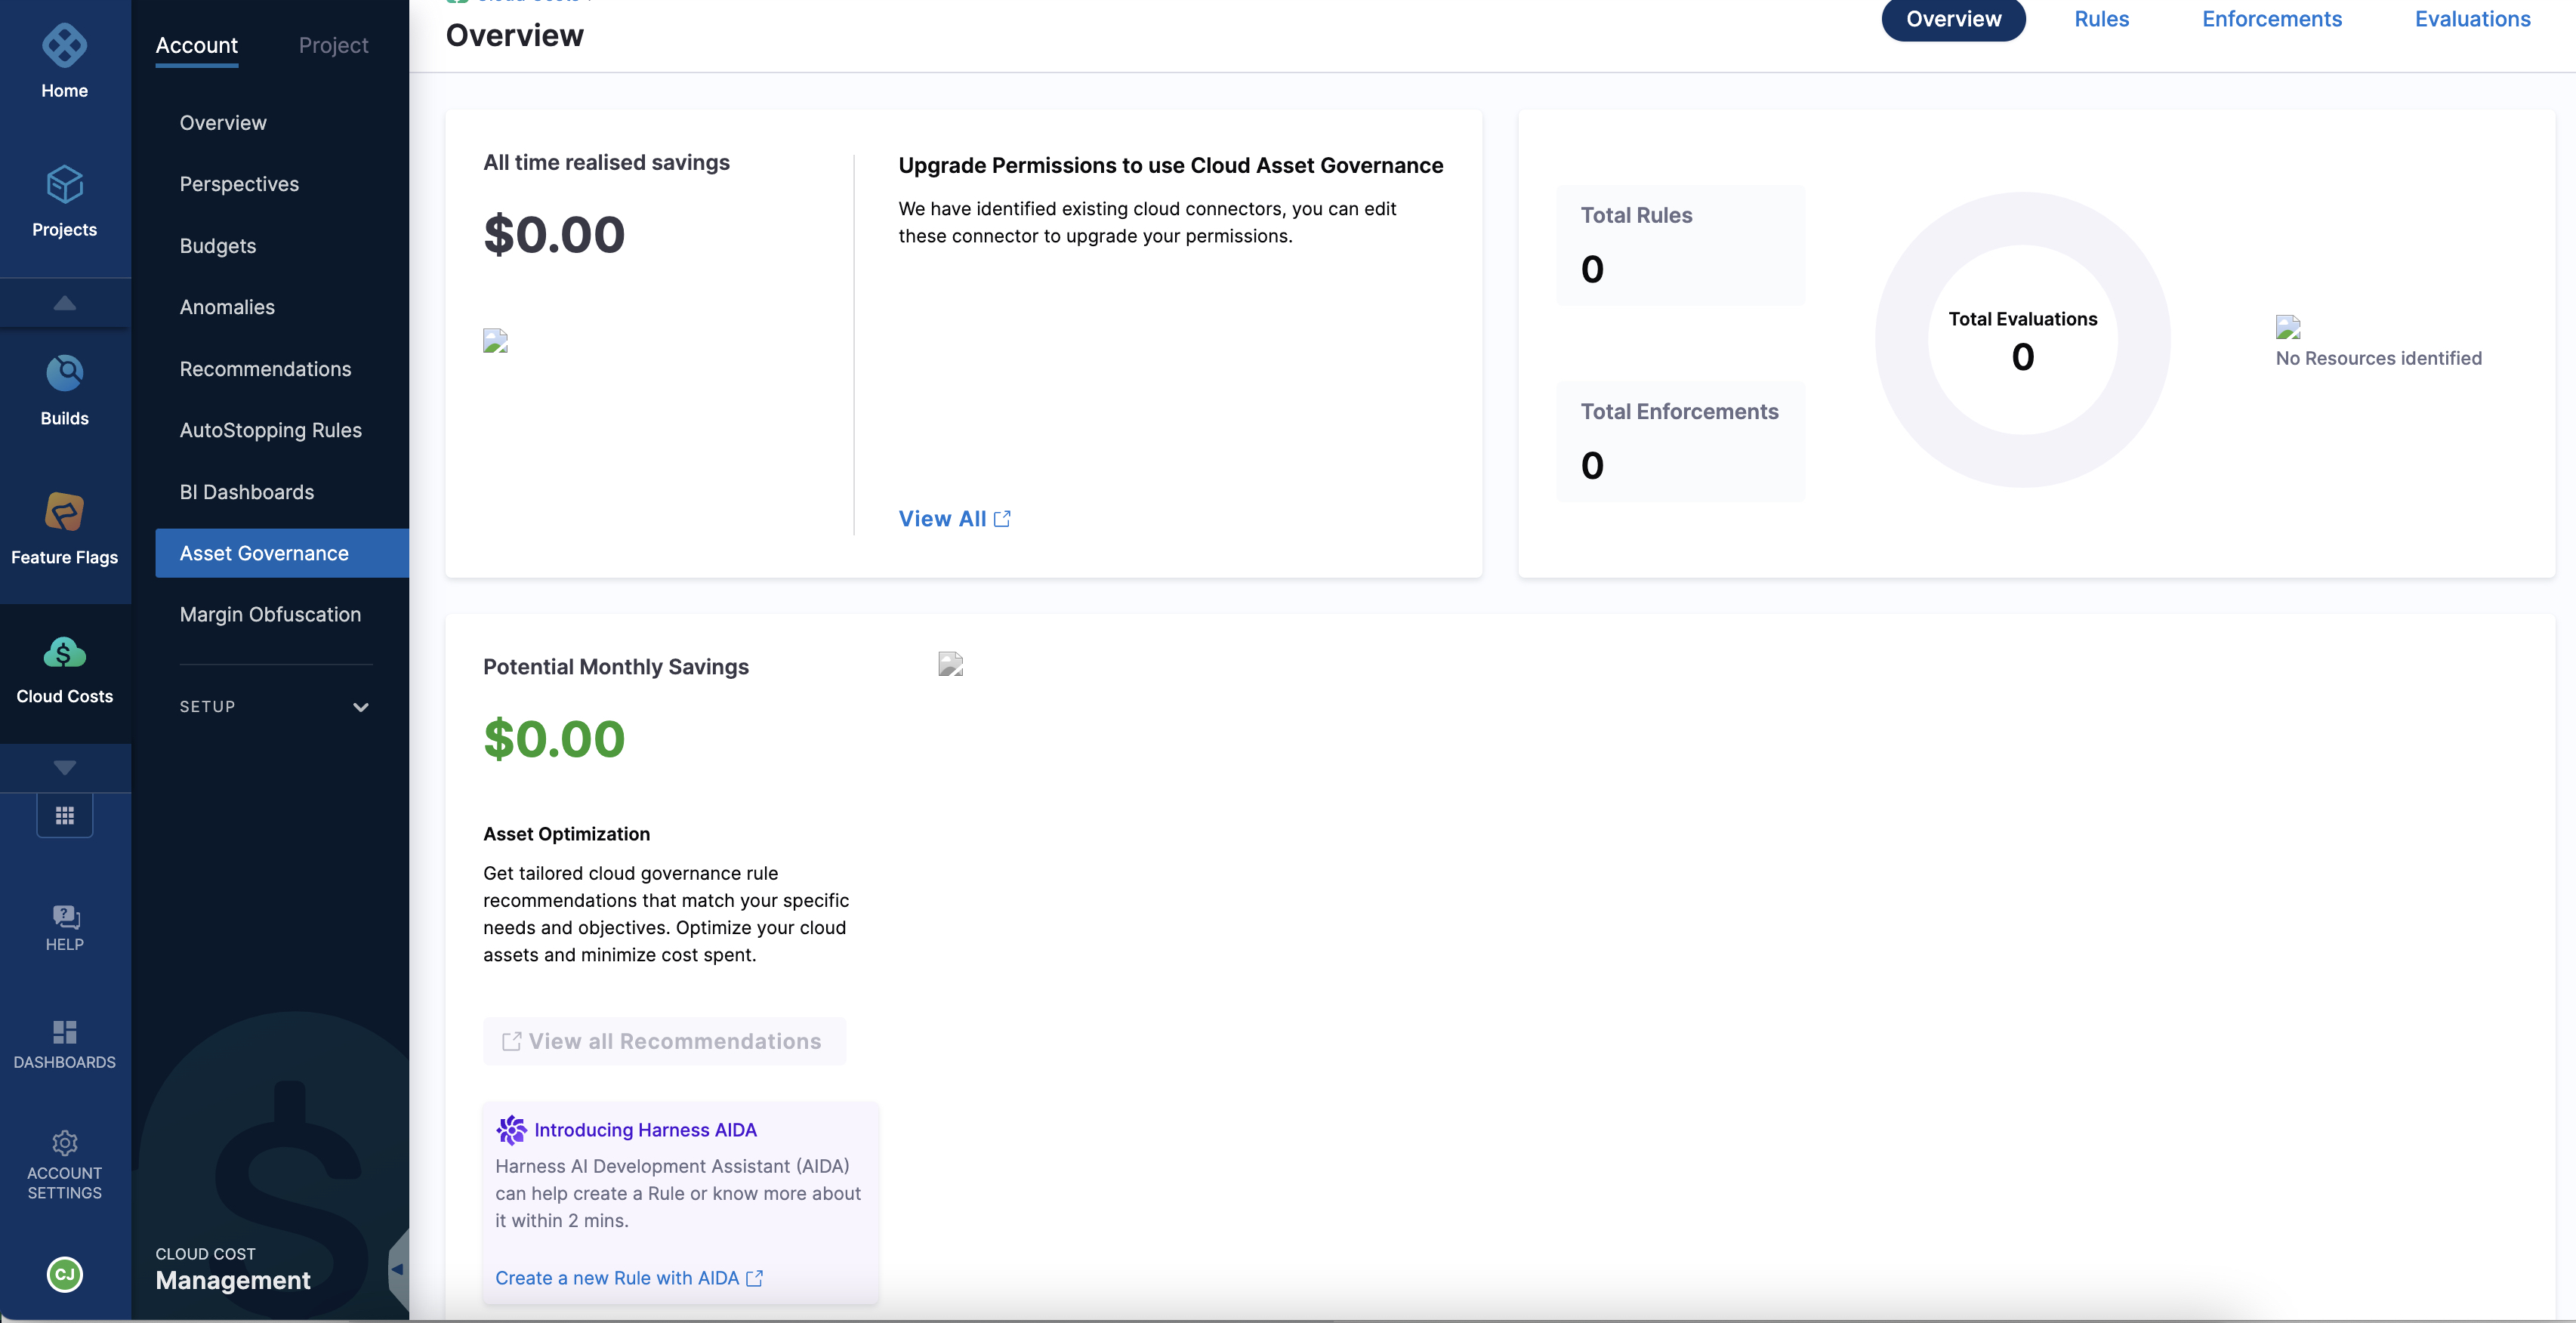
- In the Harness application, go to Cloud Costs.
- Select Asset Governance. You can create a new rule from either of the following pages:
- Overview
- Rules
-
Select Create a new rule with AI.
A new rule editor is presented, and it displays an AI-generated name for the rule. To customize the rule name, select the edit icon, and then modify the generated name according to your preference.
- Select the cloud service provider. For example: AWS, Azure.
- Select a resource type displayed based on the cloud provider selected. For example: azure.vm, ec2.
- Use one of the following options:
- Select a rule from a list of examples. Harness AI presents a curated list of rule examples from which you can choose one that is relevant to your requirement. The list covers a wide range of common governance scenarios. Adapt your selection to suit your specific requirements.
- Type your requirement and select the Return key. Alternatively, you can directly enter your governance requirement into the UI. Type your desired rule in a clear and concise manner and select the Return key. For example, you could specify a rule such as "Delete EC2 instances older than 90 days." Harness AI processes your input and generates a corresponding rule.
- Select Apply script on Rule Editor.
- Select Validate Rule.
- The system performs a validation process to ensure rule accuracy. If errors are detected within the rule, a notification banner is displayed. To access more information regarding these errors, select the More Details option. You can view a comprehensive breakdown of the specific error details to identify and address any issues effectively.
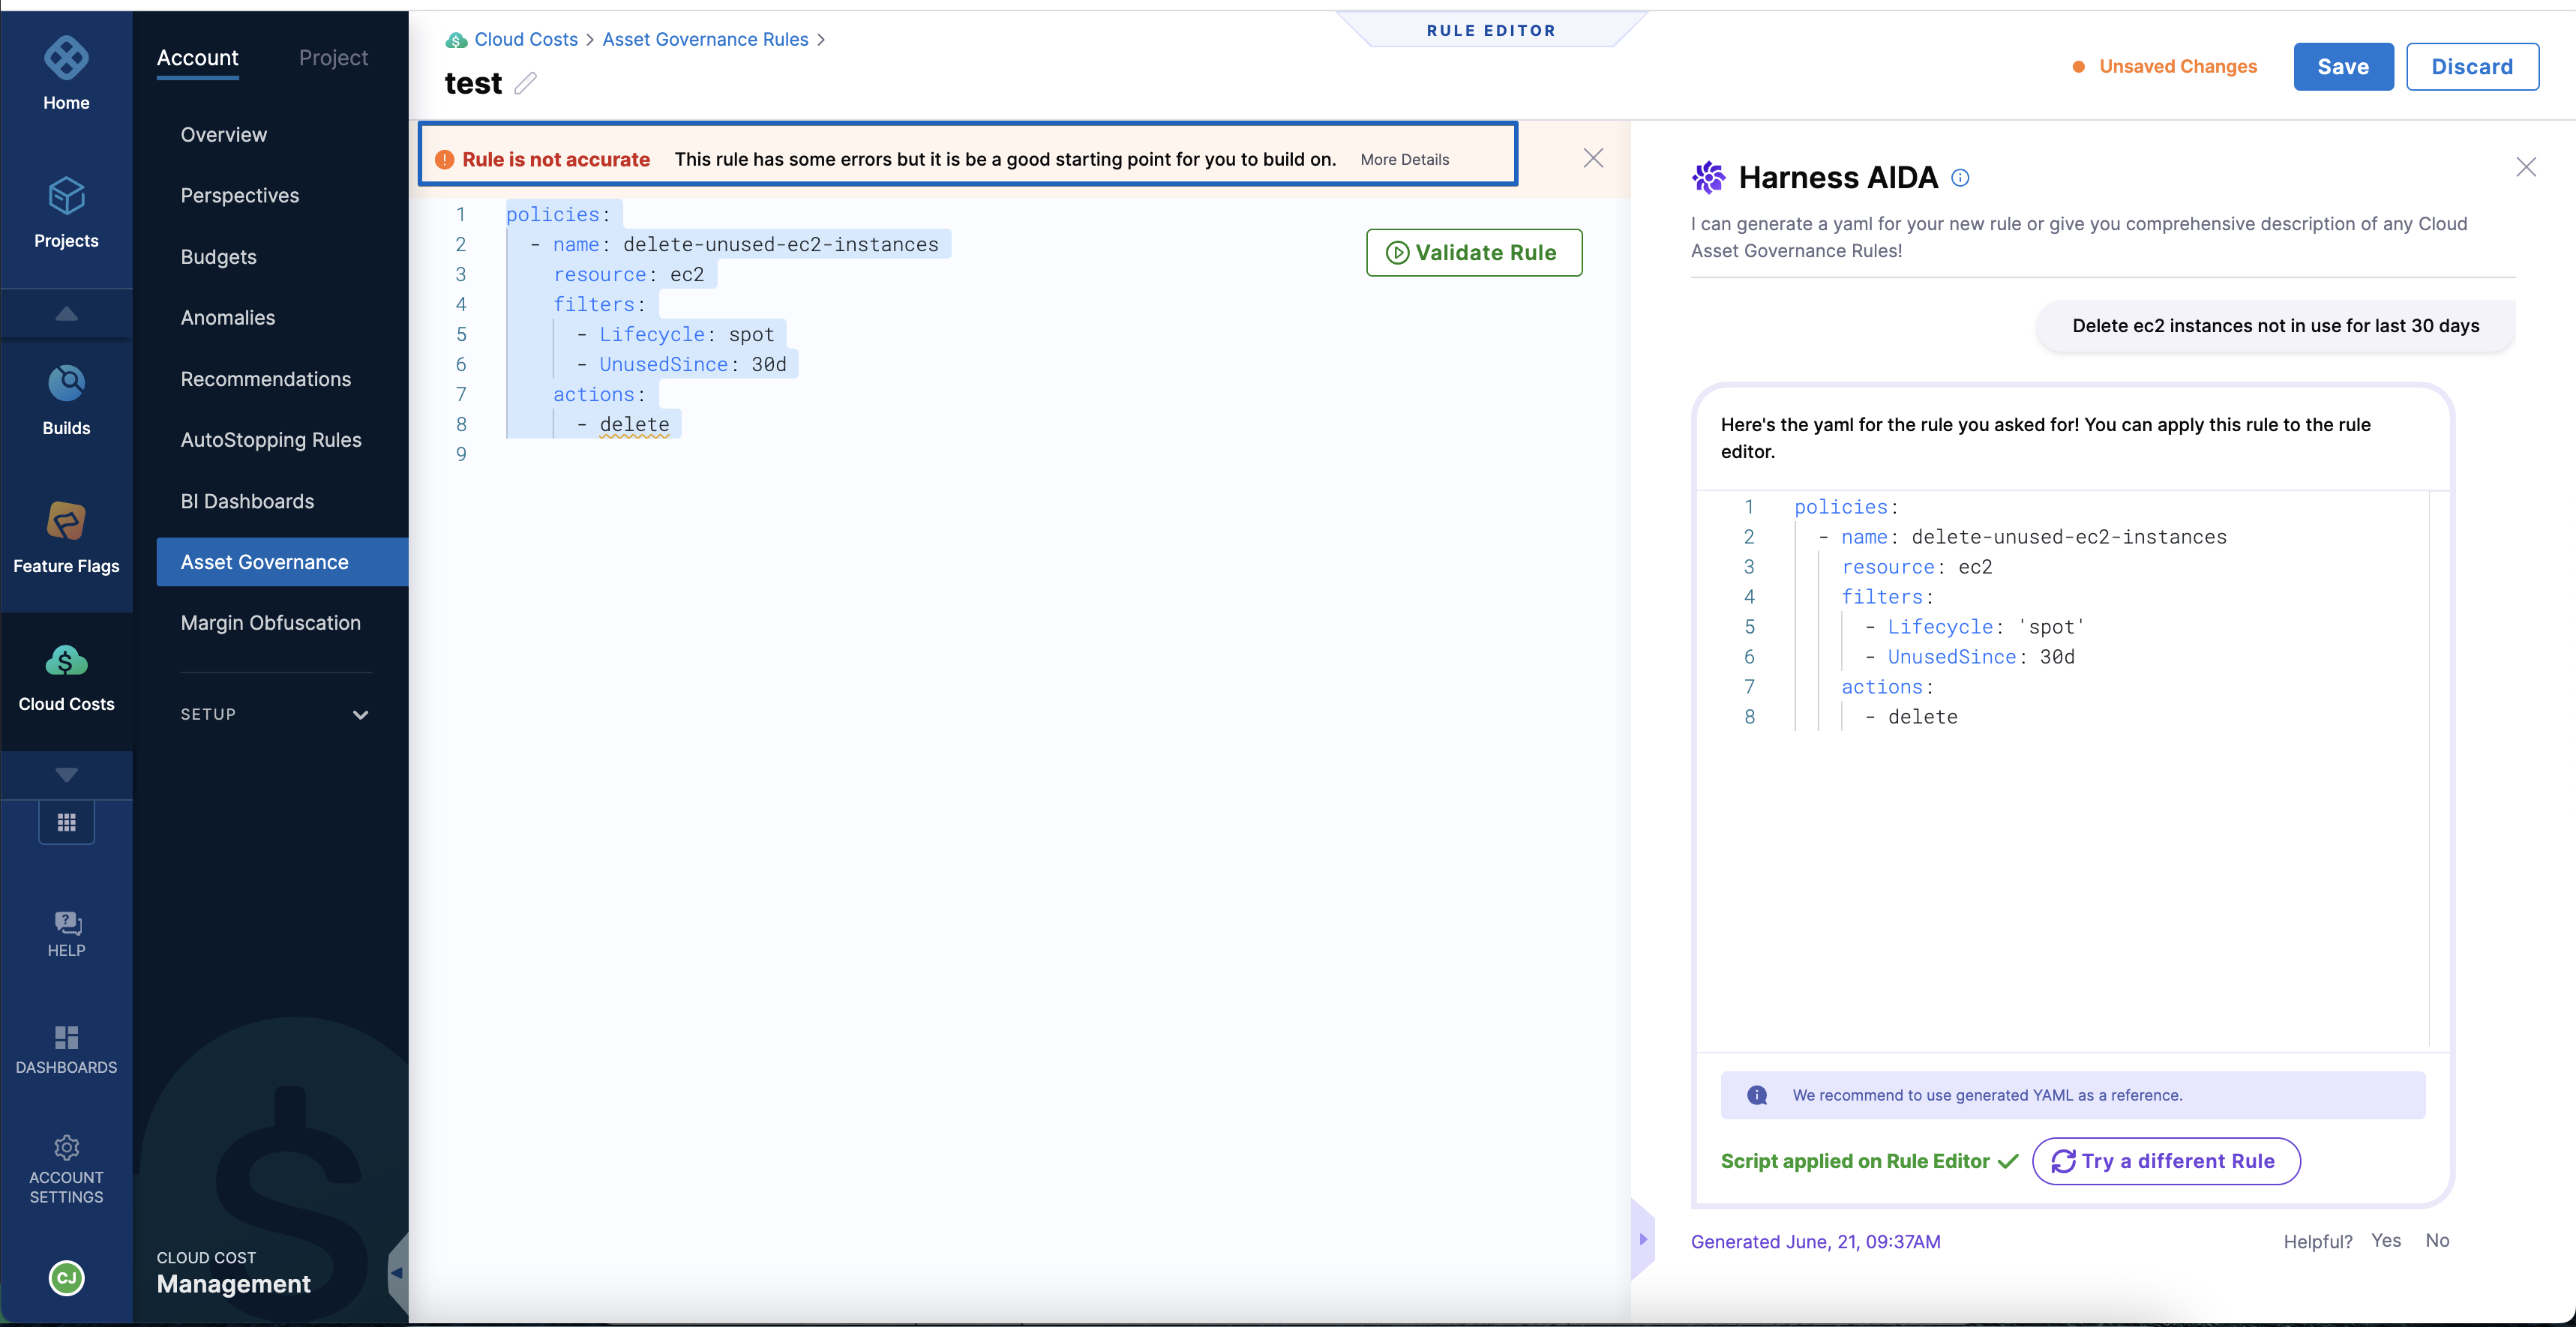
- If you are satisfied with the rule, select Save.
- Select +New Rule.
- Enter a name for the rule.
- Select the cloud service provider. For example: AWS, Azure.
- Optionally, enter a description for the rule.
- Select Apply.
- Select Create with AI.
The Harness AI pane opens. 9. Select a resource type displayed based on the cloud provider selected. For example: azure.vm, ec2. 10. Use one of the following options:
- Select a rule from a list of examples. Harness AI presents a curated list of rule examples from which you can choose one that is relevant to your requirement. The list covers a wide range of common governance scenarios. Adapt your selection to suit your specific requirements.
- Type your requirement and select the Return key. Alternatively, you can directly enter your governance requirement into the UI. Type your desired rule in a clear and concise manner and select the Return key. For example, you could specify a rule such as "Delete EC2 instances older than 90 days." Harness AI processes your input and generates a corresponding rule.
-
Select Apply script on Rule Editor.
-
Select Validate Rule.
-
The system performs a validation process to ensure rule accuracy. If any errors are detected within the rule, a notification banner is displayed. To access more information regarding these errors, select the More Details option. You can view a comprehensive breakdown of the specific error details to identify and address any issues effectively.

-
If you are satisfied with the rule, select Save.
View rule descriptions by using Harness AI
Harness AI offers valuable insights by providing a description of the rule along with a clear and concise description of its purpose, functionality, and potential impact. This information helps you understand the rationale behind the rule and how it aligns with your governance objectives.
- In the Harness application, navigate to the Asset Governance page.
- Select Rules.
- Select the more options icon for a rule, and then select Learn more about rule. Or, select the rule, and then select Learn more about rule.
Harness AI displays the description of the rule and its implications.
From the current page, you have the option to create a new rule. Select Create another rule to initiate the process. Upon selecting this option, a new rule editor is presented, and it displays an AI-generated name for the rule. To customize the rule name, select the edit icon, and then modify the generated name according to your preference.
