> For the complete documentation index, see [llms.txt](https://developer.harness.io/llms.txt). Markdown versions of documentation pages are available by appending `.md` to page URLs; this page is available as [Markdown](https://developer.harness.io/harness-platform/use-harness-platform/authentication/single-sign-on-saml/okta.md).

# Okta

Use Okta as a SAML SSO provider to let your users log into Harness with their Okta credentials.

Okta acts as a SAML identity provider (IdP) for Harness, so your users authenticate with their existing Okta credentials. This page walks you through creating an Okta app integration, exchanging the SAML metadata with Harness, and enabling group-based authorization so Okta group members map automatically to Harness user groups.

When a user attempts to log in to Harness, Harness redirects them to Okta for authentication. After successful authentication, Okta sends a signed SAML assertion containing user attributes back to Harness, which validates it and grants access. Optionally, Okta includes group membership information in the SAML assertion through group attribute statements, so Harness assigns users to corresponding Harness user groups for role-based access control (RBAC).

{% hint style="info" %}
Adding the Harness app from the Okta Integration Network (OIN) instead? Okta (OIN app) covers the catalog install path, where the SAML endpoints, audience URI, and signing settings are pre-configured and you supply only the ACS URL. This page covers building the SAML 2.0 app manually.
{% endhint %}

***

### What you will learn in this topic <a href="#what-you-will-learn-in-this-topic" id="what-you-will-learn-in-this-topic"></a>

By the end of this topic, you will be able to:

* [Create a SAML app integration in Okta](#step-2-create-app-integration-in-okta) for Harness.
* [Configure Harness to use Okta](#step-3-okta-saml-metadata-file) as a SAML SSO provider.
* [Enable and test](#step-4-enable-sso-with-okta) SSO Okta login.
* Set up [SAML authorization](#step-5-saml-authorization-with-okta) using Okta.
* Use [Just-in-Time (JIT) provisioning](#just-in-time-jit-provisioning) to automatically create users on first login.

***

### Before you begin <a href="#before-you-begin" id="before-you-begin"></a>

Before you configure Okta as the SAML identity provider for Harness, ensure you have the following:

* **Harness account access**: A Harness account with Account Admin permissions.
* **Okta account access**: An Okta account with admin access.
* **Provisioned Okta users**: Users already provisioned in Okta, with the same email addresses they use in Harness.

***

### Set up your workspace <a href="#set-up-your-workspace" id="set-up-your-workspace"></a>

Prepare both applications before you configure SAML so you can copy values between them without losing your place. Use two browser windows or tabs for this process: open Okta in one tab and Harness in the other.

In your Harness tab, [add a SAML provider](/harness-platform/3.0/harness-platform-resources/authentication/authentication-overview.md#enable-multiple-identity-providers).

{% hint style="info" %}
If you use [Harness Self-Managed Enterprise Edition](/self-managed-enterprise-edition/new-to-self-managed-enterprise-edition/smp-overview.md), your instance must be accessed through an HTTPS load balancer, otherwise SAML authentication fails over HTTP.

* Users are not created as part of the SAML SSO integration. Okta user accounts must exist before you exchange information between your Okta account and Harness.
* Users are invited to Harness using their email addresses. After they log into Harness, their email addresses are registered as Harness users. For more information on user registration, see [Single sign-on with SAML](/harness-platform/use-harness-platform/authentication.md).
  {% endhint %}

***

### Step 1: Set up user accounts in Okta and Harness <a href="#step-1-set-up-user-accounts-in-okta-and-harness" id="step-1-set-up-user-accounts-in-okta-and-harness"></a>

To set up SAML support in your Okta Harness app, ensure that the app has corresponding users in Harness:

1. In Harness, add the users you want to set up for SAML SSO by inviting them to Harness using the same email addresses that they use in your SAML provider.
2. In Okta, assign those users to your Harness SAML app. Do this after you create the app in [Step 2](#step-2-create-app-integration-in-okta):
   1. Open the Harness app and select the **Assignments** tab.
   2. Click **Assign**, and then select **Assign to People** or **Assign to Groups**.
   3. Find the user or group that needs access to Harness, and then click **Assign**. For a group, no further fields appear and the assignment is complete.
   4. For a person, confirm the **Username**. It defaults to the user's Okta email address, which must match the email address of the corresponding Harness user. Click **Save and Go Back**.
   5. Repeat for each user or group you want to assign, and then click **Done**.

{% hint style="info" %}

* The only user property that must match between a Harness user and its corresponding SAML provider user account is its **email address**.
* Sometimes users have mixed case email addresses in Okta. In these situations, Harness converts the email address to lowercase when adding them to Harness.
  {% endhint %}

***

### Step 2: Create app integration in Okta <a href="#step-2-create-app-integration-in-okta" id="step-2-create-app-integration-in-okta"></a>

Create the SAML app integration in Okta to establish the trust between Okta and Harness.

1. Sign in to your Okta administrator account, and select **Applications and Resources** > **Applications**.
2. Click **Create App Integration**.

   <figure><img src="https://173309742-files.gitbook.io/~/files/v0/b/gitbook-x-prod.appspot.com/o/spaces%2F3F2TpHXhur2QtQnORSM9%2Fuploads%2FV1m5oHAcnR1enmEZ7O9N%2Fsingle-sign-on-saml-53.png?alt=media&#x26;token=40b85311-26b9-4d28-919b-61d43cc40d37" alt="The Applications page in the Okta Admin Console with the Create App Integration button"><figcaption><p>Click to view full size image</p></figcaption></figure>

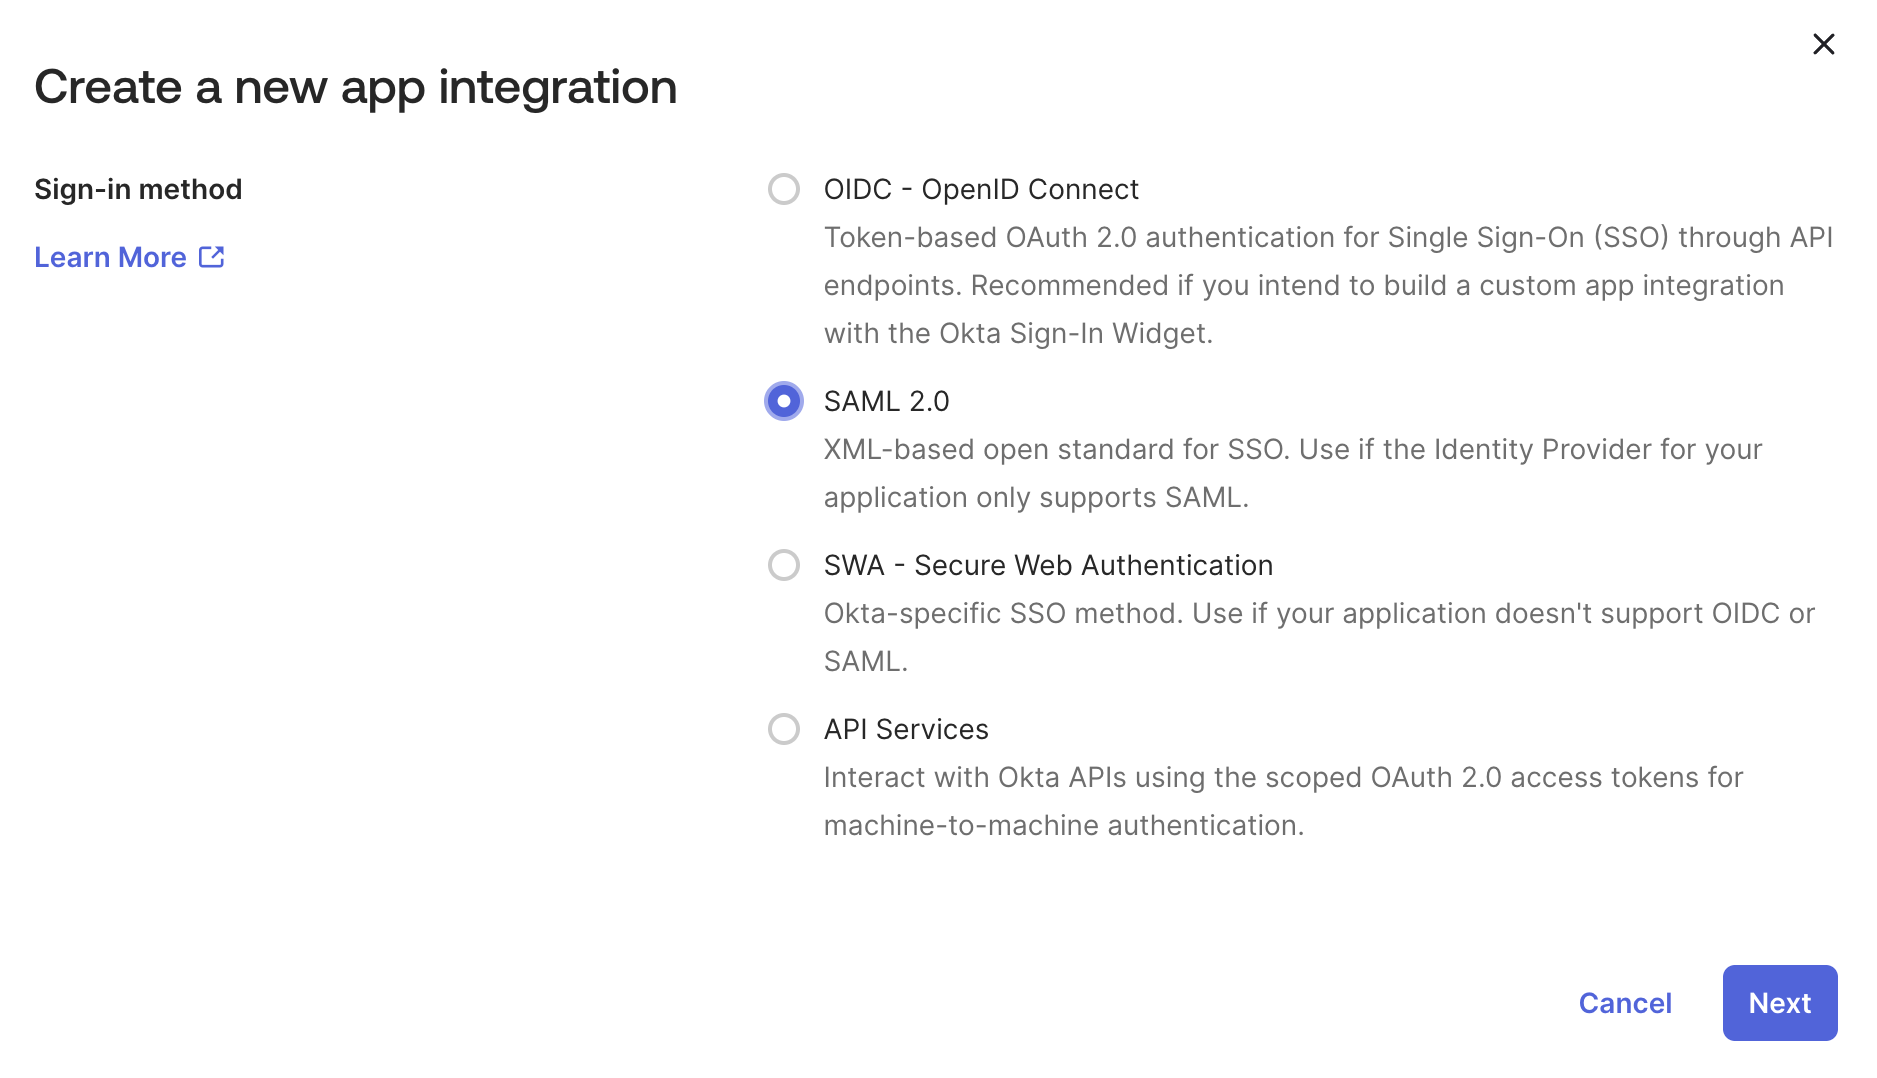
   The **Create a new app integration** dialog opens.
3. Select **SAML 2.0**, and then click **Next**.

   <figure><img src="https://173309742-files.gitbook.io/~/files/v0/b/gitbook-x-prod.appspot.com/o/spaces%2F3F2TpHXhur2QtQnORSM9%2Fuploads%2Fgit-blob-ff4c90d50948e6de965c052e0b6563ee02452f33%2Fsingle-sign-on-saml-54.png?alt=media" alt="The Create a new app integration dialog with SAML 2.0 selected"><figcaption><p>Click to view full size image</p></figcaption></figure>
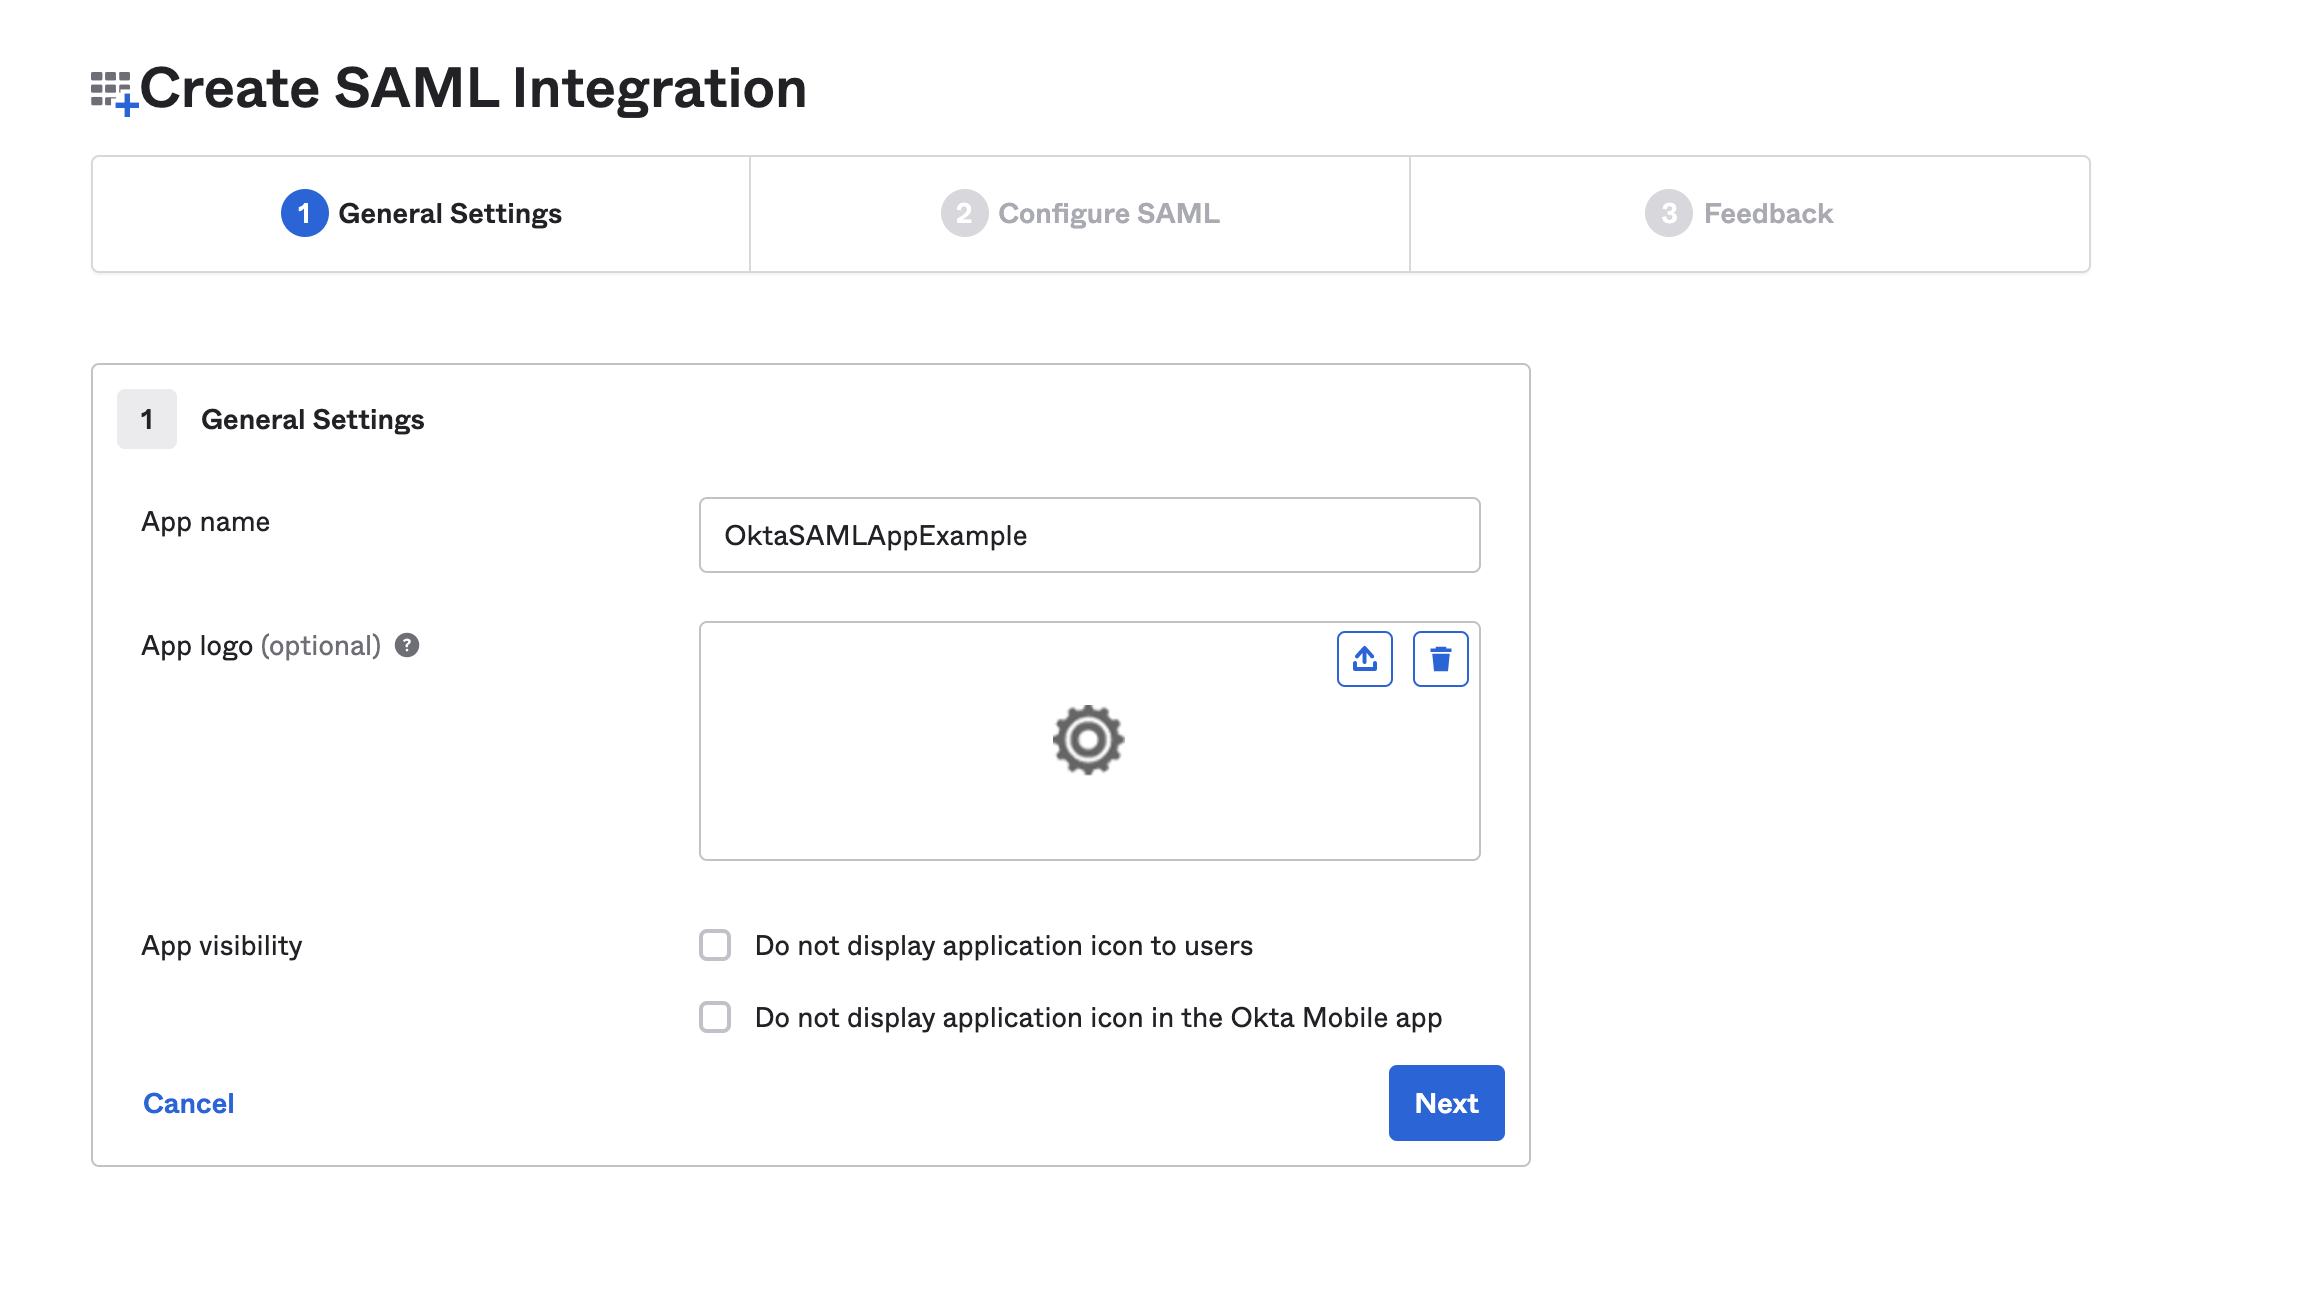
4. In **General Settings**, enter a name in the **Application label** field, and then click **Next**.

   <figure><img src="https://173309742-files.gitbook.io/~/files/v0/b/gitbook-x-prod.appspot.com/o/spaces%2F3F2TpHXhur2QtQnORSM9%2Fuploads%2Fgit-blob-4477b4396d6fb169861f91152ffb5e4565db9706%2Fsingle-sign-on-saml-55.png?alt=media" alt="The General Settings step of the Okta app wizard with the Application label field"><figcaption><p>Click to view full size image</p></figcaption></figure>
5. On the **Configure SAML** tab, enter the Harness SAML endpoint URL in the **Single sign on URL** field. To get the SAML endpoint URL from Harness:

   1. If you are not already on the **Add SAML Provider** panel in Harness, open a new browser tab and navigate there. Sign in to Harness, navigate to **Account Settings**, select **Authentication**, and select **SAML Provider**. Enter a **Name** for the SAML configuration, and then under **Select a SAML Provider** select **Okta**. The panel expands to show the rest of the configuration.

      <figure><img src="https://173309742-files.gitbook.io/~/files/v0/b/gitbook-x-prod.appspot.com/o/spaces%2F3F2TpHXhur2QtQnORSM9%2Fuploads%2FnWVfAQM3JFXEI02TdG5h%2Fharness-add-saml-provider-collapsed.png?alt=media&#x26;token=4b035d47-eadc-480e-89c5-7826830f7cc9" alt="The collapsed Harness Add SAML Provider panel showing the Name field and the provider tiles"><figcaption><p>Click to view full size image</p></figcaption></figure>
   2. Copy the endpoint URL from **Enter this SAML Endpoint URL as your Harness application's ACS URL**. This is the URL you paste in the **Single sign on URL** field in Okta.

      <figure><img src="https://173309742-files.gitbook.io/~/files/v0/b/gitbook-x-prod.appspot.com/o/spaces%2F3F2TpHXhur2QtQnORSM9%2Fuploads%2Fy8SAzdiFkWX45QpGCeeT%2FScreenshot%202026-09-18%20at%203.47.43%E2%80%AFPM.png?alt=media&#x26;token=e3b91660-53da-4ce5-9708-72ec9d6b6e21" alt="The Harness SAML endpoint URL field, which you copy and paste into Okta"><figcaption><p>Click to view full size image</p></figcaption></figure>
   3. Leave the **Add SAML Provider** panel open, and do not click **Add** yet. You return to this panel in [Step 3](#step-3-okta-saml-metadata-file) to upload the Okta metadata and submit the configuration.

   <div data-gb-custom-block data-tag="hint" data-style="info" class="hint hint-info"><p>The <strong>Add SAML Provider</strong> panel starts collapsed. It shows only a <strong>Name</strong> field and the provider tiles, offering <strong>Azure</strong>, <strong>Okta</strong>, <strong>OneLogin</strong>, and <strong>Other</strong>. Selecting a provider expands the panel to show the SAML endpoint URL, the metadata upload control, and the authorization options, and the tile you chose then shows a checkmark and a <strong>Change</strong> link, so you can switch providers without starting over. The <strong>Add</strong> button at the bottom of the panel submits the whole configuration, so leave it until last.</p></div>
6. In **Audience URI (SP Entity ID)**, enter `app.harness.io`. The SAML application identifier is always `app.harness.io`.
7. In **Default RelayState**, leave the field blank. Harness uses this to exchange additional information between the IdP SAML provider (Okta) and the Service Provider (Harness), by sending Custom RelayState information.
8. In **Name ID format**, enter the username format you are sending in the SAML Response. The default format is **Unspecified**.
9. In **Application username**, enter the default username.
10. Click **Next**, and then click **Finish**.
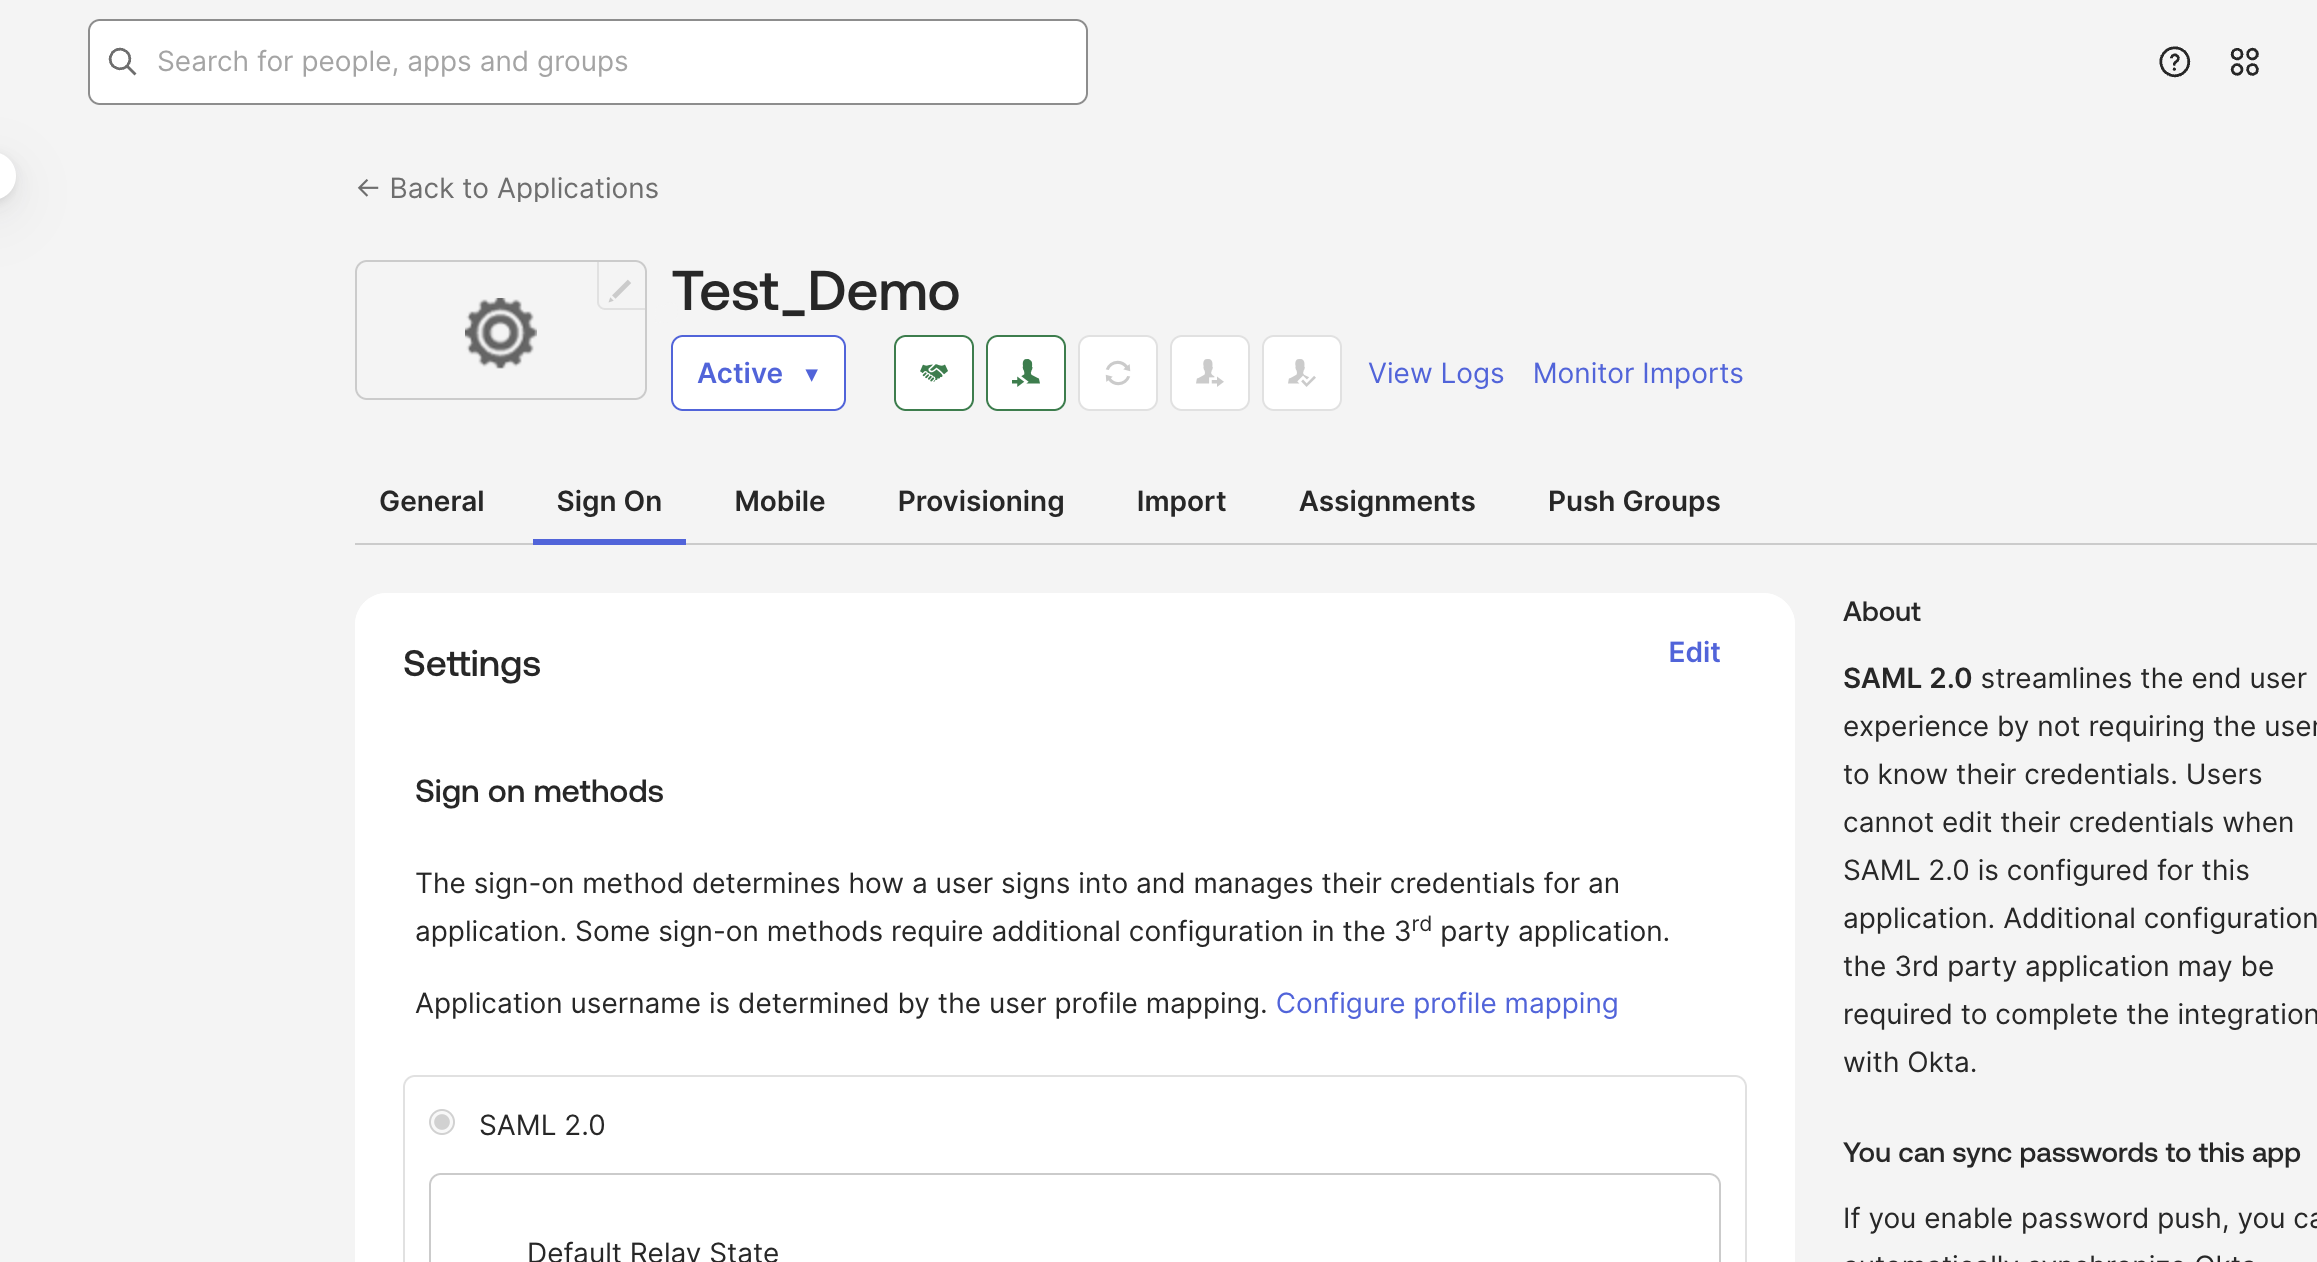
11. Navigate to the **Sign On** tab, and in the **Settings** card, click **Edit**.

    <figure><img src="https://173309742-files.gitbook.io/~/files/v0/b/gitbook-x-prod.appspot.com/o/spaces%2F3F2TpHXhur2QtQnORSM9%2Fuploads%2Fgit-blob-66e7d8cc89e579704ddd46b35fff3346e2b124a7%2Fsign-on.png?alt=media" alt="The Sign On tab of the Okta app showing the Settings card with the Edit link"><figcaption><p>Click to view full size image</p></figcaption></figure>
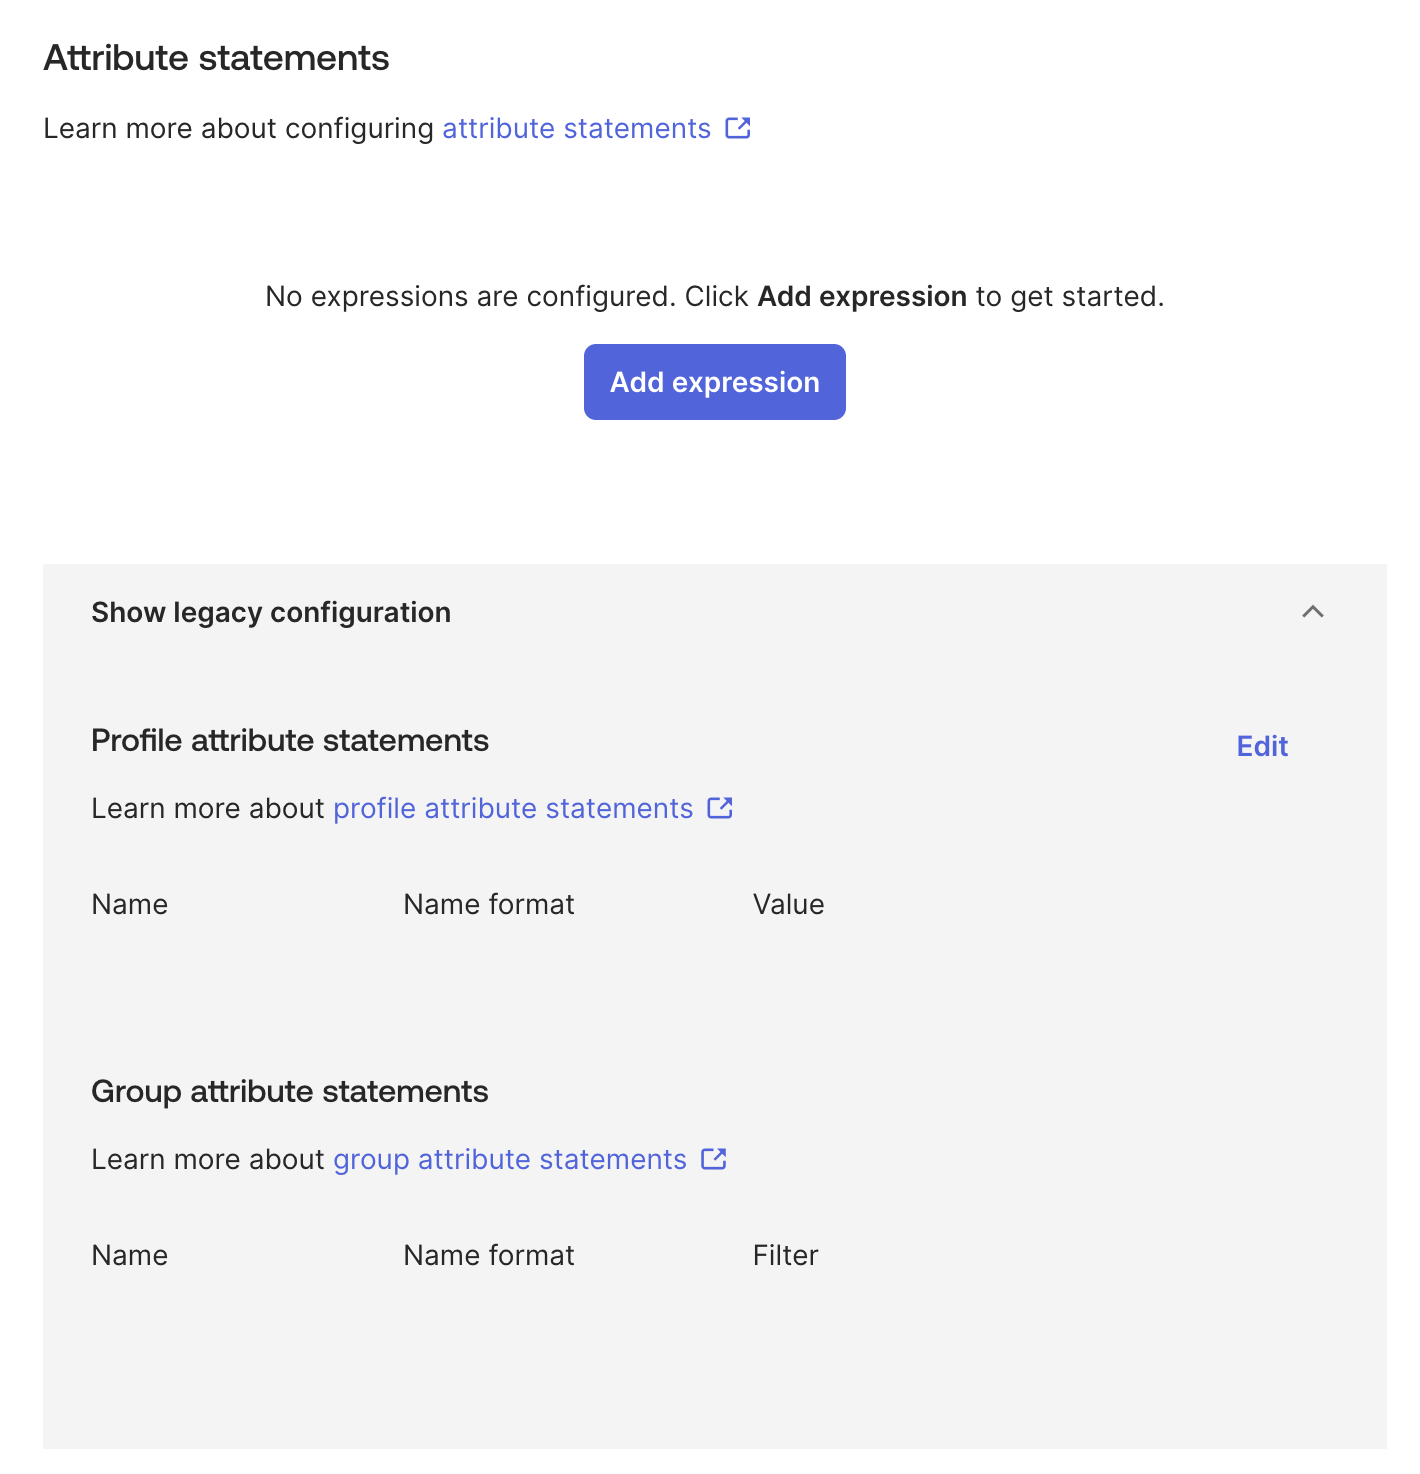
12. Expand **Attributes (Optional)**. Under **Attribute Statements (optional)**, enter a name in the **Name** field, select **Name format** as **Basic**, and select the **Value** as **user.email**. To add more attribute statements, click **Add Another**.

The **Attributes (Optional)** section is collapsed by default, and **Name format** defaults to **Unspecified**.

When you create a new SAML integration or modify an existing one, you can define custom attribute statements. These statements are inserted into the SAML assertions shared with your app. For more information on custom attribute statements, see the Okta documentation on [defining attribute statements](https://help.okta.com/oie/en-us/content/topics/apps/define-attribute-statements.htm).

<figure><img src="https://173309742-files.gitbook.io/~/files/v0/b/gitbook-x-prod.appspot.com/o/spaces%2F3F2TpHXhur2QtQnORSM9%2Fuploads%2Fgit-blob-67931ce6c830d1d34459f81c26efcc6d4a14ab90%2Fadd-attributes.png?alt=media" alt="The attribute statement configured with the user.email value"><figcaption><p>Click to view full size image</p></figcaption></figure>

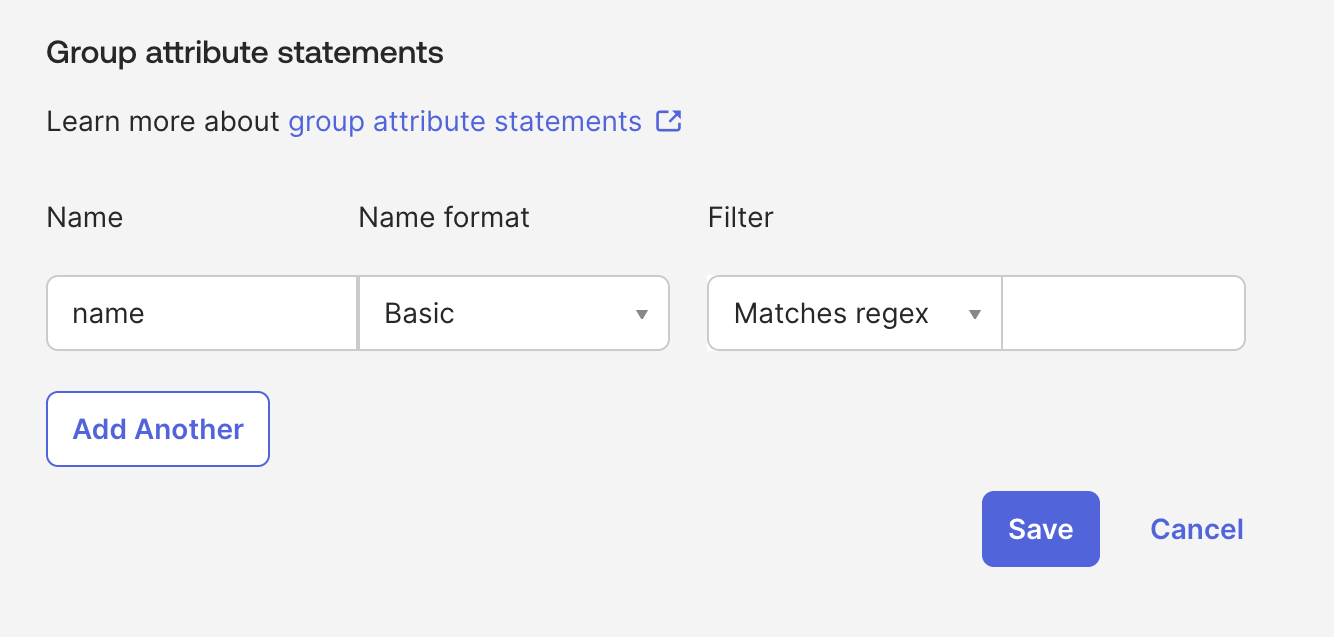
13\. Under **Group Attribute Statements (optional)**, enter a name in the **Name** field, select **Name format** as **Basic**, change the **Filter** from its **Starts with** default to an appropriate filter, and enter its value.

If your Okta org uses groups to categorize users, you can add group attribute statements to the SAML assertion shared with your app. For more information on group attribute statements, see the Okta documentation on [defining group attribute statements](https://help.okta.com/oie/en-us/content/topics/apps/define-group-attribute-statements.htm).

14. Click **Save**.

{% hint style="info" %}
Below the attribute statements is **Disable Force Authentication**, which is selected by default and means Okta never prompts the user to re-authenticate. Clear it if your organization requires users to re-authenticate with Okta each time they start a Harness session.
{% endhint %}

***

### Step 3: Okta SAML metadata file <a href="#step-3-okta-saml-metadata-file" id="step-3-okta-saml-metadata-file"></a>

Download the **Identity Provider metadata** XML from your Okta app and upload it into the expanded **Add SAML Provider** panel to complete the trust exchange.

1. In your Harness Okta app, navigate to the **Sign On** tab, and then click **Edit**.

   <figure><img src="https://173309742-files.gitbook.io/~/files/v0/b/gitbook-x-prod.appspot.com/o/spaces%2F3F2TpHXhur2QtQnORSM9%2Fuploads%2Fgit-blob-6ef9d011458285d08657633d7511e68b6e6832fa%2Fsingle-sign-on-saml-60.png?alt=media" alt="The Edit action on the Sign On tab of the Okta app"><figcaption><p>Click to view full size image</p></figcaption></figure>
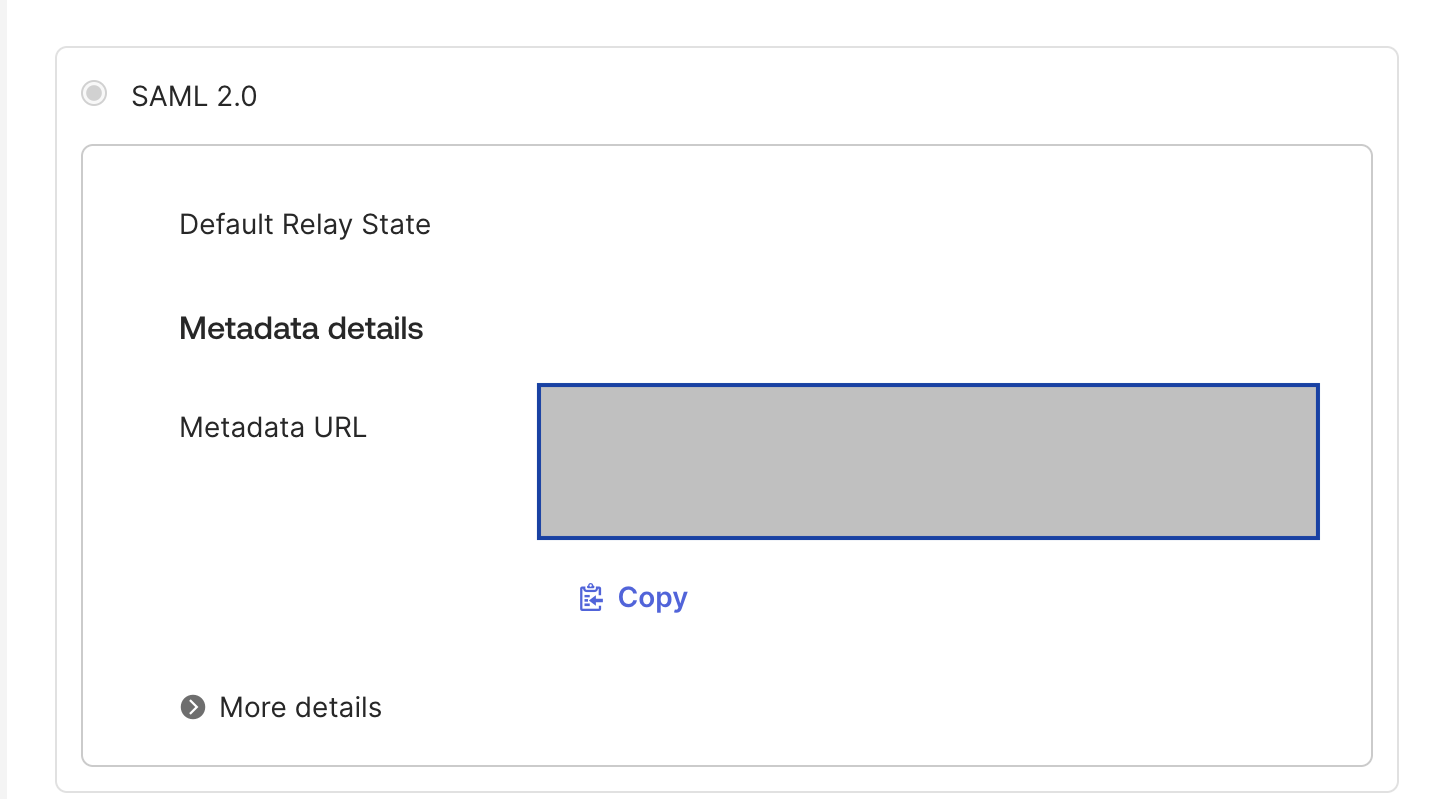
2. Click **Copy** to copy that data into a file, and save it with an `.xml` extension.

   <figure><img src="https://173309742-files.gitbook.io/~/files/v0/b/gitbook-x-prod.appspot.com/o/spaces%2F3F2TpHXhur2QtQnORSM9%2Fuploads%2Fgit-blob-714d6d7a127912fbdf1c3a538acd7b0fd712e63f%2Fcopy-metadata.png?alt=media" alt="The Copy action for the Okta identity provider metadata"><figcaption><p>Click to view full size image</p></figcaption></figure>
3. In Harness, on the **Add SAML Provider** panel, in **Upload the Identity Provider metadata XML downloaded from your app**, click **Choose a file** or **Upload**, and select the SAML metadata file you downloaded from your Okta app.

   <figure><img src="https://173309742-files.gitbook.io/~/files/v0/b/gitbook-x-prod.appspot.com/o/spaces%2F3F2TpHXhur2QtQnORSM9%2Fuploads%2Fs2F9Noc6KFATNNS7DD0u%2Fharness-add-saml-provider-expanded.png?alt=media&#x26;token=cae60ed4-c0f7-44ce-8bf8-fc6d2919ef0f" alt="The Harness upload control for the identity provider metadata XML file"><figcaption><p>Click to view full size image</p></figcaption></figure>
4. Optionally, enter a **Logout URL**.
5. Leave **Enable Authorization** cleared. It is cleared by default, and selecting it reveals a **Group Attribute Name** field beneath the checkbox. Authorization depends on the group attribute statement you configured in [Step 2](#step-2-create-app-integration-in-okta) and on a Harness user group linked to an Okta group, so you enable it in [Step 5](#step-5-saml-authorization-with-okta) once SSO is working.
6. The default entity ID is `app.harness.io`. To use a different one, select **Add Entity Id** and enter your custom entity ID.
7. To have Harness create a user account automatically the first time someone signs in through Okta, select **Enable JIT Provisioning**. For more information, see [Just-in-time (JIT) provisioning](#just-in-time-jit-provisioning).
8. Click **Add** to save the SAML provider configuration.

{% hint style="info" %}
**Enable Authorization**, **Add Entity Id**, and **Enable JIT Provisioning** are grouped together in a box at the bottom of the panel, below **Logout URL**, and all three are cleared by default. If you have already configured the group attribute statement and linked a Harness user group, you can select **Enable Authorization** and enter the **Group Attribute Name** here instead of returning in [Step 5](#step-5-saml-authorization-with-okta). This page enables it later so that you confirm SSO works before authorization is in play.
{% endhint %}

{% hint style="info" %}
The **Add SAML Provider** panel also offers **Encryption Certificate for SAML assertions - Download**. Download this certificate if you want Okta to encrypt the SAML assertions it sends to Harness.
{% endhint %}

Your Okta configuration appears under **Login via SAML**.

<figure><img src="https://173309742-files.gitbook.io/~/files/v0/b/gitbook-x-prod.appspot.com/o/spaces%2F3F2TpHXhur2QtQnORSM9%2Fuploads%2Fgit-blob-3afefa9654b509b6eb240c206eac8f4e30c3a5a4%2Fadd-provider.png?alt=media" alt="The saved Okta configuration listed under Login via SAML in Harness authentication settings"><figcaption><p>Click to view full size image</p></figcaption></figure>

***

### Step 4: Enable SSO with Okta <a href="#step-4-enable-sso-with-okta" id="step-4-enable-sso-with-okta"></a>

Now that Okta is set up in Harness as a SAML SSO provider, enable and test it.

1. In Harness, navigate to **Account Settings**, and then select **Authentication**.
2. Select **Login via SAML**.
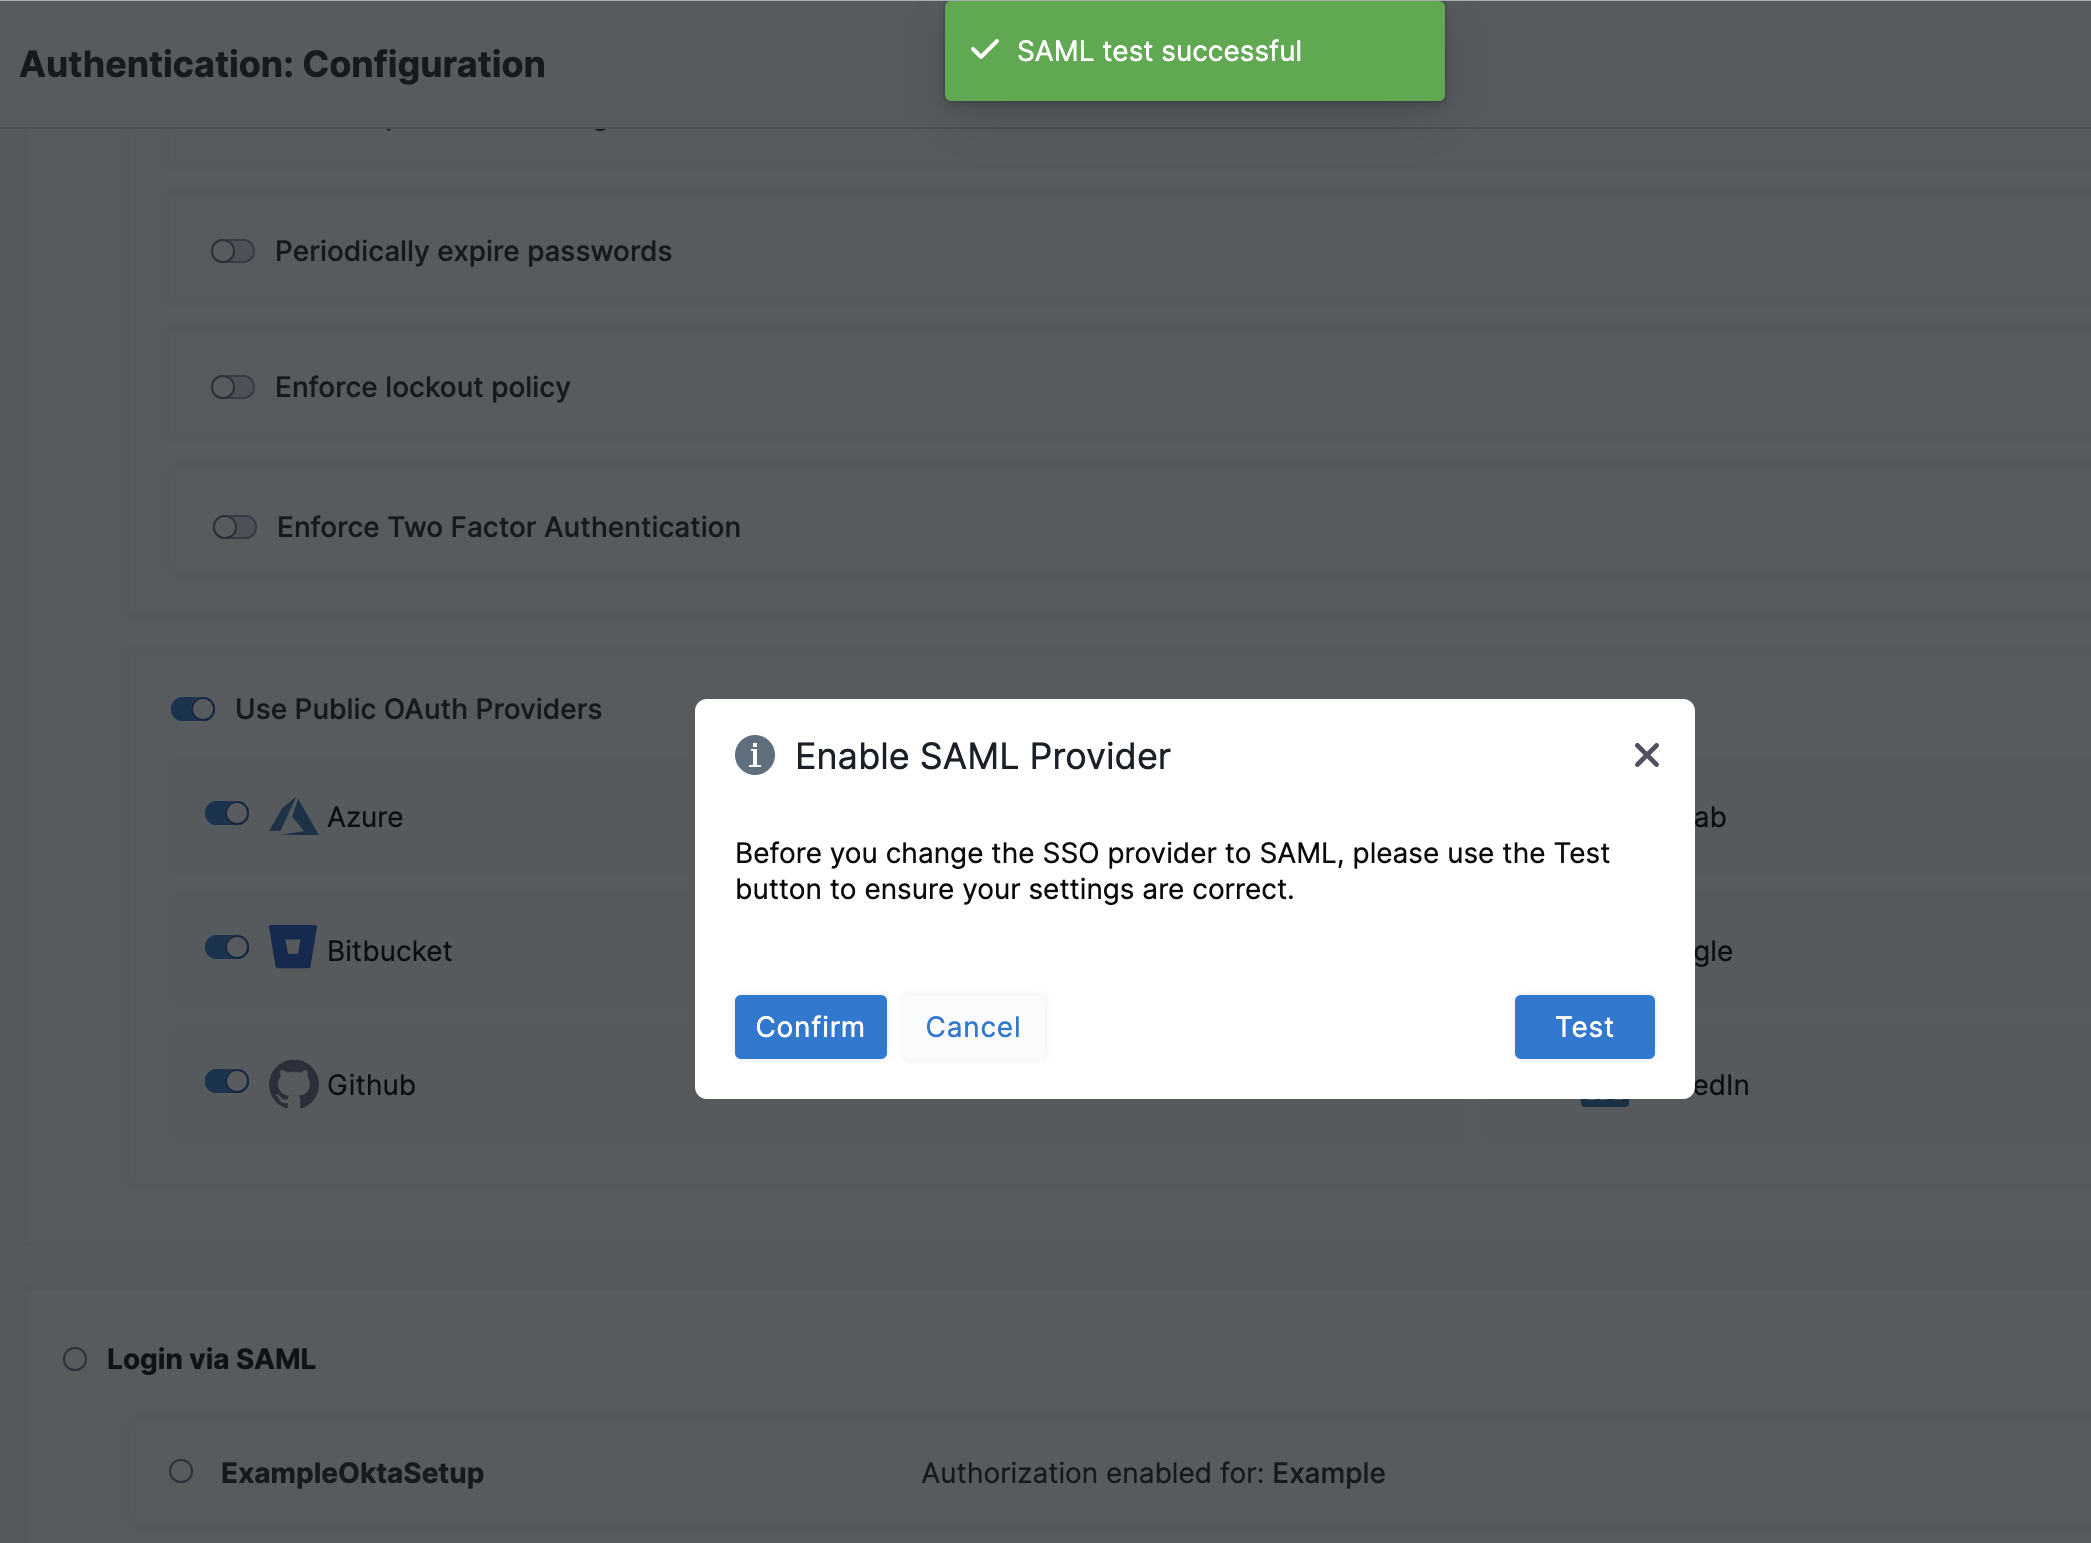
3. On the **Enable SAML Provider** confirmation window, click **Test** to verify the connection.

   <figure><img src="https://173309742-files.gitbook.io/~/files/v0/b/gitbook-x-prod.appspot.com/o/spaces%2F3F2TpHXhur2QtQnORSM9%2Fuploads%2Fgit-blob-4d95d51bbfb16effacfb1594cd073c6346376e52%2Fsingle-sign-on-saml-63.png?alt=media" alt="The Enable SAML Provider confirmation window with the Test button"><figcaption><p>Click to view full size image</p></figcaption></figure>

A new browser tab opens where you log in to **Okta**.

If the connection test succeeds, Harness displays a **SAML test successful** banner.

4. Click **Confirm** to enable Okta SAML SSO in Harness.

{% hint style="info" %}
Keep at least two accounts available while you set this up: a Harness Administrator account to configure and, if needed, roll back SSO, and an ordinary Harness user account to test with. That way a failed test never locks you out.
{% endhint %}

#### Test SSO configuration <a href="#test-sso-configuration" id="test-sso-configuration"></a>

To test the SSO configuration, log into Harness through a different user account. Do this in a separate private browsing (Incognito) window so you can disable SSO in your Harness Administrator account if there are any errors.

If you get locked out of Harness due to an SSO issue, you can log into Harness through local login.

1. In a private browsing window, navigate to Harness.
2. Log in using a Harness user account that has a corresponding email address registered in Okta. If successful, Harness redirects you to the Okta log in page.
3. On the Okta log in page, enter the email address associated with the Harness user account. The Harness account and Okta account can have different passwords. If successful, you are returned to Harness.

If you belong to multiple accounts, confirm the default account is set before attempting to use Harness Local Login.

***

### Step 5: SAML authorization with Okta <a href="#step-5-saml-authorization-with-okta" id="step-5-saml-authorization-with-okta"></a>

Once you have enabled Harness SSO with your Okta app, set up and enable Okta SAML authorization in Harness.

To set up SAML authorization in Harness, link a Harness user group to an Okta user group. When an Okta user in that Okta user group logs in to Harness, Harness adds them automatically to the associated Harness user group, and the user inherits all permissions and access assigned to that group. For more information on permissions, see [RBAC in Harness](/harness-platform/3.0/harness-platform-resources/platform-access-control/rbac-in-harness.md).

1. Set up SAML SSO in Harness as described in [Set up user accounts in Okta and Harness](#step-1-set-up-user-accounts-in-okta-and-harness).

   When you enable SAML authorization, Harness authorizes the same Harness users that are authenticated using your SAML provider.

   <div data-gb-custom-block data-tag="hint" data-style="info" class="hint hint-info"><p>Harness uses email addresses to match Harness user accounts with Okta user accounts. Make sure the email addresses of your registered Harness users match the Okta users you want to authenticate and authorize.</p></div>
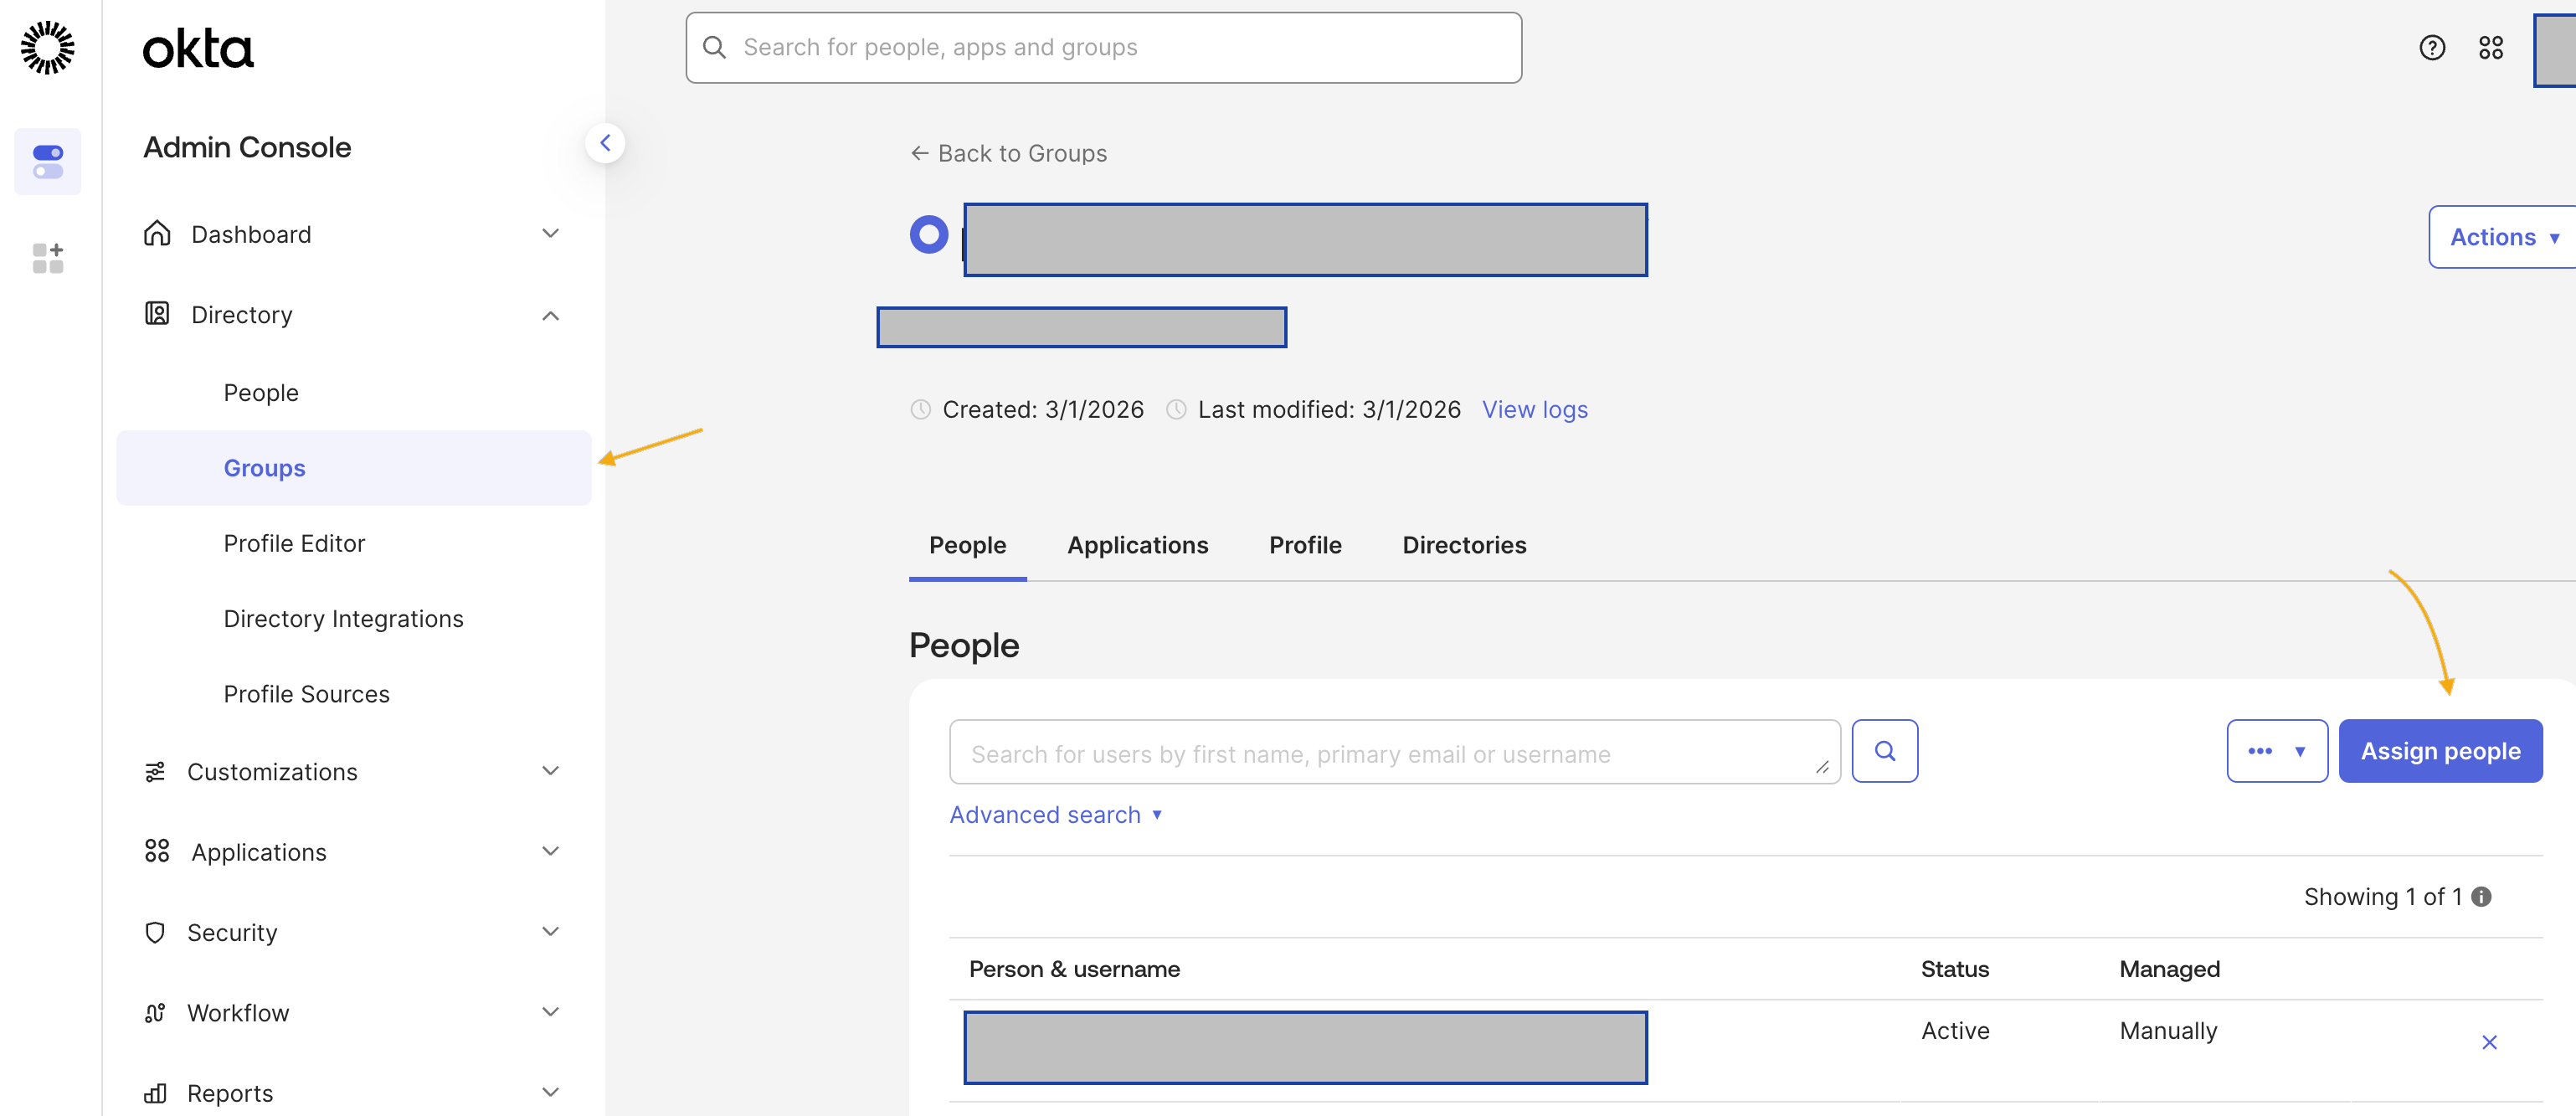
2. In Okta, create a user group and add users to the group, if you do not already have one.

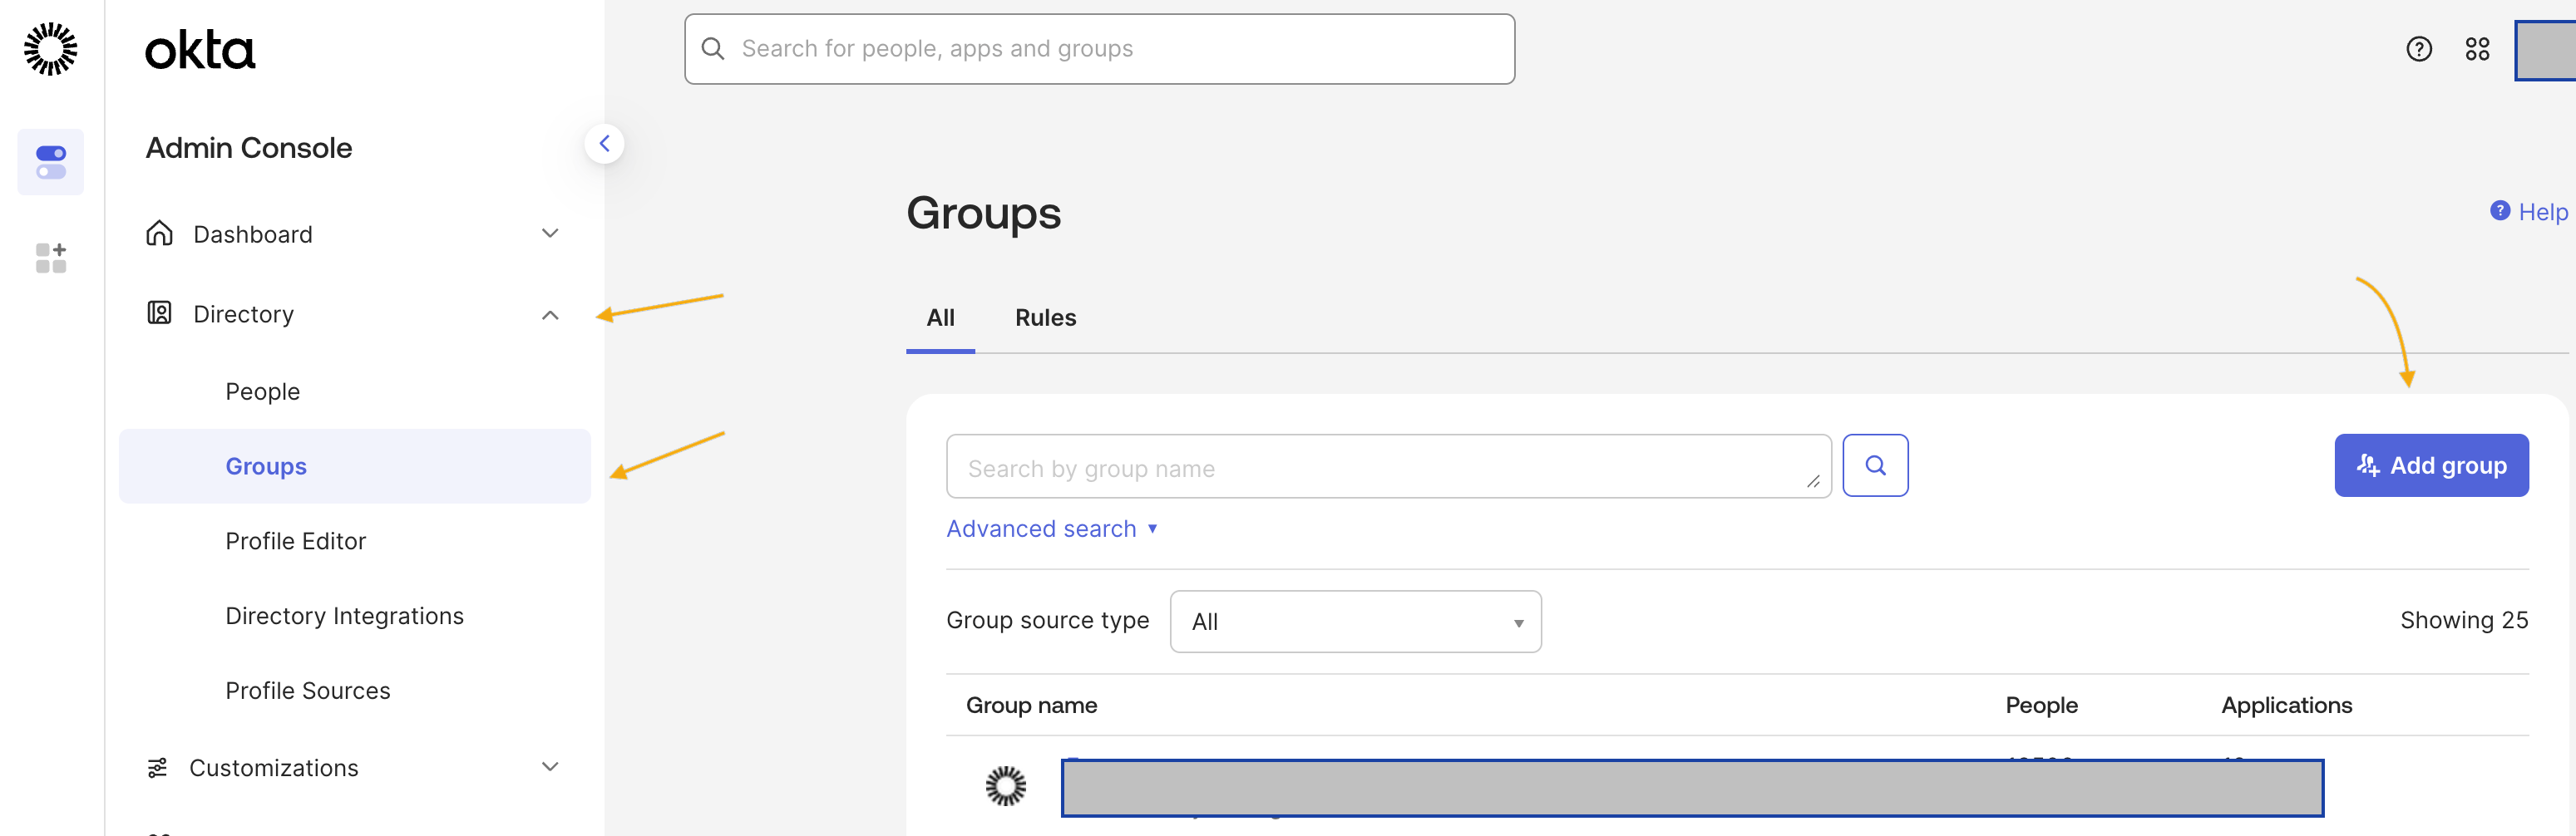
   a. Sign in to Okta using an admin account. b. Under **Directory**, select **Groups**, and then click **Add Group**.

   <figure><img src="https://173309742-files.gitbook.io/~/files/v0/b/gitbook-x-prod.appspot.com/o/spaces%2F3F2TpHXhur2QtQnORSM9%2Fuploads%2Fgit-blob-f0f75f4ba28e02682b1e368786a97444dbb01f75%2Fadd-group.png?alt=media" alt="The Groups page in the Okta Directory with the Add Group button"><figcaption><p>Click to view full size image</p></figcaption></figure>

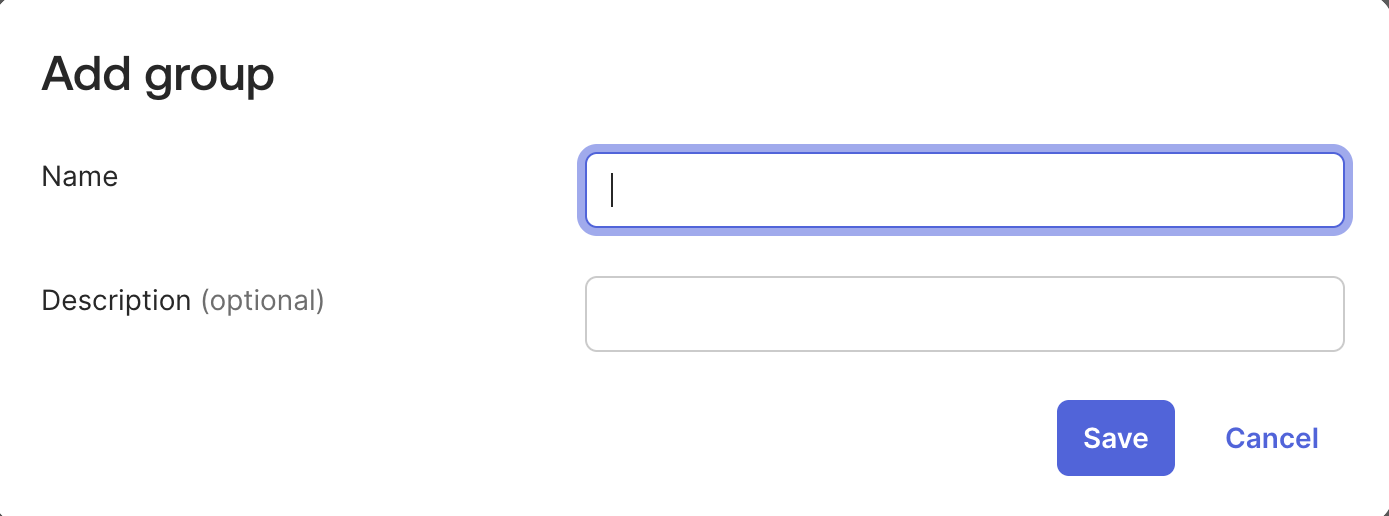
   The **Add Group** dialog opens.

   c. Enter a **Name** and **Group Description** for your group. Click **Save**.

   <figure><img src="https://173309742-files.gitbook.io/~/files/v0/b/gitbook-x-prod.appspot.com/o/spaces%2F3F2TpHXhur2QtQnORSM9%2Fuploads%2Fgit-blob-e1c81f7dde25914914f806fc9cd6c71c78cd1316%2Fsingle-sign-on-saml-65.png?alt=media" alt="The Okta Add Group dialog with the group name and description fields"><figcaption><p>Click to view full size image</p></figcaption></figure>

   d. Okta redirects you to the **Groups** page. Search for the group you created, and then select it. e. Click **Assign People**. Find and add members to your group. Click **Done**.

   <figure><img src="https://173309742-files.gitbook.io/~/files/v0/b/gitbook-x-prod.appspot.com/o/spaces%2F3F2TpHXhur2QtQnORSM9%2Fuploads%2Fgit-blob-f9d61e9db7f507a6d0506d411736a1152bb17700%2Fsingle-sign-on-saml-66.png?alt=media" alt="The Assign People view used to add members to an Okta group"><figcaption><p>Click to view full size image</p></figcaption></figure>
3. Make note of the Okta group name. You need it later to link the Okta group to a Harness user group.
4. Make sure the Okta user group is assigned to the same Okta SAML provider app you use for Harness SAML SSO.
   1. In Okta, under **Directory**, select **Groups**.
   2. Find and select your Okta user group.
   3. Click **Assign applications**. Find your Harness Okta app and click **Assign**.
   4. Click **Done**.
   5. Under **Applications and Resources**, select **Applications**.
   6. Find and select your Harness Okta app.
   7. On the **Assignments** tab, select **Groups**, and make sure your Okta user group is listed there.
5. Configure the group attribute statements in your Okta app. Later, you use the name configured under **Group Attribute Statements (optional)** to enable SAML authorization in Harness.

   a. In Okta, under **Applications and Resources**, select **Applications**, and then select your Harness Okta SAML SSO app.

   b. On the **Sign On** tab, click **Edit** in the **Settings** card, and then expand **Attributes (Optional)**. For details, see steps 11 to 14 in [create app integration](#step-2-create-app-integration-in-okta).

   c. Under **Group Attribute Statements (optional)**, ensure that the **Filter** is set to **Matches regex** and is set to the **.**\* value. Click **Save**.

   <figure><img src="https://173309742-files.gitbook.io/~/files/v0/b/gitbook-x-prod.appspot.com/o/spaces%2F3F2TpHXhur2QtQnORSM9%2Fuploads%2Fgit-blob-ee8b6bce1ced862ae14db98e6777f1263df03f63%2Fmatch-regex.png?alt=media" alt="The group attribute statement filter set to Matches regex with the .* value"><figcaption><p>Click to view full size image</p></figcaption></figure>

   The `Group Attribute Name` is different from an `Okta Group Name`. Your company might have many groups set up in Okta, and the Group Attribute Name filters the groups that you want to authenticate to Harness.
6. In Harness, navigate to **Account Settings**, and select **Authentication**.
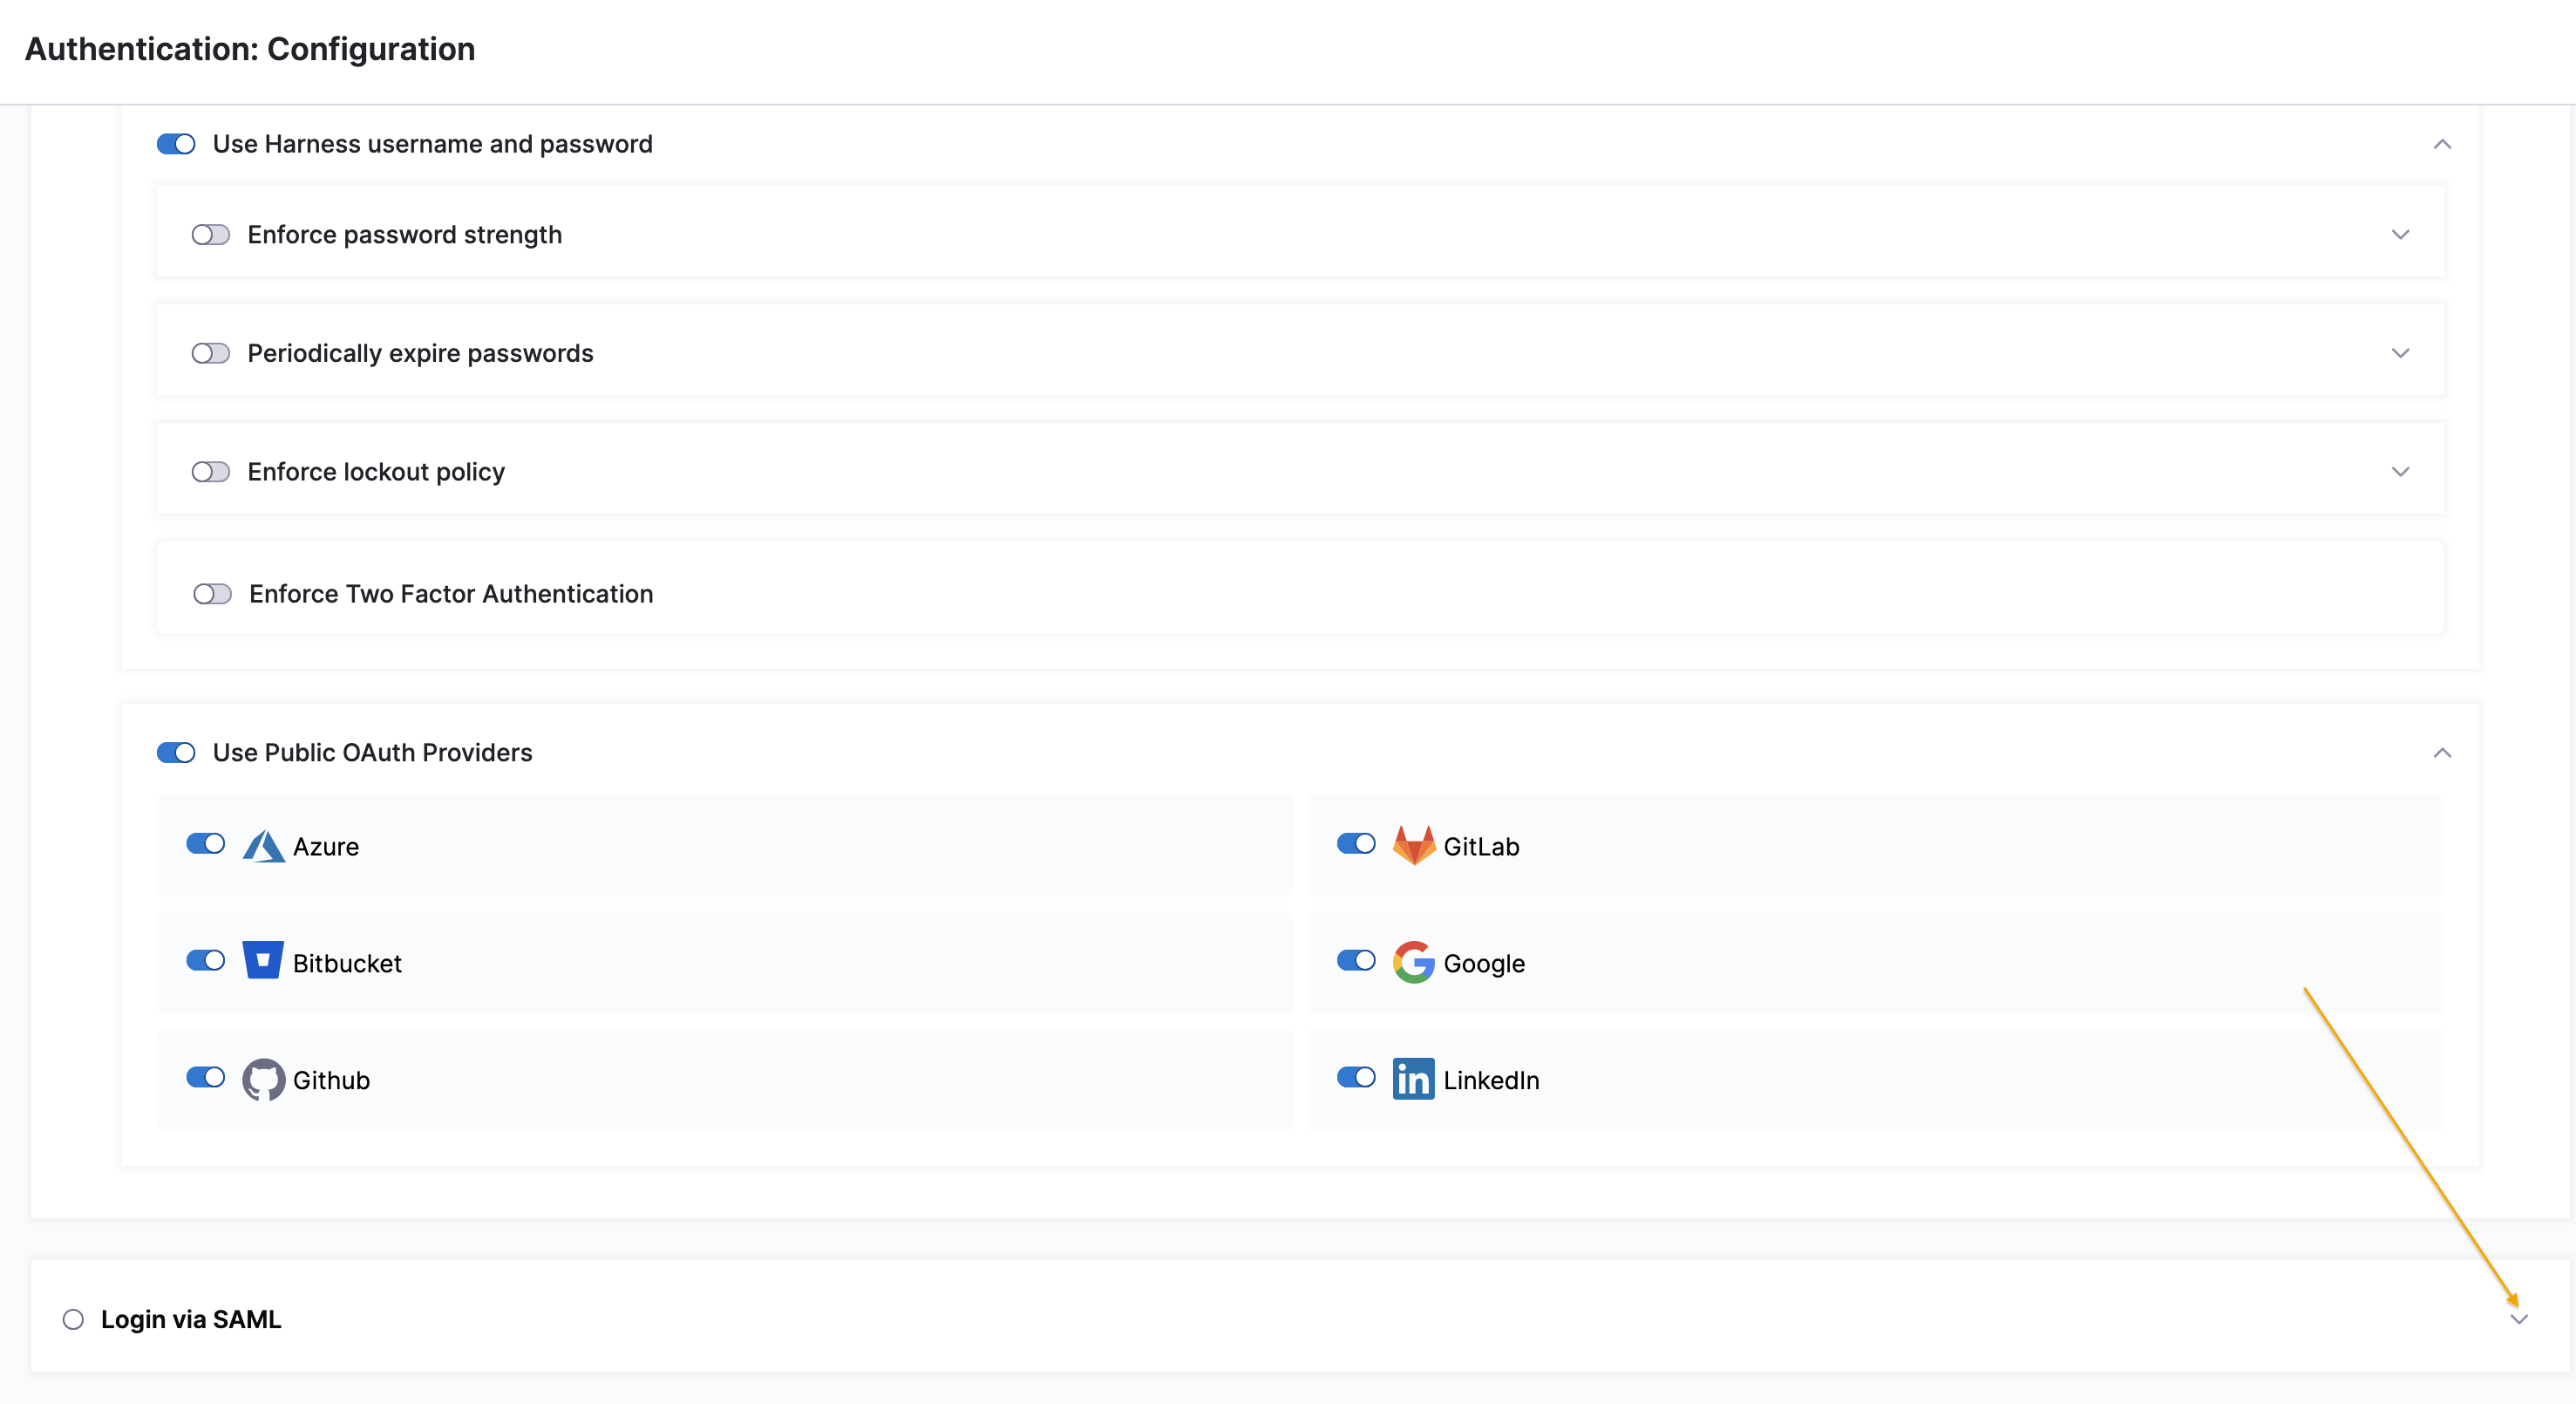
7. Select the arrow to expand the **Login via SAML** section.

   <figure><img src="https://173309742-files.gitbook.io/~/files/v0/b/gitbook-x-prod.appspot.com/o/spaces%2F3F2TpHXhur2QtQnORSM9%2Fuploads%2Fgit-blob-85683f6de8e64305910523f3b53959e5d1f05039%2Fsingle-sign-on-saml-73.png?alt=media" alt="The expanded Login via SAML section in Harness authentication settings"><figcaption><p>Click to view full size image</p></figcaption></figure>
8. Select **More options** (⋮) next to your Okta provider configuration, and then select **Edit**.

   <figure><img src="https://173309742-files.gitbook.io/~/files/v0/b/gitbook-x-prod.appspot.com/o/spaces%2F3F2TpHXhur2QtQnORSM9%2Fuploads%2Fgit-blob-9a8da72acdd67de2dc9e22e61493a2c14d7117a9%2Fsingle-sign-on-saml-111.png?alt=media" alt="The More options menu for a Harness SAML provider with the Edit action"><figcaption><p>Click to view full size image</p></figcaption></figure>
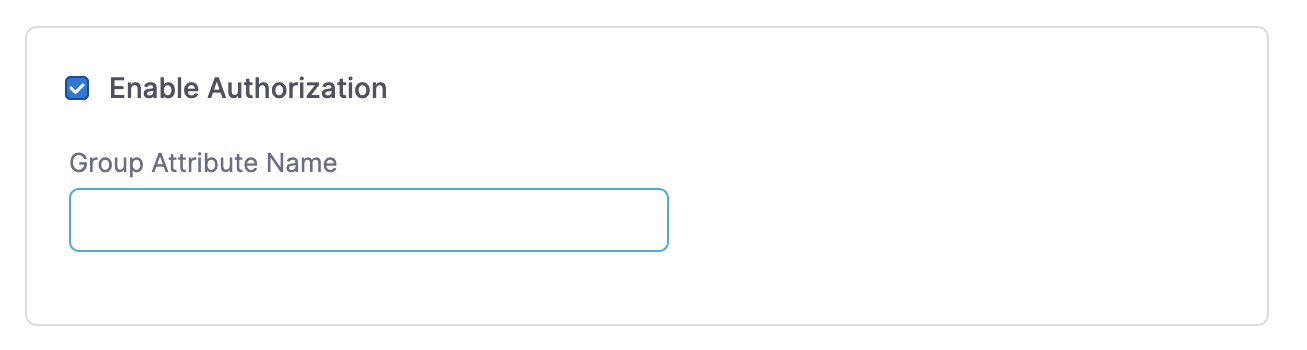
9. On the **Edit SAML Provider** page, select **Enable Authorization**. A **Group Attribute Name** field appears beneath the checkbox.
10. Enter the **Group Attribute Name**.

    <figure><img src="https://173309742-files.gitbook.io/~/files/v0/b/gitbook-x-prod.appspot.com/o/spaces%2F3F2TpHXhur2QtQnORSM9%2Fuploads%2Fgit-blob-acf30e21df76aaf000ceff920ff807f87a95ed63%2Fsingle-sign-on-saml-74.png?alt=media" alt="The Group Attribute Name field on the Harness Edit SAML Provider page"><figcaption><p>Click to view full size image</p></figcaption></figure>
11. Click **Add**. Your Okta configuration now uses the Group Attribute Name for authorization.
12. Link your Okta user group to a corresponding Harness user group. You can create a user group or use an existing group if your Harness user account is a member and your user account is registered under the same email address as in Okta.
    1. In Harness, navigate to **Account Settings**, and select **Access Control**.
    2. Select **User Groups** in the header, and locate the user group that you want to connect to your Okta user group.
    3. Select **Link to SSO Provider Group**.

       <figure><img src="https://173309742-files.gitbook.io/~/files/v0/b/gitbook-x-prod.appspot.com/o/spaces%2F3F2TpHXhur2QtQnORSM9%2Fuploads%2Fgit-blob-bf0e843b00e4b1ce09bc9ed5c96ec051682f76b5%2Fsingle-sign-on-saml-75.png?alt=media" alt="The Link to SSO Provider Group action on a Harness user group"><figcaption><p>Click to view full size image</p></figcaption></figure>
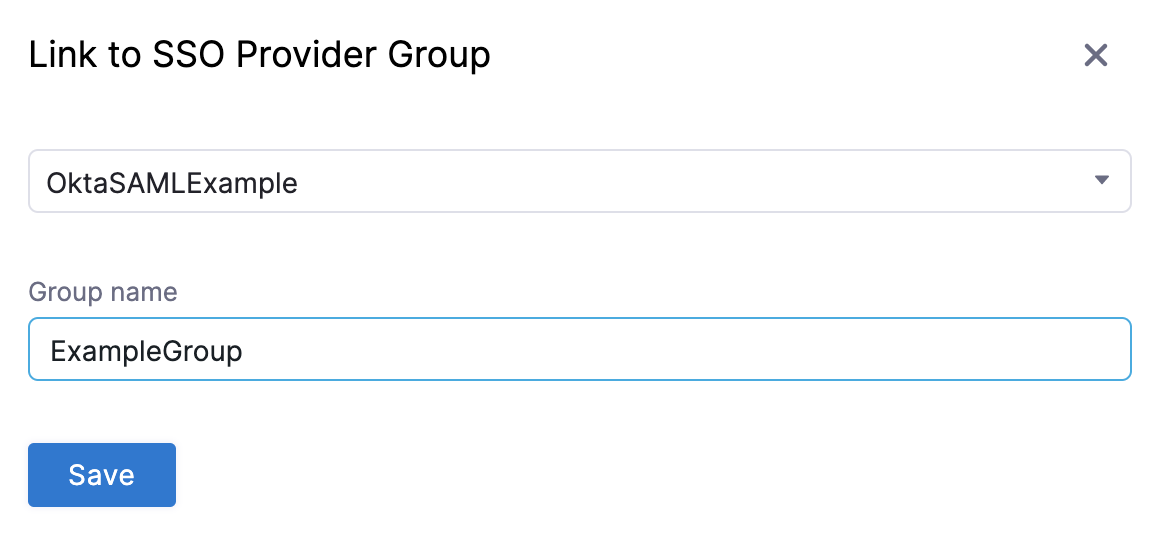
    4. In **Search SSO Settings**, select your Okta SAML SSO configuration.
    5. Enter the Okta **Group Name**, and click **Save**.

       <figure><img src="https://173309742-files.gitbook.io/~/files/v0/b/gitbook-x-prod.appspot.com/o/spaces%2F3F2TpHXhur2QtQnORSM9%2Fuploads%2Fgit-blob-10358437e610b117d5fdcc076cf7e4281ef9311a%2Fsingle-sign-on-saml-76.png?alt=media" alt="The Link to SSO Provider Group dialog with the Okta SSO setting and group name entered"><figcaption><p>Click to view full size image</p></figcaption></figure>
    6. Repeat these steps if you need to connect more user groups.

#### Test SAML authorization <a href="#test-saml-authorization" id="test-saml-authorization"></a>

To test the SAML authorization configuration, log into Harness through a different user account.

1. Follow the steps mentioned in [test configuration](#test-sso-configuration).
2. In your other browser window (where you are logged in to your admin account), make sure the user appears in the Harness user group. Navigate to **Account Settings**, select **Access Control**, select **User Groups** in the header, select the user group you linked to Okta, and make sure the user you just logged in with is listed as a member.

By being a member of this user group, the user receives the permissions and access granted to that group. For more information on group permissions, see [RBAC in Harness](/harness-platform/3.0/harness-platform-resources/platform-access-control/rbac-in-harness.md).

***

### Just-in-time (JIT) provisioning <a href="#just-in-time-jit-provisioning" id="just-in-time-jit-provisioning"></a>

Harness supports SAML configuration [with or without JIT user provisioning](/harness-platform/use-harness-platform/authentication.md#just-in-time-jit-provisioning). To turn it on, select **Enable JIT Provisioning** on the **Add SAML Provider** panel in [Step 3](#step-3-okta-saml-metadata-file). For more information on how Harness creates users on first SAML login when JIT is enabled, see [Just-in-Time (JIT) user provisioning](/harness-platform/3.0/harness-platform-resources/platform-access-control/provision-use-jit.md).

***

### Delink groups <a href="#delink-groups" id="delink-groups"></a>

If you no longer want a Harness user group to be connected with an Okta user group, delink the groups without losing group members.

Delinking groups is required to remove a SAML SSO provider configuration from Harness. You cannot delete the SAML SSO provider from Harness until you have delinked all associated Harness user groups.

1. In Harness, navigate to **Account Settings**, and select **Access Control**.
2. Select **User Groups** in the header, and locate the user group that you want to delink.
3. Select **Delink Group**.

   <figure><img src="https://173309742-files.gitbook.io/~/files/v0/b/gitbook-x-prod.appspot.com/o/spaces%2F3F2TpHXhur2QtQnORSM9%2Fuploads%2Fgit-blob-f588be47c5c91b1d702cd65d6472c5ad9ac7a52d%2Fsingle-sign-on-saml-77.png?alt=media" alt="The Delink Group action on a Harness user group linked to an Okta group"><figcaption><p>Click to view full size image</p></figcaption></figure>
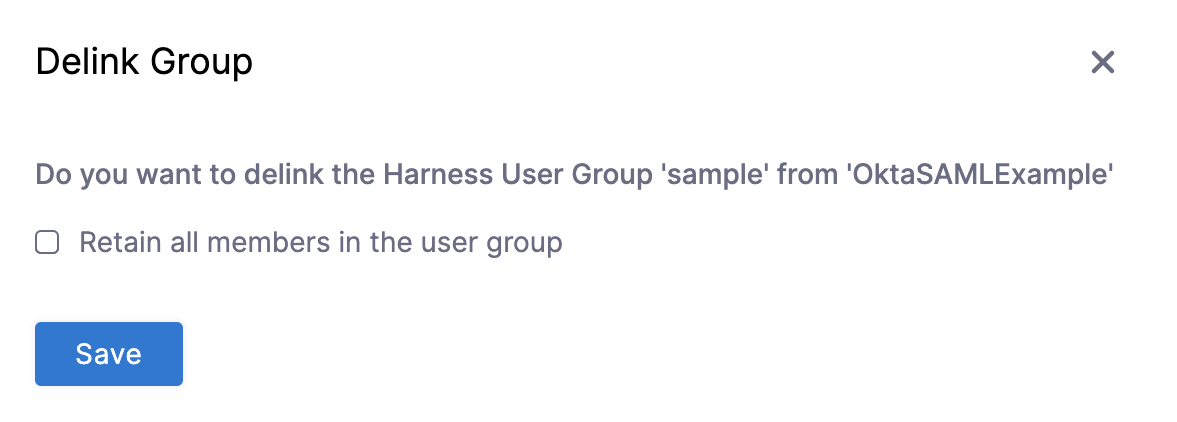
4. On the **Delink Group** window, select **Retain all members in the user group** to keep the users (as local Harness user accounts) in the Harness user group. If unselected, the groups are delinked and the group members who were authenticated through Okta are removed from the Harness user group.

   <figure><img src="https://173309742-files.gitbook.io/~/files/v0/b/gitbook-x-prod.appspot.com/o/spaces%2F3F2TpHXhur2QtQnORSM9%2Fuploads%2Fgit-blob-219057ac738a2dcb84708b726a9b05cd459cebb8%2Fsingle-sign-on-saml-78.png?alt=media" alt="The Delink Group window with the option to retain all members in the user group"><figcaption><p>Click to view full size image</p></figcaption></figure>
5. Click **Save**.

***

### Troubleshooting <a href="#troubleshooting" id="troubleshooting"></a>

<details>

<summary>SAML assertion validation failed when signing in to Harness with Okta</summary>

Ensure the SAML Endpoint URL from Harness is entered in the Single sign-on URL field in Okta. Verify the Audience URI (SP Entity ID) is set to app.harness.io. Confirm users or groups are assigned to the Harness application on the Assignments tab.

</details>

<details>

<summary>The user signs in to Okta but is not recognized as a Harness user</summary>

On the Assignments tab of your Harness Okta app, check the Username set for that user. It must match the email address the user is registered with in Harness. Harness converts mixed case email addresses to lowercase when adding users.

</details>

<details>

<summary>Users sign in but are not added to their Harness user groups</summary>

On the Sign On tab of your Harness Okta app, click Edit in the Settings card and expand Attributes (Optional). This section is collapsed by default and is easy to miss, so confirm a group attribute statement exists, that its Filter is set to Matches regex rather than the default Starts with, and that the name matches the Group Attribute Name entered in Harness. Then confirm Enable Authorization is selected on the Edit SAML Provider page in Harness, because it is cleared by default, and that the Group Attribute Name field beneath it is filled in.

</details>

***

### Related articles <a href="#related-articles" id="related-articles"></a>

* Okta (OIN app): Add the Harness app from the Okta Integration Network catalog instead of creating a custom SAML app.
* SAML SSO with Microsoft Entra ID: Configure Microsoft Entra ID as a SAML SSO provider in Harness.
* SAML SSO with OneLogin: Configure OneLogin as a SAML SSO provider in Harness.
* SAML SSO with Keycloak: Configure Harness to use Keycloak SAML client as an SSO provider.
* Advanced SAML configuration: Configure advanced SAML options in Harness.

{% @harness-feedback/feedback module="harness-ai" pagePath="harness-ai/use-harness-platform/authentication/single-sign-on-saml/okta" %}