> For the complete documentation index, see [llms.txt](https://developer.harness.io/llms.txt). Markdown versions of documentation pages are available by appending `.md` to page URLs; this page is available as [Markdown](https://developer.harness.io/harness-platform/use-harness-platform/notifications-alerts-and-banners/notifications/configure-notifications.md).

# Configure notifications

Notifications keep your teams informed about pipeline events such as start, success, failure, and pause. You can create a reusable notification channel at the scope you need, then attach notifications to a pipeline so that the relevant people are alerted through Slack, Microsoft Teams, email, webhooks, PagerDuty, or Datadog.

***

### What you will learn in this topic <a href="#what-you-will-learn-in-this-topic" id="what-you-will-learn-in-this-topic"></a>

By the end of this topic, you will be able to:

* [Create a reusable notification channel](#configure-new-channels) at any scope and select its connectivity mode.
* [Configure pipeline notifications](#configure-pipeline-notifications) for the pipeline events you want to track.
* Identify the credentials each channel type requires, such as a webhook URL, a PagerDuty service key, or a Datadog API key.

***

### Before you begin <a href="#before-you-begin" id="before-you-begin"></a>

Before you configure notifications, ensure you have the following:

* A Harness pipeline with active delegates and connectors. You can follow the [tutorial to get started with Harness Continuous Delivery (CD)](/continuous-delivery/troubleshooting-and-resources/tutorials/kubernetes-container-deployments/manifest.md) to set up a sample pipeline.
* These steps use [Harness user groups](/harness-platform/use-harness-platform/platform-access-control/add-user-groups.md) to manage user access. If you want to follow along, create a user group named `notification-demo` at the account level, and then add yourself as a user in that group.

***

### Configure new channels <a href="#configure-new-channels" id="configure-new-channels"></a>

Follow the interactive walkthrough to see the flow end to end, or the next section for the step-by-step instructions.

{% embed url="<https://demo.arcade.software/jkqOeBievR5MDNVdwNOF?embed&embed_mobile=tab&embed_desktop=inline&show_copy_link=true>" %}

1. To set up a channel, navigate to **Settings** in your desired scope (Account, Organization, or Project), then under **Notifications and alerts**, select **Notification Channels**.
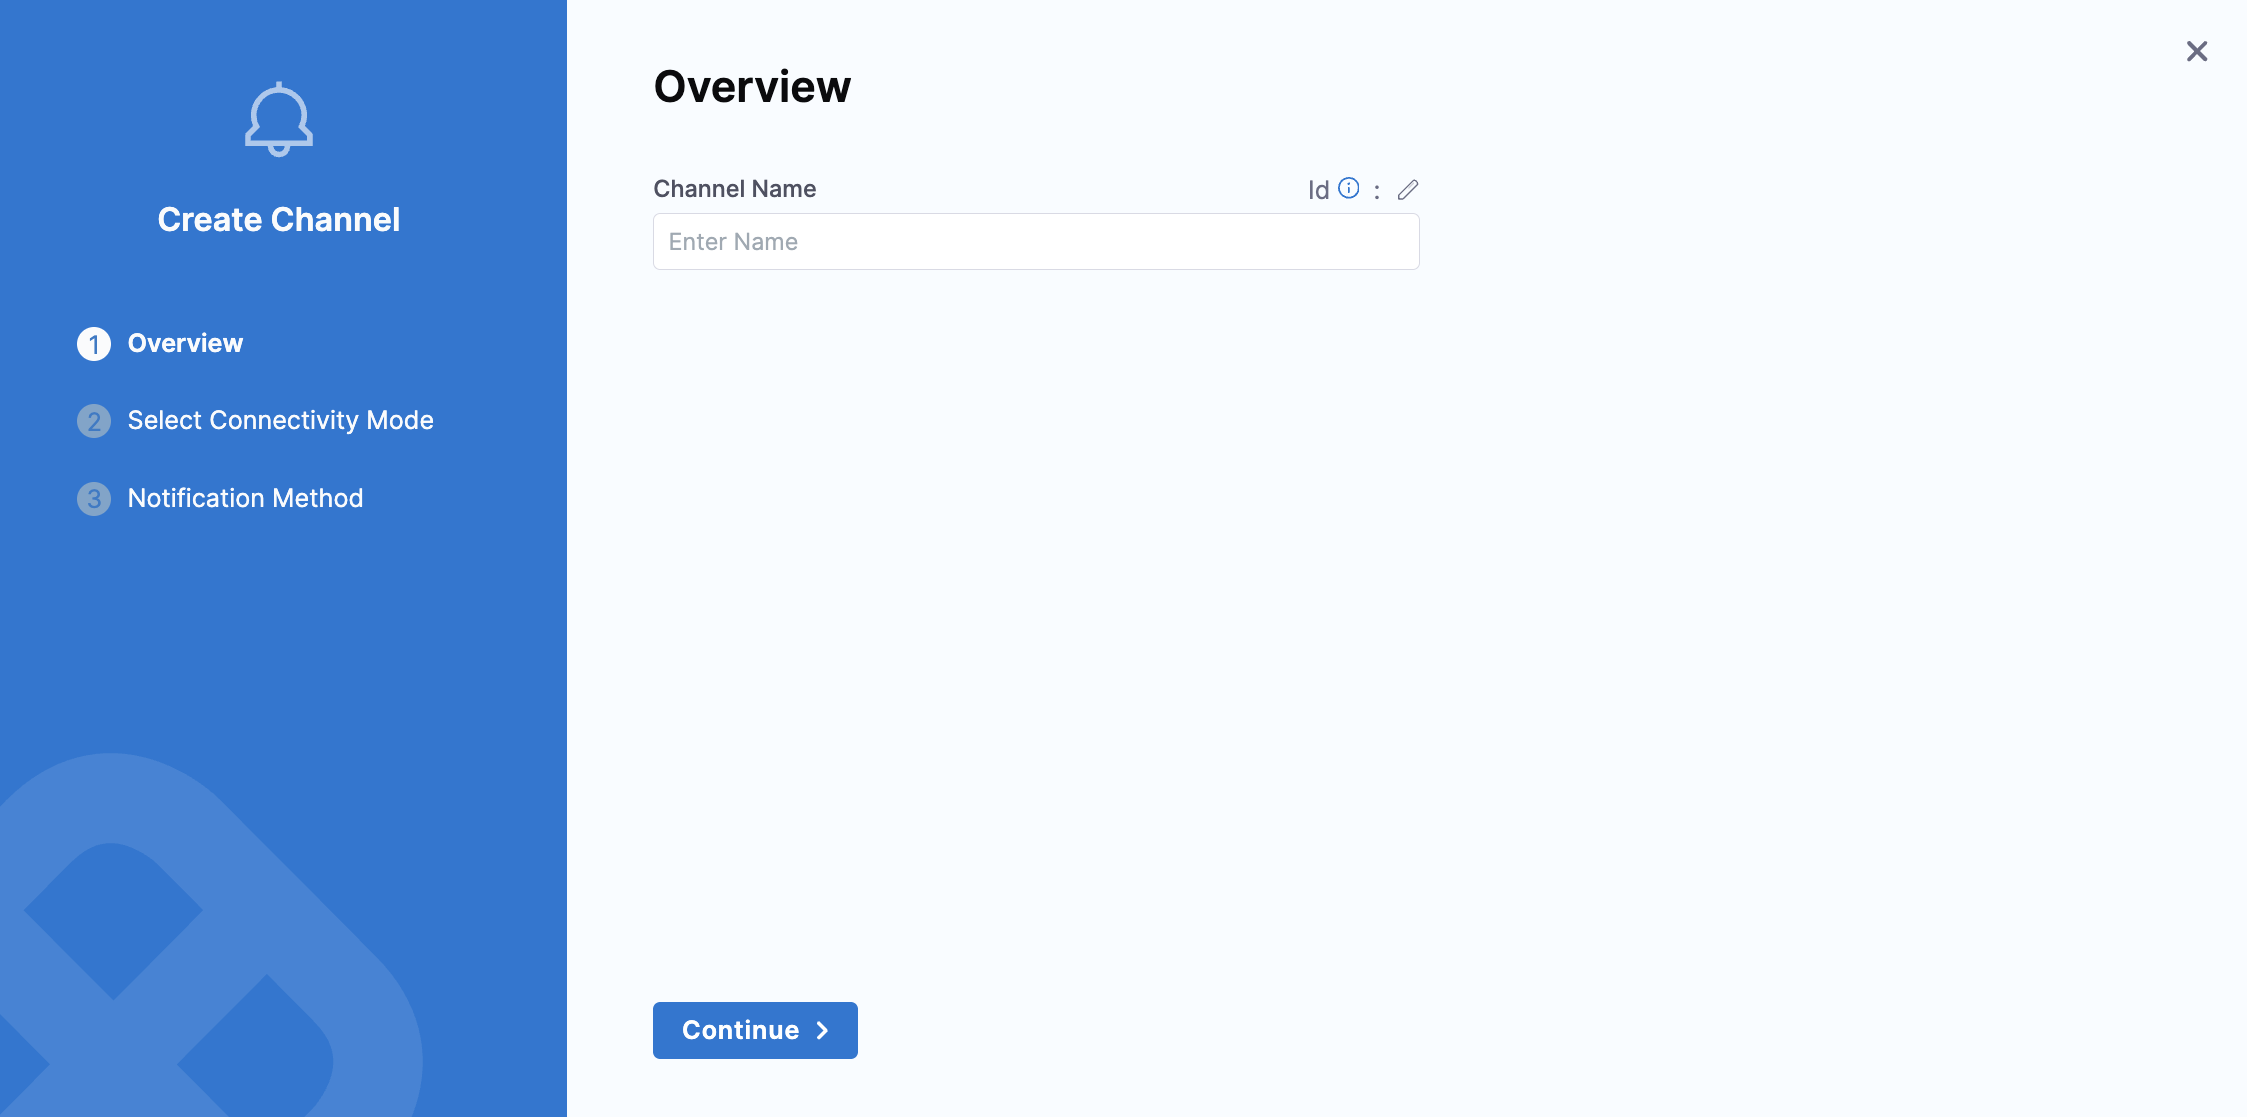
2. Click **New Channel** and enter a **Channel Name**. Click **Continue**.

   <figure><img src="/files/qQ88mgjda7by5QVo0QD7" alt=""><figcaption><p>Click to view full size image</p></figcaption></figure>

   The **Select Connectivity Mode** tab appears.
3. Select a **Connectivity Mode**. You can send notifications directly through the Harness Platform or through a Harness Delegate. Click **Continue**.

   The **Notification Method** tab appears.
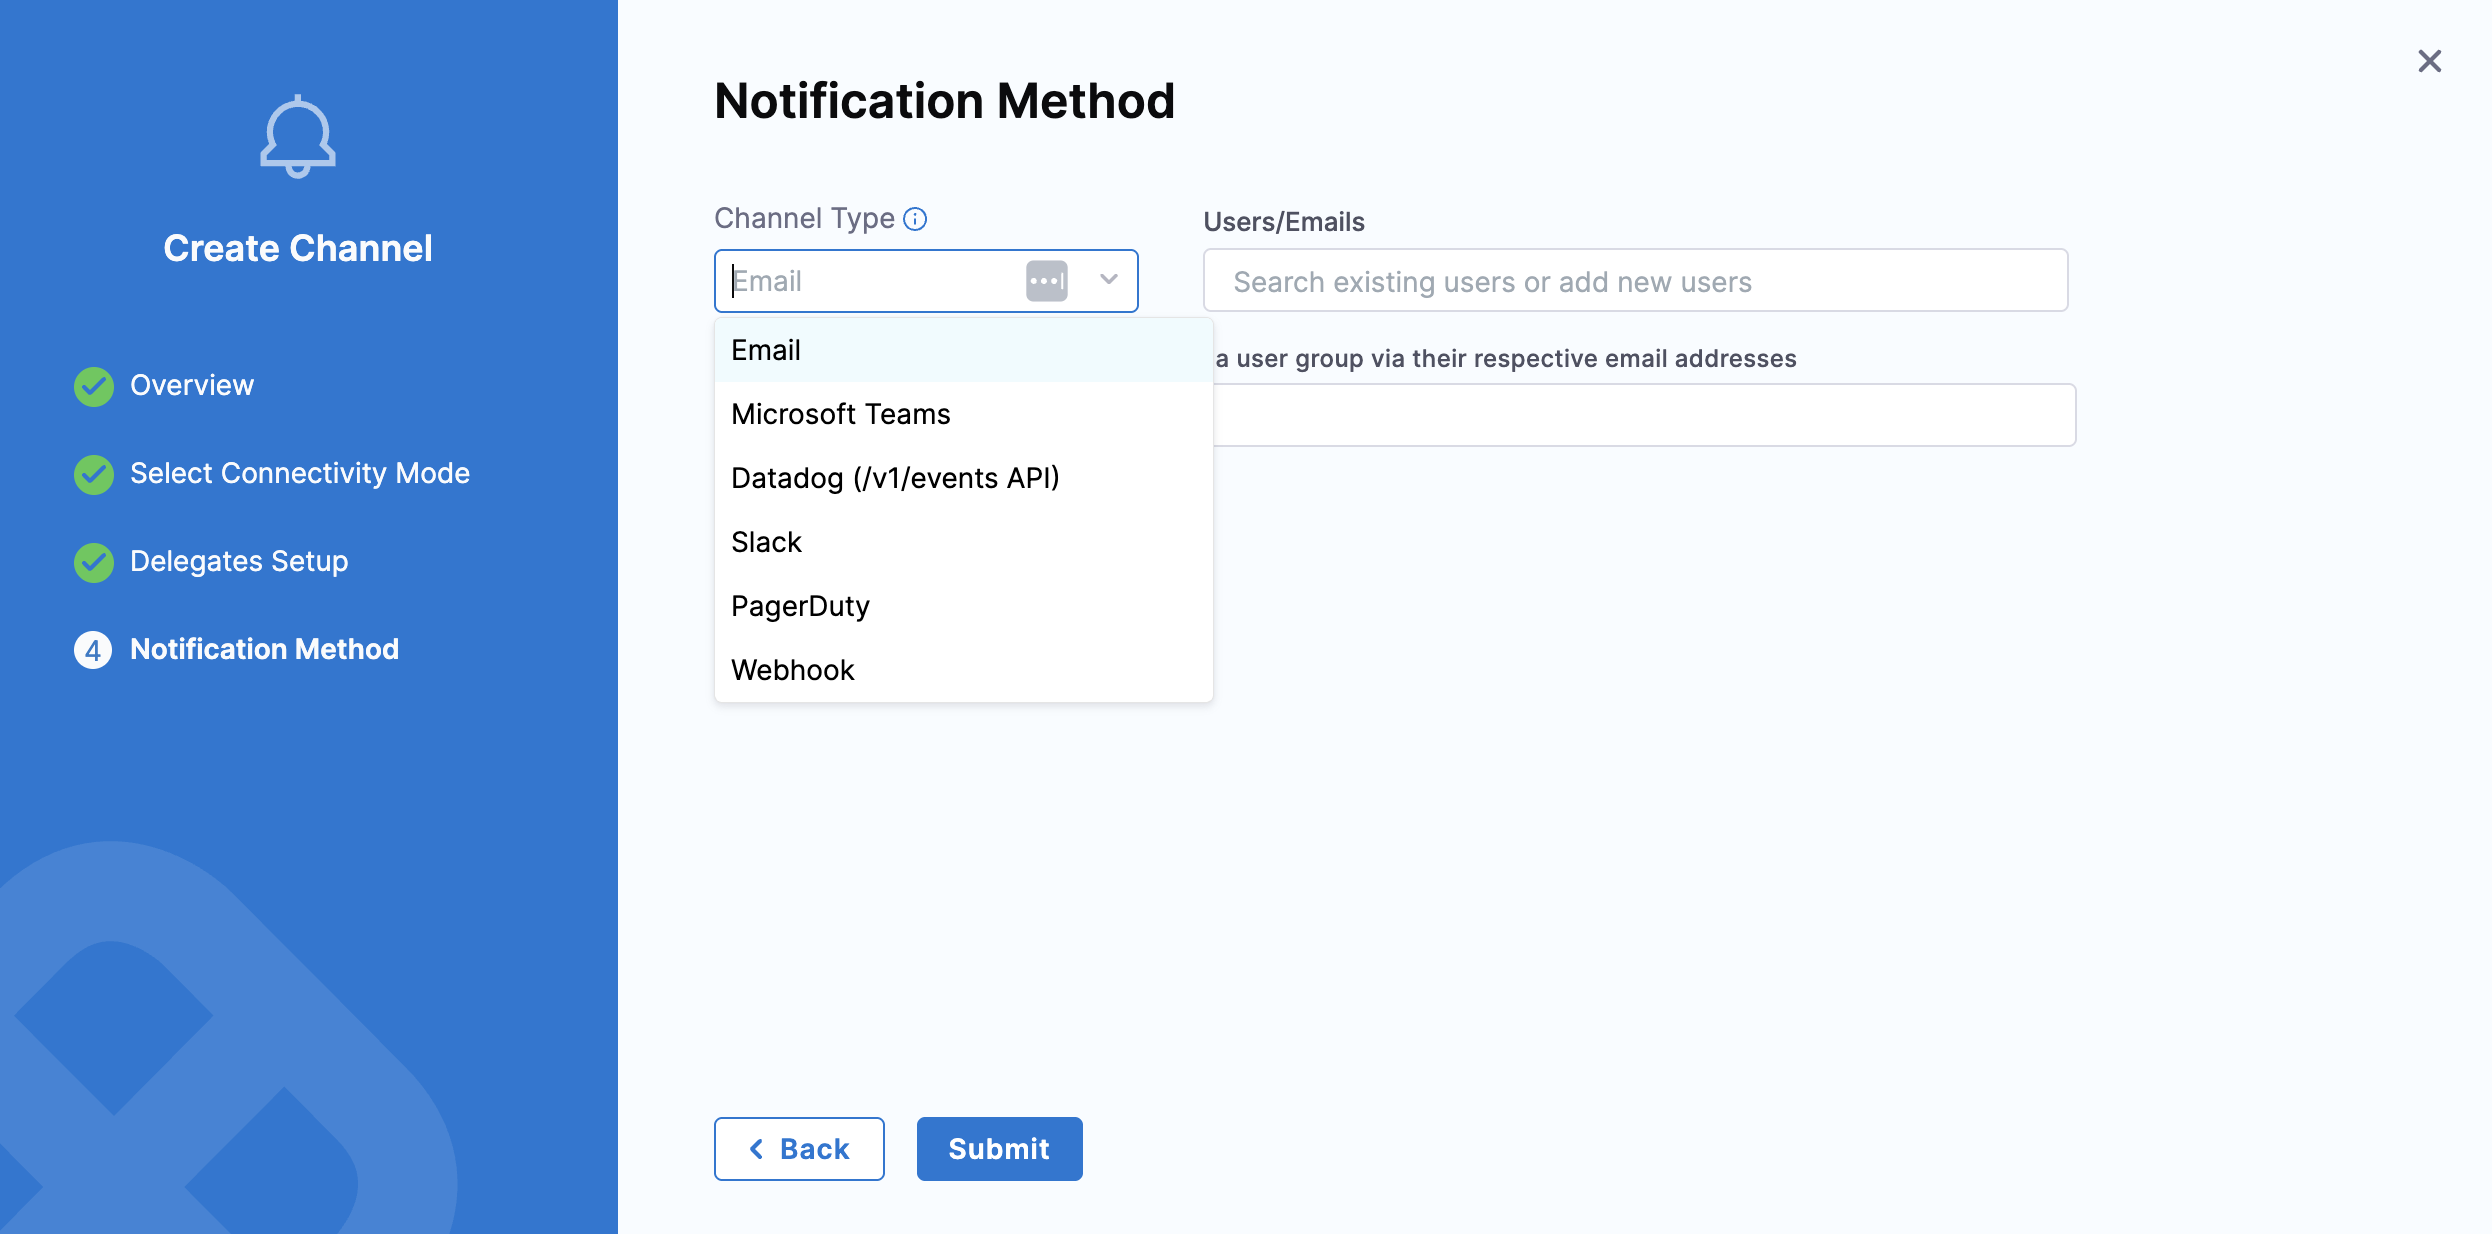
4. Once the connectivity mode is configured, select the [Channel Type](#configure-pipeline-notifications) and add details related to the channel type to proceed. Click **Submit**.

   <div data-gb-custom-block data-tag="hint" data-style="info" class="hint hint-info"><p>If you select the <strong>Connectivity Mode</strong> as "Connect through a Harness Delegate" and <strong>Channel Type</strong> as "Email", add a <a href="/pages/Oniu9yF0PpZh3DCFLcYi">Simple Mail Transfer Protocol (SMTP) configuration</a> to which the Harness delegate has access. If this is not done, then the email notifications fail.</p></div>

   <div data-gb-custom-block data-tag="hint" data-style="warning" class="hint hint-warning"><p><strong>USER GROUPS REQUIRE A NOTIFICATION PREFERENCE</strong></p><p>If you target a Harness user group instead of entering a recipient directly, the channel delivers through the channels configured in that group's <strong>Notification Preferences</strong>. When the group has no preference configured for the channel type you selected, no notification is delivered and Harness does not report an error.</p><p>Add the preference to the user group before you rely on the channel. Go to <a href="/pages/37QQUiOv0Gx4vKkNjA8b#edit-notification-preferences">Edit notification preferences</a> to add a channel to a user group.</p></div>

   <figure><img src="/files/7fPzpkfz65BZcXt6V1HP" alt=""><figcaption><p>Click to view full size image</p></figcaption></figure>

The channel is now available at the scope where you created it, and you can reference it when you configure pipeline notifications.

***

### Configure pipeline notifications <a href="#configure-pipeline-notifications" id="configure-pipeline-notifications"></a>

When you configure pipeline notifications, you select the **Pipeline Events** that trigger the notification. Available pipeline-level events include start, end, success, failure, pause, and **Waiting for User Action**. The **Waiting for User Action** event fires whenever a pipeline pauses because it needs user input, such as an **Approval** step, **Manual Intervention**, or runtime execution input. For the full list of events and their behavior, see [Add a pipeline notification strategy](/continuous-delivery/use-continuous-delivery/cd-building-blocks/cd-steps/notify-users-of-pipeline-events.md#select-events).

Select the tab for the channel type you want to use. Each channel type requires different delivery details.

{% tabs %}
{% tab title="Email" %}

1. Click the **Notify** icon on the right side of the Harness pipeline studio.
2. In **New Notification**, add a name for your notification.
3. In **Pipeline Events**, select the events (pipeline or stages) that trigger the notification.
   * For stage-based events, select the stage name that you want to trigger the notification and click **Next**.
4. In **Notification Method**, select `Email`. For email notifications, enter the email addresses that you want to notify.
   * Enter multiple addresses as a comma-separated list. For example, `john.doe@example.io,qateam@example.io`.
   * You can also use the user group that you created above to receive notifications.
5. You can optionally add **notification templates** to get custom notifications based on the event. For more information, see [Custom notification templates for pipeline notifications](/harness-platform/use-harness-platform/templates/customized-notification-template.md).
6. Select the **Connectivity Mode**.
   * Connect through Harness Platform to send notifications.
   * Connect through Harness Delegate to send notifications.
     * Select the delegate that you want to use to send notifications.
7. Click **Submit** and your notification is created.
   {% endtab %}

{% tab title="Slack" %}
To configure Slack notifications, you need to create a Slack webhook. For more information, see the [sending messages using incoming webhooks](https://api.slack.com/messaging/webhooks) tutorial provided by Slack. Copy and store the webhook URL for use in Harness.

1. Click the **Notify** icon on the right side of the Harness pipeline studio.
2. In **New Notification**, add a name for your notification.
3. In **Pipeline Events**, select the events (pipeline or stages) that trigger the notification.
   * For stage-based events, select the stage name that you want to trigger the notification and click **Next**.
4. In **Notification Method**, select `Slack`.
   * Paste the webhook in **Slack Webhook URL**. Harness recommends that you add the webhook as an [encrypted text secret](/harness-platform/use-harness-platform/secrets/add-use-text-secrets.md) and reference it in **Slack Webhook URL** as an expression, such as `<+secrets.getValue("slackwebhookURL")>`.
   * You can also use the user group created above, if it is associated with the Slack channels to send notifications. For more information, see [Notify Slack channels in user groups](/continuous-delivery/use-continuous-delivery/cd-building-blocks/cd-steps/notify-users-of-pipeline-events.md#notify-slack-channels-in-user-groups).
5. You can optionally add **notification templates** to get custom notifications based on the event. For more information, see [Custom notification templates for pipeline notifications](/harness-platform/use-harness-platform/templates/customized-notification-template.md).
6. Select the **Connectivity Mode**.
   * Connect through Harness Platform to send notifications.
   * Connect through Harness Delegate to send notifications.
     * Select the delegate that you want to use to send notifications.
7. Click **Submit** and your notification is created.
   {% endtab %}

{% tab title="PagerDuty" %}
To configure PagerDuty notifications, you need a PagerDuty [service key](https://support.pagerduty.com/docs/services-and-integrations) to integrate with Harness. Copy or store this key from PagerDuty's **Configuration** > **Services** > **Service Details dialog** > **Integrations** tab.

1. Click the **Notify** icon on the right side of the Harness pipeline studio.
2. In **New Notification**, add a name for your notification.
3. In **Pipeline Events**, select the events (pipeline or stages) that trigger the notification.
   * For stage-based events, select the stage name that you want to trigger the notification and click **Next**.
4. In **Notification Method**, select `Pagerduty`.

   * Create an [encrypted text](/harness-platform/use-harness-platform/secrets/add-use-text-secrets.md) secret with the name `pagerdutykey` for the PagerDuty service you created above, and reference it in **PagerDuty Key** using an expression. Harness sends notifications using this key.

   For example, you can reference a secret within the **Organization** scope using an expression with `org`:

   ```
   <+secrets.getvalue("org.your-secret-Id")>
   ```
5. You can optionally add **notification templates** to get custom notifications based on the event. For more information, see [Custom notification templates for pipeline notifications](/harness-platform/use-harness-platform/templates/customized-notification-template.md).
6. Select the **Connectivity Mode**.
   * Connect through Harness Platform to send notifications.
   * Connect through Harness Delegate to send notifications.
     * Select the delegate that you want to use to send notifications.
7. Click **Submit** and your notification is created.
   {% endtab %}

{% tab title="Microsoft Teams" %}
In Microsoft Teams, you can use webhook notifications to inform an external application of a pipeline or stage event.

1. Click the **Notify** icon on the right side of the Harness pipeline studio.
2. In **New Notification**, add a name for your notification.
3. In **Pipeline Events**, select the events (pipeline or stages) that trigger the notification.
   * For stage-based events, select the stage name that you want to trigger the notification and click **Next**.
4. In **Notification Method**, select `Microsoft Teams`. In **Enter the Microsoft Teams Webhook URL**, paste the webhook URL for your Microsoft Teams channel.
5. You can optionally add **notification templates** to get custom notifications based on the event. For more information, see [Custom notification templates for pipeline notifications](/harness-platform/use-harness-platform/templates/customized-notification-template.md).
6. Select the **Connectivity Mode**.
   * Connect through Harness Platform to send notifications.
   * Connect through Harness Delegate to send notifications.
     * Select the delegate that you want to use to send notifications.
7. Click **Submit** and your notification is created.
   {% endtab %}

{% tab title="Webhook" %}
In Harness you can use webhook notifications to inform an external application of a pipeline or stage event.

1. Click the **Notify** icon on the right side of the Harness pipeline studio.
2. In **New Notification**, add a name for your notification.
3. In **Pipeline Events**, select the events (pipeline or stages) that trigger the notification.
   * For stage-based events, select the stage name that you want to trigger the notification and click **Next**.
4. In **Notification Method**, select `Webhook`. In **Enter the URL to be called**, use expressions to compose the URL to be called when the event occurs. For example, `https://companyurl.notify.com/execution=-<+pipeline.executionId>`.
   * The webhook call is made as a POST request, and includes a JavaScript Object Notation (JSON) object containing the properties of the triggered event.
   * The expression must be evaluated in the context of the event. For example, stage-related expressions might not be valid for pipeline start events.
5. You can optionally add **notification templates** to get custom notifications based on the event. For more information, see [Custom notification templates for pipeline notifications](/harness-platform/use-harness-platform/templates/customized-notification-template.md).
6. Select the **Connectivity Mode**.
   * Connect through Harness Platform to send notifications.
   * Connect through Harness Delegate to send notifications.
     * Select the delegate that you want to use to send notifications.
7. Click **Submit** and your notification is created.
   {% endtab %}

{% tab title="Datadog" %}
{% hint style="info" %}
Currently, the Datadog notifications feature is behind the feature flag `PIPE_DATADOG_NOTIFICATIONS`. Contact [Harness Support](mailto:support@harness.io) to enable this feature.
{% endhint %}

To configure Datadog notifications, you need a Datadog [API key](https://docs.datadoghq.com/account_management/api_keys/) to integrate with Harness. Copy or store this key from Datadog's **Configuration** > **API Keys** > **API Key Details dialog** > **Integrations** tab.

1. Click the **Notify** icon on the right side of the Harness pipeline studio.
2. In **New Notification**, add a name for your notification.
3. In **Pipeline Events**, select the events (pipeline or stages) that trigger the notification.
   * For stage-based events, select the stage name that you want to trigger the notification and click **Next**.
4. In **Notification Method**, select `Datadog`. Create an [encrypted text](/harness-platform/use-harness-platform/secrets/add-use-text-secrets.md) secret with the name `datadogkey` for the Datadog service you created above, and reference it in **Datadog Key** using an expression. Harness sends notifications using this key.

   * For example, you can reference a secret within the **Organization** scope using an expression with `org`:

   ```
   <+secrets.getvalue("org.your-secret-Id")>
   ```
5. You can optionally add **notification templates** to get custom notifications based on the event. For more information, see [Custom notification templates for pipeline notifications](/harness-platform/use-harness-platform/templates/customized-notification-template.md).
6. Select the **Connectivity Mode**.
   * Connect through Harness Platform to send notifications.
   * Connect through Harness Delegate to send notifications.
     * Select the delegate that you want to use to send notifications.
7. Click **Submit** and your notification is created.
   {% endtab %}
   {% endtabs %}

When you run the pipeline, you receive notifications on the platform you set up.

***

### Next steps <a href="#next-steps" id="next-steps"></a>

* [Notify users of pipeline events](/continuous-delivery/use-continuous-delivery/cd-building-blocks/cd-steps/notify-users-of-pipeline-events.md): Configure the notification at the receiver end and review the full list of pipeline events.
* [Custom notification templates](/harness-platform/use-harness-platform/templates/customized-notification-template.md): Customize the content of a notification based on the event that triggers it.
* [Add SMTP configuration](/harness-platform/use-harness-platform/notifications-alerts-and-banners/notifications/add-smtp-configuration.md): Configure SMTP for email-based deployment notifications, approvals, and tracking.