> For the complete documentation index, see [llms.txt](https://developer.harness.io/llms.txt). Markdown versions of documentation pages are available by appending `.md` to page URLs; this page is available as [Markdown](https://developer.harness.io/harness-platform/use-harness-platform/organizations-and-projects/move-projects/move-projects-across-organization.md).
# Steps to move a project from one organization to another
Step-by-step guide to move a project across organizations.
This page provides step-by-step instructions to move a project from one organization to another within your Harness account. This process includes selecting the destination organization, confirming the move, and verifying the outcome.
Moving a project transfers a project and all its entities from one organization to another within your Harness account. The project retains its identifier, access control settings, and audit history. However, entities that reference organization-level resources (such as connectors, secrets, or templates) may break and require updates after the move.
### Feature availability
* This feature is currently in **closed beta**, and is available for select accounts only. The access is determined based on the currently [supported modules and entities](/harness-platform/use-harness-platform/organizations-and-projects/move-projects.md#supported-modules).
* This feature requires the `PL_PROJECT_MOVEMENT_ENABLED` feature flag. Contact [Harness support](mailto:support@harness.io) to enable it.
***
### What you will learn in this topic
By the end of this page, you will understand how to:
* Move a project from source to destination.
* Verify the project in its new organization.
***
### Before you begin
Before you move a project across organizations, ensure you have the following:
* **Create and move project permissions**: `core_project_create` and `core_project_move` permissions on the source and destination projects. Go to [RBAC in Harness](/harness-platform/3.0/harness-platform-resources/platform-access-control/rbac-in-harness.md) to understand how permissions are assigned through roles.
* **Pre-move validation**: Complete the checks in the [pre-move guide](/harness-platform/3.0/harness-platform-resources/organizations-and-projects/move-projects/pre-move-and-post-move-guide.md) to understand which entities may break after the move.
***
### Move a project across organizations
Follow these steps to move a project from one organization to another:
#### Step 1: Select a project to move
1. Go to one of the following:
* **Project overview page**: `https://app.harness.io/ng/account//all/orgs//projects//overview`
* **Projects listing page**: `https://app.harness.io/ng/account//all/orgs//projects`
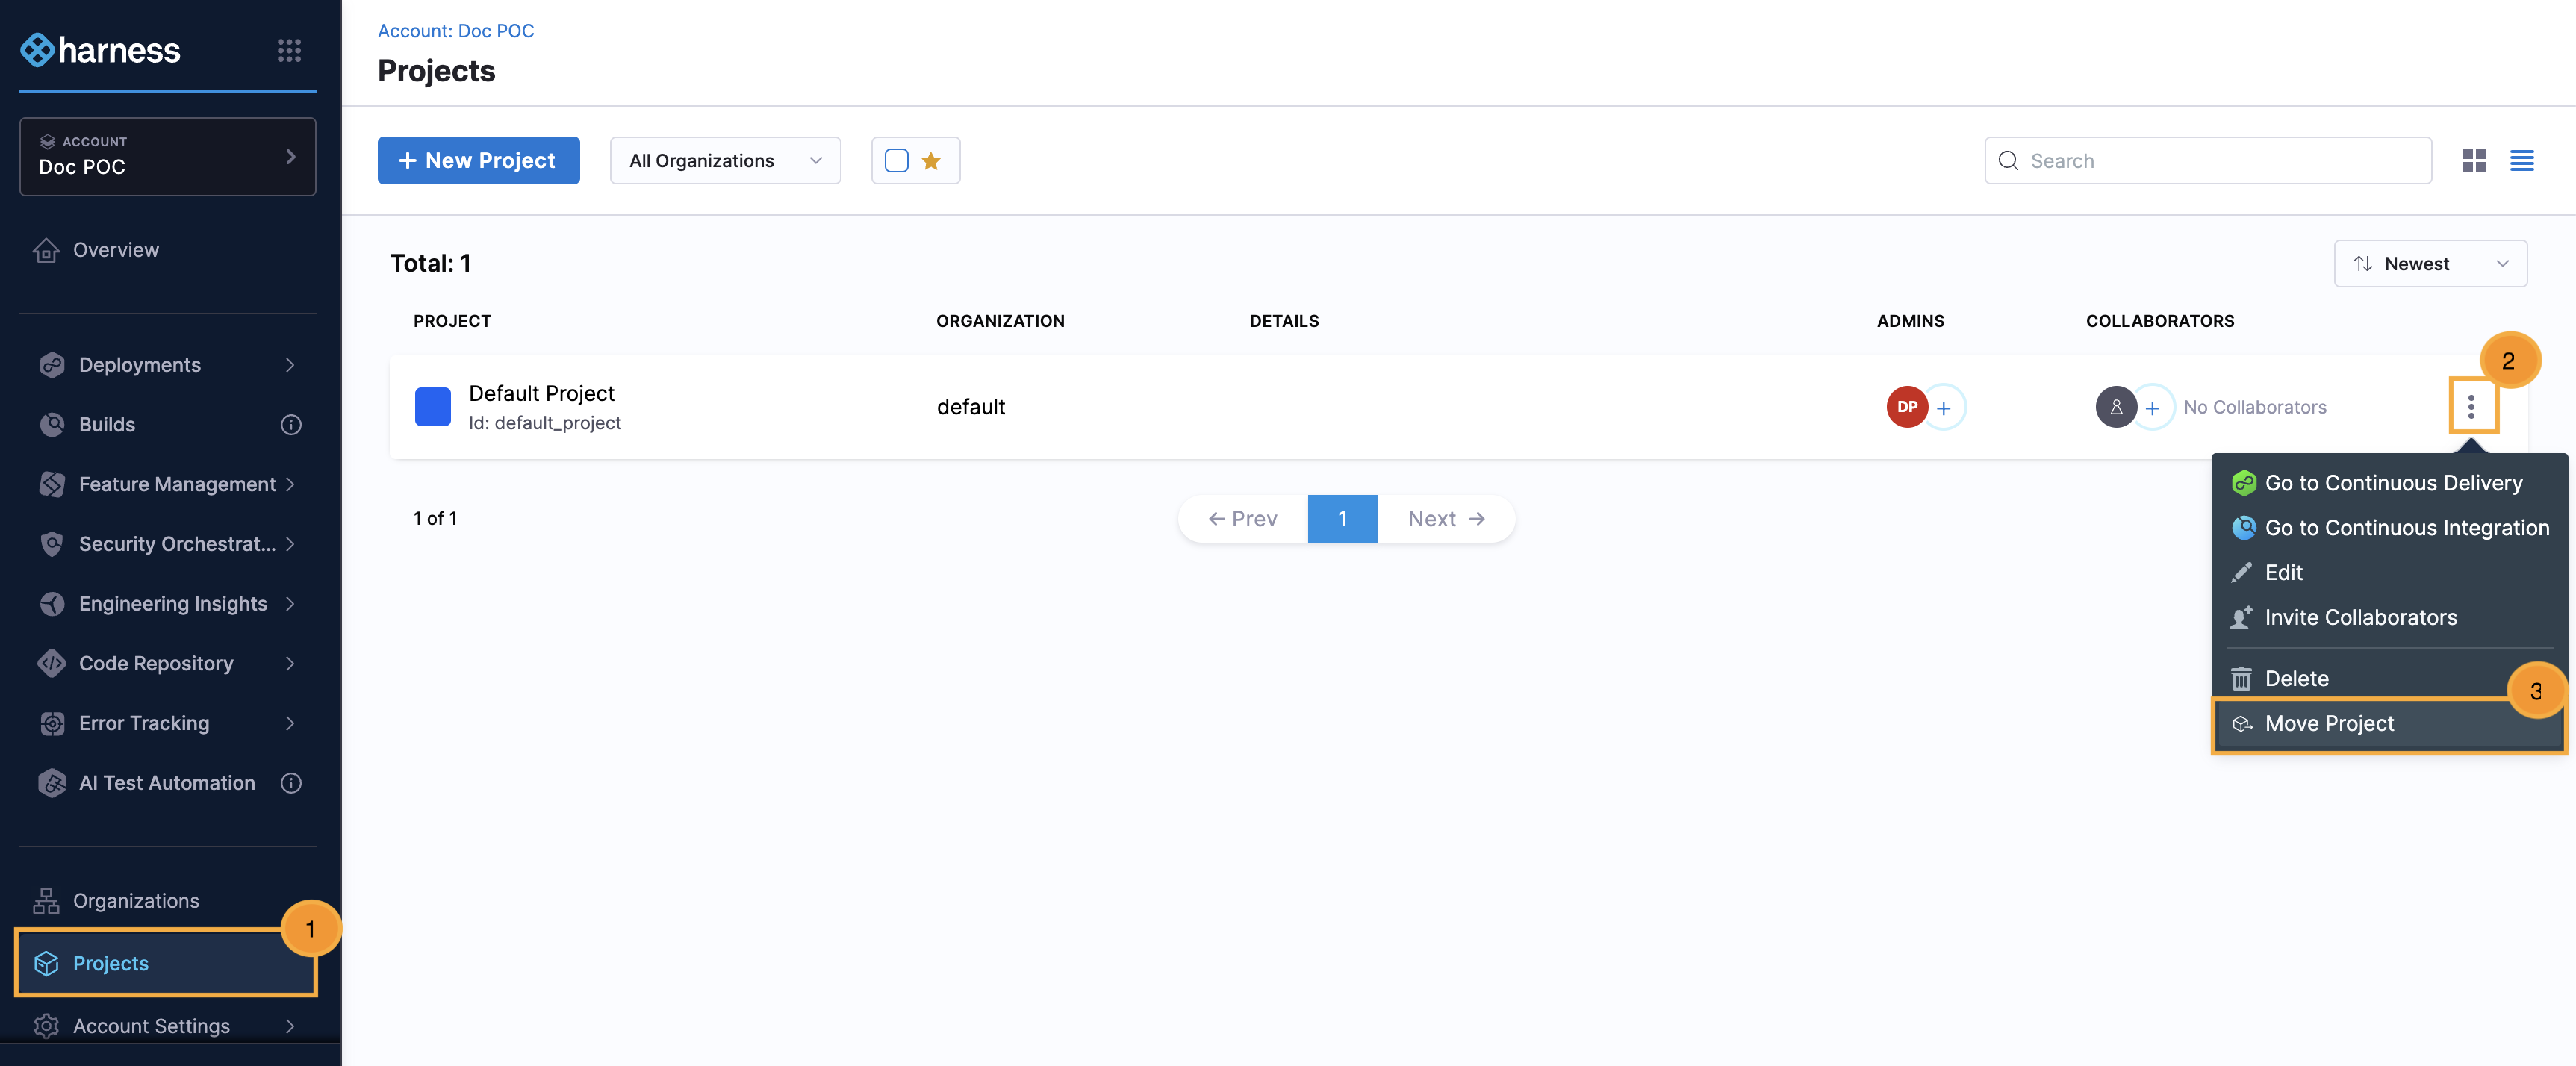
2. On the **Projects** page, select the **⋮** (more options) icon. The location depends on which page you are on:
* On the project overview page, select the **⋮** icon in the top right corner.
* On the projects listing page, select the **⋮** icon next to the project you want to move.
3. Select **Move Project**.
Move project modal
#### Step 2: Select destination organization
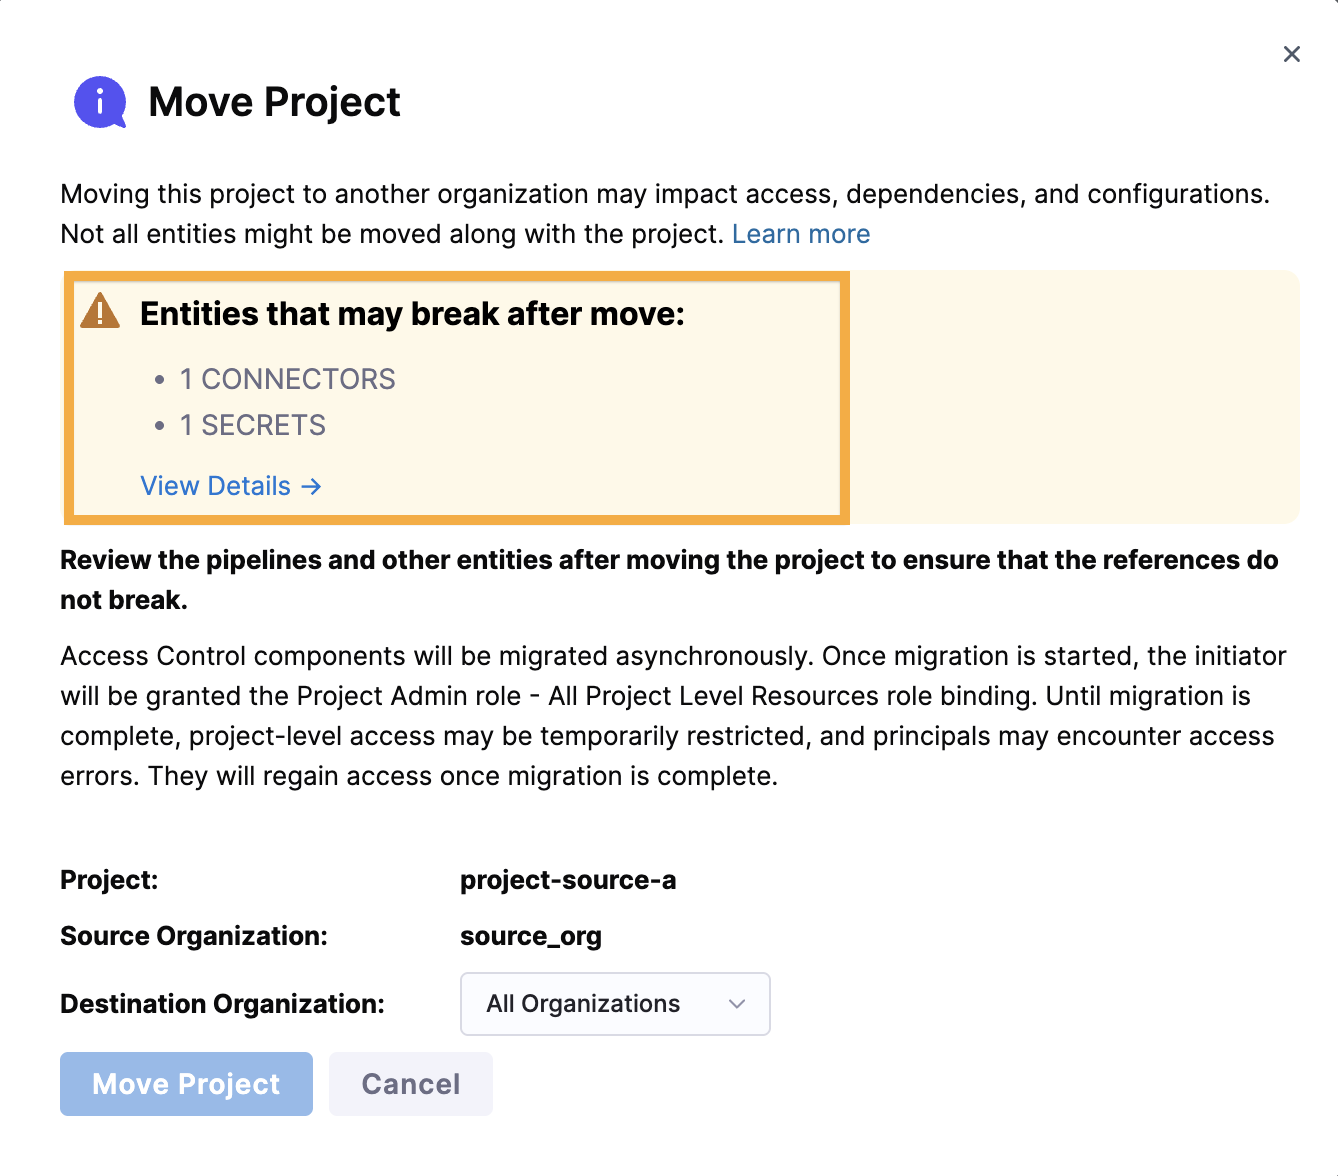
1. In the Move Project pop-up window, review the warning about potential impacts and the list of entities that may break after the move. This list is not exhaustive. Manually check the entities to understand the full scope of impact.
Move project modal
If needed, view details and select each referenced entity type to explore further. {% embed url="" %}
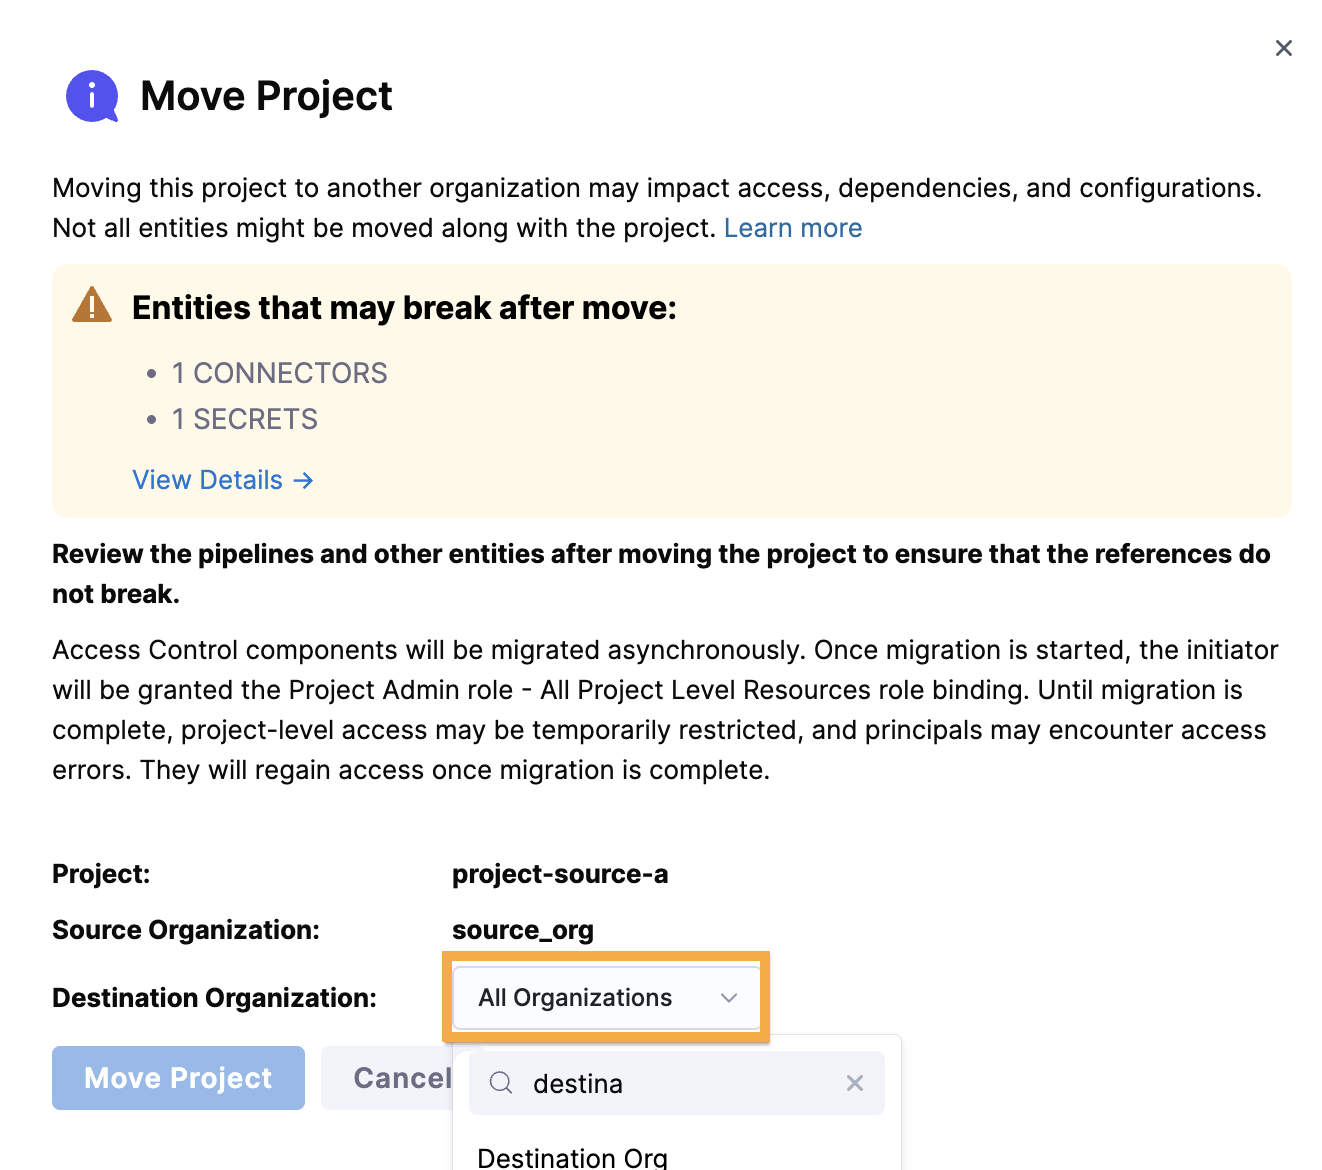
2. Select the destination organization from the dropdown menu where you want to move the project.
Move project modal
3. Select **Move Project** to proceed.
#### Step 3: Confirm the move
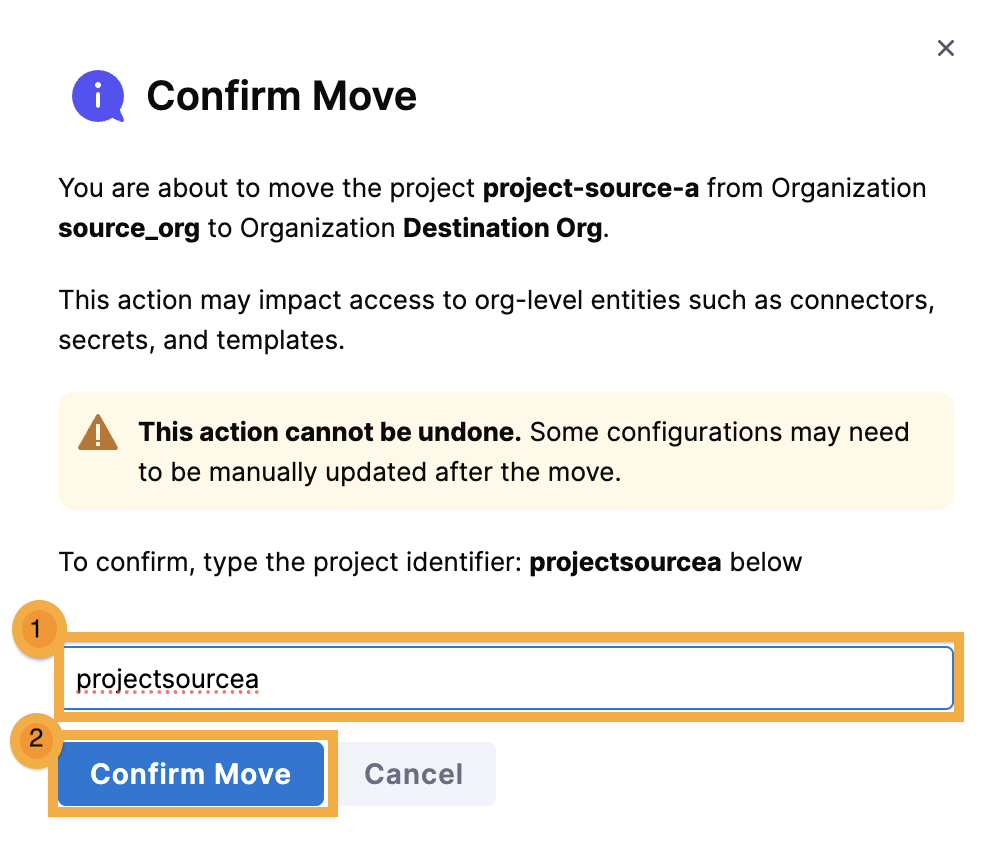
1. Review the confirmation dialog showing potential impacts. Type the **Project identifier** to confirm the move.
2. Select **Confirm Move**.
Move project confirm
After you confirm, Harness moves the project to the destination organization. All project-level access control components (users, service accounts, user groups, role bindings, resource groups, and roles) are moved asynchronously in the background, which may take some time to complete.
After the move completes, you are redirected to the project overview page. The project now appears within the new organization. A banner appears stating: **This project was recently moved from another organization. Some entities may reference resources that no longer exist.**
Move project confirm
***
### Next steps
Follow the [post-move remediation](/harness-platform/use-harness-platform/organizations-and-projects/move-projects/post-move-guide.md) guide to verify and update any broken references, and ensure the project functions correctly in its new organization. This guide is not exhaustive; you might need additional steps based on your project setup.
{% @harness-feedback/feedback module="harness-ai" pagePath="harness-ai/use-harness-platform/organizations-and-projects/move-projects/move-projects-across-organization" %}