> For the complete documentation index, see [llms.txt](https://developer.harness.io/llms.txt). Markdown versions of documentation pages are available by appending `.md` to page URLs; this page is available as [Markdown](https://developer.harness.io/harness-platform/use-harness-platform/pipelines/create-pipeline-quickstart.md).
# Create your first pipeline
Create and run your first Harness pipeline using the Pipeline Studio visual editor. Covers creating a pipeline, adding a stage and steps, and running an execution.
This quickstart walks you through creating and running your first Harness pipeline using the Pipeline Studio.
This topic uses a **Custom** stage with a **Shell Script** step. A Custom stage does not require build infrastructure or deployment prerequisites, allowing you to focus on creating and running the pipeline.
After completing this quickstart, you can add [CI Build stages](/continuous-integration/use-harness-ci/use-harness-ci/prep-ci-pipeline-components.md), [CD Deploy stages](https://developer.harness.io/continuous-delivery/), or any other stage type.
***
### What you will learn from this topic
* How to [create a pipeline](#create-a-pipeline) in Pipeline Studio.
* How to [add a stage and steps](#add-a-custom-stage) to the pipeline.
* How to [run the pipeline](#run-the-pipeline) and view the execution.
* How to [view execution logs](#view-execution-logs) for a step.
***
### Before you begin
You need the following before you begin:
* **Harness account**: You need an active Harness account. If you do not have one, [sign up for free](https://app.harness.io/auth/#/signup/?module=ci).
* **Project**: You need an existing project. For more information, refer to [Organizations and Projects](/harness-platform/use-harness-platform/organizations-and-projects.md).
* **Permissions**: You need the **Pipeline: Create/Edit** permission in the project. For more information, refer to [RBAC in Harness](/harness-platform/3.0/harness-platform-resources/platform-access-control/rbac-in-harness.md).
* **Delegate**: A Harness Delegate is required to execute steps on your infrastructure. If you do not have a delegate yet, go to [Install a delegate](/harness-platform/use-harness-platform/delegates/delegate/install-delegates/overview.md) to install one.
***
### Pipeline creation architecture
You create and manage pipelines in a Harness project. If you are new to Harness pipelines, use this flow to get started:
```mermaid
flowchart TD
A[Create a pipeline] --> B[Choose storage: Inline or Remote]
B --> C[Add a stage]
C --> D[Configure the stage]
D --> E[Add steps]
E --> F[Save the pipeline]
F --> G[Run the pipeline]
G --> H[Review the execution]
H --> I{Automatic execution required}
I -- Yes --> J[Add a trigger]
I -- No --> K[Done]
```
The exact configuration depends on what you want the pipeline to do and which Harness module you are using.
### Pipeline studio modes
Harness Pipeline Studio provides two interchangeable editors. To switch between editors, use the **Visual / YAML** toggle at the top of Pipeline Studio.
{% tabs %}
{% tab title="Visual" %}
#### Visual
The **Visual** editor is a graphical canvas where you configure stages and steps using the Harness UI. It is the recommended starting point for new pipeline authors.
Key areas in the visual editor:
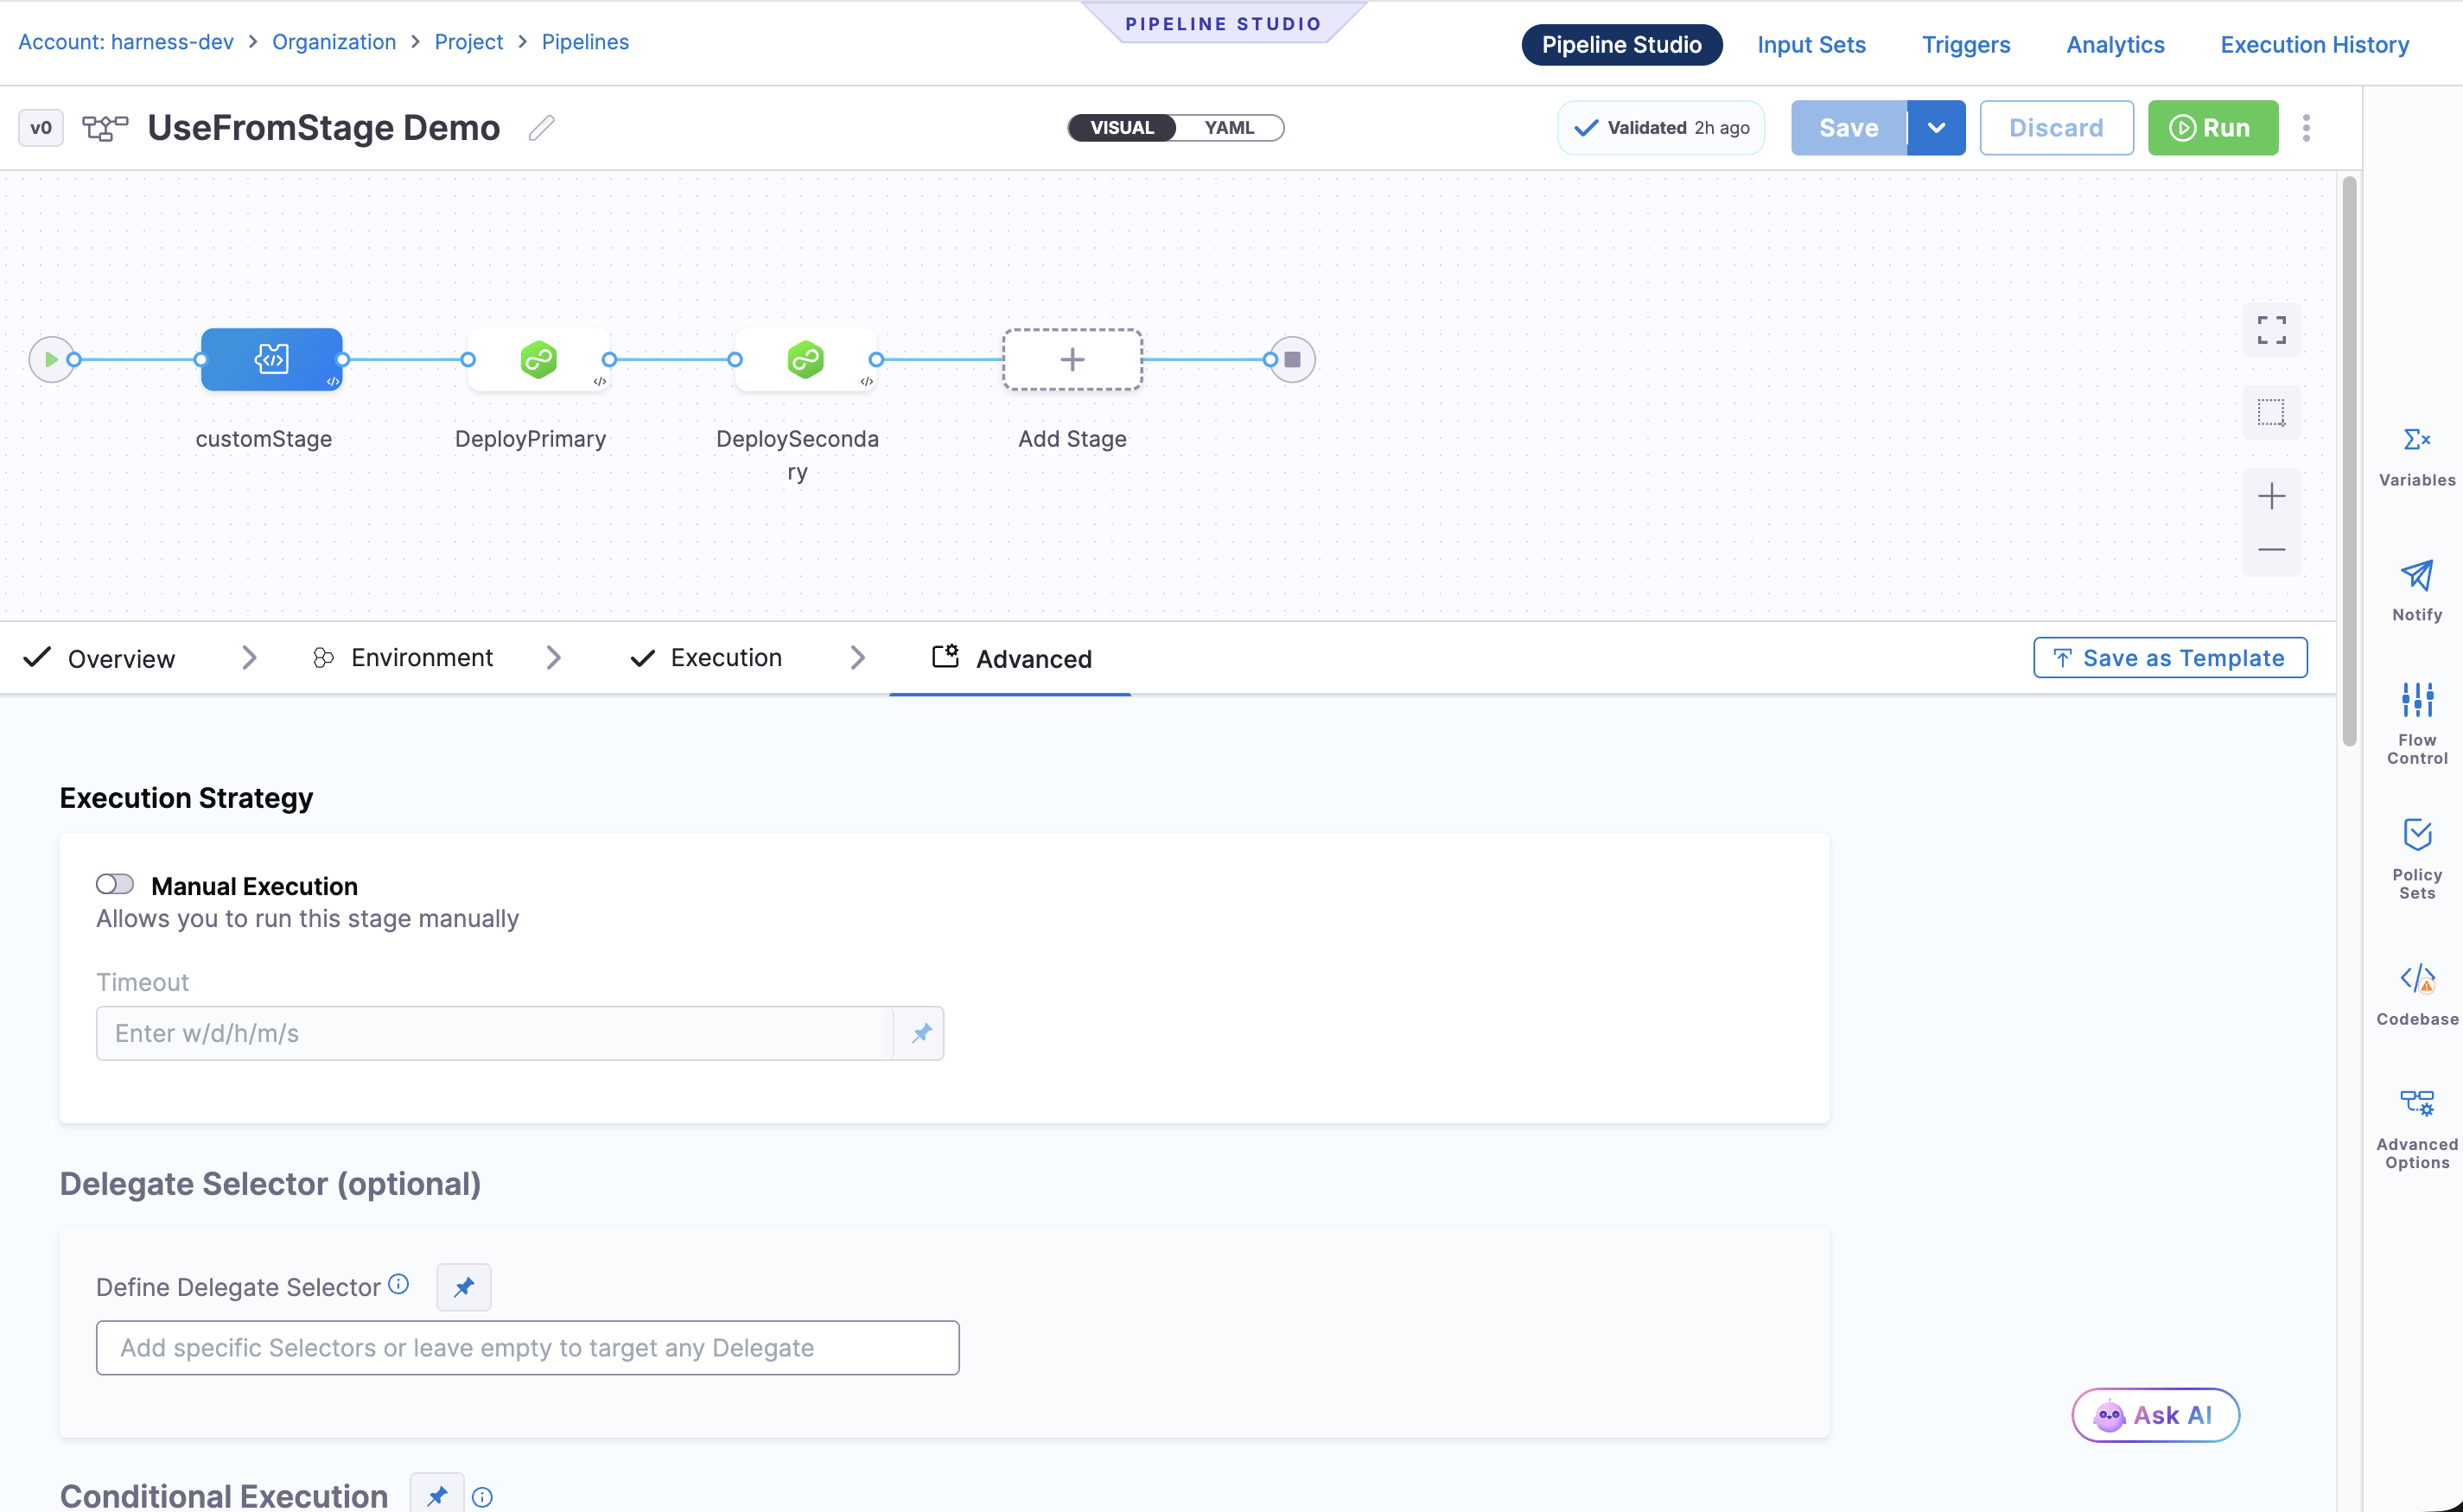
* **Pipeline canvas:** Shows stages as cards arranged left to right. Select a stage to open its configuration panel.
* **Stage configuration panel:** Contains the **Overview**, **Infrastructure**, **Execution**, and **Advanced** tabs for the selected stage.
* **Step Library:** A searchable catalog of available steps. Open it by selecting **Add Step** in a stage's execution view.
* **Pipeline header:** Contains **Run**, **Save**, **Triggers**, **Input Sets**, **Variables**, and **Notifications** controls.
{% endtab %}
{% tab title="YAML" %}
#### YAML
The **YAML** editor is a full-featured text editor for the pipeline YAML. Use it when you prefer to write or review pipeline configuration as code.
Key features:
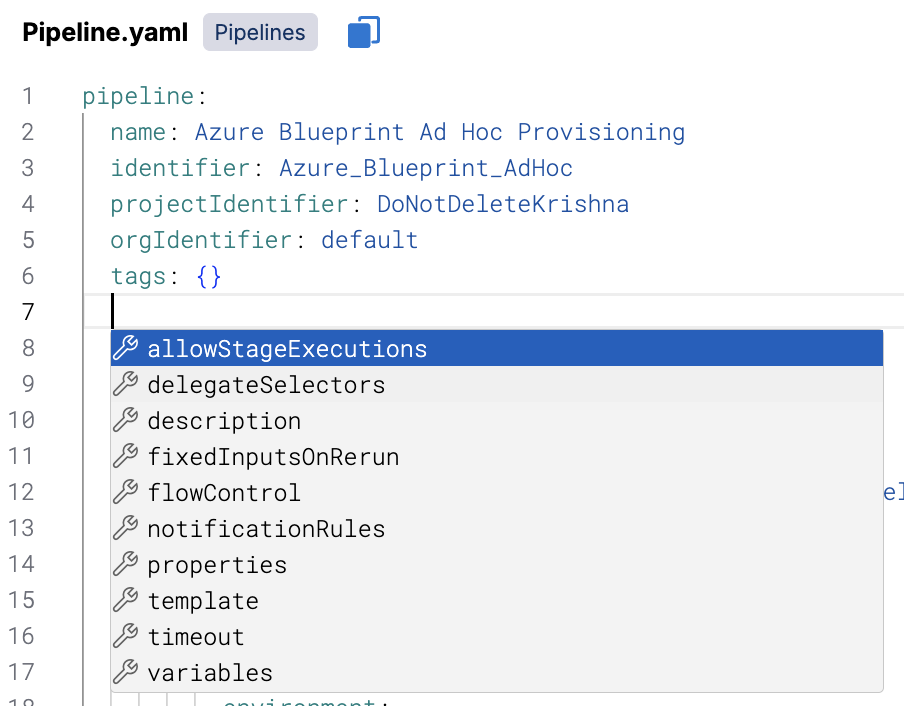
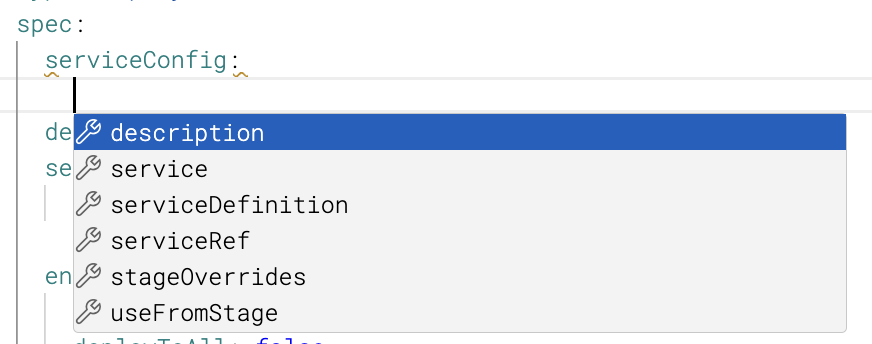
* **Autocomplete:** Press `Cmd/Ctrl + Space` to see context-aware suggestions for keys and values.
* **On a blank line:** Suggestions include valid keys at that level, such as `timeout`, `stage`, and `step`.
* **In context:** Suggestions narrow to keys valid at the current nesting level.
* **For a key without a value:** Suggestions include valid values for that key.
* **Find and replace:** Press `Cmd/Ctrl + F`.
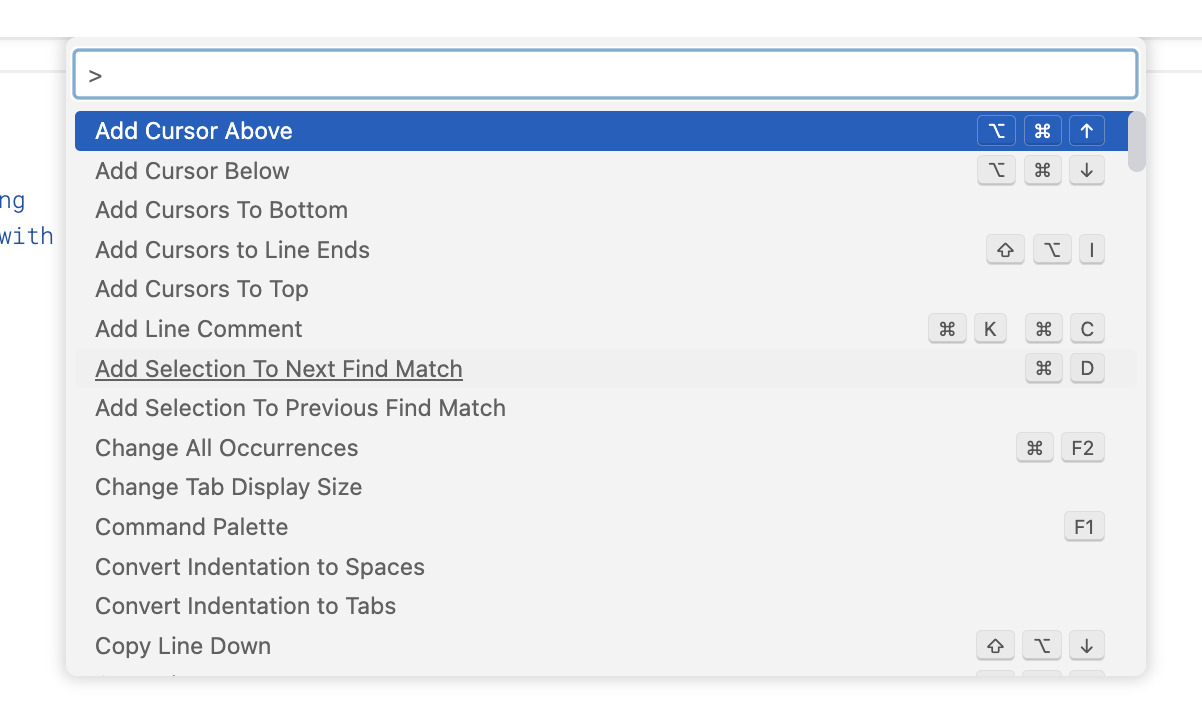
* **Command palette:** Press `F1` to see all available commands and shortcuts.
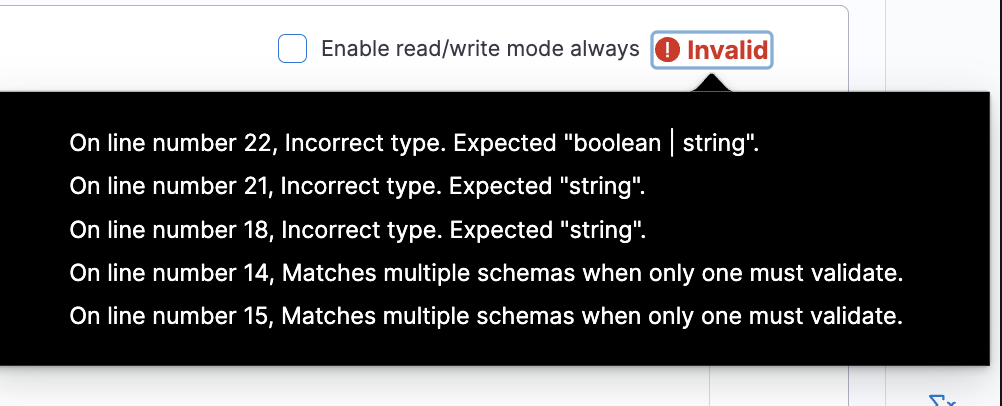
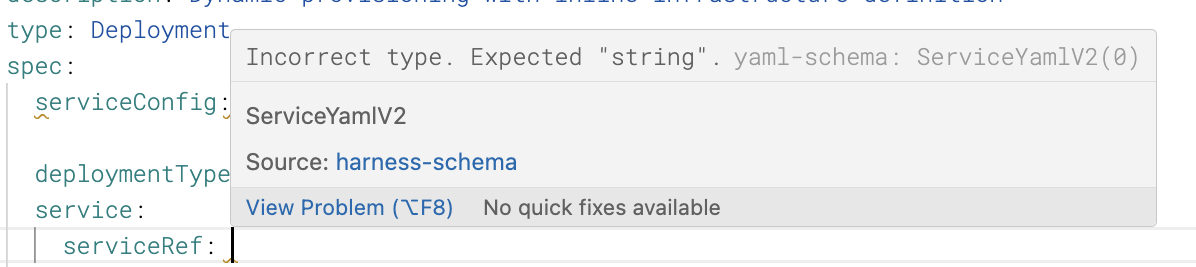
* **Inline validation:** Errors are highlighted in real time. Hover over an error marker to see details.
Everything you configure in the visual editor is reflected immediately in the YAML editor, and vice versa.
**YAML schema**
The Harness YAML schema formally defines all valid keys, values, and structures. It is available at [github.com/harness/harness-schema](https://github.com/harness/harness-schema). That repository also includes instructions for embedding the schema in VS Code and Sublime Text for local validation and autocomplete support.
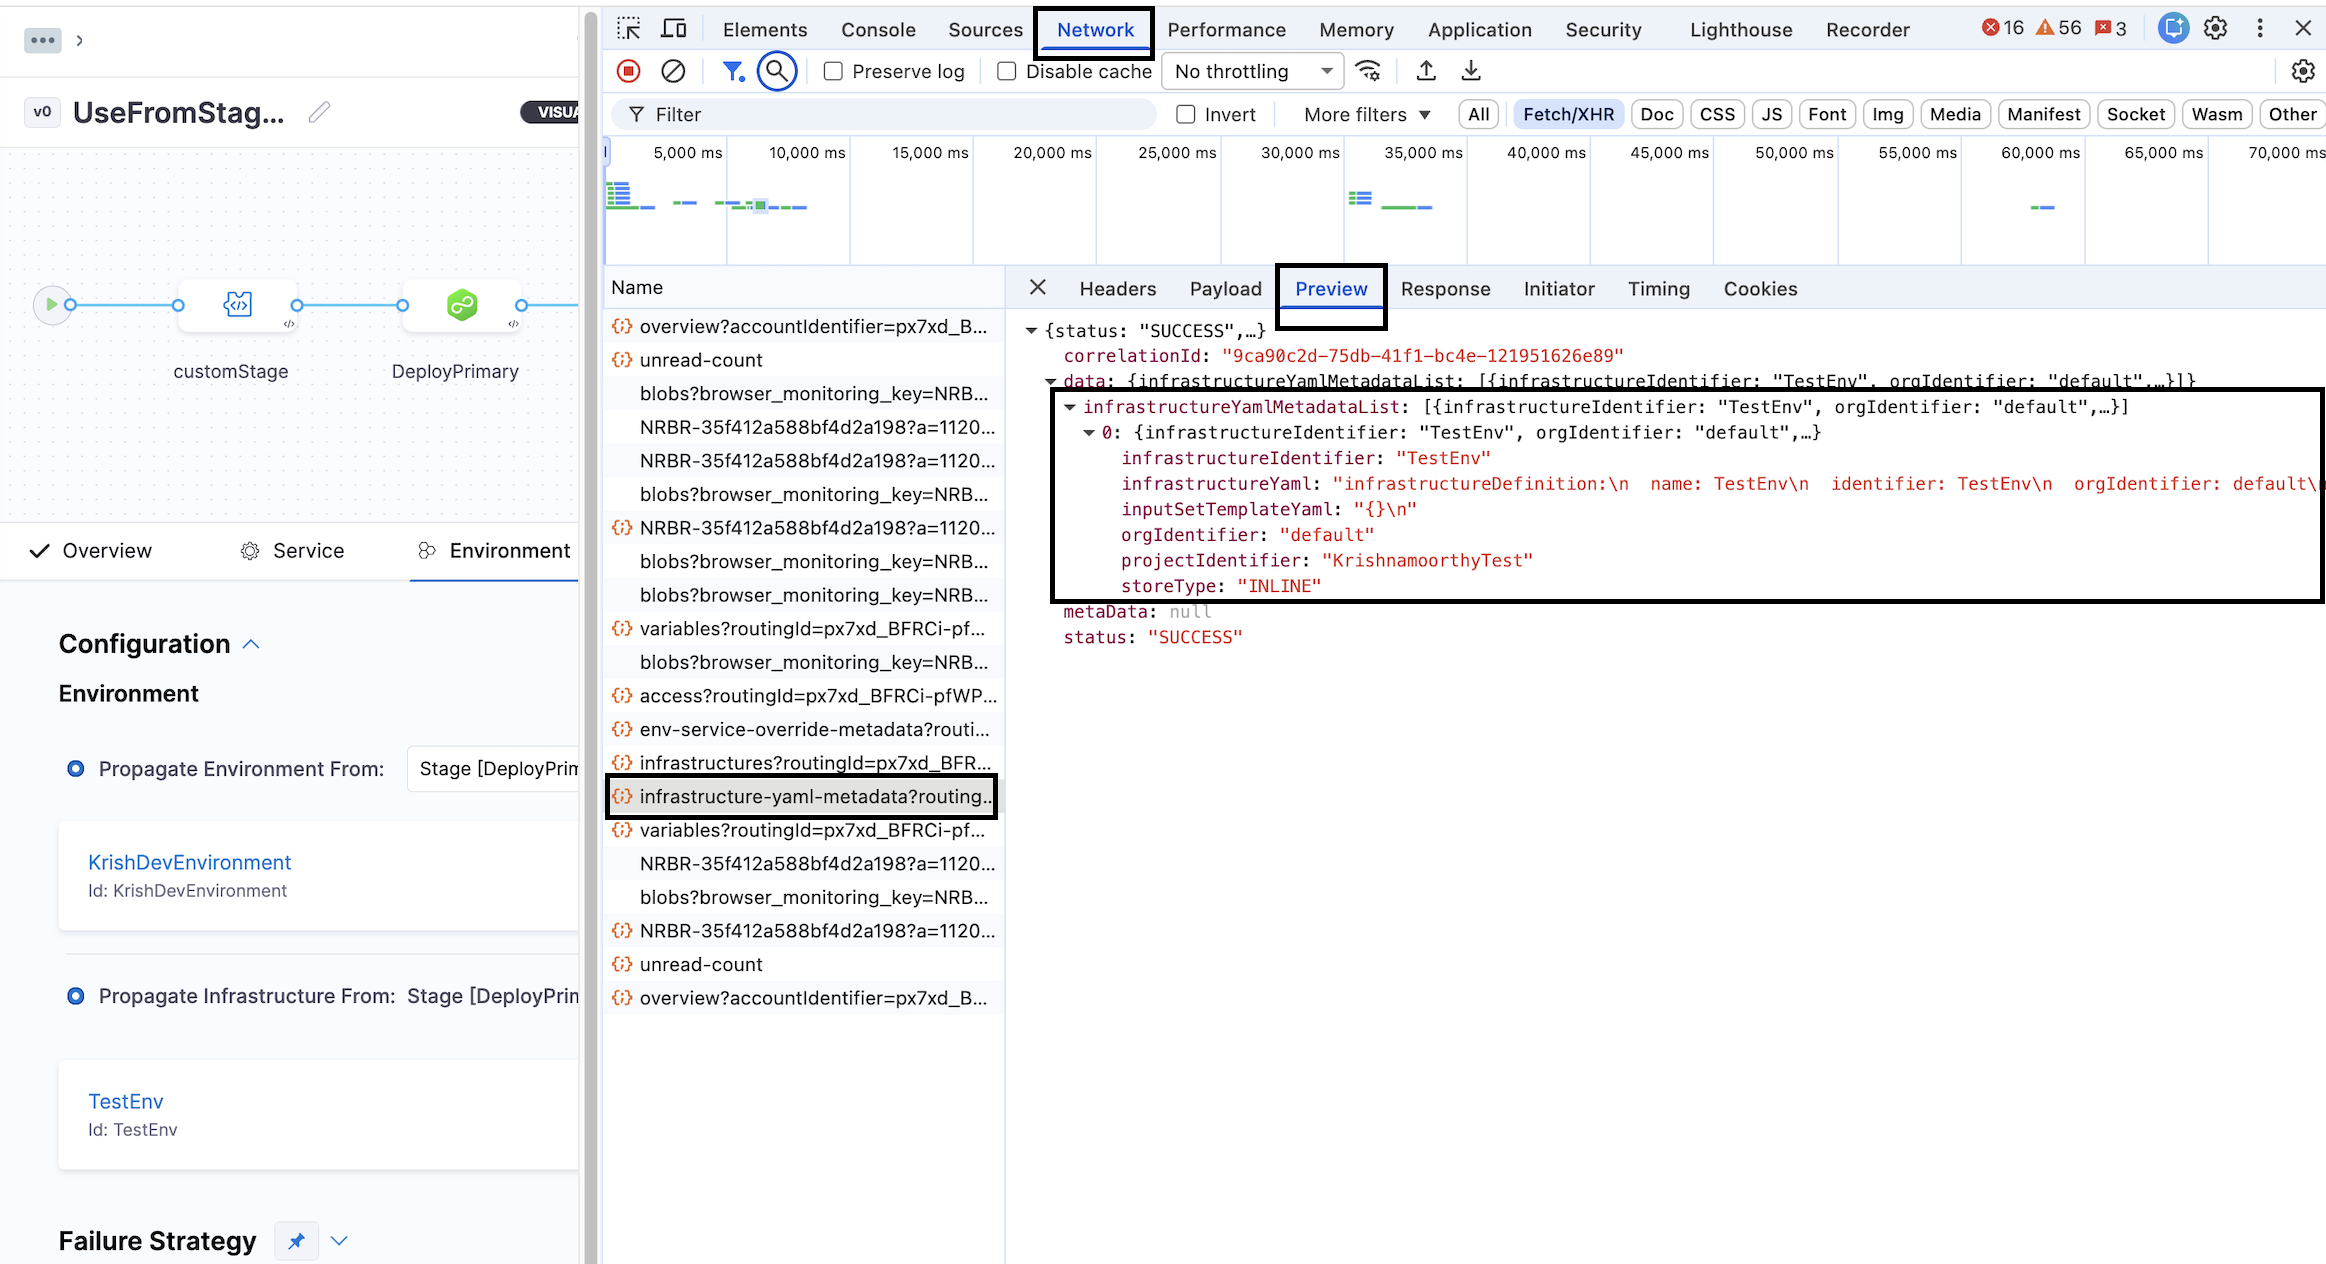
You can also inspect the schema at runtime using Chrome DevTools:
1. Open Chrome DevTools and select the **Network** tab.
2. Open the relevant configuration section in Harness and reload it if necessary.
3. Identify the successful network request that loads the configuration or schema metadata for that section.
4. Open the request's **Preview** or **Response** tab.
5. Inspect the returned metadata or schema for the relevant definitions, properties, or configuration fields.
**Schema conventions**
| Convention | Description |
| --------------------------- | --------------------------------------------------------------------------------------------------------------------------------------------------------------------- |
| `key: value` | Standard YAML associative arrays. Settings are not quoted. |
| 2-space indentation | Default indentation. Lines prefaced by `-` use 4-space indentation from the position of the `-`. |
| `<+input>` | Marks a field as a [runtime input](/harness-platform/use-harness-platform/variables-and-expressions/runtime-inputs.md). The value is provided at execution time. |
| `<+expression>` | Marks a field as an [expression](/harness-platform/use-harness-platform/variables-and-expressions/harness-expressions-reference.md). Harness evaluates it at runtime. |
| `[]` (empty brackets) | Inline empty array. To add items: delete the brackets, add a new line, enter `-` followed by the item, and use autocomplete to see valid item structures. |
| `{}` (empty braces) | Inline empty map. To add entries: delete the braces, add a new line, and enter `key: value` pairs. |
| `\|` (block style) | Multiline string. Every new line becomes a literal new line, with one added at the end. |
| `\|-` (block scalar, strip) | Multiline string. Strips trailing new lines. Use for multi-line scripts. |
| {% endtab %} | |
| {% endtabs %} | |
***
### Create a pipeline
This section demonstrates how to create a pipeline with a **Custom** stage and a **Shell Script** step using the visual editor. The same workflow applies when you create pipelines with other stage types and steps.
Perform the following steps to create a pipeline.
1. In Harness, navigate to your project.
2. In the left navigation, select **Pipelines**.
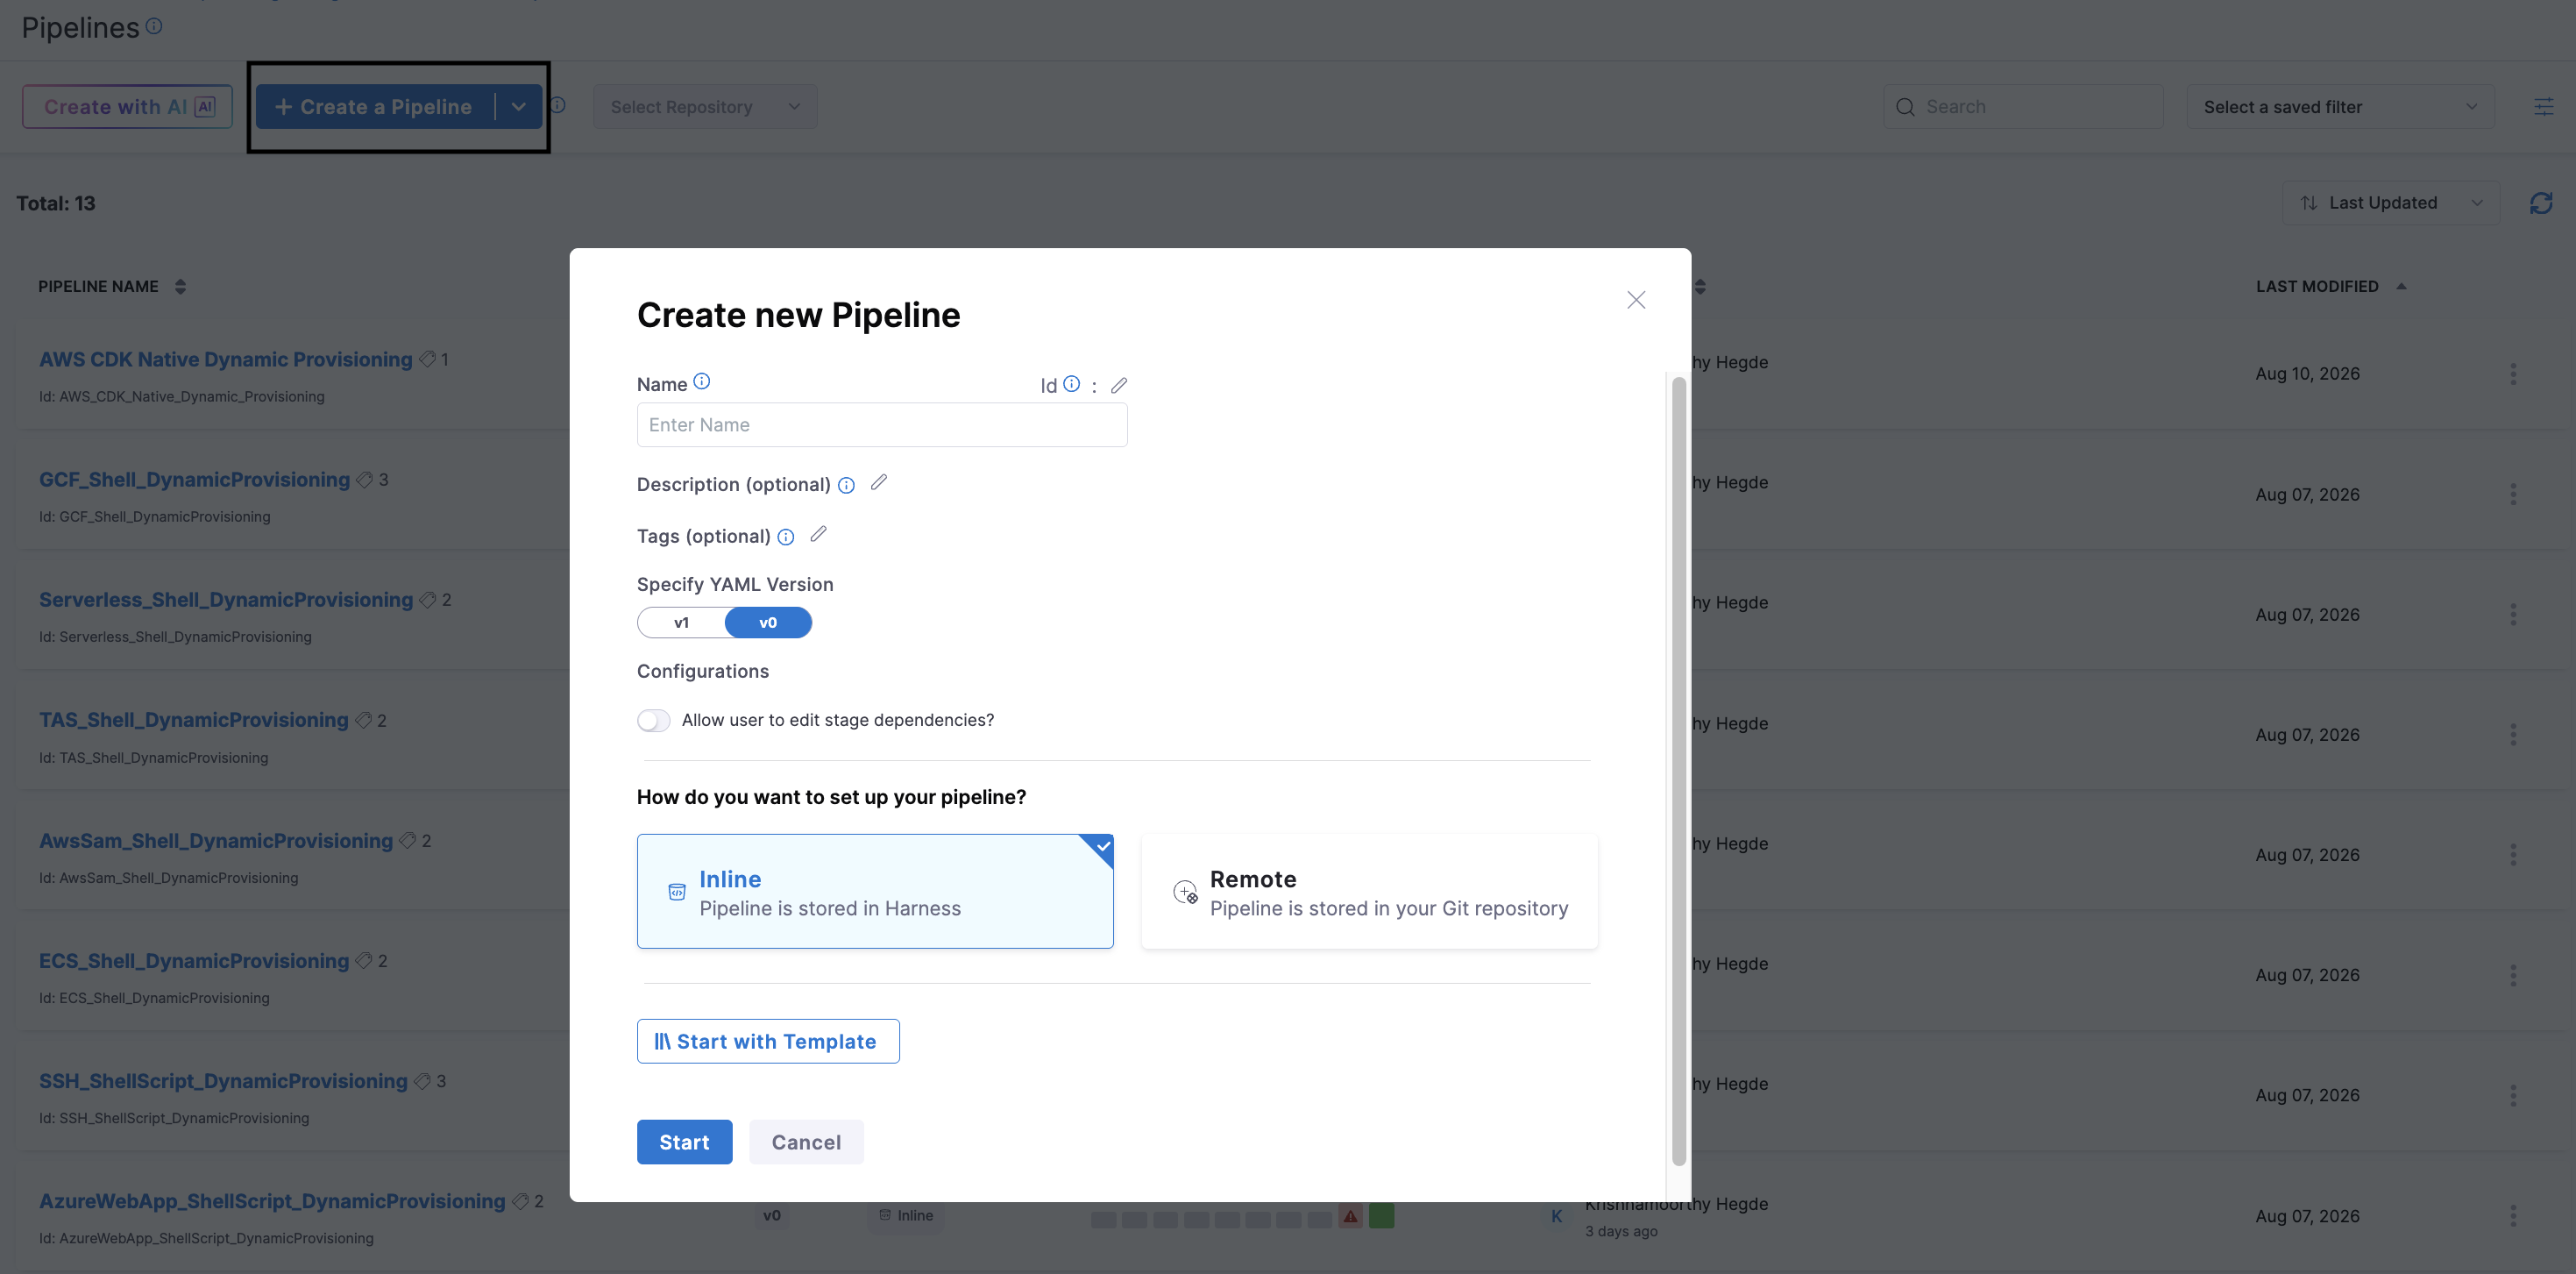
3. Select **+ Create a Pipeline**.
4. In the **Create new Pipeline** dialog, enter a **Name** for your pipeline. For this quickstart, enter `DemoPipeline`.
Harness automatically generates an **ID** from the name. You can edit the ID now; after saving, the ID cannot be changed.
5. Choose where to store the pipeline definition:
* Select **Inline** to store the pipeline configuration in Harness.
* Select **Remote** to store it as code in a Git repository. For more information, refer to [Git Experience](/harness-platform/use-harness-platform/git-experience/git-experience-overview.md).
6. Select **Start**.
Harness opens **Pipeline Studio** in the visual editor.
YAML
You can also create this pipeline using the YAML editor by replacing the default YAML with the following definition:
```yaml
pipeline:
name: DemoPipeline # Enter the pipeline name.
identifier: DemoPipeline # Pipeline ID. Harness generates this from the name.
tags: {} # Optional: Add pipeline tags.
projectIdentifier: # Project where the pipeline is created.
orgIdentifier: default # Organization that contains the project.
```
#### Add a Custom stage
Perform the following steps to add a Custom stage to the pipeline.
1. On the pipeline canvas, select **Add Stage**.
2. Select **Custom Stage** as the stage type.
3. Enter a **Stage Name**. For this quickstart, enter `Teststage`.
4. Select **Set Up Stage**.
The stage configuration panel opens with the following tabs: **Overview**, **Execution**, and **Advanced**.
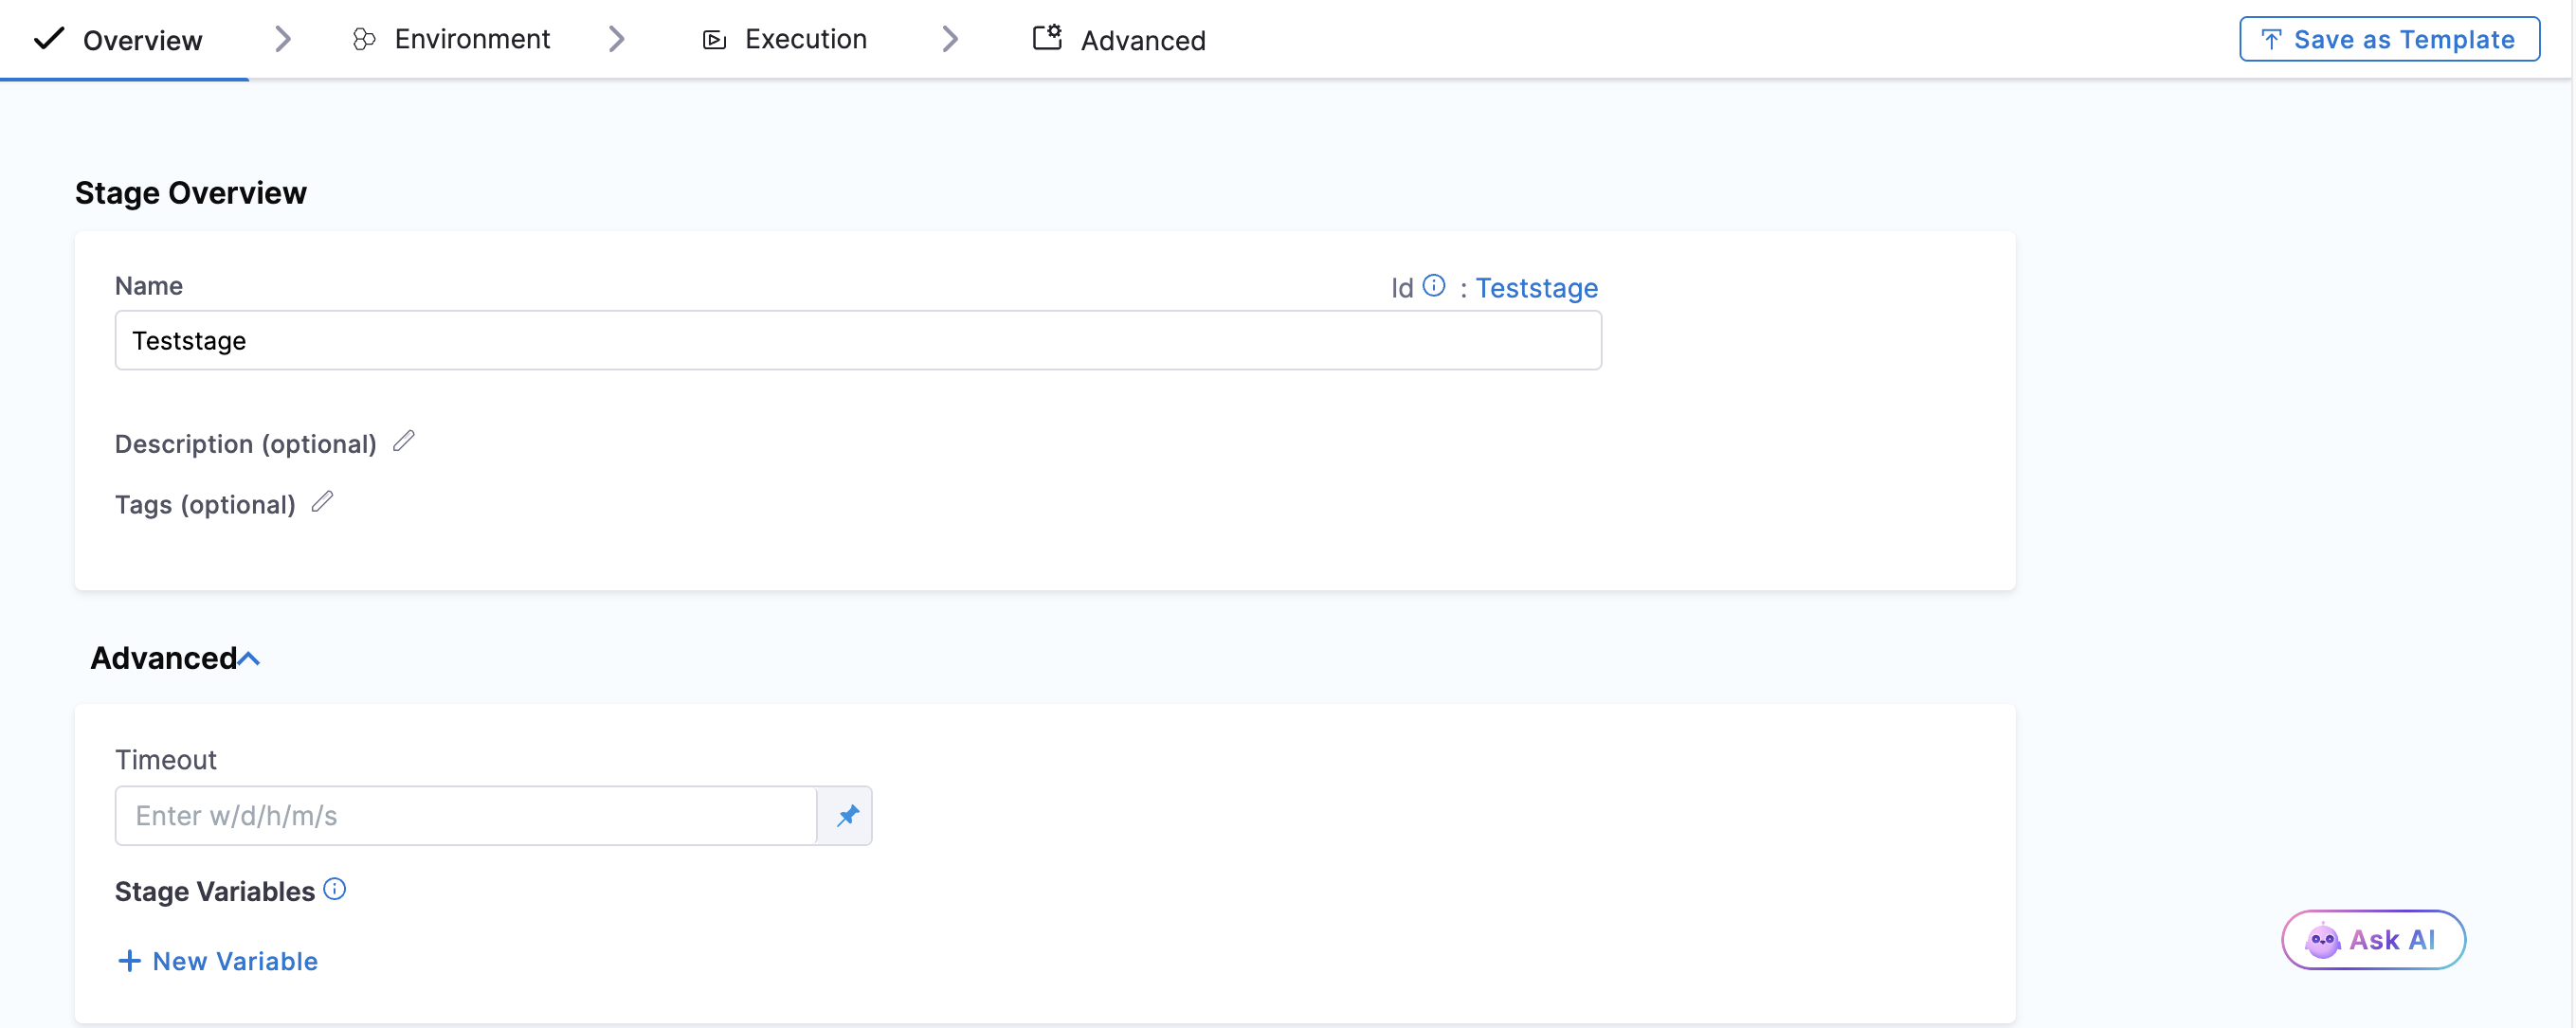
**Overview tab**
The **Overview** tab contains basic stage information and optional settings.
1. In the **Stage Name** field, enter `Teststage` (if not already entered).
2. Optionally, add a **Description** for the stage.
3. Optionally, add **Tags** to categorize the stage.
4. Optionally add a **Timeout**.
5. Add a stage variable if needed using **Stage variable**.
1. Select **+ New Variable**.
2. In **Type**, select the variable type.
3. In **Name**, enter a name for the variable.
4. In **Value**, enter the variable value.
5. To require the value when the pipeline runs, select **Set variable as required during runtime**. You can configure a pipeline setting to accept a value when the pipeline runs instead of specifying a fixed value when you create the pipeline. When you run the pipeline, Harness prompts you to provide a value for the variable. For more information, go to [Use runtime input](/harness-platform/use-harness-platform/variables-and-expressions/runtime-input-usage.md).
6. Optionally, enter a description in Description.
7. Select **Save** to add the variable.
6. Click **Next**
{% hint style="info" %}
**SERVICES AND ENVIRONMENT TABS**
The **Service**, **Environment**/**Infrastructure** tabs are required for **Deploy** stages and other stage types that require deployment configuration. They are not required for a **Custom** stage.
For more information, see the [Service YAML schema](https://github.com/harness/harness-schema/blob/main/v0/pipeline/stages/cd/service-yaml-v2.yaml), [Environment YAML schema](https://github.com/harness/harness-schema/blob/main/v0/pipeline/stages/cd/environment-yaml-v2.yaml), and [Infrastructure Definition YAML schema](https://github.com/harness/harness-schema/blob/main/v0/pipeline/stages/cd/infra-structure-definition-yaml.yaml).
{% endhint %}
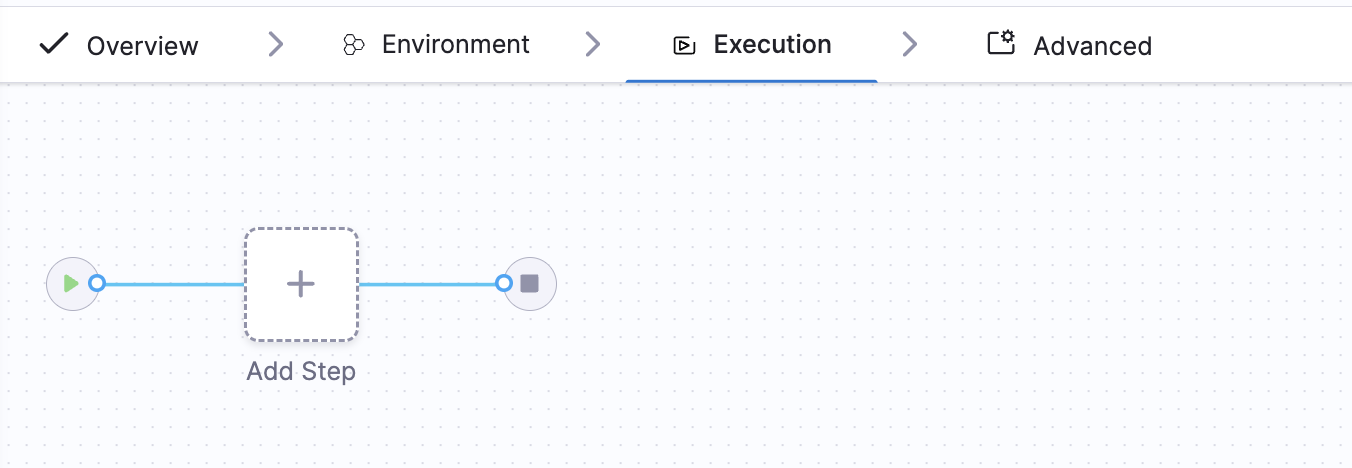
**Execution tab**
The **Execution** tab is where you add and configure the steps that run in this stage. For more information, refer to [Add a Shell Script step](#add-a-shell-script-step).
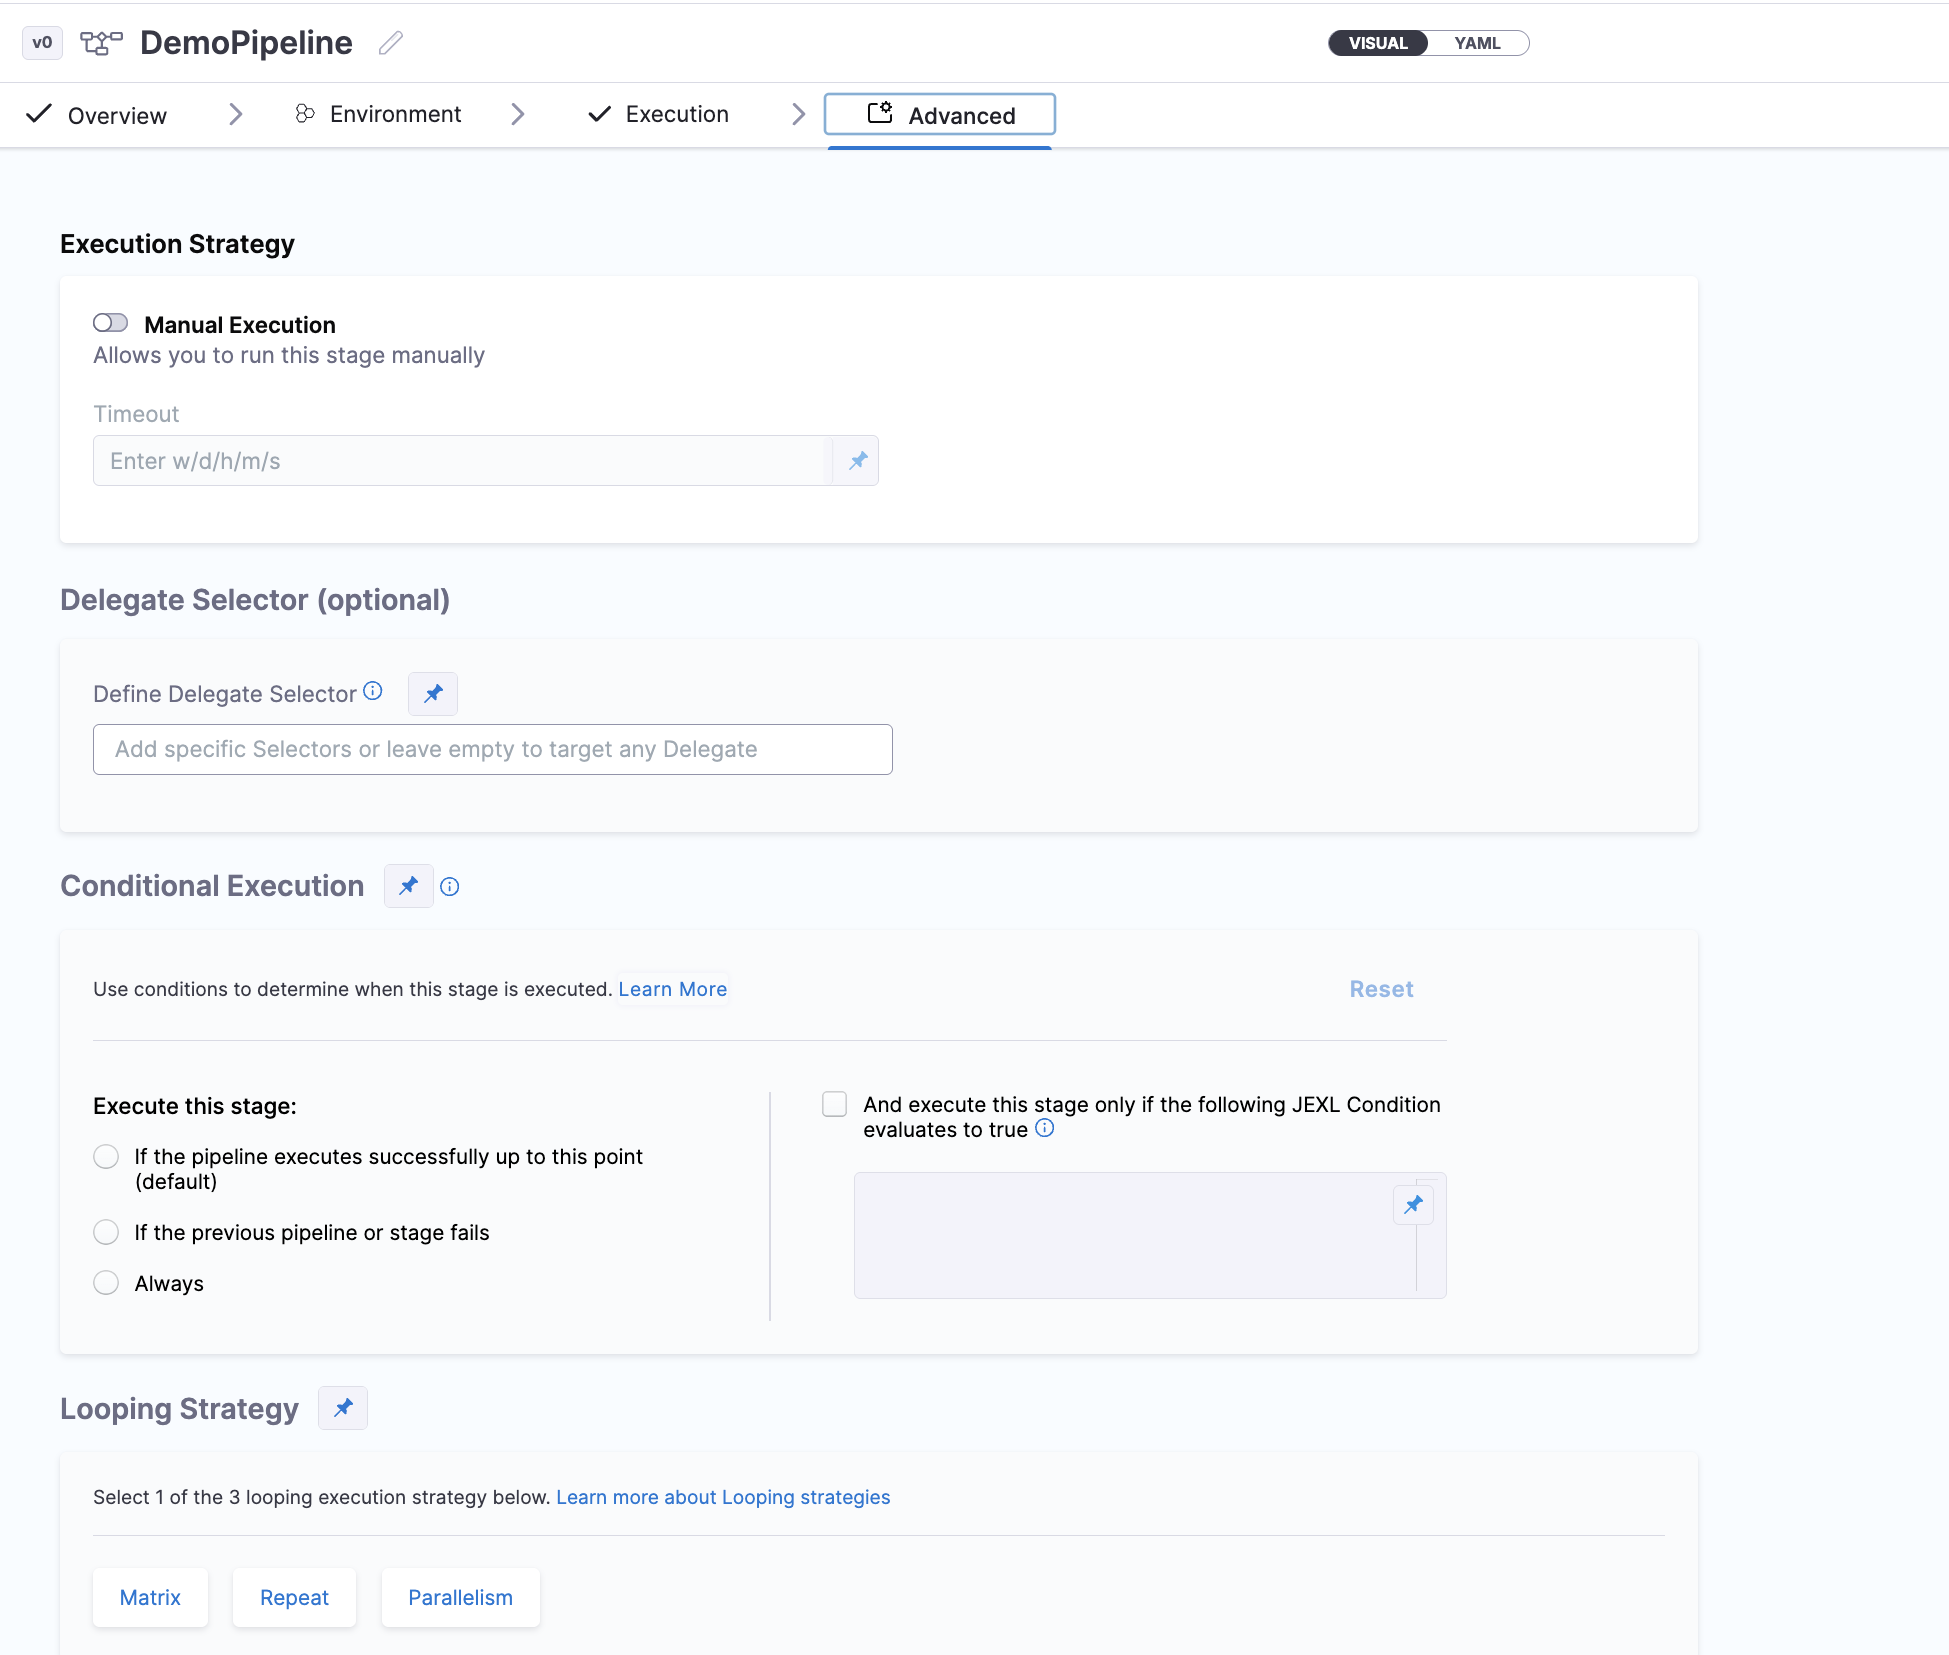
**Advanced tab**
The **Advanced** tab includes optional configuration that you can add at the stage or step level, depending on your requirements:
* **Conditional Execution:** Run the stage only when specific conditions are met. For more information, refer to [Conditional execution](/harness-platform/use-harness-platform/pipelines/step-skip-condition-settings.md).
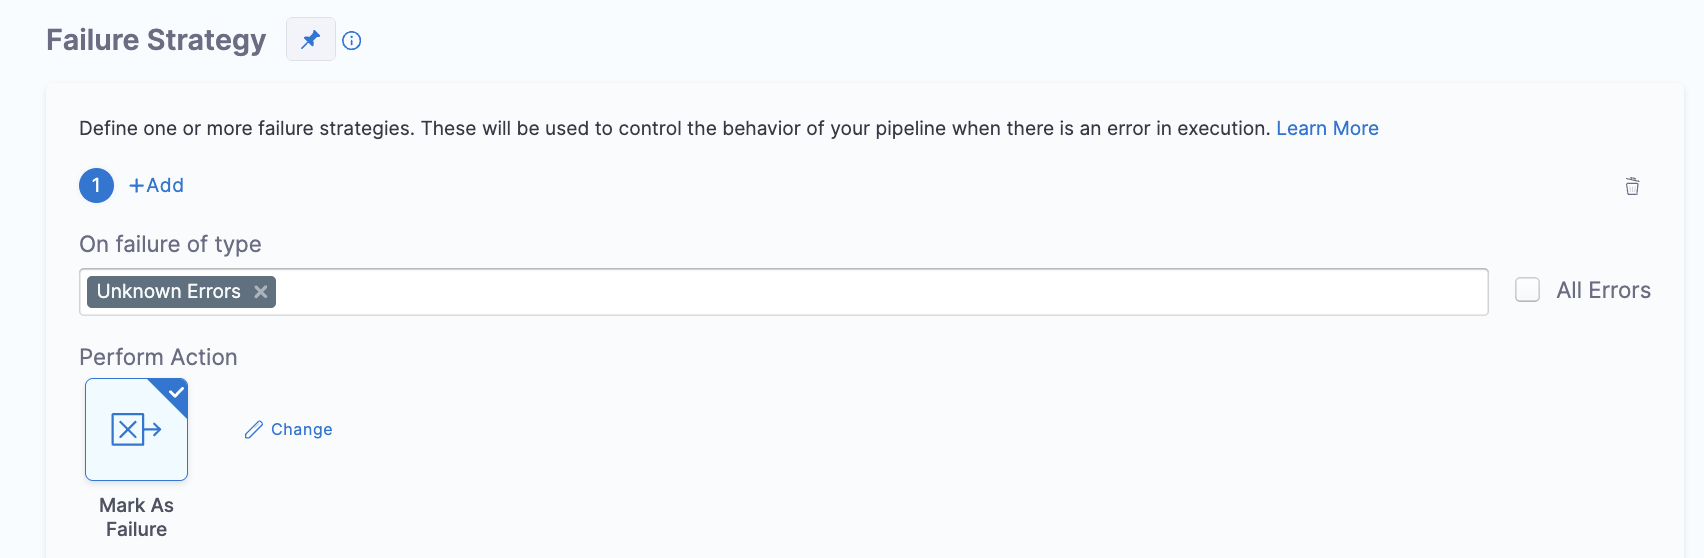
* **Failure Strategy:** Define what happens when the stage fails. For more information, refer to [Failure strategies](/harness-platform/use-harness-platform/pipelines/failure-handling/define-a-failure-strategy-on-stages-and-steps.md).
* **Looping Strategy:** Repeat the stage for multiple items or configurations. For more information, refer to [Looping strategies](/harness-platform/use-harness-platform/pipelines/looping-strategies/looping-strategies-matrix-repeat-and-parallelism.md).
* **Delegate Selector:** Choose which delegate runs this stage. For more information, refer to [Delegate overview](/harness-platform/use-harness-platform/delegates/delegate/delegate-concepts/delegate-overview.md).
For example, you can add the pipeline marked as failed for unknown errors as a **Failure Strategy**.
YAML - Failure strategy
```yaml
failureStrategies:
- onFailure:
errors:
- Unknown
action:
type: MarkAsFailure
```
***
#### Add a Shell Script step
Perform the following steps to add a shell script step to the stage.
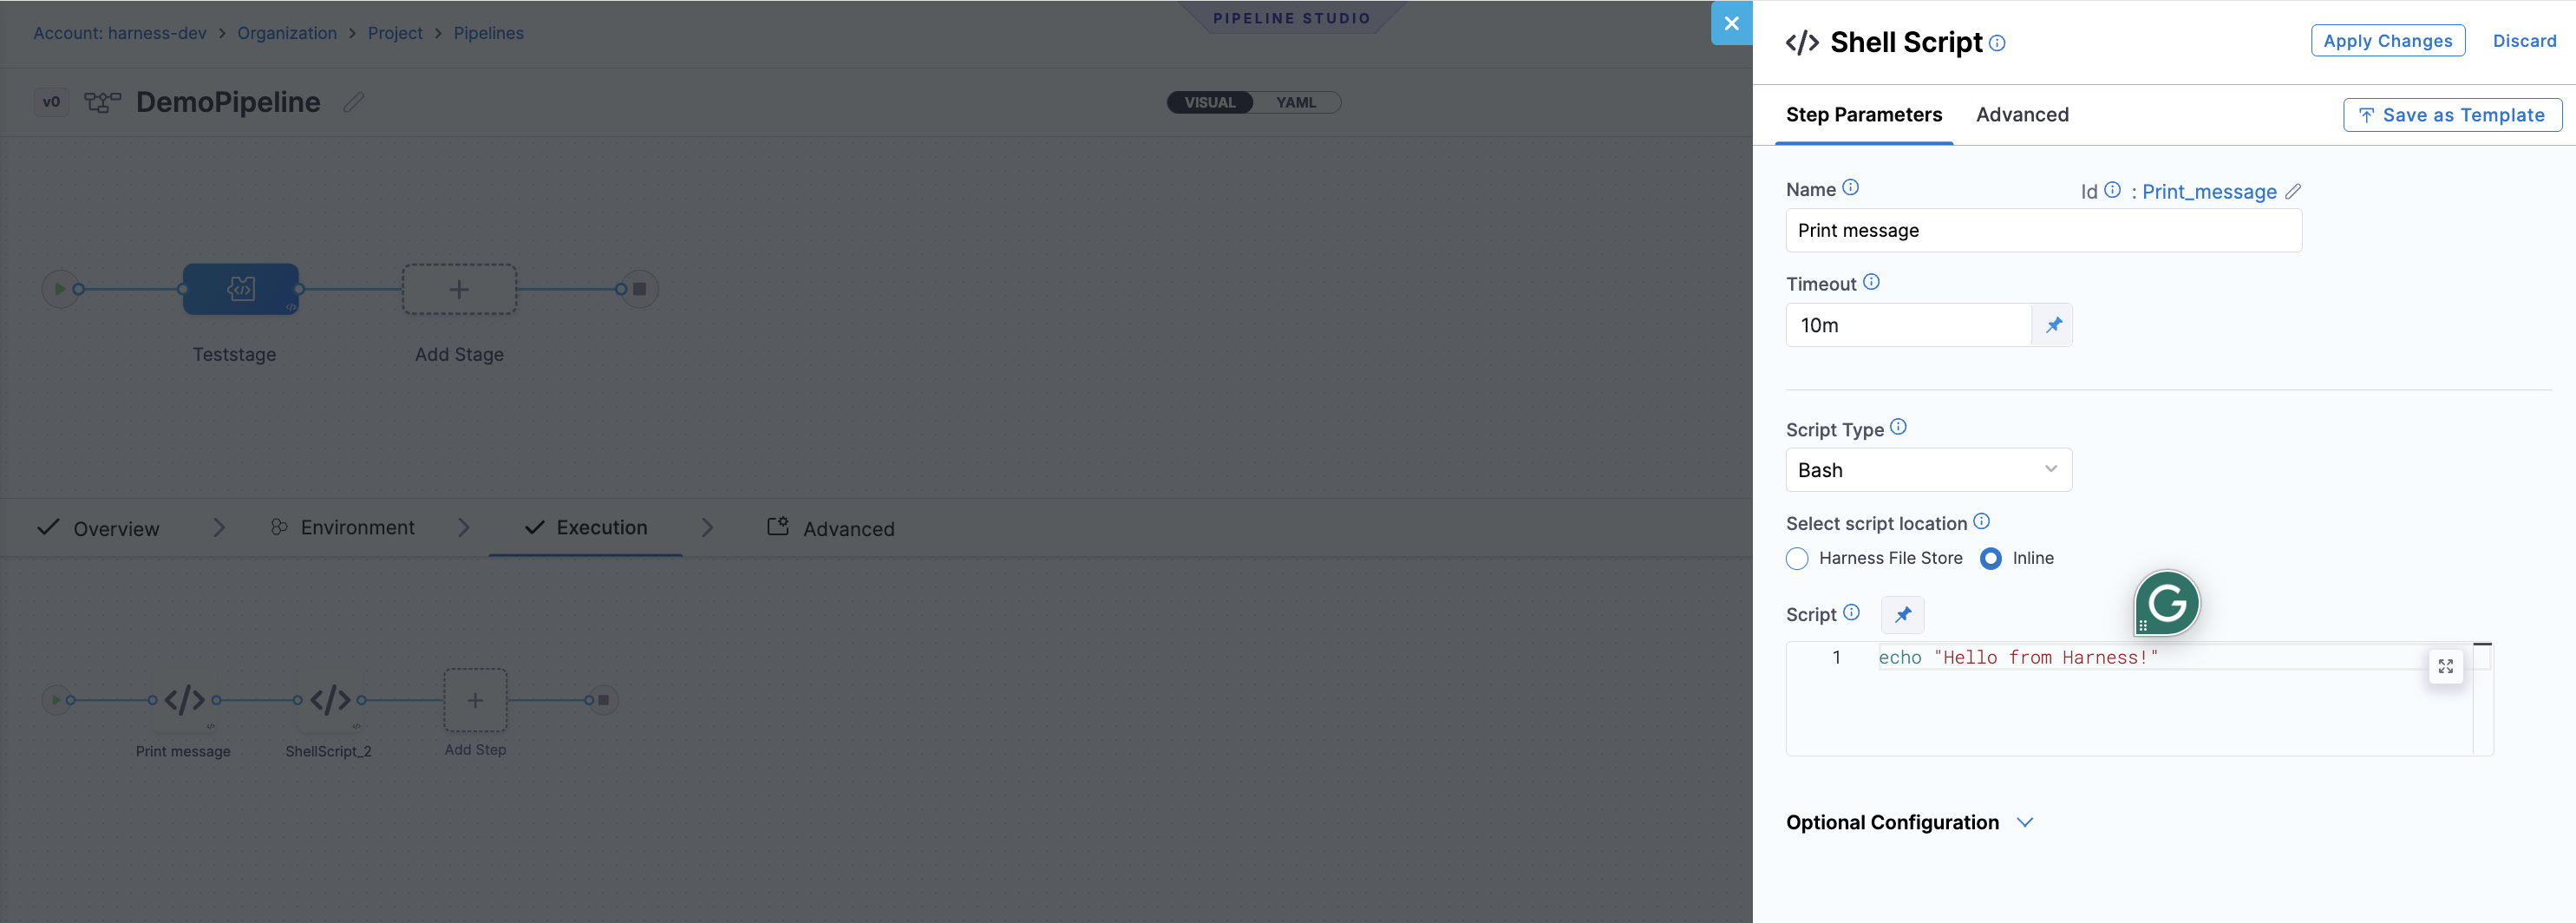
1. In the **Execution** tab, select **Add Step**.
2. In the **Step Library**, search for **Shell Script** and select it.
3. Configure the step:
| Field | Value |
| -------------------------- | ---------------------------- |
| **Name** | `Print message` |
| **Timeout** | `10m` (default) |
| **Script Type** | `Bash` |
| **Select script location** | `Inline` |
| **Script** | `echo "Hello from Harness!"` |
4. Select **Apply Changes**. The step appears on the stage execution canvas.
YAML - Pipeline step
```yaml
step:
type: ShellScript
name: Print message
identifier: Print_message
spec:
shell: Bash
executionTarget: {}
source:
type: Inline
spec:
script: echo "Hello from Harness!"
environmentVariables: []
outputVariables: []
timeout: 10m
```
You can arrange steps sequentially, in step groups, or in parallel. Each step type has its own configuration options. For more information about organizing steps into groups, go to [Organize steps in step groups](/harness-platform/use-harness-platform/pipelines/use-step-groups.md).
***
### Run the pipeline
Perform the following steps to run the pipeline.
1. In Pipeline Studio, select **Run** in the top right corner.
2. The **Run Pipeline** dialog opens. This pipeline has no runtime inputs, so no additional configuration is needed.
3. Select **Run Pipeline**.
Harness queues and starts the execution. You are redirected to the execution view.
***
### View execution logs
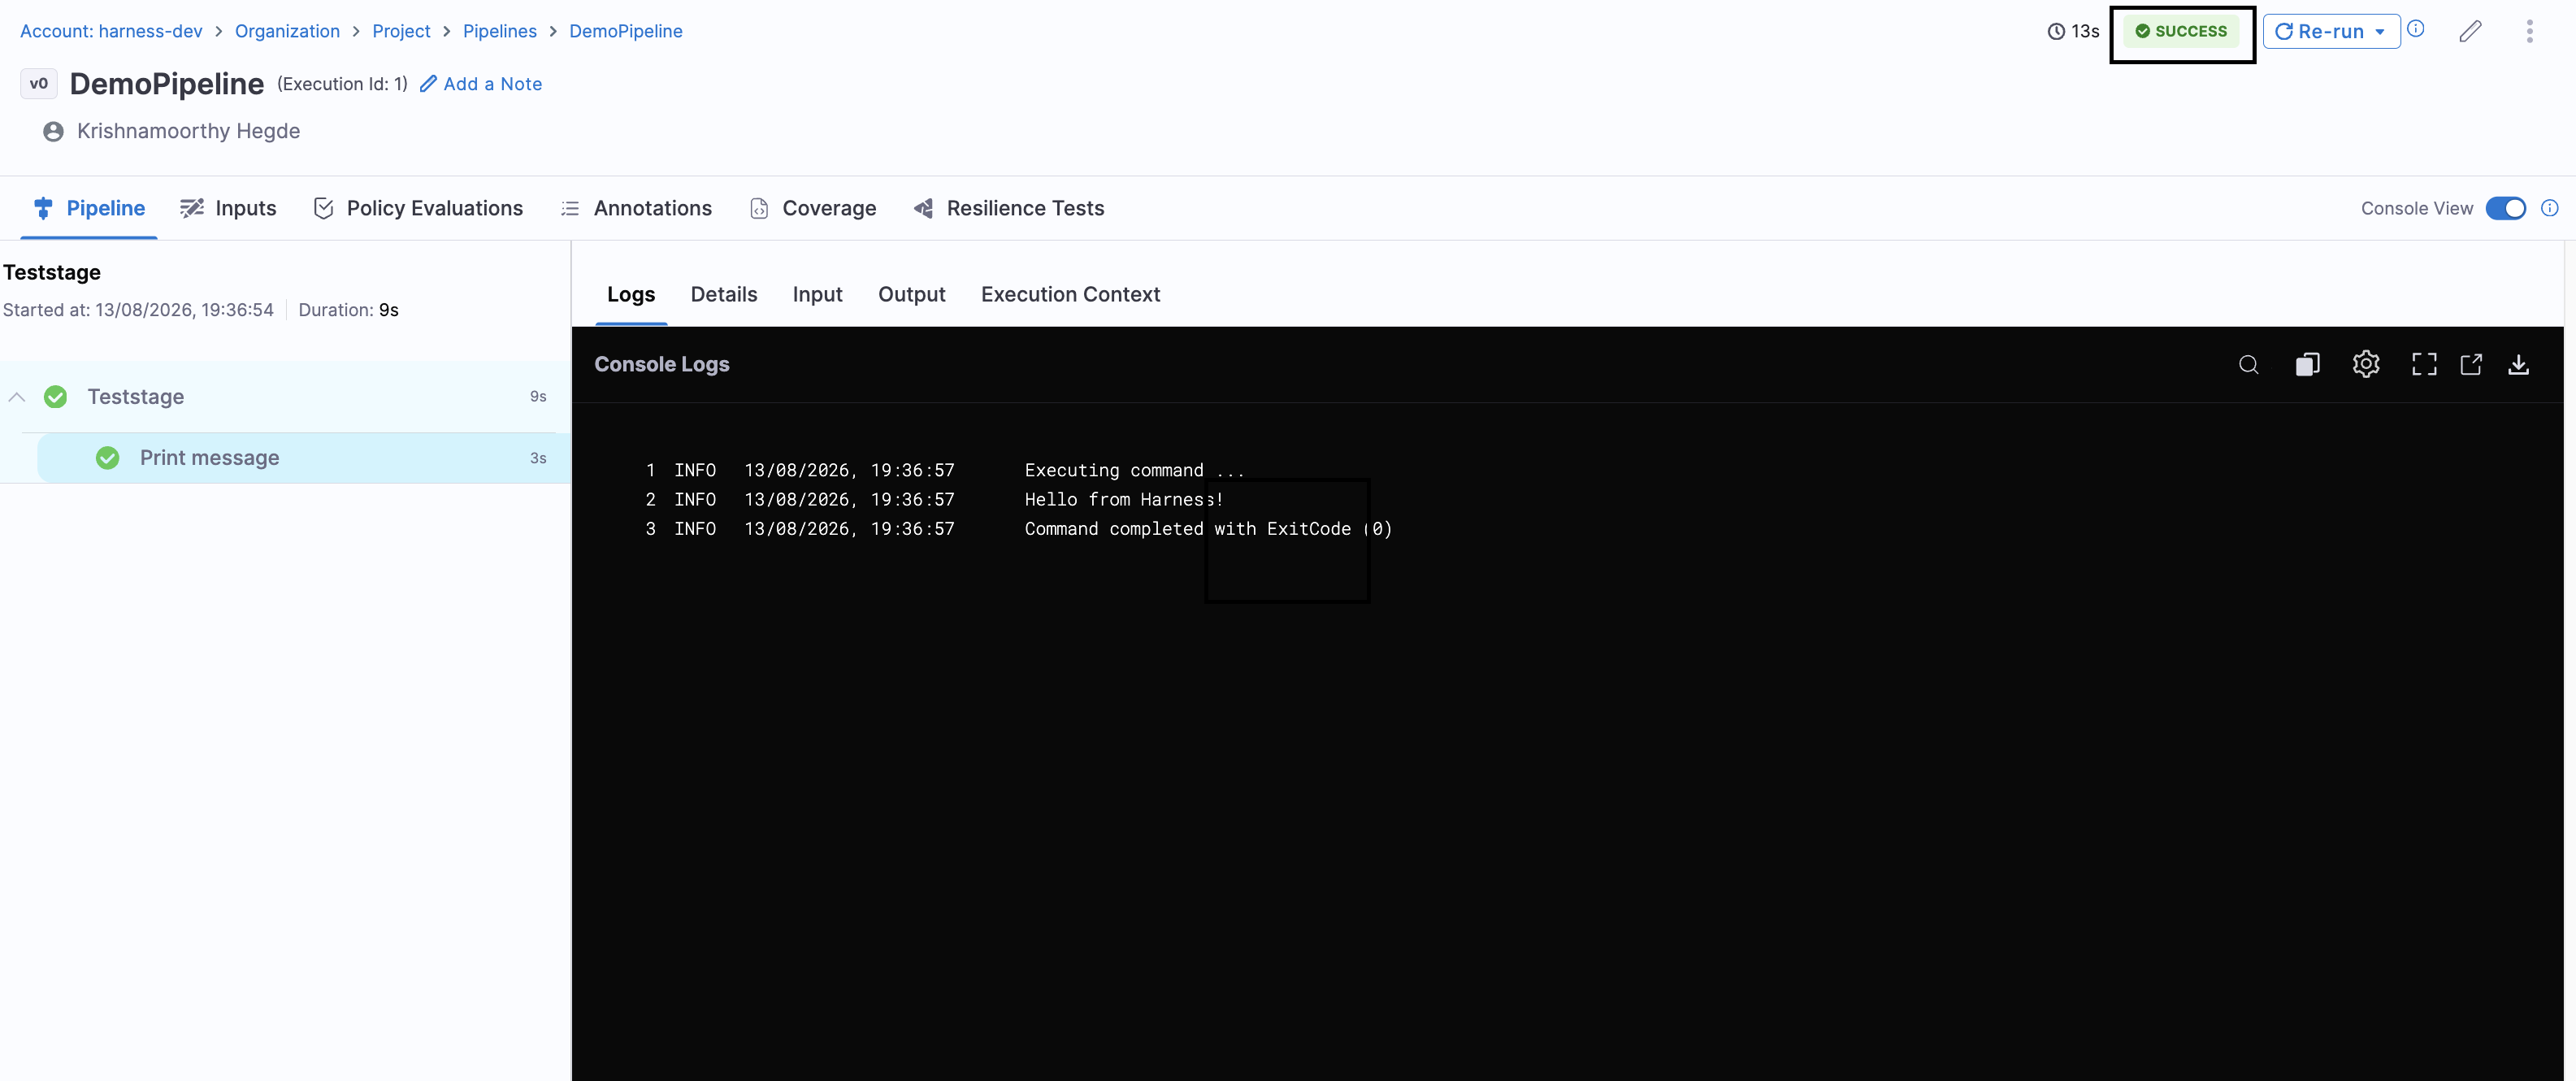
After the pipeline starts running, the execution view shows the pipeline graph with stage and step status.
1. On the execution graph, select the **Teststage** stage.
2. Select the **Print message** step.
3. The **Console View** panel opens on the right, showing real-time logs for the step.
You should see output similar to the following:
```
Executing command...
Hello from Harness!
Command completed with ExitCode (0)
```
4. After the step completes, the stage and pipeline statuses update to **Success**.
***
### Pipeline YAML
The following example shows the complete YAML for the pipeline created in this quickstart, including the pipeline, stage, step, variables, and failure strategy.
Pipeline YAML
```yaml
pipeline:
name: DemoPipeline # Your pipeline name.
identifier: DemoPipeline # Your pipeline identifier.
tags: {} # Your pipeline tags.
projectIdentifier: # Your project identifier.
orgIdentifier: default # Your organization identifier.
stages: # Your pipeline stages.
- stage:
name: Teststage # Your stage name.
identifier: Teststage # Your stage identifier.
description: "" # Your stage description.
type: Custom # Your stage type.
spec: # Your stage configuration.
execution: # Your stage execution settings.
steps: # Your stage steps.
- step:
type: ShellScript # Your step type.
name: Print message # Your step name.
identifier: Print_message # Your step identifier.
spec: # Your step configuration.
shell: Bash # Your script type.
executionTarget: {} # Your execution target.
source: # Your script source.
type: Inline # Your script location.
spec:
script: echo "Hello from Harness!" # Your script.
environmentVariables: [] # Your environment variables.
outputVariables: [] # Your output variables.
timeout: 10m # Your step timeout.
tags: {} # Your stage tags.
variables: # Your stage variables.
- name: name # Your variable name.
type: String # Your variable type.
description: Name description # Your variable description.
required: false # Your runtime requirement setting.
value: Test # Your variable value.
failureStrategies: # Your failure strategy.
- onFailure:
errors:
- Unknown # Your failure condition.
action:
type: MarkAsFailure # Your failure action.
```
### Next steps
* [Get started with Harness CI](/continuous-integration/new-to-harness-ci/onboarding-guide.md): Add a Build stage to compile code, run tests, and push artifacts.
* [Get started with Harness CD](/continuous-delivery/new-to-continuous-delivery/getting-started.md): Add a Deploy stage to deploy a service to Kubernetes, a VM, or a serverless target.
* [Triggers overview](/harness-platform/use-harness-platform/triggers/triggers-overview.md): Automate pipeline runs on Git events or a schedule.
* [Input sets and overlays](/harness-platform/use-harness-platform/pipelines/input-sets.md): Parameterize the pipeline with runtime inputs and save reusable input sets.
***
{% @harness-feedback/feedback module="harness-ai" pagePath="harness-ai/use-harness-platform/pipelines/create-pipeline-quickstart" %}