> For the complete documentation index, see [llms.txt](https://developer.harness.io/llms.txt). Markdown versions of documentation pages are available by appending `.md` to page URLs; this page is available as [Markdown](https://developer.harness.io/infrastructure-as-code-management/3.0/platform/workspaces/create-workspace.md).

# Create a workspace

A workspace is a named environment that stores Terraform configurations, variables, states, and other resources necessary to manage infrastructure. Each workspace is mapped to a single state, and you can define a single Terraform configuration with multiple workspaces to enforce the same desired configuration across independent lifecycles.

***

### Before you begin <a href="#before-you-begin" id="before-you-begin"></a>

* **IaCM module access:** Your Harness account must have the IaCM module enabled.
* **Workspace permissions:** You need Create or Edit permissions on workspaces. Go to [Workspace RBAC](/infrastructure-as-code-management/3.0/platform/workspaces/workspace-rbac.md) to configure roles.
* **Git repository:** A Git repository (GitHub, GitLab, Bitbucket, or Harness Code) containing your Terraform or OpenTofu configuration.
* **Cloud provider connector:** A configured connector for your cloud provider or backend system. Go to [Connectors](/harness-ai/use-harness-platform/connectors.md) to set one up.

***

### Workspace statuses <a href="#workspace-statuses" id="workspace-statuses"></a>

A workspace can have one of the following statuses:

* **Active:** Successfully deployed and running.
* **Inactive:** Successfully destroyed or was not provisioned.
* **Drifted:** Drift was detected.
* **Provisioning:** Currently being provisioned.
* **Destroying:** Currently being destroyed.
* **Failed:** Errors were encountered during provisioning or destroying.
* **Apply\_Needed:** Apply is required to bring the infrastructure in sync with the workspace configuration.
* **Unknown:** Changes were made outside the product.

Go to [Workspace statuses](/infrastructure-as-code-management/3.0/platform/workspaces/workspace-statuses.md) to filter workspaces by status.

***

### Create a new workspace <a href="#create-a-new-workspace" id="create-a-new-workspace"></a>

{% tabs %}
{% tab title="Interactive guide" %}
{% embed url="<https://app.tango.us/app/embed/cfb68b54-eb46-42af-a622-5b76c9270598?skipCover=false&defaultListView=false&skipBranding=false&makeViewOnly=true&hideAuthorAndDetails=true>" %}
Create a IaCM Workspace in Harness
{% endembed %}
{% endtab %}

{% tab title="Step-by-step" %}
To create a new workspace, follow these steps:

1. Sign in to [app.harness.io](https://app.harness.io).
2. In the module pane, select **Infrastructures as Code Management**.
3. Select **Workspaces**, then select **+New Workspace**, then select **Start from scratch**.

#### Step 1: About workspace <a href="#step-1-about-workspace" id="step-1-about-workspace"></a>

* Enter a name for your workspace. This name will appear in your workspace list.
* (Optional) Add a description to clarify the purpose of the workspace.
* (Optional) Add tags for easier filtering and organization.
* Click **Next**.

#### Step 2: Configure repository details <a href="#step-2-configure-repository-details" id="step-2-configure-repository-details"></a>

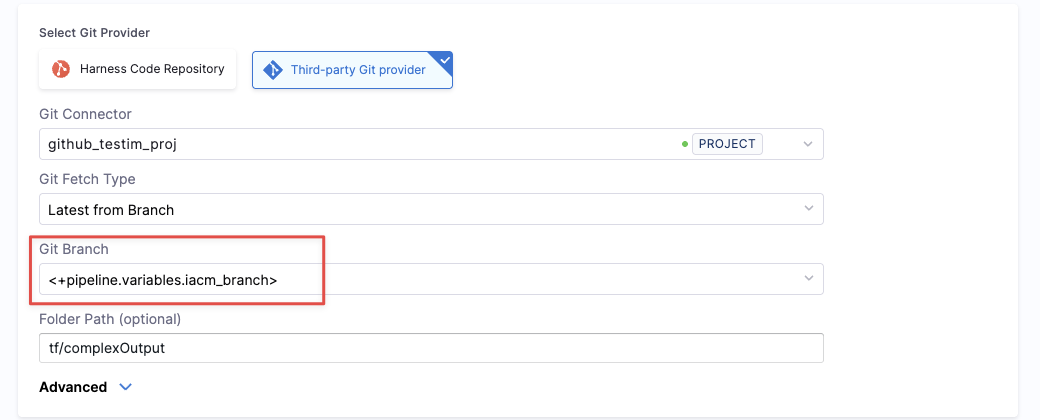
* Select a git provider: choose either Harness Code Repository or a third-party git provider (for example, GitHub, GitLab, or Bitbucket).
* Select a git connector: choose an existing connector or create a new one.
* Choose a git fetch type:

  * Latest from Branch is selected by default.
  * Enter the git branch name you want to fetch from.

  <div data-gb-custom-block data-tag="hint" data-style="info" class="hint hint-info"><p><strong>BRANCH WITH JEXL</strong></p><p>You can configure the workspace branch to be a <a href="/spaces/3F2TpHXhur2QtQnORSM9/pages/tUiFRZ5SdqvDB97hJdLq">JEXL expression</a> that references a pipeline variable, and then set the pipeline variable as a runtime input.</p><p><img src="/files/9s0Ke2NG272mYVymn3tQ" alt="" data-size="original"></p><p>Set your branch variable as a runtime input in the pipeline:</p><pre class="language-yaml"><code class="lang-yaml">variables:
   - name: iacm_branch
     type: String
     description: ""
     required: true
     value: &#x3C;+input>.default(main)
  </code></pre></div>

  * (Optional) Enter a folder path: if your IaC code resides in a subdirectory, specify the folder path.
  * Click **Next**.

#### Step 3: Provisioner <a href="#step-3-provisioner" id="step-3-provisioner"></a>

* Select a **Connector:** choose the connector for the cloud provider or backend system (for example, `aws-oidc`).
* Set **Scope:** confirm the scope for the connector (for example, Account, Project, or Organization).
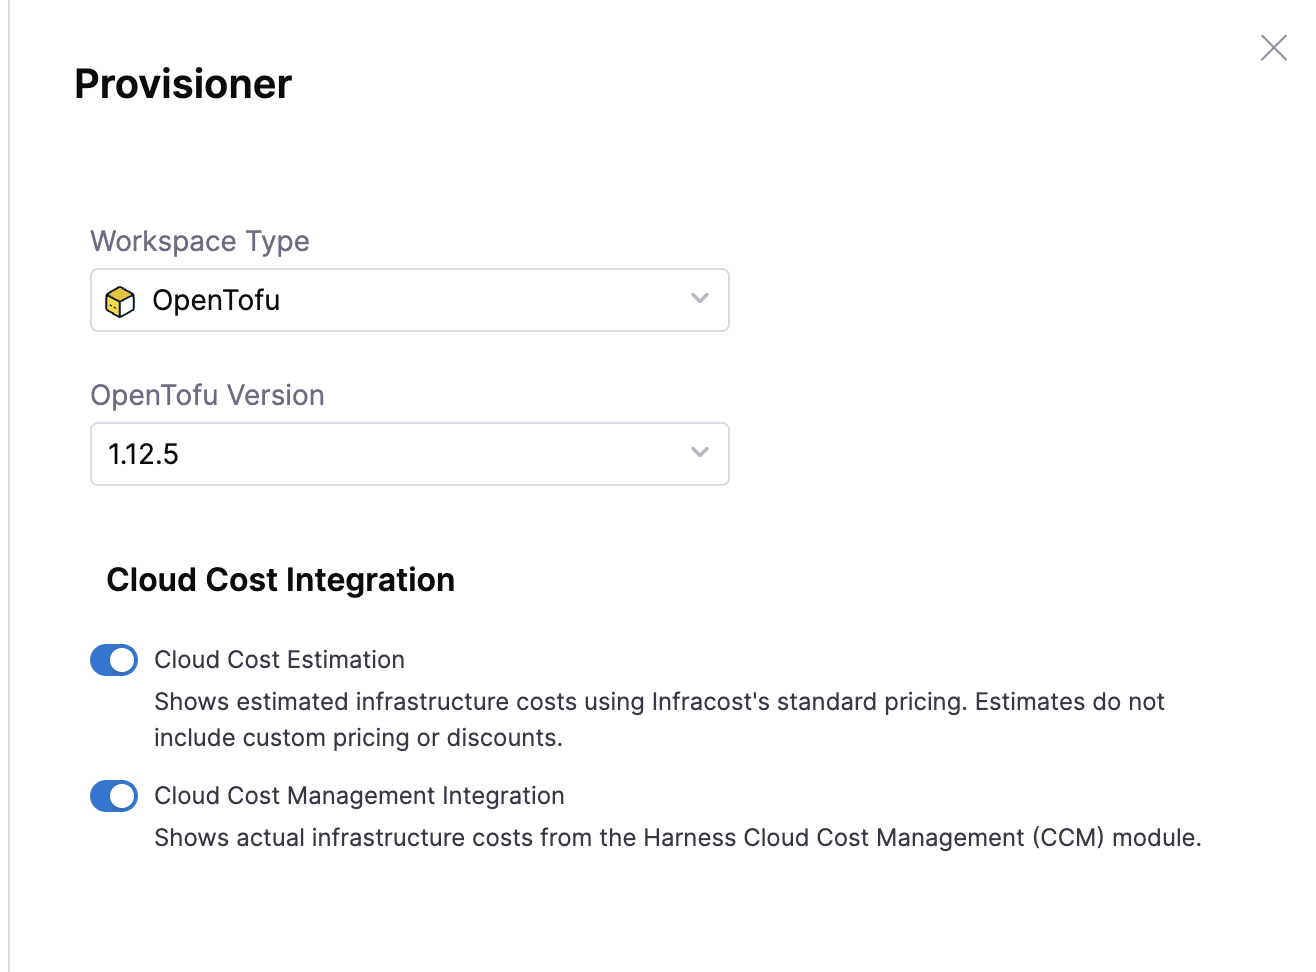
* Choose **Workspace Type:** select OpenTofu or Terraform based on your IaC framework.
* Select the **Version** of OpenTofu or Terraform to use (for example, `1.12.5`).

{% hint style="info" %}
**PENDING RELEASE**

Cloud Cost Management Integration is currently **pending release**. Contact [Harness Support](mailto:support@harness.io) to request access.
{% endhint %}

Under **Cloud Cost Integration**, toggle the cost features you want to enable for this workspace:

* **Cloud Cost Estimation:** Runs Infracost during each Terraform or OpenTofu plan and shows estimated cost changes in approval steps and the Cost Change Estimation tab.
* **Cloud Cost Management Integration:** Pulls actual infrastructure costs and optimization recommendations from the Harness CCM module and displays them on the workspace Overview tab.

<div data-with-frame="true"><figure><img src="/files/cWOtS1vLy0dTcyHtpypY" alt=""><figcaption></figcaption></figure></div>

Go to [Cost estimation](/infrastructure-as-code-management/3.0/platform/workspaces/cost-estimation.md) for details on each option.

Click **Create** to finalize and create the workspace.
{% endtab %}
{% endtabs %}

***

If you need to use either environment or Terraform variables during execution, select the **Variables** tab to define the variables.

* **Environment Variables:** can be either String, [Secret](/harness-ai/use-harness-platform/secrets.md), or a reference to another variable using a [JEXL expression](/harness-ai/use-harness-platform/variables-and-expressions/harness-variables.md) (it can be in the same or a different workspace or from the pipeline).
* **Terraform Variables:** can be provided in the following ways:
* **Inline:** you can define Terraform variables within the workspace. Variables can be either String, [hcl](https://developer.hashicorp.com/terraform/language/syntax/configuration), [Secret](/harness-ai/use-harness-platform/secrets.md), or a reference to another variable, using a [JEXL expression](/harness-ai/use-harness-platform/variables-and-expressions/harness-variables.md) (can be in the same or a different workspace, or from the pipeline).
* **From Git Repo (Implicit):** you can store `.tfvar` files in the same folder as the Terraform code for the workspace.
* **From Git Repo (Explicit):** you can define a specific folder for `.tfvar` files (which can be different from the Terraform code's location). These files can be in the same or different repository as the Terraform code.

{% hint style="info" %}
**TFVAR JEXL SUPPORT**

[JEXL expressions](/harness-ai/use-harness-platform/variables-and-expressions/harness-variables.md) cannot be used to reference `tfvar` files.
{% endhint %}

The values defined inline with the workspace take precedence over the git configuration.

![Workspace variables](/files/SxpvUvIDNTaMuyG9M8b4)

***

### Clone a workspace <a href="#clone-a-workspace" id="clone-a-workspace"></a>

Harness supports workspace cloning for quick setup of new workspaces with the same or similar configuration as existing workspaces.

{% tabs %}
{% tab title="Interactive guide" %}
{% embed url="<https://app.tango.us/app/embed/64cc1d48-a7c5-451e-aaa8-98d3888027d4?skipCover=false&defaultListView=false&skipBranding=false&makeViewOnly=true&hideAuthorAndDetails=true>" %}
Clone your workspace
{% endembed %}
{% endtab %}

{% tab title="Step-by-step" %}

1. In your IaCM project, go to **Workspaces**.
2. Select the option icon (vertical ellipsis) beside the workspace you want to clone.
3. Select **Clone**.
4. Name your new workspace.
   * The default placeholder name will be "*cloned\_workspace\_name*-clone".
5. Select **Clone**.

Review your new workspace and make any amendments in the Configuration tab if necessary.
{% endtab %}
{% endtabs %}

***

### Workspace templates <a href="#workspace-templates" id="workspace-templates"></a>

Create reusable workspace templates to standardize your workspace configurations across projects. Go to [Workspace templates](/infrastructure-as-code-management/3.0/platform/workspaces/workspace-templates.md) to learn how to create and manage workspace templates.

***

### Next steps <a href="#next-steps" id="next-steps"></a>

Once you have created your workspace by creating a new workspace from scratch, cloning, or using a template, you can [provision](/infrastructure-as-code-management/3.0/platform/workspaces/provision-workspace.md) it to apply your OpenTofu or Terraform state.