> For the complete documentation index, see [llms.txt](https://developer.harness.io/llms.txt). Markdown versions of documentation pages are available by appending `.md` to page URLs; this page is available as [Markdown](https://developer.harness.io/internal-developer-portal/new-to-idp/get-started/step-2-set-up-software-catalog-get-started/create-manually-step-2-set-up-software-catalog-get-started.md).
# Create Manually
{% @harness-package-selector/package-selector platforms="%5B%7B%22label%22%3A%22Create%20Manually%22%2C%22slug%22%3A%22create-manually%22%2C%22path%22%3A%22internal-developer-portal%2Fnew-to-idp%2Fget-started%2Fstep-2-set-up-software-catalog-get-started%2Fcreate-manually-step-2-set-up-software-catalog-get-started%22%7D%2C%7B%22label%22%3A%22Auto-Discovery%22%2C%22slug%22%3A%22auto-discovery%22%2C%22path%22%3A%22internal-developer-portal%2Fnew-to-idp%2Fget-started%2Fstep-2-set-up-software-catalog-get-started%2Fauto-discovery-step-2-set-up-software-catalog-get-started%22%7D%2C%7B%22label%22%3A%22Import%20from%20Git%22%2C%22slug%22%3A%22import-from-git%22%2C%22path%22%3A%22internal-developer-portal%2Fnew-to-idp%2Fget-started%2Fstep-2-set-up-software-catalog-get-started%2Fimport-from-git-step-2-set-up-software-catalog-get-started%22%7D%5D" selectedPlatform="create-manually" %}
### Create entities manually
In IDP 2.0, entity creation is simplified with full UI support and optional YAML-based creation. Entities are now "inline," which means their entire lifecycle can be managed through the UI or API, without Git integration.
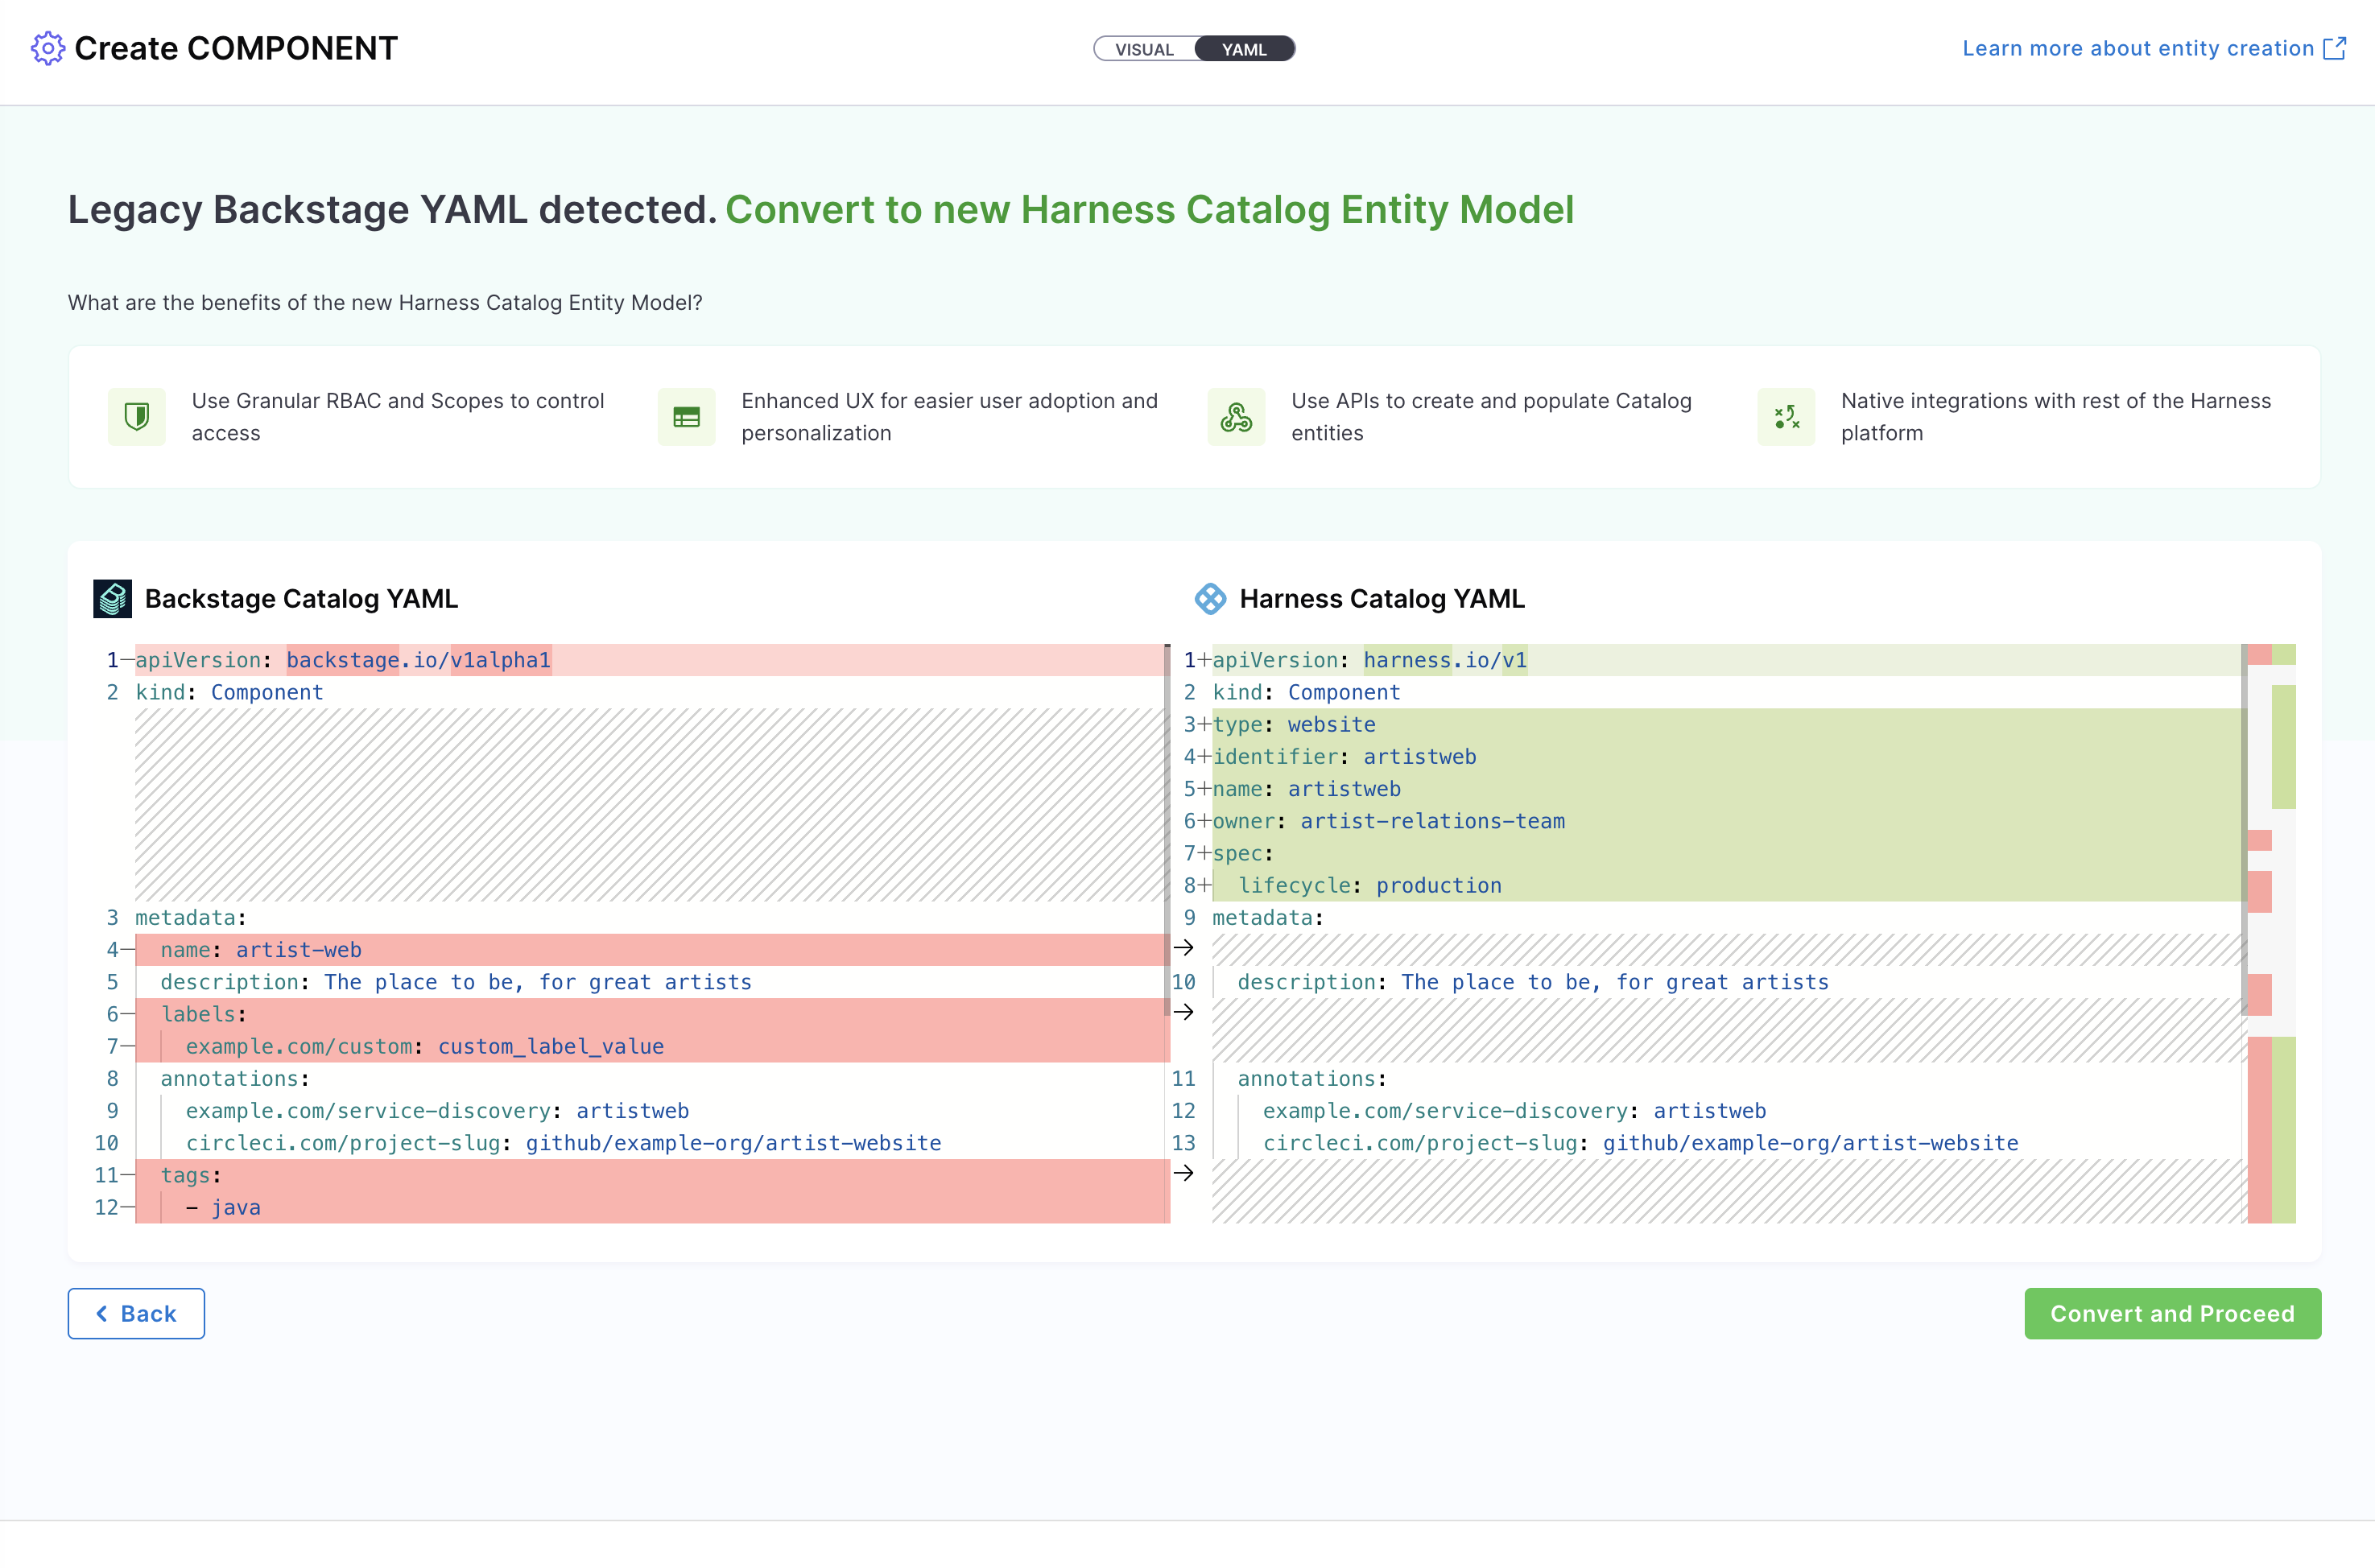
You can create entities directly via the **Harness IDP UI**, no YAML required for a streamlined, code-free experience. Alternatively, you can use your **existing catalog YAML** files, and Harness will automatically convert **legacy Backstage YAML** into the new Harness Catalog Entity Model.
{% tabs %}
{% tab title="Interactive Guide" %}
{% embed url="" %}
Create Entities Manually
{% endembed %}
{% endtab %}
{% tab title="Step-by-Step" %}
Let us walk through creating a **Component** entity using both the Visual View and YAML View methods.
**Method 1: Visual view**
**Step 1: Navigate to Create**
1. Navigate to the Harness IDP portal and click **"Create"** in the sidebar.
2. Select **Component** from the available options.
3. You will enter the **Visual View**, where you can fill out entity details interactively.
{% hint style="info" %}
Ensure your `identifier` follows [naming rules](/harness-ai/use-harness-platform/references/entity-identifier-reference.md#identifier-naming-rules). Invalid identifiers may lead to entity registration errors. The **identifier** is a unique key for your entity and cannot be changed after creation.
{% endhint %}
***
**Step 2: Configure Entity Details**
1. **Specify the Entity Scope** (Account, Org, or Project). For this example, choose **Account scope**. [Read more about Catalog RBAC](/internal-developer-portal/admin-and-customization/rbac/catalog-rbac.md).
2. **Link to Source Code Repository**\
Configure the source code repository associated with this component. This link enables several key capabilities:
* Automatically configuring plugins like **Scorecards**, **TechDocs**, and **STO**
* Displaying the **View Source** option in the UI
* Enabling advanced features like **CI/CD integration** and **security scanning**
> Harness IDP also auto-generates the legacy `backstage.io/source-location` annotation for backwards compatibility.
***
**Step 3: Choose Management Option**
You have two options for managing your Component configuration:
* **Inline (default):** Manage the Component YAML directly within Harness.
* **Git-based:** Store the Component YAML in your Git repository and sync it with Harness.
***
**Step 4: Configure Plugins (Optional)**
If applicable, configure a plugin by referring to its documentation and adding the necessary **annotations** in the Catalog YAML.
***
**Step 5: Save the Entity**
Click **Save** to create your entity.
{% hint style="info" %}
**YAML validation** is performed to ensure compatibility with the **Harness-native Catalog YAML** model. Any errors will be shown in the Validation logs.
{% endhint %}
***
**Method 2: YAML view**
**Step 1: Navigate to Create**
1. Navigate to the Harness IDP portal and click **"Create"** in the sidebar.
2. Select **Component** from the available options.
3. Switch to the **YAML View** by clicking the toggle.
***
**Step 2: Paste Your YAML**
Paste your **Catalog YAML** in the editor. You can use the following template:
```yaml
apiVersion: harness.io/v1
kind: component
name: artist-lookup-api
identifier: artistlookupapi
type: service
owner: team-a
scope: account
projectIdentifier: myproject
orgIdentifier: myorg
spec:
lifecycle: production
sourceCode:
provider: github
repoName: myorg/artist-lookup-api
connectorRef: github_connector
branch: main
metadata:
tags:
- java
- api
description: "Artist lookup API service"
```
> You can even paste your existing Backstage YAML if available. Harness will auto-convert it into the native format.
***
**Step 3: Save the Entity**
Click **Save** to create your entity.
{% endtab %}
{% endtabs %}
***
Example Component YAML Template
```yaml
apiVersion: harness.io/v1
kind: component
name: artist-lookup-api
identifier: artistlookupapi
type: service
owner:
scope:
projectIdentifier:
orgIdentifier:
spec:
lifecycle: production
sourceCode:
provider:
repoName:
connectorRef:
branch:
monoRepo:
metadata:
tags: []
description: ""
```
{% @harness-feedback/feedback %}