> For the complete documentation index, see [llms.txt](https://developer.harness.io/llms.txt). Markdown versions of documentation pages are available by appending `.md` to page URLs; this page is available as [Markdown](https://developer.harness.io/internal-developer-portal/use-idp/software-catalog/create-entity/catalog-discovery/custom-integrations/create-custom-integration.md).
# Create a Custom Integration
Configure a Custom Integration in Harness IDP - name it, choose API or webhook ingestion, select a data schema, map webhook payloads, and set up correlation with your catalog.
This page walks through creating a Custom Integration in the IDP UI. When you finish, the integration is enabled and gives you either an API endpoint or a webhook URL that your tools can start sending data to.
{% hint style="info" %}
* Review the [prerequisites](/internal-developer-portal/use-idp/software-catalog/create-entity/catalog-discovery/custom-integrations/overview.md#before-you-begin).
* Decide which [ingestion mode](/internal-developer-portal/use-idp/software-catalog/create-entity/catalog-discovery/custom-integrations/overview.md#ingestion-modes) and [data schema](/internal-developer-portal/use-idp/software-catalog/create-entity/catalog-discovery/custom-integrations/overview.md#data-schemas) you need. Neither can be changed after the integration is created.
{% endhint %}
***
### Step 1: Open the Custom Integrations page
To open the Custom Integrations page, complete the following steps:
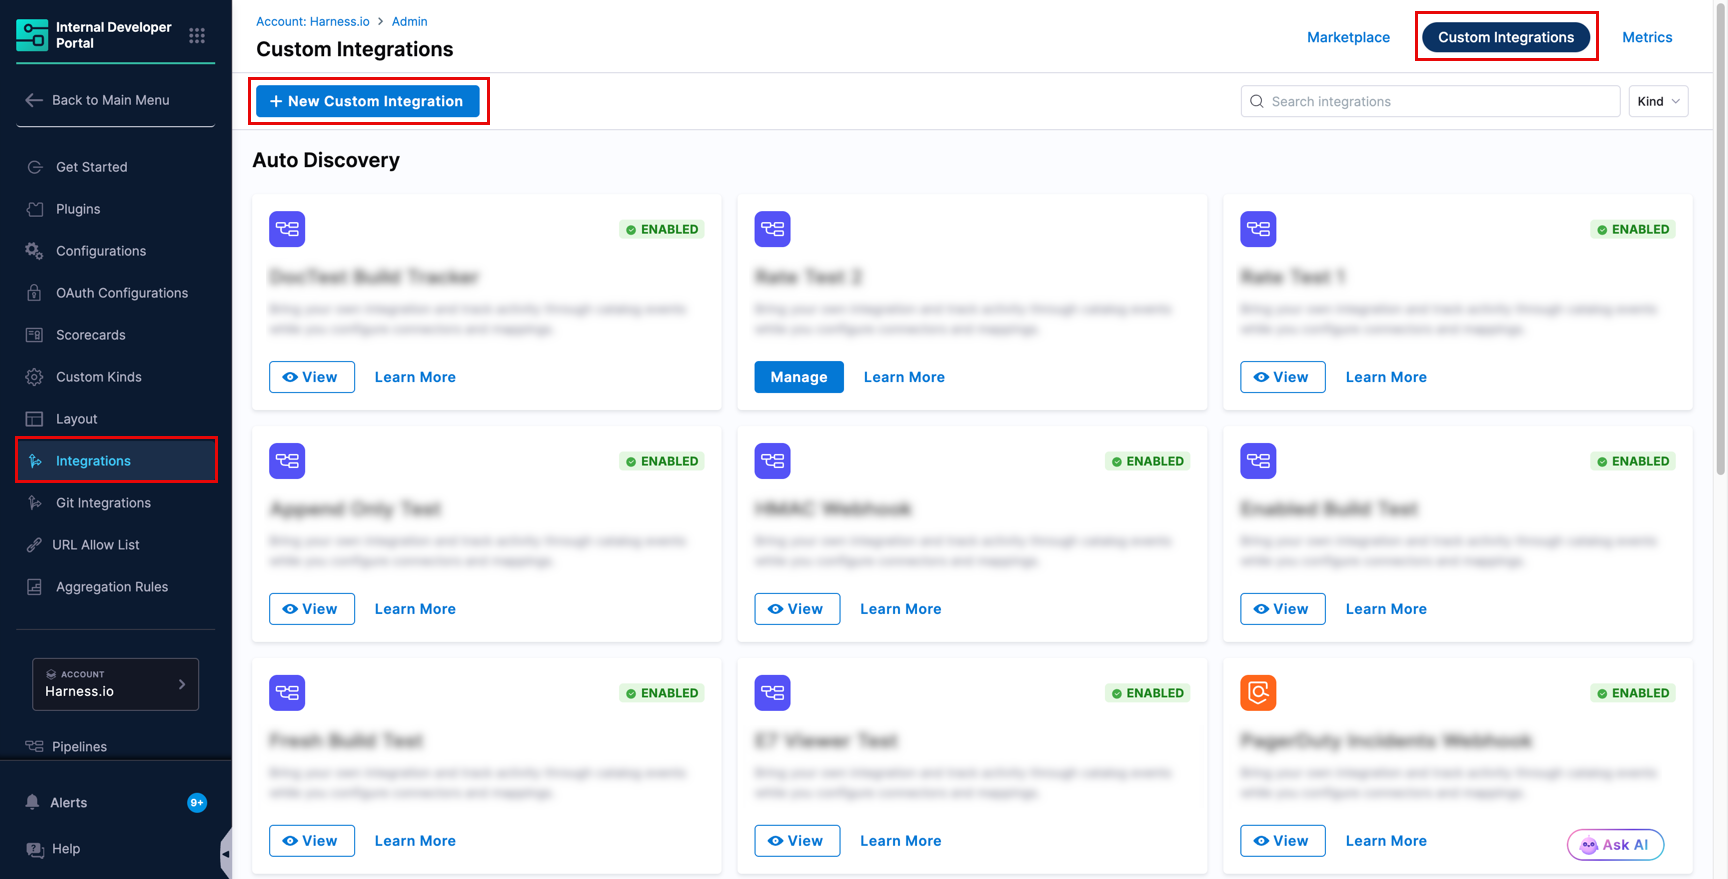
1. In Harness IDP, go to **Configure** → **Integrations**.
2. Select **Custom Integrations** at the top right of the page.
3. Select **+ New Custom Integration**.
***
### Step 2: Set up identity
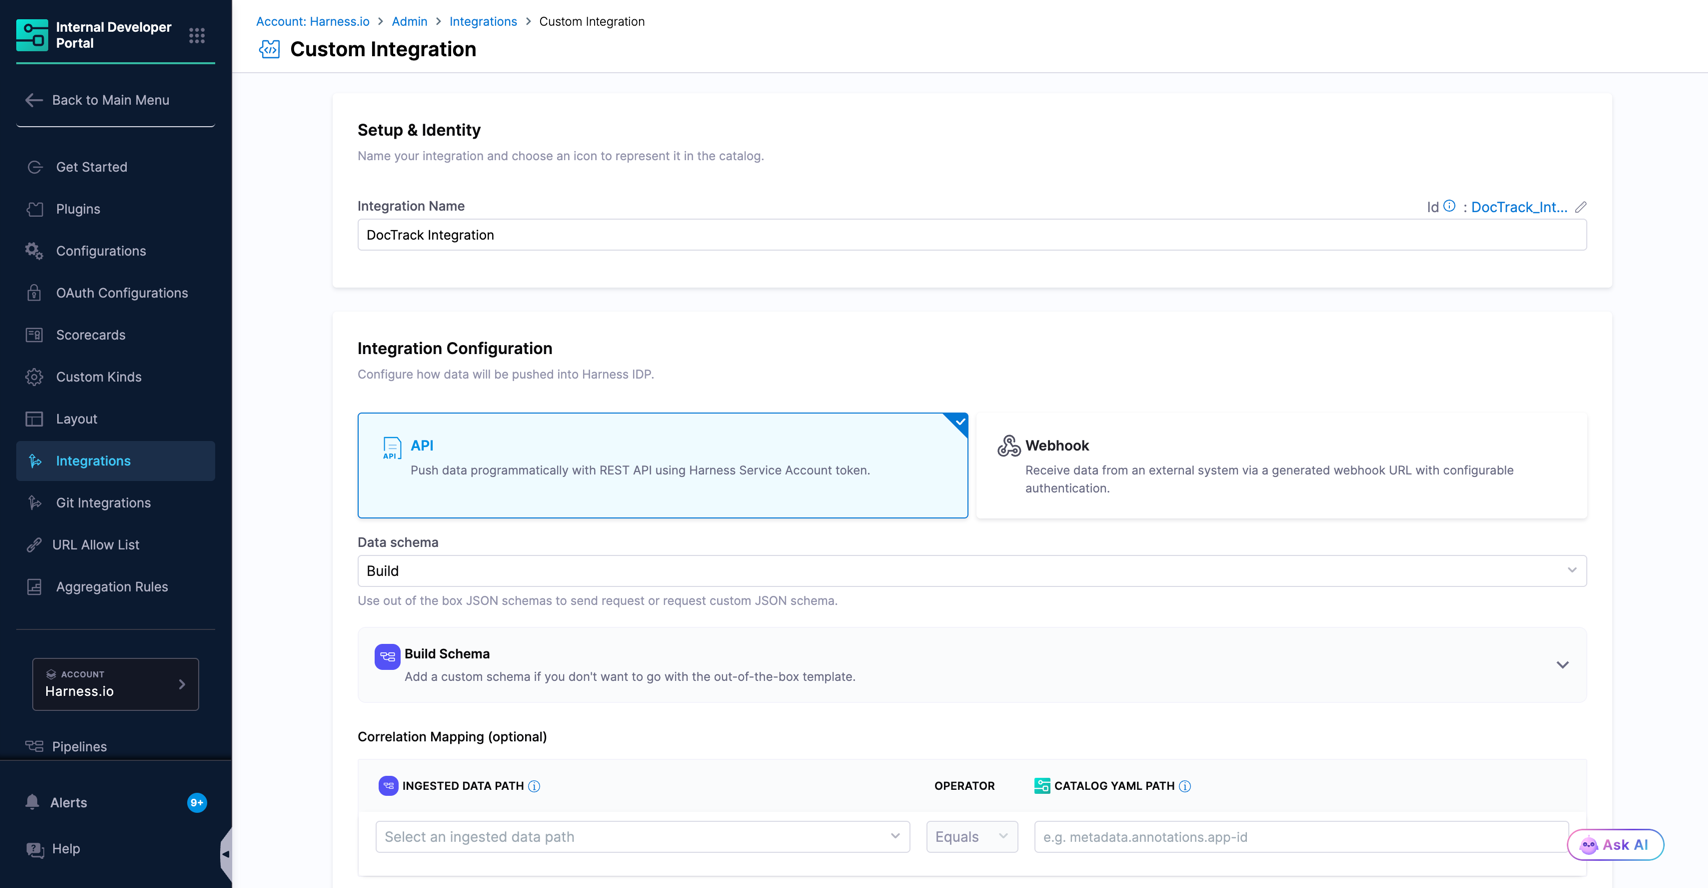
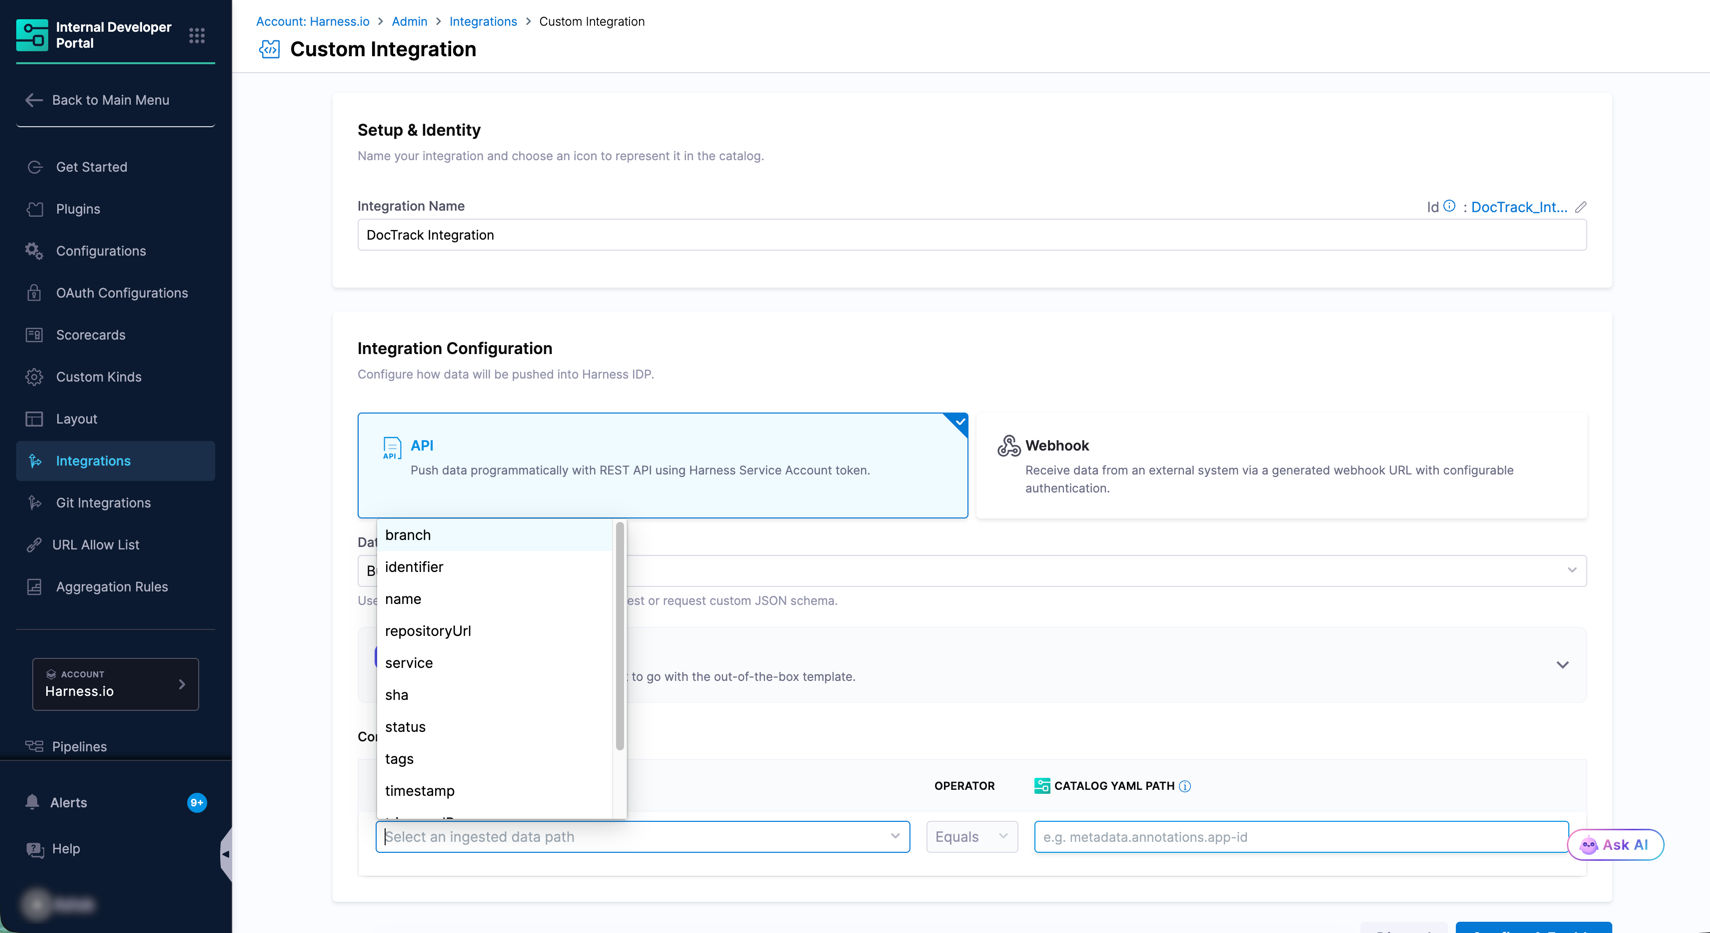
Under **Setup & Identity**, enter an **Integration Name**. This is how the integration appears in the Custom Integrations list and in the filters on entity pages, so name it after what it carries, for example `Jenkins Builds` or `PagerDuty Incidents`.
An **Id** is generated from the name. To change it, select the pencil icon next to it. The Id becomes part of the integration's endpoint URL and cannot be changed after creation.
***
### Step 3: Choose an ingestion mode
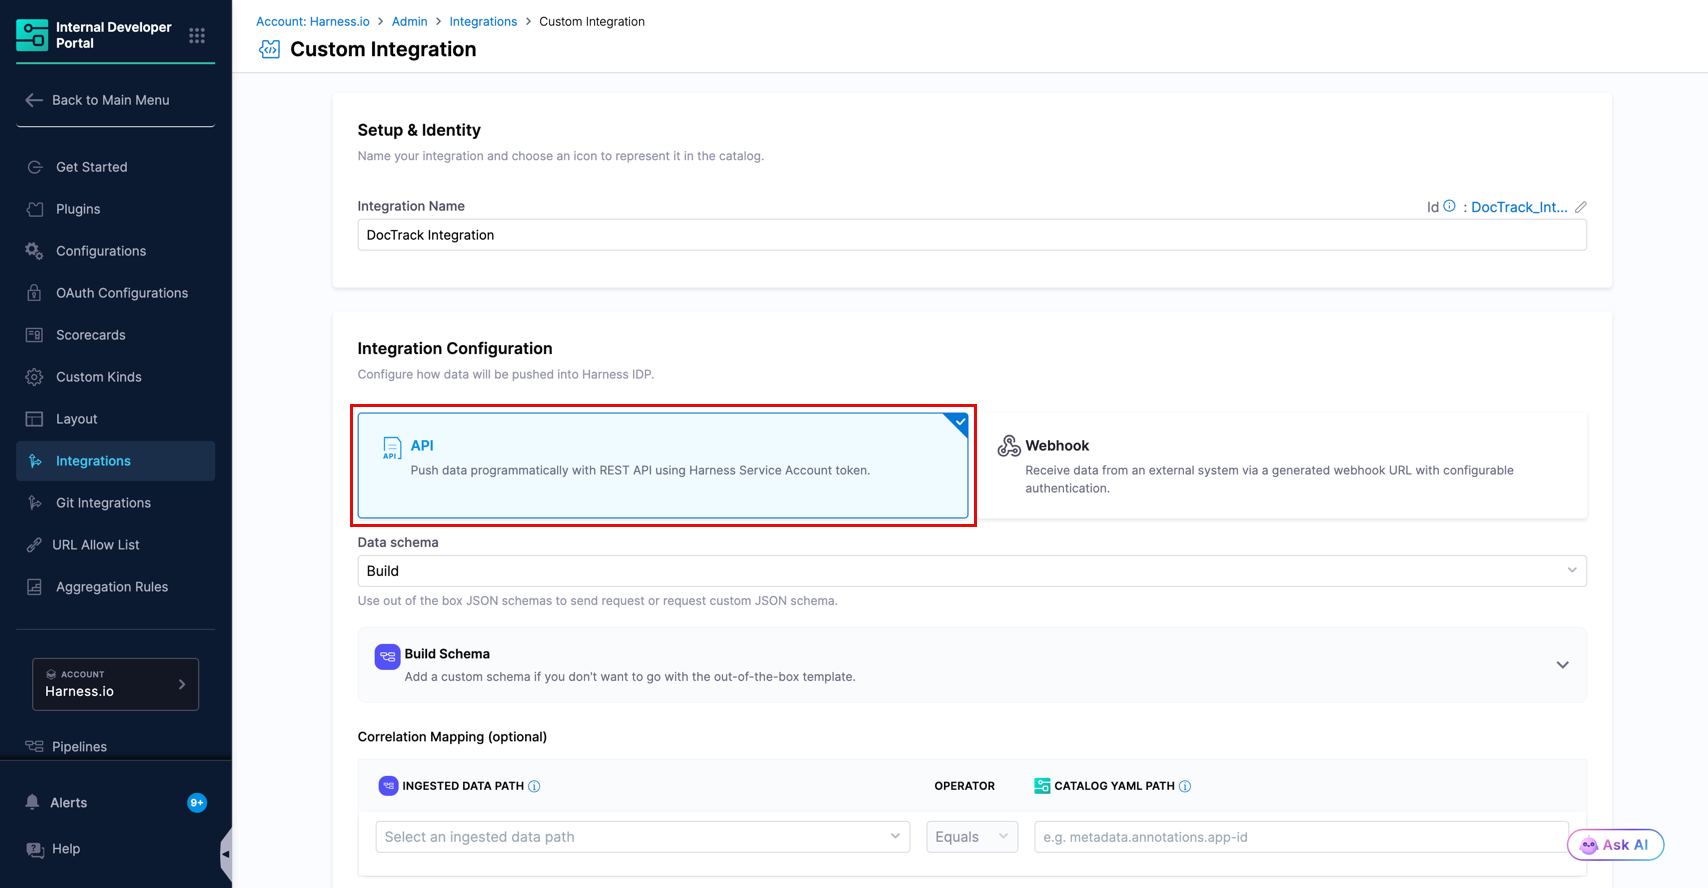
Under **Integration Configuration**, select the card for the mode you want.
{% tabs %}
{% tab title="API" %}
Select **API** to push data programmatically with a REST call, authenticated with a Harness [Service Account Token (SAT)](https://developer.harness.io/harness-platform/use-harness-platform/platform-access-control/add-and-manage-service-account) token or [PAT](https://developer.harness.io/harness-platform/use-harness-platform/automation/api/add-and-manage-api-keys#create-personal-api-keys-and-tokens).
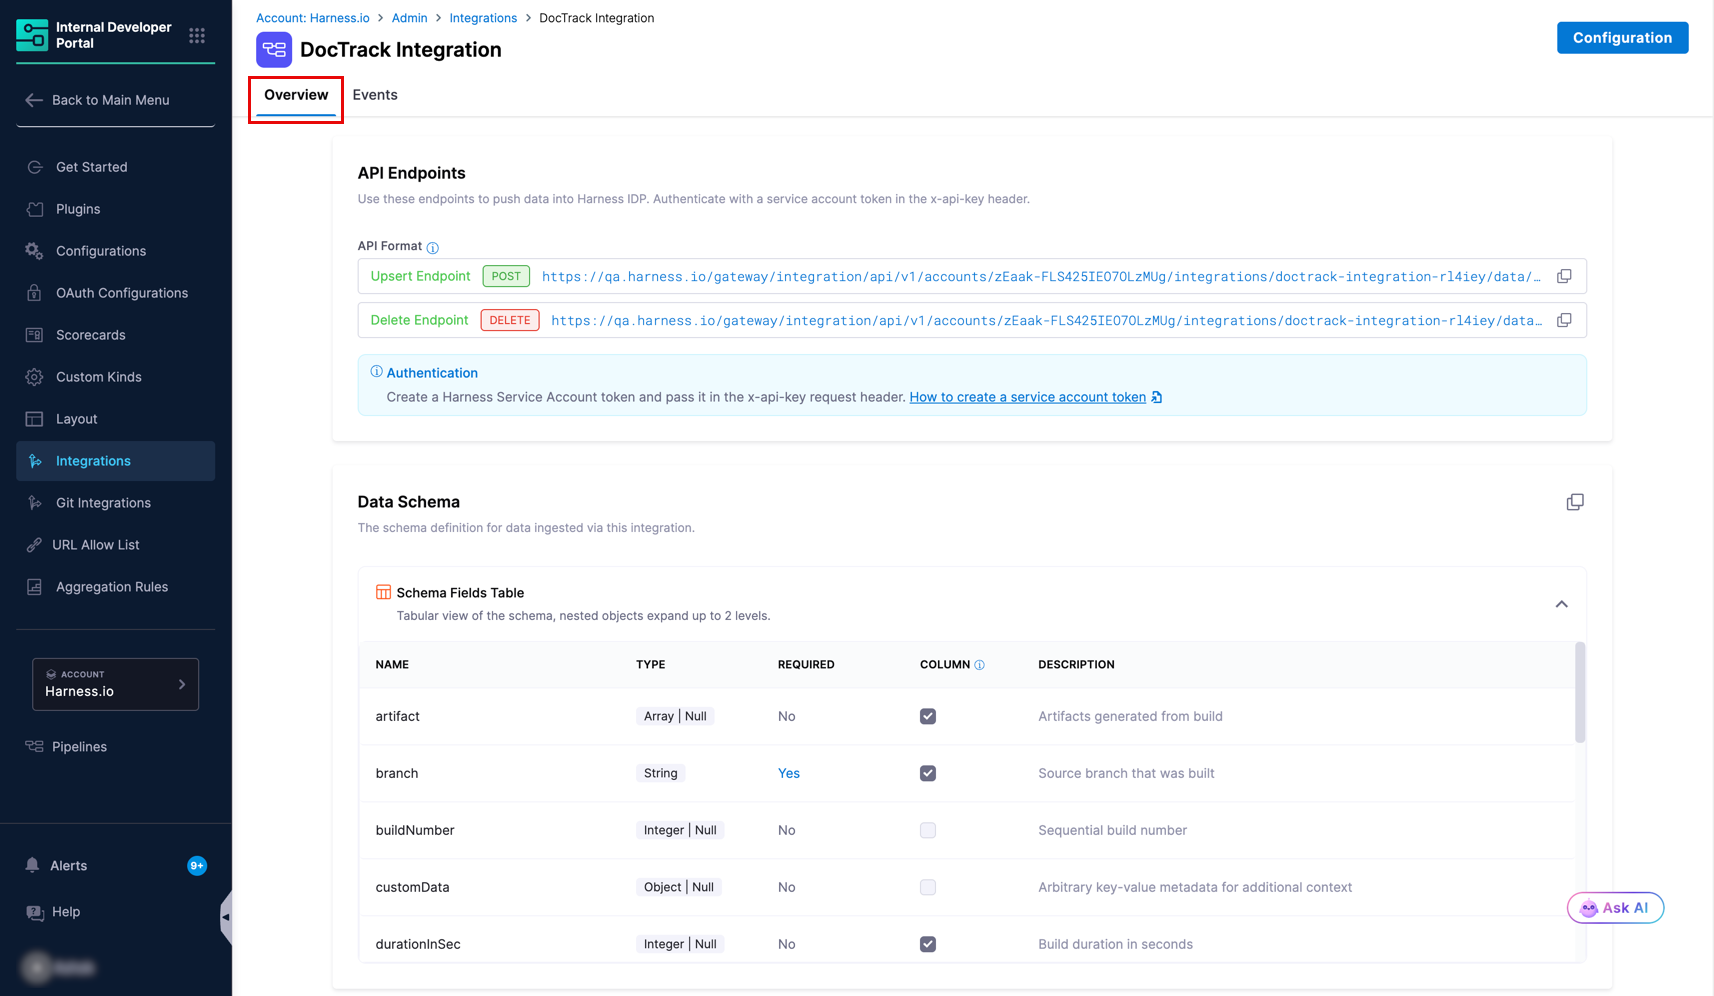
No further configuration is needed here. After you save, the Upsert and Delete endpoints appear on the integration's **Overview** tab.
{% endtab %}
{% tab title="Webhook" %}
Select **Webhook** to receive data from an external system through a generated webhook URL.
Choose an **Auth Type**:
| Auth Type | How it works | Use it when |
| --------- | -------------------------------------------------------------------------------------------------------------------------------------------------------------------------------------------------------------------------------------------------------------------------------------------------------------------------------------------------------------------------------------------------------------------------------------------------------------------------------- | ------------------------------------------------------------------------------------------ |
| **JWT** | The caller passes a JWT token (Harness [Service Account Token (SAT)](https://developer.harness.io/harness-platform/use-harness-platform/platform-access-control/add-and-manage-service-account) or [Personal Access Token (PAT)](https://developer.harness.io/harness-platform/use-harness-platform/automation/api/add-and-manage-api-keys#create-personal-api-keys-and-tokens)) in the `x-api-key` header. Harness authenticates it the same way as any other Harness API call. | The source tool lets you add custom headers to its webhook. |
| **HMAC** | Harness verifies the signature the source tool adds to the payload, using a shared secret. | The source tool signs payloads but does not let you add custom headers, as with PagerDuty. |
{% hint style="warning" %}
The JWT token must be sent in the `x-api-key` header. Harness does not accept it in any other header.
{% endhint %}
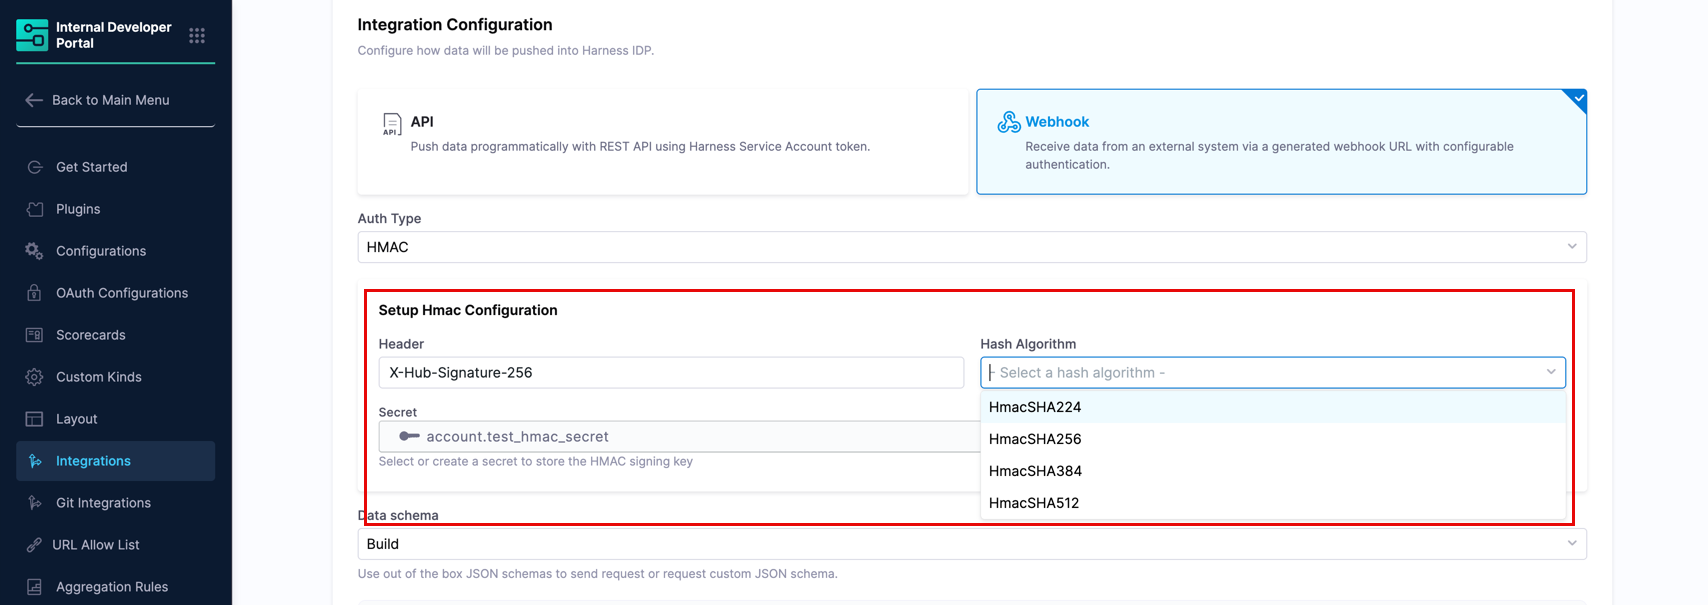
If you select **HMAC**, complete **Setup Hmac Configuration**:
| Field | Description |
| ------------------ | ---------------------------------------------------------------------------------------------------------------------- |
| **Header** | The header the source tool puts its signature in. The name varies by tool, so check your tool's webhook documentation. |
| **Hash Algorithm** | The algorithm the source tool signs with. |
| **Secret** | The signing secret issued by the source tool, selected from Harness secrets. |
{% hint style="info" %}
The **Secret** must be a secret stored in the [Harness Secret Manager](https://developer.harness.io/harness-platform/use-harness-platform/secrets/secrets-management/harness-secret-manager-overview). Third-party secret managers are not supported for HMAC verification. Create the secret first using [Add and use text secrets](https://developer.harness.io/harness-platform/use-harness-platform/secrets/add-use-text-secrets), then select it here.
{% endhint %}
{% hint style="warning" %}
How you obtain the secret depends on the tool:
* **The tool generates it** - PagerDuty, for example, issues the secret when you add the webhook and does not let you supply your own. Create the webhook there first, copy the secret into a Harness secret, then finish this configuration.
* **You supply it** - GitHub, for example, lets you enter your own secret. Create the Harness secret first, then paste the same value into the tool.
Tools that generate the secret often show it only once, so store it immediately.
{% endhint %}
{% endtab %}
{% endtabs %}
***
### Step 4: Select a data schema
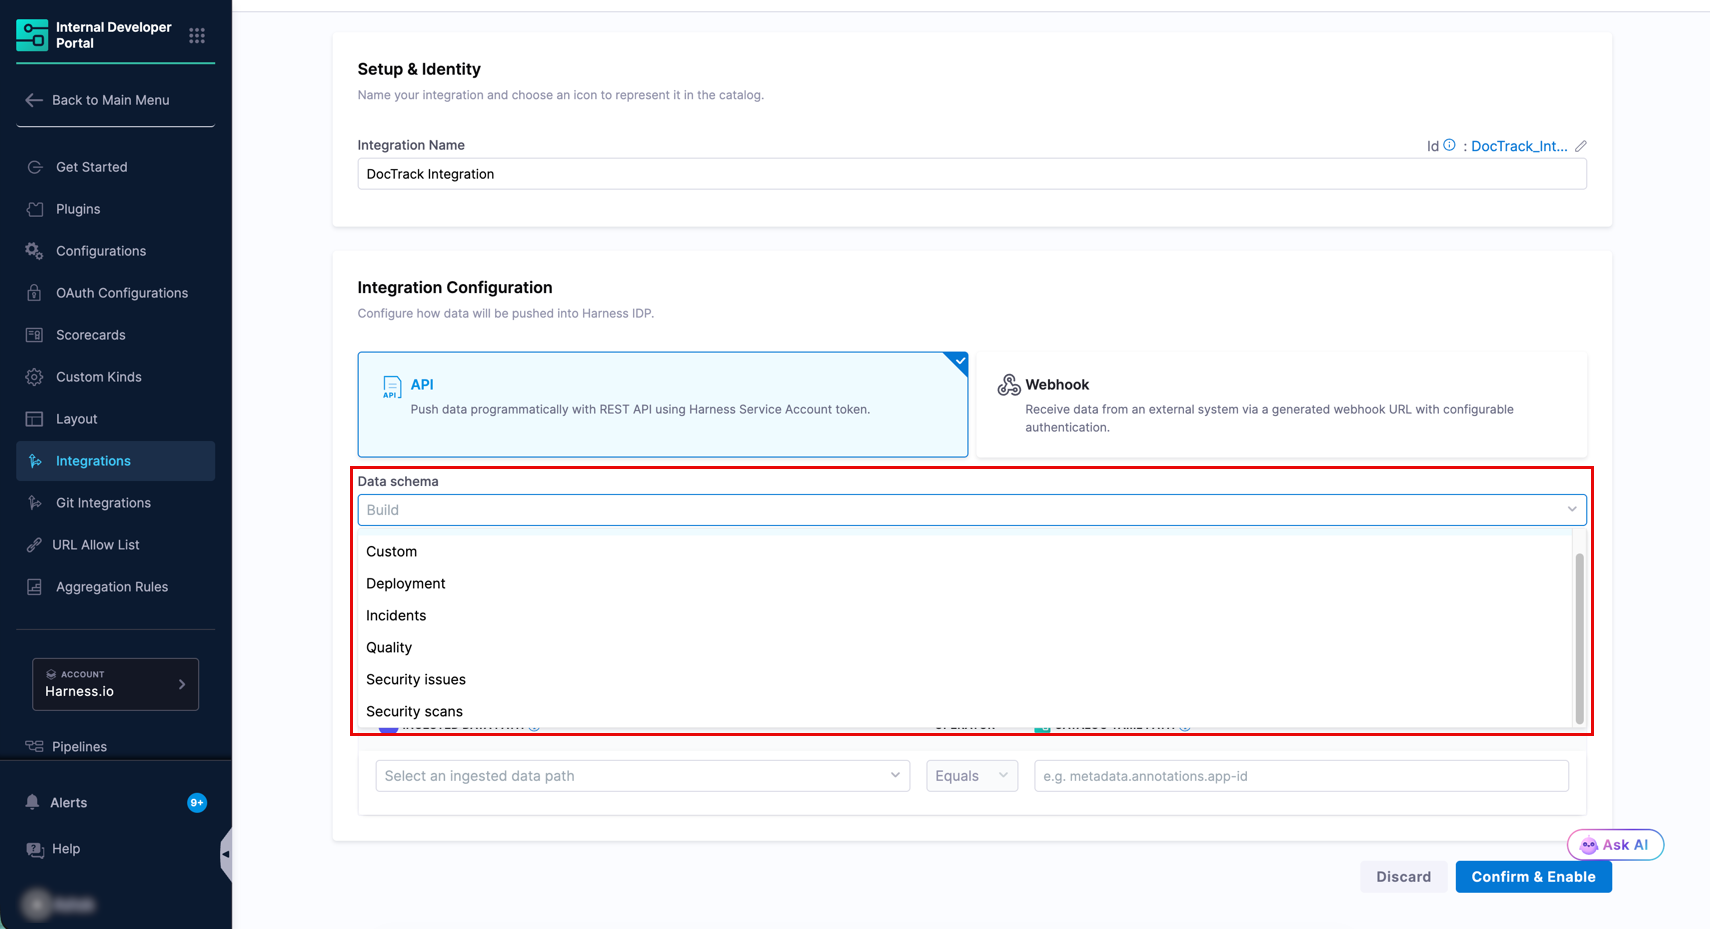
From the **Data schema** dropdown, choose the shape of the data this integration will accept: **Build**, **Custom**, **Deployment**, **Incidents**, **Quality**, **Security issues**, or **Security scans**.
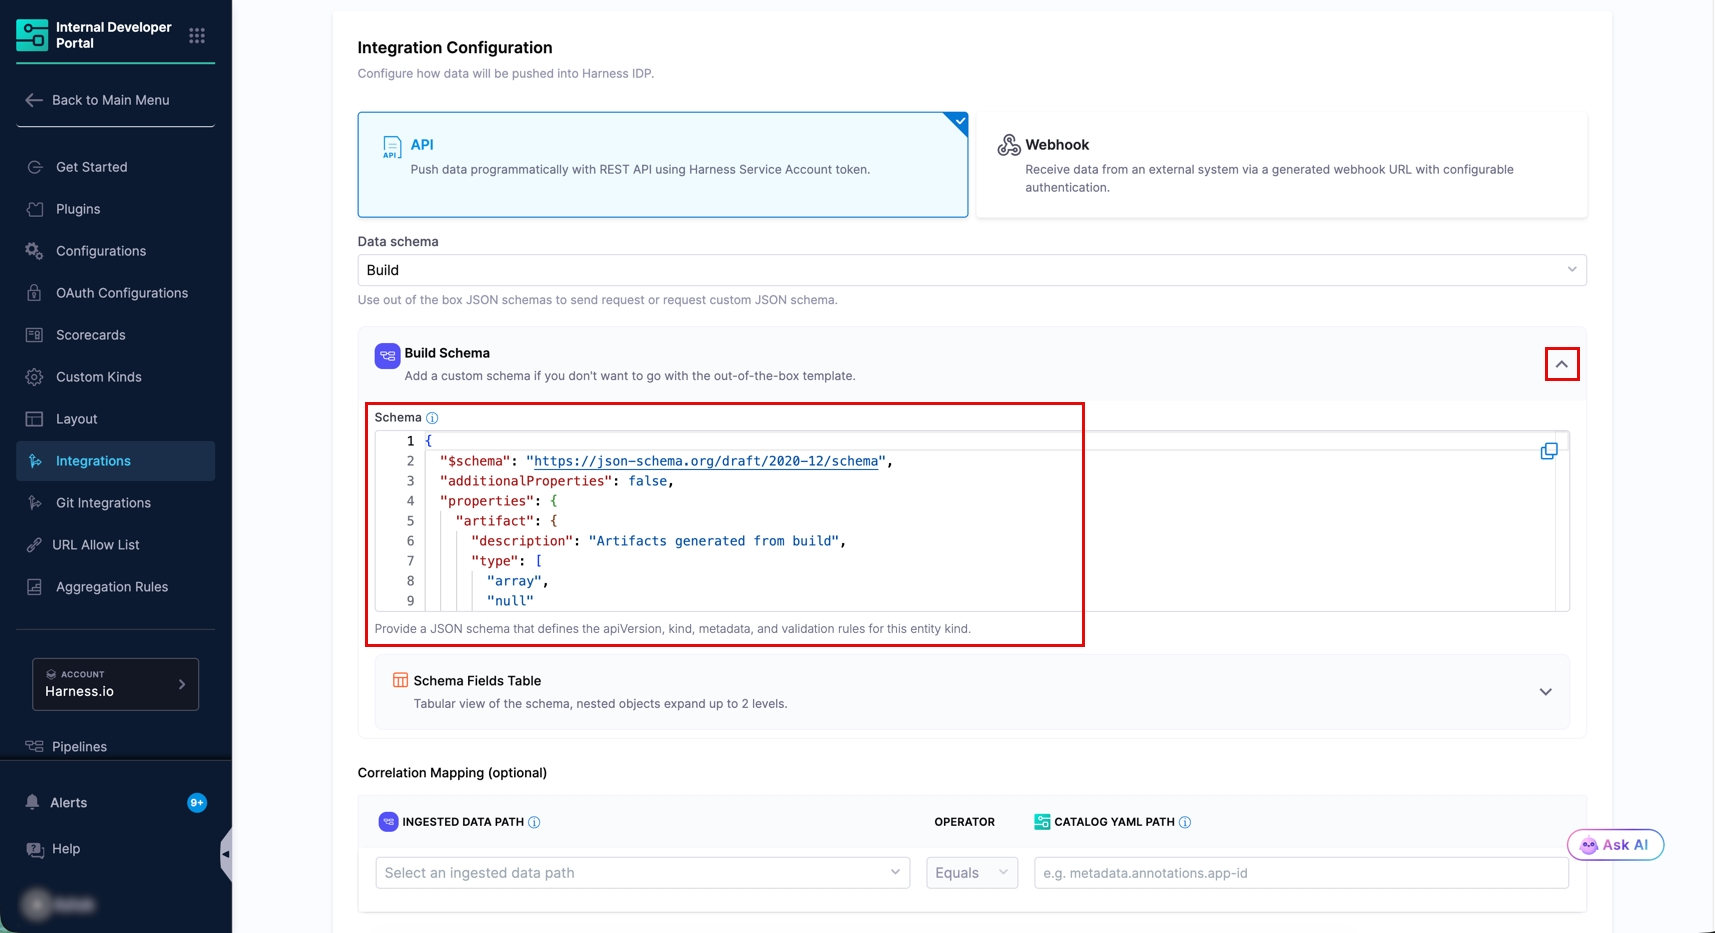
Selecting a schema reveals two panels.
#### Schema
The **Schema** panel holds the JSON Schema that incoming records are validated against. For the six out-of-the-box schemas this is prefilled, and you can use it as is.
To ingest a shape that is not covered, select **Custom** and provide your own JSON Schema defining the fields and validation rules.
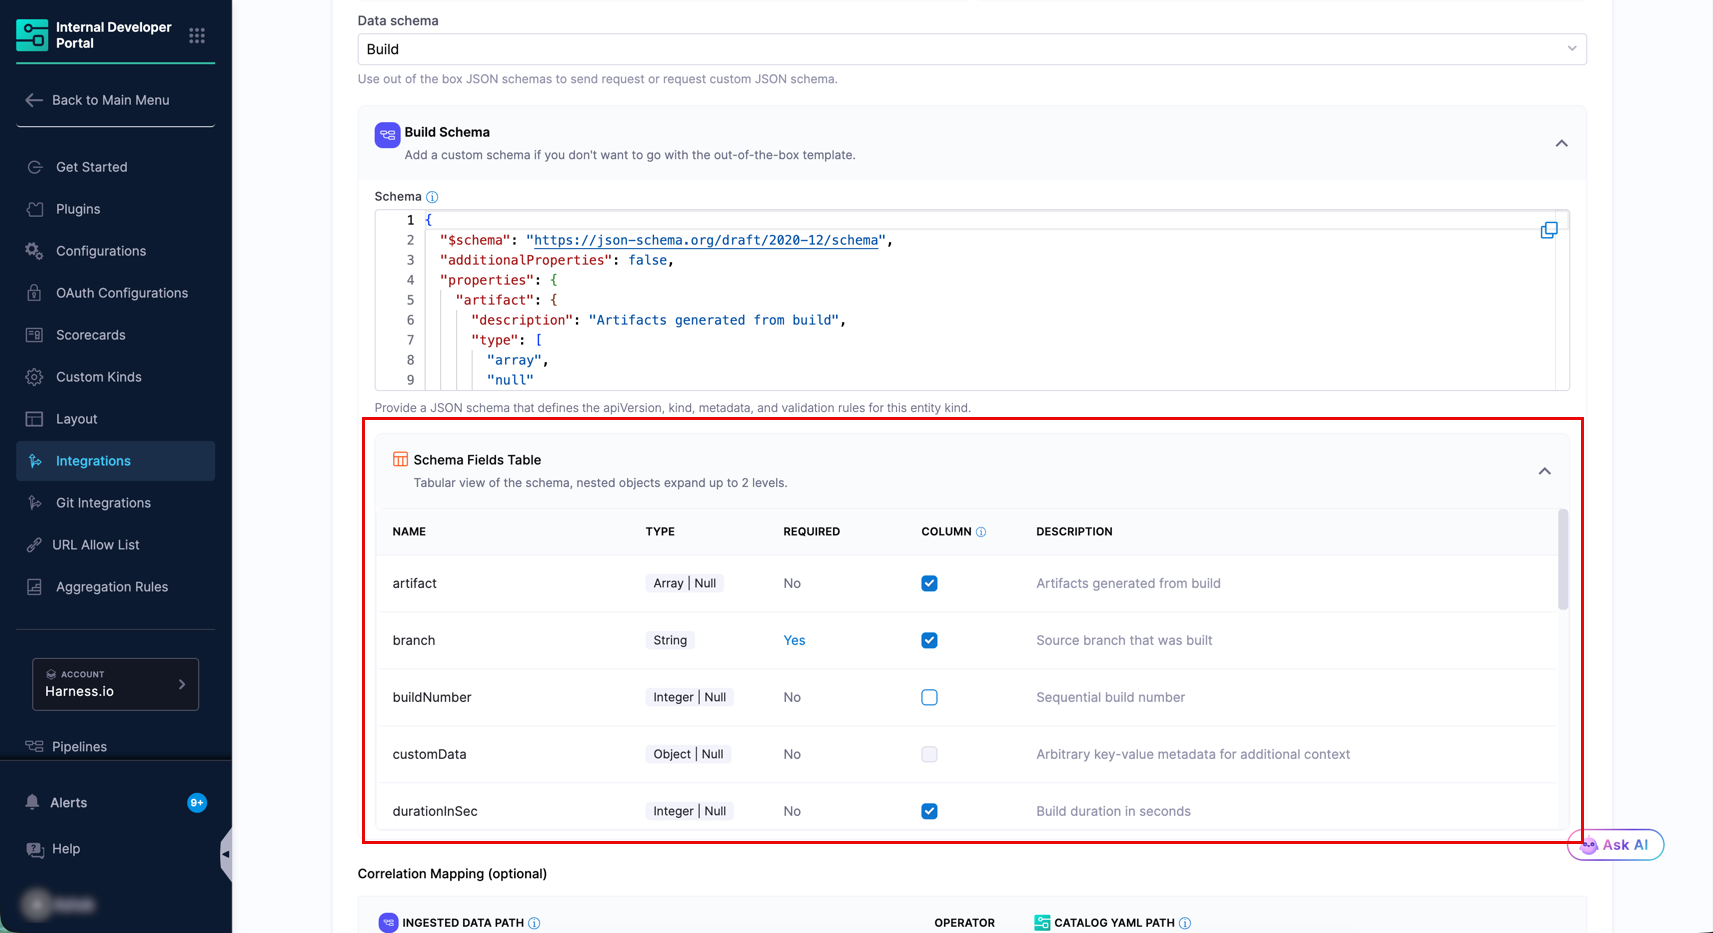
#### Schema fields table
The **Schema Fields Table** renders the schema as a table so you can see the fields without reading the JSON. Nested objects expand up to two levels.
| Column | Description |
| --------------- | ---------------------------------------------------------------------------------------------------------------------------------------------------------------------------------------------------------------------------------------------------------------------- |
| **Name** | The field name. |
| **Type** | The field's data type, for example `String` or `Integer \| Null`. |
| **Required** | Whether a record is rejected if the field is missing. |
| **Column** | Select this to show the field as a column in the data table on entity pages. Go to [View data in the catalog](/internal-developer-portal/use-idp/software-catalog/create-entity/catalog-discovery/custom-integrations/view-data-in-catalog.md) to configure the table. |
| **Description** | What the field holds. |
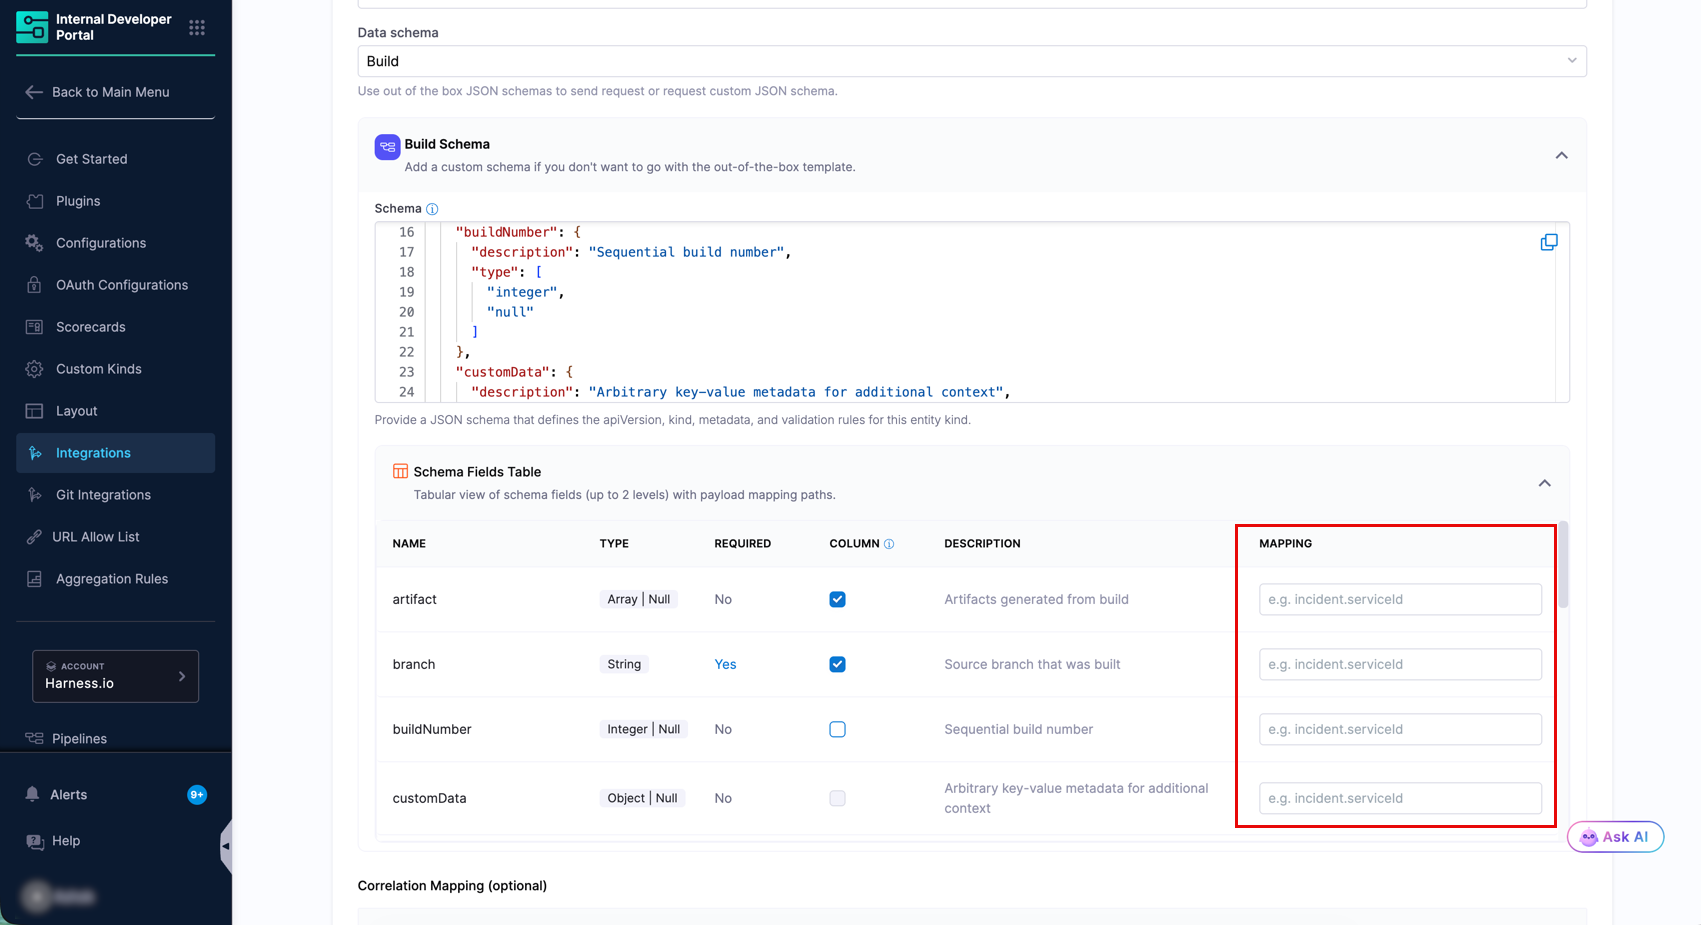
| **Mapping** | Webhook mode only. The path to this field in the incoming payload. Go to [Map the webhook payload](#map-the-webhook-payload) to set the path. |
{% hint style="info" %}
The **Column** selections control what your users see on the entity page, so set them deliberately. Choose the few fields someone scanning the table actually needs, and leave the rest unselected. Every field is still visible in the record details panel.
{% endhint %}
**Map the webhook payload**
If you are using webhook mode, the payload from the source tool will not match the schema field names, so you tell Harness where to find each value. In the **Mapping** column, enter the path to that field in the incoming payload.
For example, for PagerDuty incidents:
| Schema field | Mapping |
| ------------ | ----------------------- |
| `identifier` | `event.data.id` |
| `name` | `event.data.title` |
| `status` | `event.data.status` |
| `service` | `event.data.service.id` |
Every **Required** field must have a mapping, and the integration cannot be saved until they all do.
{% hint style="warning" %}
Map `identifier` to a value that is genuinely unique and stable for the record in the source system, such as an incident ID. Harness treats `identifier` as the record's key: a second payload with the same identifier updates the existing record instead of adding a new one. This is what lets an incident move from triggered to resolved in place. Mapping `identifier` to a value that repeats across different records causes them to overwrite each other.
{% endhint %}
***
### Step 5: Configure Correlation Mapping (optional)
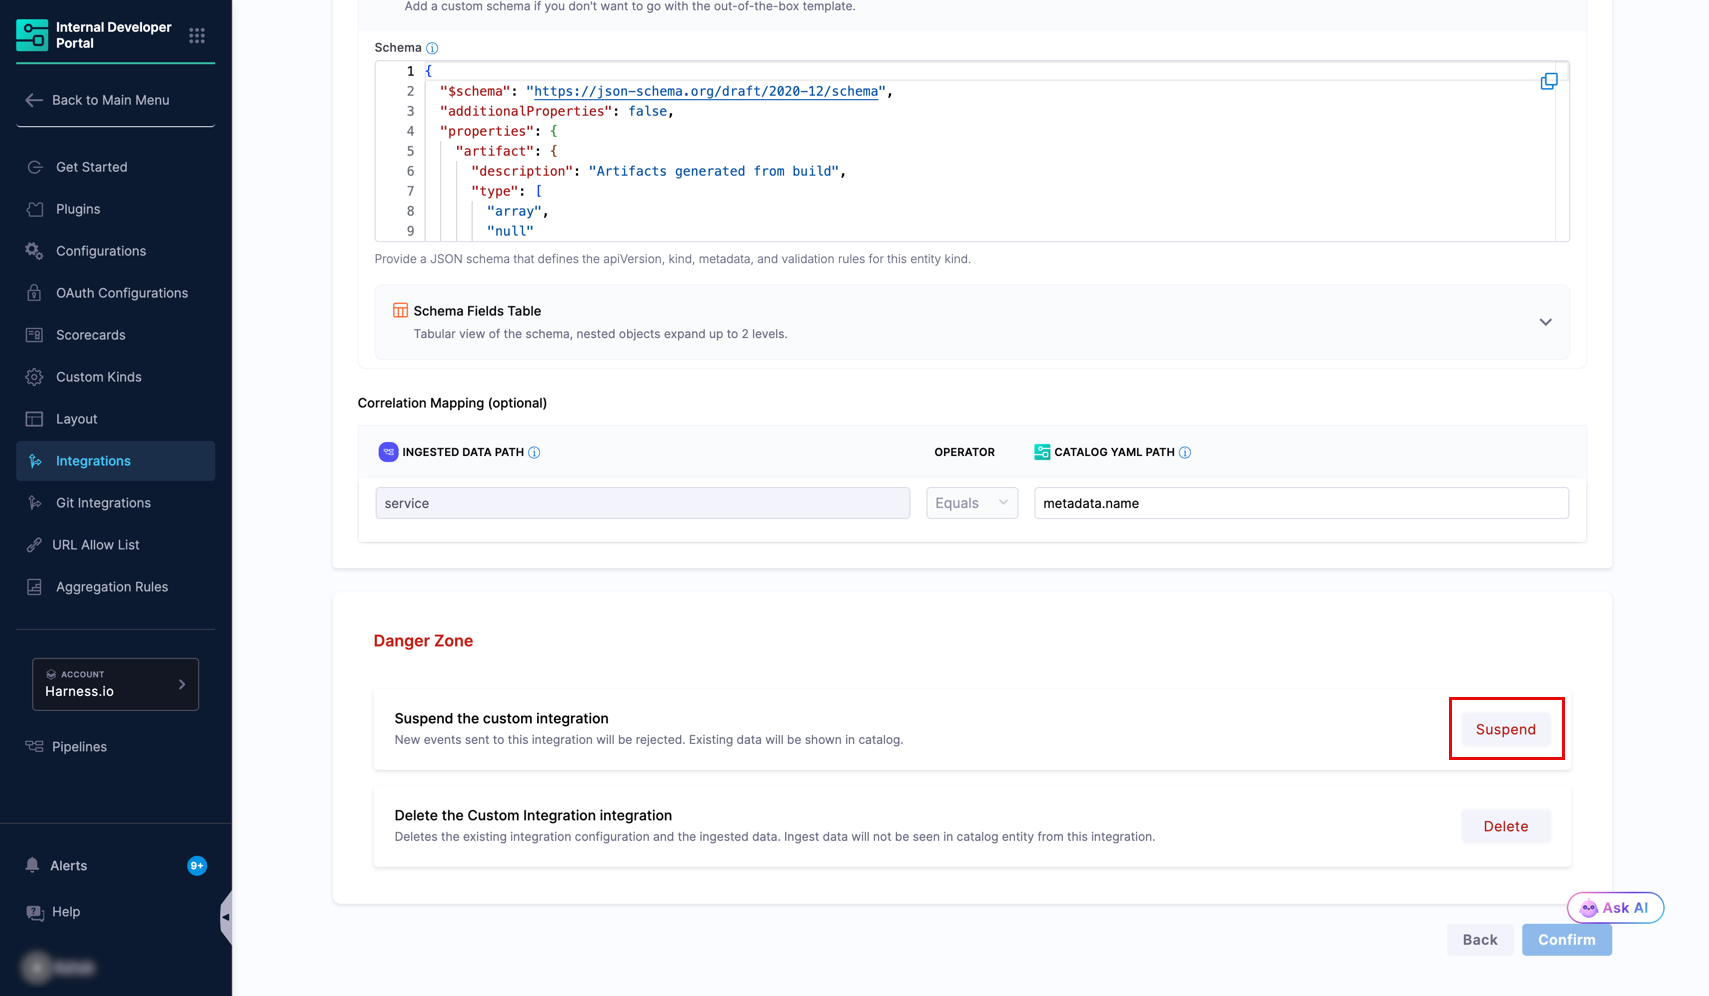
**Correlation Mapping** tells Harness which catalog entity each record belongs to.
| Field | Description |
| ---------------------- | ------------------------------------------------------------------------------------------------------------------- |
| **Ingested Data Path** | The field in the incoming data holding the value to match on, for example `service`. |
| **Operator** | The comparison to apply. **Equals** is supported. |
| **Catalog YAML Path** | The path in the catalog entity YAML to match against, for example `metadata.name` or `metadata.annotations.app-id`. |
A record is linked to every entity where the two values are exactly equal. Partial and pattern matching are not supported.
{% hint style="info" %}
Choose a value the sending system already knows. A Jenkins pipeline knows the repository URL and the service name it is building, so mapping `service` to `metadata.name` works well. It almost never knows an IDP entity reference.
{% endhint %}
Correlation Mapping is optional. If you leave it empty, records must carry an [`entity_ref`](/internal-developer-portal/use-idp/software-catalog/create-entity/catalog-discovery/custom-integrations/ingest-data.md#link-records-with-entity_ref) in the payload instead, otherwise they are ingested but not shown against any entity.
{% hint style="info" %}
Correlation is applied when the integration is created or updated, not on every push. If you change the **Catalog YAML Path** later, the linkage is recalculated for existing entities.
{% endhint %}
***
### Step 6: Confirm and enable
Select **Confirm & Enable**. The integration is created, enabled, and its detail page opens.
On the **Overview** tab you now find:
* For API mode, the **Upsert** and **Delete** endpoints, plus the authentication reminder.
* For webhook mode, the generated **Webhook URL** to paste into the source tool.
* The **Data Schema** for reference.
Go to [Ingest data](/internal-developer-portal/use-idp/software-catalog/create-entity/catalog-discovery/custom-integrations/ingest-data.md) to start sending records.
***
### Manage a Custom Integration
To manage an existing integration, go to **Configure** → **Integrations** → **Custom Integrations**, find its card, and select **View**. Then select **Configuration** at the top right.
#### Edit an integration
You can change the **Integration Name** and the **Catalog YAML Path** of the Correlation Mapping.
The ingestion mode, data schema, Id, and the **Ingested Data Path** of the Correlation Mapping are fixed once the integration is created. To change any of those, create a new integration.
#### Suspend an integration
Suspending stops ingestion while keeping what you have already collected. New data sent to a suspended integration is rejected, and data already ingested continues to be shown in the catalog.
1. On the **Configuration** screen, scroll to **Danger Zone**.
2. Select **Suspend** and confirm.
You can re-enable the integration at any time from the same place.
{% hint style="info" %}
Suspend is the right tool when a misconfigured source is sending bad data. It stops the flow immediately without losing history, giving you time to fix the sender.
{% endhint %}
#### Delete an integration
Deleting removes the integration configuration, the data ingested through it, and its event history. The ingested data stops appearing in the catalog.
1. On the **Configuration** screen, scroll to **Danger Zone**.
2. Select **Delete** and confirm.
{% hint style="warning" %}
Deletion cannot be undone. Entities themselves are not deleted, but every record this integration contributed is removed from them. If you only want to stop new data, use [Suspend](#suspend-an-integration) instead.
{% endhint %}
{% @harness-feedback/feedback %}