> For the complete documentation index, see [llms.txt](https://developer.harness.io/llms.txt). Markdown versions of documentation pages are available by appending `.md` to page URLs; this page is available as [Markdown](https://developer.harness.io/release-orchestration/new-to-release-orchestration/getting-started.md).
# Getting Started
Learn what Release Orchestration is, why it matters, and how to model your first release process.
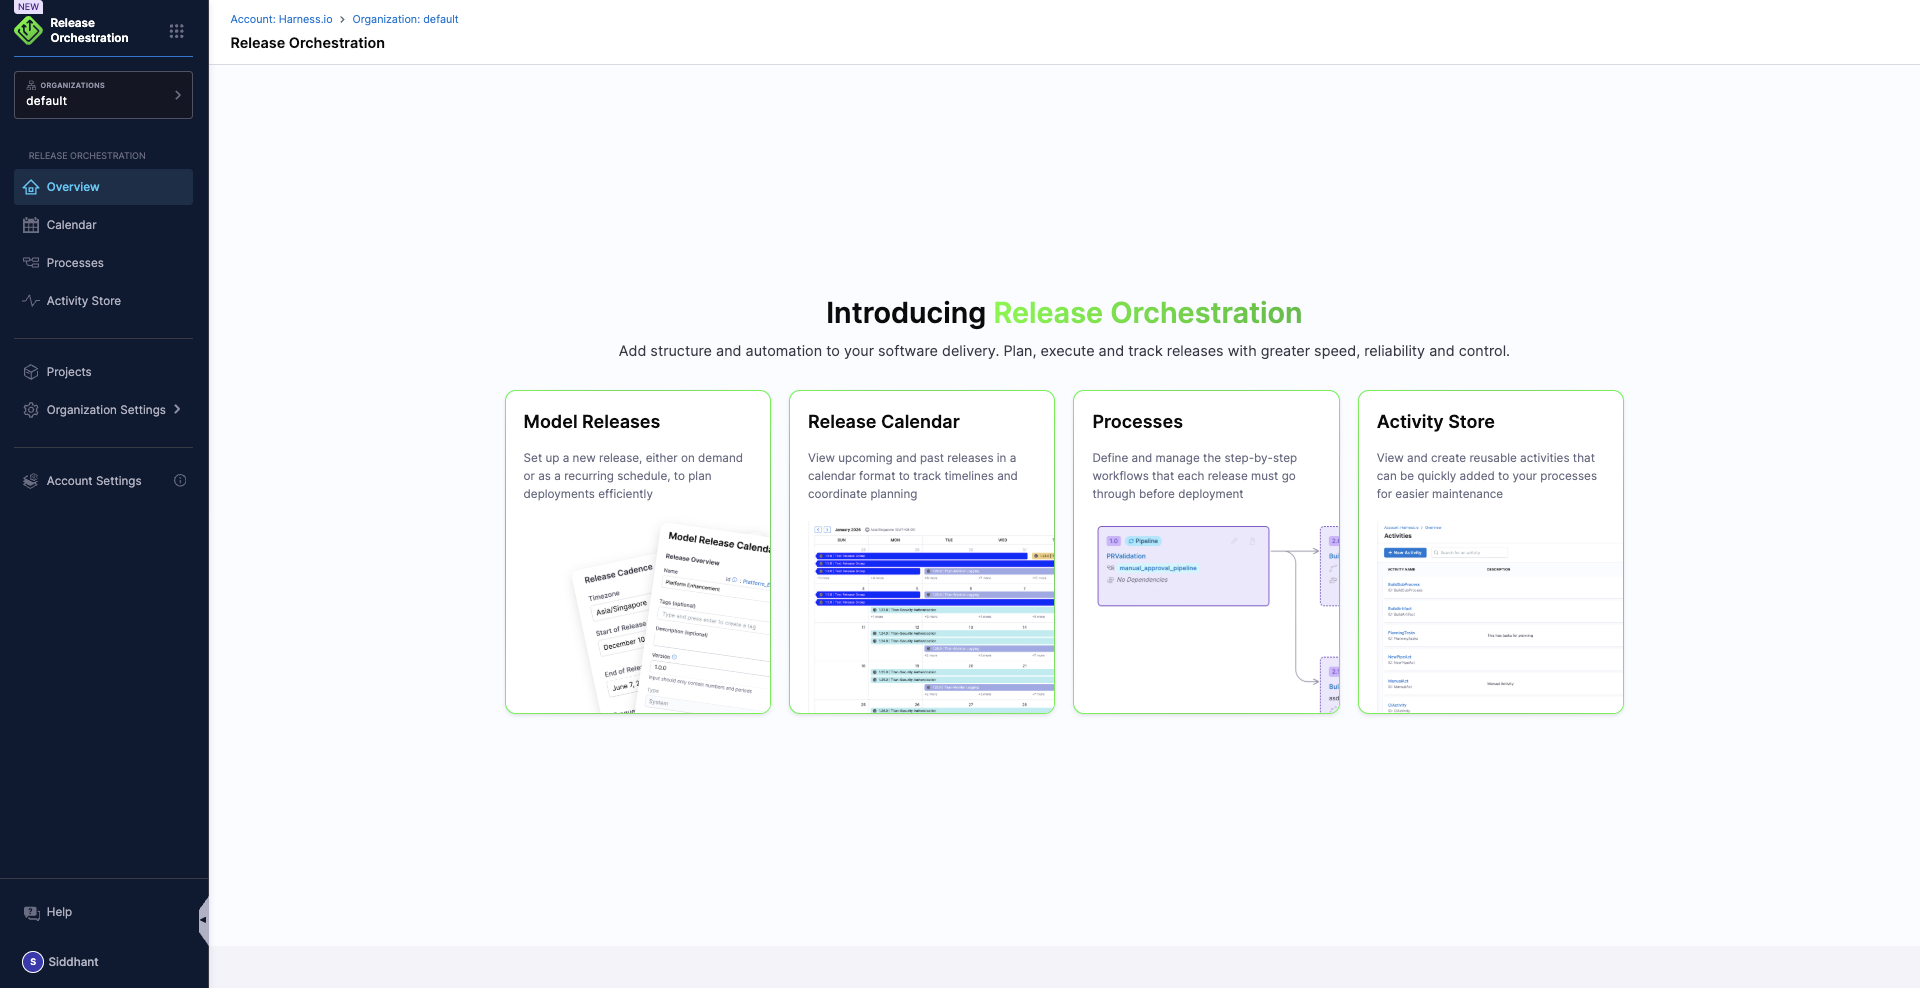
Release Orchestration provides a unified framework for modeling, scheduling, automating, and tracking releases. It supports every step from planning with Harness AI to production deployment, feature flag enablement, and monitoring.
Release Orchestration interface
### How the entities fit together
The following diagram shows how the core entities in Release Orchestration relate to each other:
```mermaid
flowchart TD
RC["Release Calendar"] -->|schedules| RG["Release Group"]
RG -->|contains| R["Release"]
R -->|executes| P["Process"]
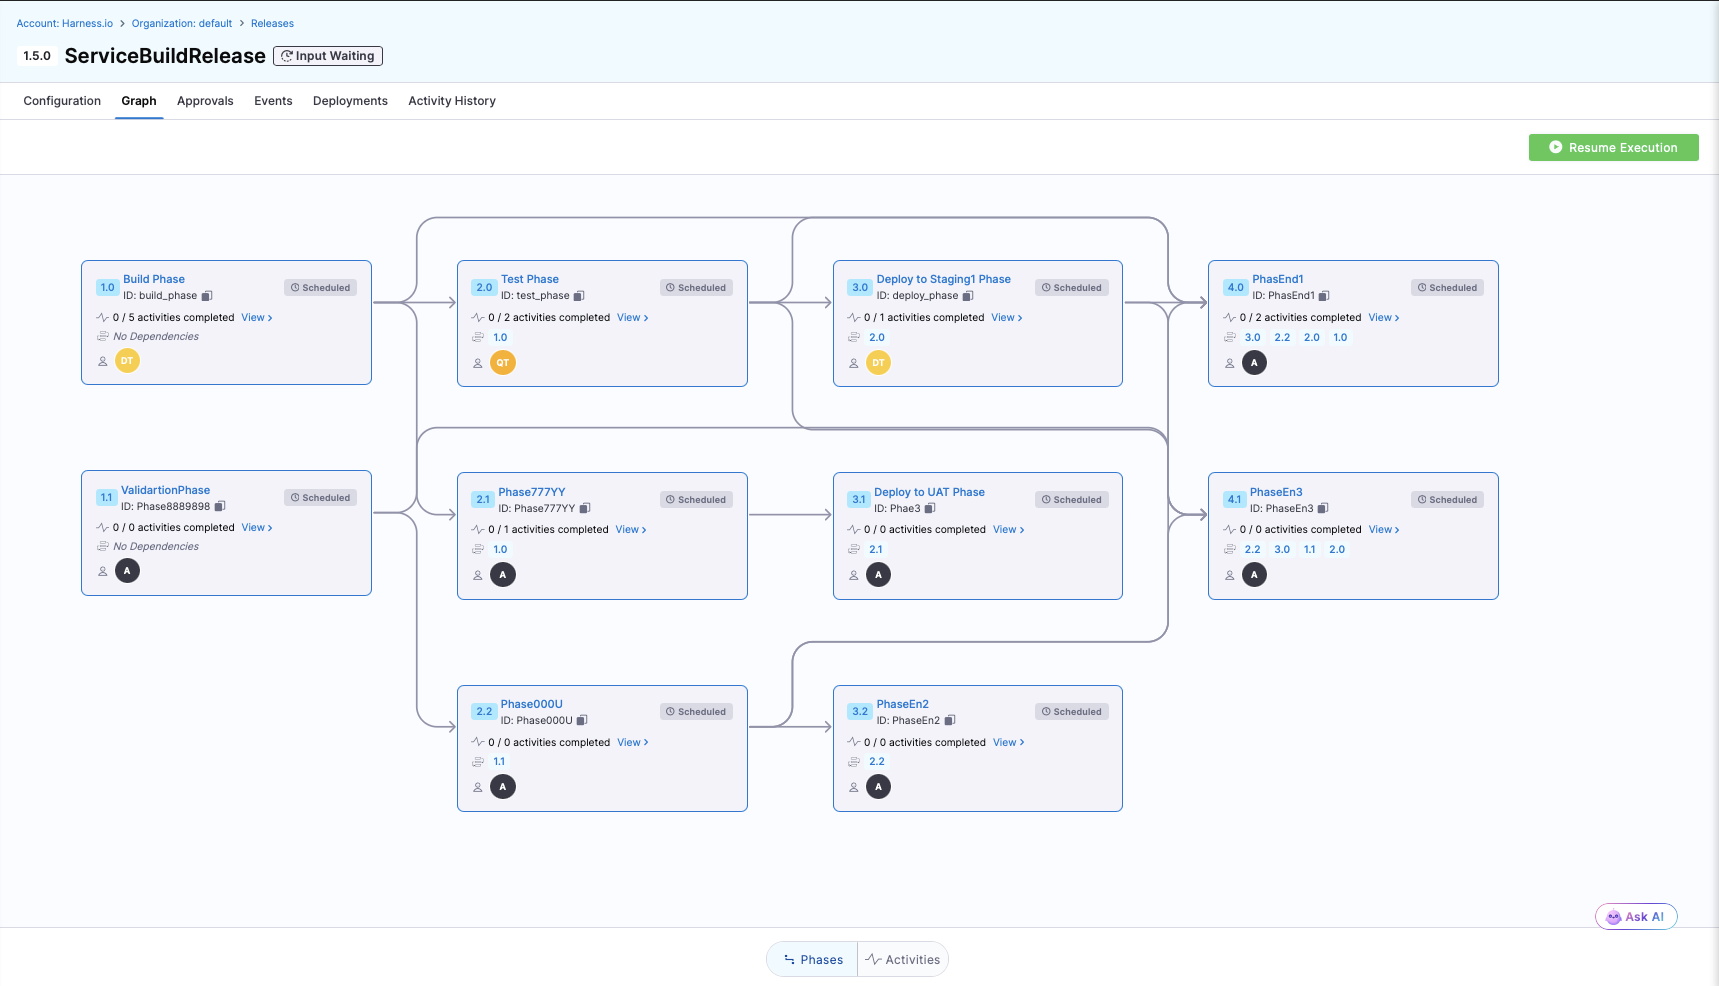
P -->|composed of| PH["Phases"]
PH -->|contain| A["Activities"]
A -->|can be| AUTO["Automated (pipeline-backed)"]
A -->|can be| MAN["Manual (sign-offs / approvals)"]
A -->|can be| SUB["Subprocess (nested process)"]
AS["Activity Store"] -->|provides reusable activities to| PH
IS["Input Store"] -->|supplies input sets to| P
```
* A [**Process**](/release-orchestration/use-release-orchestration/release-orchestration-processes/overview.md) is a reusable release blueprint made up of [**Phases**](/release-orchestration/use-release-orchestration/release-orchestration-phases/phases-overview.md) and [**Activities**](/release-orchestration/use-release-orchestration/release-orchestration-activities/activities-overview.md).
* Activities come from the [**Activity Store**](/release-orchestration/use-release-orchestration/release-orchestration-activities/activity-store.md) and can be automated, manual, or subprocess-based.
* A [**Release Group**](/release-orchestration/use-release-orchestration/release-orchestration-releases/modeling-releases.md) defines a cadence and contains individual **Releases**, each of which executes a Process.
* The [**Release Calendar**](/release-orchestration/use-release-orchestration/release-orchestration-releases/modeling-releases.md) visualizes all scheduled and in-flight releases.
* The [**Input Store**](/release-orchestration/use-release-orchestration/release-orchestration-inputs-variables/overview.md) provides named input sets, allowing the same Process to run with different configurations.
### Why Release Orchestration
Without orchestration, releases that span multiple services, teams, and tools become fragmented. Status lives in spreadsheets, coordination happens over email, and there is no single source of truth for what was deployed, when, or by whom.
Release Orchestration provides the following:
* **Structured process modeling**: Define reusable release blueprints ([Processes](/release-orchestration/use-release-orchestration/release-orchestration-processes/overview.md)) composed of [Phases](/release-orchestration/use-release-orchestration/release-orchestration-phases/phases-overview.md) and [Activities](/release-orchestration/use-release-orchestration/release-orchestration-activities/activities-overview.md) instead of ad-hoc checklists.
* **Automated and manual execution**: Automate pipeline-backed steps while retaining manual sign-offs and approvals where governance requires them.
* **End-to-end visibility**: Track activity-level status, phase-level progress, and overall release health in real time.
* **Proactive notifications**: Configure [notifications](/release-orchestration/use-release-orchestration/notifications.md) for key release events like starts, completions, failures, and input requirements, ensuring teams stay informed through Slack.
* **Built-in governance and auditability**: Enforce approvals, capture sign-offs, and maintain a full audit trail linking code to deployment.
* **Scheduled releases**: Use [Release Groups](/release-orchestration/use-release-orchestration/release-orchestration-releases/modeling-releases.md) and the Release Calendar to run releases on a cadence (daily, weekly, monthly, or custom).
Release Orchestration process view
### Before you begin
Prepare the following:
* **Feature flags**: The following must be enabled in your Harness account. Contact [Harness Support](mailto:support@harness.io) to enable them.
* `RMG_RELEASE_MANAGEMENT_ENABLED` enables the Release Management module.
* `RMG_PROCESS_ENABLED` enables Process functionality for creating release blueprints.
* **Module access**: Confirm you have access to the **Release Orchestration** module in Harness.
* **Permissions**: Confirm that your role can create processes, releases, and activities. Navigate to **Account Settings** > **Access Control** to verify permissions.
Access Control settings
* **Pipelines (for automated activities)**: If you plan to use [Automated Activities](/release-orchestration/use-release-orchestration/release-orchestration-activities/activity-types/automated-activities.md), have at least one Harness pipeline configured. Automated activities encapsulate pipelines, so the pipeline must exist before you can reference it.
* **Phase owners identified**: List the owners responsible for each phase of your release (e.g., Development, QA, DevOps). Owners are assigned per phase and can receive notifications when their input is needed.
* **Slack notification channels (optional)**: Configure Slack notification channels in your account settings to receive real-time alerts for release events. Go to [Notifications](/release-orchestration/use-release-orchestration/notifications.md) to configure channels and events.
### Key concepts
Before walking through the steps, familiarize yourself with the core entities. Each term links to its detailed reference page.
| Entity | Description |
| ---------------------------------------------------------------------------------------------------------------------------- | --------------------------------------------------------------------------------------------------------------------------------------------------------------------------------------------------------------------------------------------------------------------------------------------------------------------------------------------------------------------------------------------------------------------------------------------------------------------------------------------------------------------------- |
| [**Process**](/release-orchestration/use-release-orchestration/release-orchestration-processes/overview.md) | A reusable release blueprint containing phases, activities, dependencies, and variables. |
| [**Phase**](/release-orchestration/use-release-orchestration/release-orchestration-phases/phases-overview.md) | A logical group of work within a process (for example, Build, Testing, Deployment). Phases can depend on other phases. |
| [**Activity**](/release-orchestration/use-release-orchestration/release-orchestration-activities/activities-overview.md) | A single unit of work within a phase. Can be [Automated](/release-orchestration/use-release-orchestration/release-orchestration-activities/activity-types/automated-activities.md) (pipeline-backed), [Manual](/release-orchestration/use-release-orchestration/release-orchestration-activities/activity-types/manual-activities.md) (sign-offs/approvals), or a [Subprocess](/release-orchestration/use-release-orchestration/release-orchestration-activities/activity-types/subprocess-activities.md) (nested process). |
| [**Activity Store**](/release-orchestration/use-release-orchestration/release-orchestration-activities/activity-store.md) | A library of reusable activities with pre-configured inputs and outputs. Activities from the store can be added to any process. |
| [**Input Store**](/release-orchestration/use-release-orchestration/release-orchestration-inputs-variables/overview.md) | A collection of named input sets for a process. Each input set provides concrete values for process-level, phase-level, and activity-level inputs, allowing you to run the same process with different configurations. |
| [**Release Group**](/release-orchestration/use-release-orchestration/release-orchestration-releases/modeling-releases.md) | A collection of releases executed on a defined cadence. Linked to a process so each release follows the same blueprint. |
| [**Release Calendar**](/release-orchestration/use-release-orchestration/release-orchestration-releases/modeling-releases.md) | A visual calendar of all planned and scheduled releases, helping teams coordinate timing and avoid conflicts. |
Go to [Key concepts](/release-orchestration/new-to-release-orchestration/key-concepts.md) to view the full glossary.
### Step 1: Create a process
A [Process](/release-orchestration/use-release-orchestration/release-orchestration-processes/overview.md) is the blueprint for your release. You can create one from scratch or use Harness AI to generate a starting point.
1. In the Release Orchestration module, open **Processes**.
2. Click **+ New Process**, then select **Create with Harness AI**.
3. Enter a prompt that describes your release flow:
```
Create a process for a multi-service release.
Include phases for planning and coordination, build, testing/validation,
feature flag enablement, deployment, monitoring, and rollback/documentation.
Assign phase owners for Development, QA, and DevOps.
```
4. Review the generated process. Harness AI creates [Phases](/release-orchestration/use-release-orchestration/release-orchestration-phases/phases-overview.md) (logical groups of work) with [Activities](/release-orchestration/use-release-orchestration/release-orchestration-activities/activities-overview.md) and assigns owners based on your prompt.
5. Save the process.
Go to [Process modeling](/release-orchestration/use-release-orchestration/release-orchestration-processes/process-modeling.md) to manually create a process.
### Step 2: Add activities from the Activity Store
The [Activity Store](/release-orchestration/use-release-orchestration/release-orchestration-activities/activity-store.md) is a library of reusable, pre-configured activities. It contains three types of activities:
* [**Automated activities**](/release-orchestration/use-release-orchestration/release-orchestration-activities/activity-types/automated-activities.md): Encapsulate a Harness pipeline that runs during execution.
* [**Manual activities**](/release-orchestration/use-release-orchestration/release-orchestration-activities/activity-types/manual-activities.md): Require input during execution, including approvals, sign-offs, verification, or documentation.
* [**Subprocess activities**](/release-orchestration/use-release-orchestration/release-orchestration-activities/activity-types/subprocess-activities.md): Reference another process to enable composition and reuse.
To add activities:
1. Open the process you created.
2. Select a phase, then click **Add Activity**.
3. Browse the Activity Store and select the activity you need.
4. For automated activities, select the pipeline to encapsulate and configure its inputs.
### Step 3: Model dependencies
Define the execution order across your process using dependencies:
* [**Phase dependencies**](/release-orchestration/use-release-orchestration/release-orchestration-phases/phase-dependencies.md): Control which phases must complete before others start. For example, Testing can depend on Build.
* [**Activity dependencies**](/release-orchestration/use-release-orchestration/release-orchestration-activities/activities-overview.md#activity-dependencies-and-execution-order): Control ordering within or across phases. For example, a manual approval can finish before a deployment pipeline runs.
Dependencies can model both sequential and parallel execution. For details, see [Parallel vs Sequential Execution](/release-orchestration/use-release-orchestration/release-orchestration-phases/phase-dependencies.md).
### Step 4: Connect the process to releases
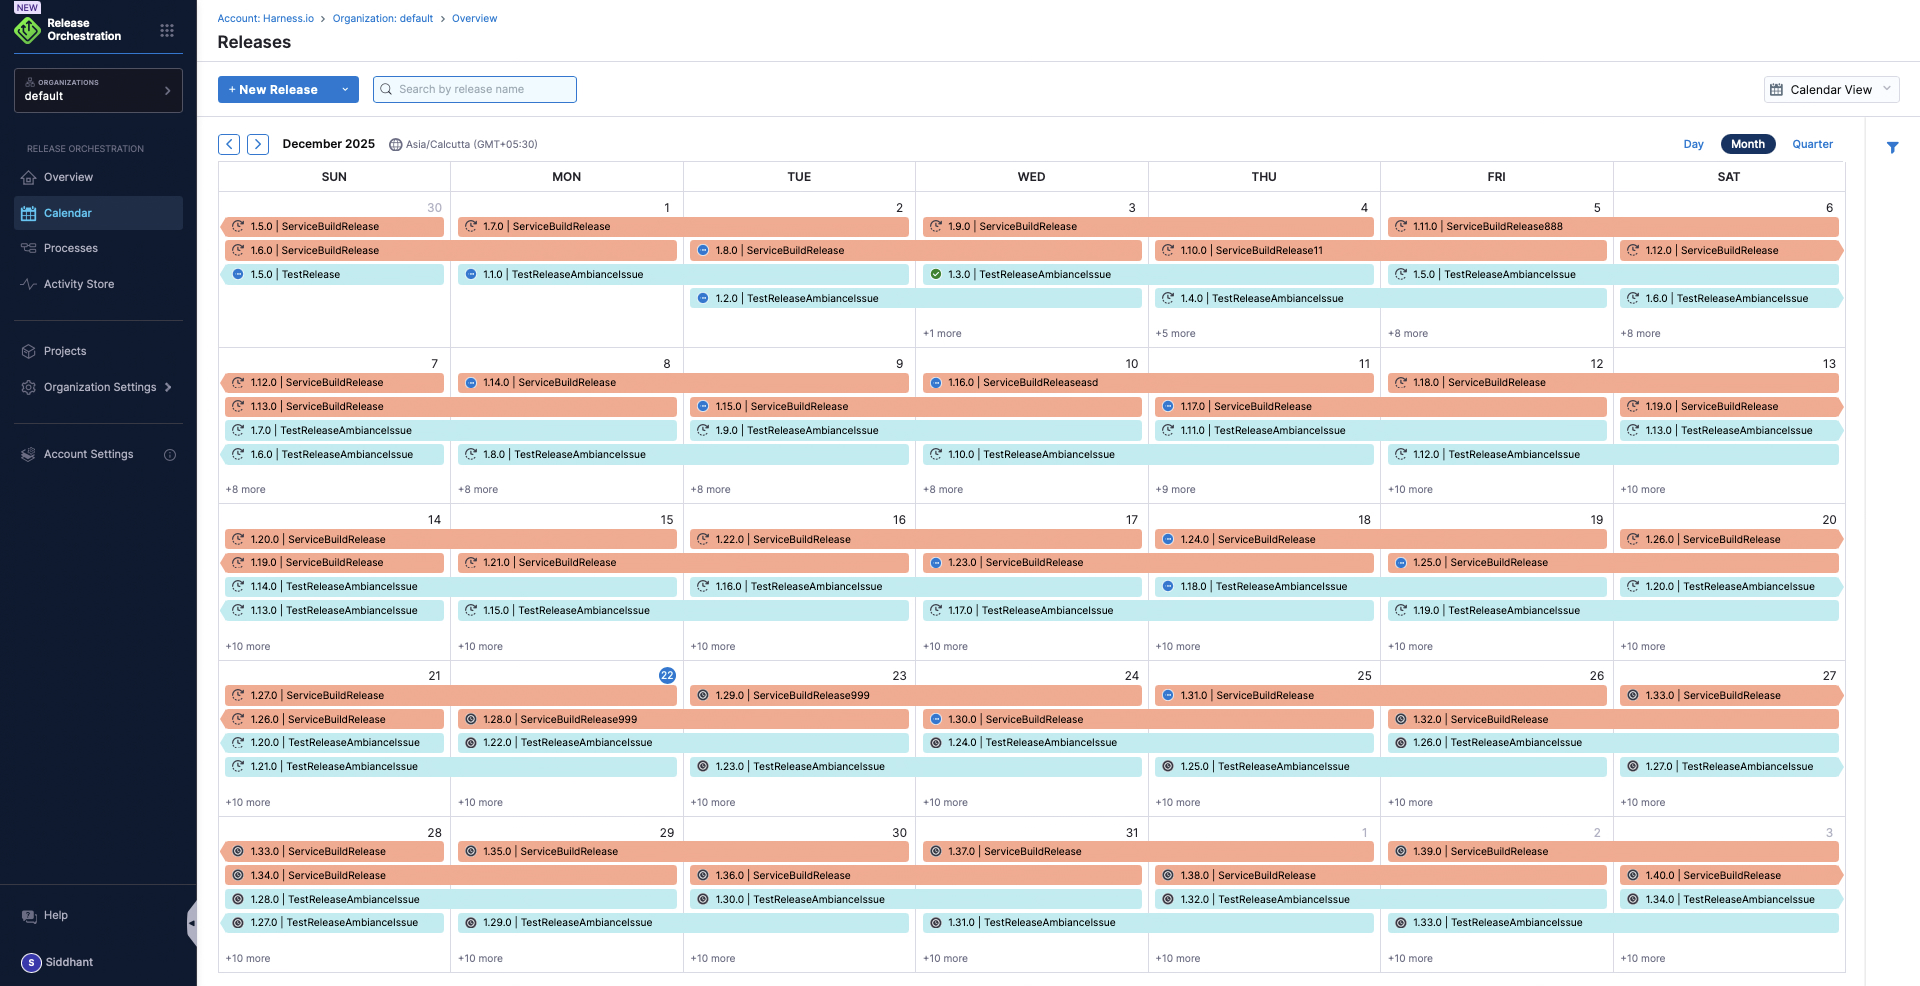
1. Open the **Release Calendar**.
2. Create or open a [Release Group](/release-orchestration/use-release-orchestration/release-orchestration-releases/modeling-releases.md) with your desired cadence (for example, recurring every Thursday and running for 2 days).
3. Link the release group to the process you created, so each release executes using that blueprint.
Release Calendar
### Step 5: Provide inputs and execute
1. From the Release Calendar, open a specific release.
2. Review the linked process and click **Pre-execute** (or let it run at the scheduled time).
3. Select an input set from the [Input Store](/release-orchestration/use-release-orchestration/release-orchestration-inputs-variables/overview.md). An **input set** is a named collection of values for all inputs your process requires (at the process, phase, and activity levels). You can create multiple input sets for the same process to run it with different configurations. For example, you can create one input set for staging and another for production.
For more on variables and input configuration, see [Inputs and Variables](/release-orchestration/use-release-orchestration/release-orchestration-inputs-variables/overview.md).
### Step 6: Configure notifications (optional)
Configure [notifications](/release-orchestration/use-release-orchestration/notifications.md) to receive real-time Slack alerts:
1. Navigate to **Account Settings** or **Project Settings**, then select **Notifications**.
2. Click **New Notification Setup**.
3. Select **Release Orchestration** as the resource type.
4. Configure conditions based on events you want to monitor:
* **Release Start/End/Burned**: Track release lifecycle
* **Release Input Waiting**: Get notified when manual input is needed
* **Phase Start/End**: Monitor phase-level progress
* **Activity On Hold/Task Output Waiting**: Track blocked activities
5. Select Slack channels to receive notifications.
Notifications help teams stay informed without constantly checking the Release Calendar and enable a quick response to failures or approval requests.
### Step 7: Monitor and remediate
During execution, track progress at every level:
* **Activity-level**: Running, succeeded, failed, or on hold.
* **Phase-level**: Overall progress of each phase.
* **Process-level**: End-to-end release status.
If an automated activity fails, you can remediate by clicking **Retry** or **Ignore** to continue execution. For details, see [Error Handling](/release-orchestration/use-release-orchestration/release-orchestration-execution/error-handling.md).
If execution is waiting for a sign-off, complete the [Manual Activity](/release-orchestration/use-release-orchestration/release-orchestration-activities/activity-types/manual-activities.md) by providing the required inputs and approval.
### Next steps
Use these resources next:
* [Key concepts](/release-orchestration/new-to-release-orchestration/key-concepts.md): View Release Orchestration entities and terminology.
* [Process modeling](/release-orchestration/use-release-orchestration/release-orchestration-processes/process-modeling.md): Build processes manually.
* [Notifications](/release-orchestration/use-release-orchestration/notifications.md): Configure Slack alerts for release events.
* [Executing a release](/release-orchestration/use-release-orchestration/release-orchestration-execution/executing-a-release.md): Run and monitor releases.
* [Multi-service release example](/release-orchestration/troubleshooting-and-resources/release-orchestration-use-cases/multi-service-release-example.md): Follow a complete release walkthrough.
* [Applications](/release-orchestration/new-to-release-orchestration/use-cases.md): Review release patterns.
{% @harness-feedback/feedback %}