Unified CI/CD GAR GKE pipeline
In this tutorial, you'll explore how to build a streamlined CI/CD pipeline using the Harness Platform, integrating the robust services of Google Artifact Registry (GAR) and Google Kubernetes Engine (GKE). GAR excels in managing and storing container images securely, while GKE offers a scalable environment for container deployment. The Harness Platform serves as a powerful orchestrator, simplifying the build and push process to GAR and managing complex deployments in GKE. You'll also cover implementing crucial approval steps for enhanced security and setting up Slack notifications for real-time updates, showcasing how these tools together facilitate a robust, streamlined CI/CD process.

Prerequisites
- A Harness free plan. If you don't have one, sign up for free.
- A GitHub account.
- A Docker Hub account.
- A GCP account with permissions for Google Artifact Registry and Kubernetes Engine.t
- Access to a slack workspace and permissions to create a slack app.
There's a bonus section in this tutorial where you'll run security tests during the build process and create a policy for the deployment process. To follow this section, you'll need a Harness enterprise account.
Required Setup and Configurations
Demo application
You can either fork Captain Canary Adventure (CCA) App or bring your own application (as long as it has a Dockerfile).
This tutorial assumes the use of a fork of the CCA App. If you are using your own app, make the necessary changes.
GitHub and Docker authentication
Create a GitHub personal access token (PAT) that will have read access to the demo application repository. Create a Docker access token.
Image registry setup on Google Cloud Platform (GCP):
- Enable the Artifact Registry API.
- From Artifact Registry, click + CREATE REPOSITORY.
- Give this repository a name -
cca-registry, chooseDockeras the format,Standardas the mode, location typeRegion(choose a region near you),Google-managed encryptionkey for encryption, haveDry Runselected, and click CREATE.
Kubernetes cluster setup with GKE:
- Enable Kubernetes Engine API.
- Create a GKE (autopilot) cluster by selecting a region near you.
GCP IAM and Service Account setup:
- Create a GCP Service Account. Copy the email address generated for this service account. It will be in this format:
SERVICE_ACCOUNT_NAME@GCP_PROJECT_NAME.iam.gserviceaccount.com. - Navigate to the artifact registry repository you created earlier, select it and click on Permissions tab. You need to create two types of access to the artifact registry repository - a public read access and a fine-grained write access. Click + ADD PRINCIPAL from the Permissions tab and paste the email address of the service account previously copied. Assign
Artifact Registry Writerrole to this principal. Next, click + ADD PRINCIPAL from the Permissions tab and type inallUsersfor the principal andArtifact Registry Readerfor the role. You might see a warning like this:This resource is public and can be accessed by anyone on the internet. - Navigate to IAM & Admin, locate the service account, select it, and then click on ADD KEY → Create new key. Choose the JSON format, and a key for your service account will be downloaded to your computer. Exercise caution and refrain from sharing this key with anyone; treat it as you would a password.
Slack workspace and app setup:
To create a Slack app and incoming webhook, you'll need elevated privilege in that Slack workspace. Create a new Slack workspace for this tutorial and an incoming webhook for a specific channel.
Your newly created slack webhook will look like this: https://hooks.slack.com/services/T00000000/B00000000/XXXXXXXXXXXXXXXXXXXXXXXX
Treat this as sensitive information.
Harness entity setup
-
Create secrets:
a. GitHub Secret: Navigate to the Harness console. From Project Setup → Secrets, click + New Secret → Text, give the secret a name (for example,
cca-git-pat) and paste in the previously created GitHub PAT.b. Docker Secret: Similarly, create a docker secret (you can name it
docker-secret) and use the previously created Docker PAT as the secret value.c. Slack Webhook: Similarly, create a slack webhook secret (you can name it
slack-webhook) and paste in the previously created slack webhook value. -
Connectors in Harness help you pull in artifacts, sync with repos, integrate verification and analytics tools, and leverage collaboration channels. From Project Setup → Connectors → + New Connector, create the following connectors:
a. GitHub Connector: Harness platform connects to the source code repository using this connector. Give this connector a name (for example,
cca-git-connector), choose URL type as Repository, connection type as HTTP, and paste in the forked Github Repository URL of the demo app. Use your GitHub username and the previously created GitHub secret for authentication. Select the connectivity mode as Connect through Harness Platform. The connection test should be successful.b. Docker Connector: Harness platform pulls in the docker image for the Slack notification using this connector. Give this connector a name (for example,
docker-connector), choose provider type as DockerHub, Docker Registry URL ashttps://index.docker.io/v2/, enter in your docker username and select the previously created docker secret. Select the connectivity mode as Connect through Harness Platform. The connection test should be successful.c. Kubernetes Connector: Harness platform creates and manages resources on your GKE cluster using this connector. Give this connector a name (for example,
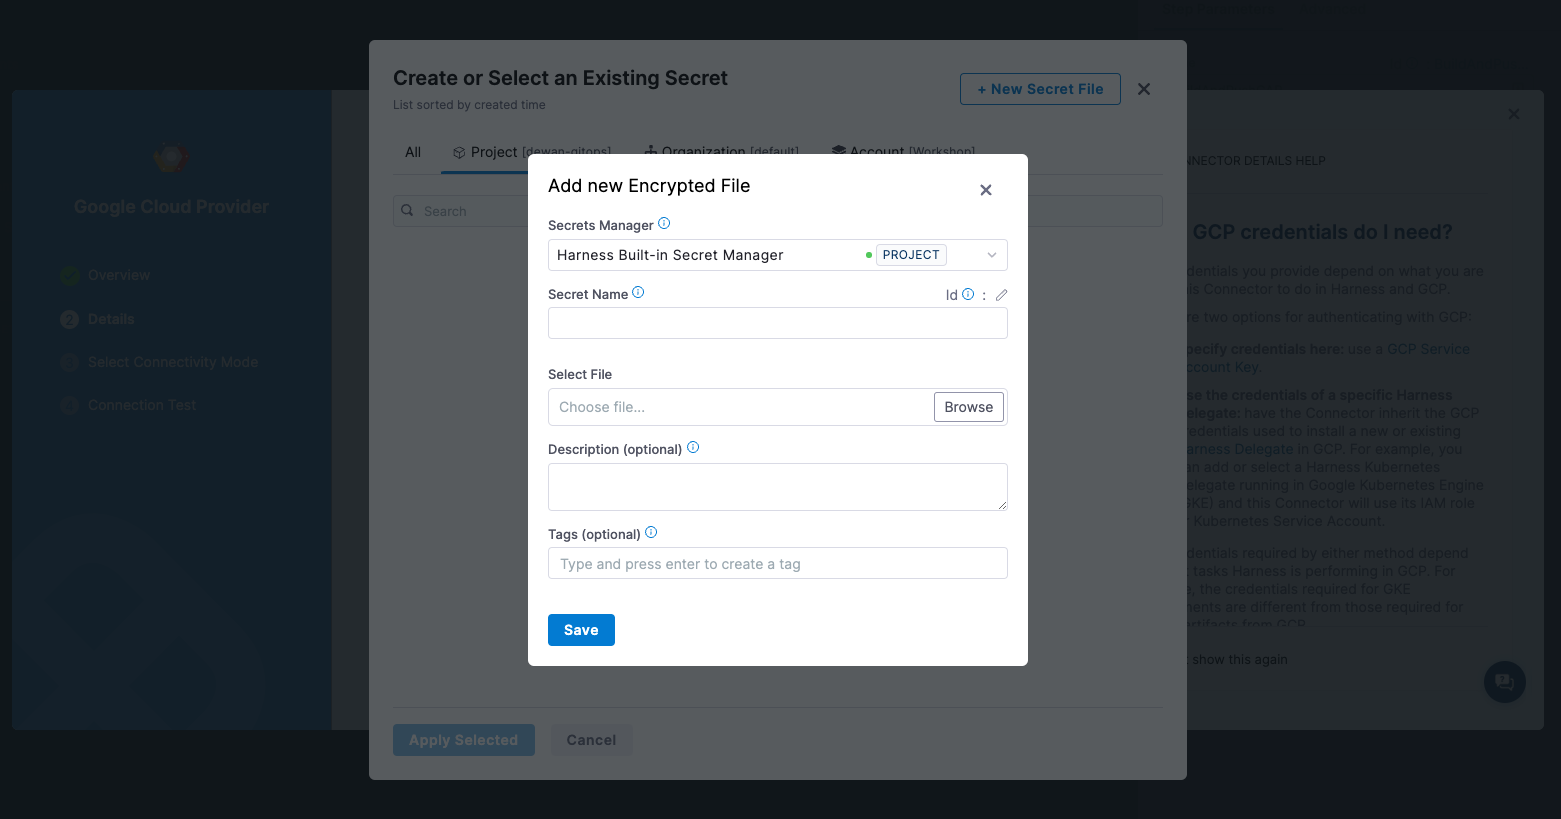
gke-connector). Choose Use the credentials of a specific Harness Delegate… and click + Install new Delegate. The Harness Delegate is a service you run in your local network or VPC to connect all of your providers with your Harness account. Follow the instructions to install a delegate on your Kubernetes cluster and once the installation is complete, select the newly created delegate from the dropdown. The connection test should be successful.d. GCP Connector: The GCP connector allows you to connect to your Google Cloud Platform resource and perform actions via Harness platform. Give this connector a name and select Specify credentials here under the Details section. Add a new secret name and upload the GCP service account key JSON file you previously downloaded. Select the connectivity mode as Connect through Harness Platform. The connection test should be successful.
Build and push image to GAR
First, let's create the build and push image part of the pipeline. Click on Pipelines → + Create a Pipeline and give it a name (e.g., gar-gke-cicd-pipeline). Select the Inline option to store the pipeline definition in Harness, and then click Start.
Click on Add Stage and choose Build as the stage type. A Harness pipeline can consist of one or more stages. Give this stage a name (e.g., Push to GAR), select the Clone Codebase option (this should be enabled, by default), and choose the GitHub connector you previously created from the dropdown. The repository name should auto-populate. Click Set Up Stage.
Under Infrastructure, specify where you'll deploy your application. Select Cloud for Harness hosted builds and choose Linux/AMD64 for the Platform option.
Under Execution, click Add Step → Add Step and find Build and Push to GAR step from the Step Library. Name this step (e.g., BuildAndPushToGAR) and select the GCP connector you created earlier from the dropdown. When choosing the host, use the region selected when creating the image registry repository (e.g., northamerica-northeast1-docker.pkg.dev). Refer to Harness Developer Hub docs or GCP Artifact Registry docs for more details on selecting the region for GAR. Enter your GCP project ID under Project Id. For Image Name, use the image registry repository name followed by the application name in this format: cca-registry/cca-app. Use latest for now as the Tags. Click Apply Changes.
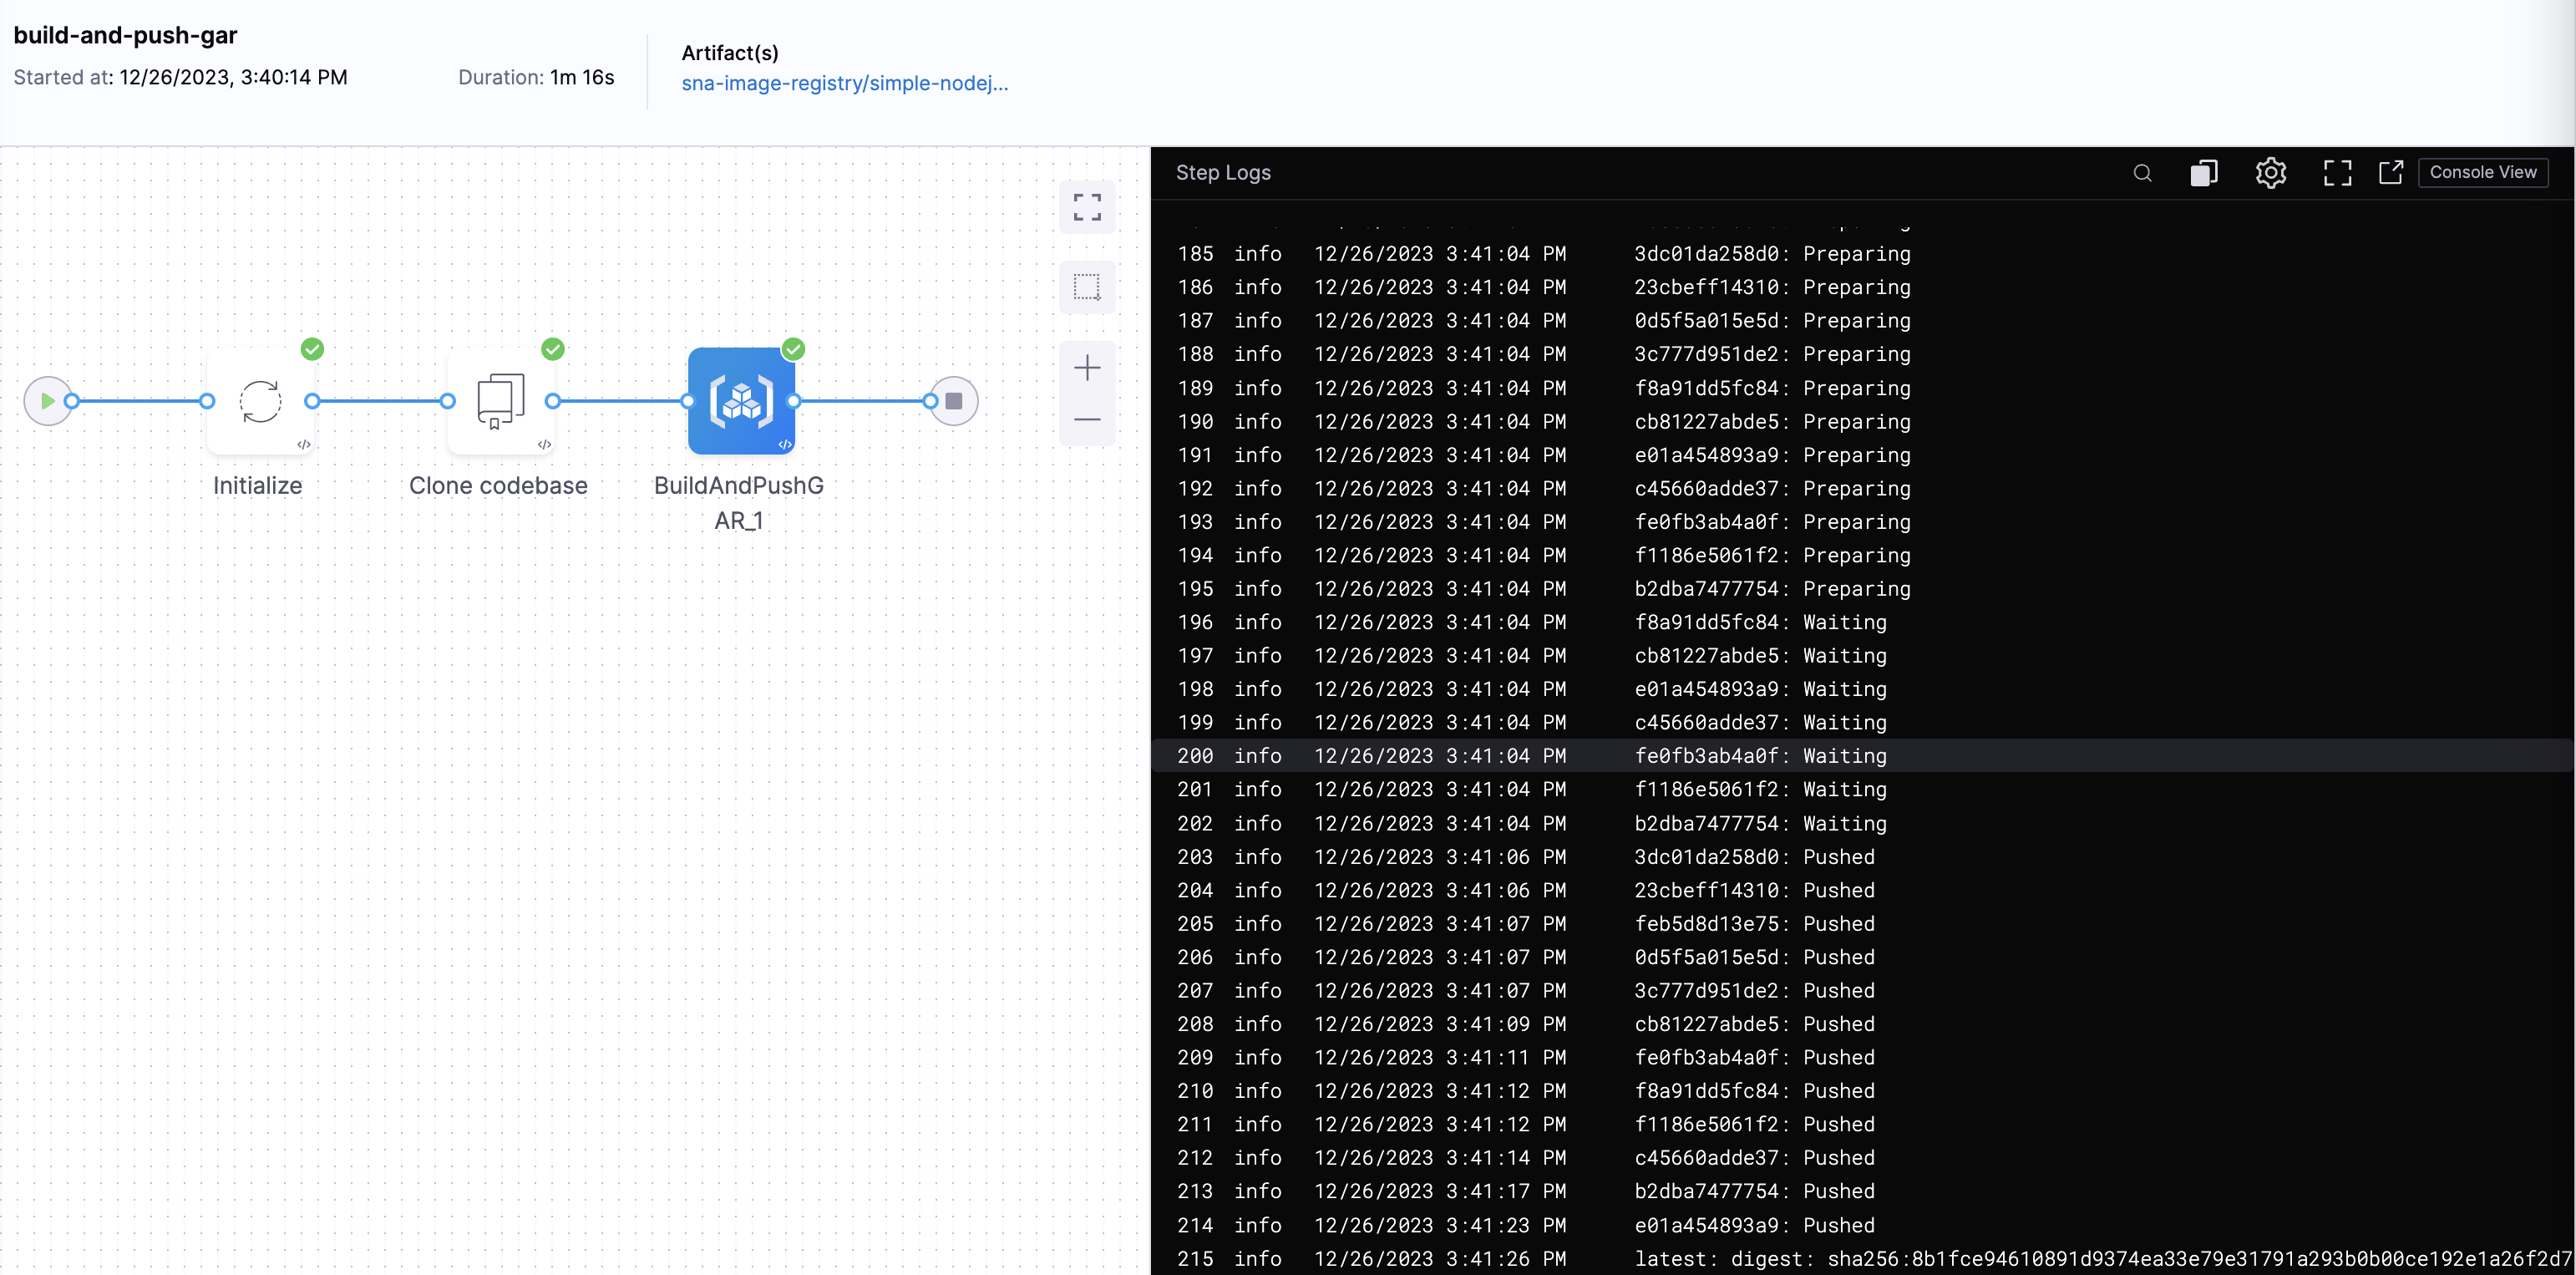
Now, click Run to execute the pipeline. Enter Master as the git branch name for the build (or main if you're not using the forked CCA app). A successful execution of the pipeline should resemble the following:
Deploy to GKE
If you're using a fork of the Captain Canary Adventure App, update the deployment.yaml before deploying the application to Kubernetes. The current YAML uses Harness variables, but since you're not there yet, you'll need to hardcode some values for now.
Assuming your GKE Artifact Registry repository name is cca-registry and the image name is cca-app, replace the current values in values.yaml with the following:
image:
  name: cca-registry/cca-app
  tag: latest
Click on + Add Stage in the pipeline and choose Deploy as the stage type. Give the stage a name (e.g., GKE Deploy), select Kubernetes as the deployment type, and click Set Up Stage.
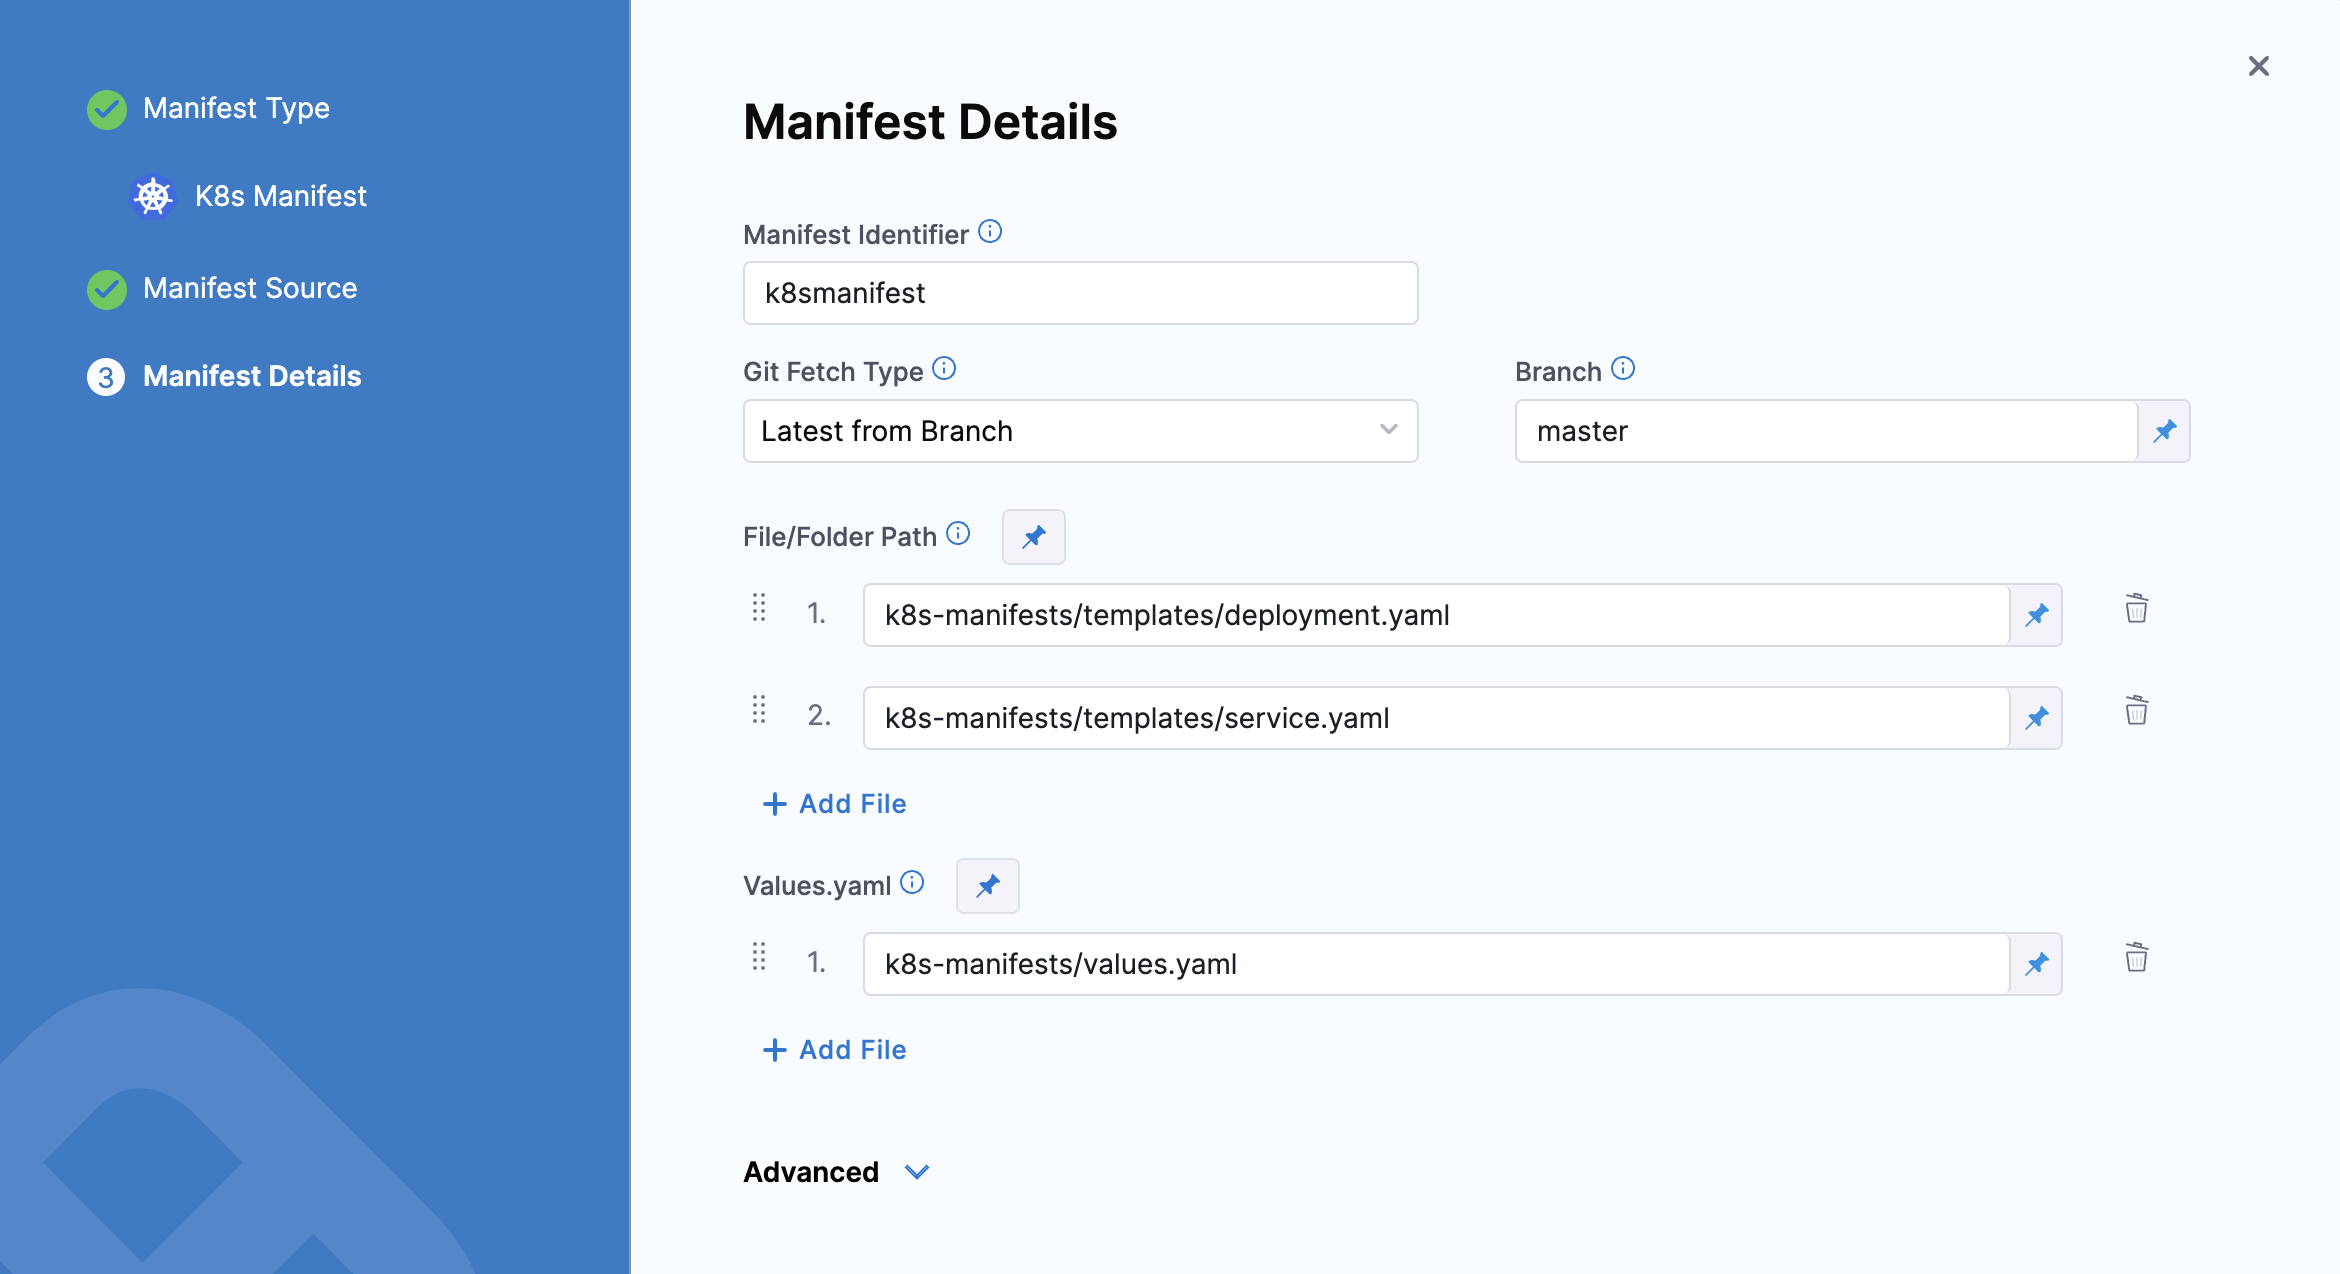
Next, create a service to deploy. Choose Kubernetes as the deployment type, select the GitHub connector, and specify the paths for the manifests. For example, for the Captain Canary Adventure App, here are the manifest details:
Environments represent your deployment targets (such as QA or Prod). Each environment contains one or more Infrastructure Definitions that list your target clusters, hosts, namespaces, etc. Click on + New Environment, give this environment a name (e.g., cca-env), select Pre-Production as the environment type, and click Save.
Next, create an infrastructure definition. Click + New Infrastructure, under cluster details, select the GKE connector, provide a Kubernetes namespace where your application will be deployed (e.g., cca-ns), and click Save. For execution strategies, choose Rolling Deployment and click Use Strategy. Under optional configuration, select Enable Kubernetes Pruning. With this setting, Harness will use pruning to remove any resources present in an old manifest but no longer in the manifest used for the current deployment. You can find more information about this configuration on the Harness Developer Hub.
You're all set! Click Save and then Run. Use master for the git branch. A successful pipeline execution will override the cca-app:latest image on your GAR repository and deploy this image to your GKE cluster.
Add Approval and Slack Notifications
In practical DevOps pipelines, gates are implemented to control artifact promotion to the production environment. Harness supports various types of approvals in Continuous Delivery (CD) pipelines. In this tutorial, you'll use the manual approval step.
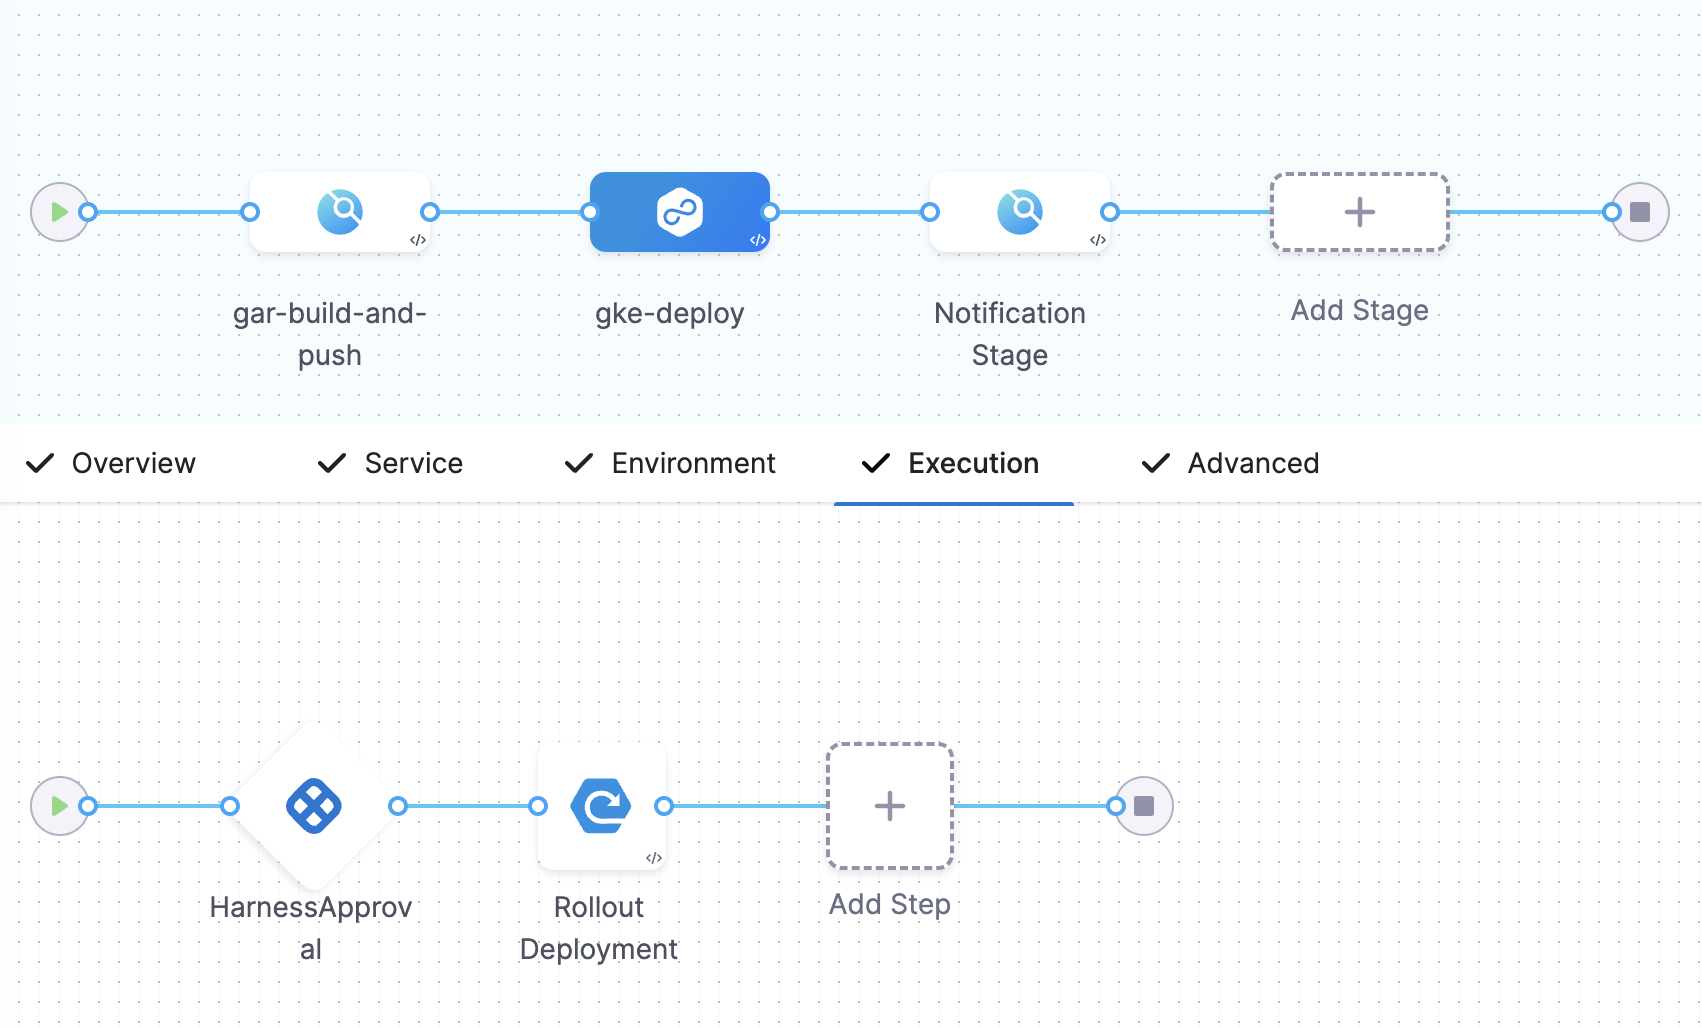
Within the gke-deploy stage, click + Add Step before the Rollout Deployment step and find Harness Approval under Approval in the Step Library. Keep all default options, and you'll need to select the approver from the User Groups. Choose Project → All Project Users under user group selection. If you're the only member of this project, you'll be the sole approver. Click Apply Selected. Click Apply Changes for the manual approval step, and then click Save.
Now, let's add a notification stage so that whenever a deployment is approved in the CI/CD pipeline, a notification will be sent to a Slack channel, indicating who approved it.
From the pipeline, click on Add Stage after the gke-deploy stage, select Build as the stage type, give this stage a name (e.g., Notifications Stage), disable the Clone Codebase option, and click Set Up Stage. Under Infrastructure, choose Use a New Infrastructure → Cloud and Linux → AMD64 for the Operating System. Under Execution, click Add Step → Add Step and find Plugin in the Build section of the Step Library.
Name this step (e.g., Slack Notification), choose the Docker connector you previously created under Container Registry, for the image, use plugins/slack, and add the following key-values under Optional Configuration → Settings (assuming the id for your Slack webhook secret is slackwebhook).
| Key | Value |
|---|---|
| webhook | <+secrets.getValue("slackwebhook")> |
| template | The deployment is moved to prod by <+approval.approvalActivities[0].user.name> |
Notice the use of a Harness variable expression in the template, which retrieves the name of the approver from the previous stage.
Before running the pipeline, one more update is needed. Currently, every image built, pushed, and deployed has the same image tag, making it challenging to track based on the build number. Harness provides powerful built-in and custom variable expressions for various practical use cases.
Click on Variables for your pipeline and select + Add Variable at the pipeline level. Let’s add two variables:
| Variable Name | Variable Value |
|---|---|
| imageName | cca-registry/cca-app |
| imageTag | <+pipeline.sequenceId> |
For the imageTag, click the thumbtack icon and select Expression. Every time you run the pipeline, the pipeline sequence ID will change, and subsequently, the image that will be built and deployed will also change.
Now that you've updated the pipeline to pass in the imageName and imageTag as variables, let's update the codebase to replace the hardcoded values. Revert the changes to deployment.yaml and values.yaml you previously made. You'll observe that the values.yaml file will receive the imageName and imageTag during pipeline runtime, and then the deployment.yaml file will use those values from the values.yaml file.
Now, click Save and then Run. After a successful gar-build-and-push stage, you should see an image in the GAR repository with a numeric tag that matches the pipeline sequence ID. Right after, you should see a following prompt for approval:
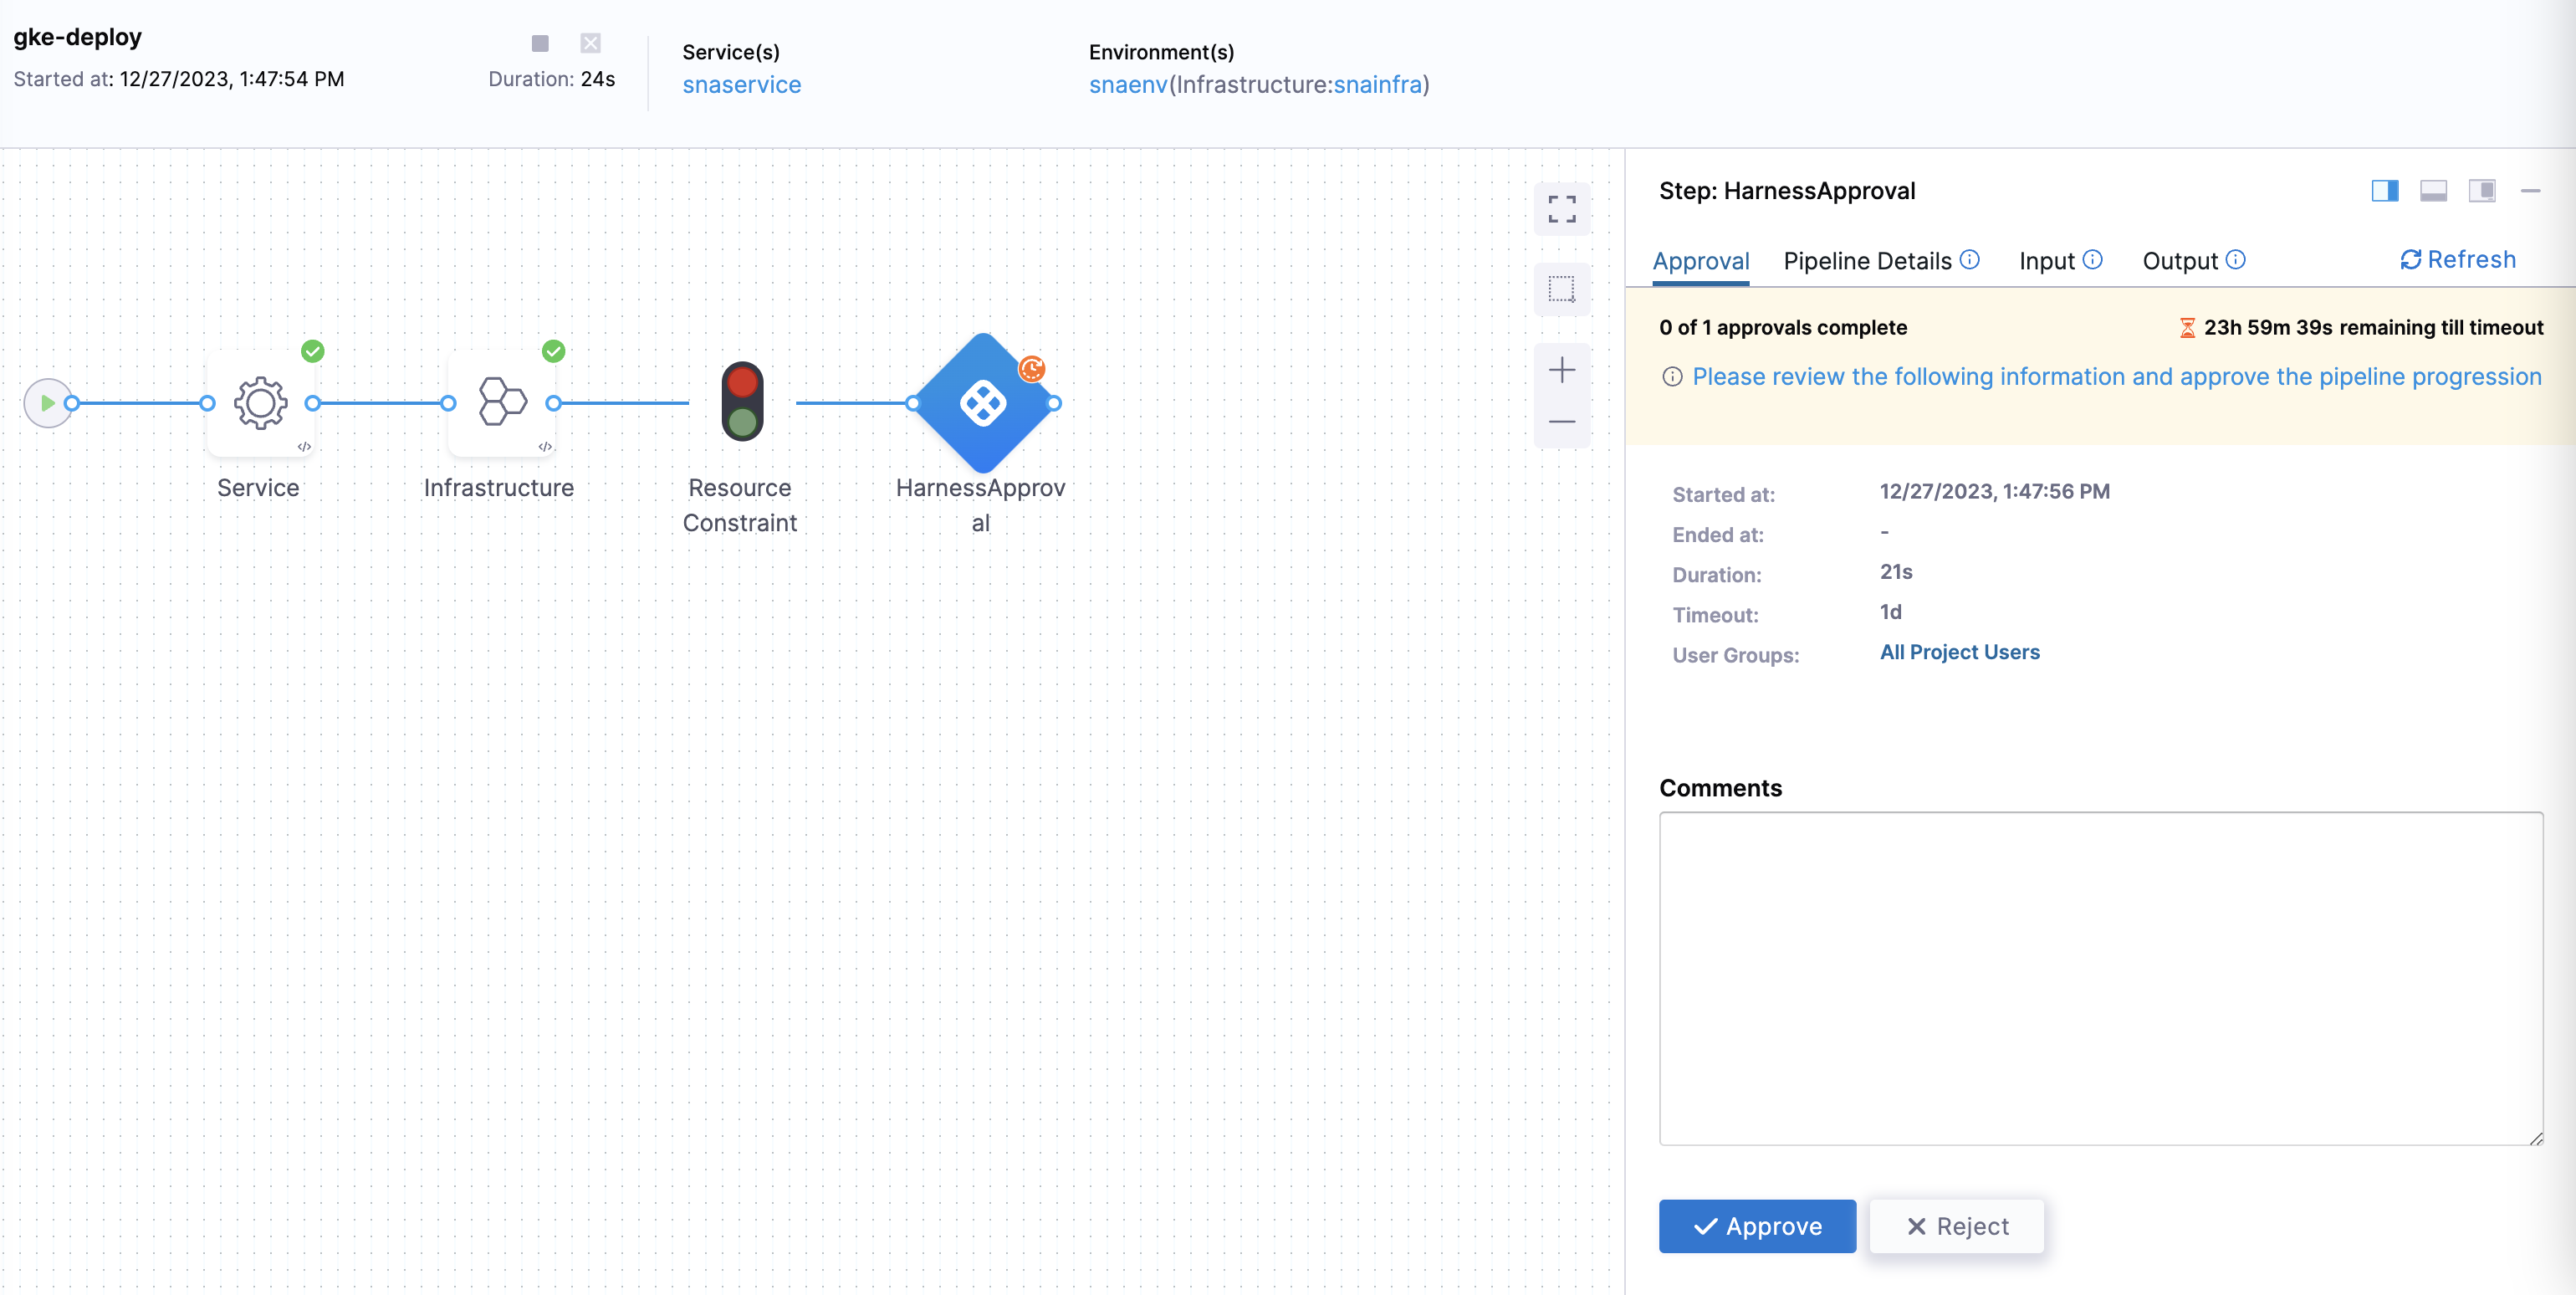
You can (optionally) add a comment and click Approve. The pipeline should continue as before and you'll see a deployment on your Kubernetes cluster. However, this time, you'll see a slack notification resulting from your approval. To modify the text that appears on the notification, you can modify the template value in the slack plugin step settings.
Security Tests and Policy Enforcement (Bonus Section)
These features are only available on Harness paid plans
Run OWASP Tests
You can scan your code repositories using OWASP Dependency-Check within a Harness pipeline. Within the gar-build-and-push stage, click on + Add Step → Add Step before the BuildAndPushGAR step. From the step library, find Owasp under the Security Tests section.
Use the following settings to configure the OWASP Dependency Check and click Apply Changes:
| Setting Name | Value |
|---|---|
| Name | Owasp Tests |
| Scan Mode | Orchestration |
| Target.Name | cca-owasp-tests |
| Variant | master (this is the branch name for the repo) |
| Log Level | Info |
| Fail On Severity | Critical |
You can have any string values for the step name and target.name. For the Variant, use the branch name for your codebase (e.g. master or main). Selecting Critical for Fail On Severity means that if there is any critical error, this test will fail and the pipeline execution will halt. You can check out the OWASP scanner reference to learn more on these configurations.
Click Save and then Run. If your codebase doesn't have an OWASP critical bug, the pipeline should execute successfully. To enforce a fail on this OWASP scan, use a codebase with known vulnerabilities like WebGoat and you'll see the OWASP scanner in action.
Add a policy to mandate approval step on deployment stages
Harness Policy As Code uses Open Policy Agent (OPA) as the central service to store and enforce policies for the different entities and processes across the Harness platform. In this section, you will define a policy that will deny a pipeline execution if there is no approval step defined in a deployment stage.
From Project Setup → Policies, follow the wizard to create a policy from the policy library. Use the Pipeline - Approval policy.
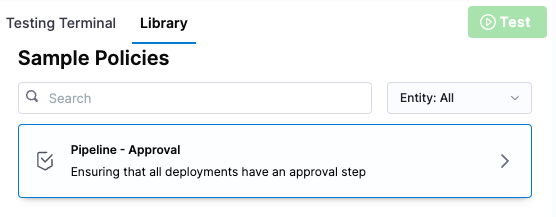
In the next screen, choose Project scope, trigger event On Run, and for the severity, choose Error & Exit. Next, click Yes to apply the policy.
Now, let's remove the approval step from the gke-deploy stage. Click on Edit on the pipeline and click on the cross button on the Harness Approval step. Click Save and then Run. You should see the following error:
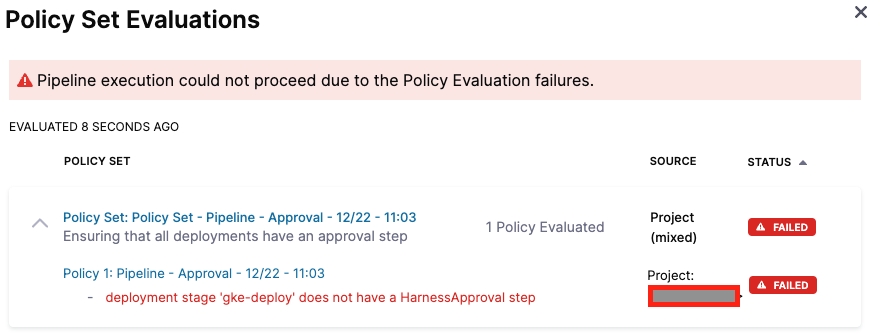
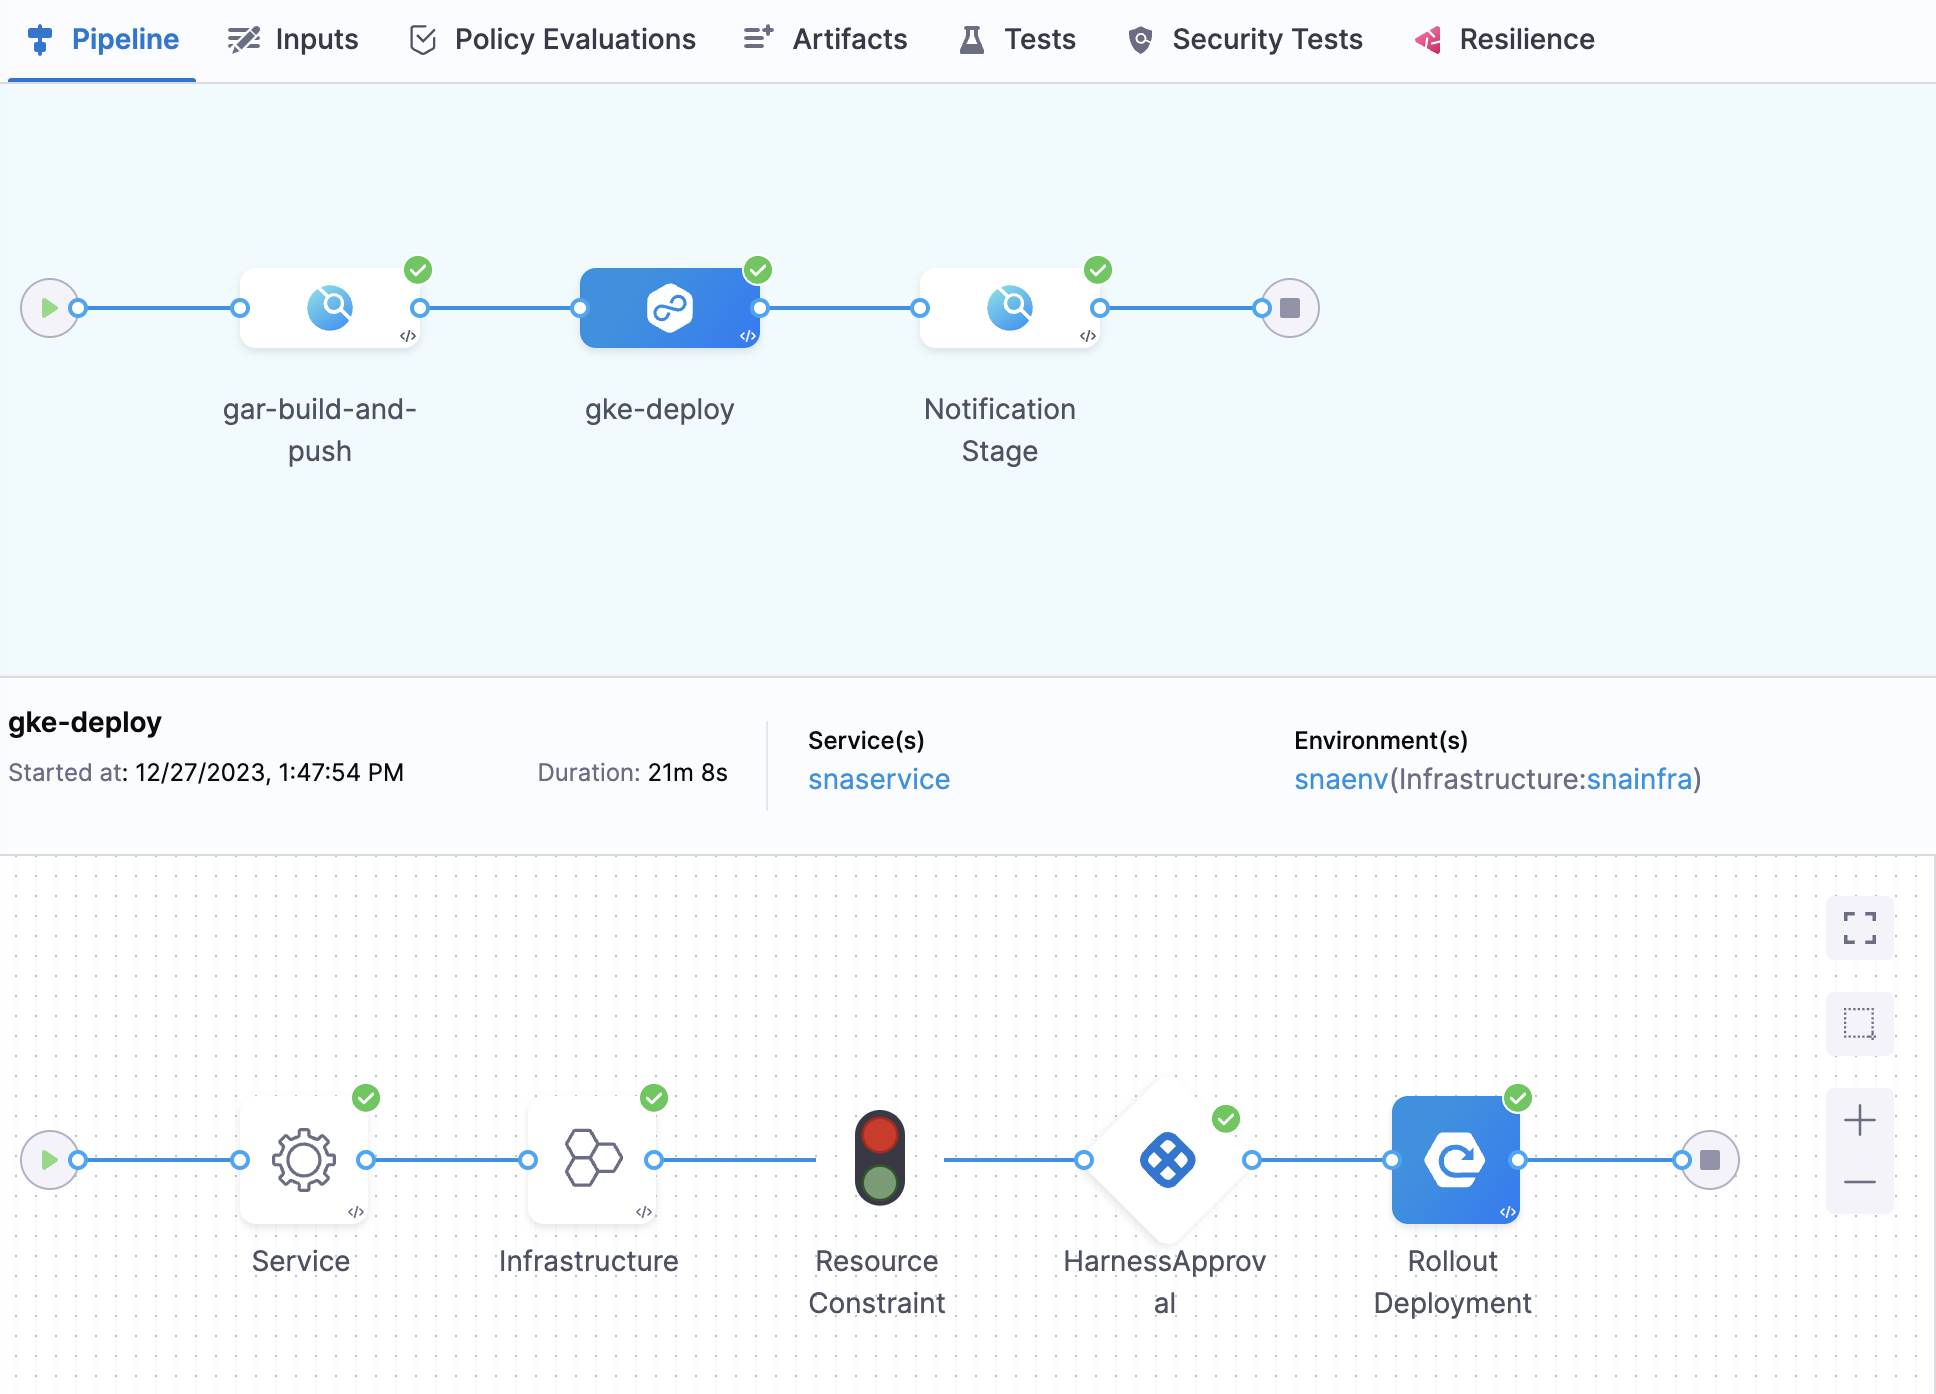
Add the Harness Approval back, save and run the pipeline and this time the pipeline should execute successfully. An end to end successful pipeline execution will look like this:
View the running application
While connected to your GKE cluster, execute the following command:
kubectl get svc -n cca-ns
This is assuming that you deployed the application to cca-ns namespace.
The output will be something like this:
NAME                    TYPE           CLUSTER-IP      EXTERNAL-IP    PORT(S)        AGE
cca-app-service         LoadBalancer   34.118.227.33   34.152.47.53   80:30008/TCP   6d19h
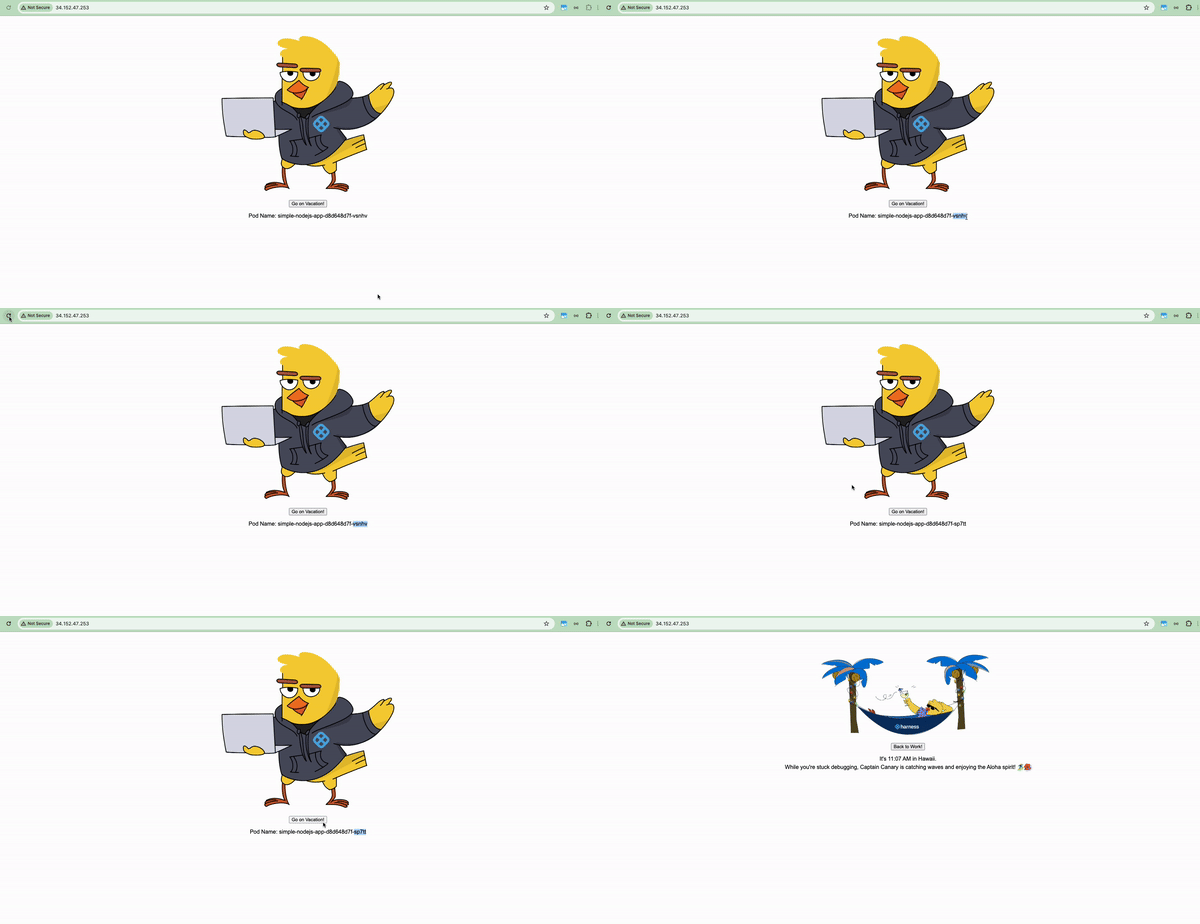
Navigate to the IP address listed under the EXTERNAL-IP column for your case, and you should see a running Captain Canary Adventure application. As the application is running on port 80, you can omit the port number from the URL.
Homework Task
If you'd like to take this pipeline one step further, you can leverage caching to share data across stages because each stage in a Harness CI pipeline has its own build infrastructure. Check out how to save and restore cache from Google Cloud Storage (GCS).