> For the complete documentation index, see [llms.txt](https://developer.harness.io/llms.txt). Markdown versions of documentation pages are available by appending `.md` to page URLs; this page is available as [Markdown](https://developer.harness.io/web-application-and-api-protection-waap-protection-protection/integrations/ci-cd/gitlab-integration.md).
# GitLab Integration
The GitLab integration connects Harness Run-time Protection Agent (RPA) with your GitLab repositories, enabling Harness RPA to scan and analyze your repository code for API security testing. It uses OAuth 2.0 to establish a secure connection between Harness RPA and GitLab.
{% hint style="info" %}
**Note**
* You can configure one or more GitLab integrations in your Harness account.
* Each integration requires a separate OAuth application created in GitLab.
{% endhint %}
***
### What you will learn from this topic
By the end of this topic, you will be able to understand:
* The purpose of GitLab integration and what it enables in your API security workflow.
* The steps to create an OAuth application in your GitLab instance.
* The steps to configure the GitLab integration in Harness RPA.
* How to authorize and verify the integration connection.
* How to use the GitLab integration to scan your repositories.
***
### Before you begin
Before you proceed to configure GitLab, make a note of the following:
* Make sure you have the *Settings* RBAC permissions under **Administration** → **Integrations** to configure the integration. For more information, see [Team and roles - RBAC](https://developer.harness.io/web-application-and-api-protection-waap/settings/configuration/teams/role-based-access-control-rbac).
* Make sure you can create a new OAuth application in GitLab. For more information, see [GitLab Documentation](https://docs.gitlab.com/integration/oauth_provider/).
***
### Configure the GitLab integration
You configure the GitLab integration by completing the following steps in GitLab and then in Harness RPA:
#### Step 1: Create an OAuth application in GitLab
To create an OAuth application in GitLab to generate the credentials for Harness RPA. To access your repositories, complete the following steps in your GitLab Service account:
1. Log in to your GitLab account and navigate to **Admin Area** → **Applications**.
2. Click **New application**.
3. Specify the application details:
* **Redirect URL** — Specify the redirect URL fetched from the Harness platform `https://api-dev.traceable.ai/integration/gitlab/callback`.
* **Scopes** — Select the `read_api`, `read_repository`, and `openid` scopes from the list.
4. Click **Save application**.
5. When you click save, GitLab displays your **Application ID** and **Secret**.
{% hint style="info" %}
**Note**
Make sure you securely save your **Application ID** and **Secret**, as you will need them for integration with the Traceable platform.
{% endhint %}
#### Step 2: Add the GitLab integration in Harness
To add the GitLab integration in Harness RPA, specify your OAuth credentials and complete the following steps on the Harness platform:
1. Log in to your Harness RPA account and navigate to **Settings** → **Integrations** → **CI/CD Integrations**.
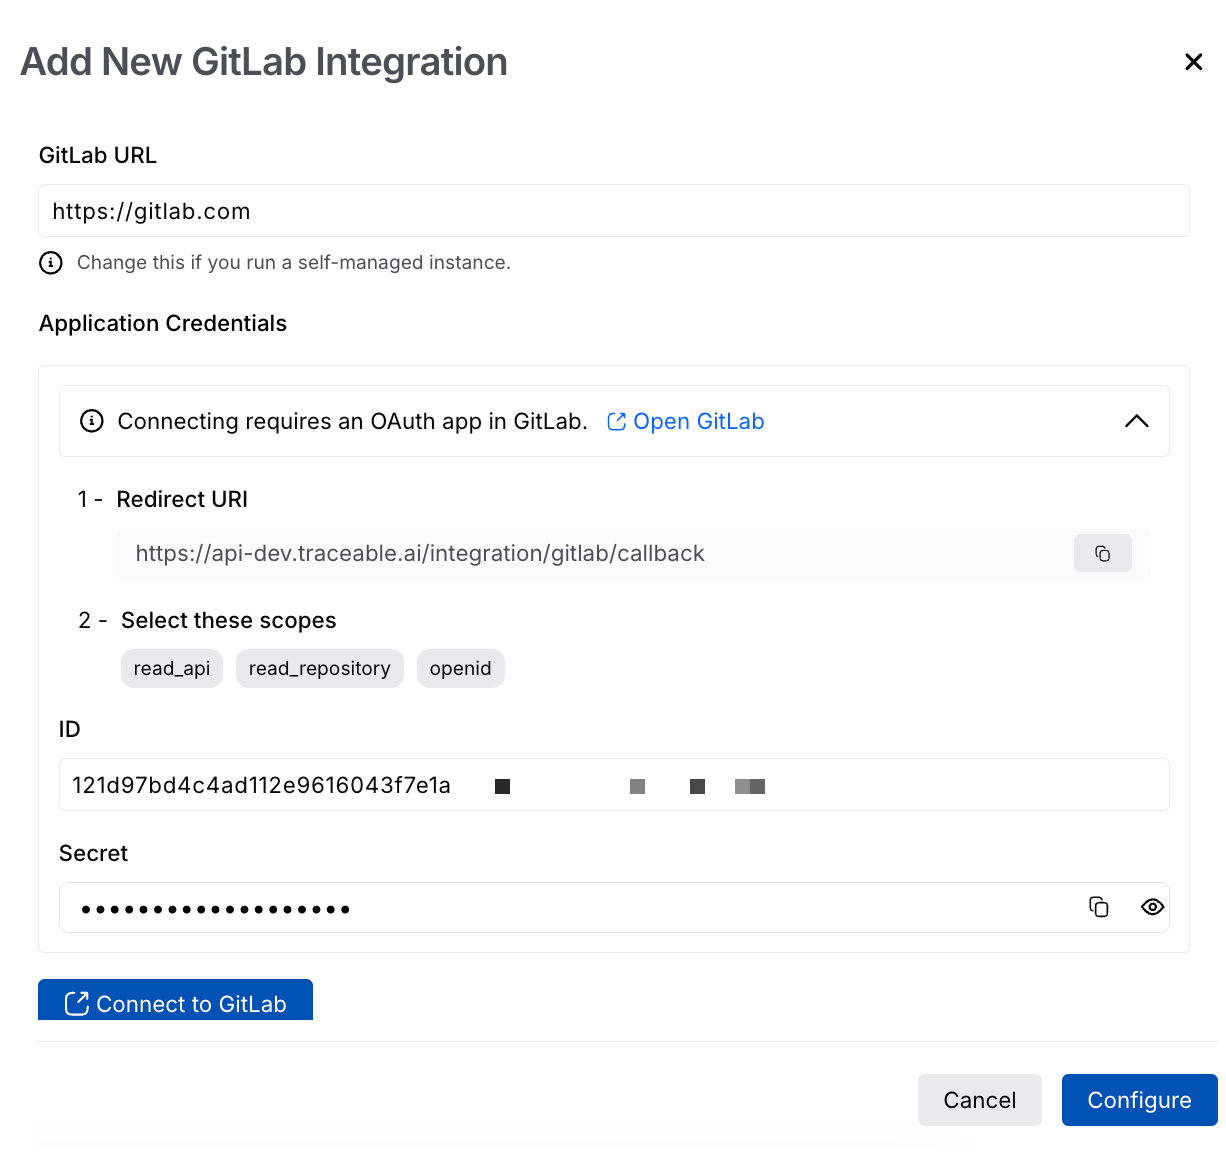
2. Click **Configure** and complete the following fields in the opened slide-out panel **Add New GitLab Integration**:
* **GitLab URL** — Specify `https://gitlab.com` for SaaS, or your self-managed GitLab instance URL.
* **Application ID** — Paste the **Application ID** from your GitLab OAuth application.
* **Secret** — Paste the **Secret** retrieved from your GitLab OAuth application
{% hint style="info" %}
**Note**
The redirect URI must match exactly: `https://api-dev.traceable.ai/integration/gitlab/callback`.
{% endhint %}
#### Step 3: Authorize the integration in GitLab
You authorize Harness to access your GitLab repositories by completing the OAuth flow.
1. In the New GitLab slide-out panel, click **Connect to GitLab**.
2. Review the permissions requested. Harness RPA requests read access to repositories and the API.
3. Click **Authorize** to grant Harness RPA access to your repositories.
4. GitLab redirects you back to the Harness RPA platform and displays the integration confirmation.
5. Click **Configure** to complete the integration setup.
***
### Demo
The following demo walks you through the steps in Harness RPA as well as the GitLab account to integrate GitLab:
{% embed url="" %}
### Verify your GitLab integration
After you complete the integration setup, verify that Harness RPA successfully connects to your GitLab instance. To verify, complete the following steps:
1. In your Harness RPA account, navigate to **Settings** → **Integrations** → **Repositories**.
2. Locate your GitLab integration in the list.
3. Confirm that the integration status displays **Connected** or **Active**.
If the integration status shows an error, verify the following:
* Your **Application ID** and **Secret** are correct and match the values displayed in GitLab.
* The redirect URI in GitLab matches `https://api-dev.traceable.ai/integration/gitlab/callback` exactly.
* Your GitLab OAuth application scopes include `read_api`, `read_repository`, and `openid`.
***
### Use your GitLab integration
After your GitLab integration is active, you reference it when creating API security scans or configuring repository-based workflows. For more information, see [API Discovery from Code](/web-application-and-api-protection-waap-protection-protection/discovery/discovery.md).
When you create a scan or configure a workflow that requires repository access:
1. Select the repository source option or integration configuration field.
2. Choose your GitLab integration from the list of available integrations.
3. Select the repository and branch you want to scan.
{% hint style="info" %}
**Note**
* Only repositories that your GitLab OAuth application can access appear in the repository list.
* Ensure that your OAuth application has sufficient scopes according to your requirements.
{% endhint %}