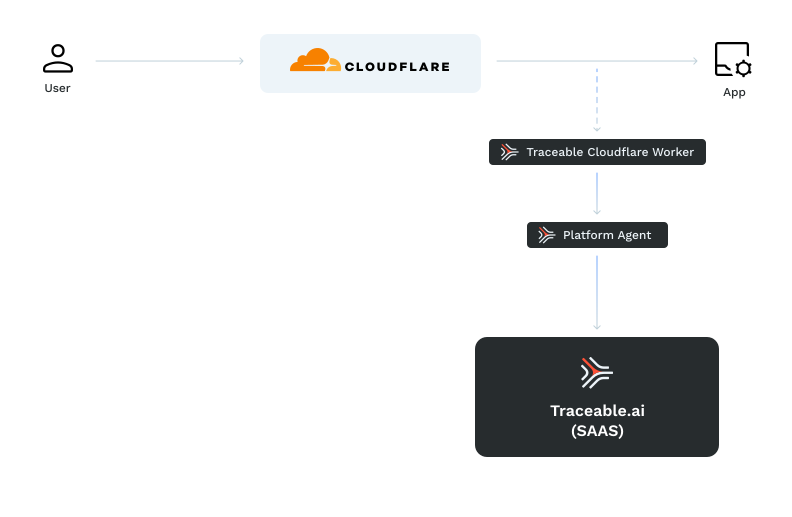
 Traceable Cloudflare worker captures the data from Cloudflare and sends it to the Traceable Platform agent. Note that the request from the Cloudflare worker to the Traceable Platform agent does not block the user request.
> **Note**
>
> Traceable’s Cloudflare worker intergrations is applicable only when Cloudflare is used as a proxy. If Cloudflare is configured as DNS only option, then the network traffic bypasses Cloudflare network including workers and hence not captured by Traceable.
***
## Before you begin
Make sure to take note of the following points before proceeding with the configuration:
* Ensure that a website is available through Cloudflare. In Cloudflare, a website refers to a web application or a set of web pages hosted on a server and accessed by users over the internet.
* Download Traceable's JavaScript code for Cloudflare from Traceable's [download](https://downloads.traceable.ai/#agent/cloudflare/latest/) site. Navigate to **agent → cloudflare → latest**.
* Ensure the Traceable platform agent (TPA) is installed, and you have its URL. For more installation information, see [Platform agent](/web-application-and-api-protection-waap/installation/platform-agent.md).
* Ensure the connectivity between the Cloudflare worker and the TPA server to export data to TPA.
Traceable Cloudflare worker captures the data from Cloudflare and sends it to the Traceable Platform agent. Note that the request from the Cloudflare worker to the Traceable Platform agent does not block the user request.
> **Note**
>
> Traceable’s Cloudflare worker intergrations is applicable only when Cloudflare is used as a proxy. If Cloudflare is configured as DNS only option, then the network traffic bypasses Cloudflare network including workers and hence not captured by Traceable.
***
## Before you begin
Make sure to take note of the following points before proceeding with the configuration:
* Ensure that a website is available through Cloudflare. In Cloudflare, a website refers to a web application or a set of web pages hosted on a server and accessed by users over the internet.
* Download Traceable's JavaScript code for Cloudflare from Traceable's [download](https://downloads.traceable.ai/#agent/cloudflare/latest/) site. Navigate to **agent → cloudflare → latest**.
* Ensure the Traceable platform agent (TPA) is installed, and you have its URL. For more installation information, see [Platform agent](/web-application-and-api-protection-waap/installation/platform-agent.md).
* Ensure the connectivity between the Cloudflare worker and the TPA server to export data to TPA.
The Traceable Platform Agent must:
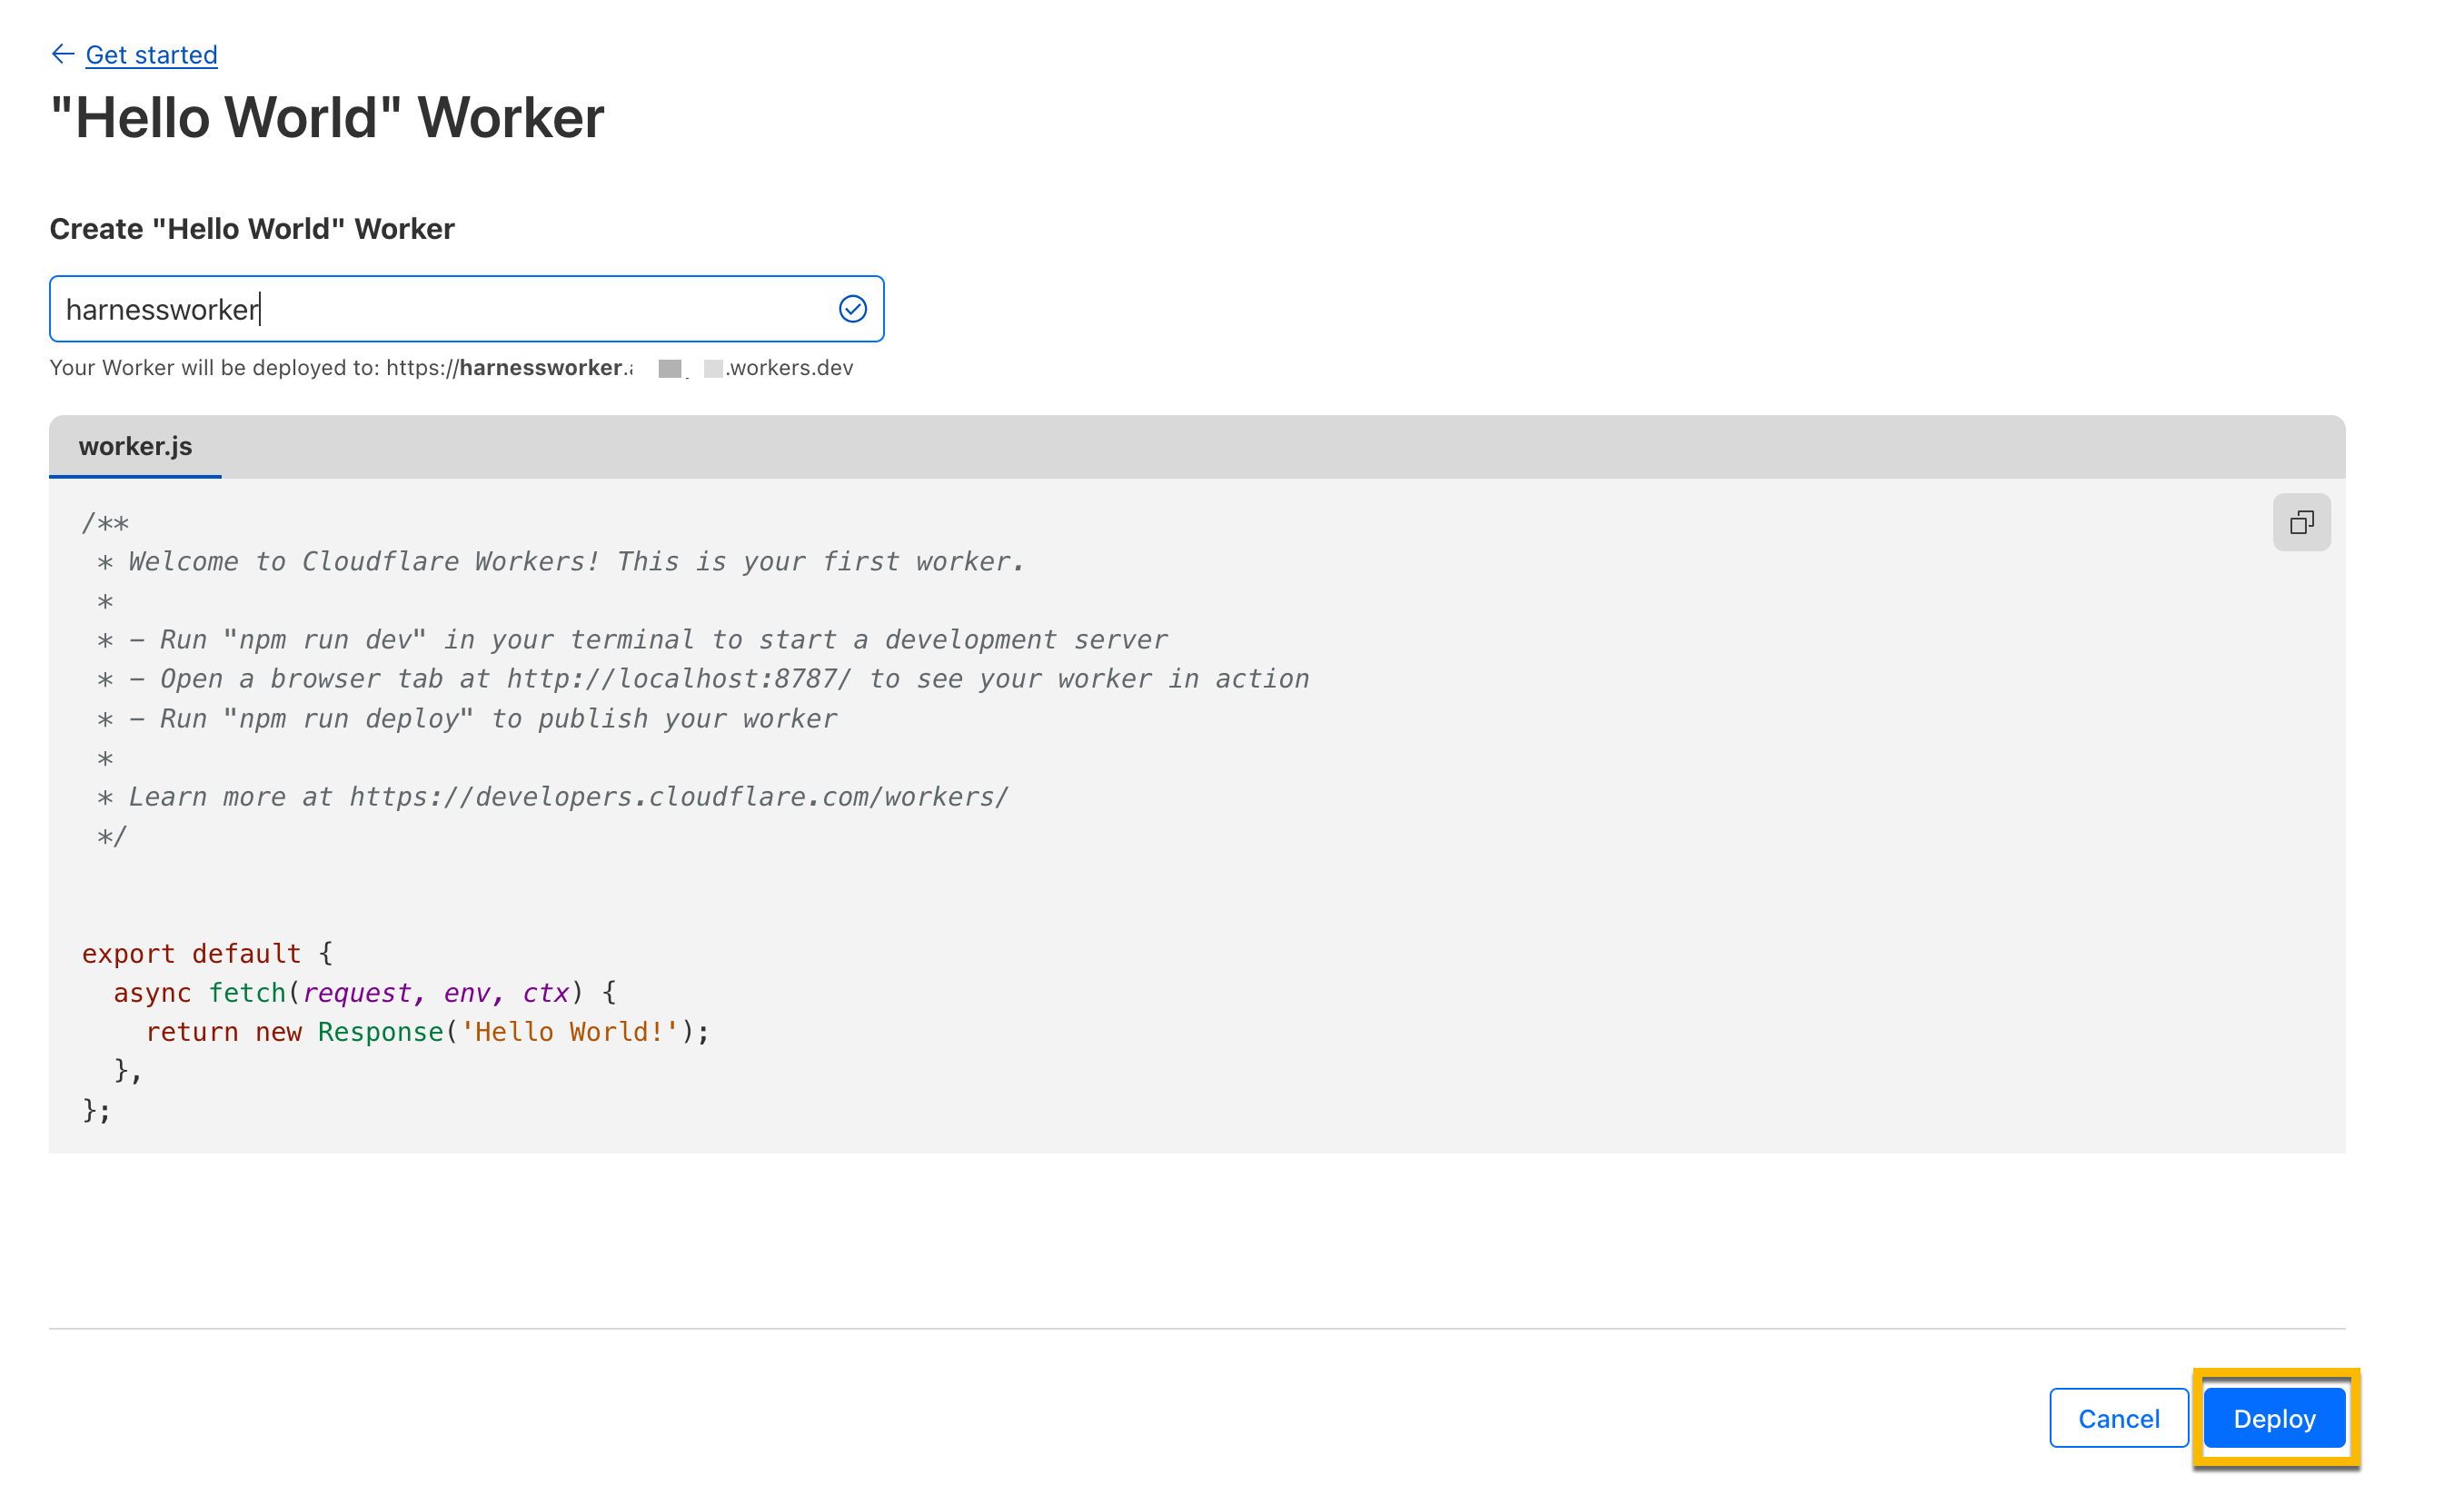
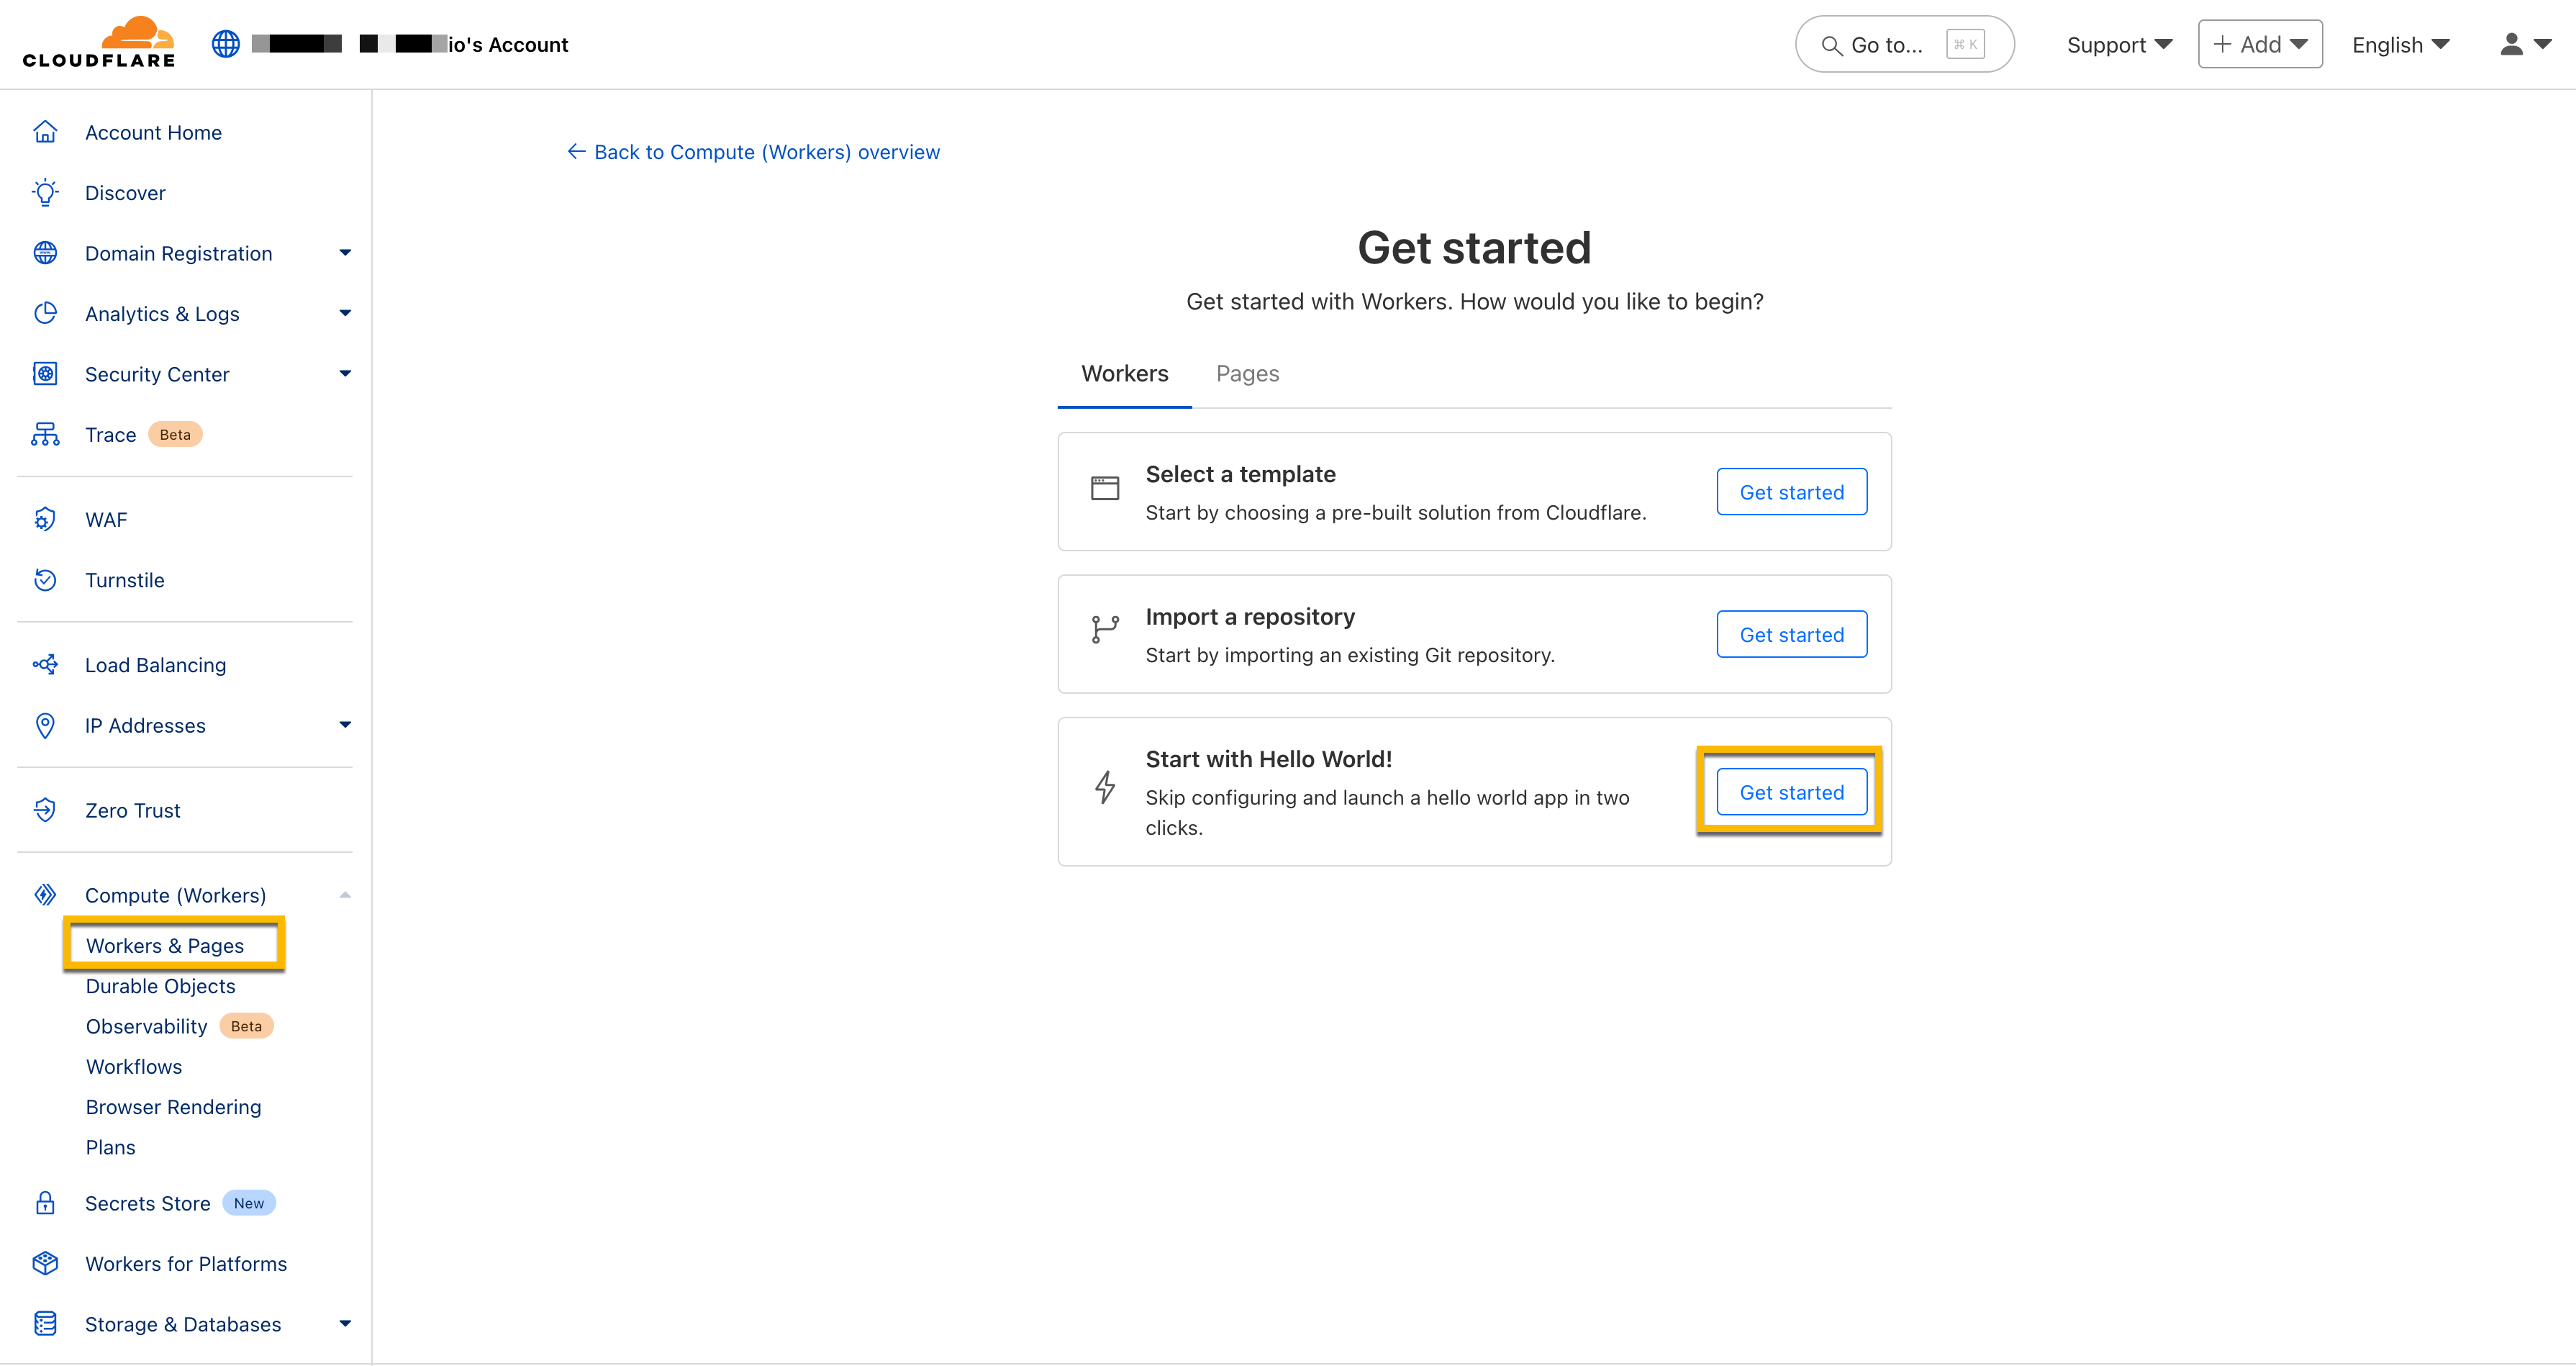 3. Provide a unique worker name and click **Deploy**.
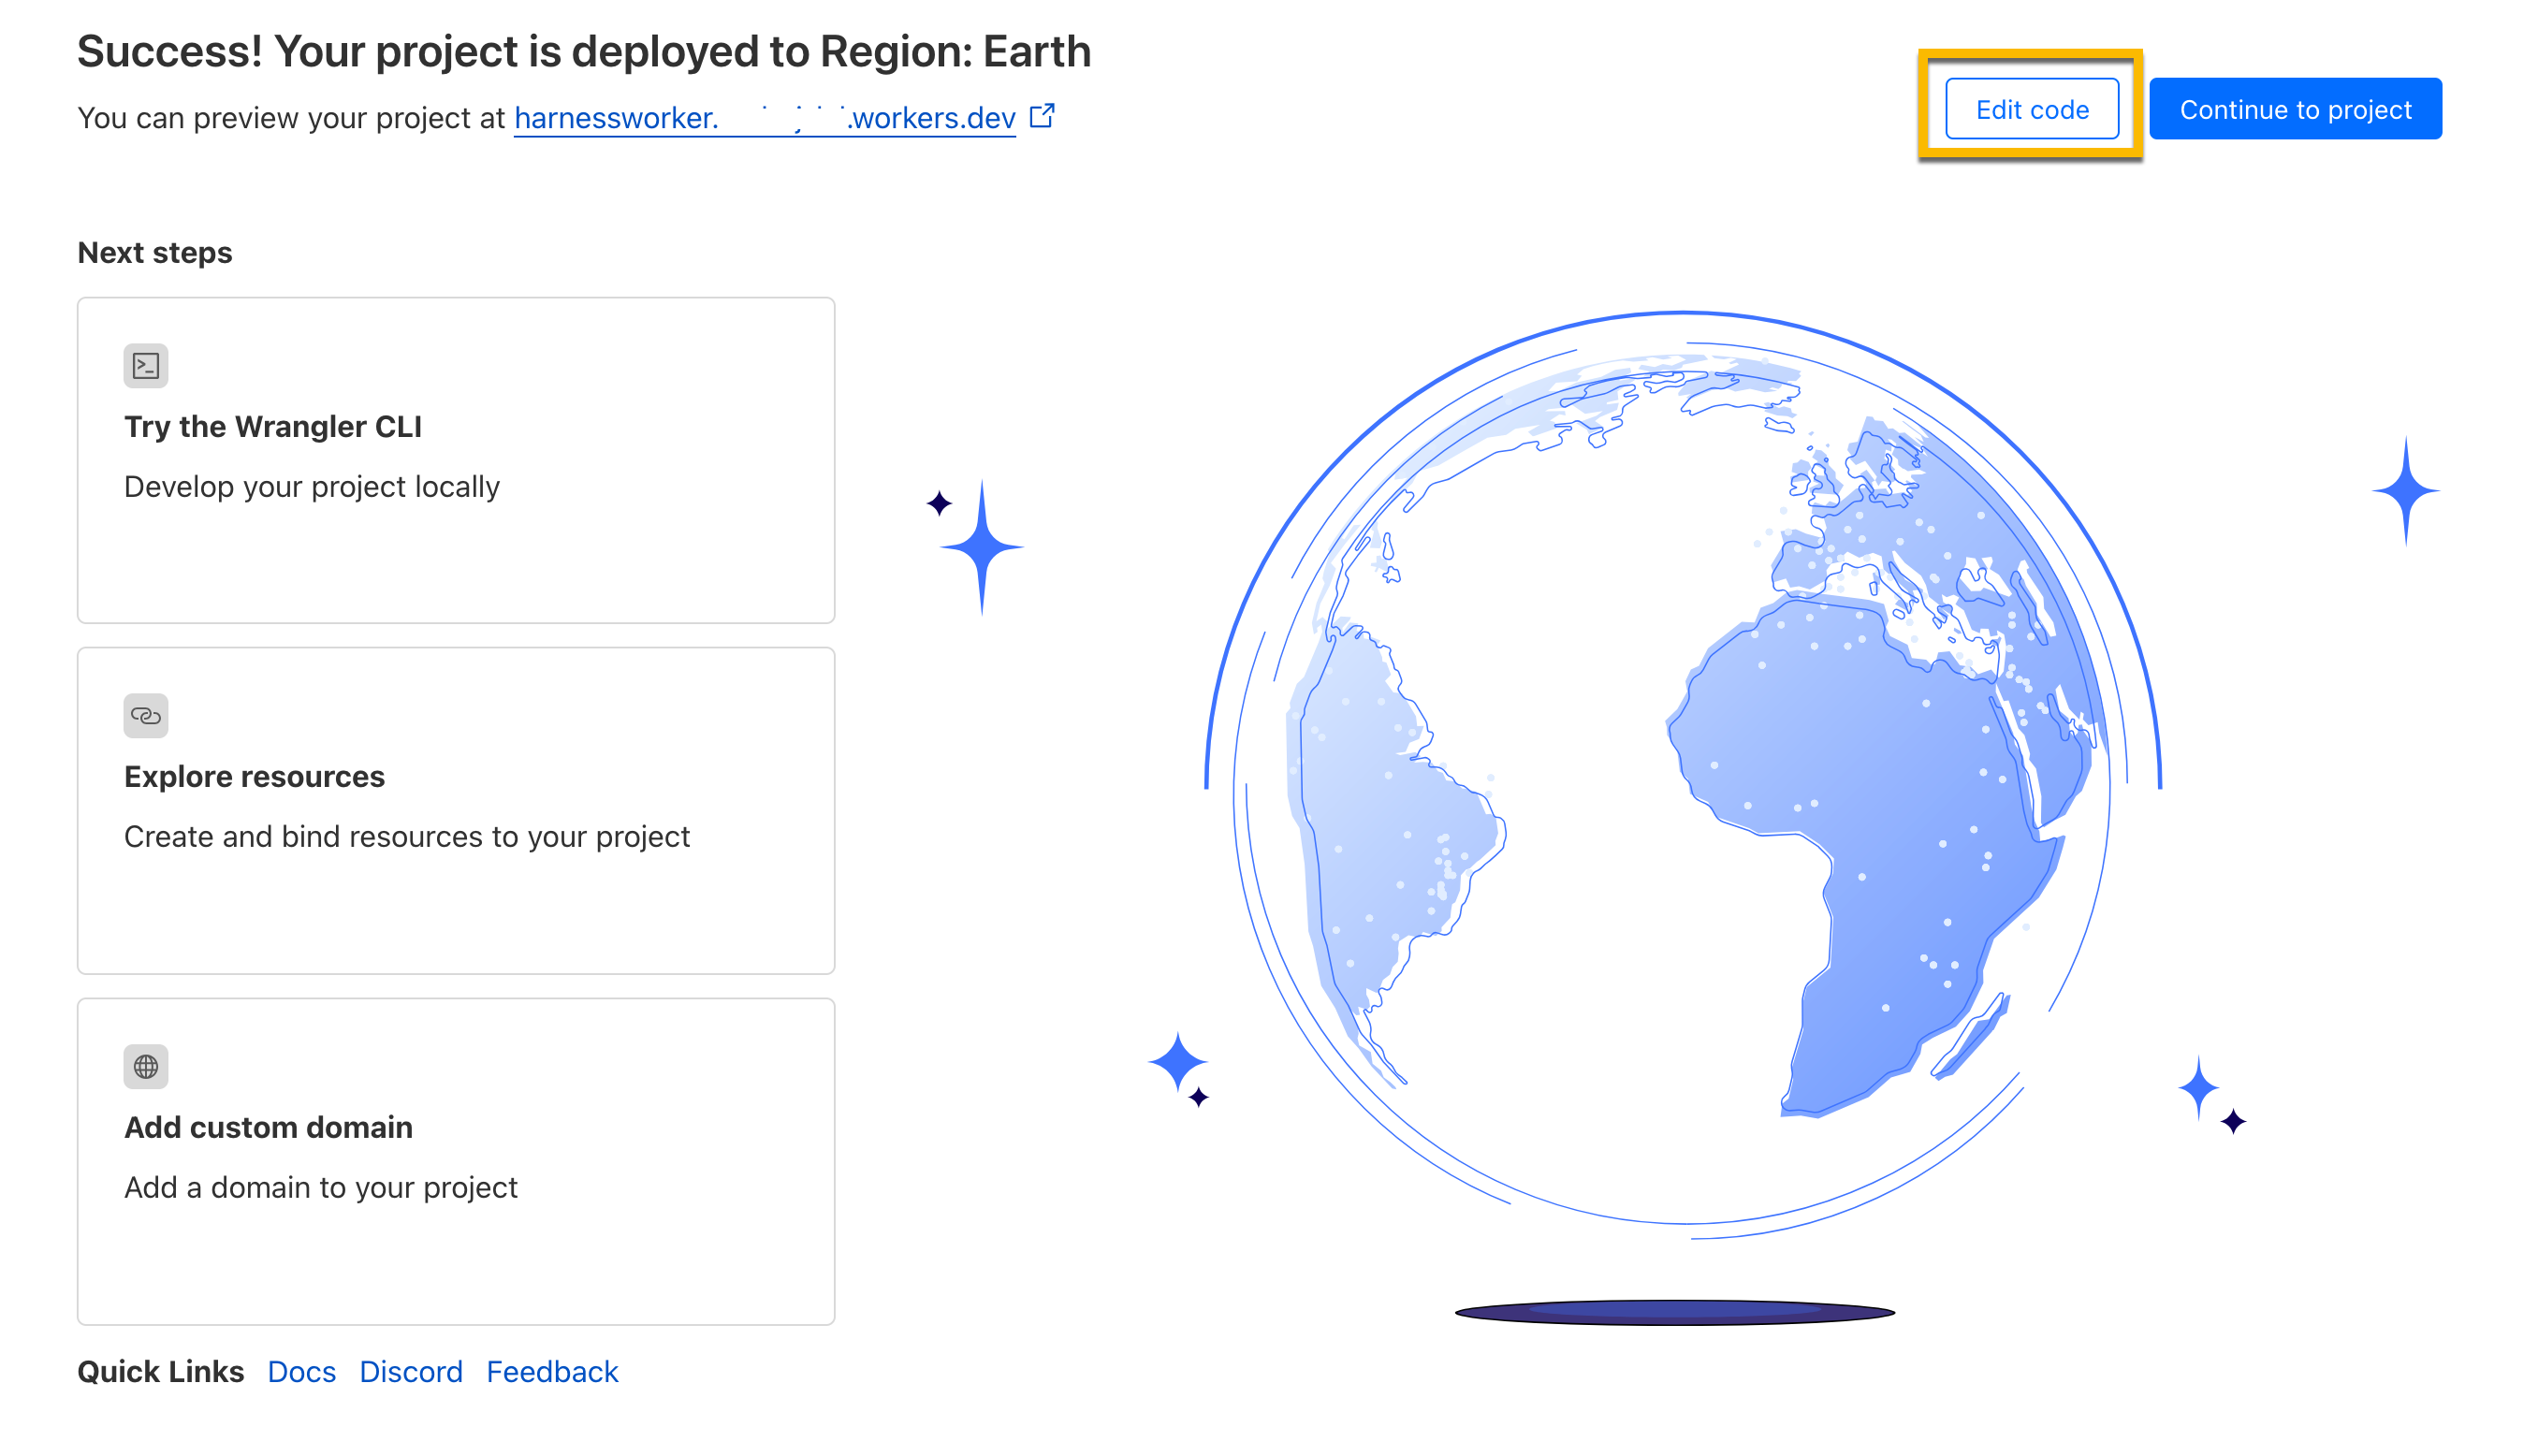
 4. After a successful deployment, click on the **Edit Code** button.
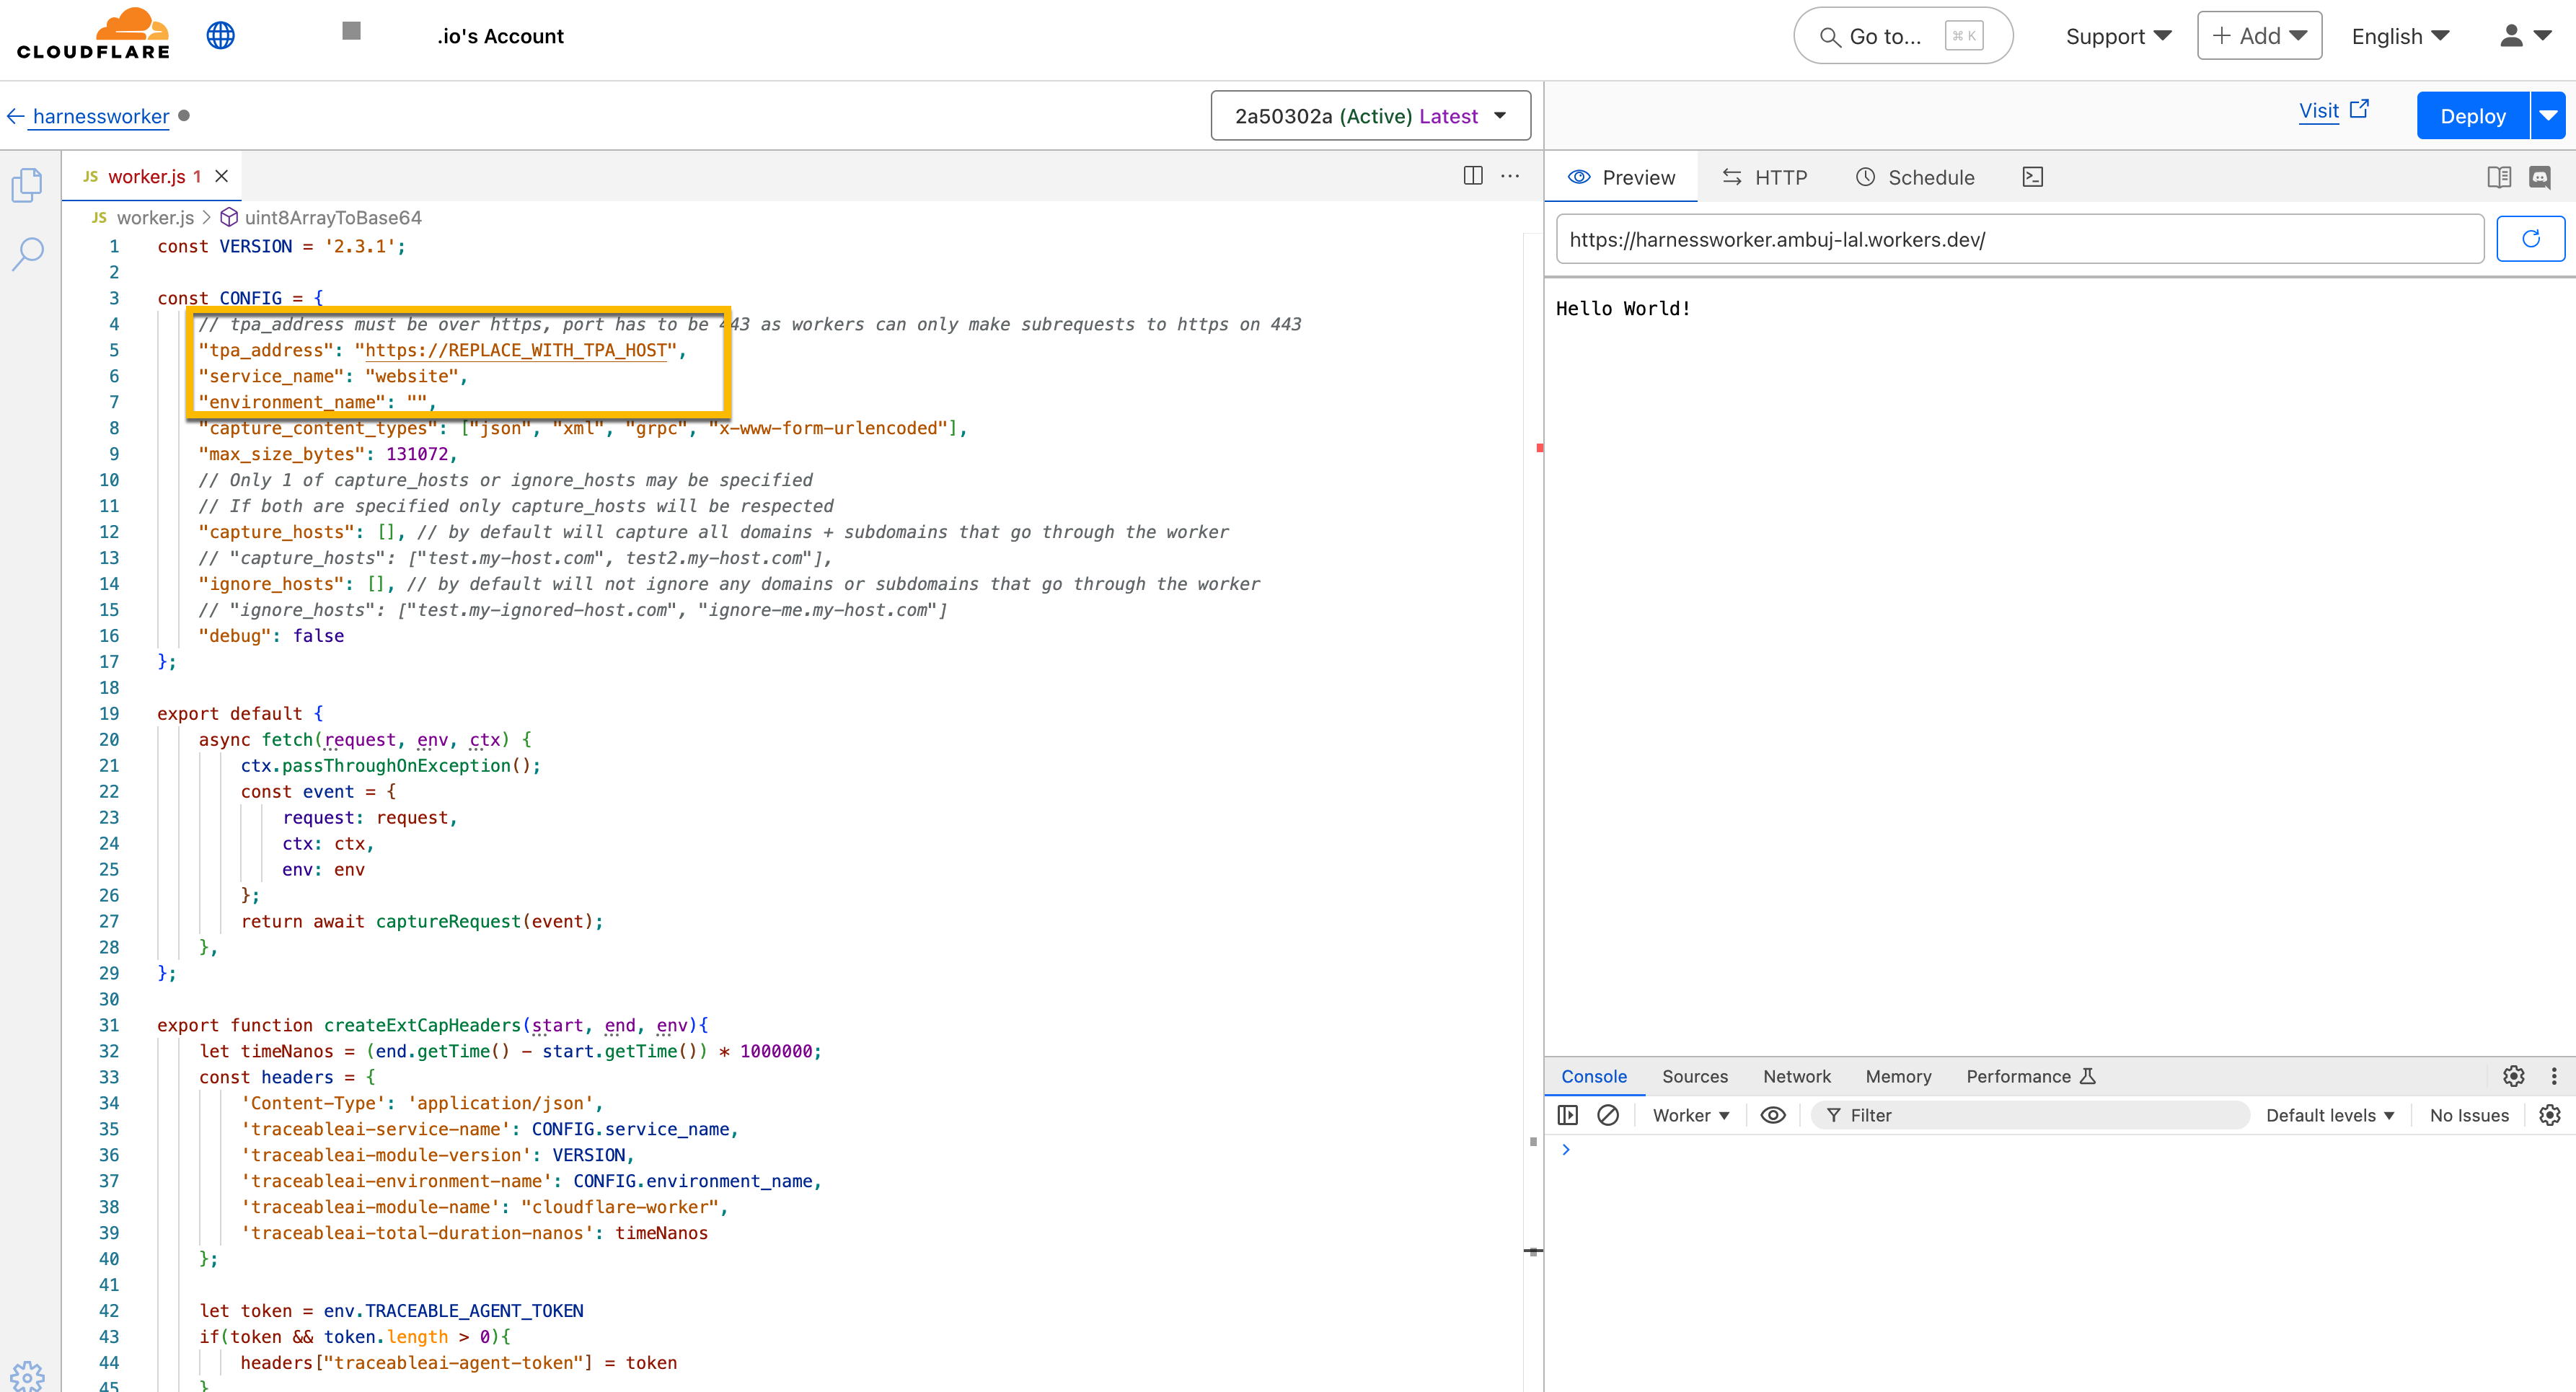
 5. Copy the JavaScript code that you downloaded as part of the **Before you begin** steps and replace the existing JavaScript. Ensure that you configure the Traceable Platform agent as shown below. You can optionally also configure the service name.
 6. Click **Deploy**.
***
### Step 2 – Enable the worker on a website
Complete the following steps to enable the worker on a website:
1. Click on the Website menu and select the Website for which you wish to enable the worker.
2. On the Website Overview page, click on the **Worker Routes** menu.
3. On the **Worker Routes** page, click on **Add Route**. Configure the Route, service, and environment and click on **Save**.
6. Click **Deploy**.
***
### Step 2 – Enable the worker on a website
Complete the following steps to enable the worker on a website:
1. Click on the Website menu and select the Website for which you wish to enable the worker.
2. On the Website Overview page, click on the **Worker Routes** menu.
3. On the **Worker Routes** page, click on **Add Route**. Configure the Route, service, and environment and click on **Save**.
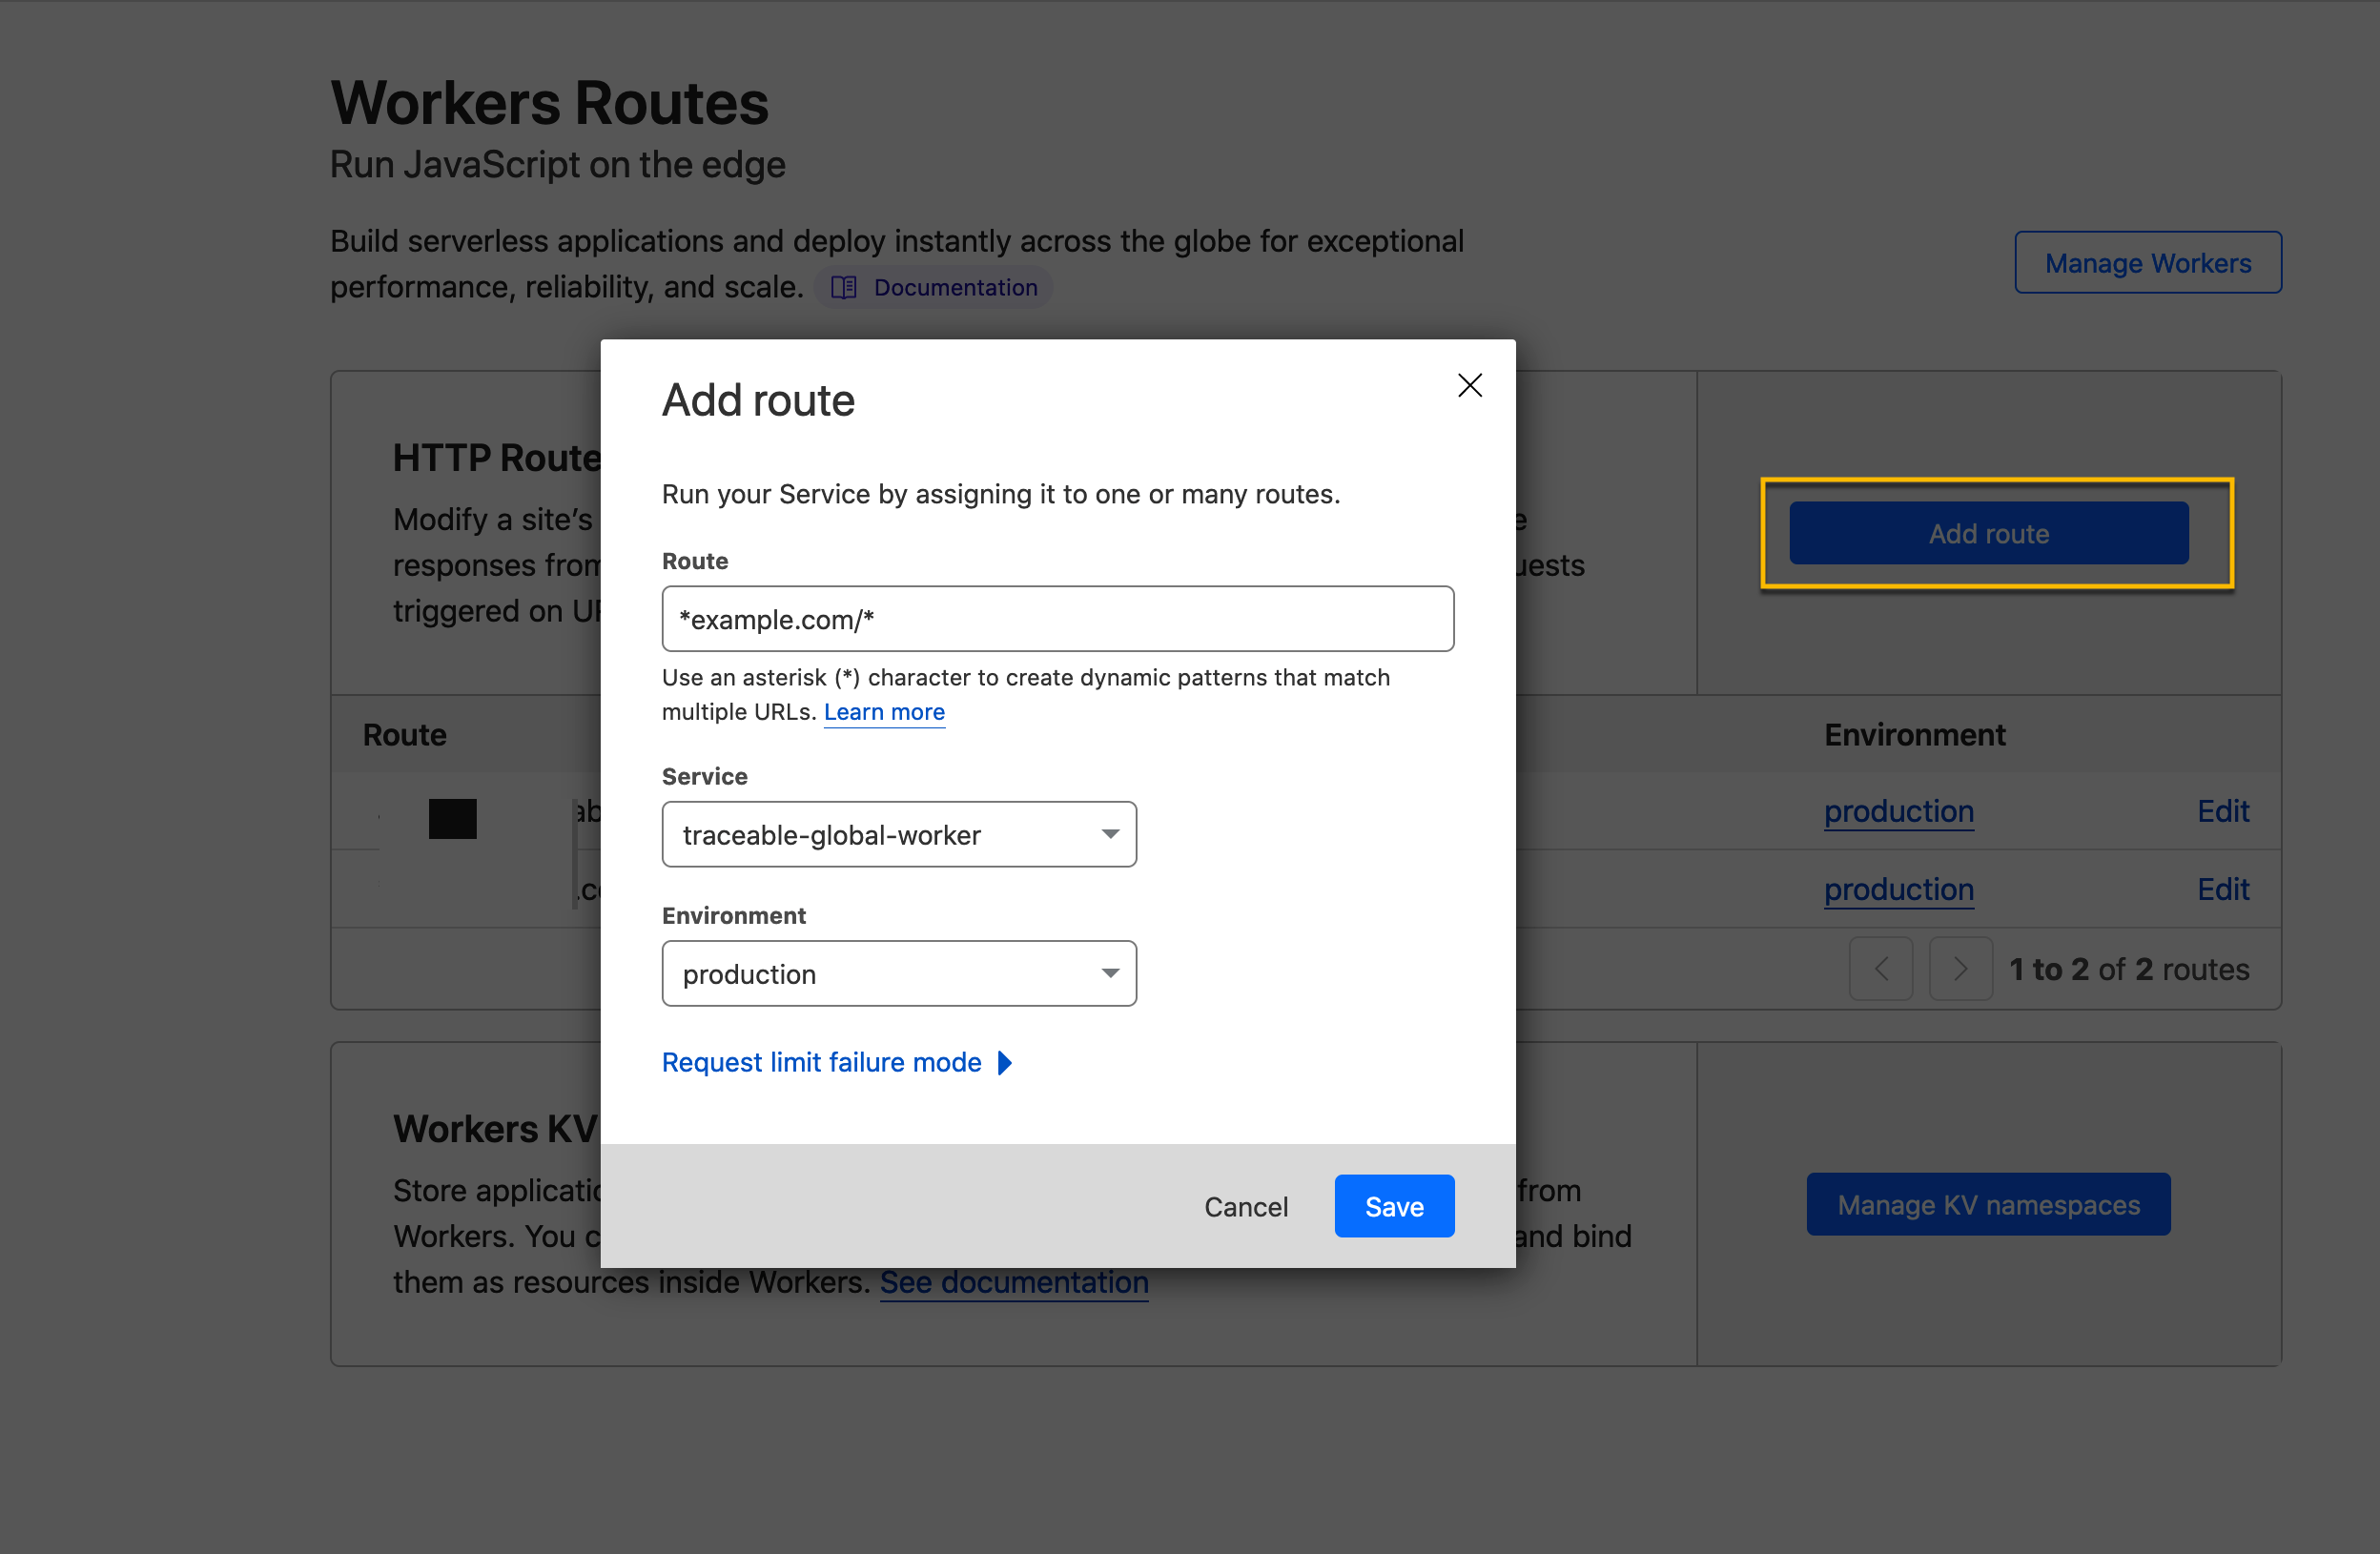 1. If you wish to capture traffic on every subdomain and all the paths of your Website, use \*your-webiste.com/\*
2. If you wish to capture traffic for a specific domain, use [www.your-website.com/\*](https://www.your-website.com/*)
3. If you wish to capture traffic for a subset of paths, you can use [your-website.com/some-path/\*](https://your-website.com/some-path/*)
***
## Verification and troubleshooting
Send traffic through your domain. Log in to the Traceable Platform to view the traffic. Complete the following steps:
1. Navigate to **Catalog → API Endpoints**.
2. Click on the Cloudflare API. On the API details page, click on the **Traces** tab.
3. Click on a trace to expand the trace details.
4. Click on the **Attributes** tab to verify the configuration's success.
If the request and response are not captured, check the Content-Type header. Request and response bodies are captured only if a Content-Type header is present and includes either `json` or `xml` as a substring. You can configure additional types by modifying the `capture_content_types` configuration options of the Worker script mentioned above.
```javascript
INSTALL_OPTIONS = {
"tpa_address": "https://REPLACE_WITH_TPA_HOST",
"enable_debug": false,
"service_name": "website",
"capture_content_types": ["json", "xml", "grpc"]
};
```
***
## Remove routes and service
If you wish to remove routes and services, complete the following steps:
#### Remove routes
1. Navigate to the **Worker Routes** page. Under **HTTP Routes**, click the Edit link for the route you wish to remove.
1. If you wish to capture traffic on every subdomain and all the paths of your Website, use \*your-webiste.com/\*
2. If you wish to capture traffic for a specific domain, use [www.your-website.com/\*](https://www.your-website.com/*)
3. If you wish to capture traffic for a subset of paths, you can use [your-website.com/some-path/\*](https://your-website.com/some-path/*)
***
## Verification and troubleshooting
Send traffic through your domain. Log in to the Traceable Platform to view the traffic. Complete the following steps:
1. Navigate to **Catalog → API Endpoints**.
2. Click on the Cloudflare API. On the API details page, click on the **Traces** tab.
3. Click on a trace to expand the trace details.
4. Click on the **Attributes** tab to verify the configuration's success.
If the request and response are not captured, check the Content-Type header. Request and response bodies are captured only if a Content-Type header is present and includes either `json` or `xml` as a substring. You can configure additional types by modifying the `capture_content_types` configuration options of the Worker script mentioned above.
```javascript
INSTALL_OPTIONS = {
"tpa_address": "https://REPLACE_WITH_TPA_HOST",
"enable_debug": false,
"service_name": "website",
"capture_content_types": ["json", "xml", "grpc"]
};
```
***
## Remove routes and service
If you wish to remove routes and services, complete the following steps:
#### Remove routes
1. Navigate to the **Worker Routes** page. Under **HTTP Routes**, click the Edit link for the route you wish to remove.
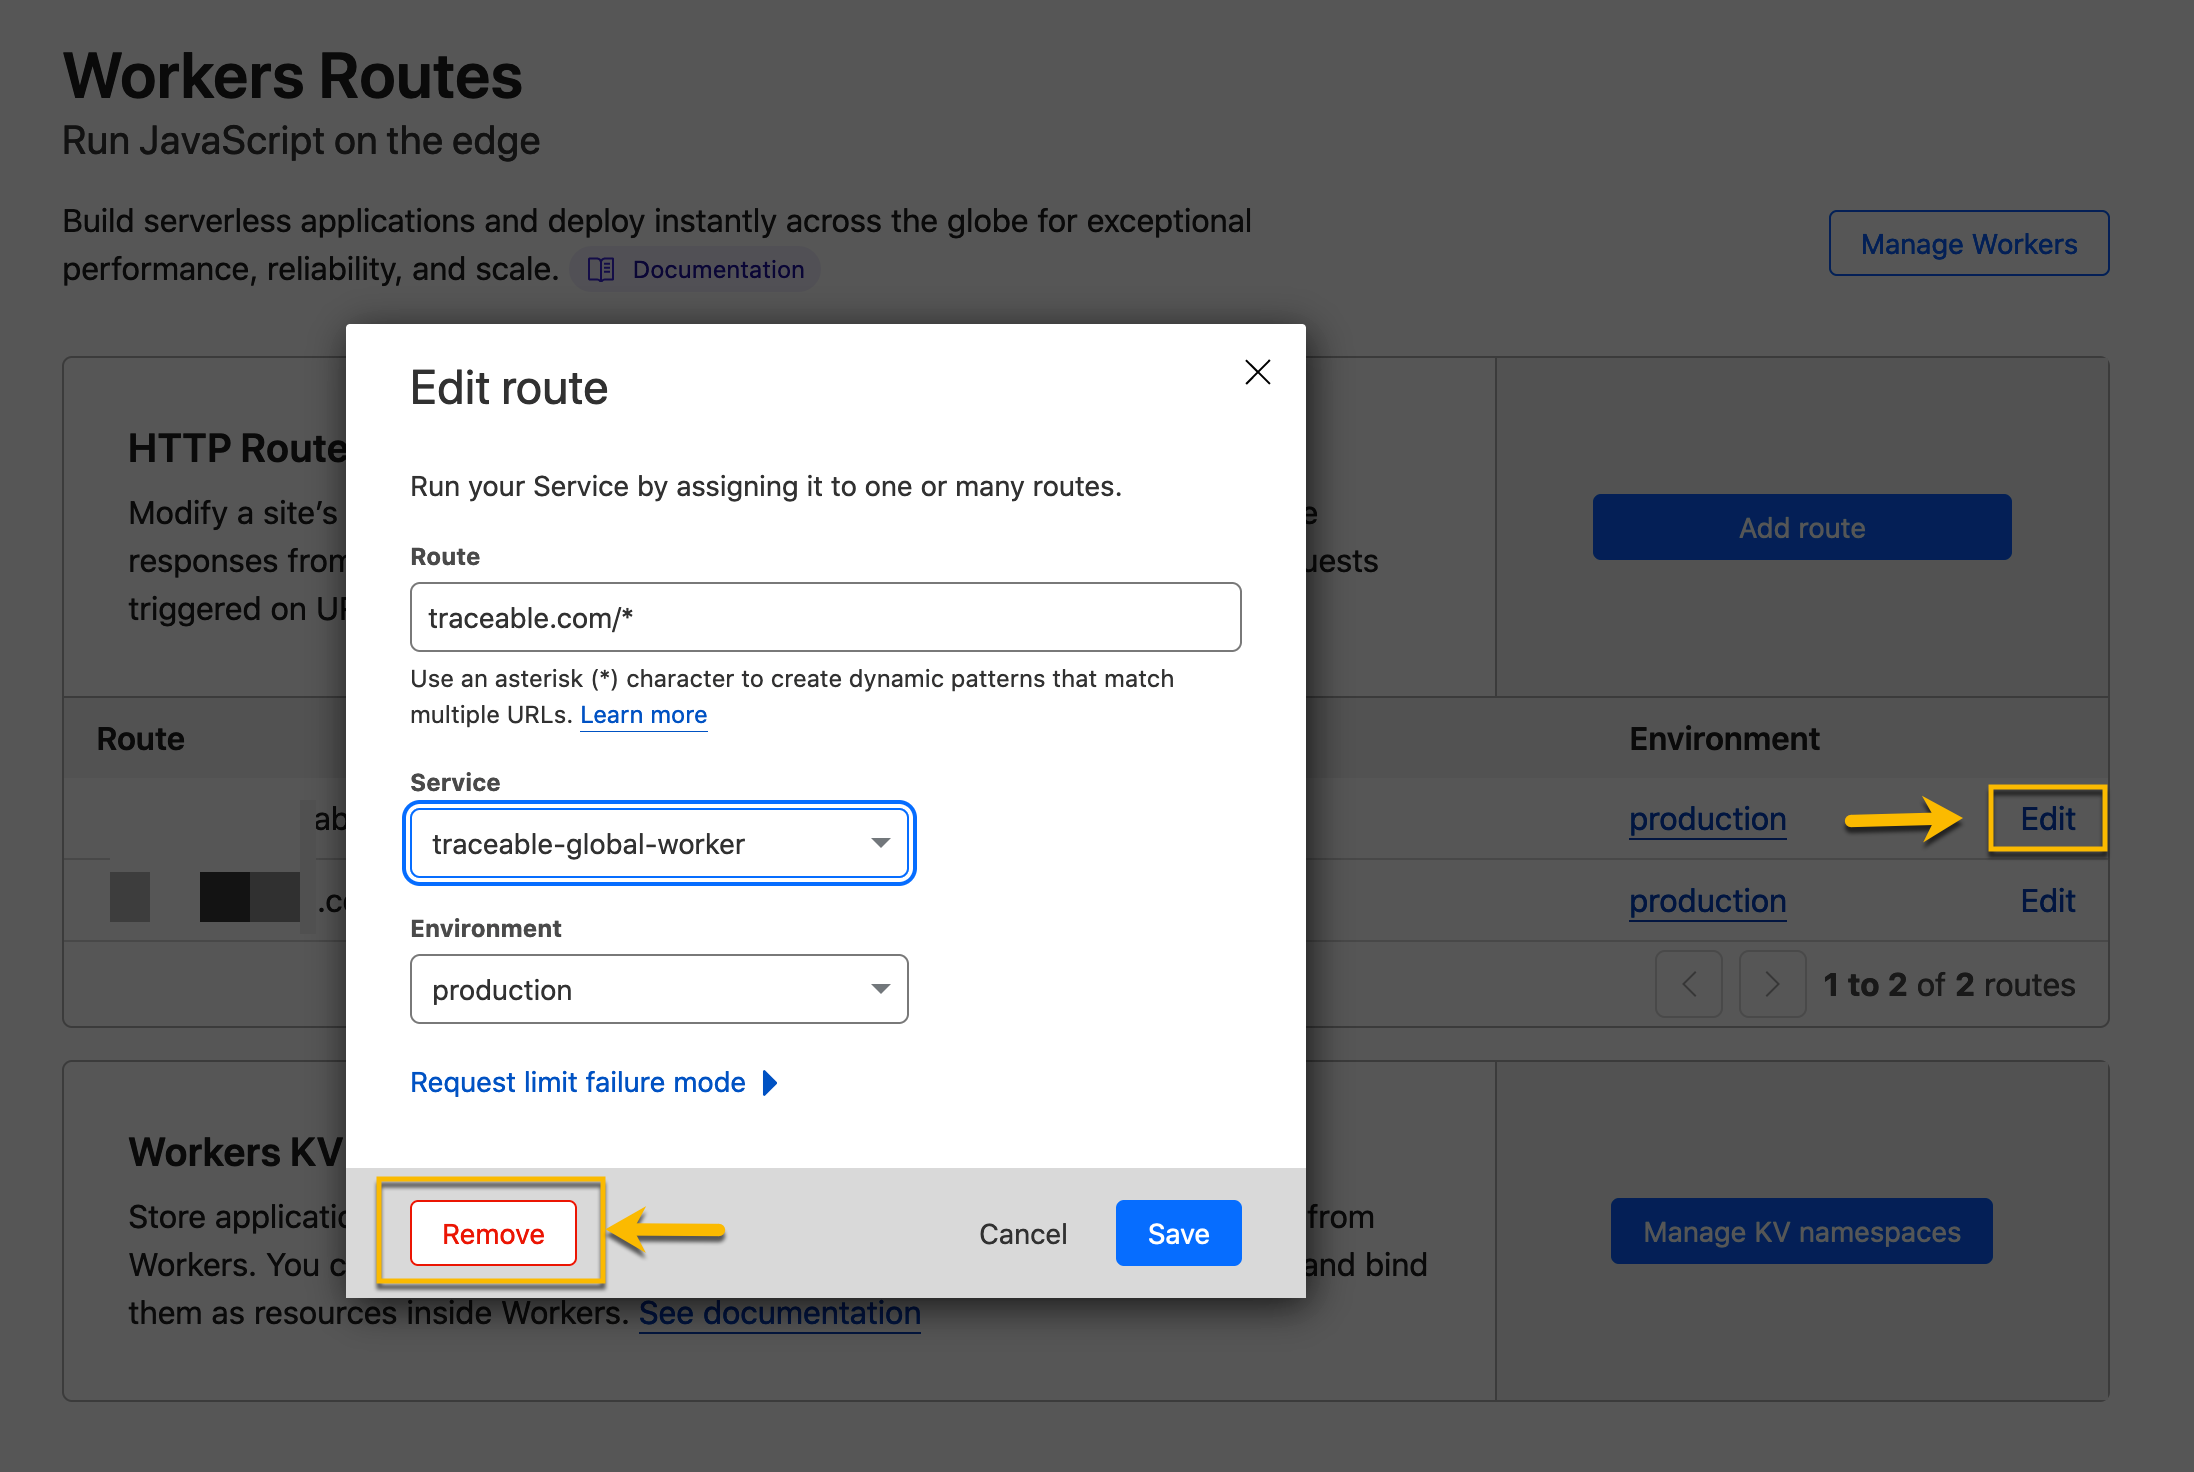 2. Select the service and environment and click on **Remove**.
#### Remove a service
1. Navigate to Cloudflare Dashboard and click on **Workers**.
2. On the **Workers** page, select the service that you wish to remove.
3. On the service page, click on the **Manage Service** button.
4. On the manage settings page, click **Delete** under the Delete Service section.
{% @harness-feedback/feedback %}
2. Select the service and environment and click on **Remove**.
#### Remove a service
1. Navigate to Cloudflare Dashboard and click on **Workers**.
2. On the **Workers** page, select the service that you wish to remove.
3. On the service page, click on the **Manage Service** button.
4. On the manage settings page, click **Delete** under the Delete Service section.
{% @harness-feedback/feedback %}