Artifact Management
All artifact operations start with the Setup Client page found inside your registry at the top right.

Login to your registry
- Click Setup Client.
- Copy the login command shown.
- Then, open a terminal window and paste the command.
- When prompted, enter the login information given in the Setup Client tab.
- If prompted for a password, click Generate Token in the Setup Client tab. Use this token as your password.

Pull an artifact
- Open the Setup Client tab in your registry.
- Scroll to the bottom and find the Pull section.
- Copy the pull command. It should look something like this:
- Run the command in terminal but replace
<IMAGE_NAME>and<TAG>with the name and tag of the image you want to pull.
This first attempts to pull the image from your registry and then any upstream proxies if they exist.
If you have multiple upstream proxies, the image will be pulled from the top most proxy that has the image in the list.
Push an artifact
- Open the Setup Client tab in your registry.
- Find the Push section.
- Copy the push command. You will need to replace anything with brackets (
<>) with the relevant artifact information. For example, replace<TAG>with the artifact version or tag that you want. - Run the command in terminal.
Now, you should see the artifact appear in your registry as well as the Artifacts tab in the left navigation panel.
Quarantine an artifact
This feature is currently behind the feature flag HAR_ARTIFACT_QUARANTINE_ENABLED. Contact Harness Support to enable this feature.
You can quarantine an artifact to prevent it from being used in your pipelines and block it from being pulled or downloaded by other users.
To quarantine an artifact:
- Navigate to the Artifacts tab in the left navigation panel.

- Select the artifact you want to quarantine.
- Click the 3-dot menu next to the artifact name.
- Select Quarantine.
You will be prompted to provide a reason for quarantining the artifact. Enter your reason and click Quarantine to confirm.
you can remove a quarantined artifact by selecting the artifact and clicking Remove from Quarantine.
Download an artifact
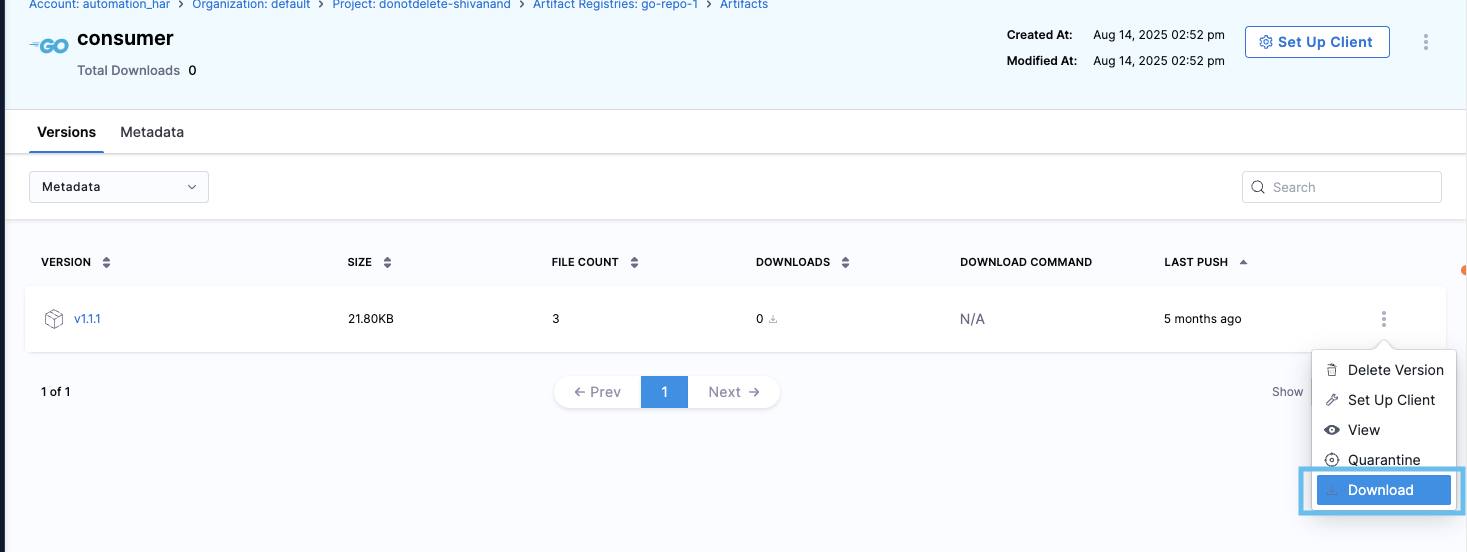
You can download artifacts directly from the Harness Artifact Registry UI. Navigate to the desired level (registry, artifact, or version), click the options menu (⋮), and select Download.

The system prepares your download and displays a status indicator at the bottom center of the page. Once ready, a green checkmark appears with a Download button to save the compressed archive locally.
Download levels:
- Package level - Downloads all versions of a specific package (non-OCI packages only)
- Version level - Downloads a specific version only
- Individual files - In the Artifact Details tab under Files, click any file to download it directly (no preparation needed)
- Package type support: Download is available for non-OCI package types only (Maven, npm, PyPI, Generic, etc.). OCI images (Docker) should be pulled using standard container tools.
- Stay on the page: Do not navigate to another tab or close the browser while the download is being prepared, as this will interrupt the process.
- Download availability: Once ready, downloads remain available for 24 hours or until you close the notification.
See Also
For a more in depth guide on how to pull and push docker artifacts, go to the Quickstart Guide