Create an AutoStopping proxy for GCP
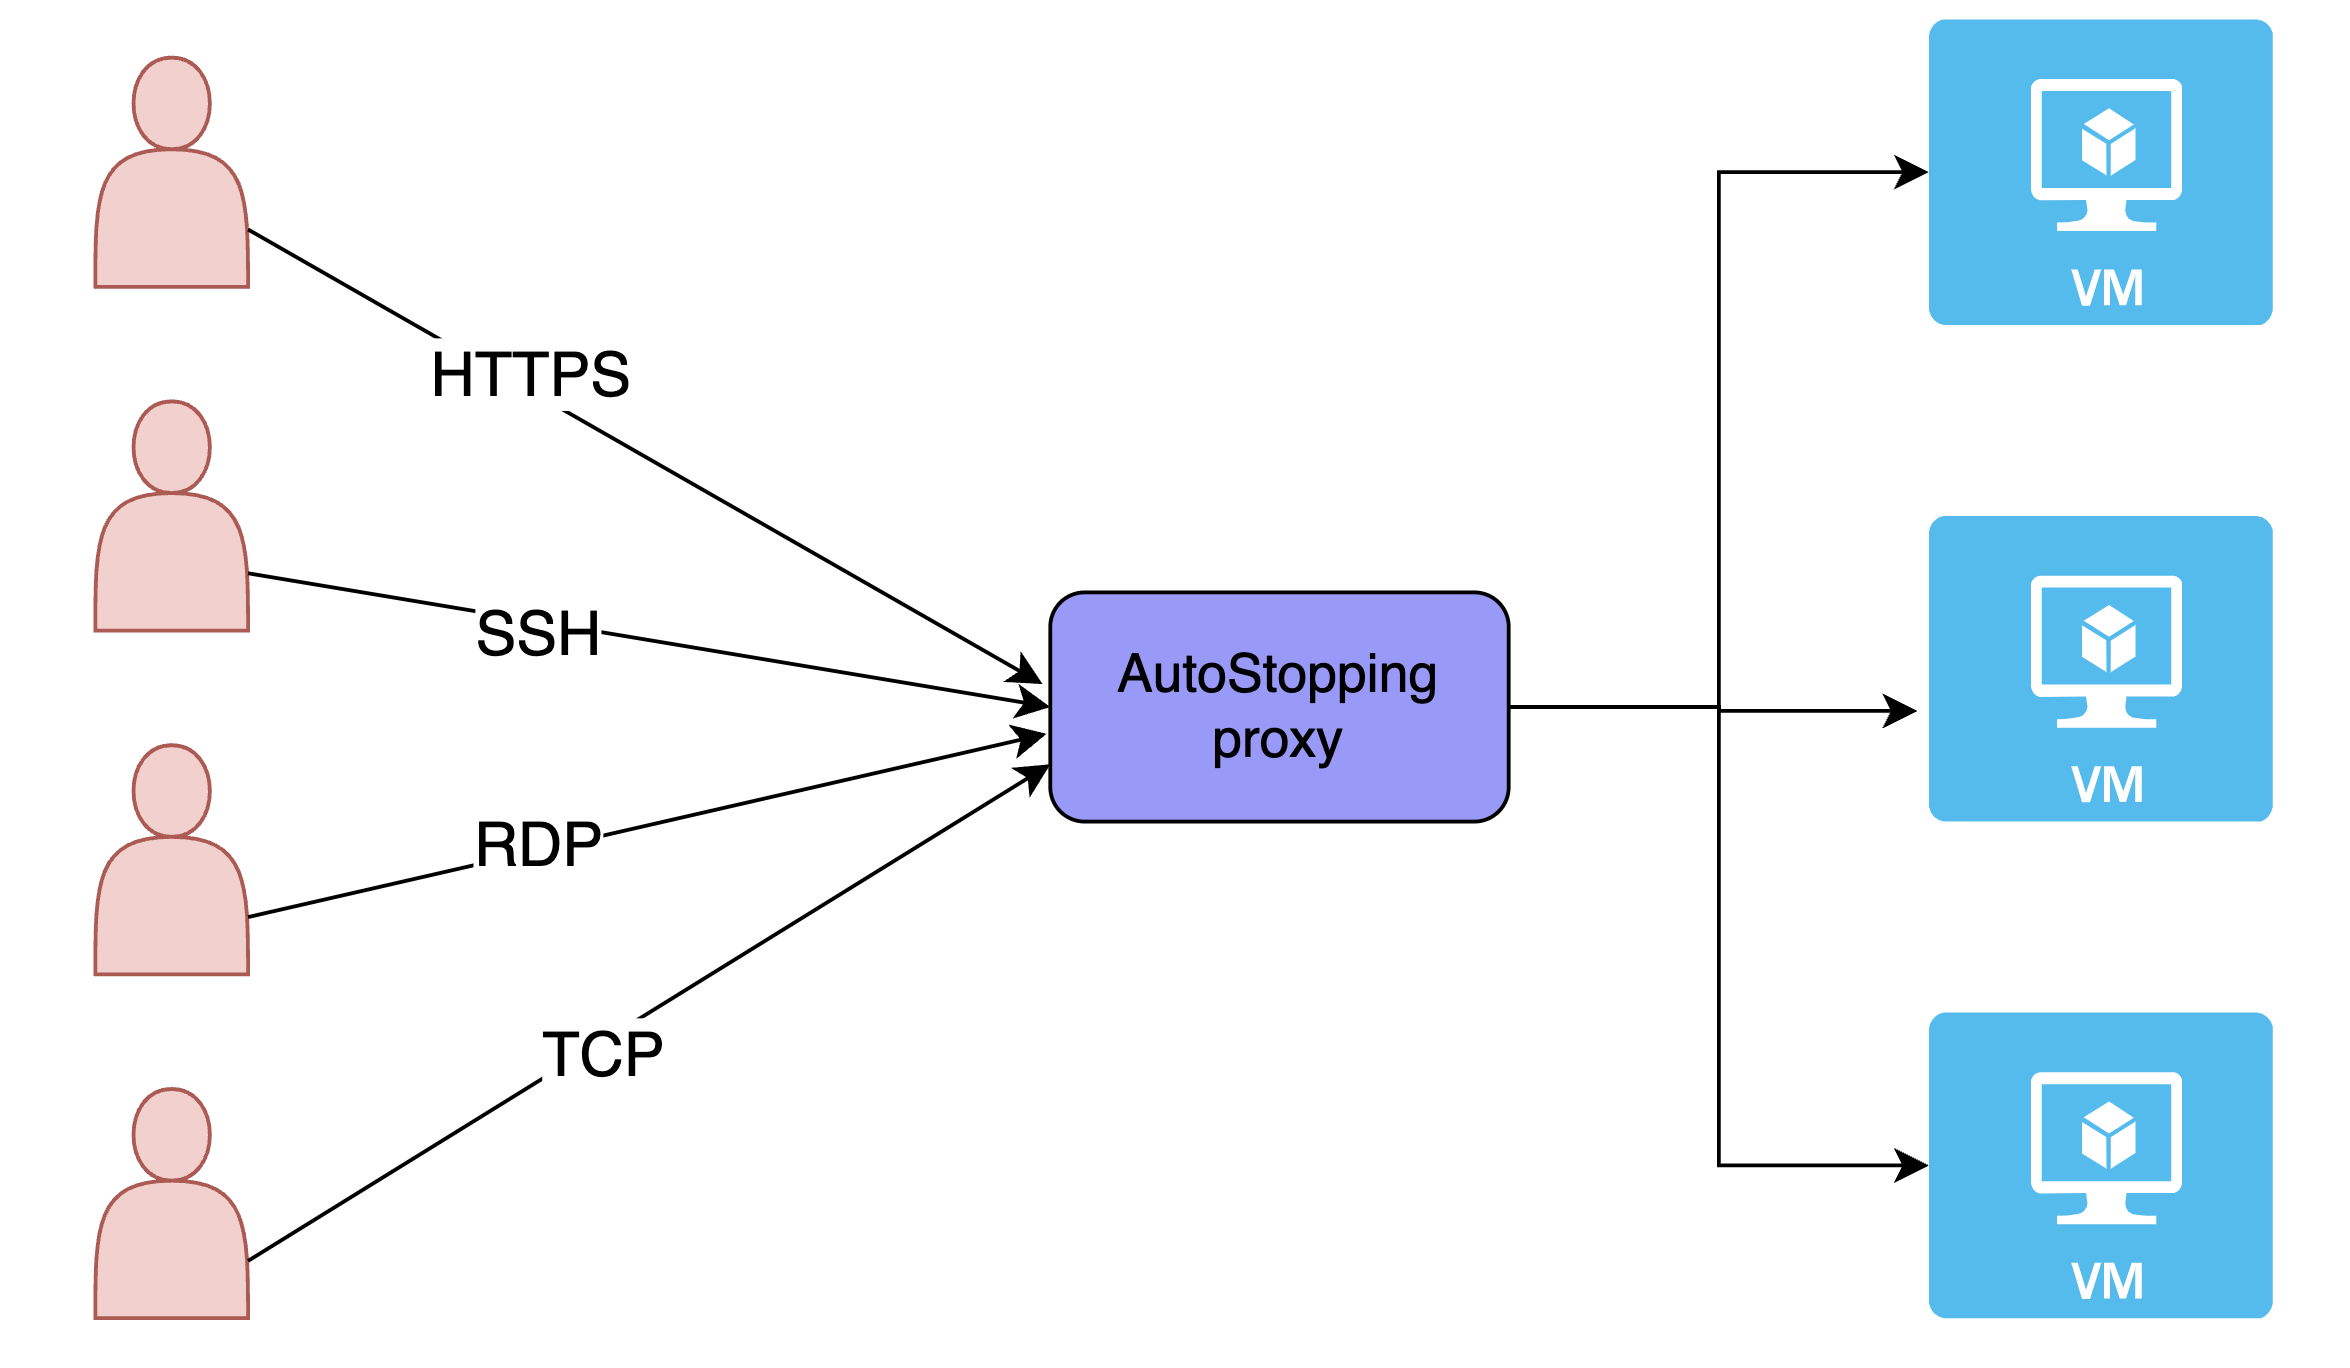
AutoStopping is a solution that is well-suited for use with native load-balancing options like AWS ALB. However, there are certain use cases, such as SSH/RDP/RDS connections, that cannot be addressed by native load balancer integrations for AutoStopping.
To address these use cases, AutoStopping offers a reverse proxy called the AutoStopping proxy. This proxy sits in front of the virtual machines (VMs) and manages the start and stop of the VMs based on network traffic. The proxy is capable of supporting both HTTP(S) and TCP connections.
For HTTP(S) traffic, the AutoStopping proxy provides Layer-7 load balancing and request routing capabilities, as well as SSL support. For all other TCP traffic, the proxy provides a dynamically generated ephemeral port-based configuration.
The AutoStopping proxy runs in a VM and uses the Envoy proxy, an open-source solution that has been thoroughly tested. One proxy VM can handle traffic to multiple AutoStopping-controlled VMs.
Perform the following steps to create an AutoStopping proxy for your resources in GCP:
-
In Harness, go to the Cloud Costs module.
-
Under Setup, click Load Balancers.
-
Click Create New Load Balancer.
-
Select GCP.
-
Choose an existing connector or create a new one.
-
Click Create AutoStopping Proxy.
-
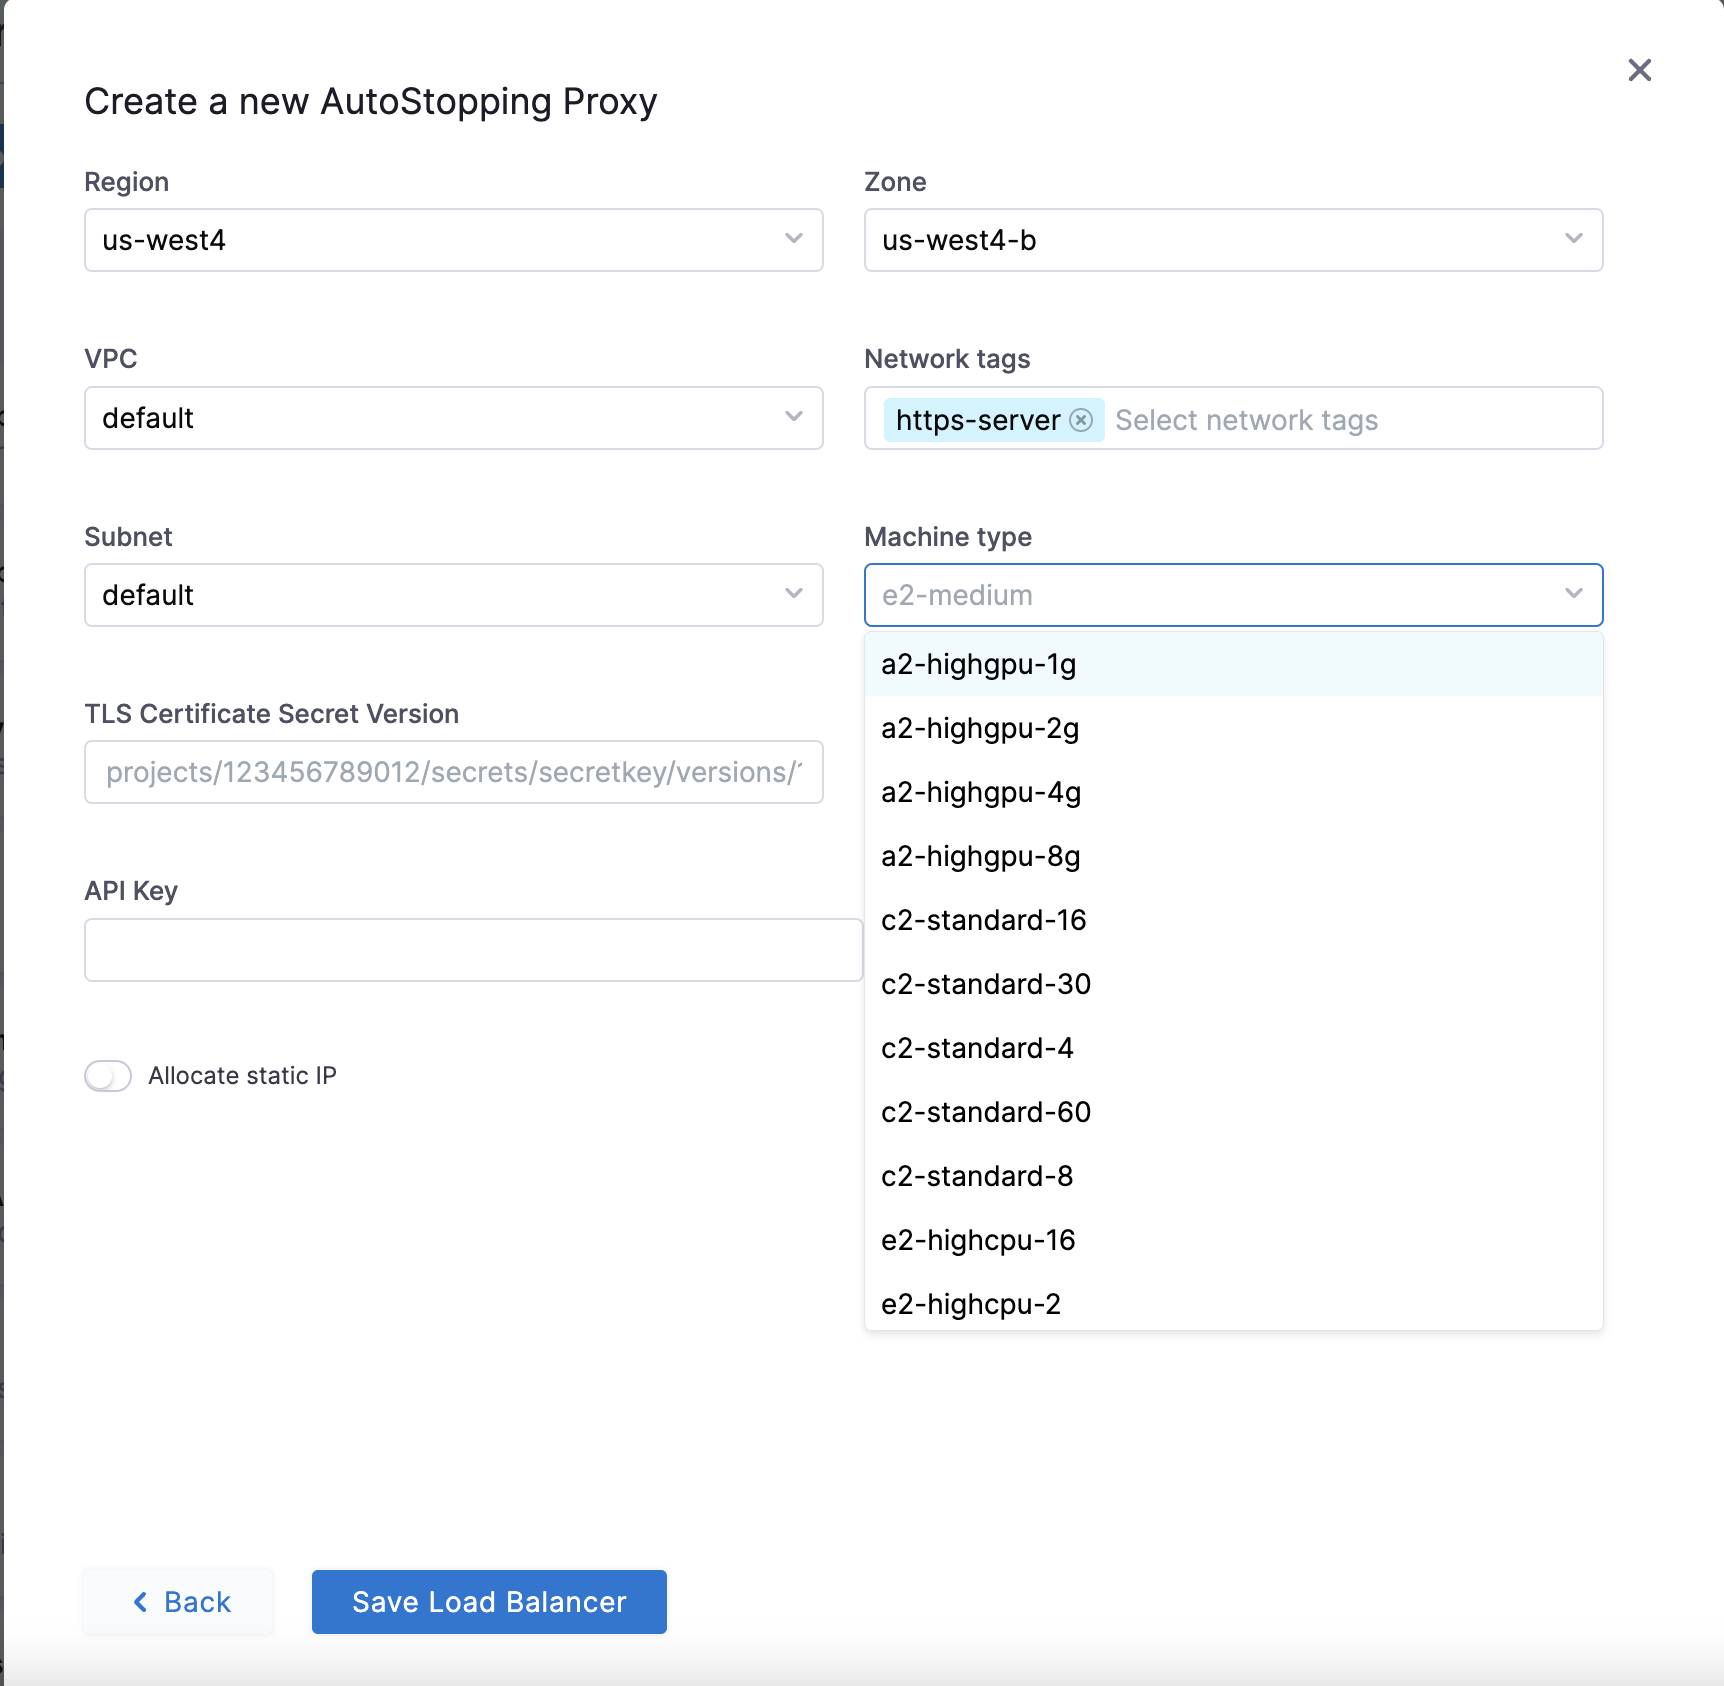
In the Create a new AutoStopping Proxy window, enter the following information:
- Provide a name for the AutoStopping Proxy.
- Enter the URL to specify the domain. Make sure that you have updated the DNS mapping in your DNS provider.
- Click Continue.
-
Region: Select the region where you have your cloud resources hosted.
-
Zone: Select the zone from the dropdown list.
-
Select the VPC and Subnet to which the resource belongs.
-
Select the Network tags to enable ports on the proxy VM which would be receiving traffic or the one that would be used to access the proxy.
-
Select the Virtual Network.
-
In the Machine type dropdown list, select the instance type.
-
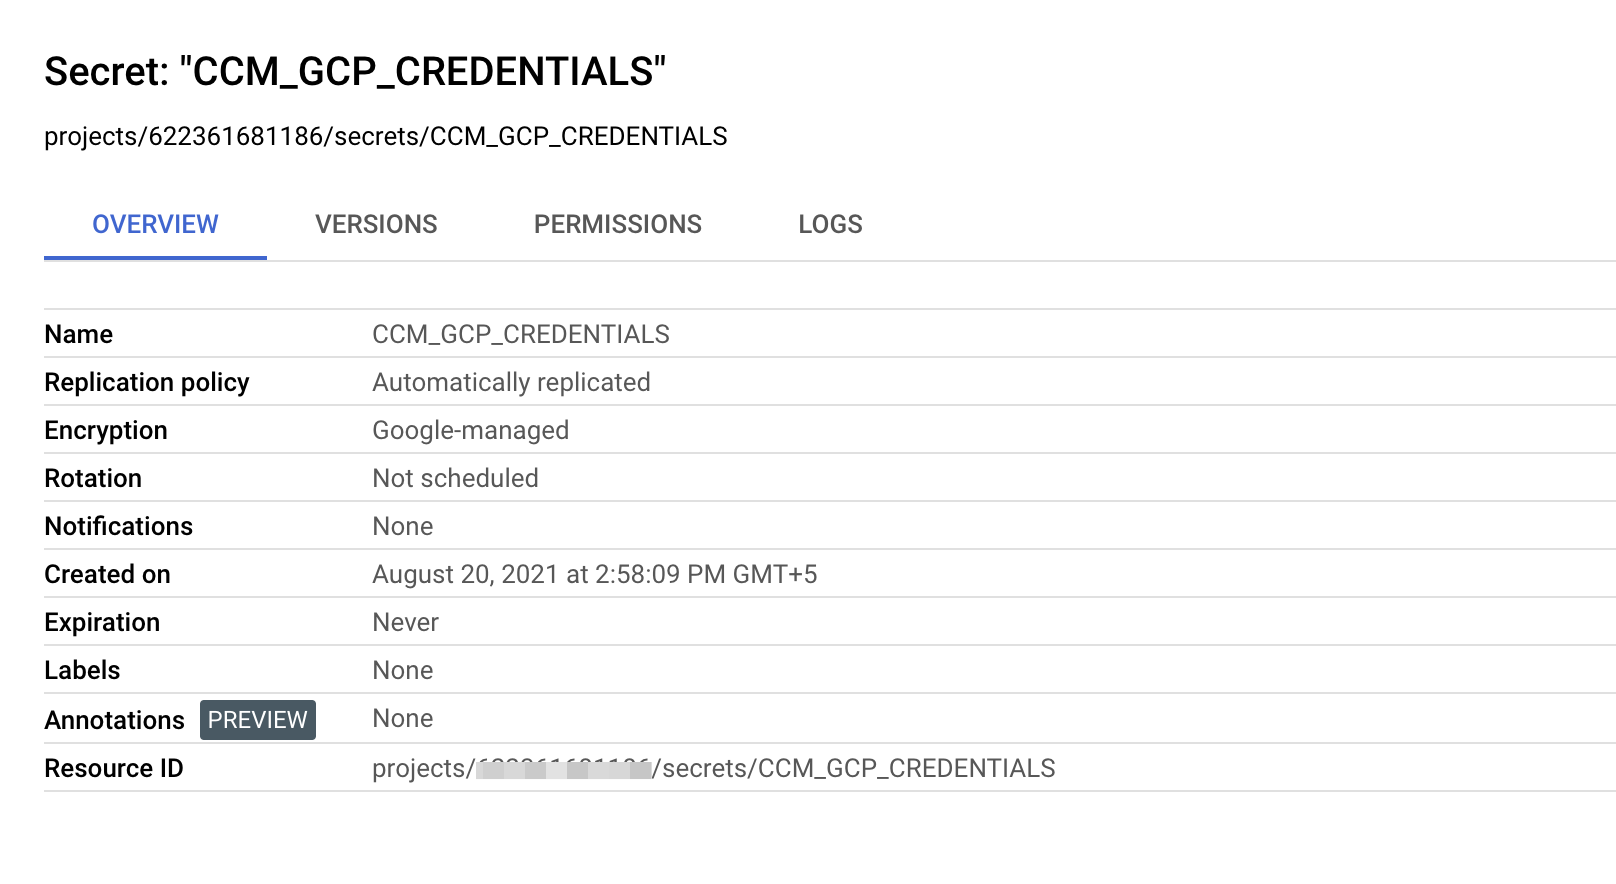
TLS Certificate Secret Version: Create a secret in your GCP account. Go to Create a secret. Enter the Resource ID displayed in the Overview tab.
Ensure that the file uploaded in the Secret value field is not encrypted or encoded. It must be a plaintext certificate.
-
TLS Private Key Secret Version: Create another secret for private key and enter the resource ID in this field.
-
API Key: Enter a valid NG API key. Choose No Expiration in the Expiration dropdown list while creating this API key. Go to Create an API Key for more information.
-
Enable Allocate Static IP if you need to assign an elastic IP address to make the VM publicly accessible. Update the DNS route to point to the public IP. You don't need to enable this field it is pointing to a private IP provided the DNS resolves. For example, when the DNS resolution is done within the VPC.
-
Click Save Load Balancer.