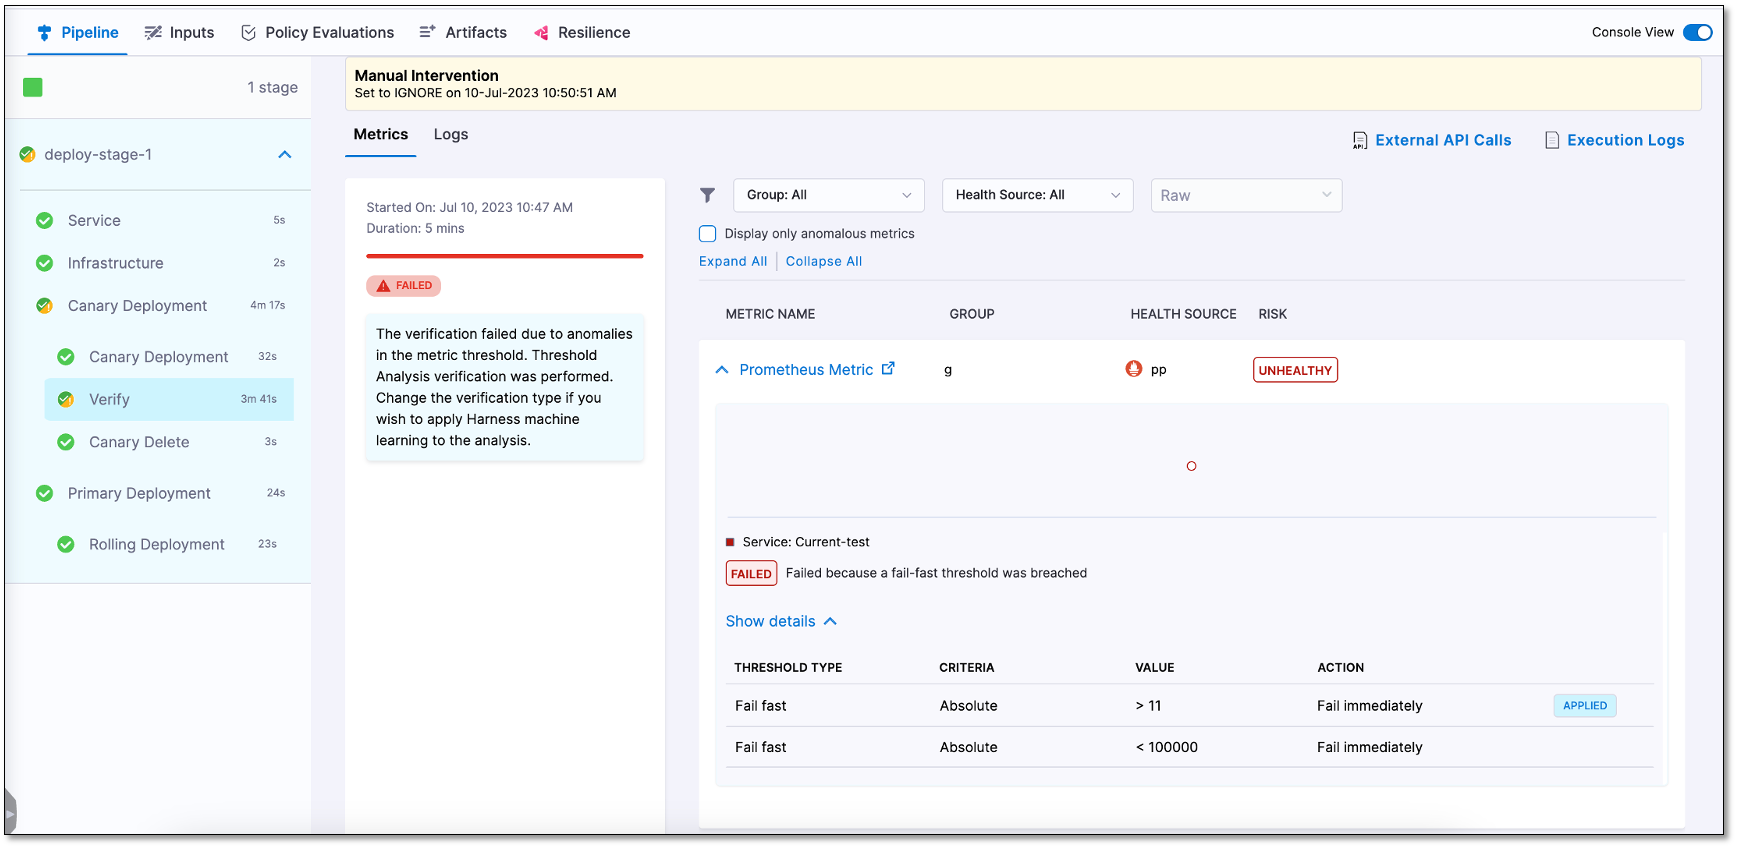
Configure Threshold-Based Verification
Currently, this feature is behind the feature flag SRM_ENABLE_SIMPLE_VERIFICATION. Contact Harness Support to enable the feature.
This topic outlines the process of adding a Verify step into a Harness CD pipeline, configuring a health source, and conducting deployment verification using threshold analysis (no ML).
For illustration purposes, this topic uses SumoLogic as a sample health source to guide you through the health source configuration steps.
Prerequisites
Make sure that you have created:
-
A connector for your health source in Harness. To learn how to add a connector, go to Connect to monitoring and logging systems.
-
A CD deployment pipeline in Harness. To learn how to create a CD pipeline, go to Create your first CD pipeline.
Add a Verify step to your CD pipeline
To add a Verify step to your pipeline, use one of the methods below.
-
In your Harness project, go to the Deployments module > Pipelines.
-
Select the pipeline to which you want to add the Verify step. The Pipeline Studio page appears.
-
Select the stage where you want to add the Verify step.
-
On the stage settings pane, select the Execution tab.
-
On the pipeline, hover over where you want to add the Verify step, select the + icon, and then choose Add Step.
The Step Library page appears. You can add a step at various points in the pipeline, such as the beginning, end, in between existing steps, or below an existing step. Simply choose the location where you want to add the step and follow the prompts to add it. -
In the Continuous Verification section, select Verify.
The Verify settings page appears.
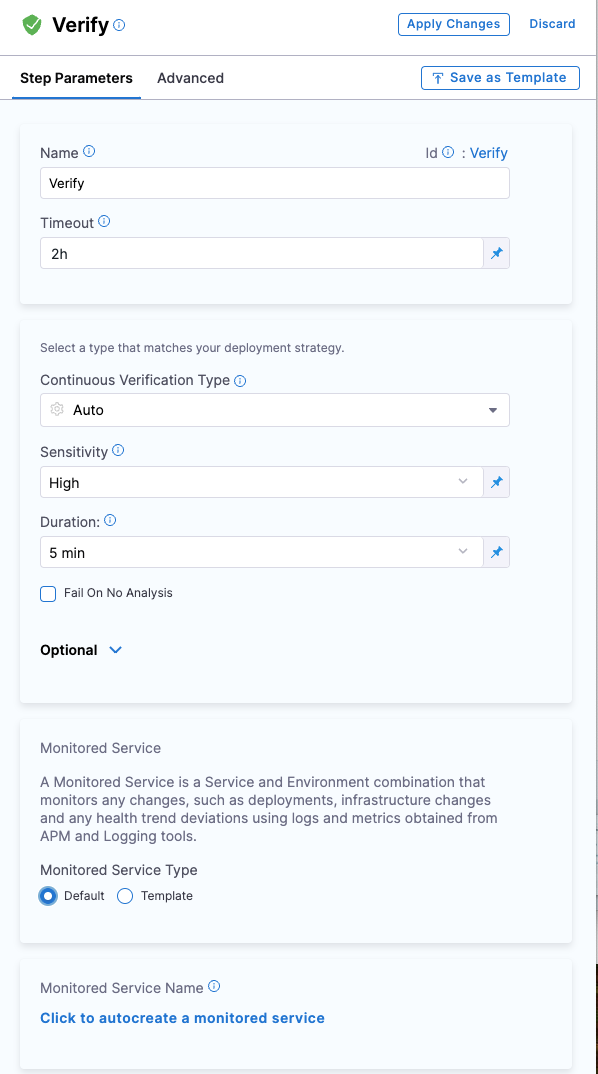
Define name and timeout information
On the Verify settings page, do the following:
-
In Name, enter a name for the Verification step.
-
In Timeout, enter a timeout value for the step. Harness uses this information to time out the verification. Use the following syntax to define a timeout:
- w for weeks.
- d for days.
- h for hours.
- m for minutes.
- s for seconds.
- ms for milliseconds.
For example, use 1w for one week, 7d for 7 days, 24h for 24 hours, 100m for 100 minutes, 500s for 500 seconds, and 1000ms for 1000 milliseconds.
The maximum timeout value you can set is 53w. You can also set timeouts at the pipeline level.
Select the continuous verification type and duration
On the Verify settings page, do the following:
-
In Continuous Verification Type, select Threshold Analysis [No ML].
-
In Duration, choose a duration. Harness uses the data points within this duration for analysis. For instance, if you select 15 minutes, Harness analyzes the first 15 minutes of your health source data.
-
In the Artifact Tag field, reference the primary artifact that you added in the Artifacts section of the Service tab. Use the Harness expression
<+serviceConfig.artifacts.primary.tag>to reference the primary artifact. To learn about artifact expression, go to Harness expressions.
Create a monitored service
The next step is to create a monitored service for the Verify step. Continuous Verification uses a monitored service to monitor health trend deviations using logs and metrics obtained from your SumoLogic health source.
When setting up the pipeline, if you've configured a service or an environment as runtime values, the auto-create option for monitored services won't be available. When you run the pipeline, Harness combines the service and environment values to create a monitored service. If a monitored service with the same name already exists in your project, it will be assigned to the pipeline. If not, Harness skips the verification step.
For instance, when you run the pipeline, if you input the service as todolist and the environment as dev, Harness creates a monitored service with the name todolist_dev. If a monitored service with that name exists, Harness assigns it to the pipeline. If not, Harness skips the Verification step.
To create a monitored service, on the Verify settings page, do the following:
-
In the Monitored Service Name section, select Click to autocreate a monitored service.
Harness automatically generates a monitored service name by combining the service and environment names. The generated name appears in the Monitored Service Name field. Note that you cannot edit the monitored service name.
If a monitored service with the same name and environment already exists, the Click to autocreate a monitored service option is hidden, and Harness assigns the existing monitored service to the Verify step.
Add a health source
A health source is an APM tool that monitors and aggregates data in your deployment environment.
The following steps describe how to add SumoLogic as a health source and write a query for memory usage.
Define health source
On the Verify settings page, do the following to add and define the health source:
-
In the Health Sources section of the Verify settings page, select + Add New Health Source.
The Add New Health Source dialog appears.
-
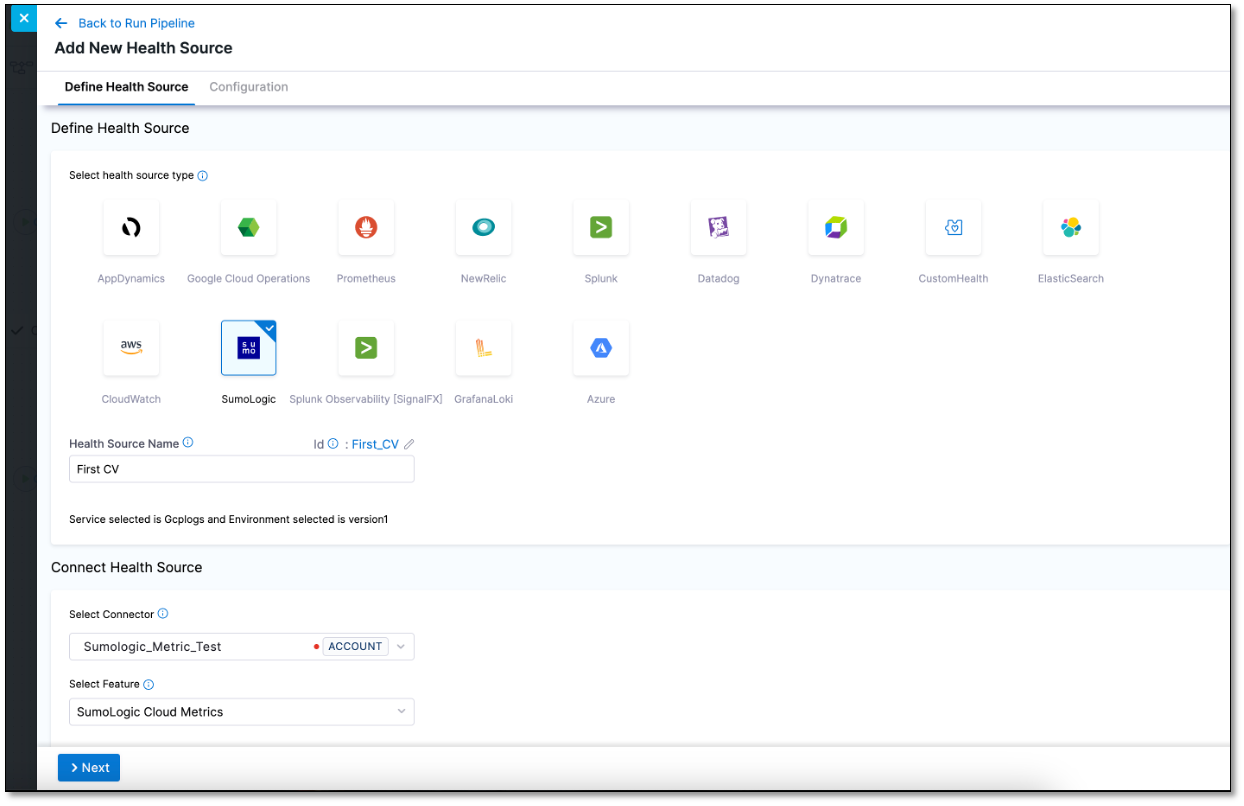
In the Define Health Source tab, do the following:
-
In the Define Health Source section, select Sumologic as the health source type.
-
In the Health Source Name field, enter a name for the health source.
-
In the Connect Health Source section, select Select Connector.
The Create or Select an Existing Connector dialog appears.
-
Select a connector, and then select Apply Selected.
The selected connector appears in the Select Connector dropdown. -
In the Select Feature field, choose SumoLogic Cloud Metrics.
-
Select Next.
The Configuration tab appears.
-
Define metric configuration settings
The following steps describe defining a query and configuring a risk profile:
-
On the Configuration tab, select + Add Metric.
The Add Metric dialog appears. -
Enter the following information, and then select Submit:
- Metric name: Enter a name for the metric. For example, "SumoLogic Metric".
- Group name: Create a new group, by selecting + Add New. In the Add Group Name dialog, enter a group name. For example, "SumoLogic".
-
Select Submit.
-
In the Add Metric dialog, select Submit.
A new group and metric are created. The query specifications and mapping settings are displayed. These settings help you get the desired metric data from your health source and map it to the Harness service.
Define a query
-
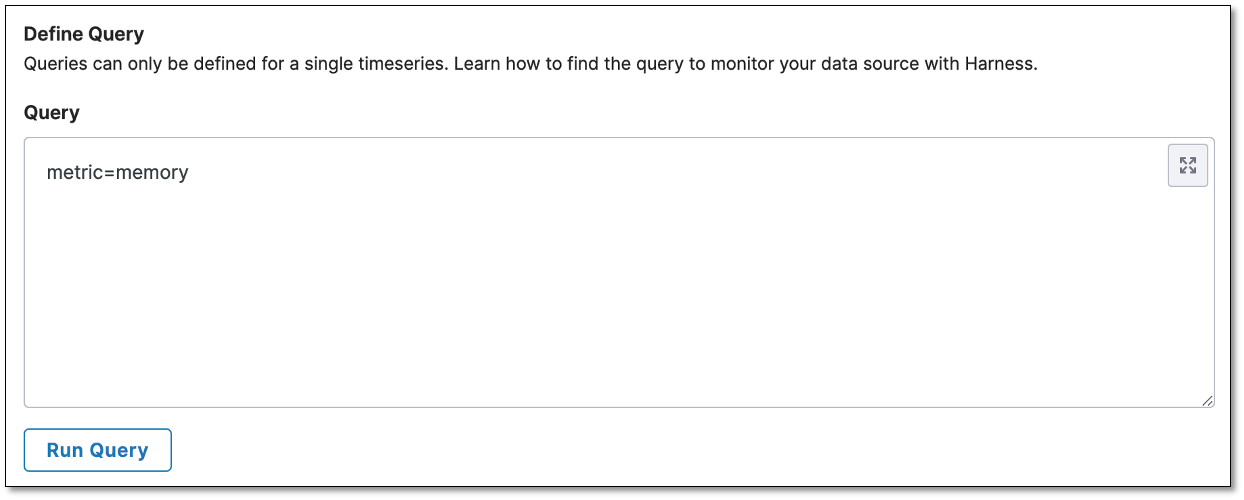
In the Query box, write a query. As an example, enter the query
metric=memoryfor querying the disk usage. -
Select Run Query.
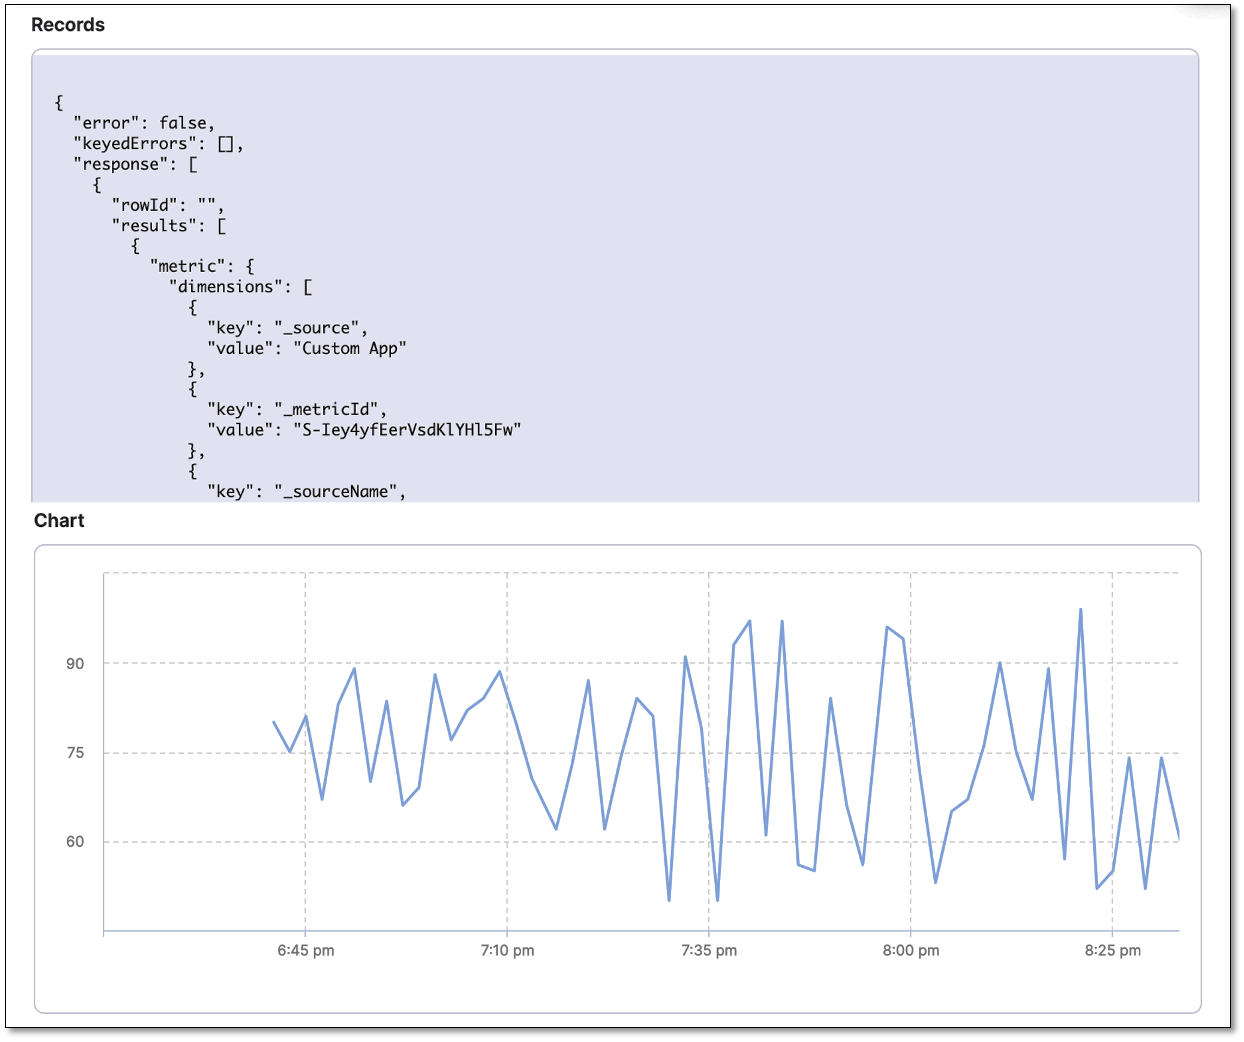
Sample data is displayed in the Records box. The Chart box displays the graph corresponding to the sample data. This helps you verify if the query that you have built is correct.
Disk usage records and chart are being displayed for the query:
Assign services and configure risk profile
-
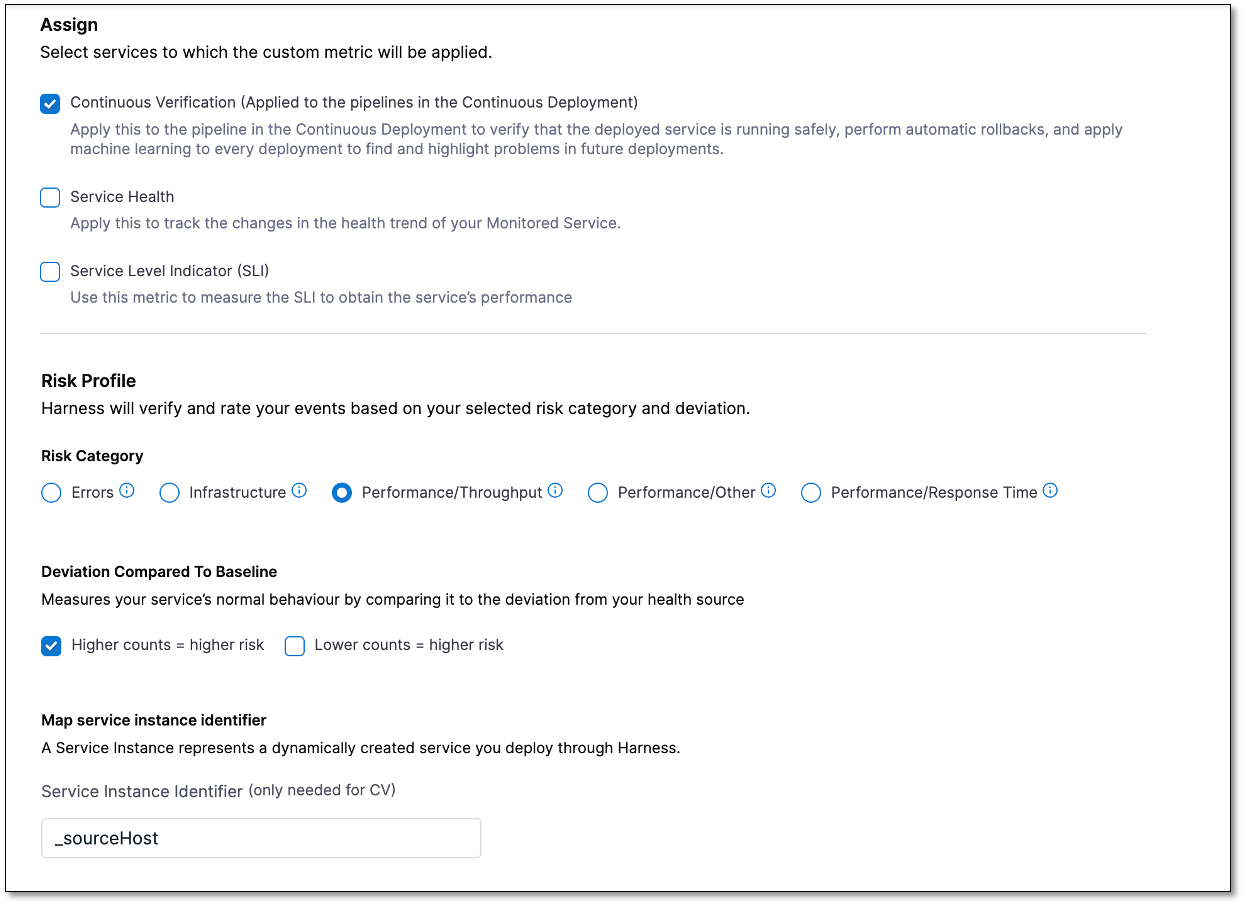
In the Assign section, select Continuous Verification (Applied to the pipelines in the Continuous Deployment).
-
Under Risk Category, select Performance/Throughput
-
Under Deviation Compared To Baseline, select Higher counts = higher risk.
Configure threshold
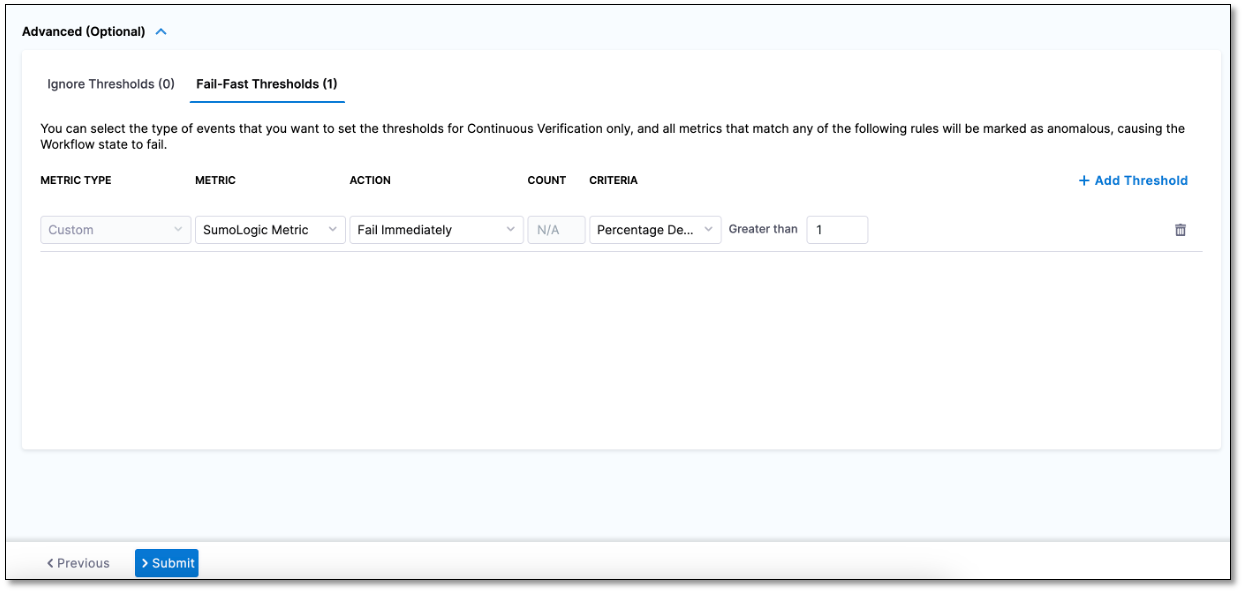
Continuous Verification evaluates the metrics based on the fail-fast threshold you configure. If the metrics exceed the fail-fast threshold, the verification step fails. In the context of the SumoLogic query you defined, the threshold sets a memory usage limit beyond which the application is considered to be in a problematic state, and the verification fails.
To set a fail-fast threshold, follow these steps:
-
Expand Advanced (Optional), go to the Fail-Fast Thresholds tab, and then select + Add Threshold.
-
From the Metric dropdown, select SumoLogic Metric. This is the metric you created in the Define metric configuration settings step.
-
In the Action field, select what action should be taken when applying the rule. Select Fail Immediately.
-
In the Criteria field, choose Percentage Deviation, and from the greater than select 1. This sets a threshold for memory usage beyond which the system or application is considered to be in a problematic state, and action should be taken. When using Percentage Deviation, observe results using Normalized Views.
Save the health source settings
-
After configuring all the settings, select Submit to add the health source to the Verify step.
-
Select Apply Changes to save the changes made to the Verify step. You will now see the health source listed in the Health Sources section.
-
Select Save.
You have successfully added and configured verification in your Harness pipeline.

Run the pipeline
When you run the pipeline, Harness executes the verification step.
To run the pipeline, follow these steps:
-
In the upper-right corner, select Run.
The Run Pipeline dialog appears.
-
In the dialog, do the following:
- Tag: If you did not add a tag in the Artifact Details settings, select it now.
- Skip preflight check: Select this option if you want to skip the preflight check.
- Notify only me about execution status: Select this option if you want Harness to alert only you about the execution status.
-
Select Run Pipeline.
The pipeline starts running.
To view the console, select View Details in the Summary section or turn on the Console View toggle switch in the upper-right corner.
Note that it may take some time for the analysis to begin. The screenshot below shows a Verification step running in a deployment:

View results
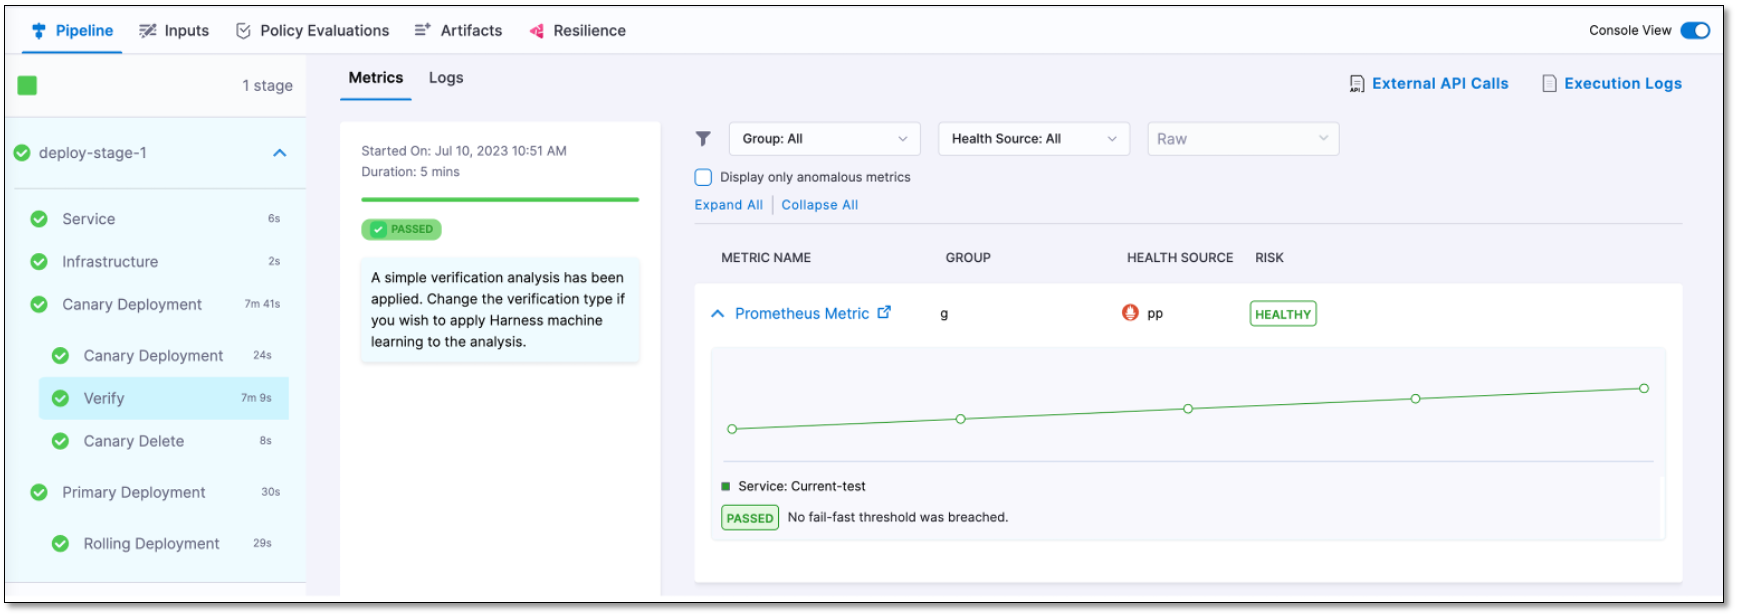
After the verification is complete, the Console View displays the verification details, such as metric name, health source, risk, and so on.
The following screenshots show the console view of successful and failed verifications in a deployment run:
Successful verification
Failed verification
