Save filter settings
Currently, this feature is behind the feature flag CET_SAVED_SEARCH. Contact Harness Support to enable the feature.
The Saved Filters feature allows you to save your current filter settings for future use, making it easy for you to access the specific data you need. Here's how to save, apply, and manage your filter settings:
Save filter settings
To save your current filter settings for future use, follow these steps:
-
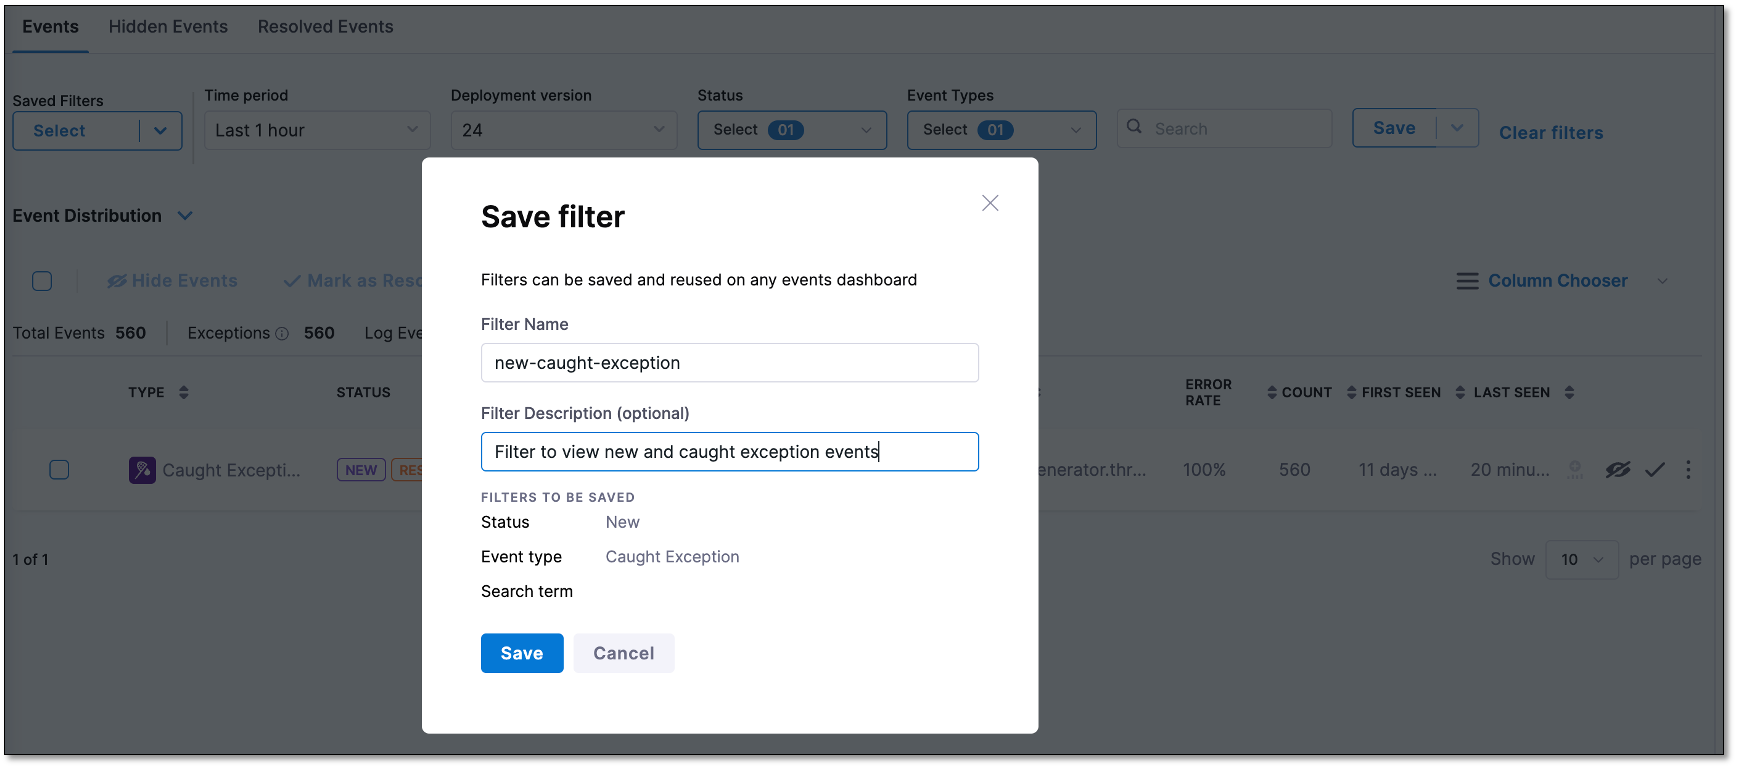
On the Events Summary page > Events tab, after configuring the desired filter settings, select Save.
The Save Filter dialog appears, displaying the current filter settings.

-
Give your filter a name and an optional description.
-
Select Save.
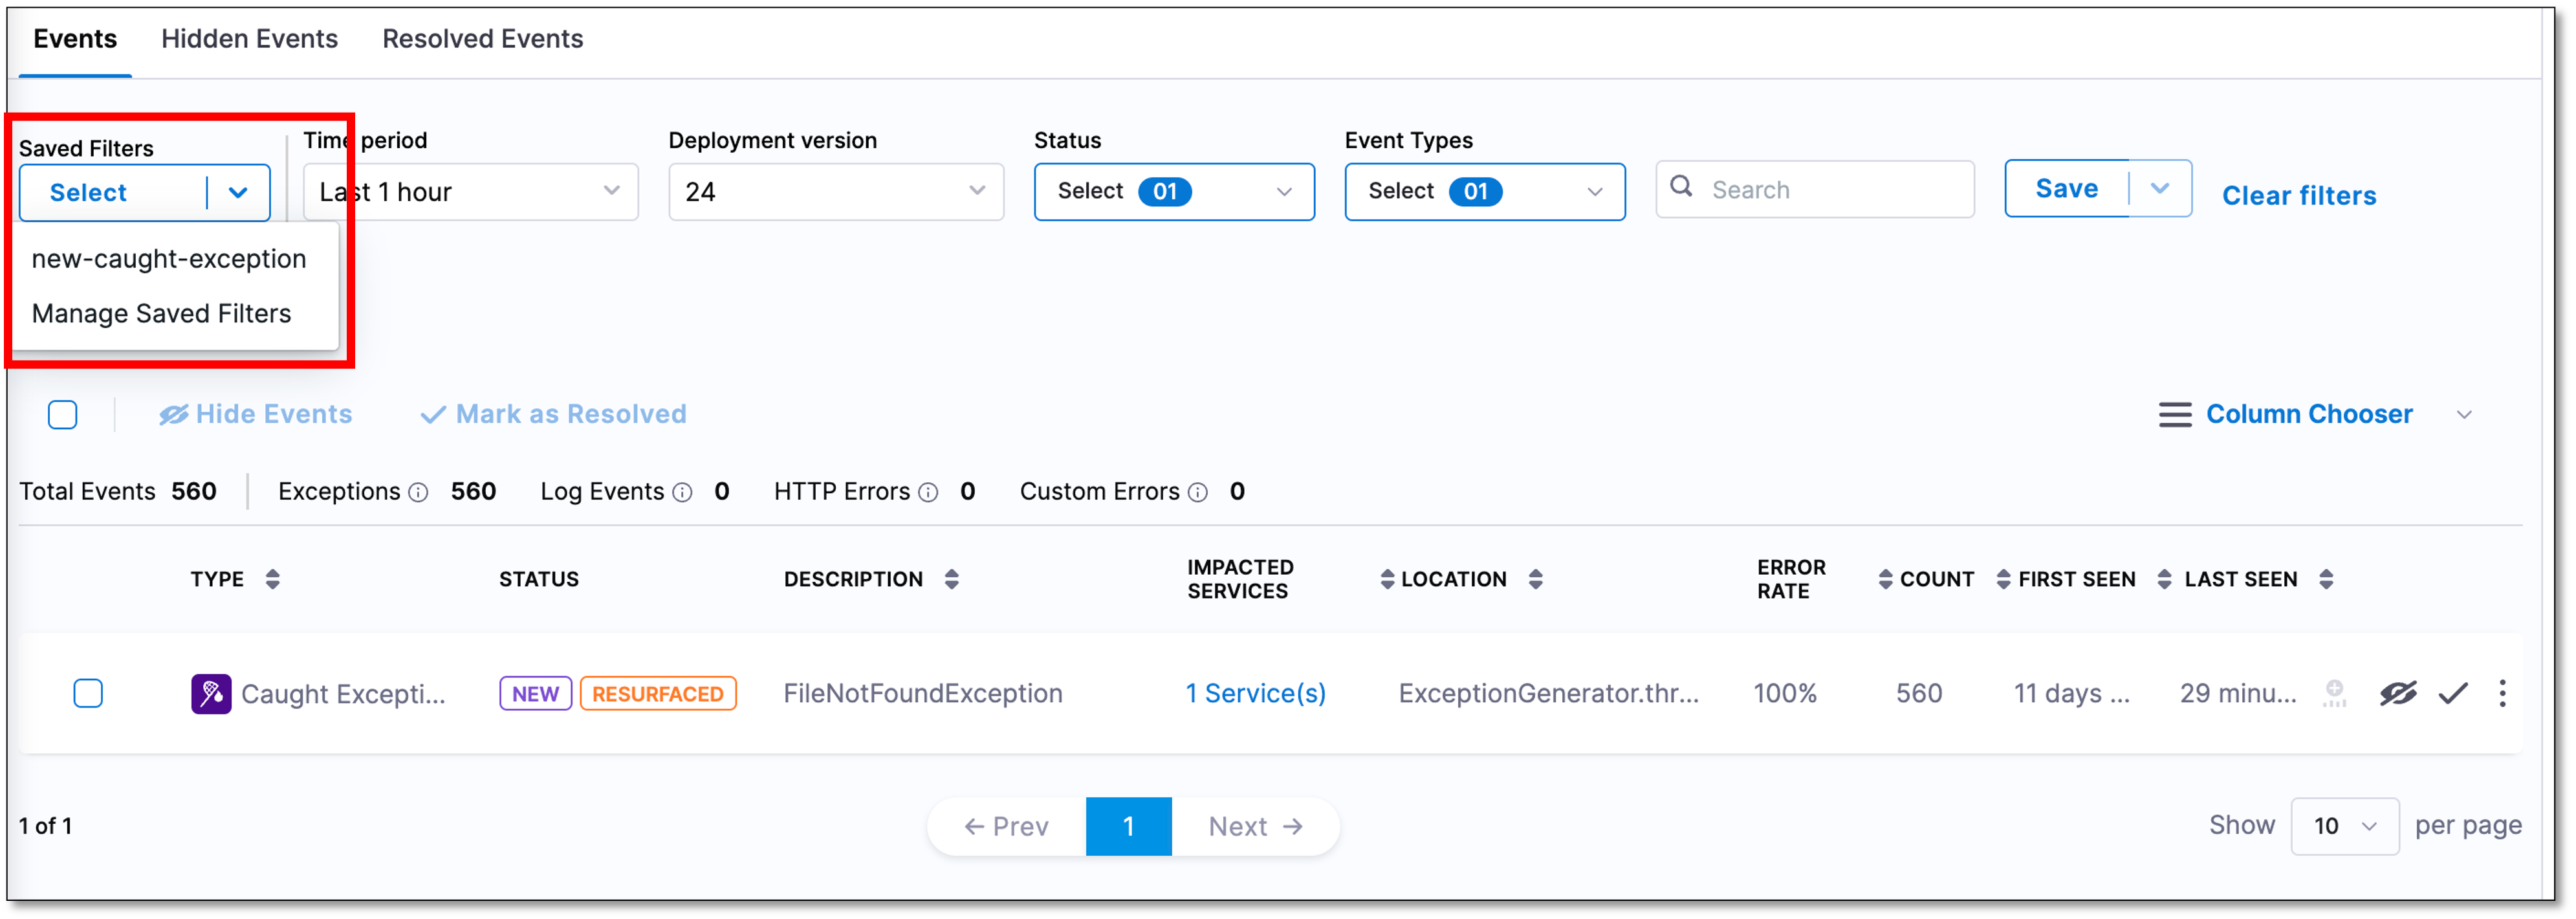
Your filter settings are added to the Saved Filters list. You can view the list by selecting the Saved Filters dropdown.

Apply a saved filter to the events list
To apply a saved filter to the events list, follow these steps:
-
From the Saved Filters dropdown, select the saved filter setting that you want to use.
The selected filter settings are applied to the events list.
Manage saved filter settings
You can modify, edit, or delete your saved filter settings.
Add or remove filters from a saved filter setting
To add or remove filters from a saved filter setting, follow these steps:
-
From the Saved Filters dropdown, select the saved filter you wish to modify.
-
Make the necessary changes. For example, add or remove filter values.
-
Select Save as.
The Save Filter dialog appears, displaying the modified filter settings. -
Select Save.
The changes are applied to the saved filter.
Change the name of a saved filter setting
To change the name of a saved filter setting, follow these steps:
- From the Saved Filters dropdown, select Manage Saved Filters.
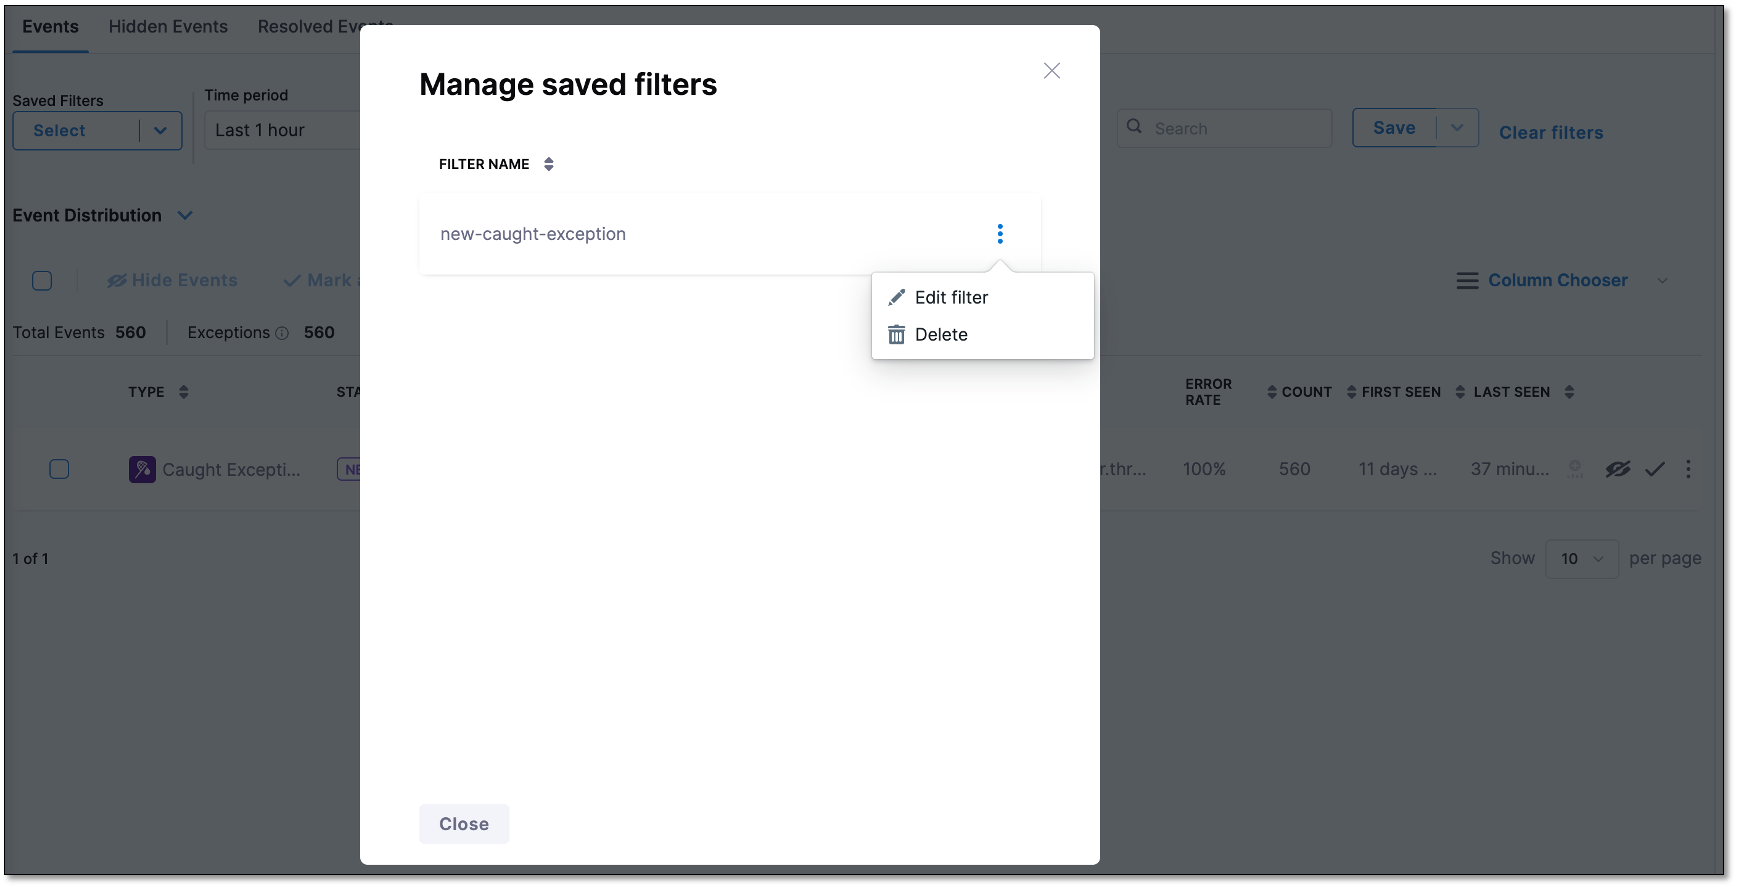
The Manage Saved Filters dialog appears, displaying a list of all your saved filters.

-
Select the settings icon next to the filter you want to modify and choose Edit Filter.
The Edit Filter dialog appears. -
Modify the filter name and description as needed, and then select Save. The changes will be saved to the filter settings.
Delete a saved filter setting
To delete a saved filter setting, follow these steps:
-
From the Saved Filters dropdown, select Manage Saved Filters. The Manage Saved Filters dialog appears, displaying a list of all your saved filters.
-
Select the settings icon next to the filter setting you want to delete, and then choose Delete Filter. The selected saved filter setting is removed from the Saved Filters list.