Connect chaos infrastructures
Chaos infrastructure is a service that runs in your target environment and aids Harness Chaos Engineering (HCE) in accessing and injecting chaos at a cloud-native scale. There are different types of chaos infrastructure based on the target environments, such as Kubernetes, Linux VMs, and so on.
These chaos infrastructures can be installed as a Kubernetes service, as a Linux daemon, and so on, based on their type. All the chaos infrastructure services adhere to the principle of least privilege, where the services execute with the minimum required permissions.
1. Create an environment
You must create a new environment in Harness to specify where you want the chaos infrastructure to exist.
To create an environment:
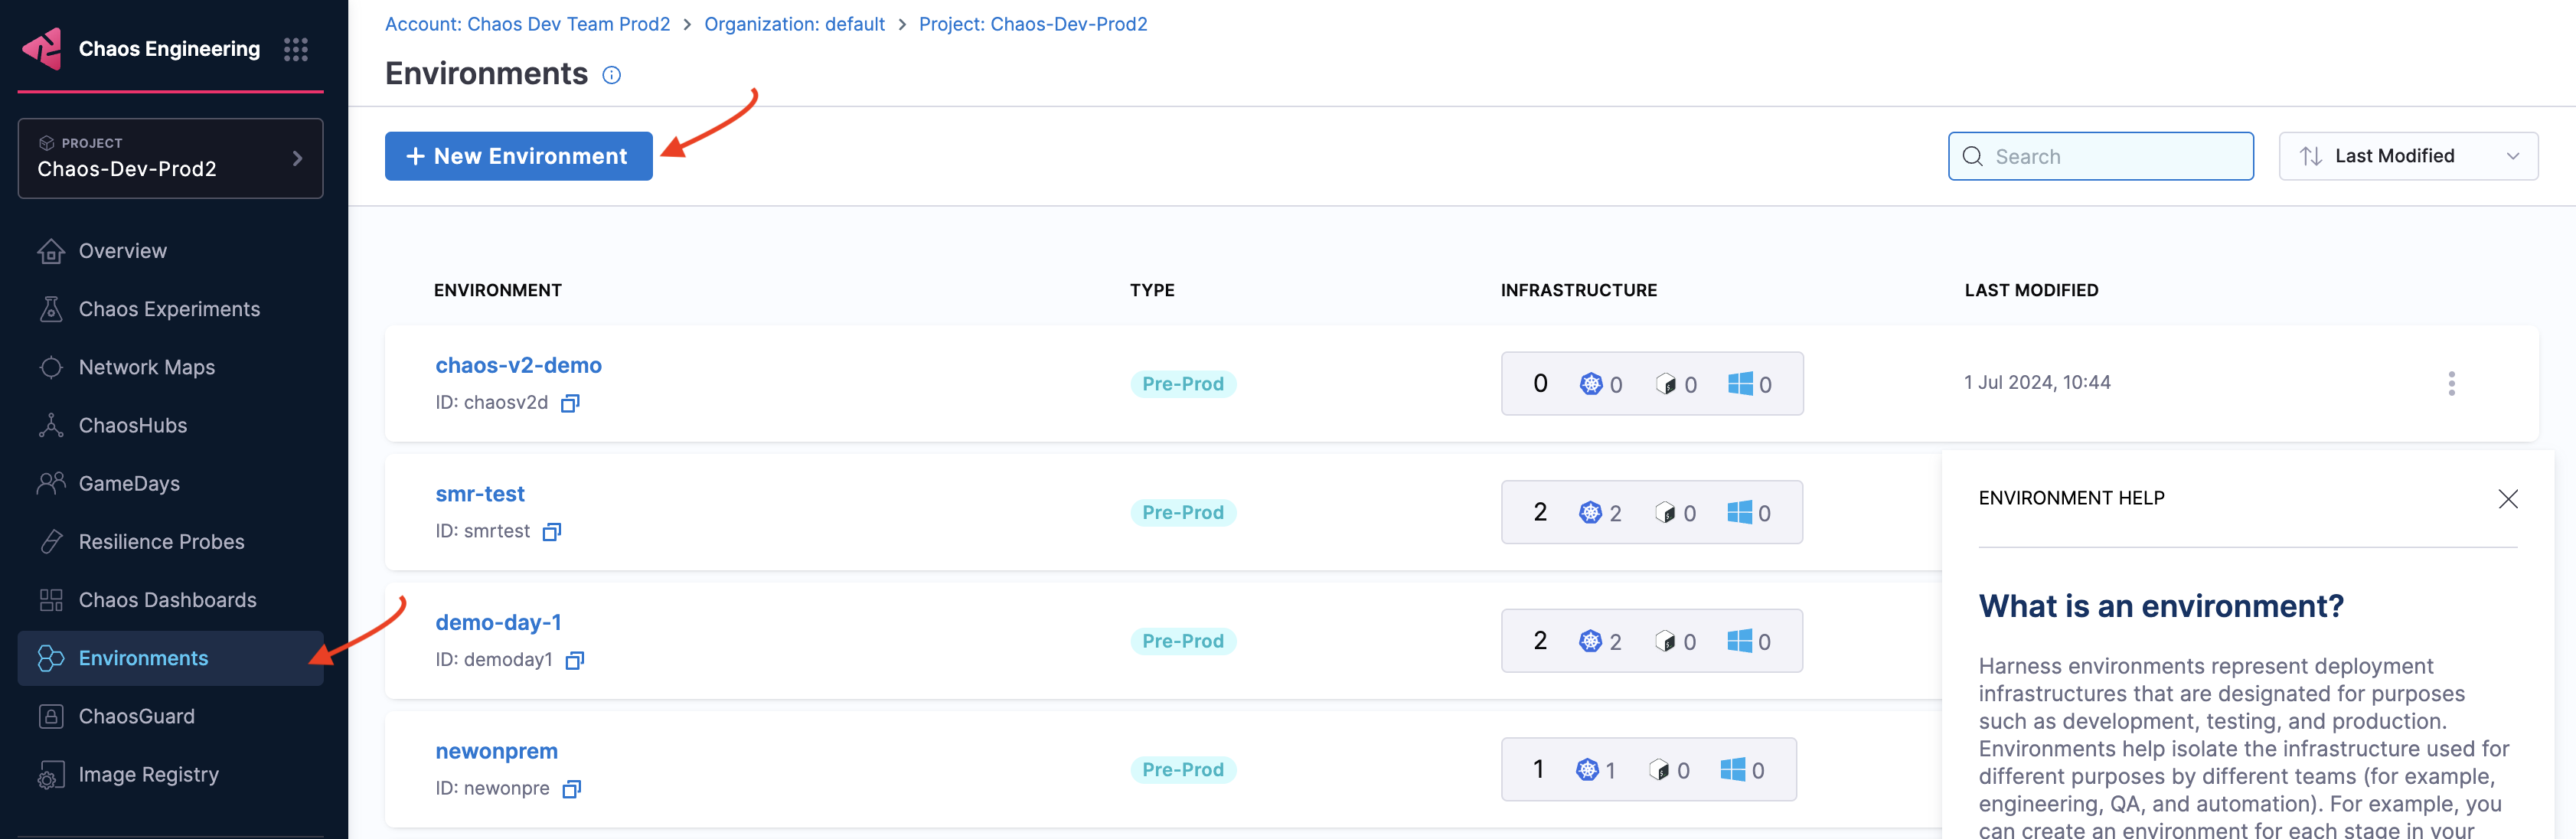
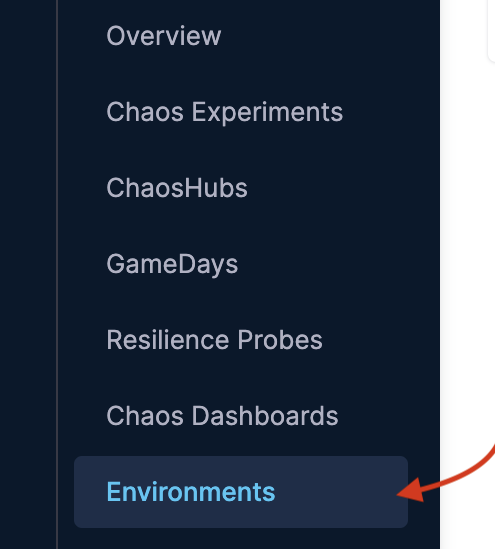
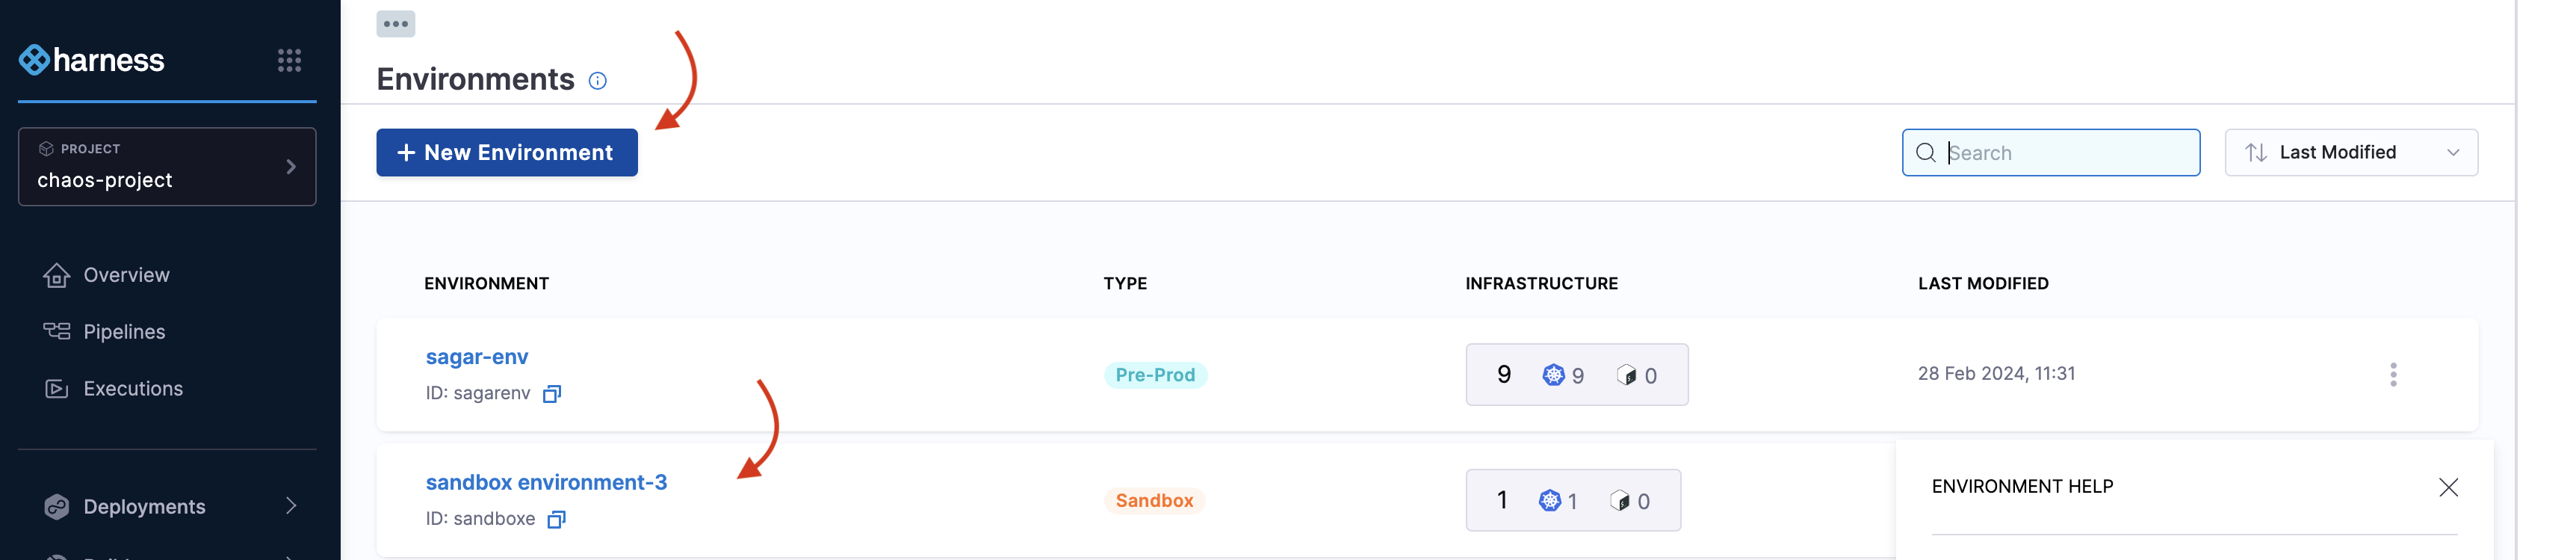
- In your Harness project, navigate to Chaos > Environments. Select + New Environment.
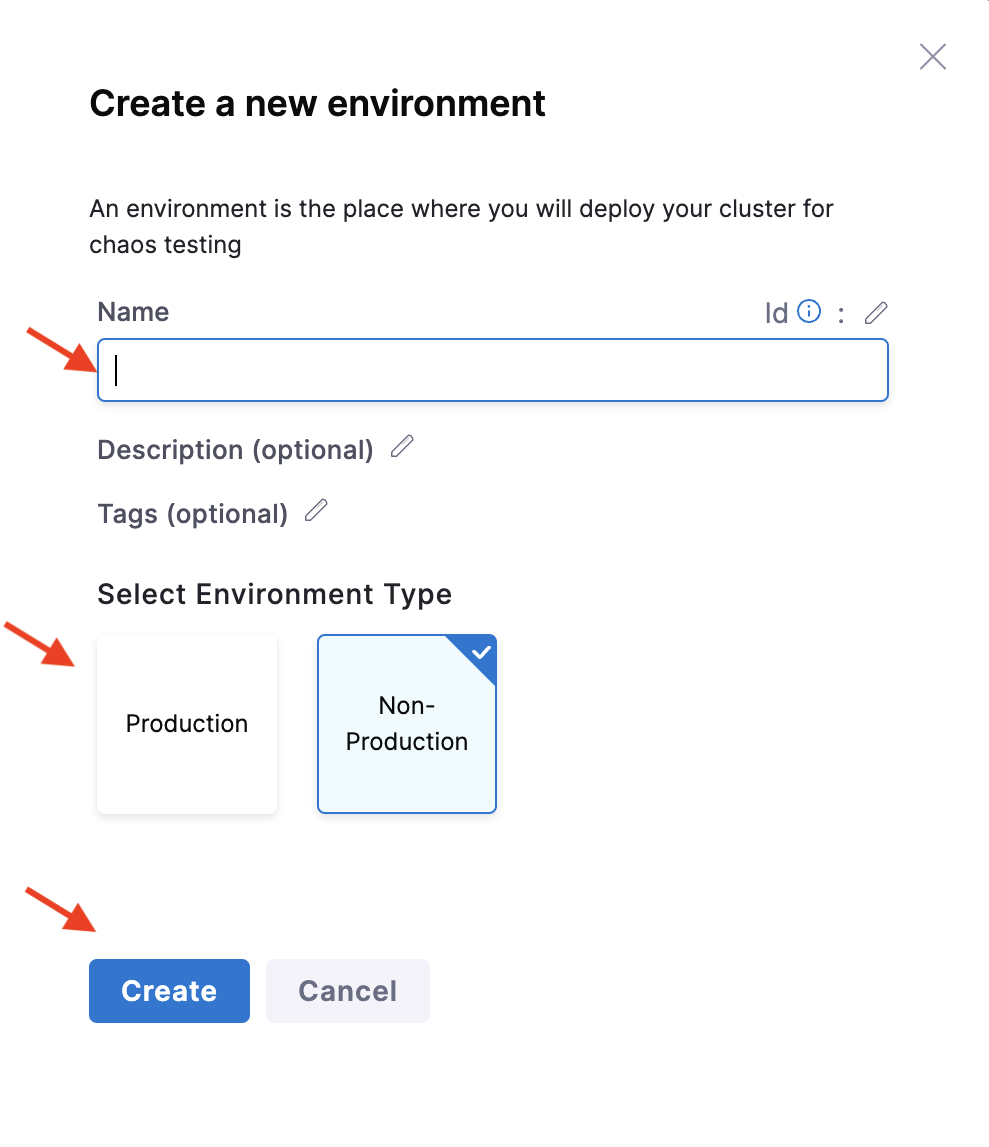
- In the Create a new environment screen, specify a Name for the environment, and optionally a Description and a Tag. For Environment type, choose either Production or Non-Production, and then click Create.
If you want to delete your environment, remove the environment references, that is, the infrastructure(s) associated with it first.
2. Add a chaos infrastructure
2.1 Add a Kubernetes infrastructure
This section outlines the steps to add a chaos infrastructure to a Kubernetes environment.
You can either set up a chaos infrastructure on existing infrastructure that use a Harness cluster connector, that is, Harness Kubernetes connector or install the chaos infrastructure on new infrastructure.
To add a chaos infrastructure on an existing Harness Kubernetes connector:
-
In Harness, navigate to Chaos > Environments, and then select the environment you want to add chaos infrastructure to.
-
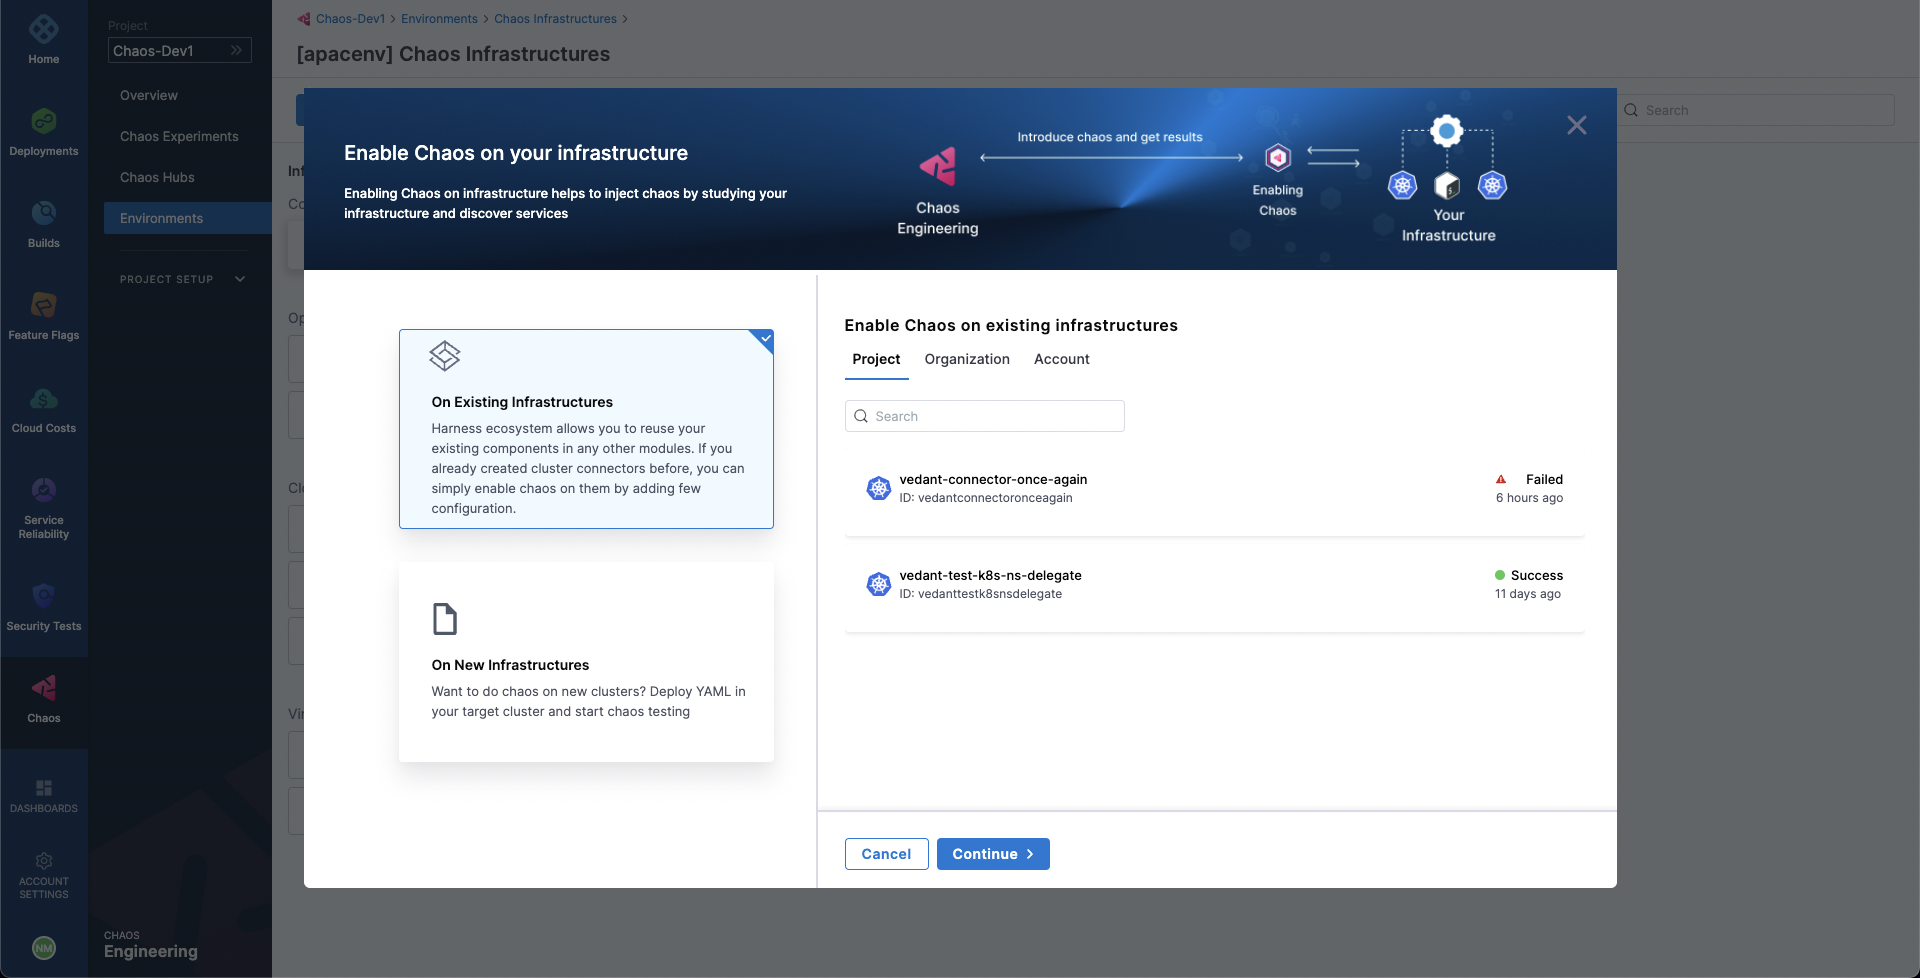
On the environment details page, select + Enable Chaos.
-
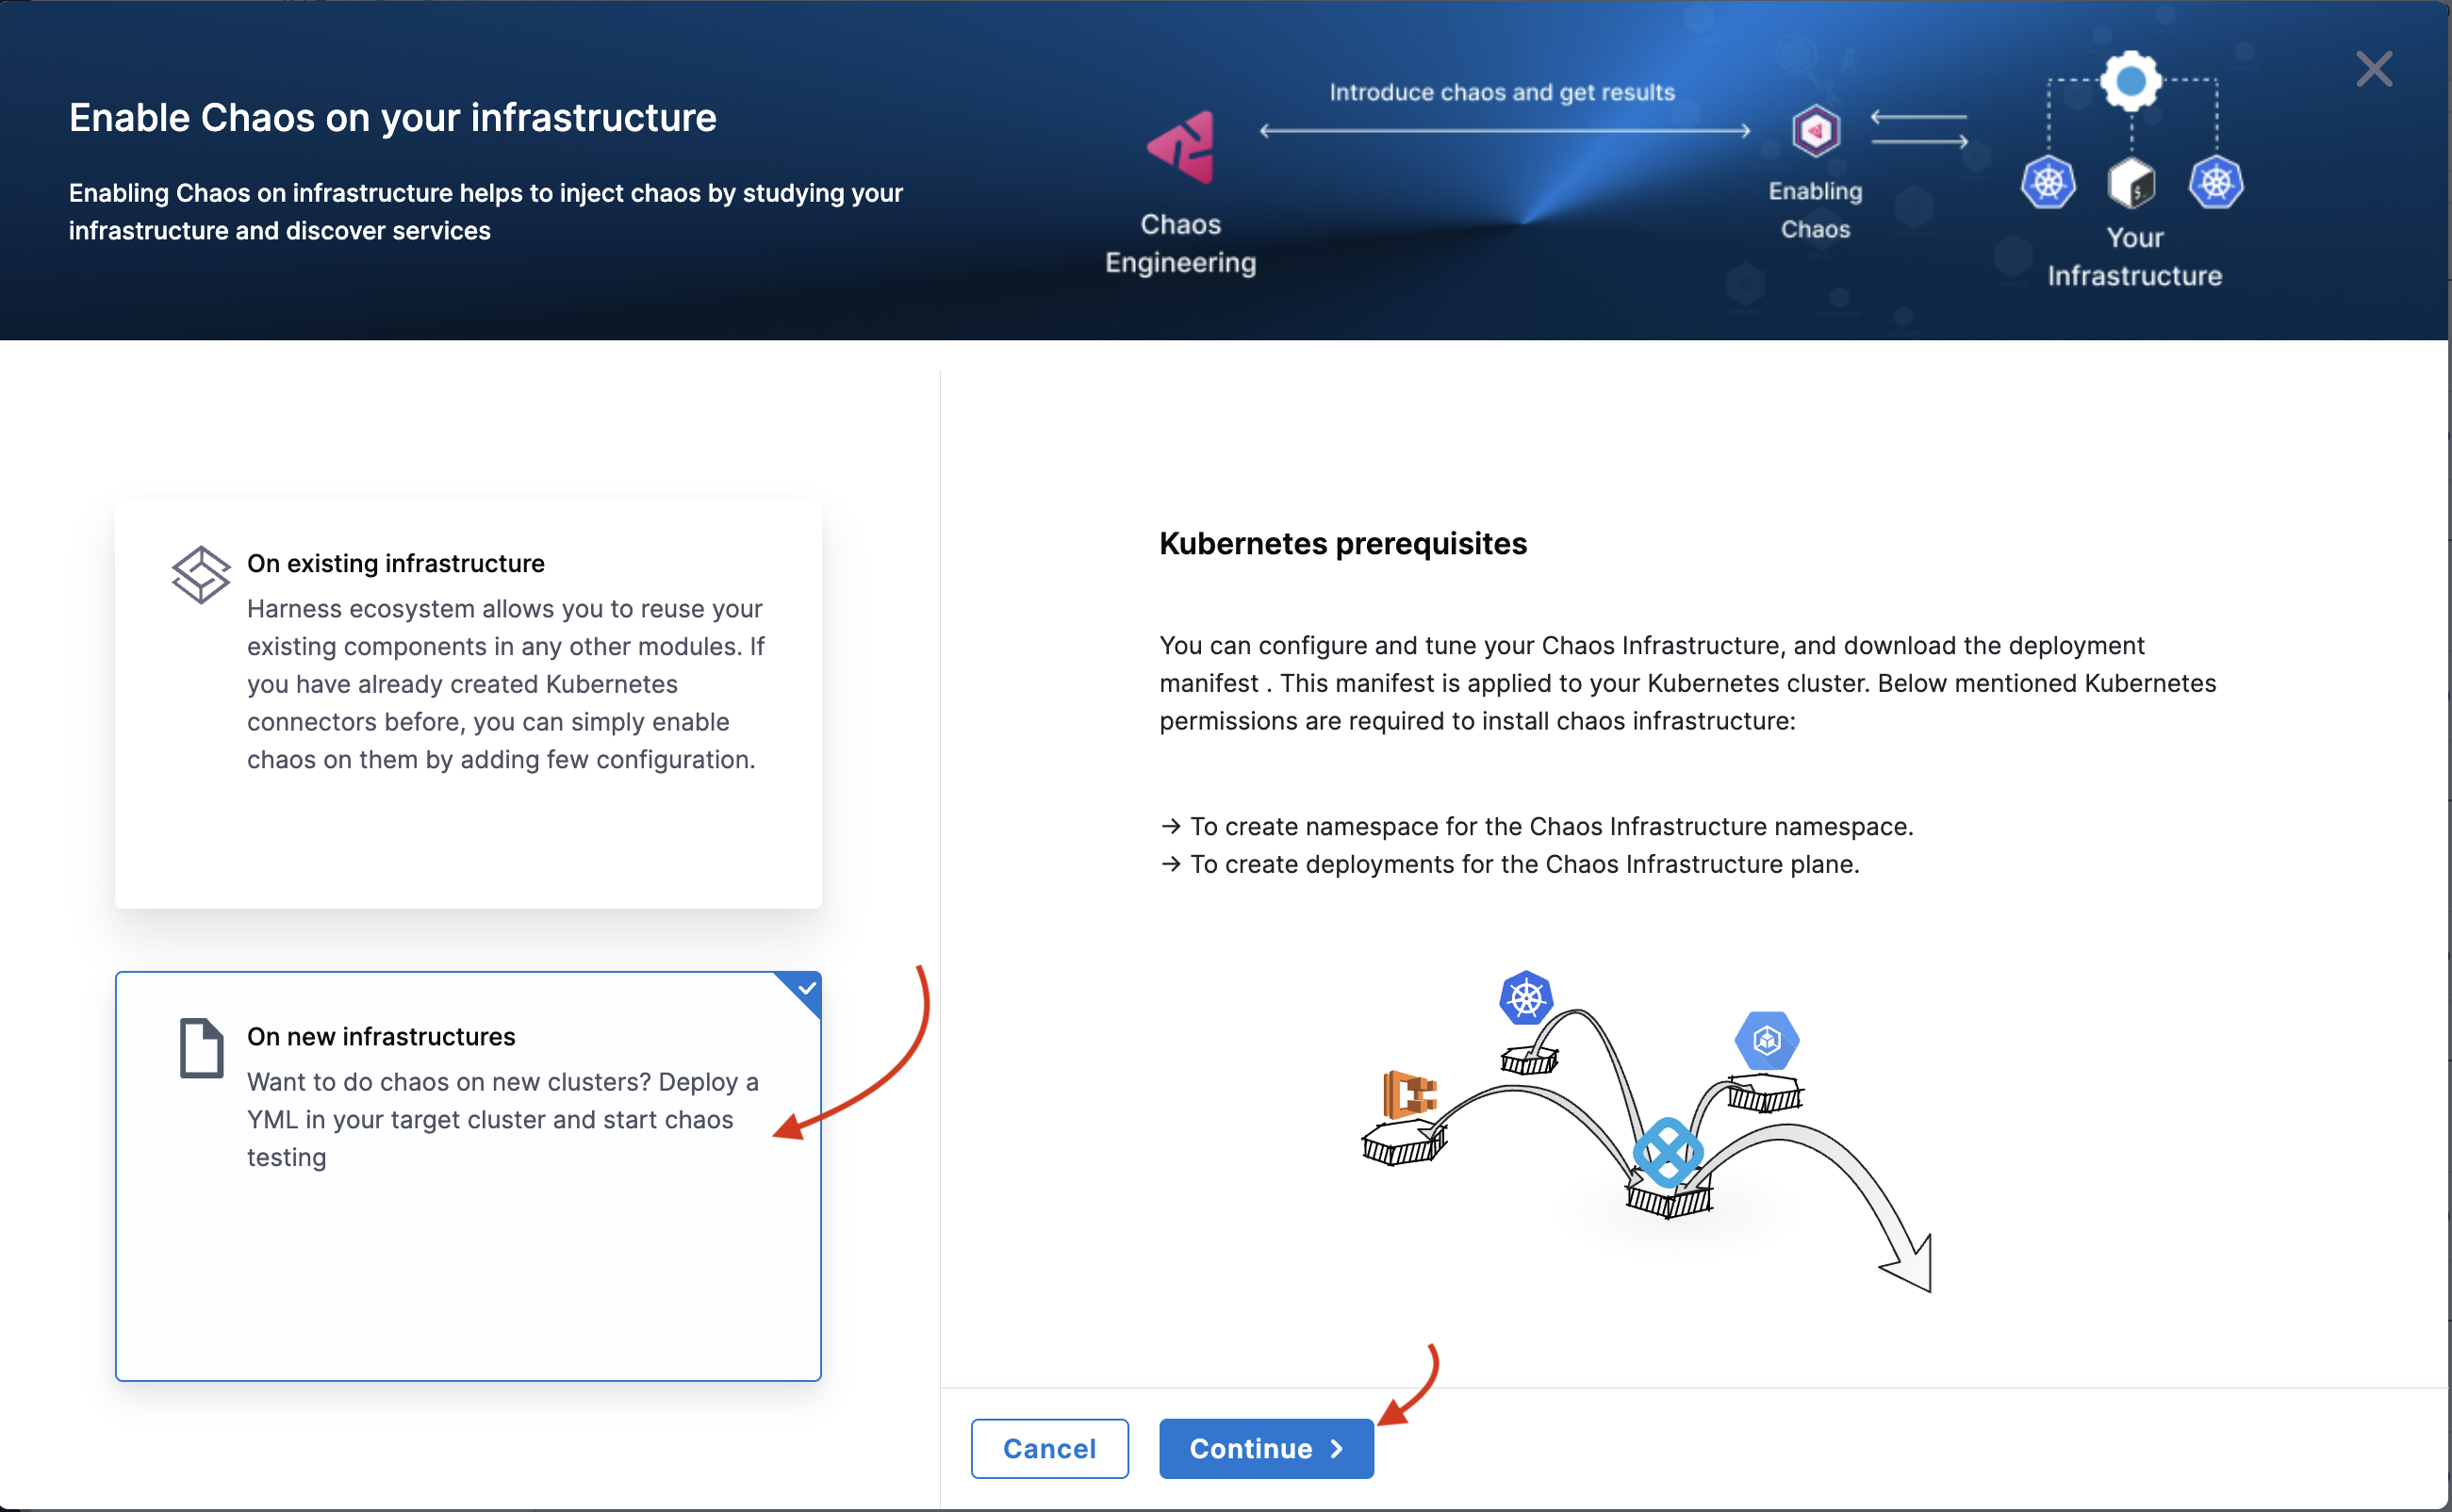
On the next screen, select where to add chaos infrastructure, and then select Continue.
Select one of the following:
On existing infrastructure
-
If you selected On Existing Infrastructures, on the next screen, select any connector under the Project, Organization, or Account scope. Select Continue.
A Harness Kubernetes connector with:
- Cluster-wide read/write access can be used to set up chaos infrastructure in cluster scope and namespace scope.
- Specific namespace access can be used to set up a chaos infrastructure in that specific Kubernetes namespace scope only.
- Cluster-wide read access cannot be used to set up a chaos infrastructure.
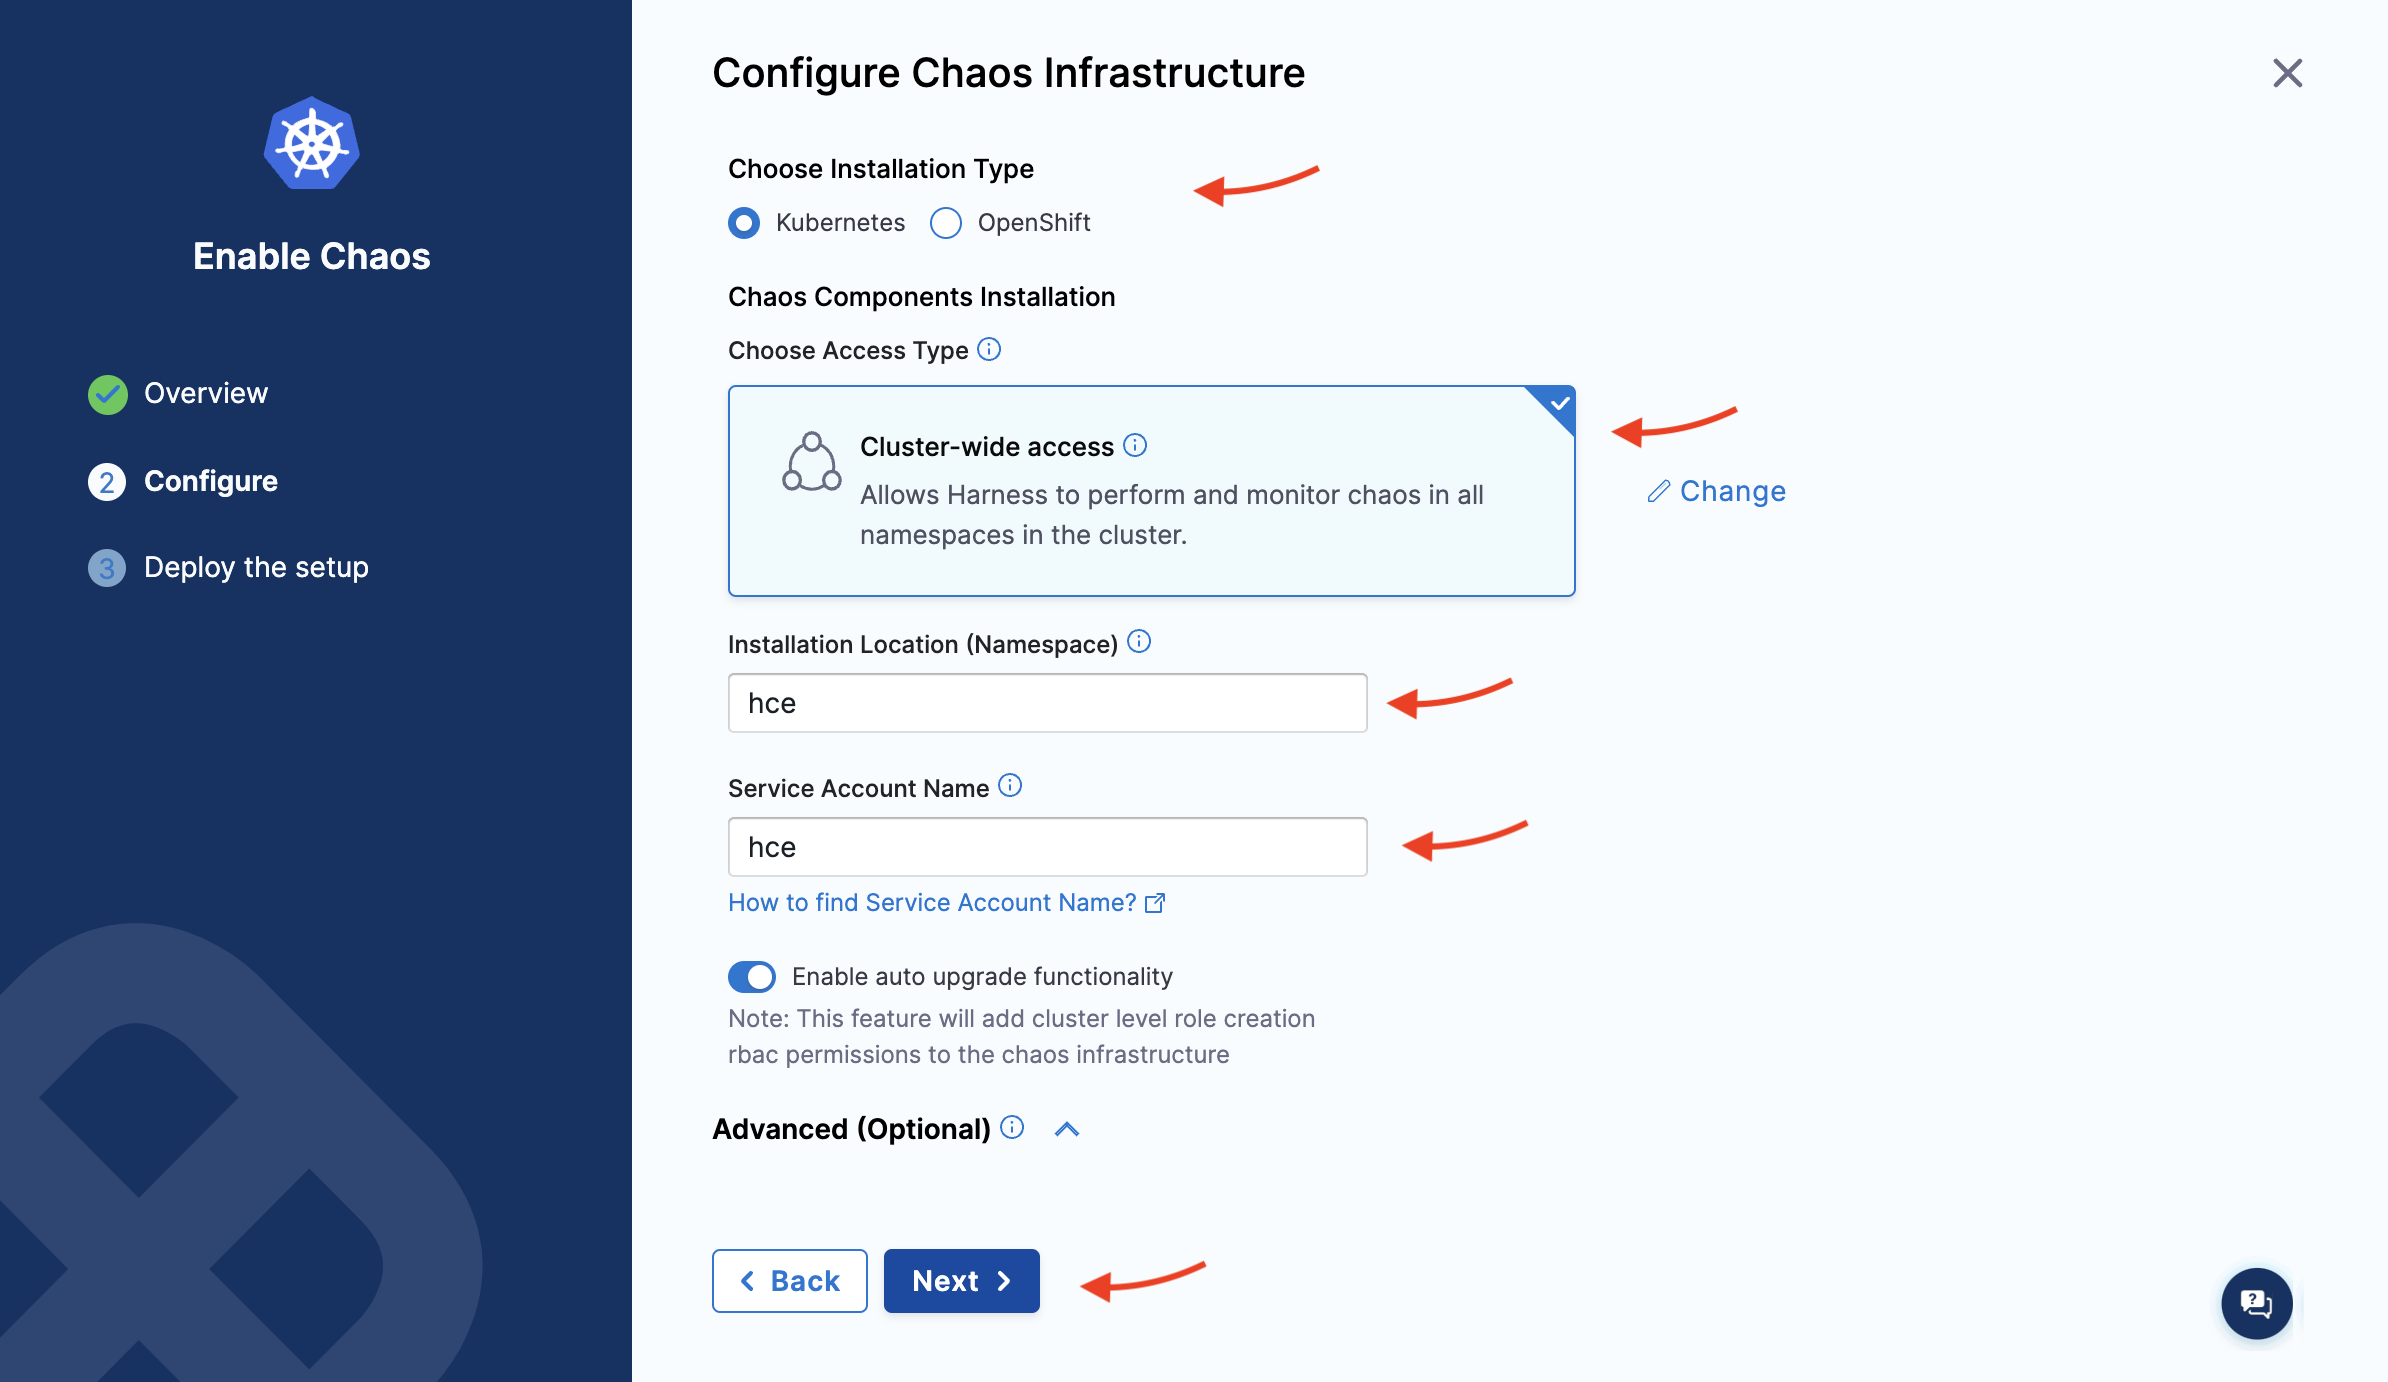
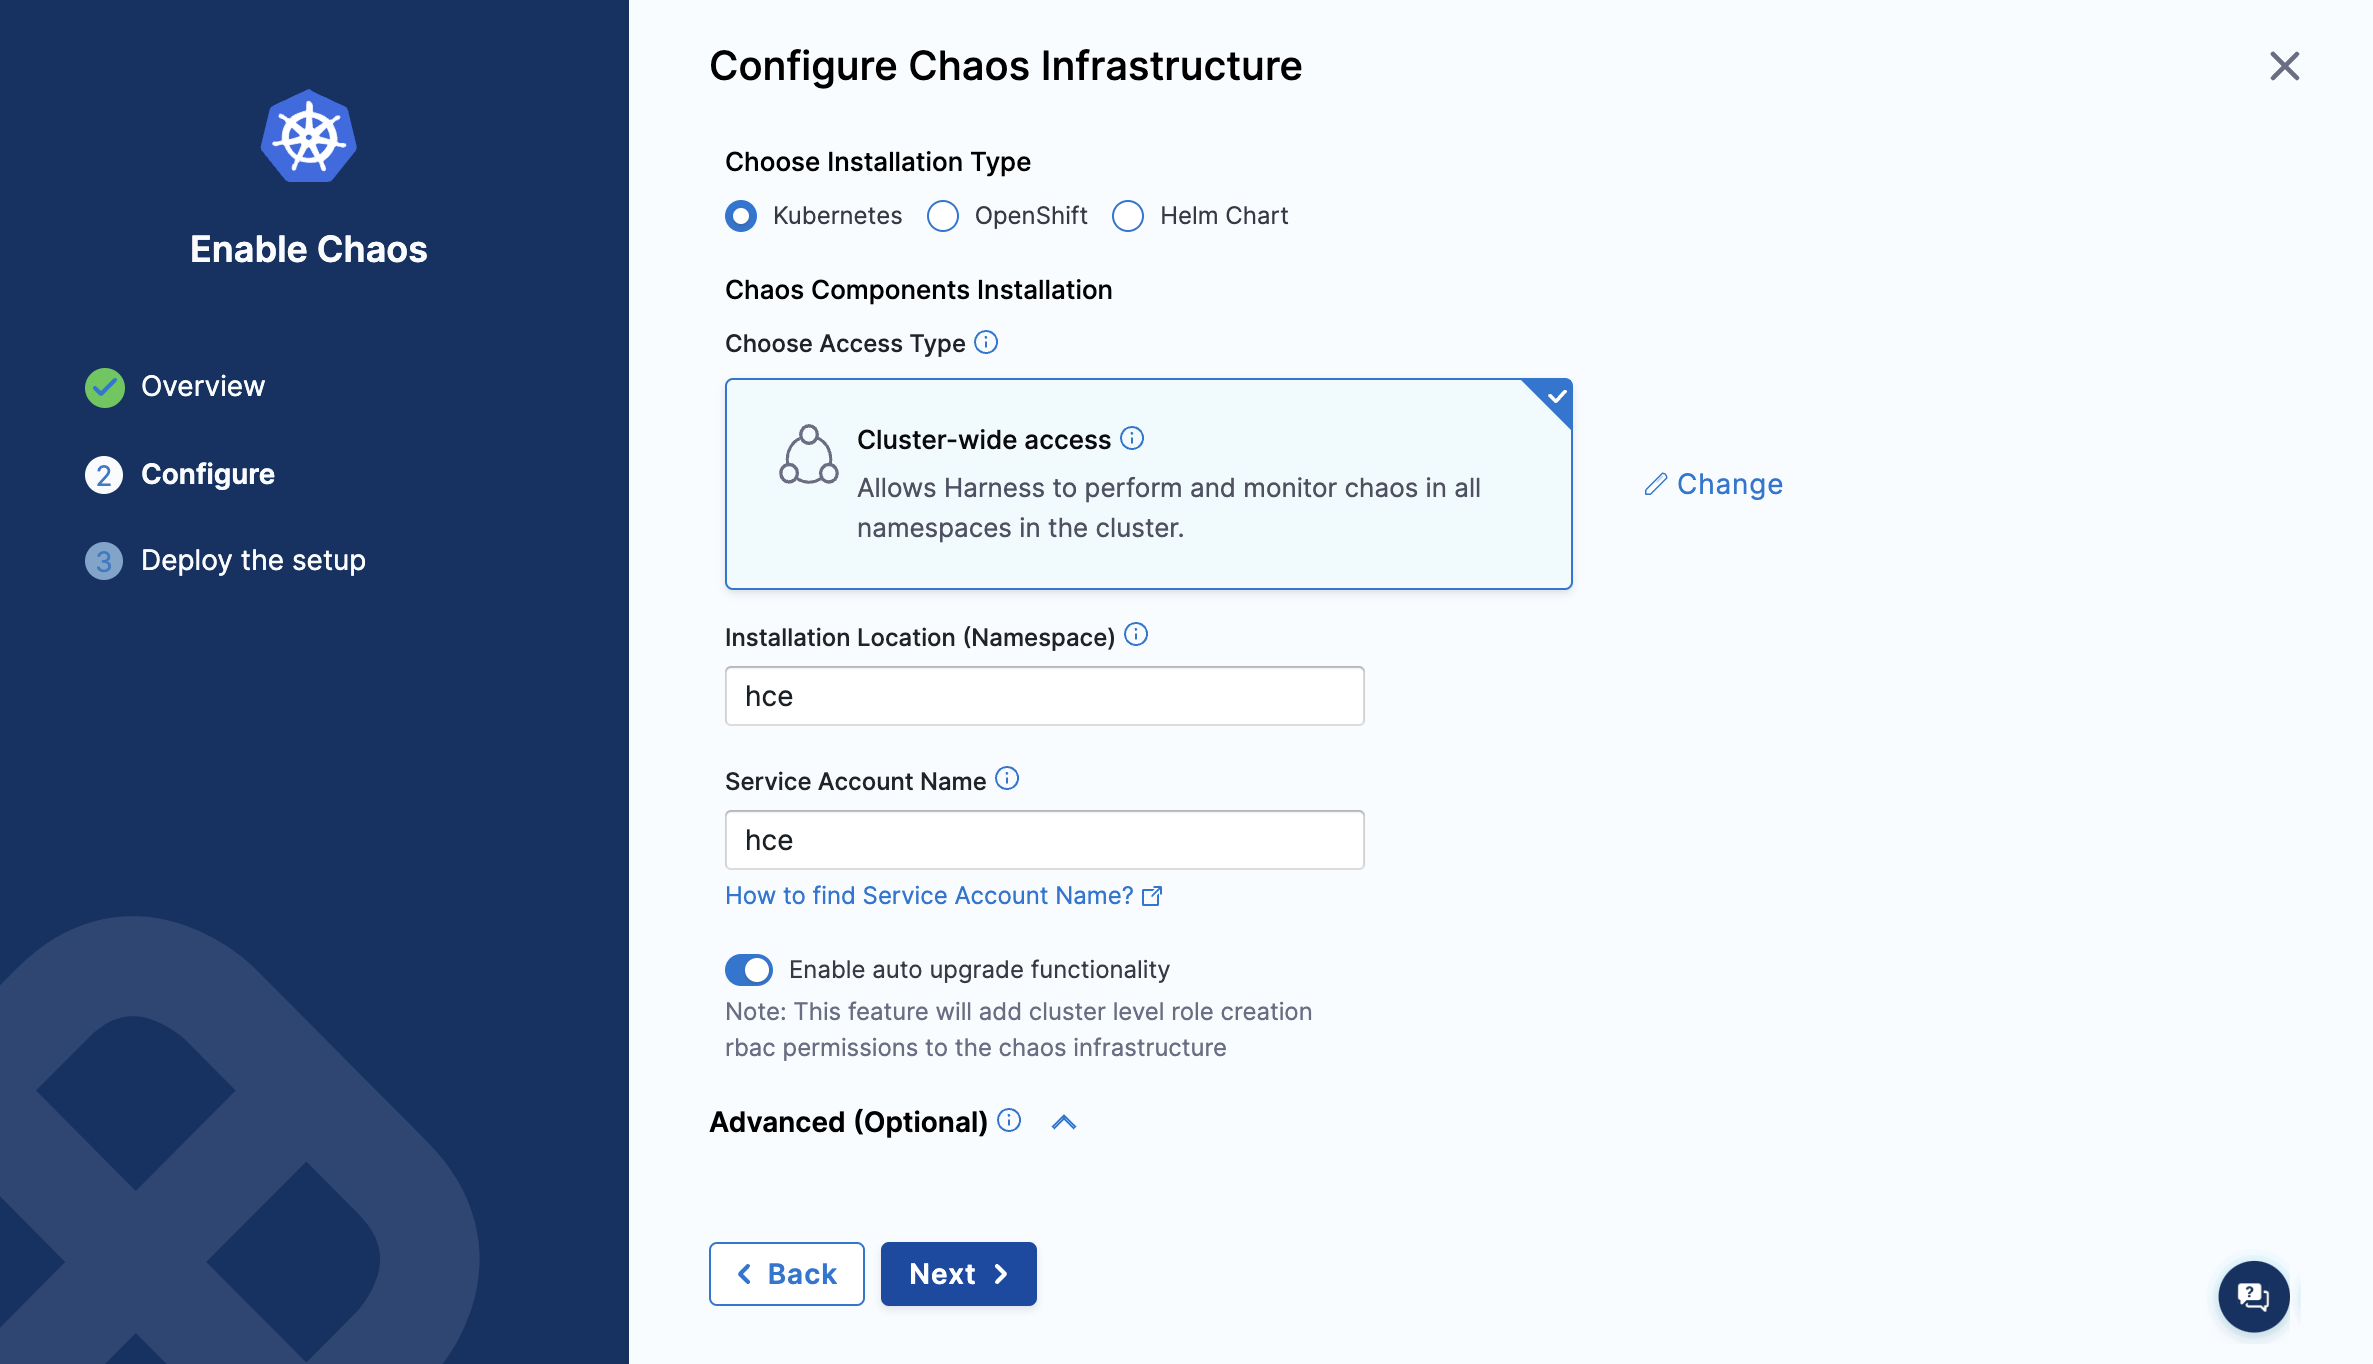
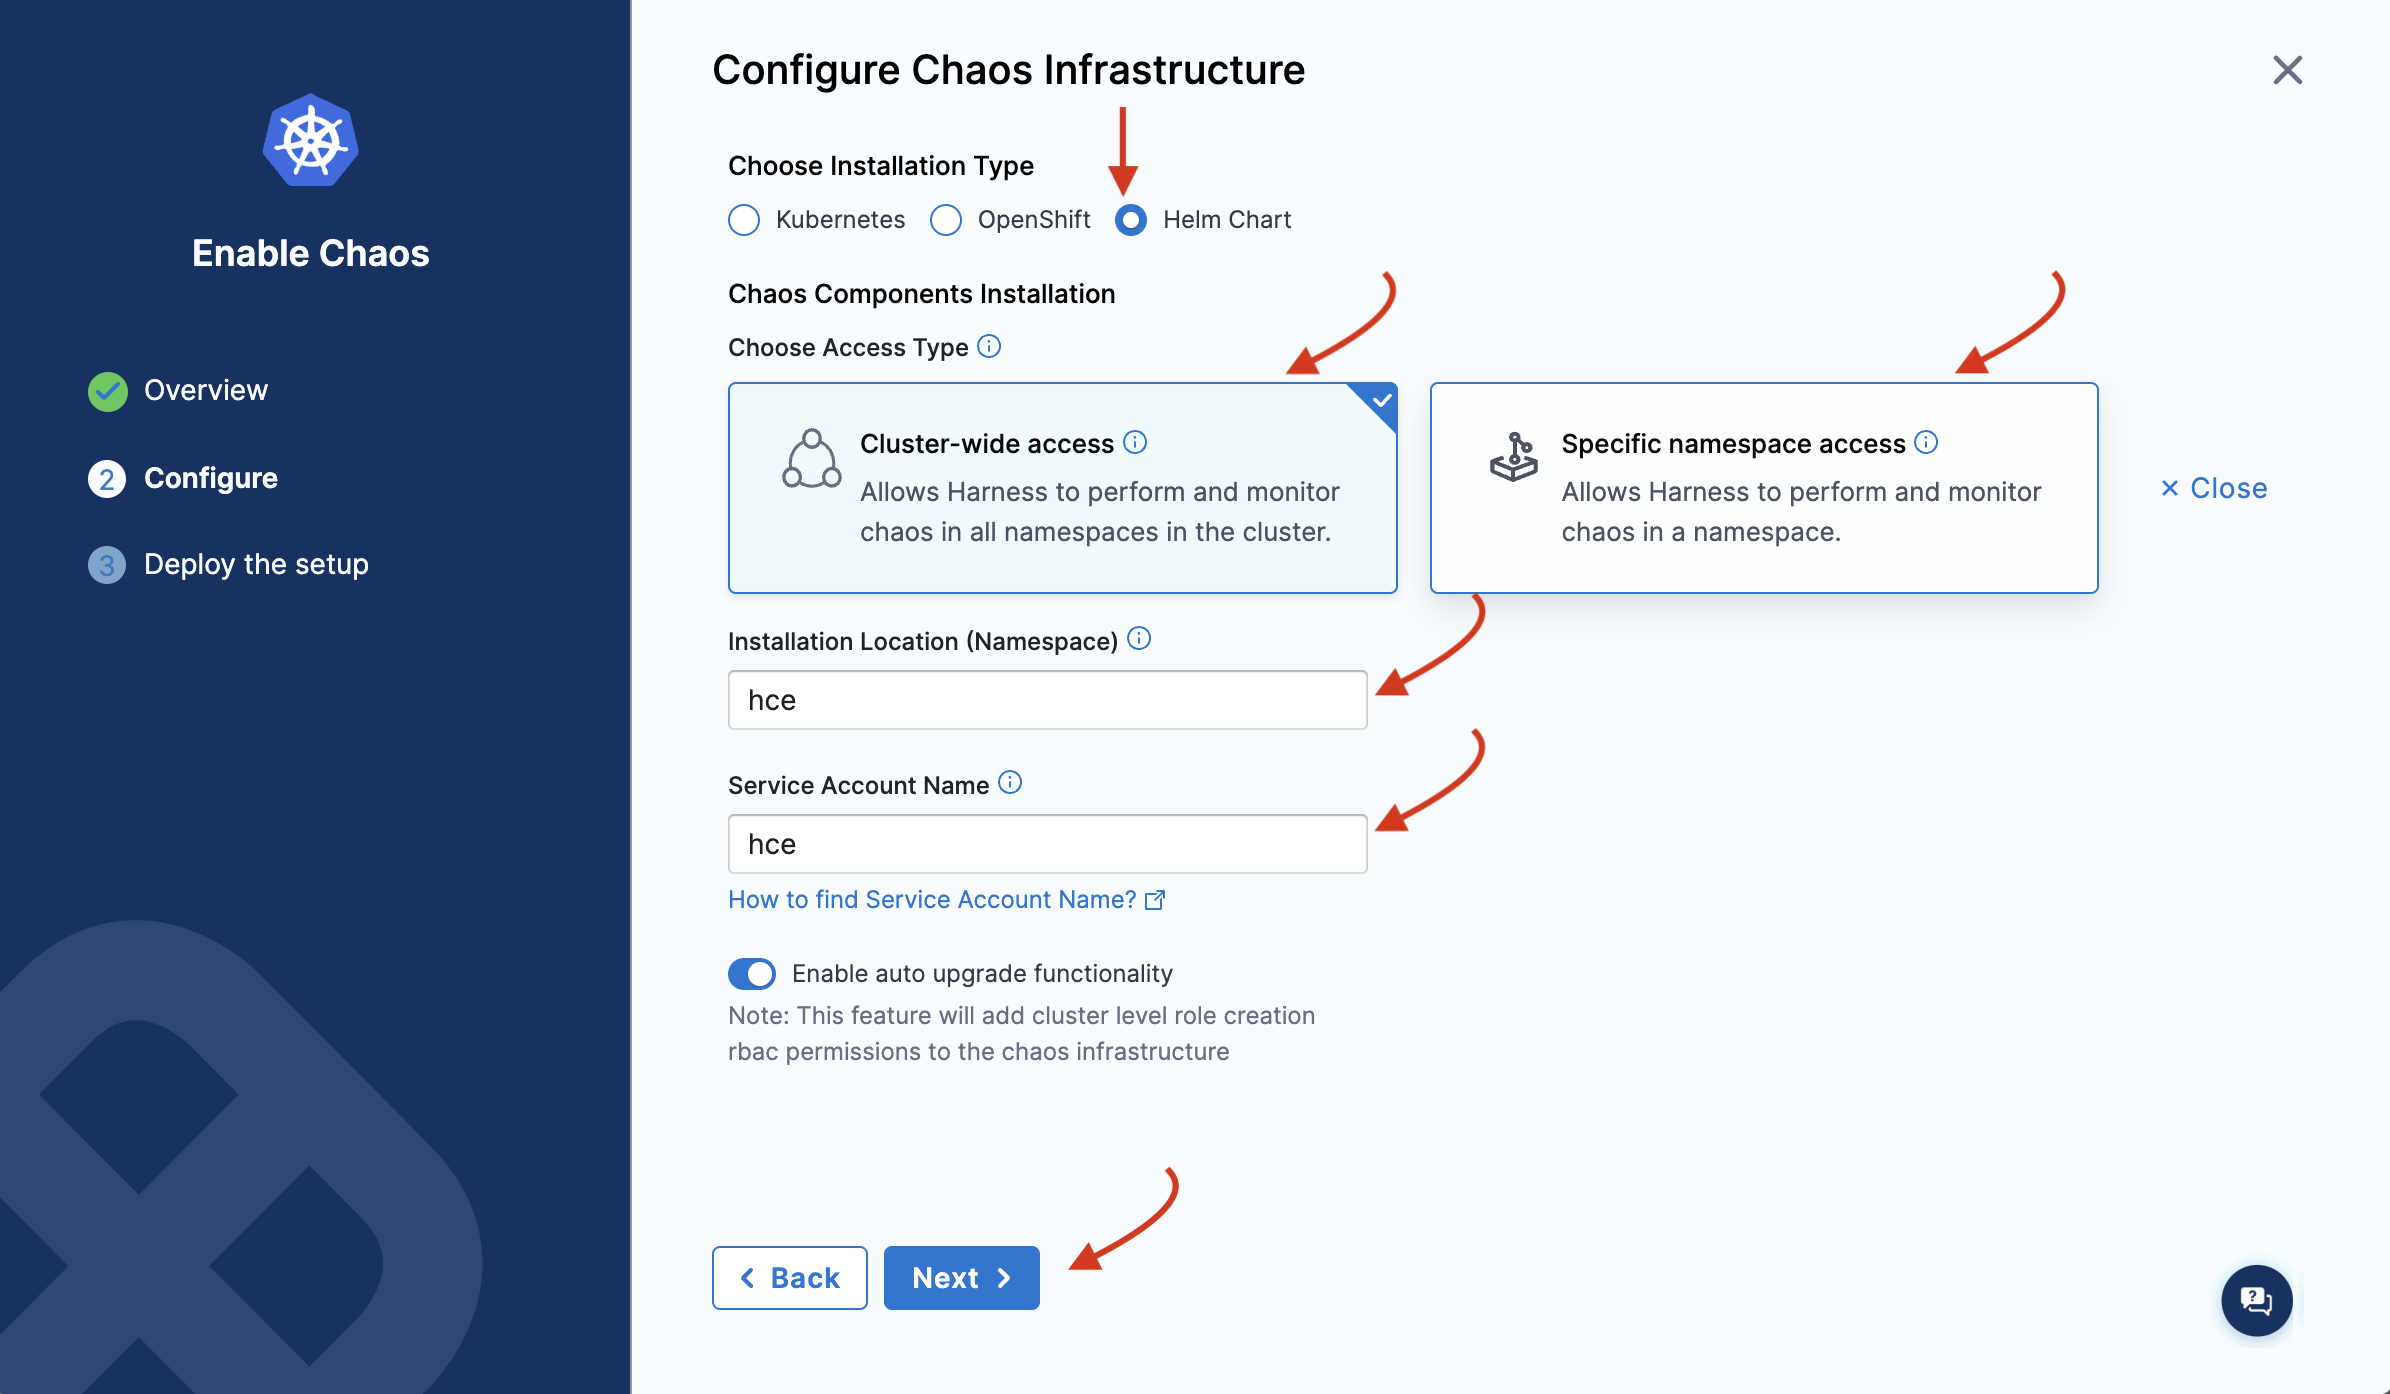
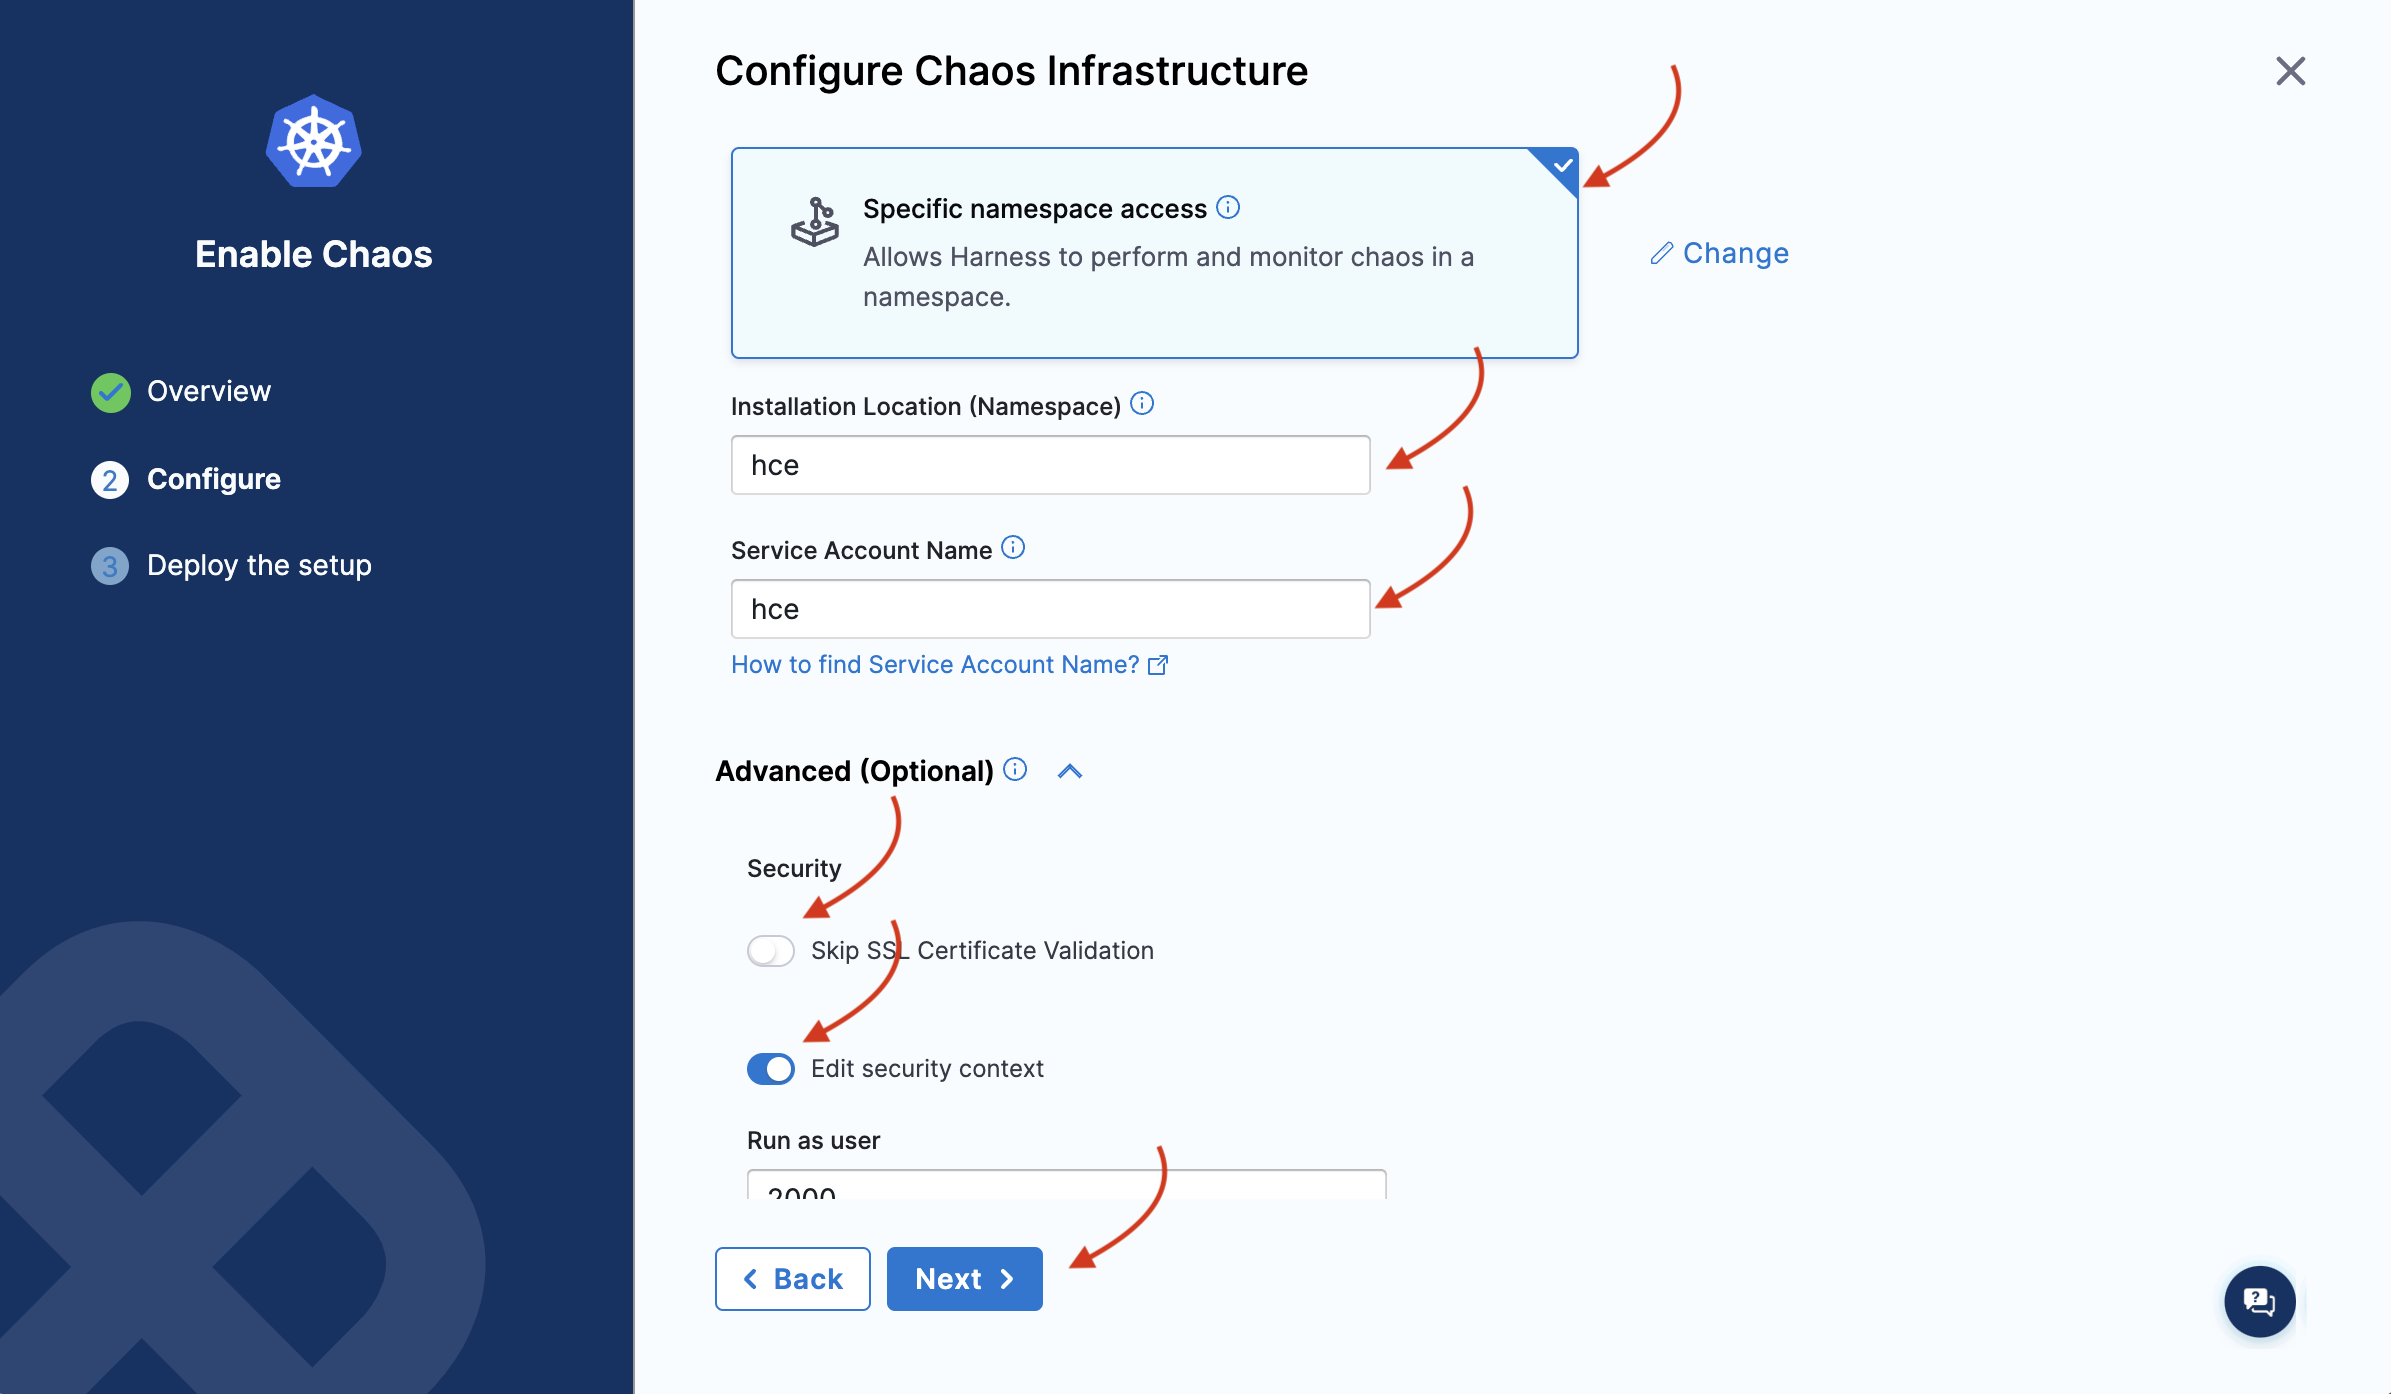
- The Configure Chaos Infrastructure screen appears. Select the installation type, access type, namespace, and service account name. Select Next.
Under Choose Access Type, choose one of the following modes.
- Cluster Wide: This mode of infrastructure installation allows targeting resources across the entire cluster, in all the namespaces, as part of an experiment.
- Namespace Mode: This mode of infrastructure installation allows targeting resources only in the namespace where the chaos infrastructure is deployed.
By default, the installation will take place in the hce namespace and uses hce service account, which can be configured under the K8s cluster details.
Optionally, you can specify the node selectors and Kubernetes tolerations for chaos infrastructure deployment.
- There can only be one cluster-wide chaos infrastructure per cluster.
- There may be multiple namespace-scoped chaos infrastructures per cluster.
-
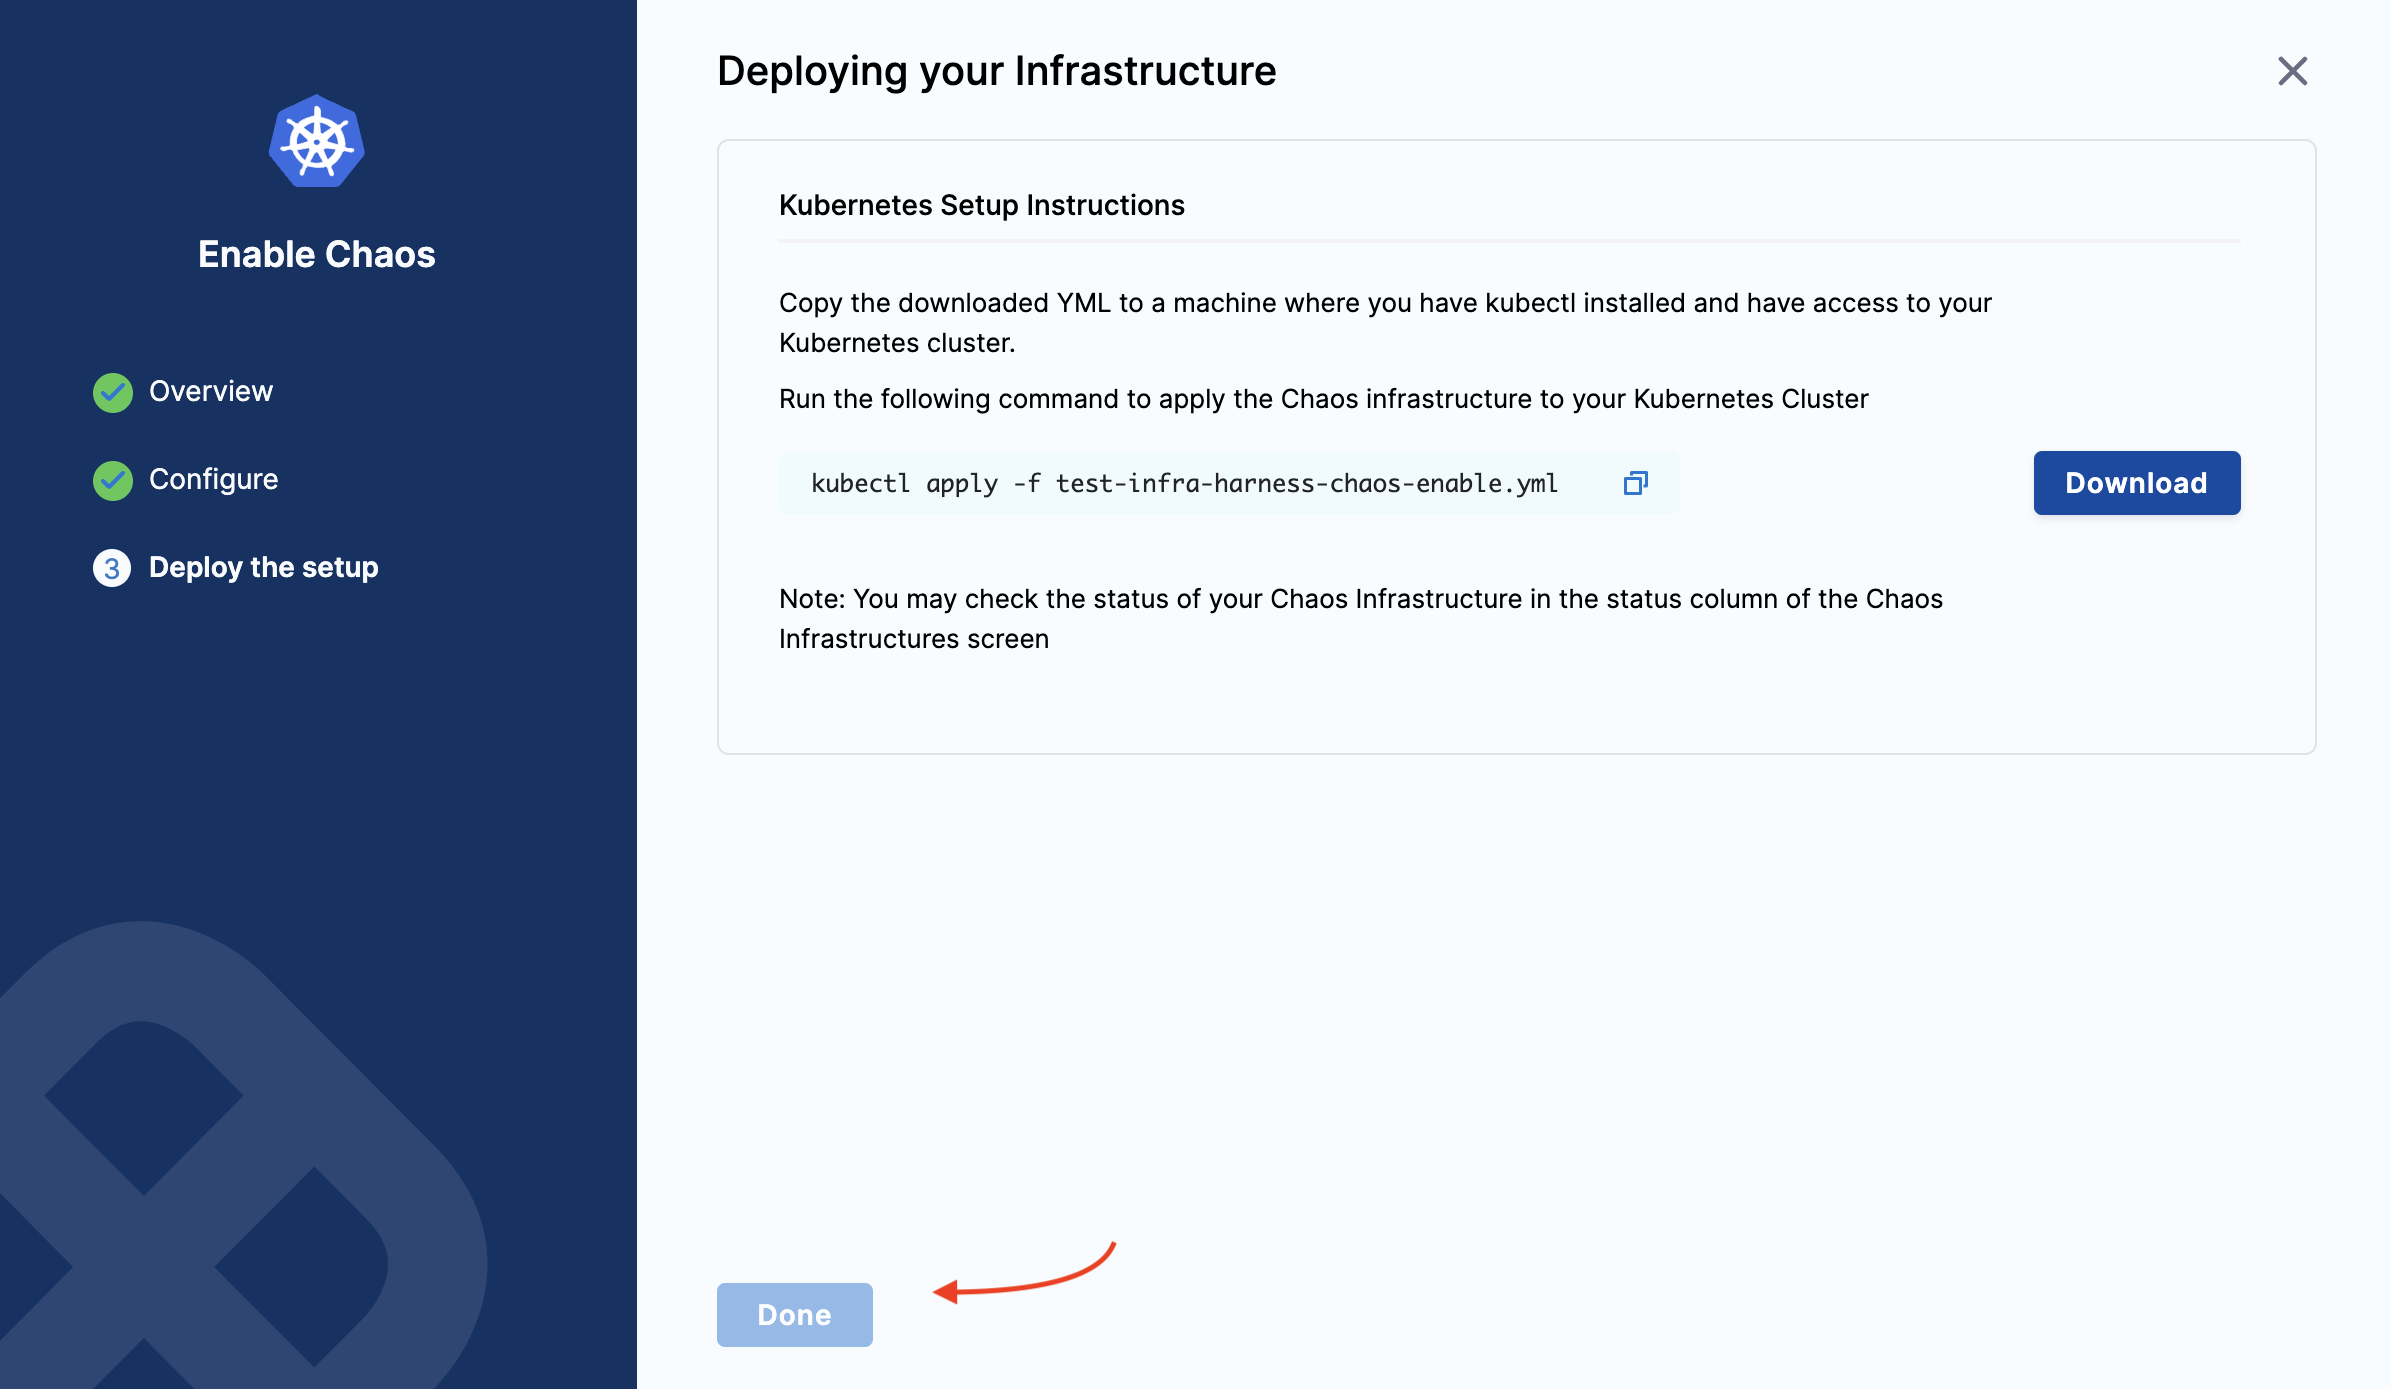
The Deploying your Infrastructure screen appears. If you're deploying on existing infrastructure, select Done.
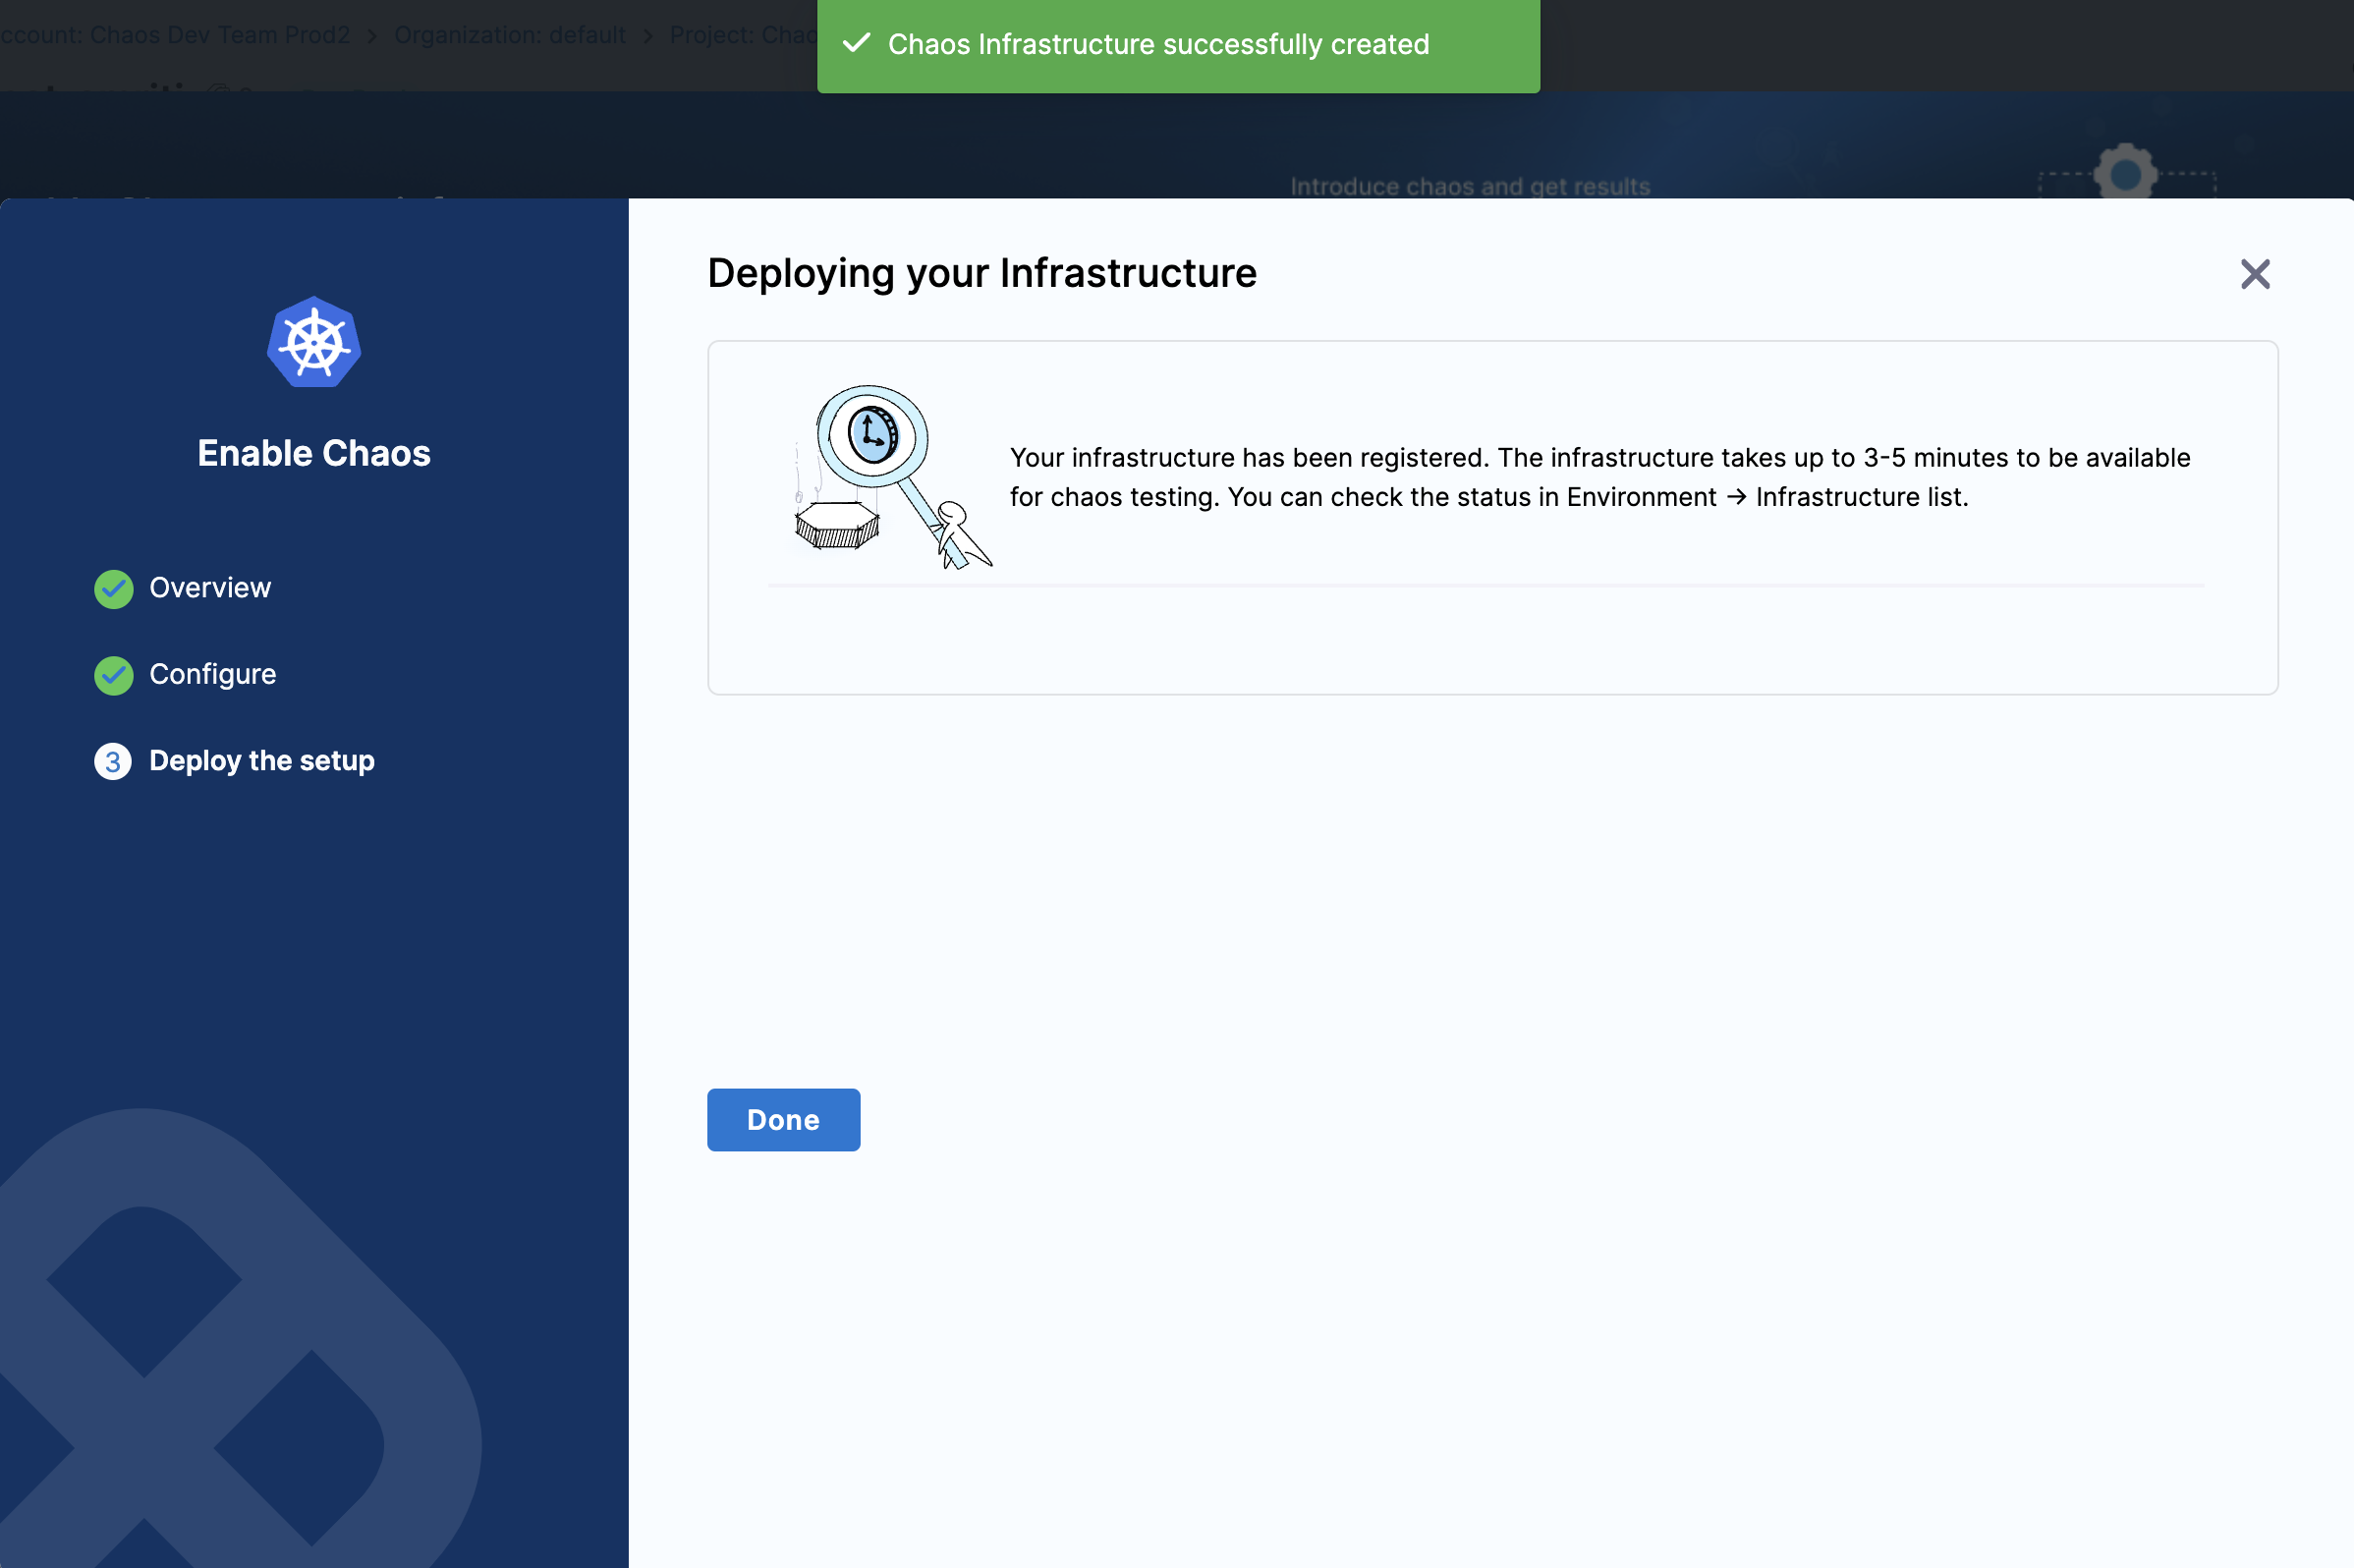
This is your final step. Harness installs the chaos infrastructure on your behalf.
On new infrastructure
-
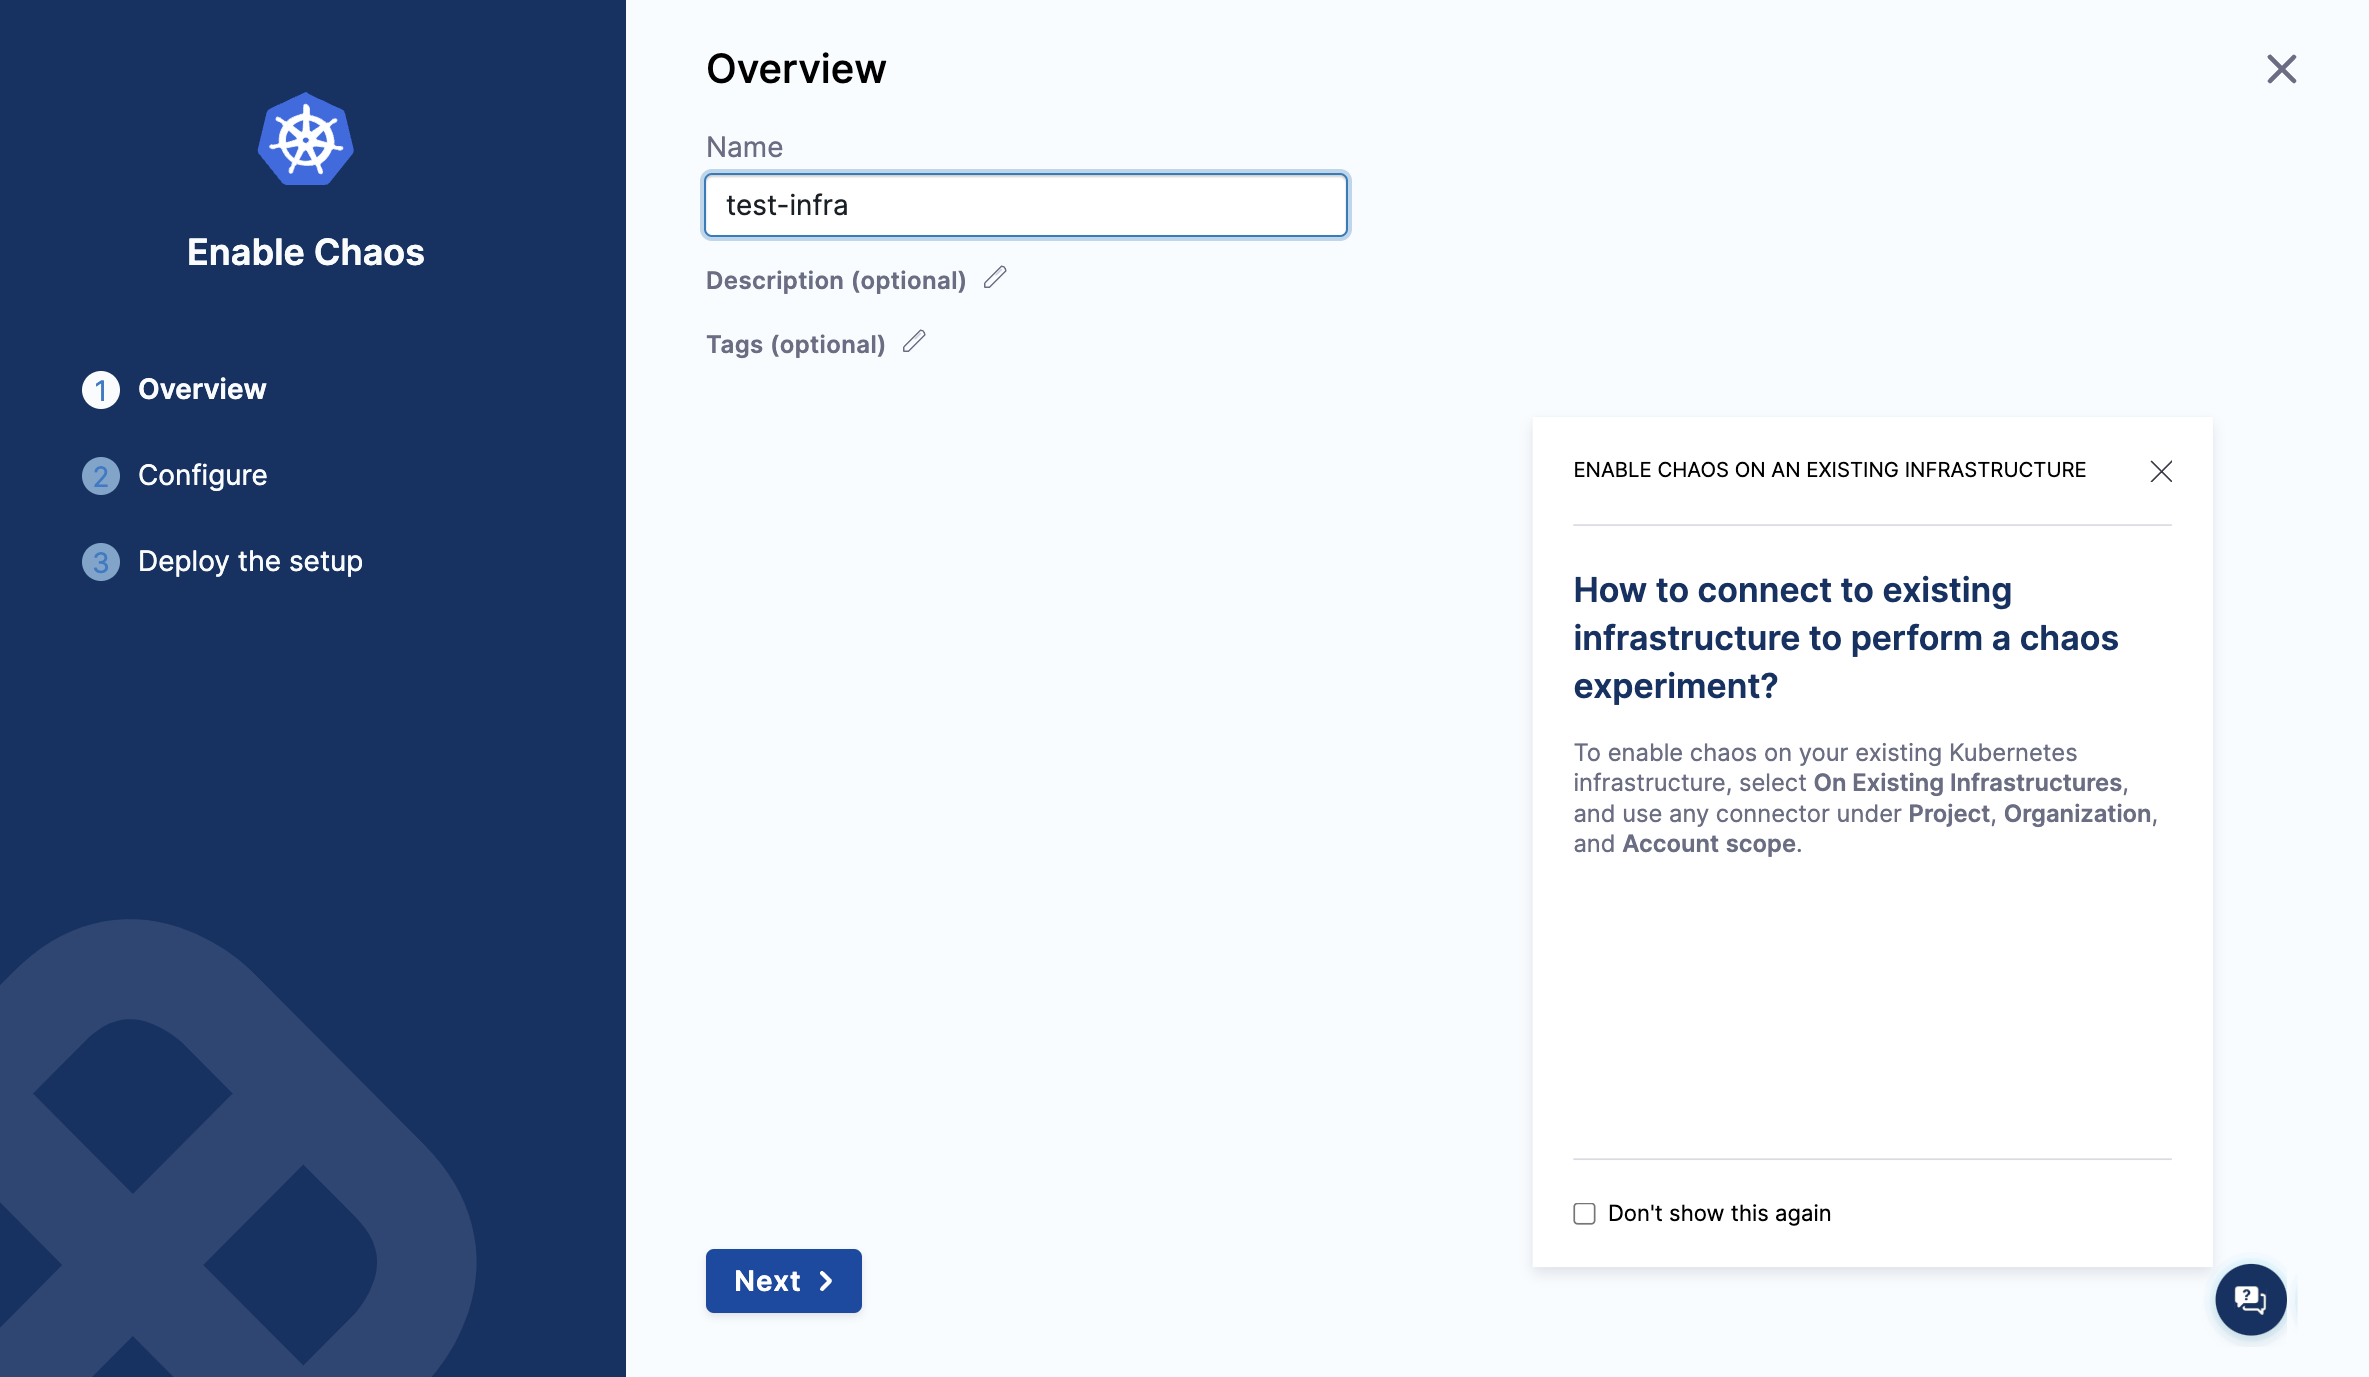
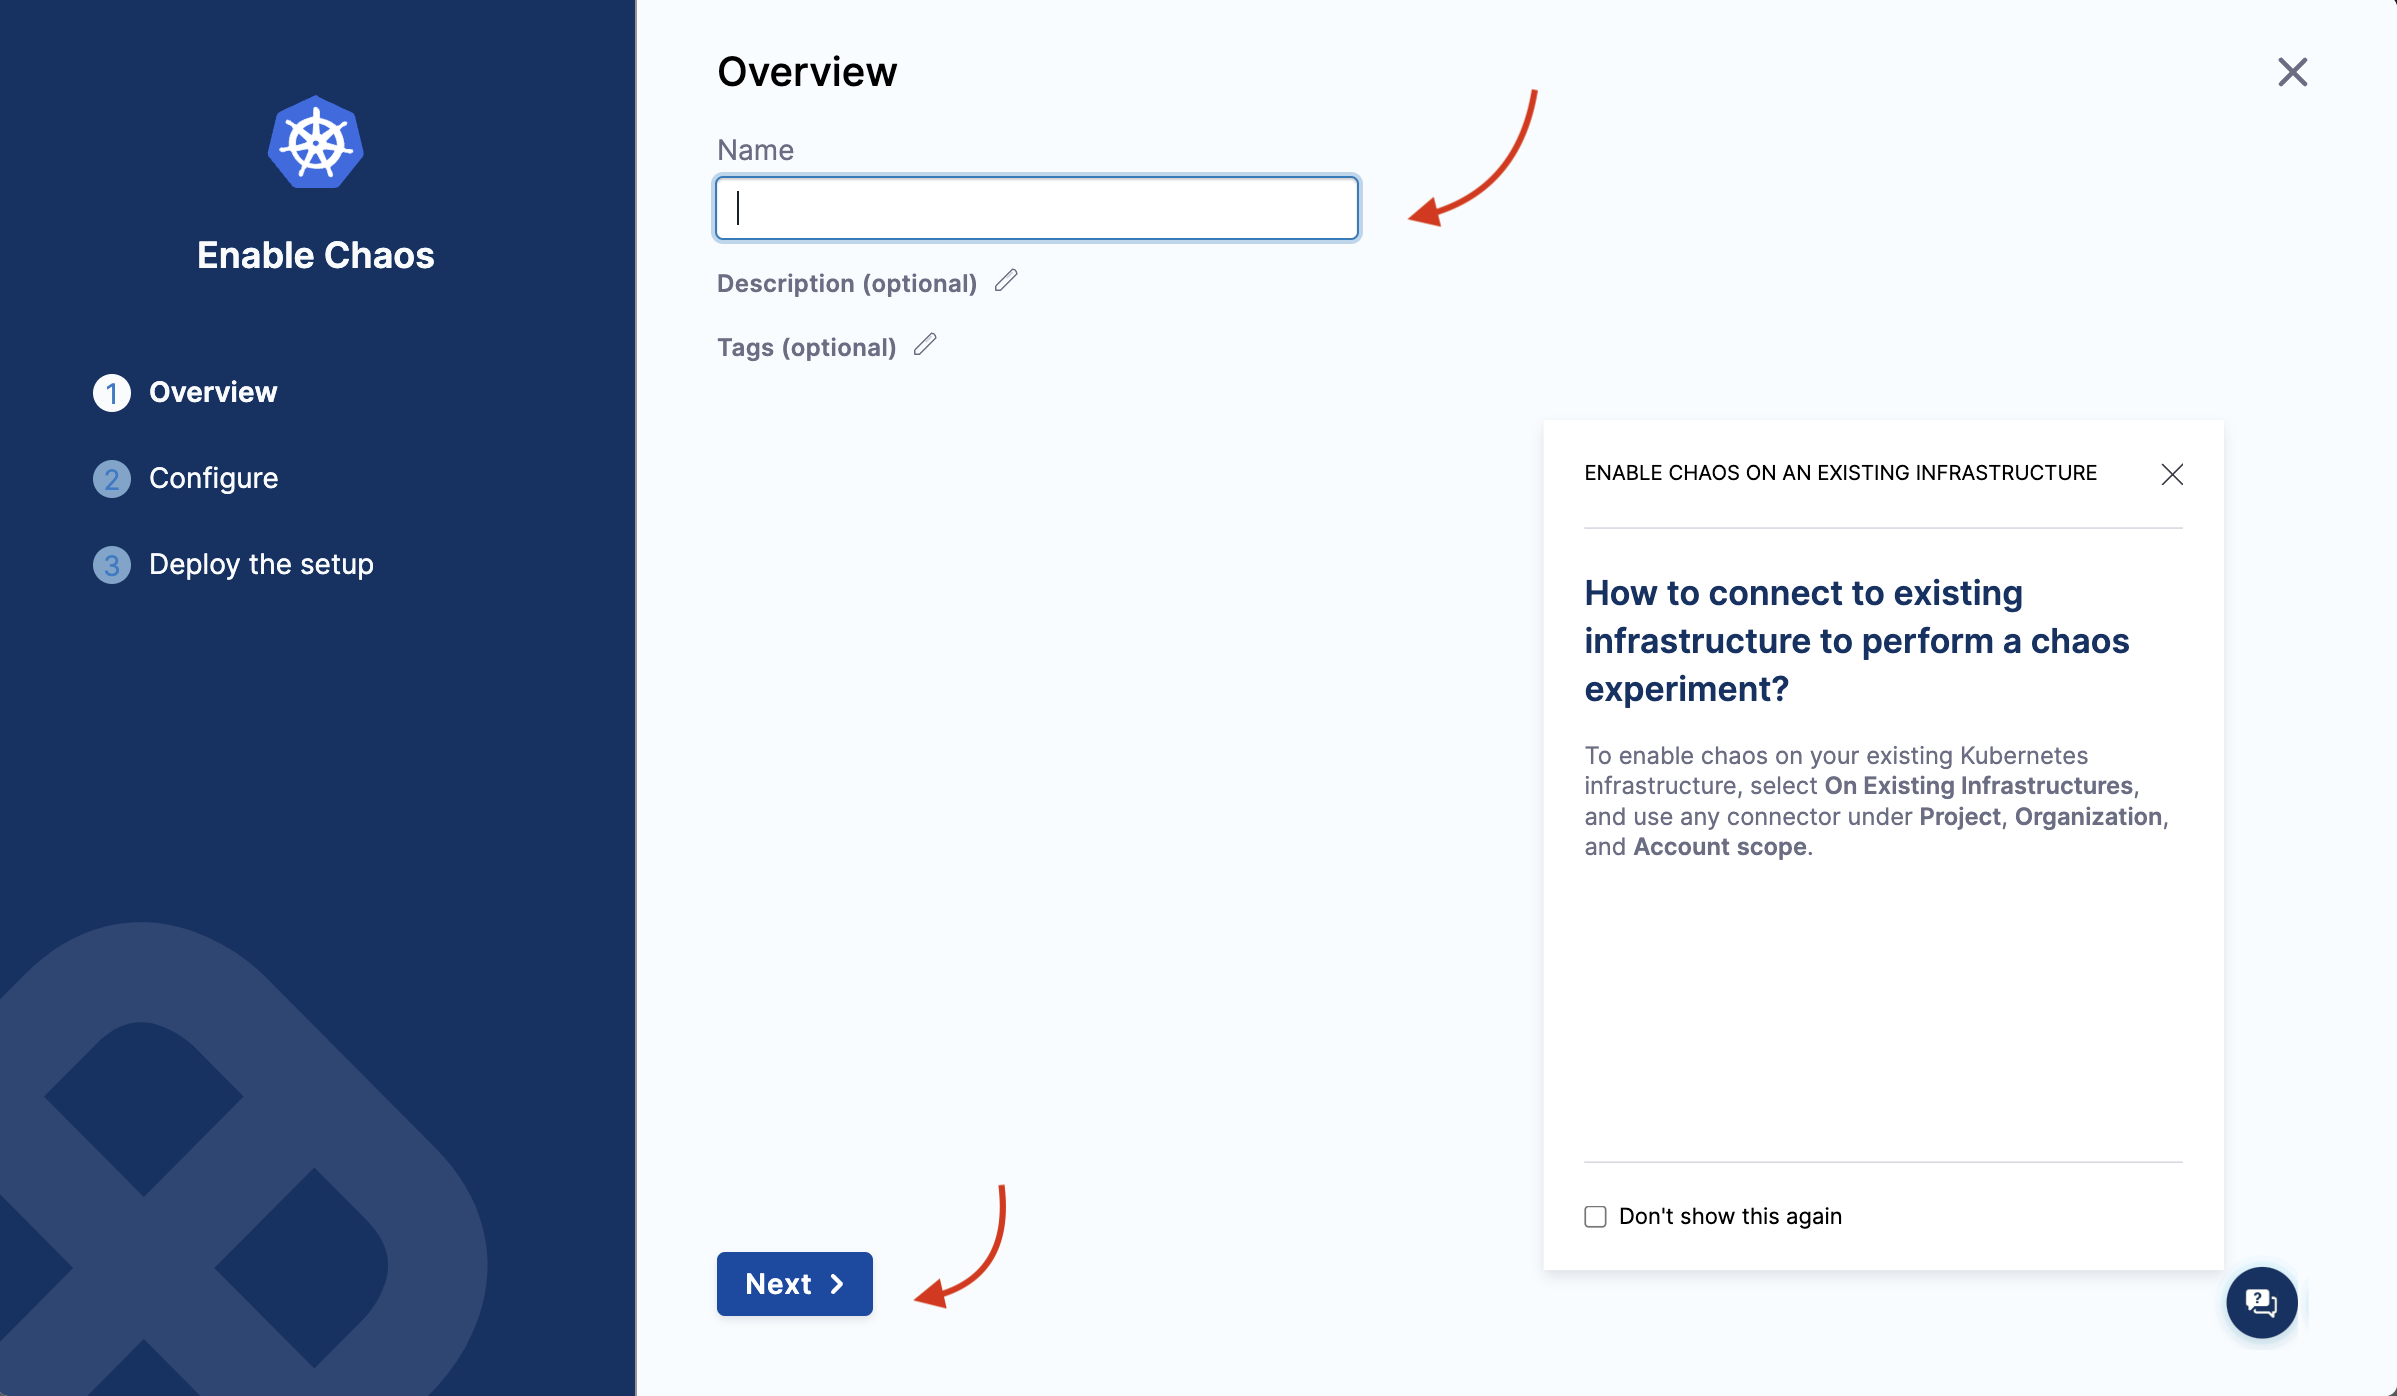
If you're deploying on new infrastructure, provide a name for the new infrastructure, and optionally a Description and a Tag. Select Next.
-
On the Configure Chaos Infrastructure screen, provide details like the installation type, access type, namespace, and service account name. Select Next.
If you choose installation type as Helm, go to install infrastructure using Helm or upgrade infrastructure using Helm
-
Run the given commands and/or download and apply the installation manifest YAML file.
-
For cluster-wide access:
-
Select Download, and then copy and run the
kubectlcommand shown on your screen to install the chaos infrastructure.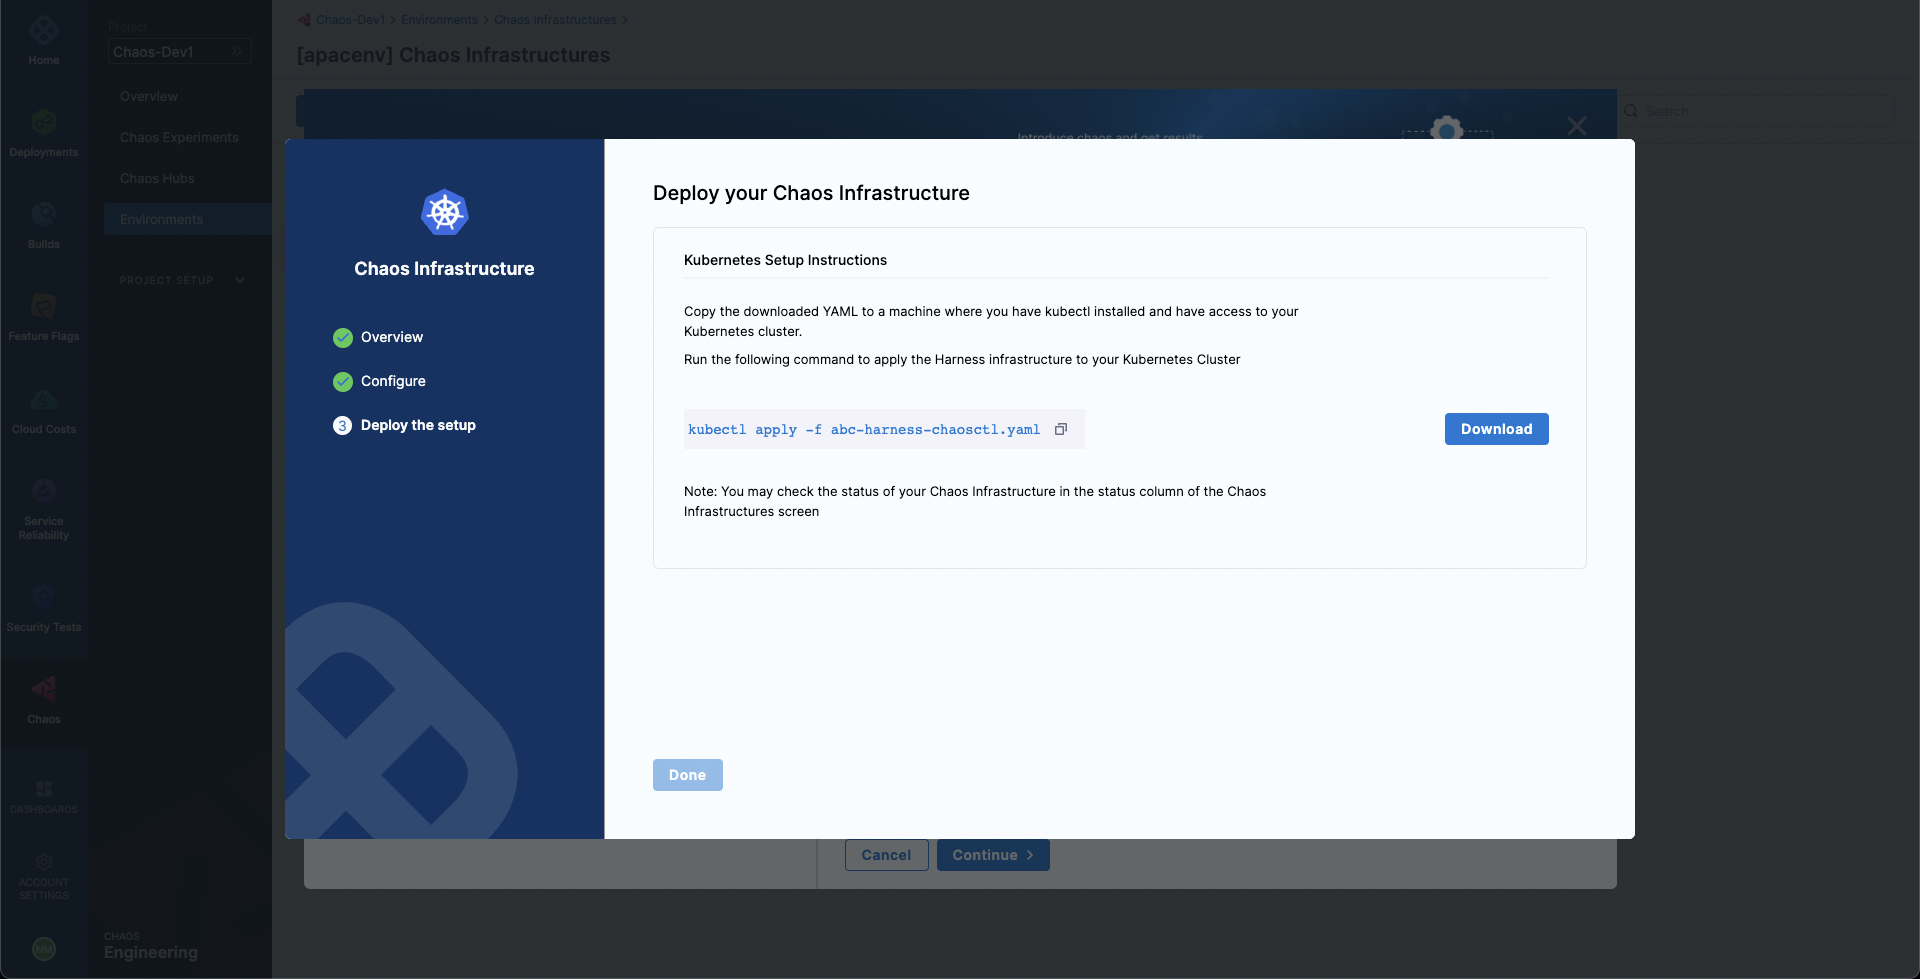
-
-
For namespace access:
-
Run the first
kubectlcommand to create the target namespace. -
Run the second
kubectlcommand to apply the chaos CRDs. -
Select Download, and then copy and run the third command to install the chaos infrastructure.
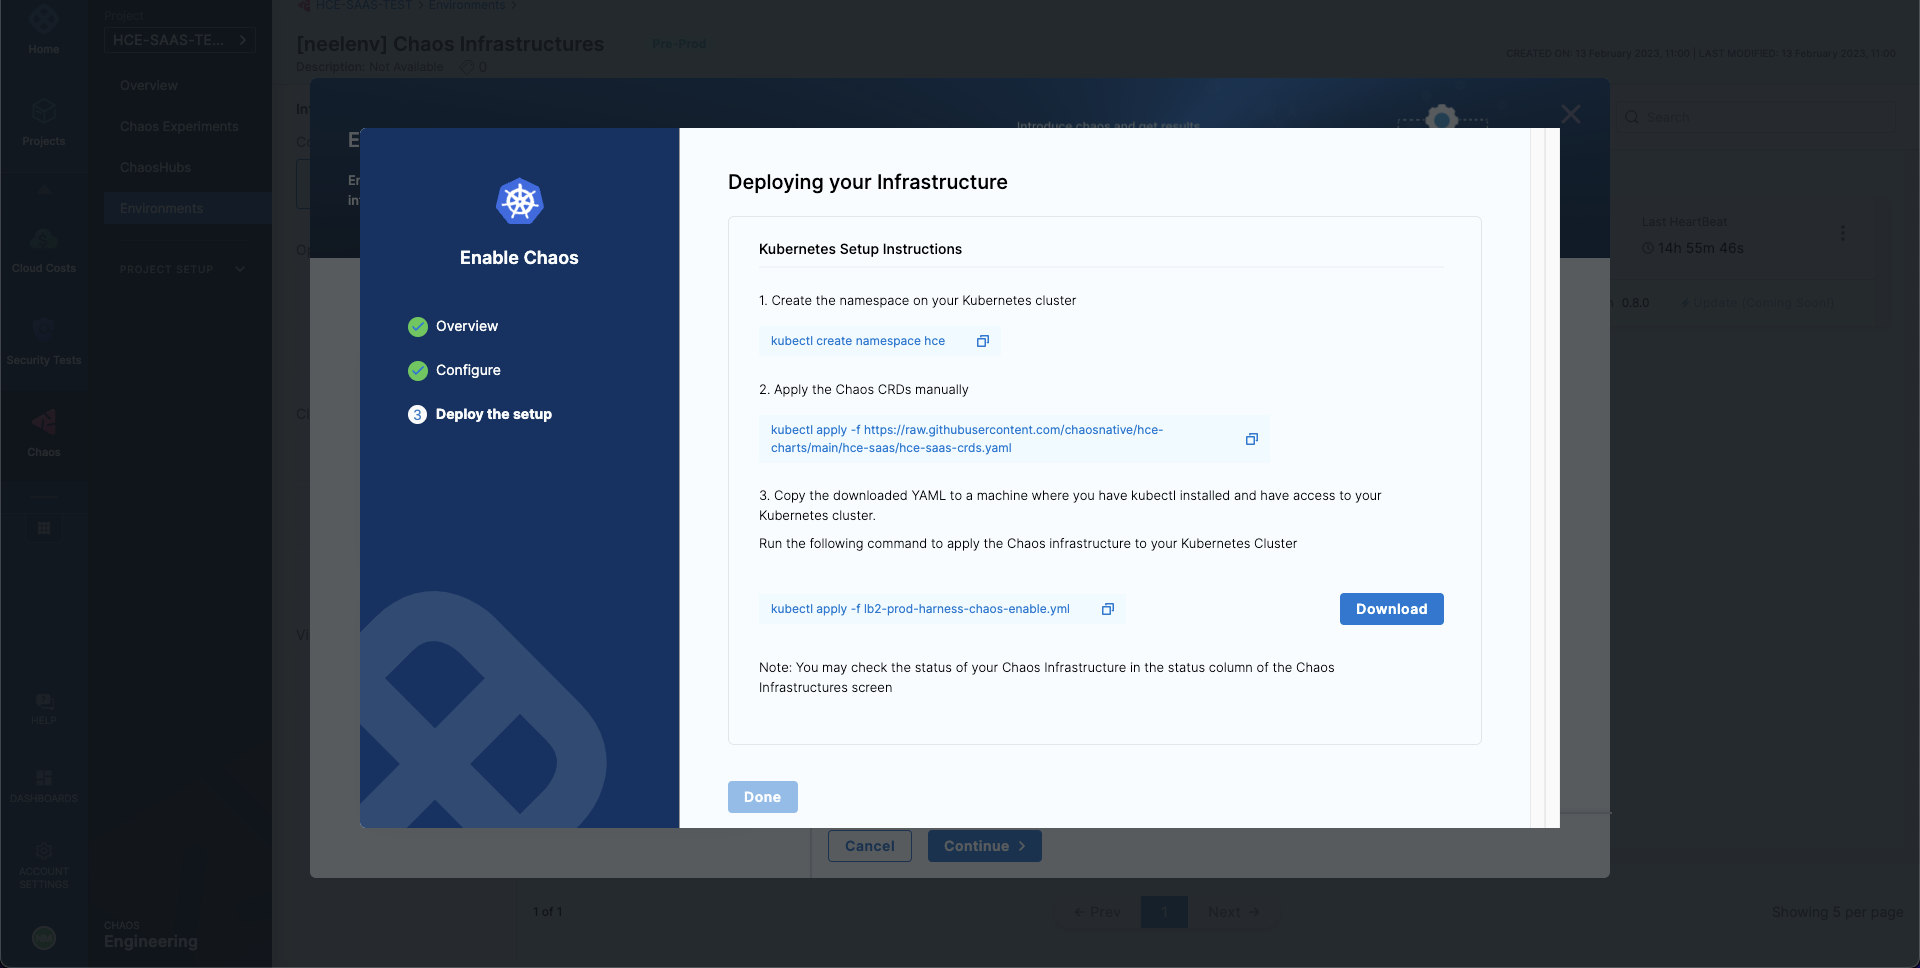
-
-
-
Select Done.
Use helm template to install chaos infrastructure
HCE provides Helm support to install chaos infrastructure, in addition to installing with the help of a manifest (as explained earlier).
To use Helm to install a chaos infrastructure,
-
Navigate to Chaos Experiments -> Environment.
-
You can select New environment and create an environment and install or upgrade chaos infrastructure. To enable chaos in an existing environment, click the environment.
-
Click Enable chaos.

-
You can use Helm commands to enable chaos on new infrastructure only. Click On new infrastructures and Continue.
-
Add a name, description (optional), and a tag (optional). Click Next.
-
Choose the installation type as Helm, and one of the access types (namespace or cluster-wide). Specify namespace and service account.
-
Depending on the type of access you choose, you will see a set of commands. If you select namespace type, you will need to enter some advanced input values. Click Next.
-
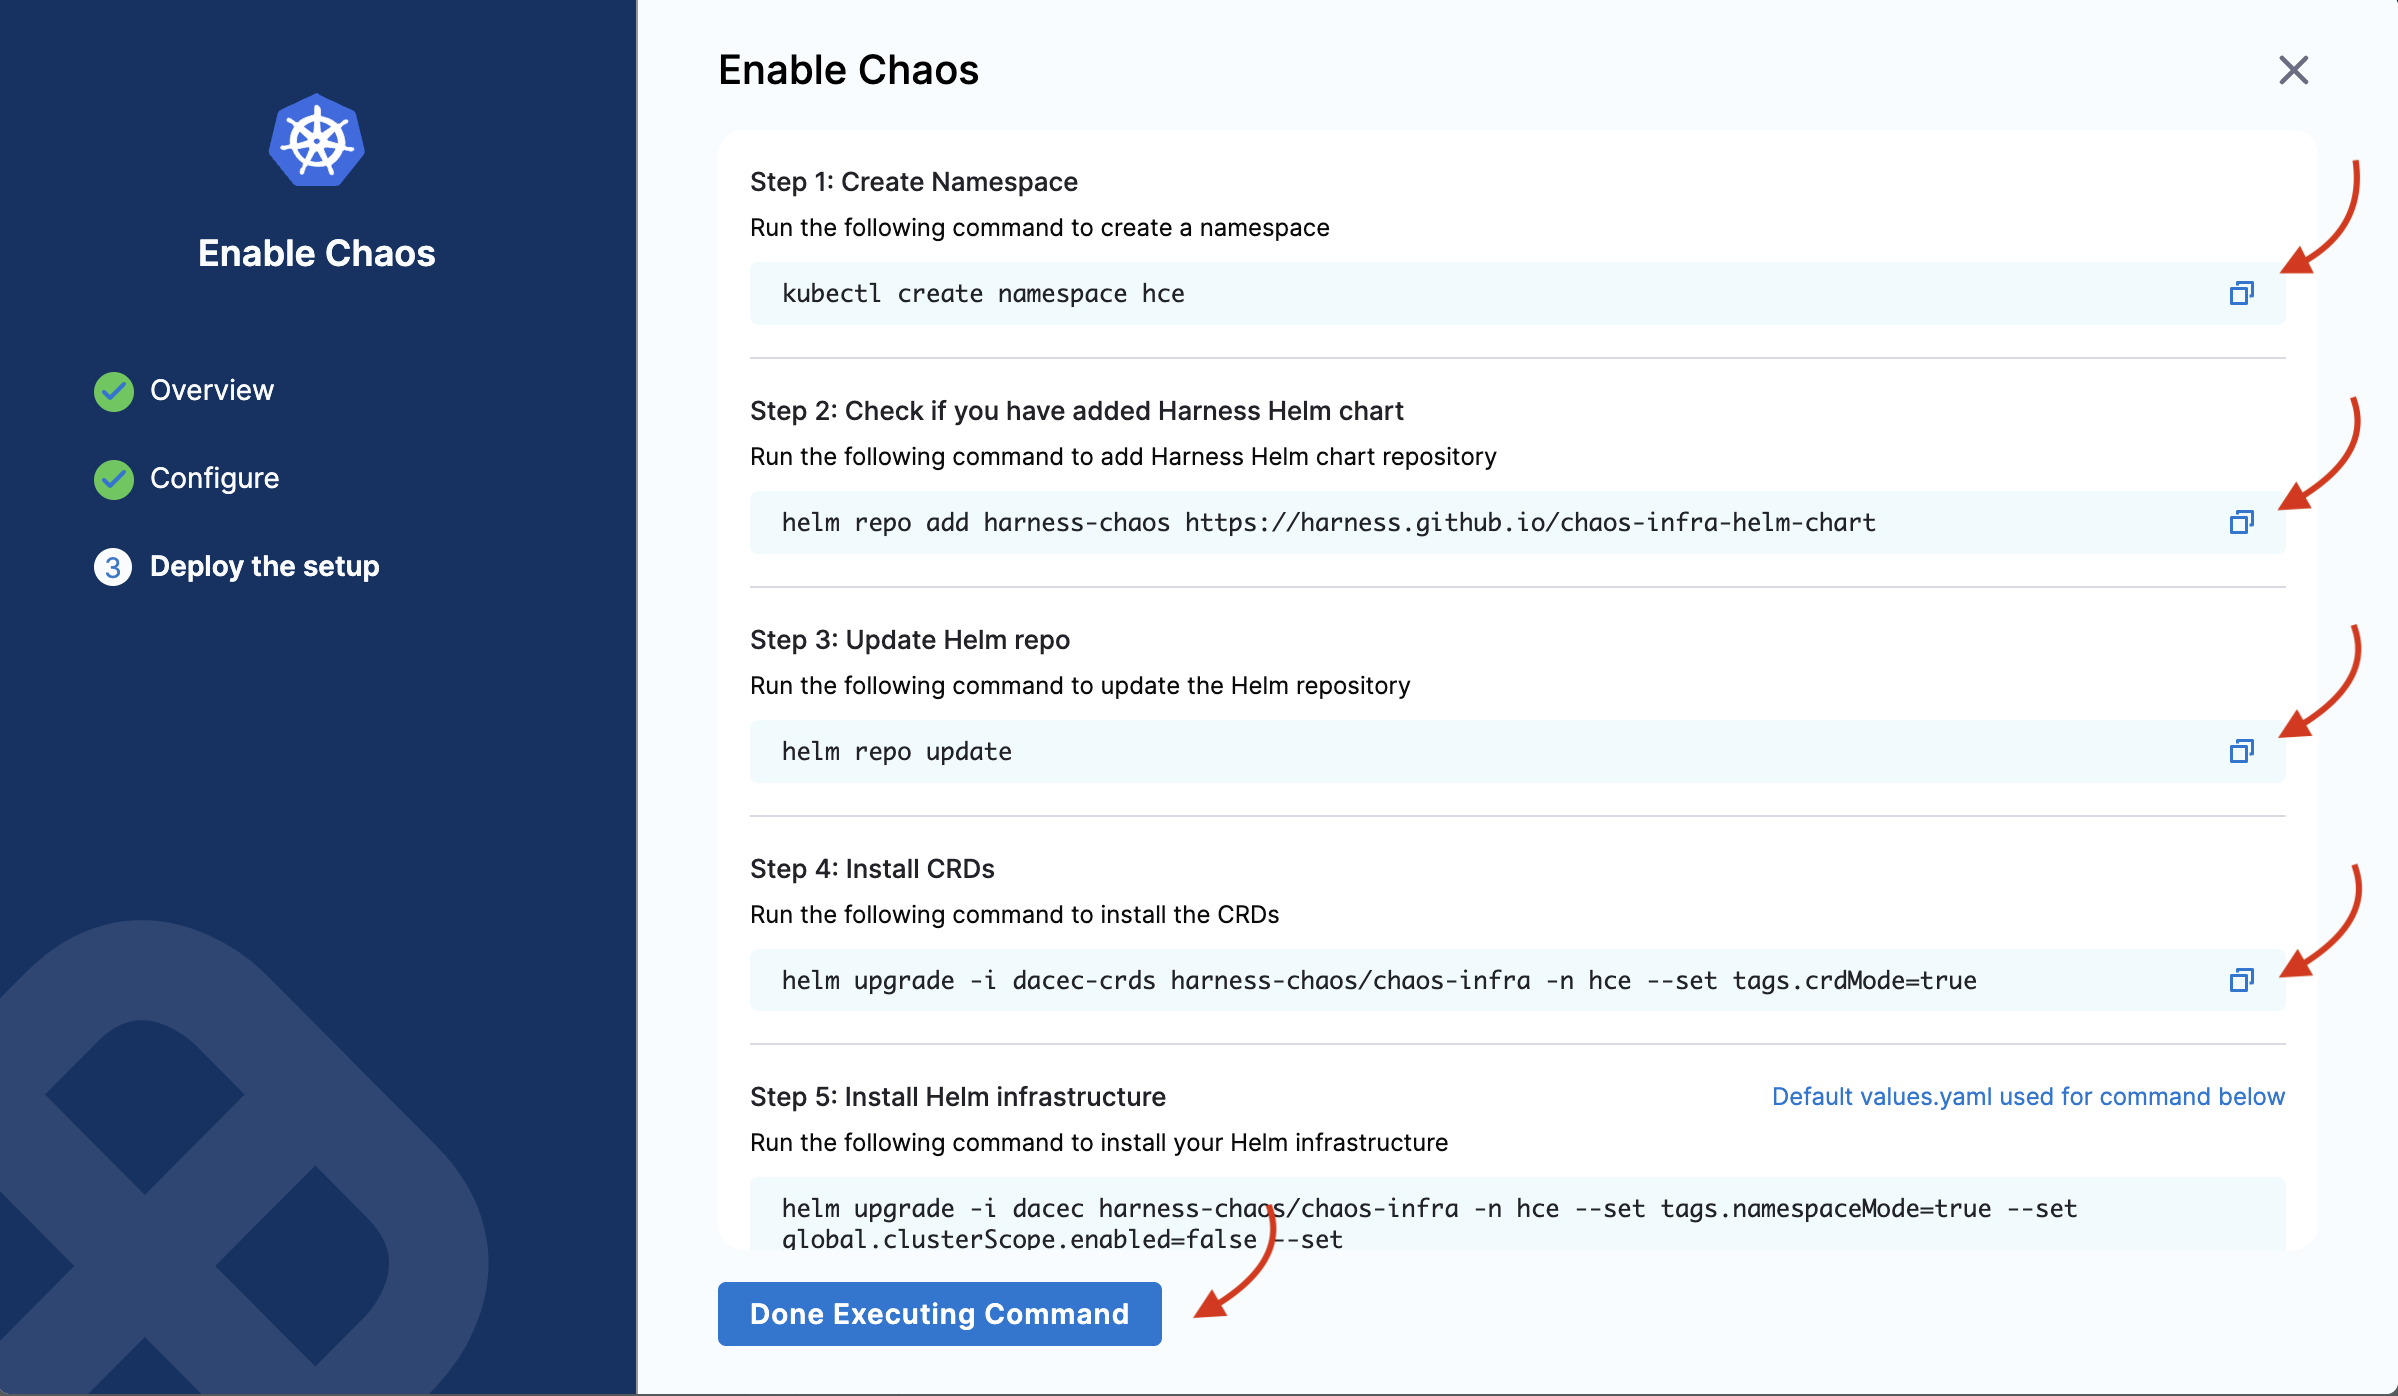
You will see the following commands that you need to execute on your terminal. Once you are done, click Completed Command Execution.
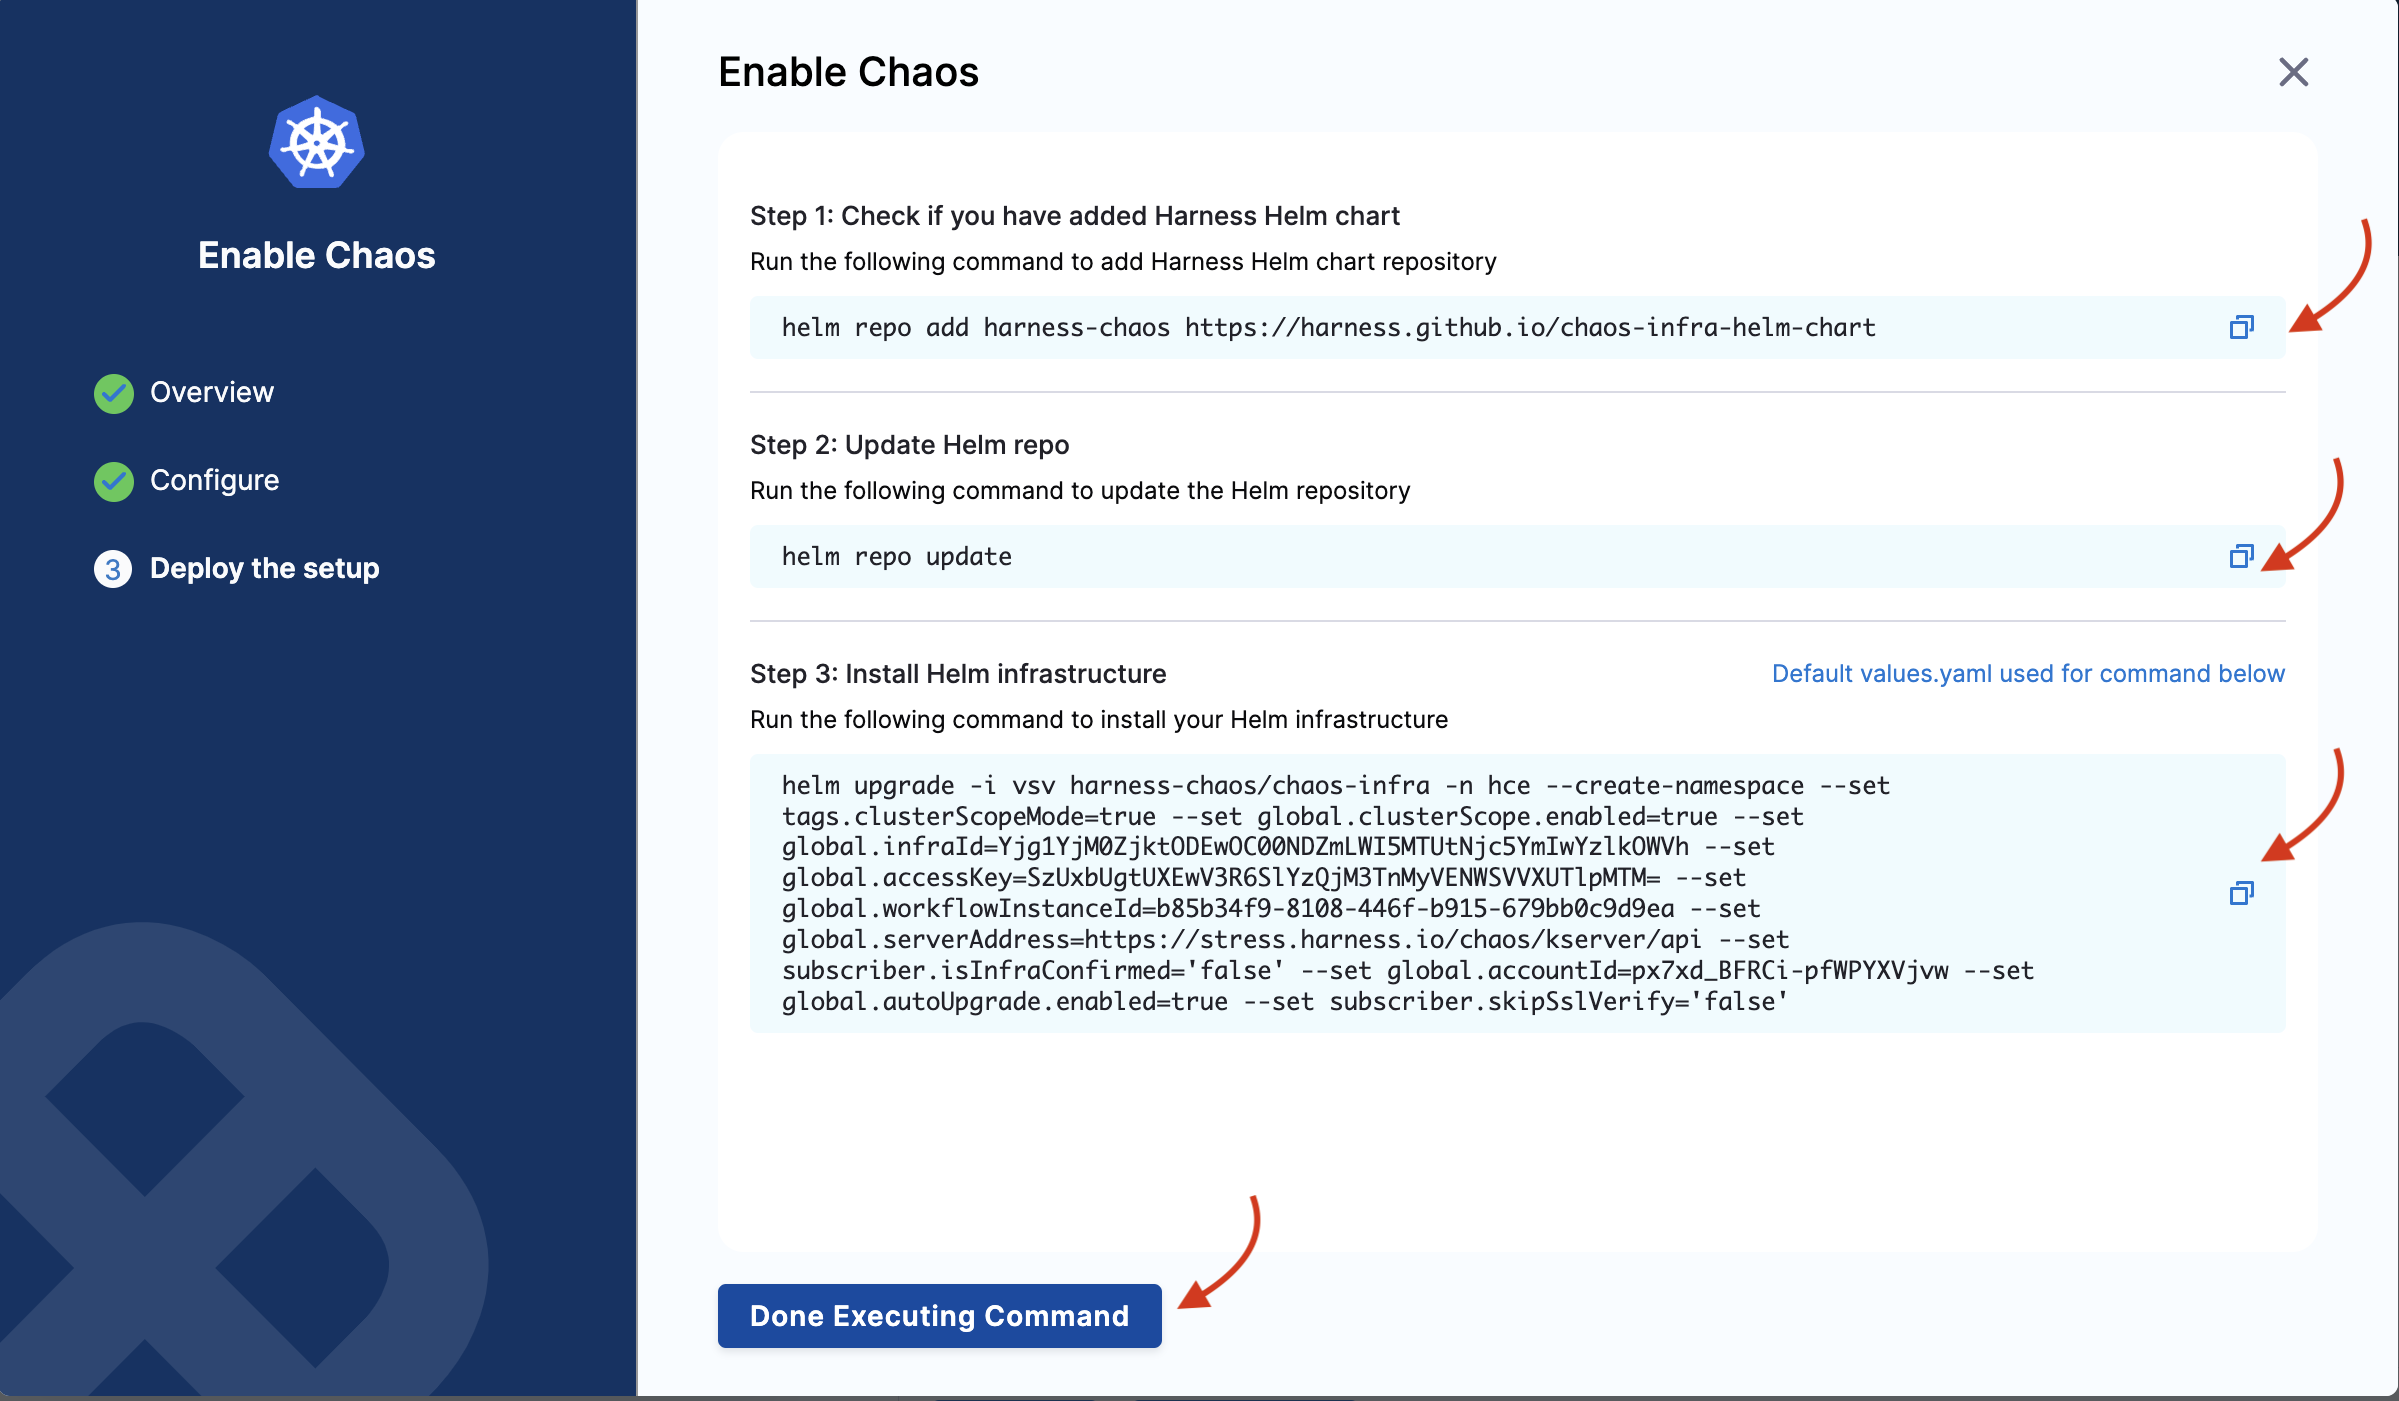
-
If you select the namespace scope, you will see the following commands that you need to execute on your terminal. One you are done, click Completed Command Execution.
Use helm template to upgrade chaos infrastructure
-
To upgrade a chaos infrastructure that you installed using the Helm commands, you can navigate to the environment and click Upgrade now. This will list the set of commands that you can execute on your terminal.

-
Choose an existing environment or create a new environment
-
If you want to override other values, you can make the changes in the values.yaml file of the respective custom resource in the Helm repository.
-
Download the helm repository. This repository contains all the chaos resources required for chaos infrastructure management. The repository also contains resources necessary for the namespace and cluster scope installations. You can use this repository to install and manage the infrastructure.
Based on the scope of installation, you have to execute the commands.
- If you wish to install the infrastructure in the namespace scope, you will get a helm command to install the CRDs. You have to apply this command separately before installing or upgrading the infrastructure.
- If you wish to install the infrastructure in cluster scope, apply the helm upgrade command to install the CRDs and other infrastructure components.
- If you install your infrastructure in cluster scope, HCE supports auto-upgrade for such an infrastructure.
- It is important that you remember that the flags in the command are based on the input parameters you provide while installing the infrastructure.
2.2 Add a Linux infrastructure
This section outlines the steps to add a chaos infrastructure to a Kubernetes environment.
If you're installing the chaos infrastructure alongside SElinux, you must add a policy module to enable timedatectl. SElinux is enabled by default in distributions such as CentOS, SUSE Linux, RHEL, and Fedora among others.
Details
If you have enabled SELinux for your OS, you must add a policy module prior to the installation of the infrastructure to access timedatectl, which is used in the linux-time-chaos fault.
To add the policy module:
- Create the file
timedatectlAllow.tein your Linux machine as follows:
module timedatectlAllow 1.0;

require {
        type systemd_timedated_t;
        type initrc_t;
        class dbus send_msg;
}

#============= systemd_timedated_t ==============
allow systemd_timedated_t initrc_t:dbus send_msg;
- Install the utilities that will help in compiling and packaging the policy module for your system. Here, we're using the yum package manager to install them:
sudo yum install -y policycoreutils-python checkpolicy
- After the installation of these packages, compile the policy module with the following command:
sudo checkmodule -M -m -o timedatectlAllow.mod timedatectlAllow.te
This creates the binary policy module file timedatectlAllow.mod.
- Use the policy module file from the previous step to create a policy module package:
sudo semodule_package -o timedatectlAllow.pp -m timedatectlAllow.mod
This creates the policy module package file timedatectlAllow.pp.
- Add the package file from the previous step alongside the other SELinux modules in your system:
sudo semodule -i timedatectlAllow.pp
The SELinux policy module is now added, and you can proceed to install the infrastructure.
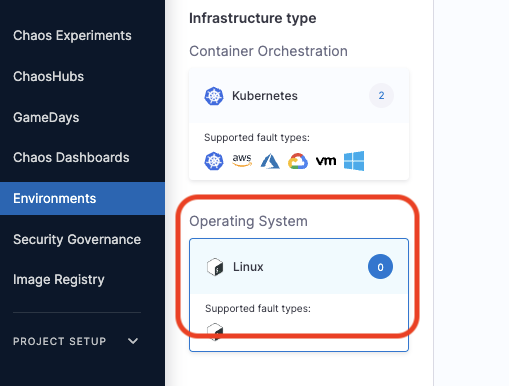
To add a Linux chaos infrastructure:
-
In Harness, navigate to Chaos > Environments, and then select the environment you want to add chaos infrastructure.
-
In the environment details page, under Infrastructure type, select Linux, and then select + Enable Chaos.
-
On the next screen, enter a Name for the infrastructure, and optionally, a Description and Tags.
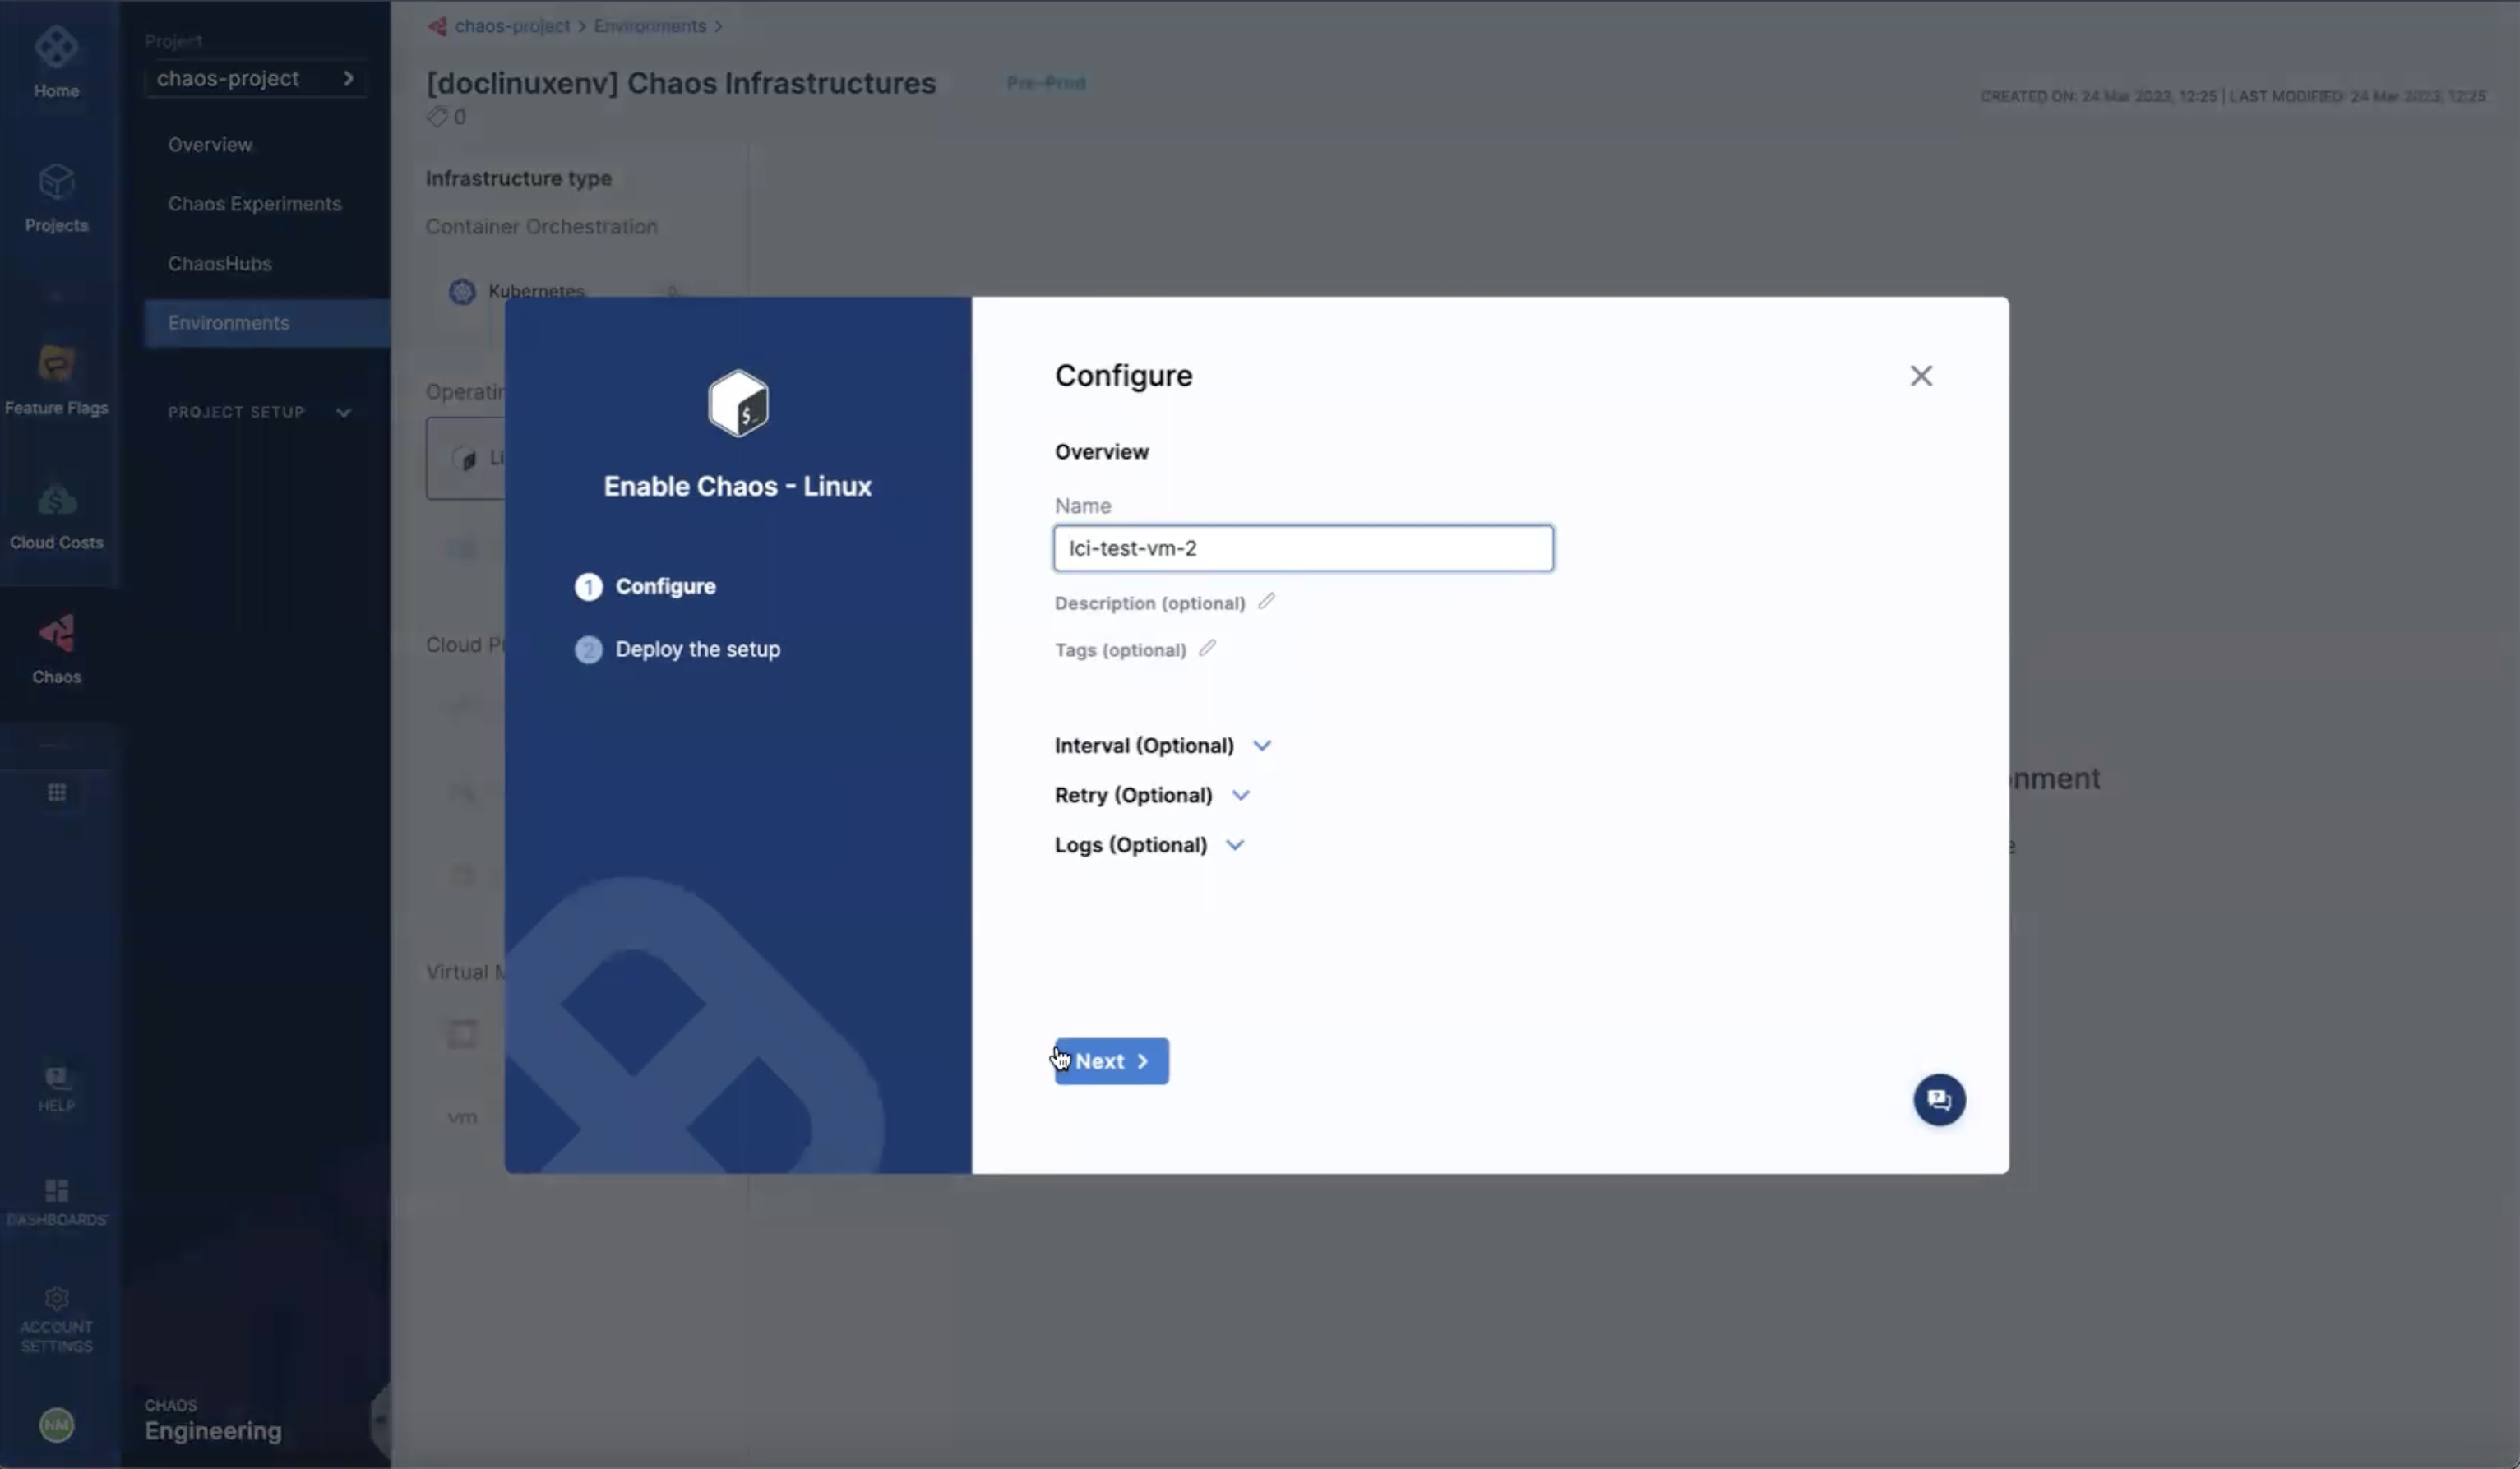
You can also specify the advanced setup options for the infrastructure.
-
Select Next.
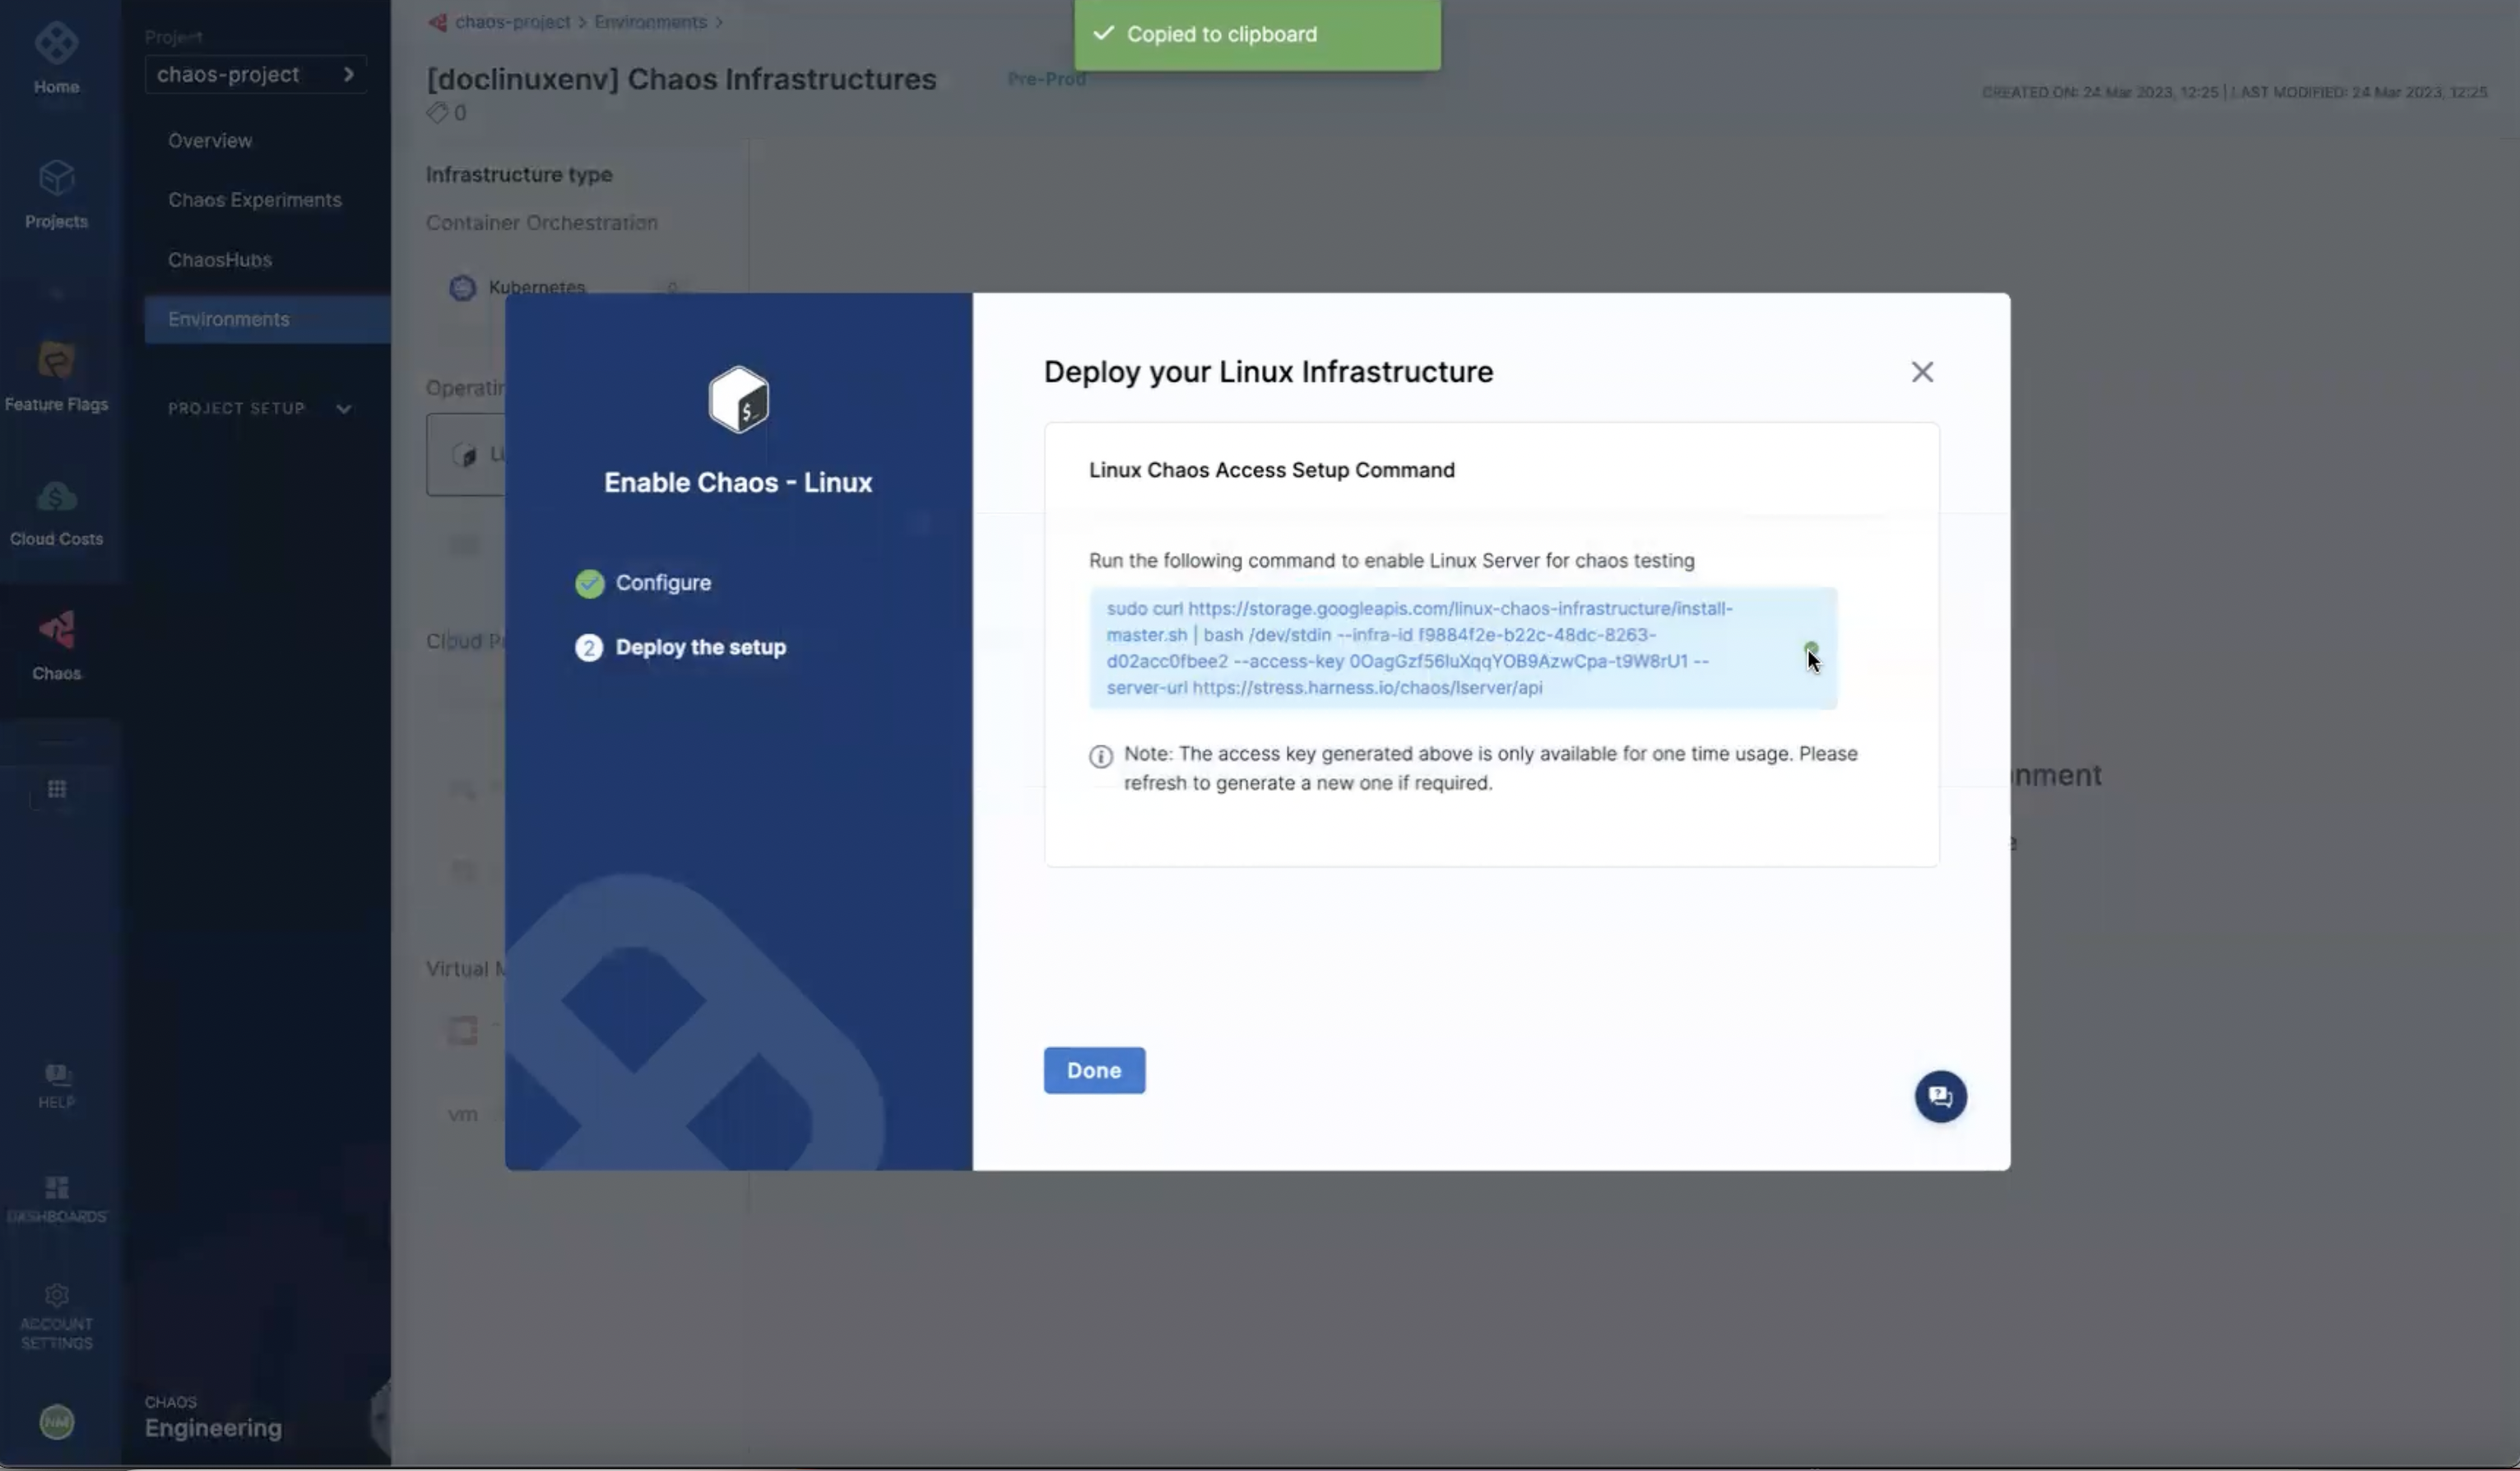
-
On the next screen, copy the command to set up Linux chaos access, select Done, and then execute the copied command on your Linux machine.
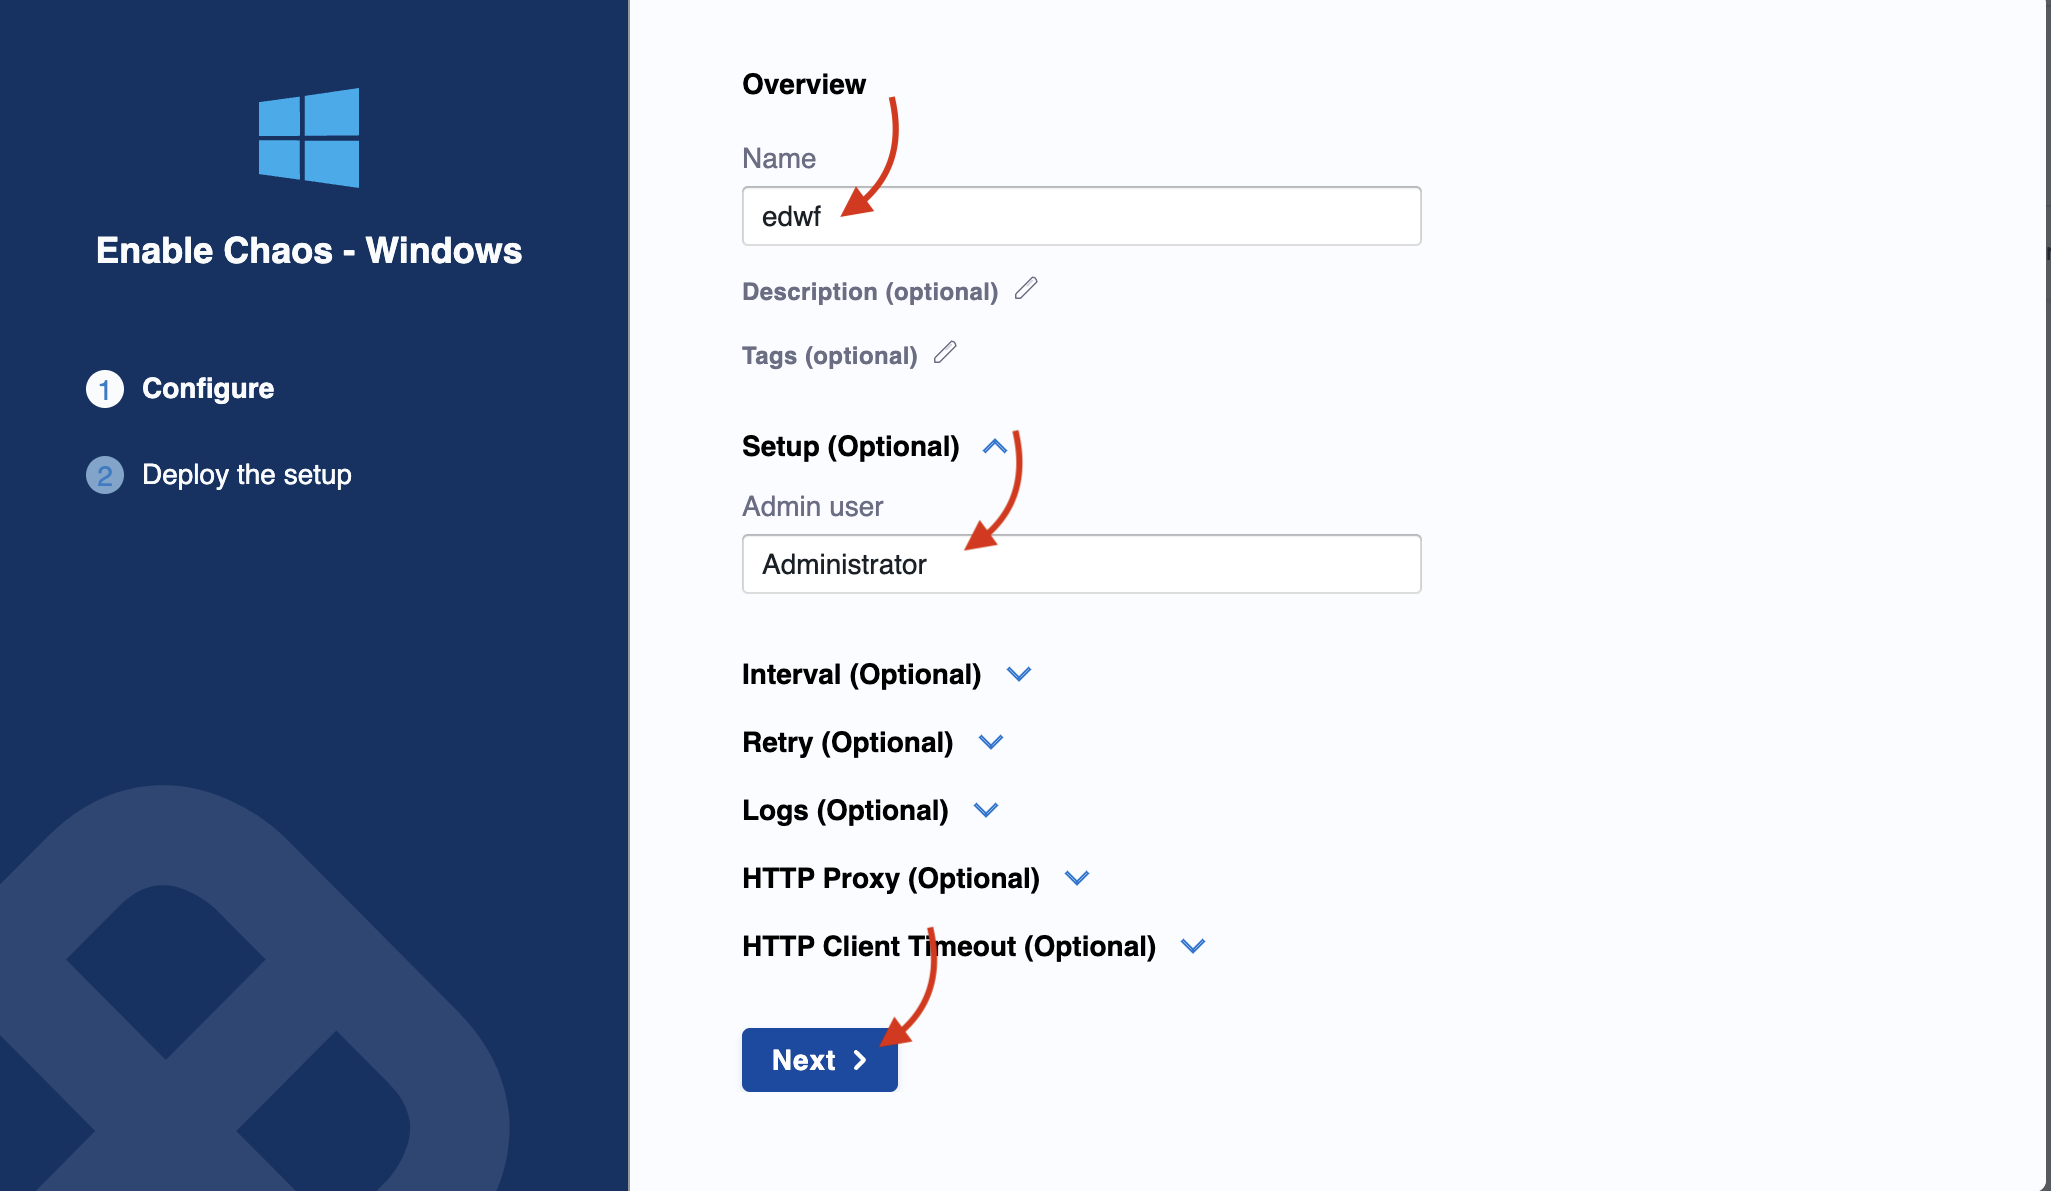
2.3 Add a Windows infrastructure
Ensure that you have fulfilled the prerequisites before connecting to a Windows chaos infrastructure.
-
Navigate to Environments and click Windows. click Enable chaos.
-
Add name (mandatory), and an admin user.
-
Copy the command generated. The prerequisites discusses how you can configure a password. If you have a password, replace it in the
<your-password>placeholder. Execute this command on your terminal (remember to open the command prompt as an admin if you are not an admin by default). Click Done once you finish the execution.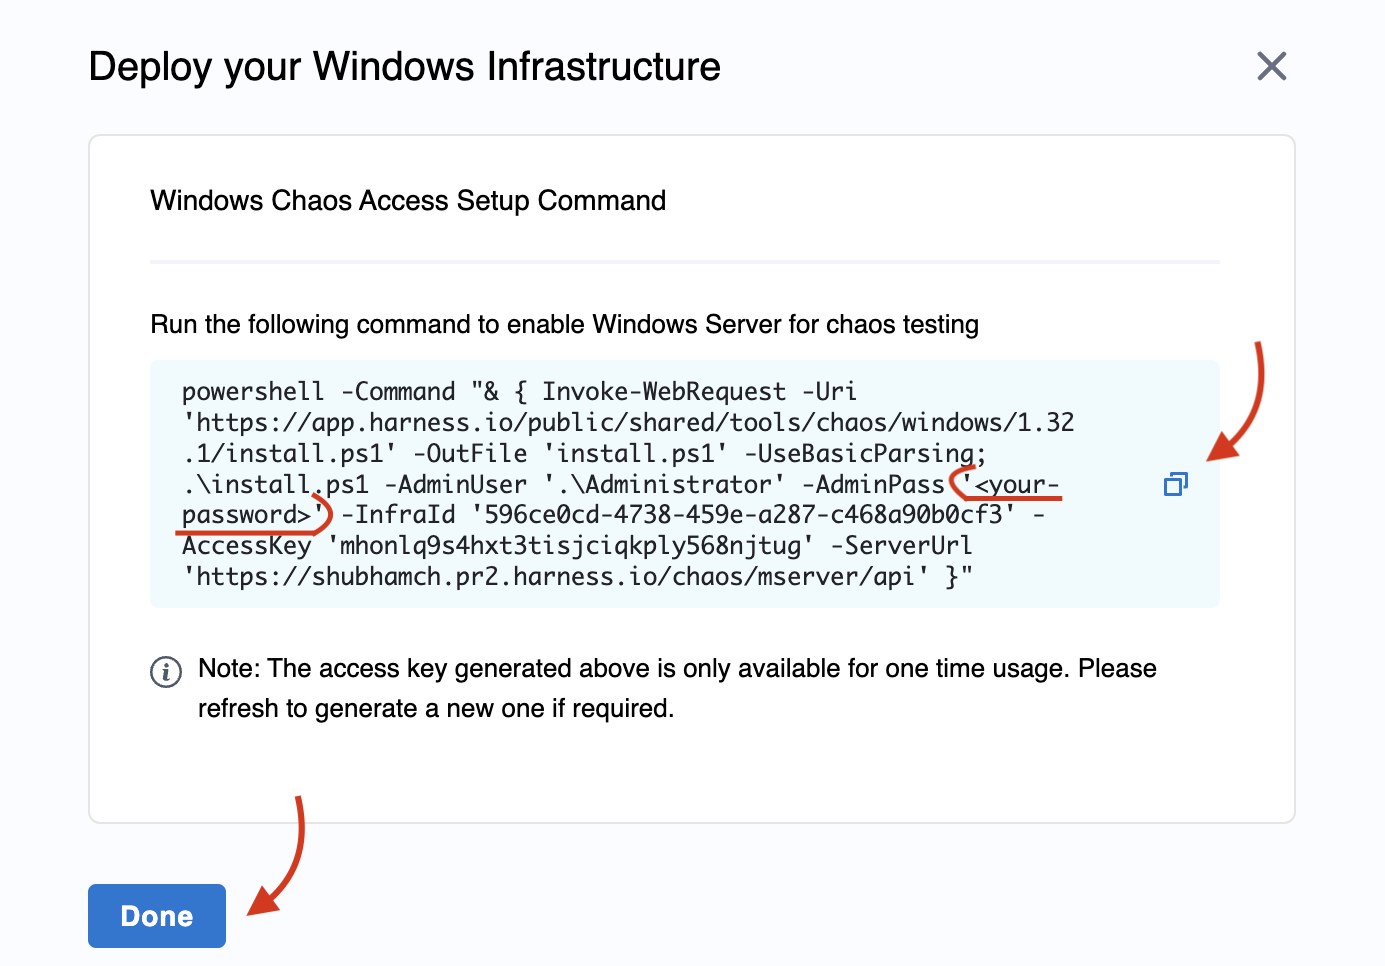
This displays the following updates about the installation on your terminal.
    Directory: C:\


Mode                 LastWriteTime         Length Name
----                 -------------         ------ ----
d-----          3/7/2024   7:48 AM                HCE
Downloading Testlimit...
Extracting Testlimit...
Accepting Testlimit EULA...
Testlimit EULA accepted.
Downloading windows-chaos-infrastructure binary...
Config file created at C:\\HCE\config.yaml


    Directory: C:\HCE\Logs


Mode                 LastWriteTime         Length Name
----                 -------------         ------ ----
-a----          3/7/2024   7:51 AM              0 windows-chaos-infrastructure.log
[SC] CreateService SUCCESS
Service created and started successfully.
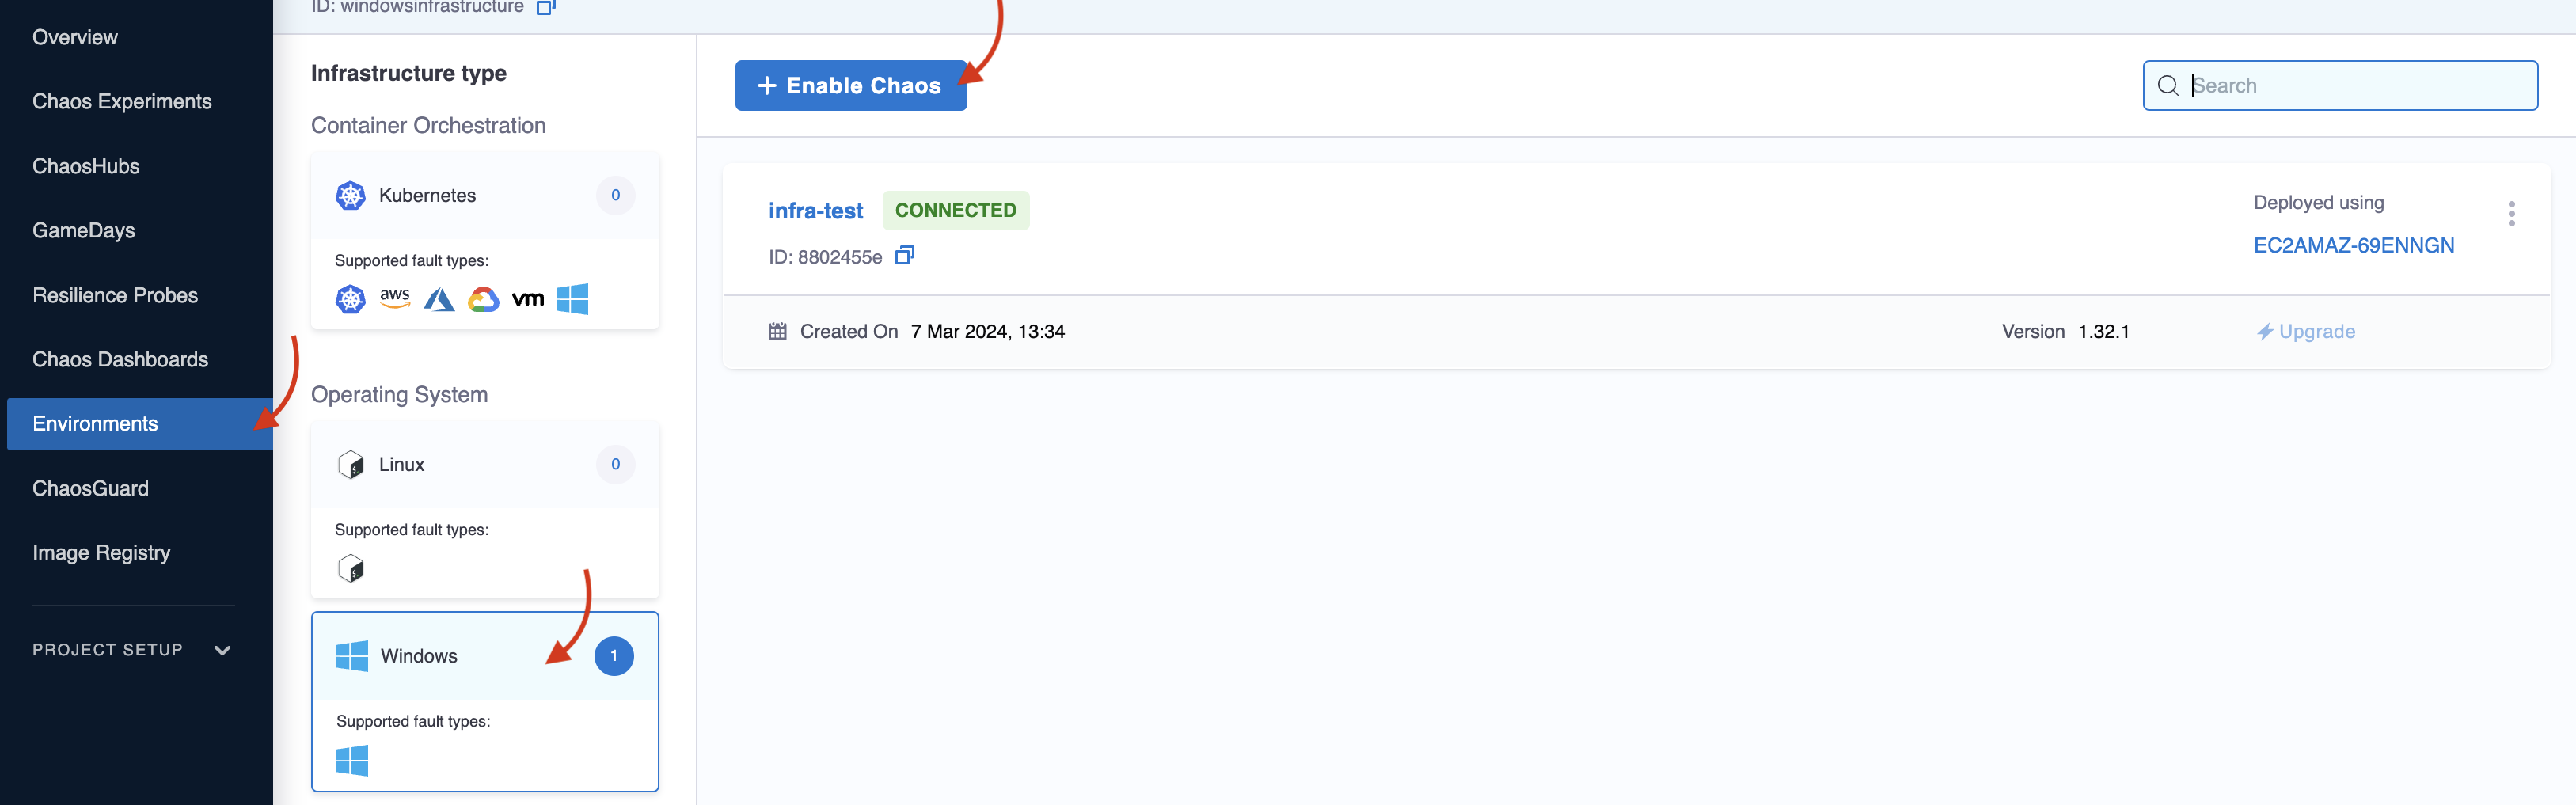
3. Validate the chaos infrastructure installation
After adding chaos infrastructure, Harness takes some time to set up all the chaos infrastructure resources. On the UI, if you navigate to Environments -> Windows (or Kubernetes or Linux), you can see the connection status is CONNECTED.
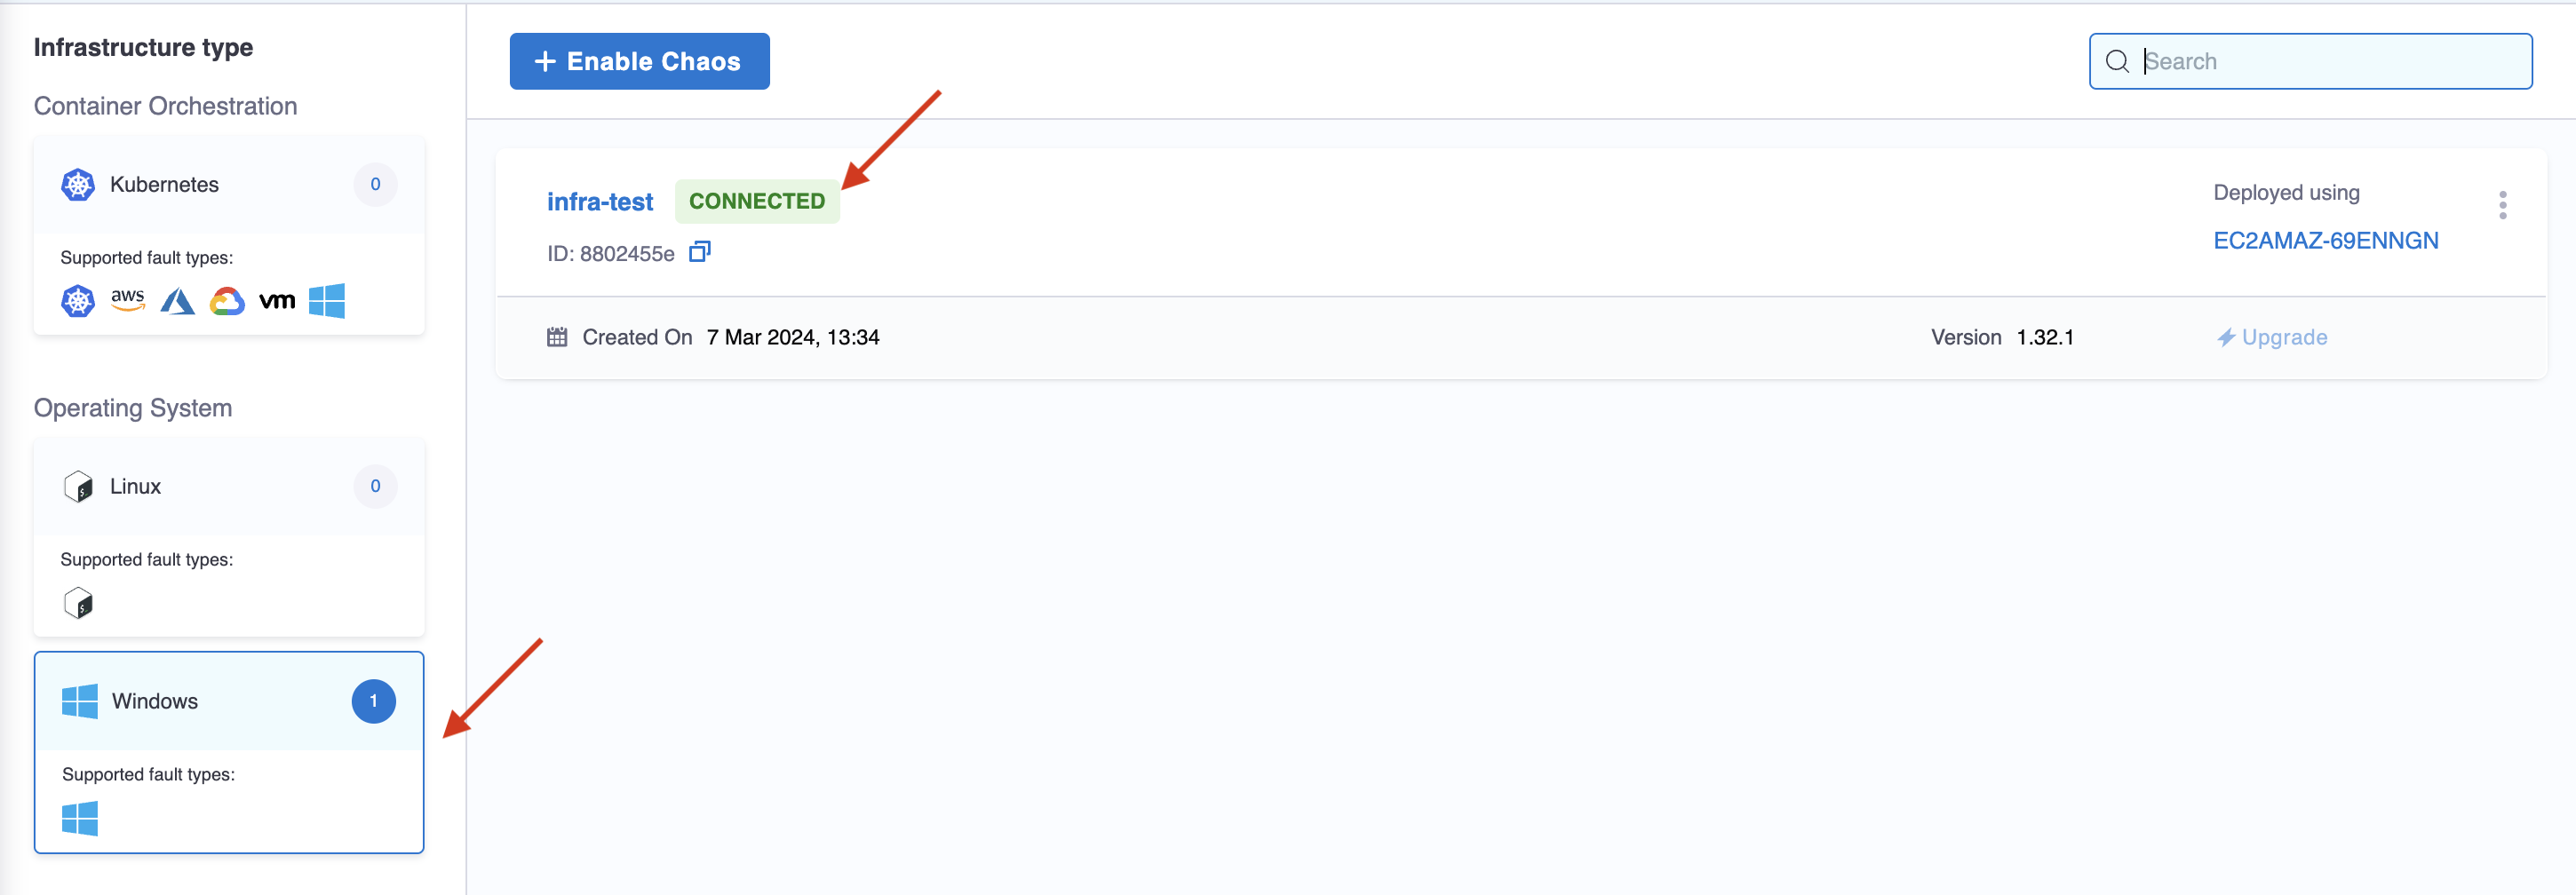
That's it! Now you're all set to inject chaos into your infrastructure.