AutoStopping RDS with Proxy
AWS RDS, or Amazon Relational Database Service, is a fully managed database service provided by Amazon Web Services (AWS). It simplifies the process of setting up, operating, and scaling a relational database in the cloud.
Optimizing the usage of cloud resources is a significant problem that organizations confront in the present day. Even allowing a small, unused virtual machine (VM) to remain active can have a negative impact on your cloud expenses. Now consider the implications of leaving a Quality Assurance (QA) or pre-production Relational Database Service (RDS) cluster running idly, without any users accessing it. Such oversight can significantly affect your organization's cloud costs. Furthermore, manually inspecting your non-production environment for unused resources can prove challenging and inefficient.
Imagine having the capability to start RDS instances when developers require them and seamlessly shutting them down when they are no longer needed. By implementing such a system, the organization can drastically minimize wastage of cloud resources, resulting in substantial cost savings on the cloud bill. This proactive approach ensures that resources are utilized efficiently, aligning with the organization's goal of optimizing cloud expenditure.
Harness Cloud Cost Management provides a valuable solution to address this challenge. Its intelligent cloud AutoStopping feature sets it apart by effectively reclaiming wasted budgets without requiring any modifications to your existing infrastructure. By leveraging AutoStopping, idle resources are automatically stopped when no traffic is detected, and promptly restarted when traffic is detected again. The implementation of this feature has resulted in significant cost savings for customers in their pre-production environments.
Harness AutoStopping Proxy provides an effective solution to reduce non-production cloud costs with minimal setup requirements and without causing disruptions for developers and other users. By onboarding your RDS instance or cluster to AutoStopping using the proxy, you will incur costs for the RDS only when it is actively utilized. Moreover, when the RDS instances are not in use, they are automatically stopped, further optimizing your cloud expenditure. The following diagram illustrates how you can use a proxy to enforce an AutoStopping rule on the RDS instance or cluster:
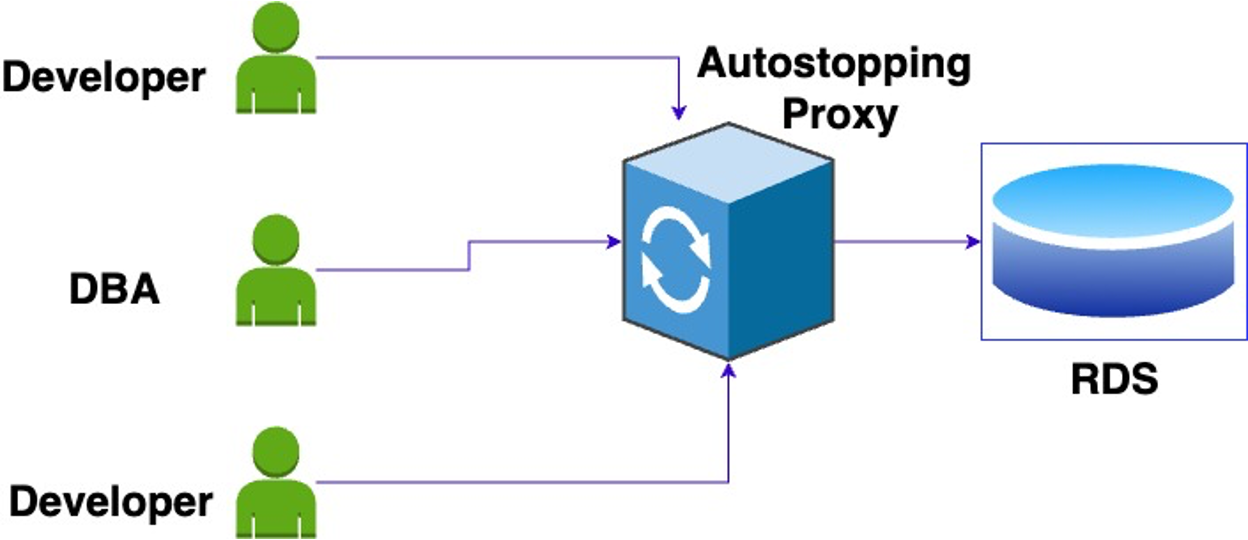
Use Harness AutoStopping proxy for RDS
- Create a Harness AutoStopping proxy.
- Create an AutoStopping rule for the RDS instance or cluster.
- Connect to the RDS instance or cluster by using the AutoStopping proxy.
Create Harness AutoStopping proxy
For more information, go to AutoStopping Proxy for AWS.
-
In Harness, go to the Cloud Costs module.
-
Under Setup, select Load Balancers.
-
Select Create New Load Balancer.
-
Select AWS.
-
Choose an existing connector or create a new one.
-
Select Continue.
-
Select Create AutoStopping Proxy.
-
Select Continue.
-
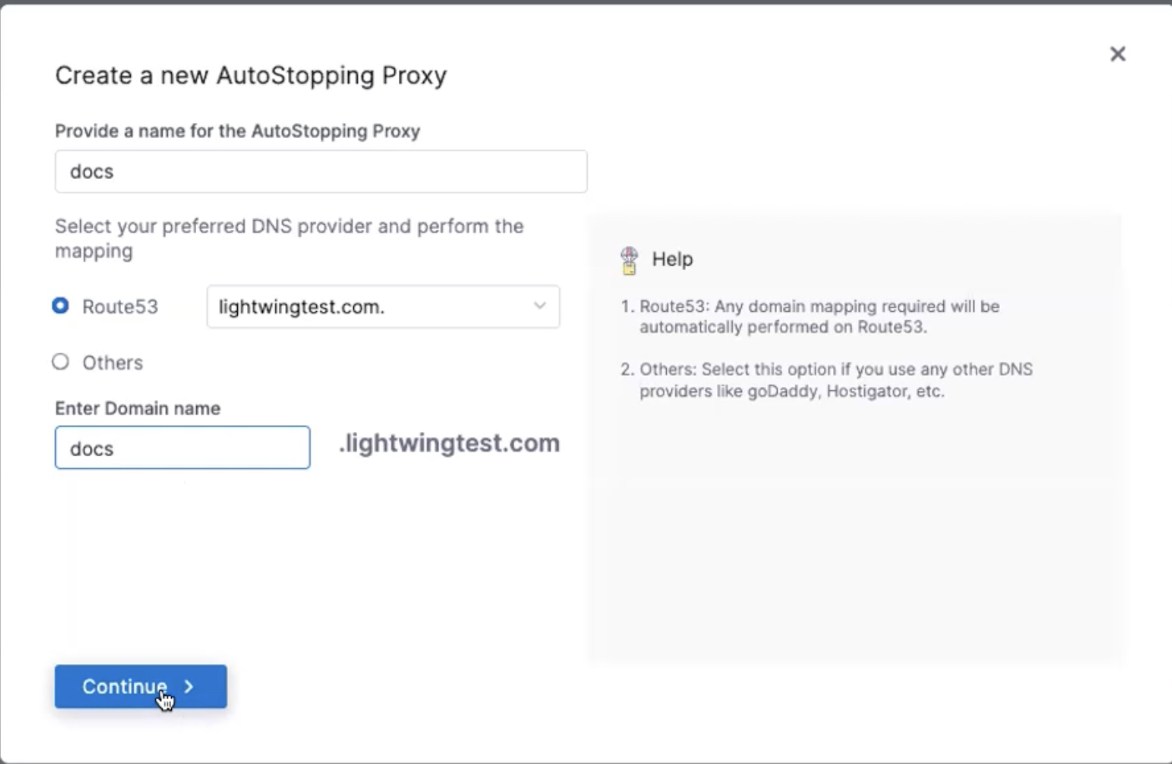
In the Create a new AutoStopping Proxy window, enter the following information:
- Provide a name for the AutoStopping Proxy.
- Select your preferred DNS provider and perform the mapping:
- If you select Route 53, you must choose a hosted zone from the available zones and enter the domain name. AutoStopping manages Route 53 configuration automatically. To know more about Route 53, go to Amazon Route 53.
- If you select Others, enter the URL of the DNS provider. Make sure that you have updated the DNS mapping in your DNS provider.
- Select Continue.
-
Select region: Select the region where you have your cloud resources hosted.
-
Select the VPC from the dropdown list.
-
Machine type: Select the instance family type from the dropdown list.
-
TLS Certificate Secret Version: This field is optional for an RDS instance or cluster. You can leave it empty.
-
API Key: Enter a valid API key generated in Harness New Generation. Choose No Expiration in the Expiration dropdown list while creating this API key. Go to Create an API Key for more information.
-
Select security groups: Select the Security Group of the proxy VM.
-
Key pair: Select the SSH key pair to connect to your proxy VM.
-
TLS Private Key Secret Version: This field is optional for an RDS instance or cluster. You can leave it empty.
-
Enable Allocate Static IP if you need to assign an elastic IP address to make the instance publicly accessible. Update the DNS route to point to the public IP. You don't need to enable this field if it is pointing to a private IP provided the DNS resolves. For example, when the DNS resolution is done within the VPC.
-
Select Save Load Balancer.
Set up Harness AutoStopping Rule for RDS
This section walks you through the steps to configure an AutoStopping rule for your RDS instance. For more information, go to Create AutoStopping rule for RDS.
Define the AutoStopping rule
-
In Cloud Costs, in AutoStopping Rules, select New AutoStopping Rule.
-
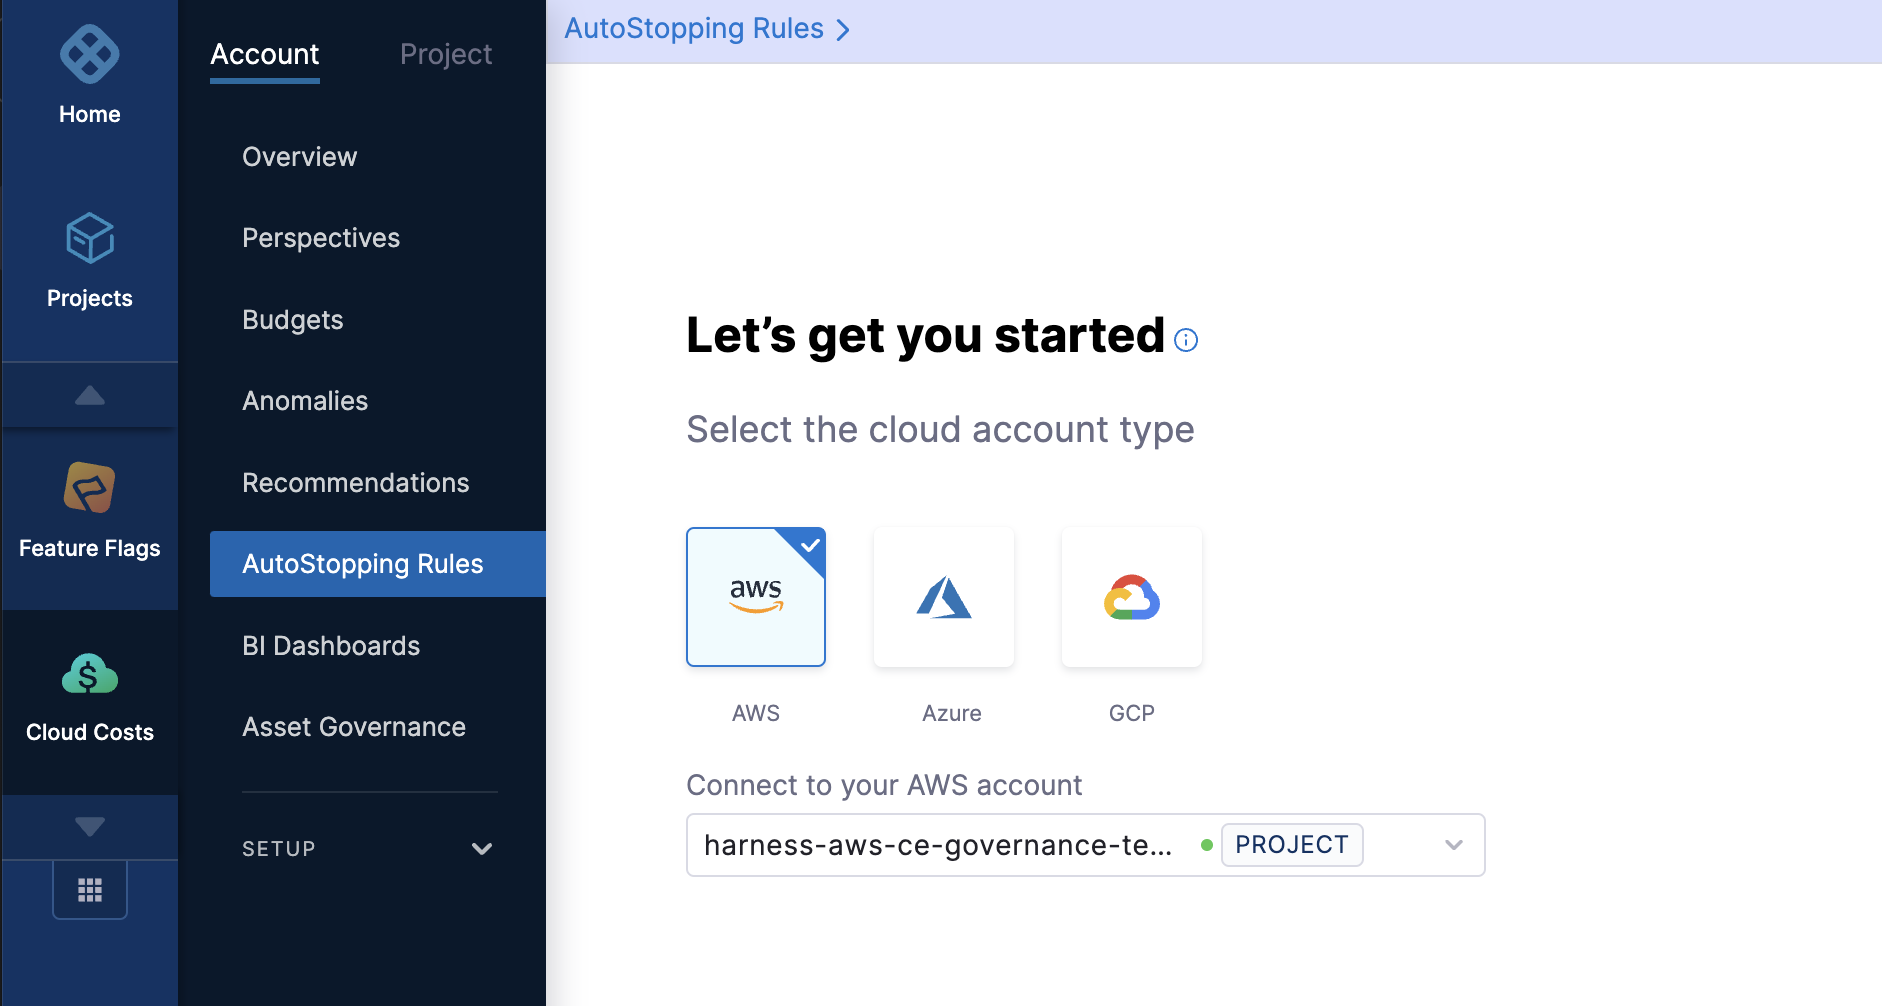
In the cloud account type, select AWS. It is the cloud account in which your workloads are running that you want to manage using AutoStopping rules.
-
Select your AWS account from the Connect to your AWS account dropdown list and select Next. If you have not added an AWS cloud account, go to Connect to an AWS Connector.
-
In Define your AutoStopping rule, in Name your Rule, enter a name for your rule. This is the name of your AutoStopping rule.
-
In Idle time, enter the idle time in minutes. This is the time that the AutoStopping rule will wait before stopping the idle instances.
Select the RDS instance or cluster to be managed by the AutoStopping Rule
Select the cloud resources that you want to manage using this rule. AutoStopping Rule will monitor the selected resources and stop them when they are idle beyond the configured idle time.
-
In Select the resources to be managed by the rule, select RDS and then select Add RDS instance.

-
In Select RDS Instance, do the following:
- Select the region where your instance is hosted from the drop-down list.
- Select the RDS instance for which you want to enable AutoStopping Rule and select Add Selected.
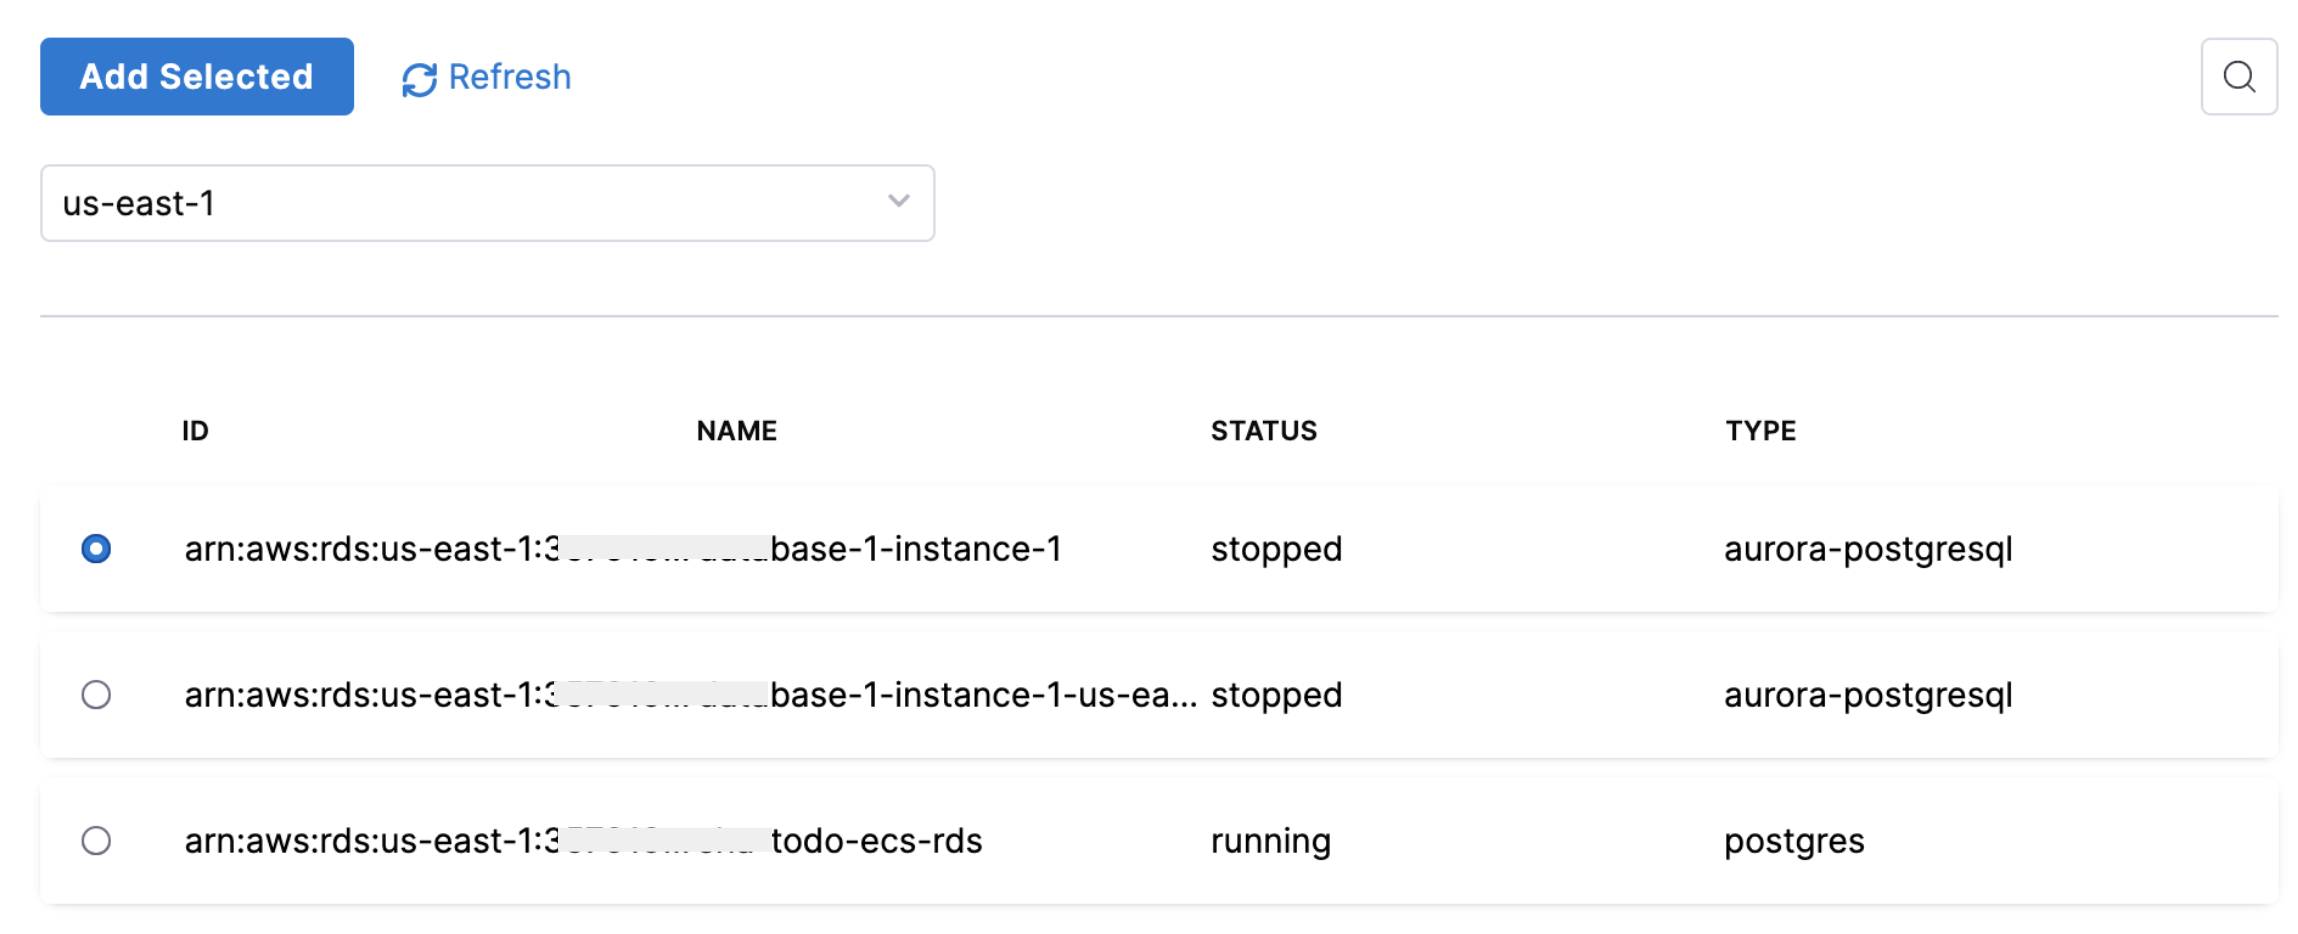
- Once you've made all the selections, select Add Selected.
-
Select Next.
These are additional advanced settings:
- Dry Run: Toggle the button if you wish to evaluate this feature without terminating your cloud resources.
- Add Dependency: Set dependencies between two or more AutoStopping Rules when you want one Rule to make one or more Rules to be active based on the traffic that it receives.
- Fixed Schedules: Create fixed uptime or downtime schedules for the resources managed by this AutoStopping Rule. When a resource is configured to go up or down on a fixed schedule, it is unaffected by activity or idleness during that time period.
Setup Access
-
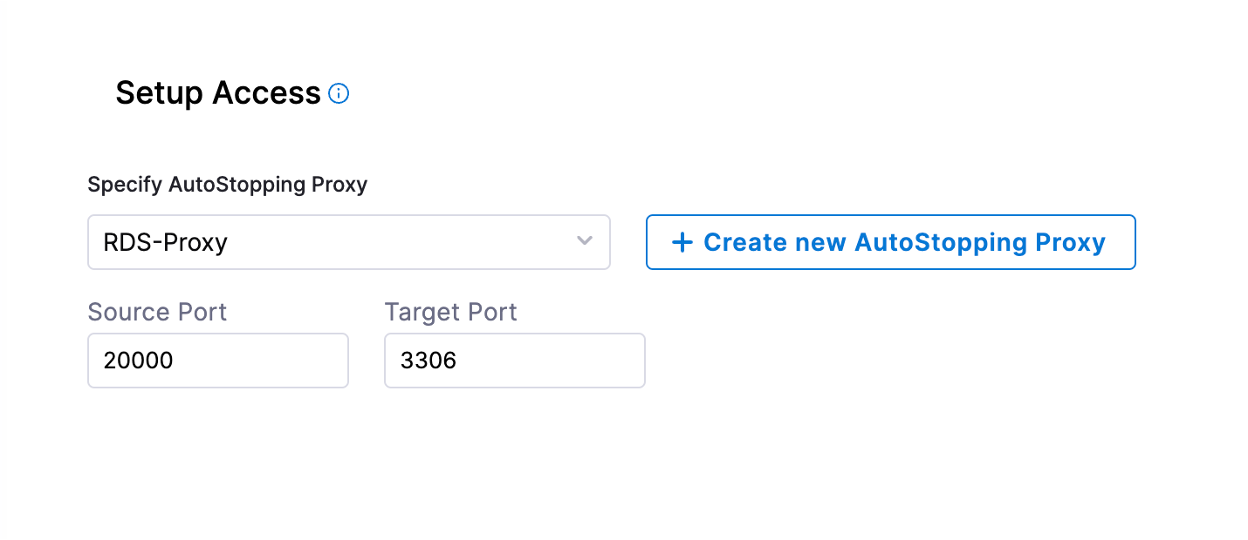
In the Setup Access screen, select the AutoStopping Proxy from the dropdown list or create a new one.
-
Specify the source port numbers and the target TCP ports your RDS instance or cluster is listening to. If the source port is not specified, a random port will be generated at the backend. This auto-generated port will continue to be used as long as the target port remains unchanged or unless the user explicitly modifies the source port. You will be always connecting to the RDS instance through the AutoStopping proxy using this port. To onboard a MySQL RDS instance, select 3306 as the target port on the RDS instance.
Review the rule
In Review, verify all the configuration details and select Save Rule. To edit any of the configuration settings, select EDIT and modify the settings.
Your AutoStopping rule is listed under the AutoStopping rules summary page.
Connect to the RDS instance
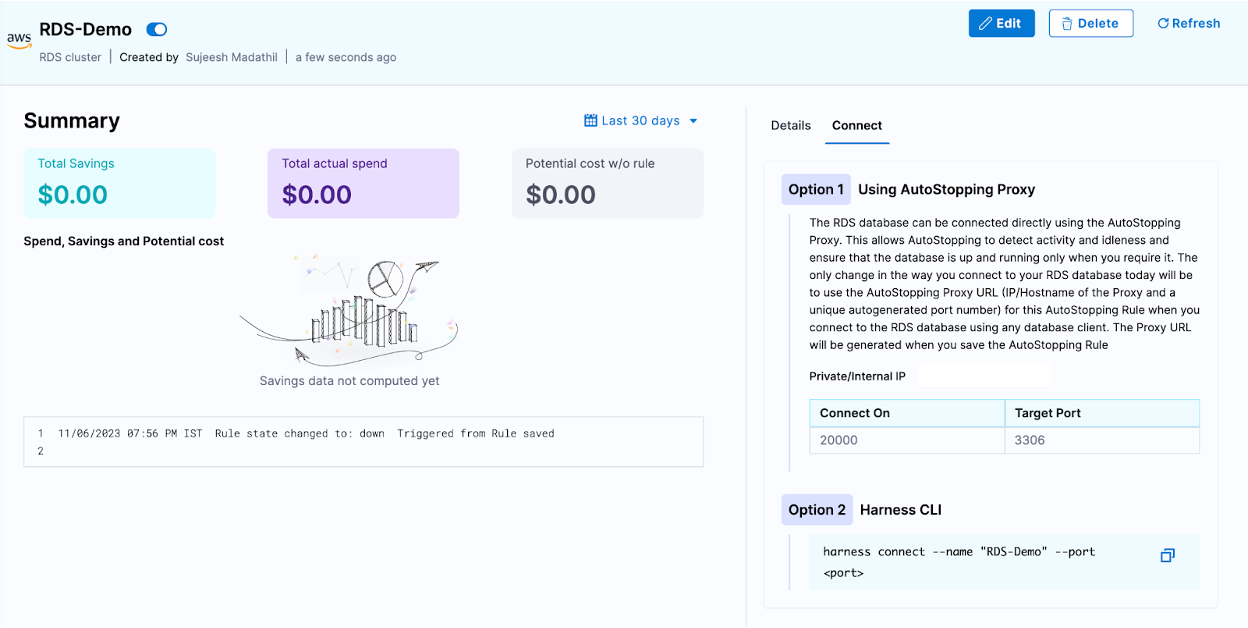
Once the rule is saved, go to the Details page of the AutoStopping rule for instructions to connect to the RDS instance.
You can connect to your RDS instance using the following attributes:
- IP/Hostname mapped to the AutoStopping proxy
- Port displayed in the AutoStopping rule details page(20000 in this example)
- Username and password of the RDS instance
If the RDS instance or cluster is in the stopped state, Harness starts it for you, allowing you to resume usage seamlessly. Subsequently, when you finish utilizing the RDS instance or cluster, Harness promptly detects this and initiates the process of stopping it.