Create perspectives
You can add business context to your Harness Cloud Cost Management (CCM) data using perspectives. Perspectives allow you to group your resources in ways that are more meaningful to your business needs.
Before You Begin
Cloud Costs Perspective Concepts
This section describes Perspective concepts.
Perspectives
Perspectives allow you to group your resources in ways that are more meaningful to your business needs.
For example, you can group and filter by Account, Environment, Service, Region, Product, Label, Namespace, Workload, etc., and create a Perspective for your business, finance, and engineering teams.
Here are some examples where you could use Perspectives:
- Build your own visual interface using flexible rules and filters. With Perspectives, business units can create views that align with their business needs based on groups of resources determined by different rules and filters.
- Create Perspectives broken down by project, team, department, or business unit to gain granular visibility into all your cloud environments. Perspectives provide a single-pane view of different products, for example, clusters, applications, AWS, GCP, and Azure.
- Schedule and share the reports with the key stakeholders for maximum business impact.
- Estimate costs consumed by specific teams, groups, departments, BUs, LOBs, cost centers, etc.
Rule-based Engine
Perspectives use a rule-based engine to organize and display your cloud costs. Each Perspective has a set of rules and each rule can have multiple conditions. The following operators are supported for each condition:
-
IN: The exact match operation is used to filter for the exact value specified.
-
NOT IN: The exact match operation is used to filter for all values except the one specified.
-
NULL: Null means the selected filter has no value. If you select NULL for your filter, then the cost of the selected filter isn't included in the Perspective.
For example, in Rules for Perspective, if you selectLabel: kubernetes.io/nameasNULL, then your Perspective won't include the cost for the selected label (kubernetes.io/name). It will include the cost of all the other resources.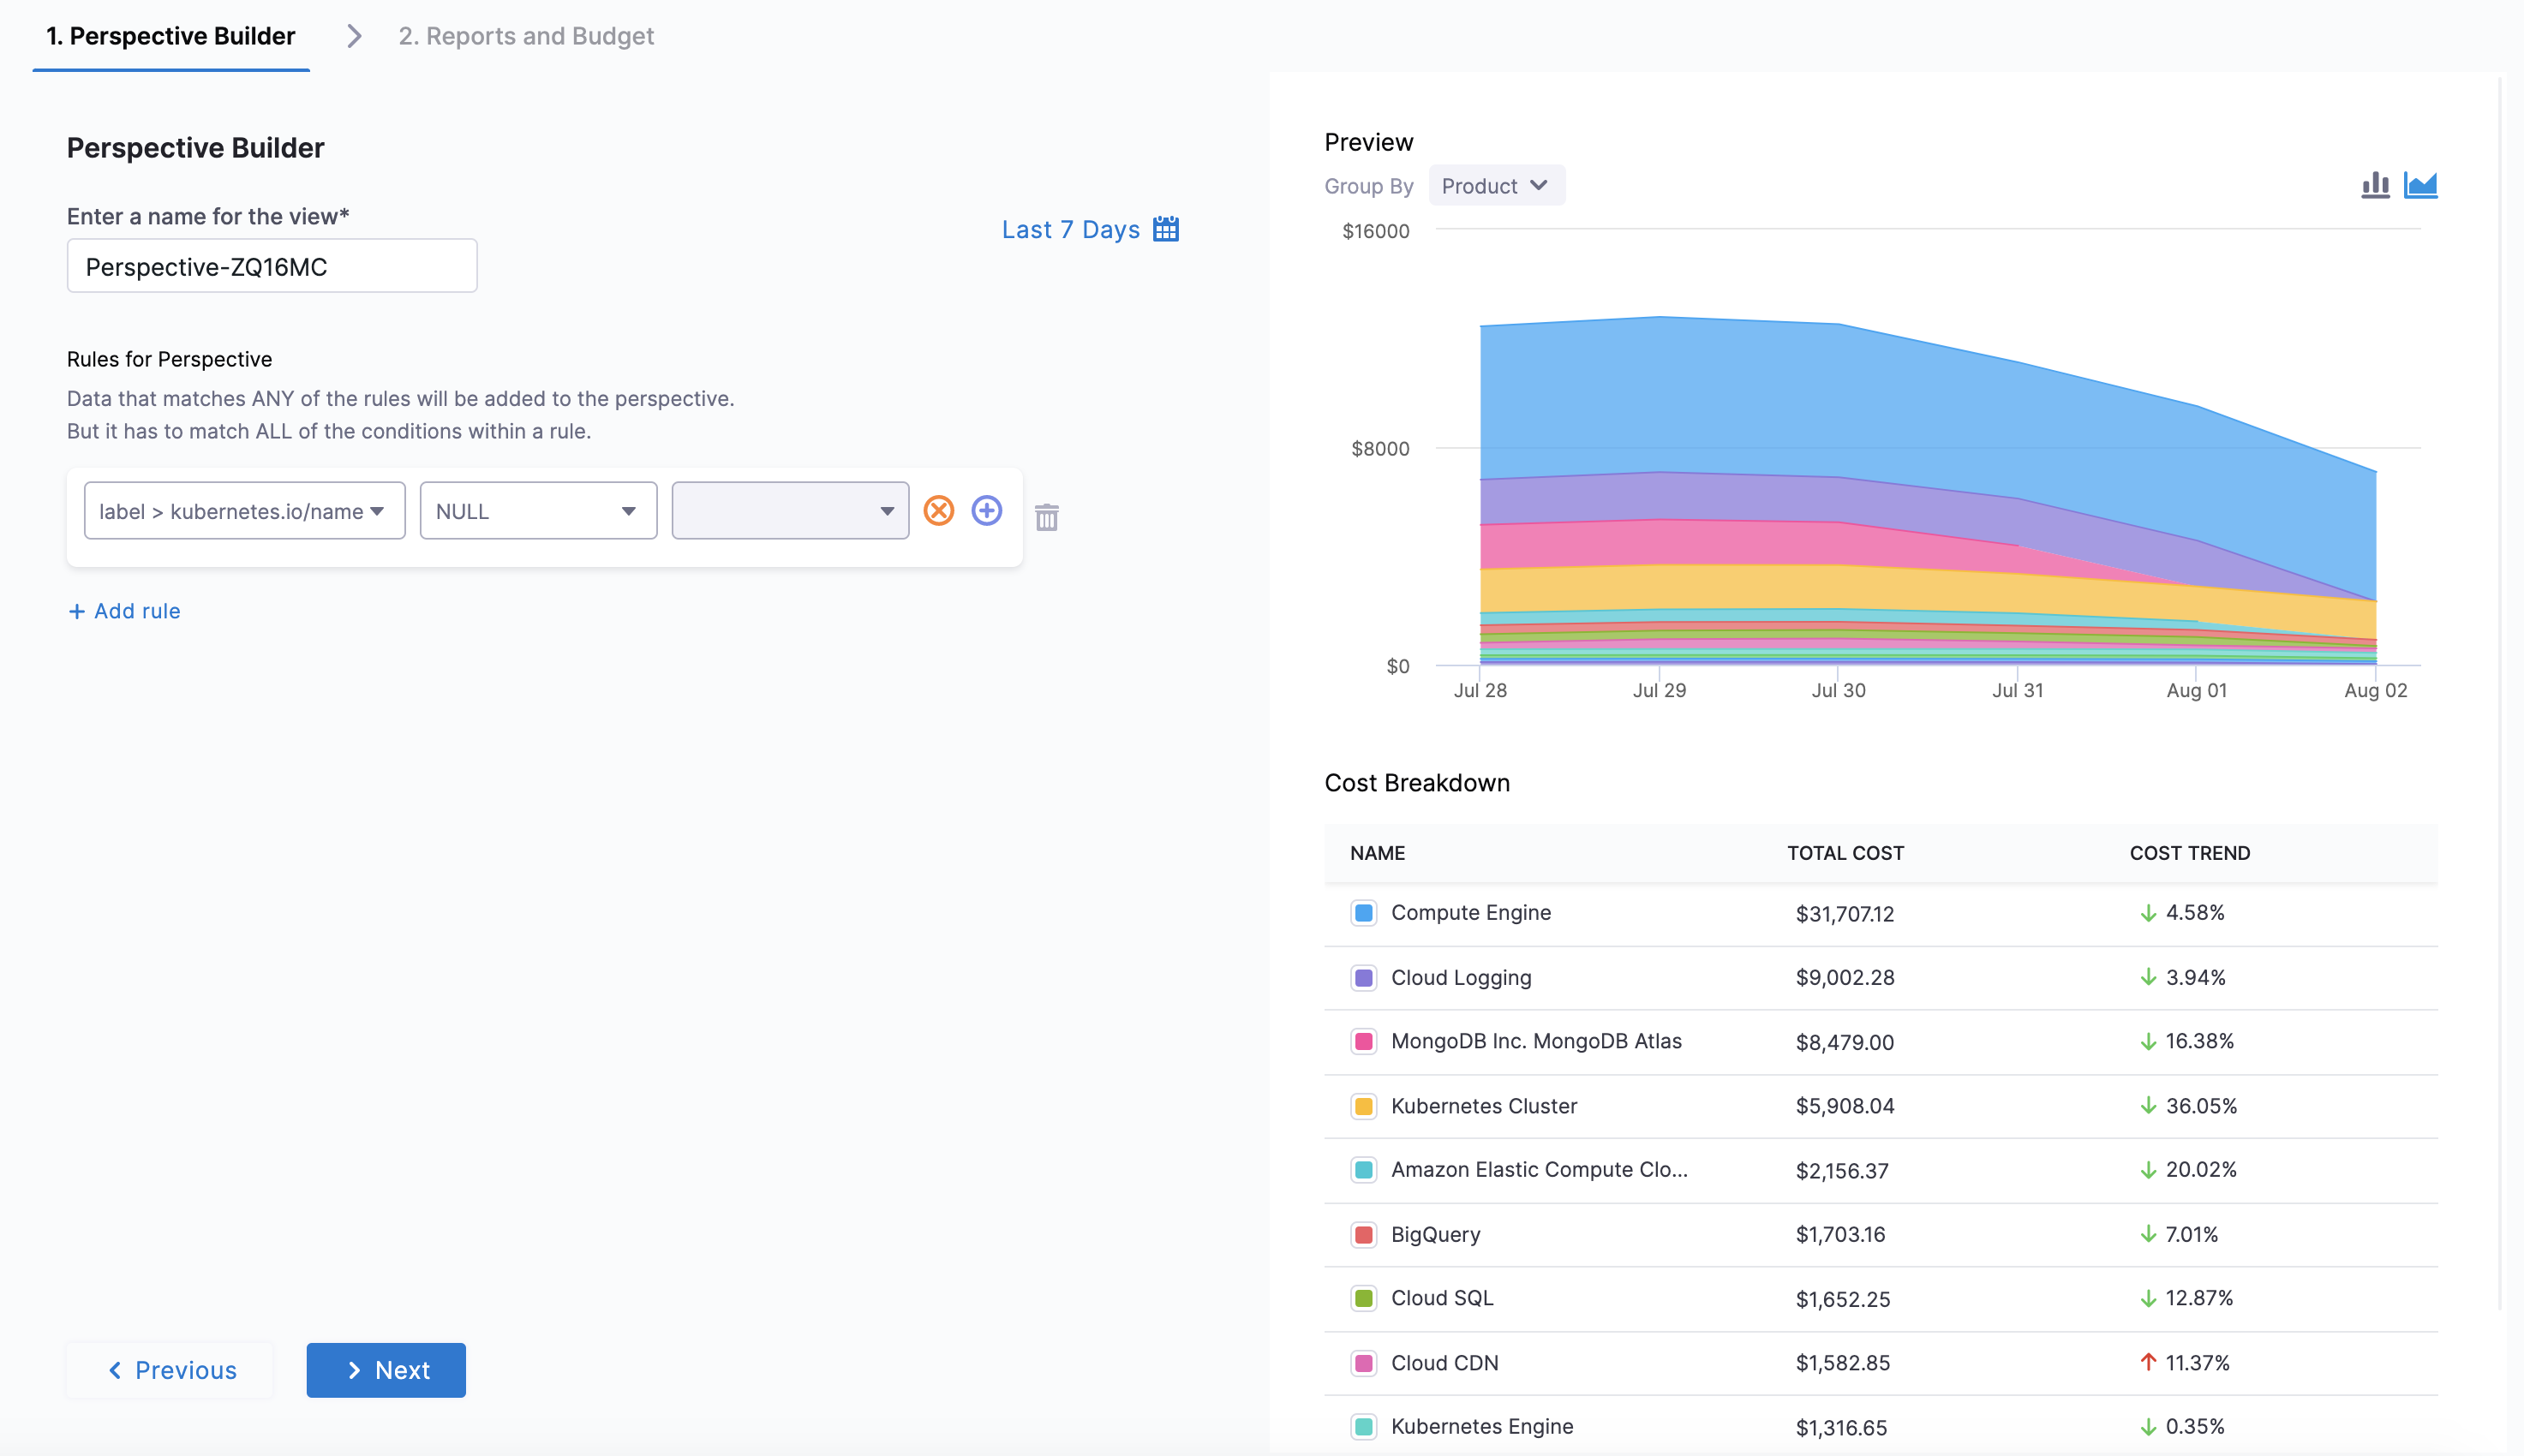
-
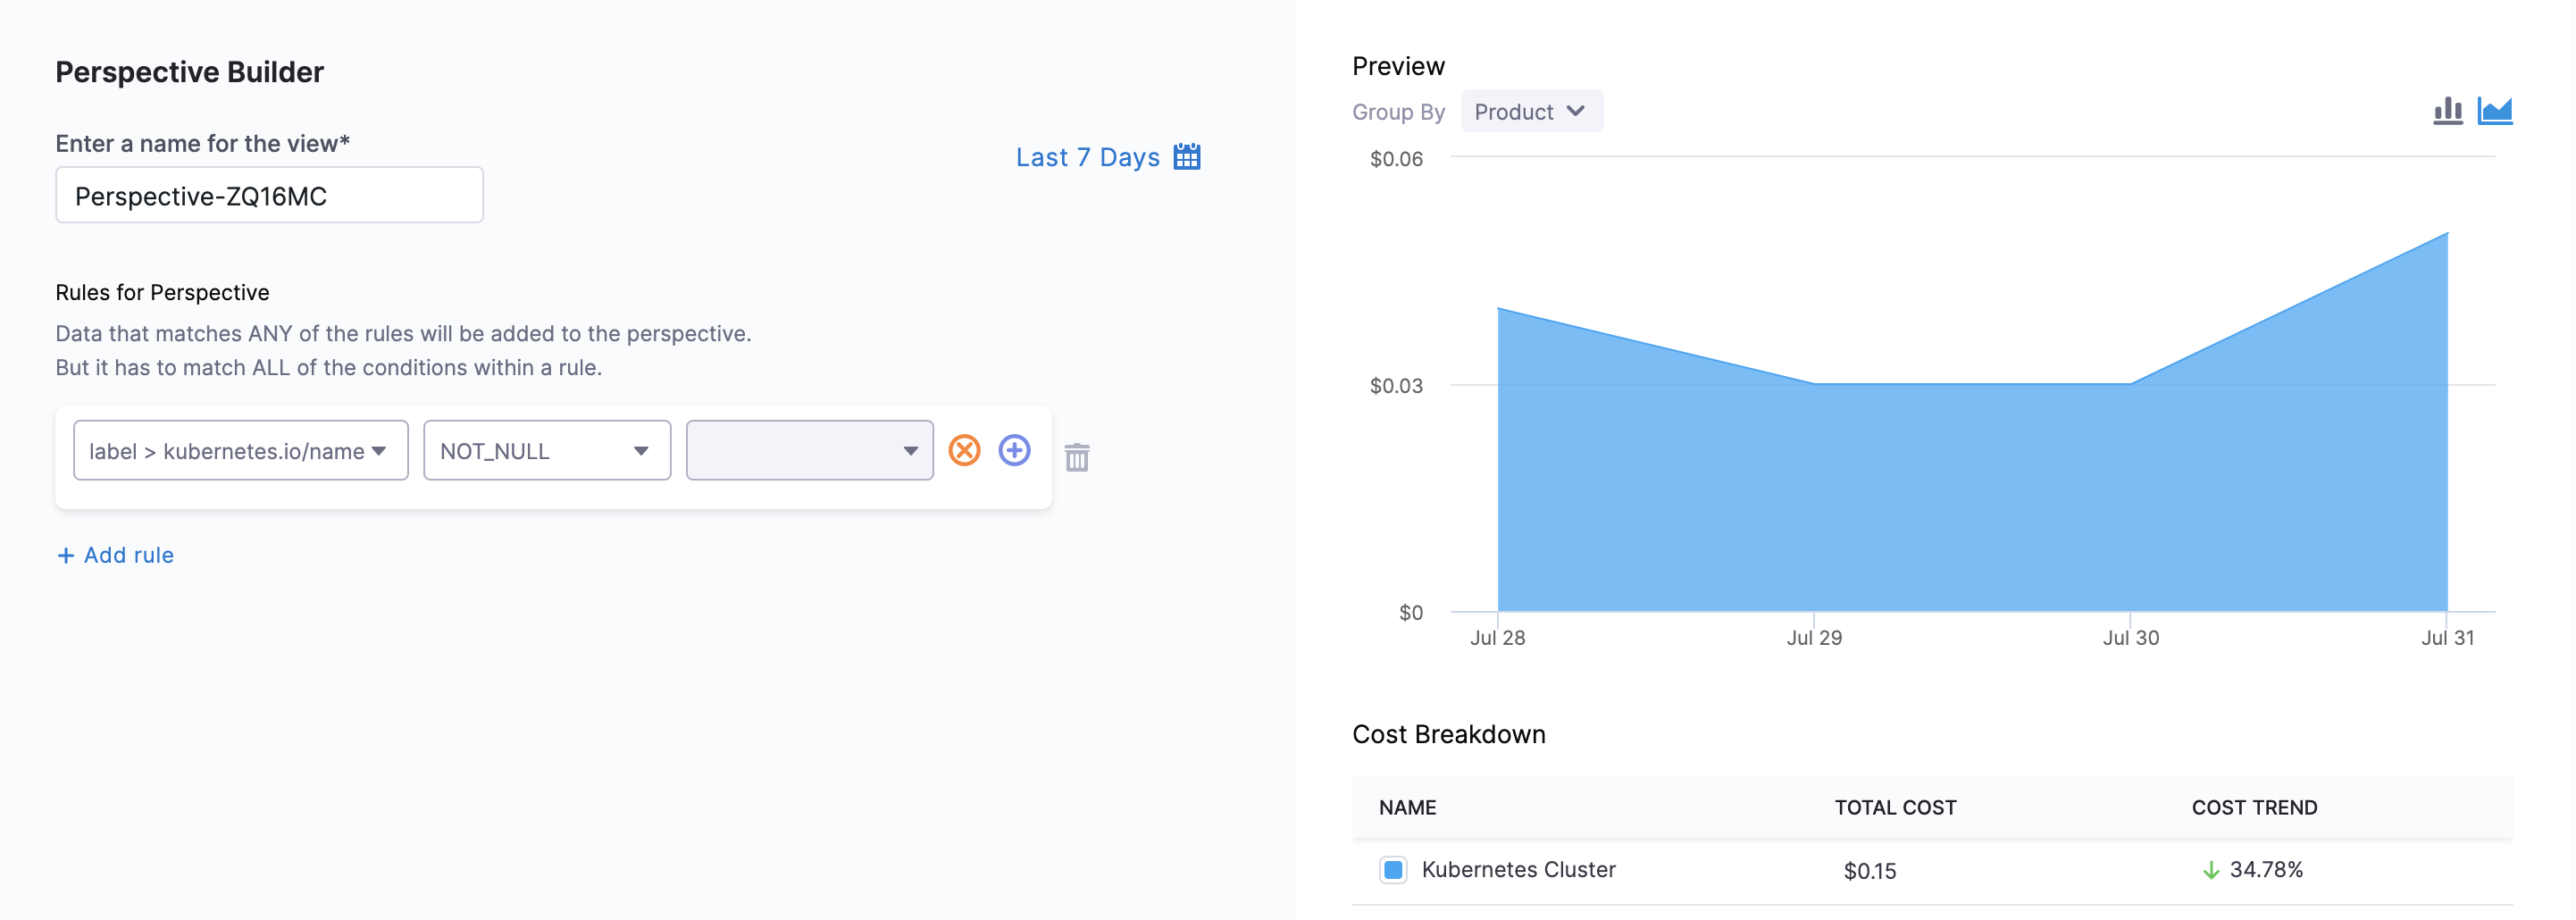
NOT NULL: Not null means that the selected filter has a value. If you choose NOT NULL for your filter, then only the cost of the selected filter is included in the perspective.
For example, in Rules for Perspective, if you select Label: kubernetes.io/name as NOT_NULL, then your Perspective will list the cost of the selected label only (kubernetes.io/name). It won't include the cost of any other resource.
-
LIKE: The Like operator uses
REGEXP_CONTAINSprovided by the BigQuery at the backend. This function is used to check if a given value partially matches a specified regular expression.- Retrieves result even if the value partially matches the regular expression.
- To search for a full match (the entire value matches the regular expression), use
^at the beginning of the regular expression and$at the end of the regular expression. These symbols signify the beginning and end of the text, respectively.
For example,
AWS Account ID LIKE ‘abc’. This means REGEXP_CONTAINS(aws_account_id, r'abc). User input is 'abc' in this example.
Filters
You can create a Perspective for your resources using rules and filters. The filters are used to group the resources. The following are the supported filters:
- Cost Categories: You can create a perspective by filtering based on the cost categories you have created. To create cost categories, see Use Cost Categories.
- AWS: CCM allows you to view your AWS costs at a glance, understand what is costing the most, and analyze cost trends. CE displays the data for all your Amazon Web Services (ECS, EC2, and so on). For more information, see Analyze Cost for AWS Using Perspectives.
- GCP: CCM allows you to view your Google Cloud Platform (GCP) costs, understand what is costing the most, and analyze cost trends. CE displays data for all your GCP products (such as Compute Engine, Cloud Storage, BigQuery, and so on), projects, SKUs, and location. For more information, see Analyze Cost for GCP Using Perspectives.
- Azure: CCM allows you to view your Azure costs at a glance, understand what is costing the most, and analyze cost trends. CE displays the data for all your Azure services (Storage accounts, Virtual machines, Containers, and so on). For more information, see Analyze Cost for Azure Using Perspectives.
- Cluster: Total cost, Cost trend, Idle cost, and Unallocated cost for each cluster.
- Region: Each AWS, GCP, or Azure region you're currently running services in.
- Product: Each of your active products with its cloud costs.
- Label: Costs organized by the Kubernetes labels used in the workload manifests. In GCP, it refers to each label that you are using to organize your Google Cloud instances.
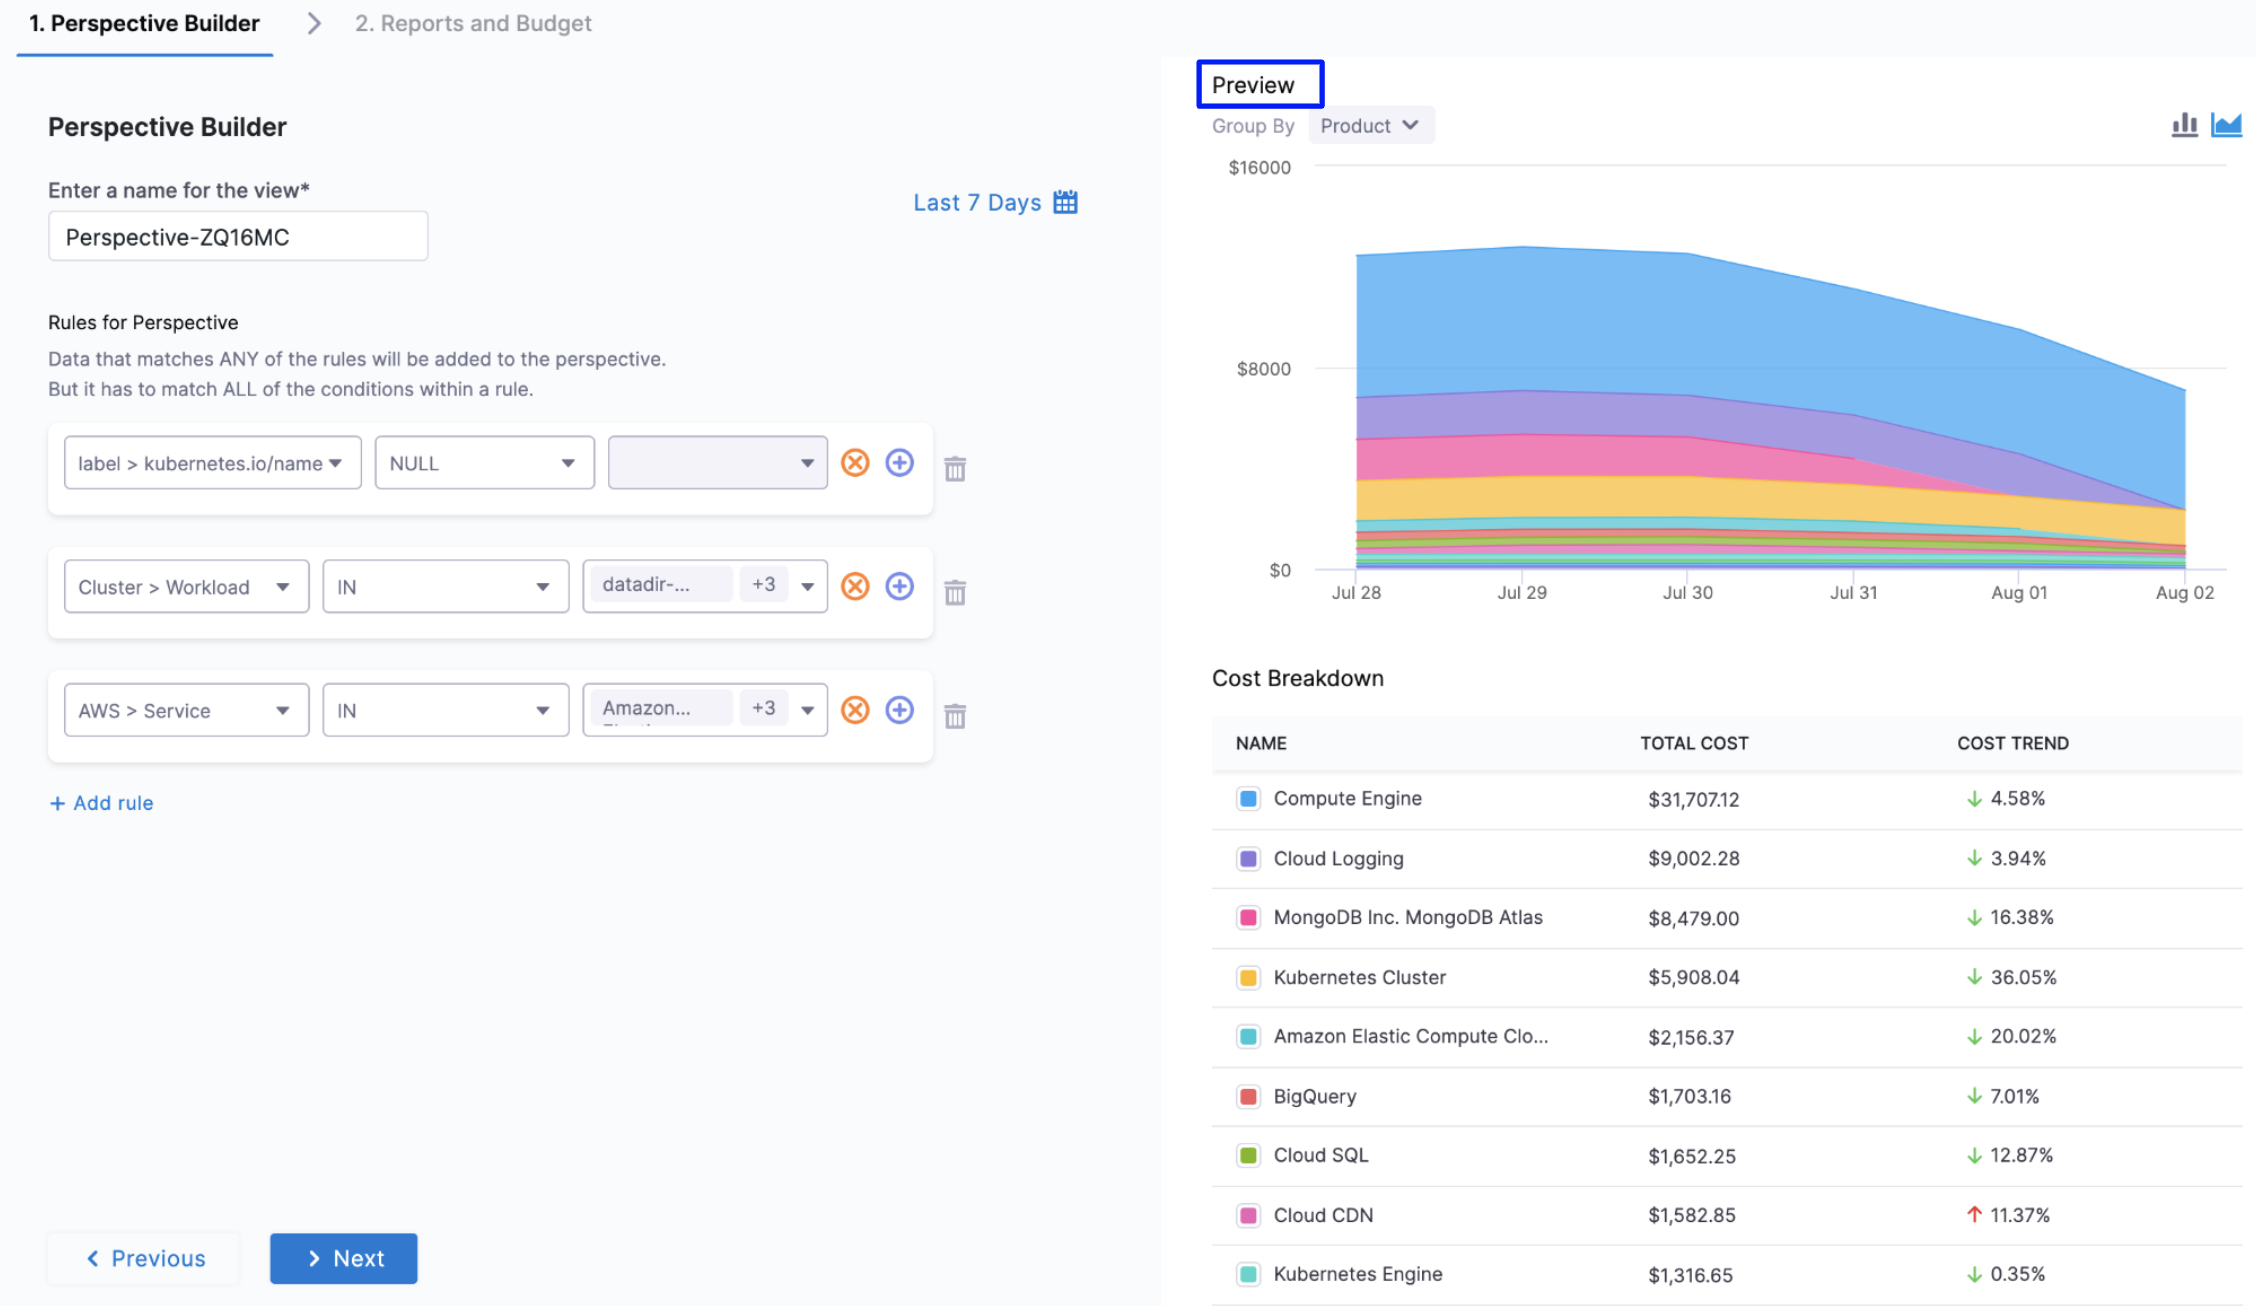
Preview
As you add your resources in the Perspective Builder, a Preview of your Perspective is displayed.
The following are the key advantages of preview:
- Provides a quick visual representation of your resources in the Perspective without saving them.
- Allows you to group resources in the preview mode itself. You can group by Common, Custom (if Custom Fields are available), Cluster, AWS, GCP, and Azure.
- Helps you to review your changes faster.
Grouped by Product in Preview.
Create a Perspective
You can create a Perspective by grouping your resources the way you wish. For example, if you want to create a perspective for your CFO, first add default or custom filters and then further group by Service, Account, Workload, Namespace, etc. that you would want to include in your Perspective.
You can create up to 10,000 Perspectives.
Perform the following steps to create a Perspective:
- In Cloud Costs, click Perspectives.
- In Perspectives, click New Perspective.
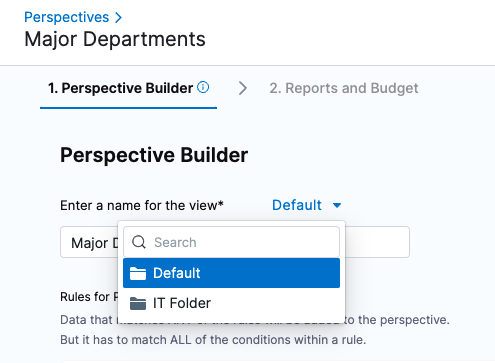
- In Perspective Builder, enter a name for your perspective. By default, a unique name is entered in the field. You can edit the pre-populated name of the perspective.
Perspective names mustn't include any special characters.
-
In Perspective Builder, in Rules for Perspective, click + Add rule.
-
Select one of the following:
- Common
- Cost Categories
- Cluster
- AWS
- GCP
- Azure
- Region
- Product
As you add your resources in the Perspective Builder, a preview of your Perspective is displayed.
-
Select the operator. See the Rule-based Engine section for more information.
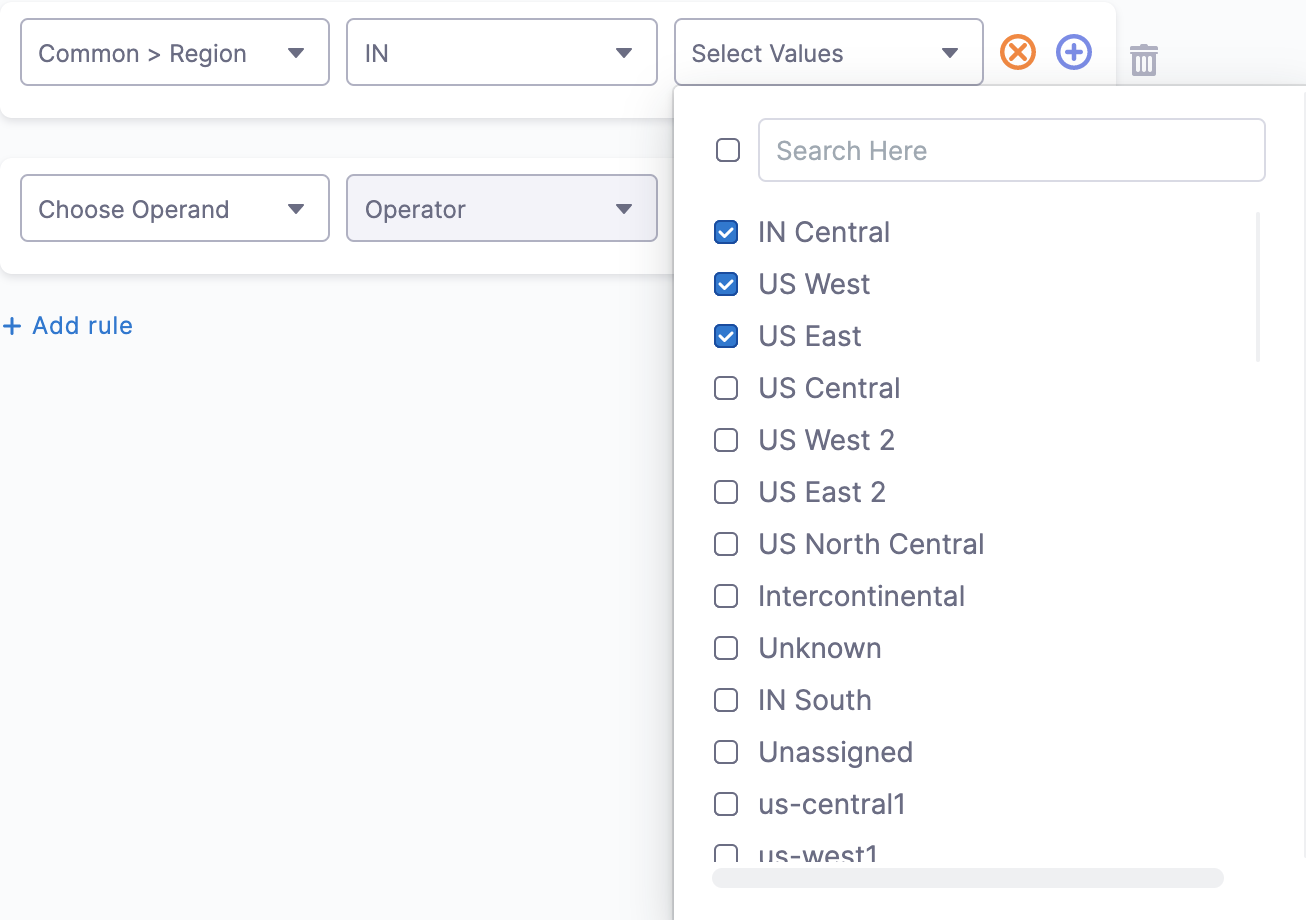
-
Select the value for your filter. You can select multiple values. You can also filter and customize your result using the search option.
-
After adding all the filters, click Next to add a report-sharing schedule and budget.
- When you create a new Perspective, data across all cloud service providers and clusters are displayed. If you want to restrict the data to a particular cloud service provider, you must apply a filter in the Cloud Provider field.
If you've added labels and cluster rules in the perspective builder section, it's considered a cluster perspective, hence all cluster labels are considered. In this case, data from cloud service providers such as GCP, Azure, and AWS are not considered. However, if you have applied a label that belongs to the cloud provider data, and you want to view the cluster data as well, then you have to add a Cloud Provider filter.
Budgets, Reports, and Alerts
For details on adding Budgets, Reports, and Alerts go to:
- Create a Budget for Your Perspective
- Share Your Cost Perspective Report
- Detect Cloud Cost Anomalies with CCM
Perspective Preferences
Go to Perspective Preferences to learn about these settings.
Review: No Account/Project/etc
It's important to understand the difference between the Others and No Account/Project/etc categories.
When a Perspective includes multiple data sources (for example, AWS, GCP, and Cluster) and you select one data source in a Perspective Group By, such as AWS: Account, the costs for the AWS data source are displayed individually. The costs for the other data sources (GCP, Cluster) are grouped under No Account.
In other words, a row with No followed by the selected Group by is displayed for costs that don’t have any relation with the selected Group by. For example, No SKUs is displayed for costs (AWS, clusters, etc.) that don’t have any GCP SKUs associated with it.
Another example is if the Group By is Project. For example, if you selected GCP: Project, then the No Project item in the graph represents the AWS and Cluster project costs.
Essentially, No GroupBy represents the null values for that Group By grouping. To work with these null values either in perspective filters or rules, you need to use the "IS NULL" function on that field. Since Perspectives don't explicitly provide a No GroupBy value in the filters, the "IS NULL" field serves as the way to handle these No GroupBy items.
For example, if your perspective includes both GCP and AWS cloud providers, and you intend to categorize costs by AWS accounts using the GroupBy function, any costs associated with GCP will be classified under the label No Account. In case you wish to view only the GCP costs, you can apply a filter with the condition AWS > Account IS NULL.
Edit a Perspective
To edit a Perspective, do the following:
-
Select the Perspective that you want to edit, and click Edit.
-
The Perspective Builder appears. Follow the steps in Create Cost Perspectives to edit the Perspective.
Clone a Perspective
When you clone a Perspective, all its settings are cloned. You simply add a new name. After it is cloned, you can edit it just as you would edit any perspective. To clone a Perspective, do the following:
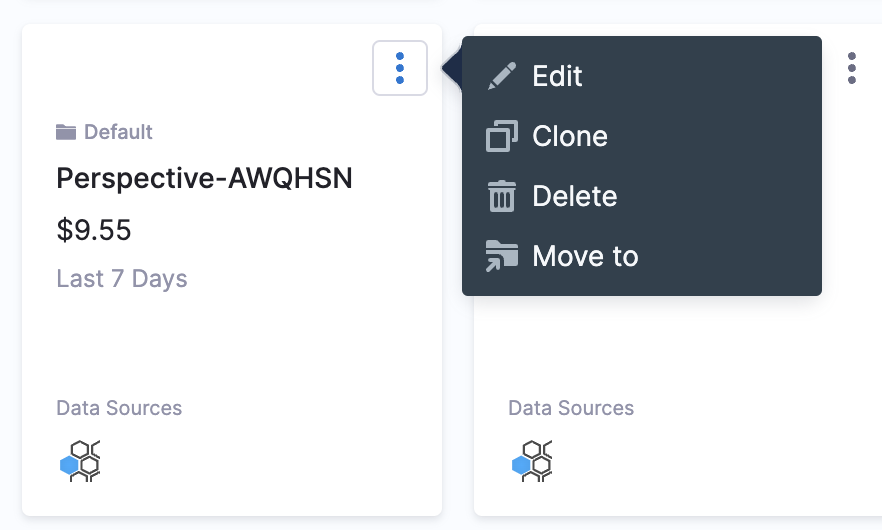
Select the more actions icon on the Perspective tile that you want to clone, and select Clone.
The cloned Perspective appears.
Delete a Perspective
To delete a Perspective, do the following:
Select the more actions icon on the Perspective tile that you want to delete, and select Delete.
The Perspective is deleted and no longer appears in the Perspective dashboard.
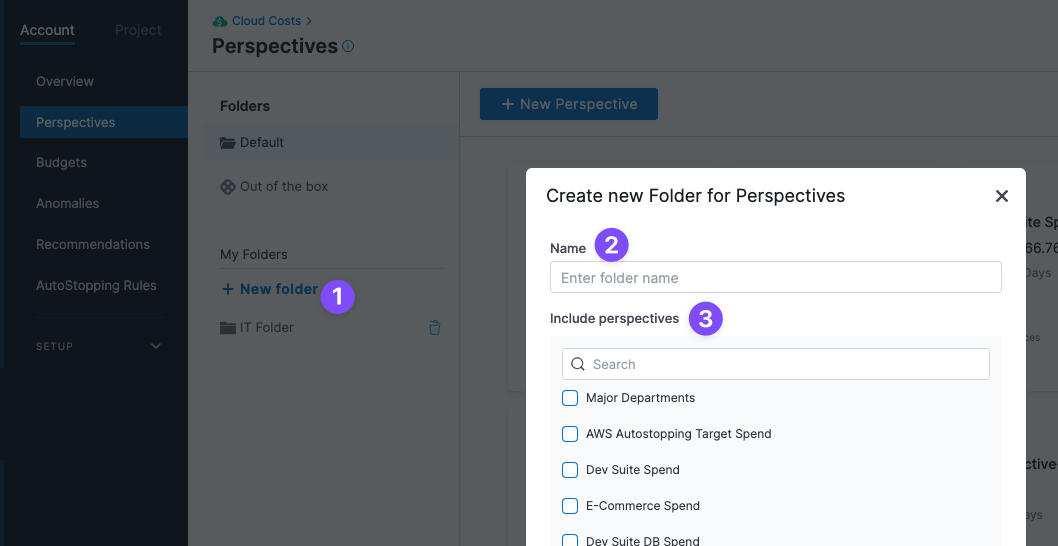
Organize Perspectives using Folders
You can organize Perspectives by adding them to folders.
Click New folder, name the folder, and then select the Perspectives you want to add.
You can also add a Perspective to a folder when you create it or move it to a folder when you edit it.
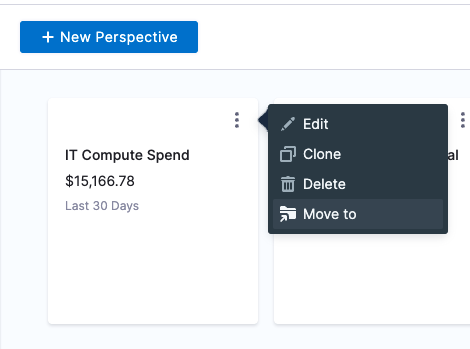
You can also move a Perspective to a folder from its more options (⋮) setting.
There are no limits as to how many folders can be made.