Deploy to Azure VMs
This tutorial helps you get started with Harness Continuous Delivery (CD). We will guide you through creating a CD pipeline with deployment types Secure Shell (SSH) and WinRM to deploy applications to remote Linux and Windows servers on Azure.
- Secure Shell (SSH)
- WinRM
Before you begin
Verify the following:
- One or more Linux Instances on Azure. Make sure port 22 is open.
- SSH private key (*.pem file) to authenticate with the remote instance(s). To understand how SSH password-less authentication works, go to Passwordless SSH using public-private key pairs.
- Docker to set up and start the Harness Docker delegate.
- For more information, go to Delegate system and network requirements.
Getting started with Harness CD
-
Log into Harness.
-
Select Projects, and then select Default Project.
warningFor the pipeline to run successfully, please follow all of the following steps as they are, including the naming conventions.
Delegate
What is the Harness Delegate?
The Harness Delegate is a service that runs in your local network or VPC to establish connections between the Harness Manager and various providers such as artifacts registries, cloud platforms, etc. The delegate is installed in the target infrastructure, for example, a Kubernetes cluster, and performs operations including deployment and integration. Learn more about the delegate in the Delegate Overview.
-
In Project Setup, select Delegates.
-
Select Delegates.
-
Select Install delegate. For this tutorial, let's explore how to install the Docker Delegate.
-
In the command provided,
ACCOUNT_ID,MANAGER_ENDPOINTandDELEGATE_TOKENare auto-populated values that you can obtain from the delegate installation wizard.docker run --cpus=1 --memory=2g \
-e DELEGATE_NAME=docker-delegate \
-e NEXT_GEN="true" \
-e DELEGATE_TYPE="DOCKER" \
-e ACCOUNT_ID=ACCOUNT_ID \
-e DELEGATE_TOKEN=DELEGATE_TOKEN \
-e MANAGER_HOST_AND_PORT=MANAGER_ENDPOINT harness/delegate:23.05.79310
-
-
Verify that the delegate is installed successfully and can connect to the Harness Manager.
-
You can also follow the Install Harness Delegate on Kubernetes or Docker steps to install a Kubernetes delegate using Helm, the Terraform Helm Provider, or a Kubernetes manifest.
Secrets
What are Harness secrets?
Harness offers built-in secret management for encrypted storage of sensitive information. Secrets are decrypted when needed, and only the private network-connected Harness Delegate has access to the key management system. You can also integrate your own secret manager. To learn more about secrets in Harness, go to Harness Secret Manager Overview.
- Create a secret of type SSH Credential.
- In Project Setup, select Secrets.
- Select New Secret, and then select SSH Credential.
- Enter the secret name
harness_sshprivatekeyand select Continue. - With SSH Key as the auth scheme, select Username/SSH Key as the authentication method.
- In Username, enter the username for the user account on the remote server. For example,
ubuntu. - Next, select Create or Select a Secret and select New Secret File.
- Enter the secret name
ssh-private-keyand select Browse to upload the SSH private key to the Harness Secret Manager. - Select Save and, if needed, modify the SSH port number.
- Finally, select Save and Continue and verify the connection to remote server is successful.
- Create a secret to store the authentication key for your Azure application.
- In Project Setup, select Secrets.
- Click New Secret, and then select Text.
- Enter the secret name
azuresecret. - For the secret value, paste in the AWS Secret Key.
- Select Save.
Connectors
What are connectors?
Connectors in Harness enable integration with 3rd party tools, providing authentication and operations during pipeline runtime. For instance, a GitHub connector facilitates authentication and fetching files from a GitHub repository within pipeline stages. Explore connector how-tos here.
- Create an Azure connector.
- Copy the contents of azure-connector.yml.
- In Harness, in Project Setup, select Connectors.
- Select Create via YAML Builder and paste in the copied YAML.
- In the YAML, replace APPLICATION_ID with the Application (Client) Id for the Azure app registration you are using and replace and TENANT_ID with the Id of the Microsoft Entra ID in which you created your application.
- Select Save Changes and verify that the new connector named harness_azureconnector is successfully created.
- Finally, select Test under Connectivity Status to ensure the connection is successful.
- Create a Artifactory connector. For this tutorial, we'll use a publicly available ToDo List app artifact, todolist.war, available in a public Harness Artifactory repo.
- Copy the contents of artifactory-connector.yml.
- In Harness, in Project Setup, select Connectors.
- Select Create via YAML Builder and paste the copied YAML.
- Select Save Changes and verify that the new connector named harness_artifactrepo is successfully created.
- Finally, select Test under Connectivity Status to ensure the connection is successful.
Environment
What are Harness environments?
Environments define the deployment location, categorized as Production or Pre-Production. Each environment includes infrastructure definitions for VMs, Kubernetes clusters, or other target infrastructures. To learn more about environments, go to Environments overview.
- In Default Project, select Environments.
- Select New Environment and toggle to YAML to use the YAML editor.
- Copy the contents of environment.yml and paste it into the YAML editor and select Save.
- In Infrastructure Definitions, select Infrastructure Definition and select Edit YAML.
- Copy the contents of infrastructure-definition.yml and paste it into the YAML editor.
- In the Infra Definition YAML, replace VM_SUBSCRIPTION_ID, VM_RESOURCE_GROUP, and INSTANCE_NAME with the VM Subscription ID, Resource Group and the name of the instance.
- Select Save and verify that the environment and infrastructure definition is created successfully.
Services
What are Harness services?
In Harness, services represent what you deploy to environments. You use services to configure variables, manifests, and artifacts. The Services dashboard provides service statistics like deployment frequency and failure rate. To learn more about services, go to Services overview.
- In Default Project, select Services.
- Select New Service.
- Name the service
harness_ssh. - Select Save, and then in the Configuration tab, toggle to YAML to use the YAML editor.
- Select Edit YAML and copy the contents of service.yml and paste it into the YAML editor.
- Select Save and verify that the service harness_ssh is successfully created.
Pipeline
What are Harness pipelines?
A pipeline is a comprehensive process encompassing integration, delivery, operations, testing, deployment, and monitoring. It can utilize CI for code building and testing, followed by CD for artifact deployment in production. A CD pipeline is a series of stages where each stage deploys a service to an environment. To learn more about CD pipeline basics, go to CD pipeline basics.
- In Default Project, select Pipelines.
- Select New Pipeline.
- Enter the name
harness_ssh_pipeline. - Select Inline to store the pipeline in Harness.
- Select Start and, in Pipeline Studio, toggle to YAML to use the YAML editor.
- Select Edit YAML to enable edit mode, and choose any of the following execution strategies. Paste the respective YAML based on your selection.
- Canary
- Rolling
- Basic
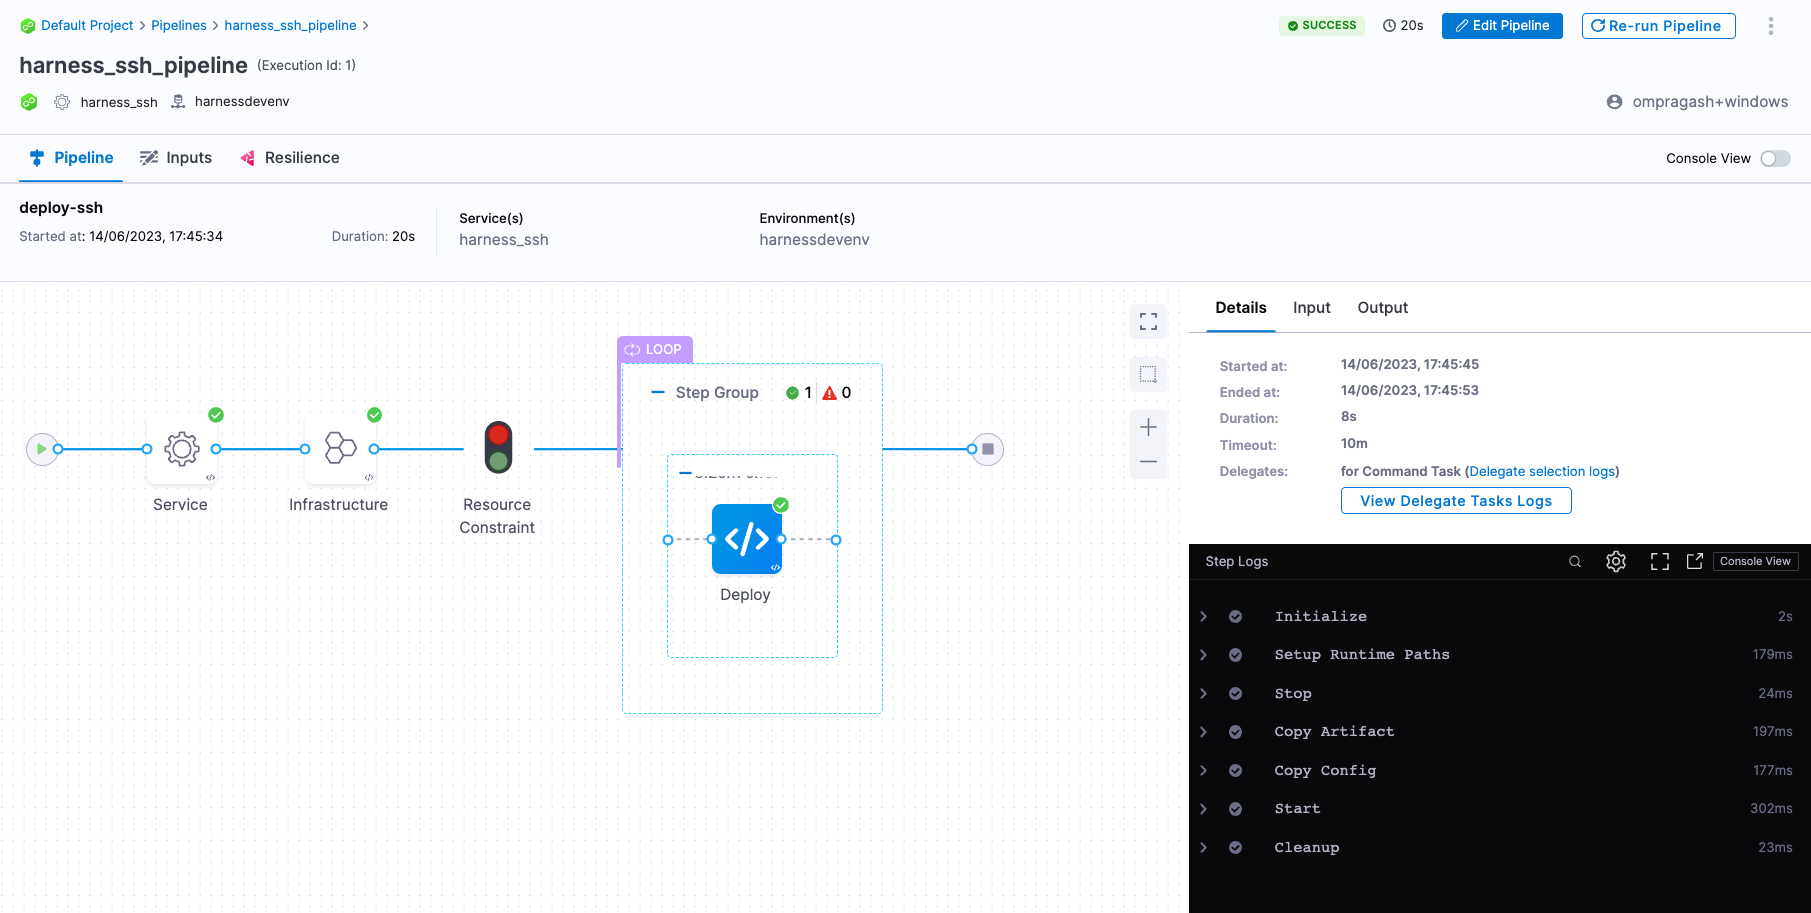
What are Canary deployments?
A canary deployment updates nodes in a single environment gradually, allowing you to use gates between increments. Canary deployments allow incremental updates and ensure a controlled rollout process. For more information, go to When to use Canary deployments.
- Copy the contents of pipeline-ssh-canary.yml and paste it into the YAML editor.
- Select Save.
- You can switch to the Visual editor and confirm the pipeline, stage, and execution steps are as shown below.
What are Rolling deployments?
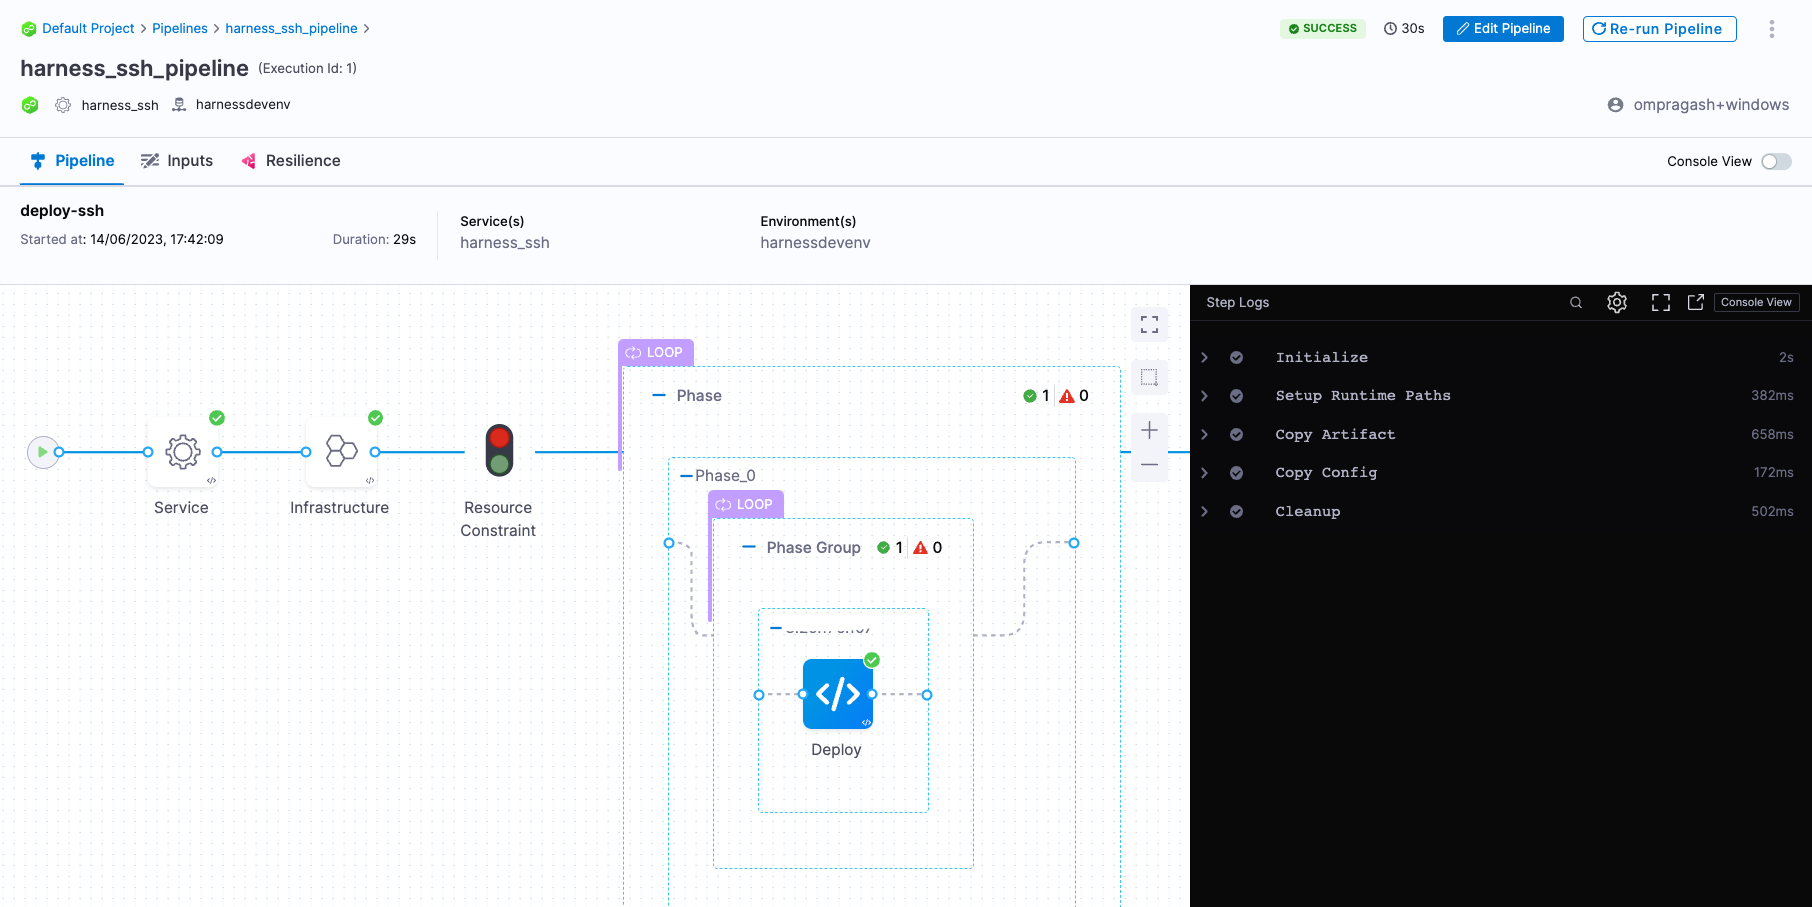
Rolling deployments incrementally add nodes/instances in a single environment with a new service version, either one-by-one or in batches defined by a window size. Rolling deployments allow a controlled and gradual update process for the new service version. For more information, go to When to use rolling deployments.
- Copy the contents of pipeline-ssh-rolling.yml and paste it into the YAML editor.
- Select Save.
- You can switch to the Visual editor and confirm the pipeline, stage, and execution steps are as shown below.
What are Basic deployments?
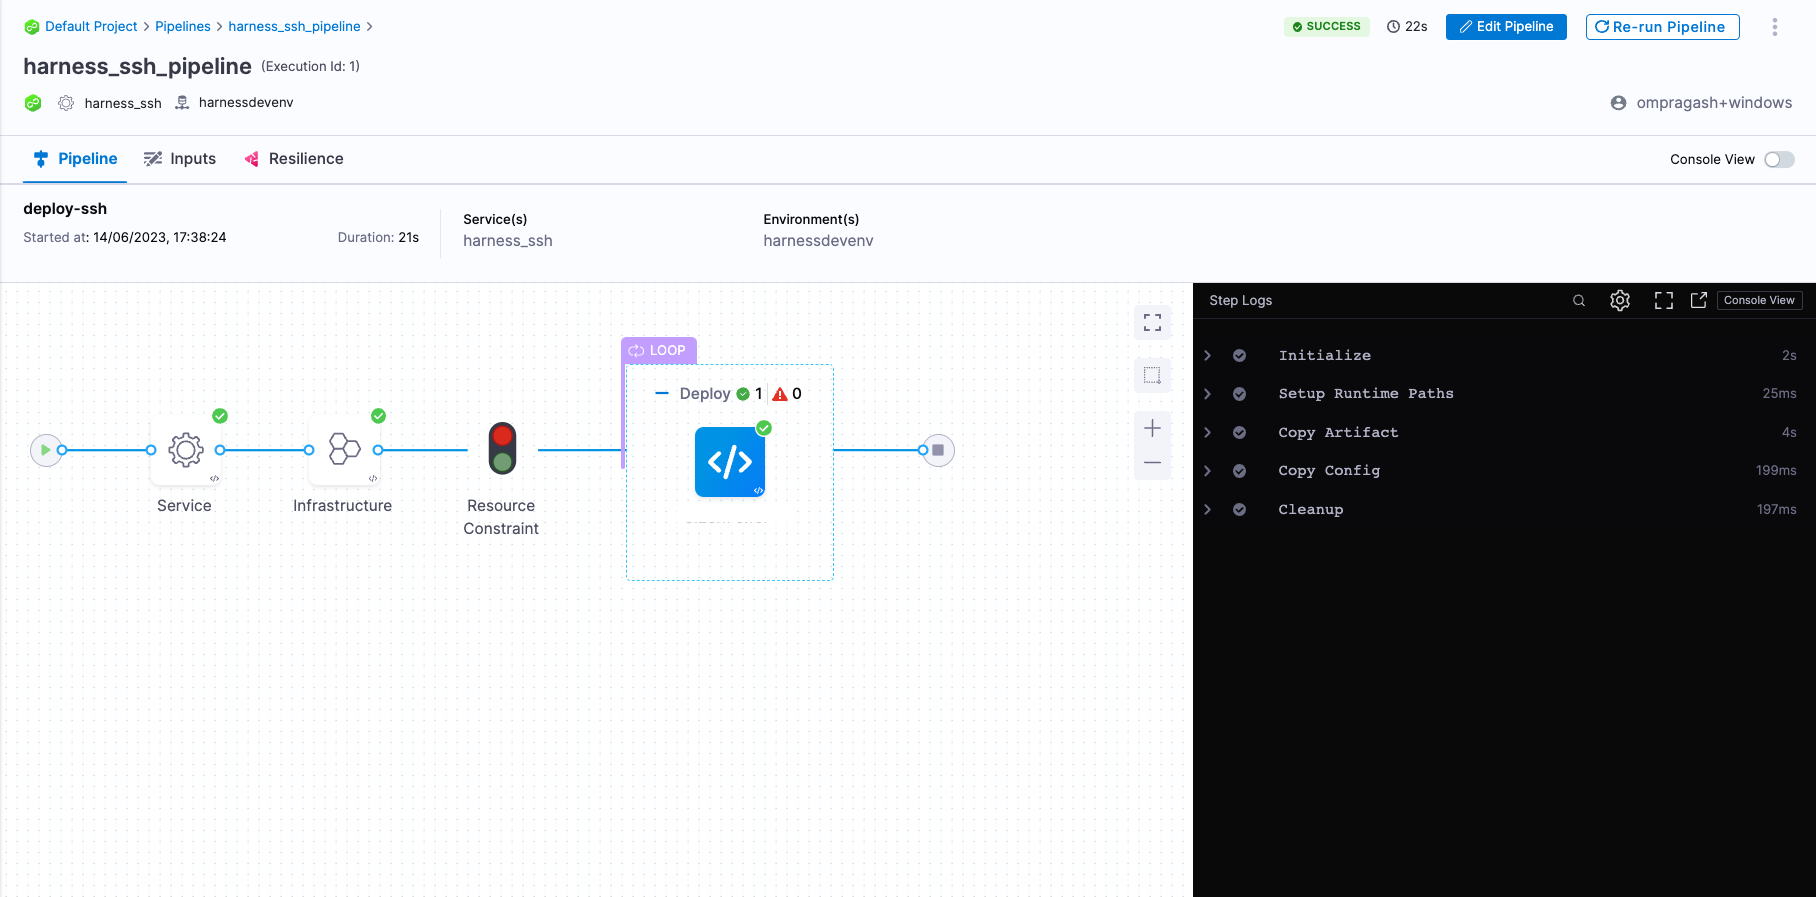
With basic deployments, all nodes (pods, instances, etc) within a single environment are updated at the same time with a single new service/artifact version. For more information, go to When to use basic deployments.
- Copy the contents of pipeline-ssh-basic.yml and paste it into the YAML editor.
- Select Save.
- You can switch to the Visual editor and confirm the pipeline, stage, and execution steps are as shown below.
- Finally, it's time to execute the pipeline. Select Run, and then select Run Pipeline to initiate the deployment.
-
Observe the execution logs as Harness copies the artifact from its source to the remote server.
-
After a successful execution, you can check the artifact in your remote server using the following command:
ls -l ~/harness_ssh/harnessdevenv/todolist.war
-
Before you begin
Verify the following:
- One or more Windows instances on Azure. Make sure port 5985 is open.
- Review Microsoft docs on how to install and configure WinRM
- Docker to set up and start the Harness Docker Delegate.
- For more information, go to delegate System and network requirements.
Getting started with Harness CD
-
Log into Harness.
-
Select Projects, and then select Default Project.
warningFor the pipeline to run successfully, please follow all of the following steps as they are, including the naming conventions.
Delegate
What is the Harness Delegate?
The Harness Delegate is a service that runs in your local network or VPC to establish connections between the Harness Manager and various providers such as artifacts registries, cloud platforms, etc. The delegate is installed in the target infrastructure, for example, a Kubernetes cluster, and performs operations including deployment and integration. Learn more about the delegate in the Delegate overview.
-
In Project Setup, select Delegates.
-
Select Delegates.
-
Select Install delegate. For this tutorial, let's explore how to install the Docker Delegate.
-
In the command provided,
ACCOUNT_ID,MANAGER_ENDPOINTandDELEGATE_TOKENare auto-populated values that you can obtain from the delegate Installation wizard.docker run --cpus=1 --memory=2g \
-e DELEGATE_NAME=docker-delegate \
-e NEXT_GEN="true" \
-e DELEGATE_TYPE="DOCKER" \
-e ACCOUNT_ID=ACCOUNT_ID \
-e DELEGATE_TOKEN=DELEGATE_TOKEN \
-e MANAGER_HOST_AND_PORT=MANAGER_ENDPOINT harness/delegate:23.05.79310
-
-
Verify that the delegate is installed successfully and can connect to the Harness Manager.
-
You can also follow the Install Harness Delegate on Kubernetes or Docker steps to install a Kubernetes delegate using Helm, the Terraform Helm Provider, or a Kubernetes manifest.
Secrets
What are Harness secrets?
Harness offers built-in secret management for encrypted storage of sensitive information. Secrets are decrypted when needed, and only the private network-connected Harness Delegate has access to the key management system. You can also integrate your own secret manager. To learn more about secrets in Harness, go to Harness Secret Manager Overview.
- Create a Secret of type WinRM Crendential.
- In Project Setup, select Secrets.
- Select New Secret, and then select WinRM Credential.
- Enter the secret name
harness_winrmpwdand select Continue. - With NTLM as the auth scheme, and enter the domain name. This is the Active Directory domain name where the user account in the credentials is registered.
- In Username, enter the username for the user account on the remote server. For example,
Administrator. - Next, select Create or Select a Secret and select New Secret Text.
- Enter the secret name
winrm_passwdand enter the user password in the Secret Value field and select Save. - Finally, select Save and Continue and verify the connection to the remote Windows server is successful.
- Create a secret to store the AWS secrete key.
- In Project Setup, select Secrets.
- Select New Secret, and then select Text.
- Enter the secret name
azuresecret. - For the secret value, paste in the AWS Secret Key.
- Select Save.
Connectors
What are connectors?
Connectors in Harness enable integration with 3rd party tools, providing authentication and operations during pipeline runtime. For instance, a GitHub connector facilitates authentication and fetching files from a GitHub repository within pipeline stages. Explore connector how-tos here.
- Create an Azure connector.
- Copy the contents of azure-connector.yml.
- In Harness, in Project Setup, select Connectors.
- Select Create via YAML Builder and paste the copied YAML.
- In the YAML, replace APPLICATION_ID with the Application (Client) Id for the Azure app registration you are using and replace TENANT_ID with the Id of the Microsoft Entra ID in which you created your application.
- Select Save Changes and verify that the new connector named harness_azureconnector is successfully created.
- Finally, select Test under Connectivity Status to ensure the connection is successful.
- Create a Artifactory connector. For this tutorial, we'll use a publicly available ToDo List app artifact, todolist.war, available in a public Harness Artifactory repo.
- Copy the contents of artifactory-connector.yml.
- In Harness, in Project Setup, select Connectors.
- Select Create via YAML Builder and paste the copied YAML.
- Select Save Changes and verify that the new connector named harness_artifactrepo is successfully created.
- Finally, select Test under Connectivity Status to ensure the connection is successful.
Environment
What are Harness environments?
Environments define the deployment location, categorized as Production or Pre-Production. Each environment includes infrastructure definitions for VMs, Kubernetes clusters, or other target infrastructures. To learn more about environments, go to Environments overview.
- In Default Project, select Environments.
- Select New Environment and toggle to YAML to use the YAML editor.
- Copy the contents of environment.yml and paste it into the YAML editor and select Save.
- In Infrastructure Definitions, select Infrastructure Definition, and the select Edit YAML.
- Copy the contents of infrastructure-definition.yml and paste it into the YAML editor.
- In the Infrastructure Definition YAML, replace VM_SUBSCRIPTION_ID, VM_RESOURCE_GROUP, and INSTANCE_NAME with the VM Subscription ID, Resource Group and the name of the instance.
- Select Save and verify that the environment and infrastructure definition is created successfully.
Services
What are Harness services?
In Harness, services represent what you deploy to environments. You use services to configure variables, manifests, and artifacts. The Services dashboard provides service statistics like deployment frequency and failure rate. To learn more about services, go to Services overview.
- In Default Project, select Services.
- Select New Service.
- Name the service
harness_winrm. - Select Save, and then in the Configuration tab, toggle to YAML to use the YAML editor.
- Select Edit YAML and copy the contents of service.yml and paste it into the YAML editor.
- Select Save and verify that the Service harness_ssh is successfully created.
Pipeline
What are Harness pipelines?
A pipeline is a comprehensive process encompassing integration, delivery, operations, testing, deployment, and monitoring. It can utilize CI for code building and testing, followed by CD for artifact deployment in production. A CD Pipeline is a series of stages where each stage deploys a service to an environment. To learn more about CD pipeline basics, go to CD pipeline basics.
- In Default Project, select Pipelines.
- Select New Pipeline.
- Enter the name
harness_winrm_pipeline. - Select Inline to store the pipeline in Harness.
- Select Start and, in the Pipeline Studio, toggle to YAML to use the YAML editor.
- Select Edit YAML to enable edit mode, and choose any of the following execution strategies. Paste the respective YAML based on your selection.
- Canary
- Rolling
- Basic
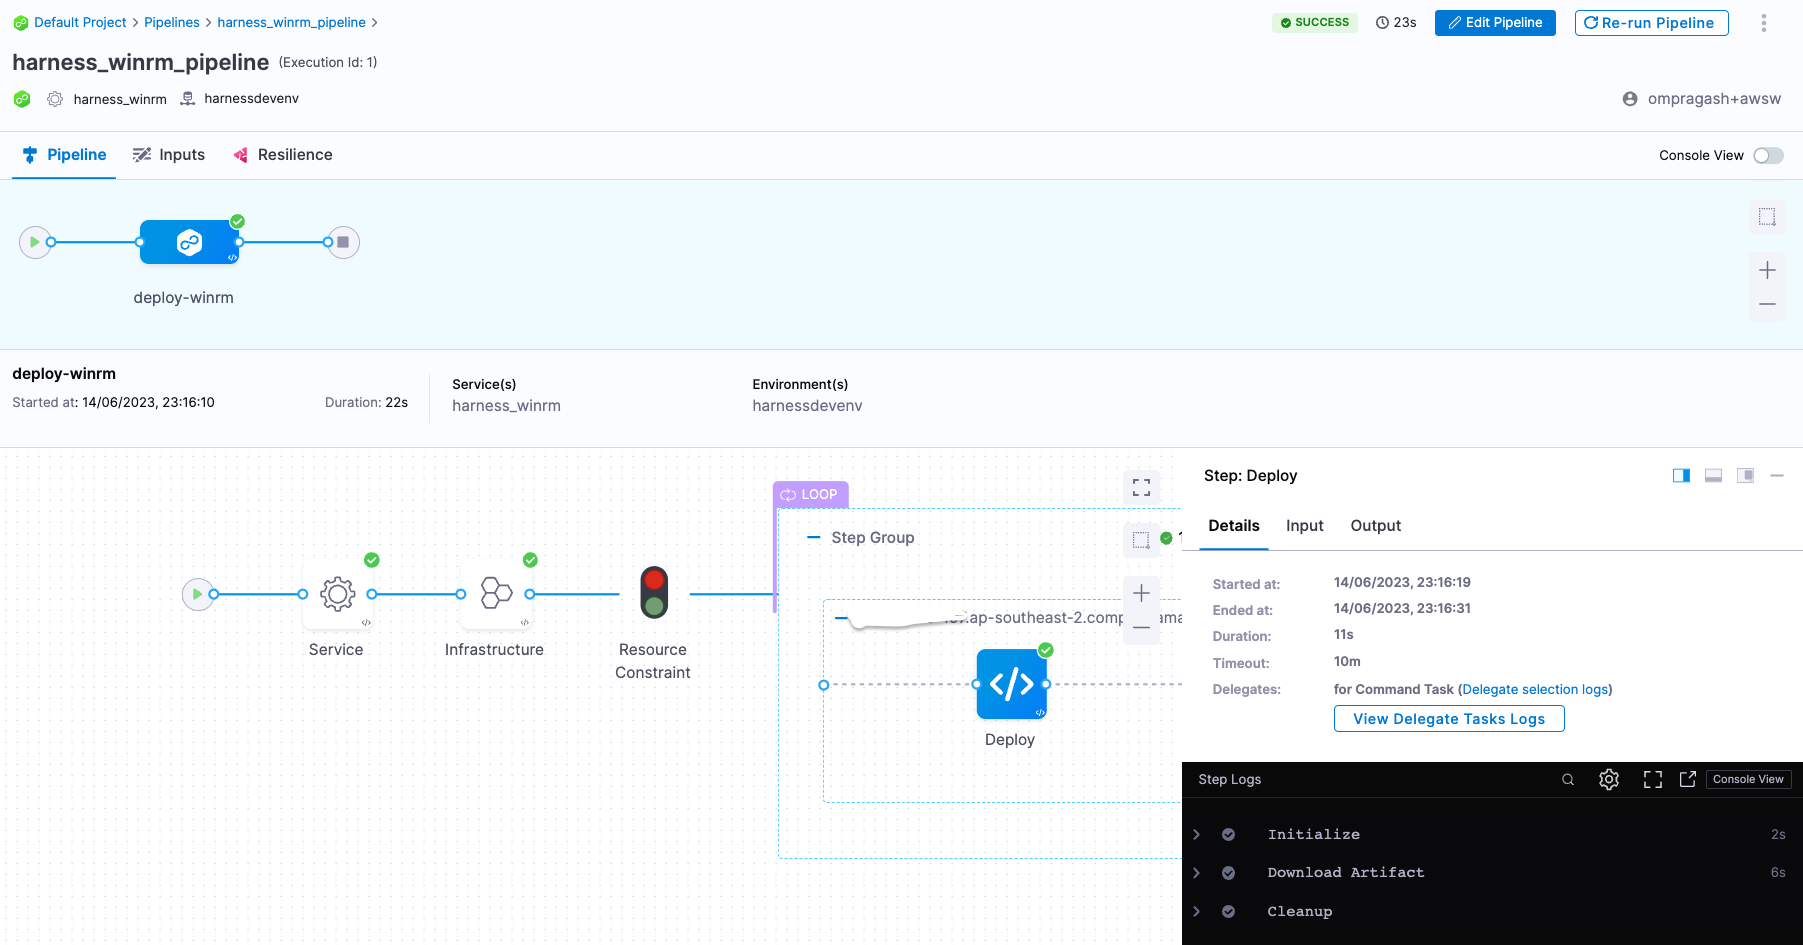
What are Canary deployments?
A canary deployment updates nodes in a single environment gradually, allowing you to use gates between increments. Canary deployments allow incremental updates and ensure a controlled rollout process. For more information, go to When to use Canary deployments.
- Copy the contents of pipeline-canary.yml and paste it into the YAML editor.
- Select Save.
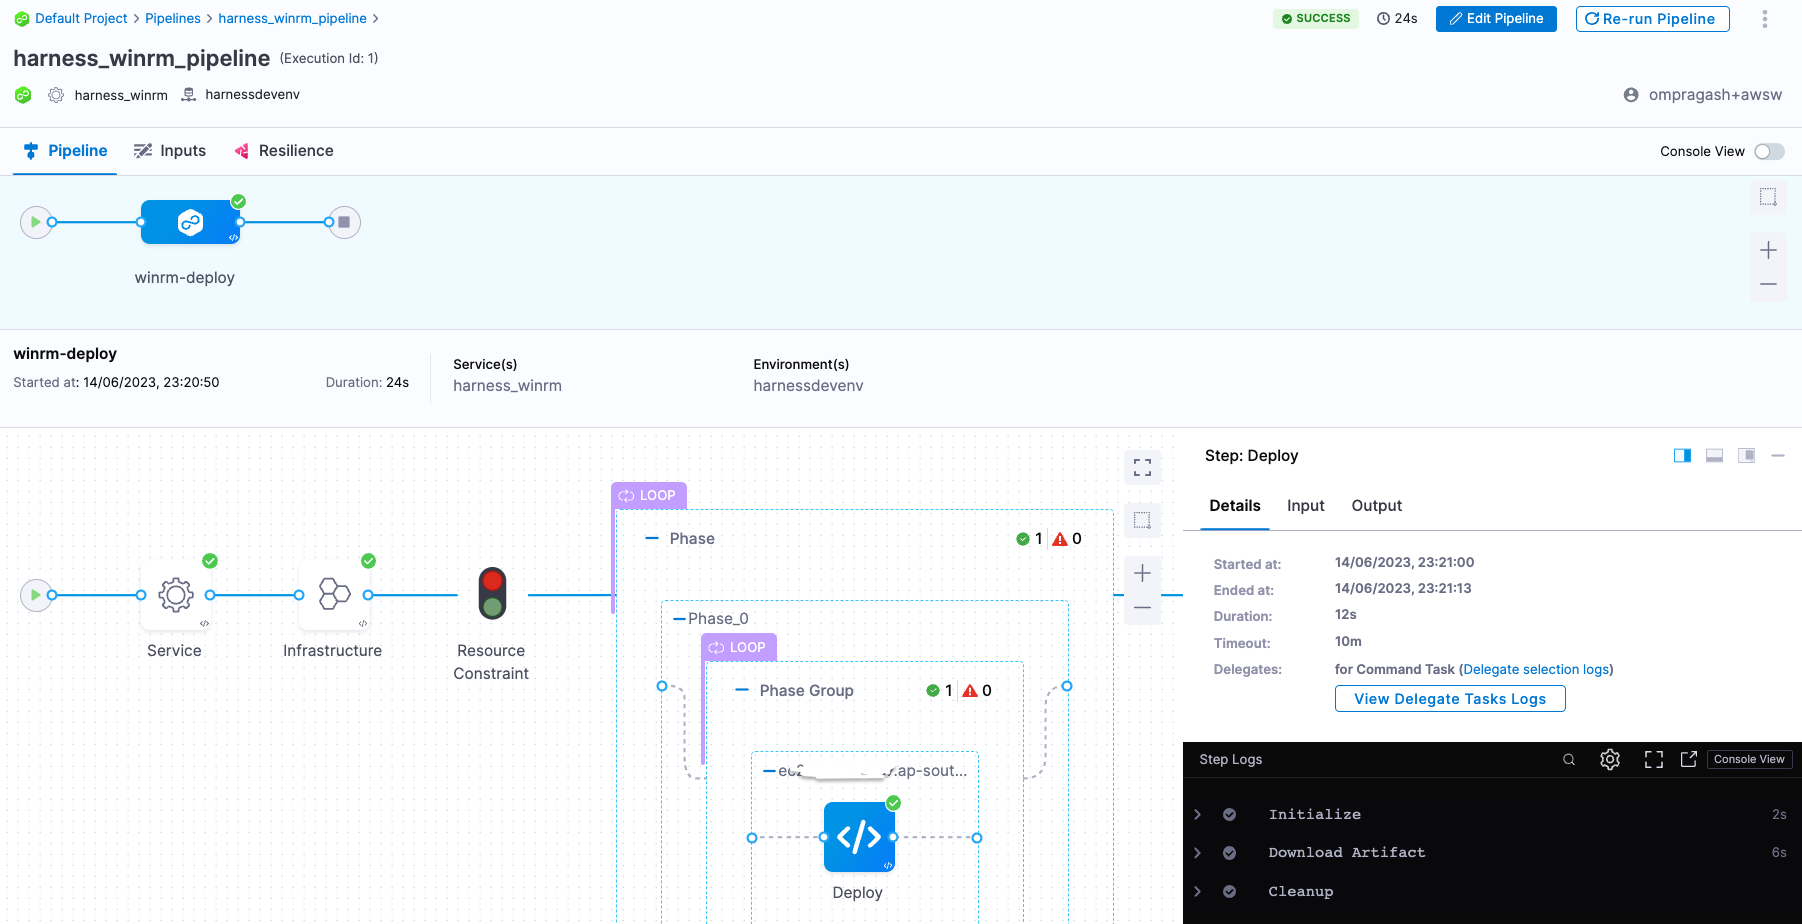
- You can switch to the Visual editor and confirm the pipeline, stage, and execution steps are as shown below.
What are Rolling deployments?
Rolling deployments incrementally add nodes in a single environment with a new service version, either one-by-one or in batches defined by a window size. Rolling deployments allow a controlled and gradual update process for the new service version. For more information, go to When to use rolling deployments.
- Copy the contents of pipeline-rolling.yml and paste it into the YAML editor.
- Select Save.
- You can switch to the Visual editor and confirm the pipeline, stage, and execution steps are as shown below.
What are Basic deployments?
With basic deployments, all nodes (pods, instances, etc) within a single environment are updated at the same time with a single new service/artifact version. For more information, go to When to use basic deployments.
- Copy the contents of pipeline-basic.yml and paste it into the YAML editor.
- Select Save.
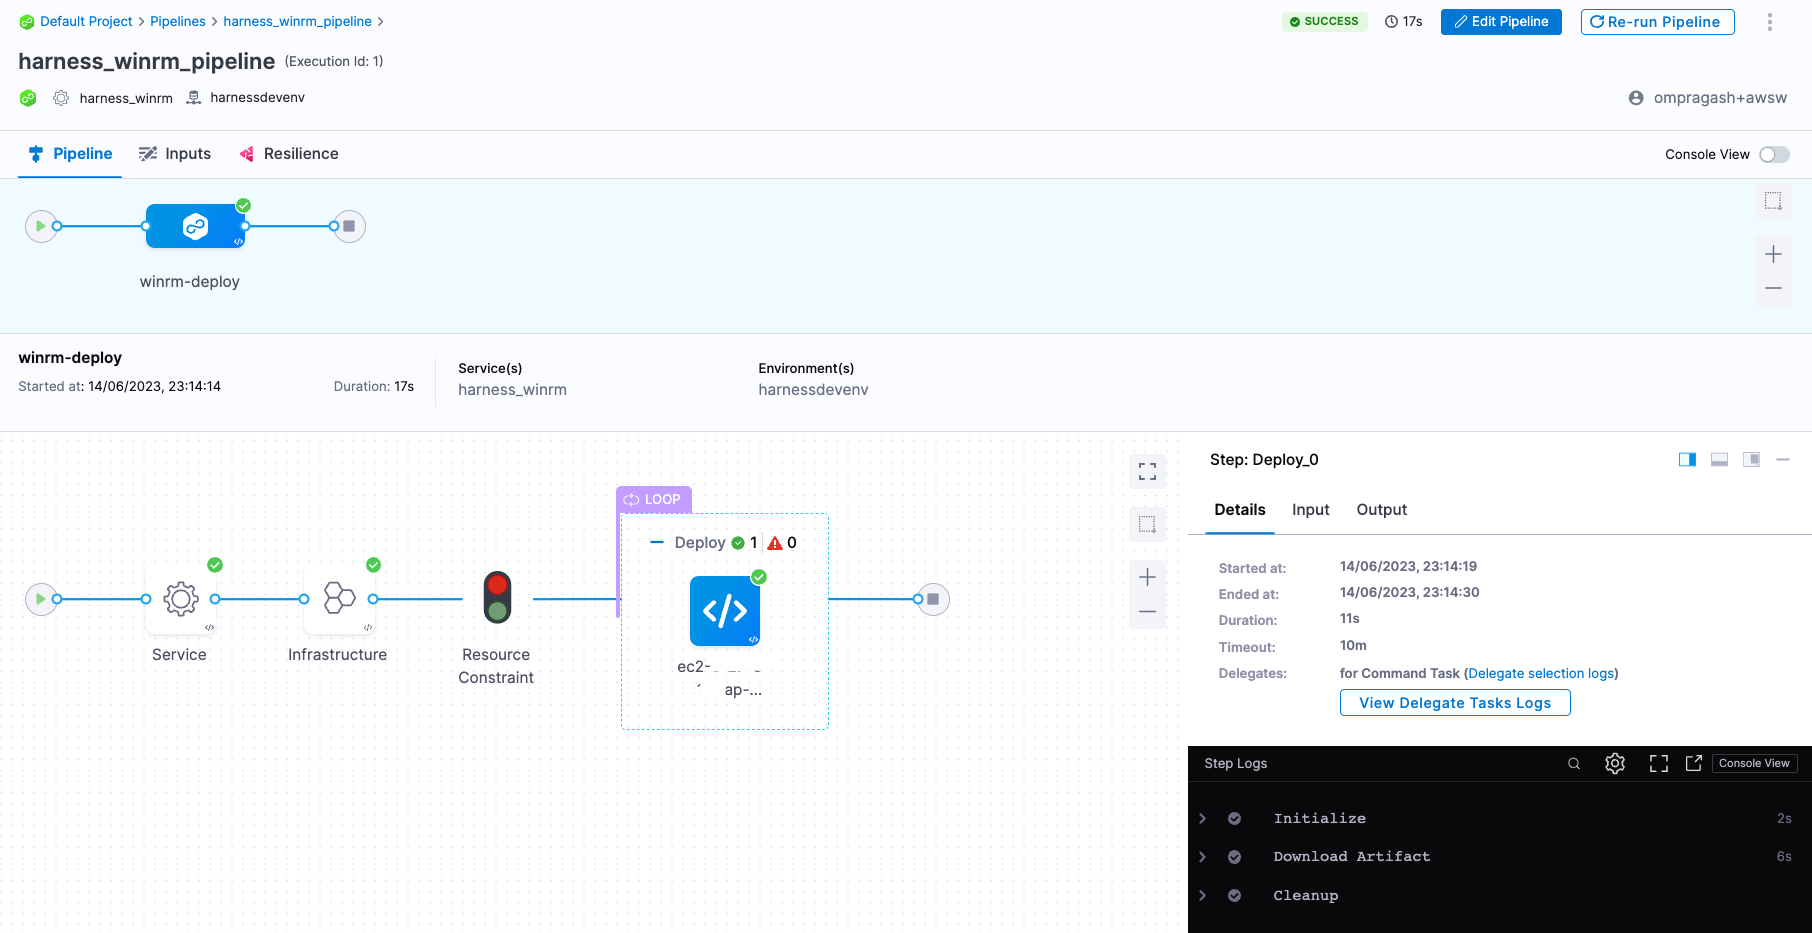
- You can switch to the Visual editor and confirm the pipeline, stage, and execution steps are as shown below.
-
Finally, it's time to execute the pipeline. Select Run, and then select Run Pipeline to initiate the deployment.
-
Observe the execution logs as Harness copy the artifact from source to the remote server.
-
After a successful execution, you can check the artifact in your remote server using the following command:
Get-ChildItem harness_winrm/harnessdevenv
-
Congratulations!🎉
You've just learned how to use Harness CD to copy an artifact to Azure instances.
What's Next?
- Keep learning about Harness CD. Add triggers to your pipeline that'll respond to Git events by following this guide.
- Visit the Harness Developer Hub for more tutorials and resources.