Add a Tanzu Application Service (TAS) connector
This topic describes how to set up the Harness Delegate in your TAS environment and add the cloud provider used to connect to your Tanzu cloud for deployment.
Install the Harness Delegate
Harness Delegate is a service you run in your local network or VPC to connect your artifacts, TAS infrastructure, and any other providers with the Harness Manager.
Expand the following section to learn how to install the Harness Delegate.
Use the delegate installation wizard
- In your Harness project, select Project Setup.
- Select Delegates.
- Select Install a Delegate.
- Follow the instructions in the delegate installation wizard.
Use this delegate installation wizard video to guide you through the process.
Use the terminal
The Harness Delegate is a lightweight worker process that is installed on your infrastructure and communicates only via outbound HTTP/HTTPS to the Harness Platform. This enables the Harness Platform to leverage the delegate to execute the CI/CD and other tasks on your behalf, without any of your secrets leaving your network.
You can install the Harness Delegate on either Docker or Kubernetes.
You might need additional permissions to execute commands in delegate scripts and create Harness users.
Install the default Harness Delegate
Create a new delegate token
You can install delegates from the Account, Project, or Org scope. In this example, we'll create a new token in the Account scope.
To create a new delegate token, do the following:
-
In Harness, select Account Settings, then select Account Resources. The Account Resources page opens.
-
Select Delegates. The Delegates list page opens.
-
Select the Tokens tab, then select +New Token. The New Token dialog opens.
-
Enter a token name, for example
firstdeltoken. -
Select Apply. Harness generates a new token for you.
-
Select Copy to copy and store the token in a temporary file.
You will provide this token as an input parameter in the next installation step. The delegate will use this token to authenticate with the Harness Platform.
Get your Harness account ID
Along with the delegate token, you will also need to provide your Harness accountId as an input parameter during delegate installation. This accountId is present in every Harness URL. For example, in the following URL:
https://app.harness.io/ng/#/account/6_vVHzo9Qeu9fXvj-AcQCb/settings/overview
6_vVHzo9Qeu9fXvj-AcQCb is the accountId.
When you install a delegate via the Harness UI, several dependencies in this topic are prefilled for your convenience. This topic explains where to find the required information for CLI-based installation.
For more information, go to View account info and subscribe to downtime alerts.
- Kubernetes
- Docker
Prerequisite
Ensure that you have access to a Kubernetes cluster. For the purposes of this tutorial, we will use minikube.
Harness supports Kubernetes versions 1.25.16, 1.26.10, and 1.27.8 for delegate installation.
Install minikube
-
On Windows
choco install minikubeinfoFor Chocolatey installation instructions, go to Installing Chocolatey in the Chocolatey documentation.
For additional options to install minikube on Windows, go to minikube start in the minikube documentation.
-
On macOS:
brew install minikubeinfoFor Homebrew installation instructions, go to Installation in the Homebrew documentation.
Now start minikube with the following config.
minikube start --memory 4g --cpus 4
Validate that you have kubectl access to your cluster.
kubectl get pods -A
Now that you have access to a Kubernetes cluster, you can install the delegate using any of the options below.
- Helm Chart
- Terraform Helm Provider
- Kubernetes Manifest
Install the Helm chart
As a prerequisite, you must have Helm v3 installed on the machine from which you connect to your Kubernetes cluster.
You can now install the delegate using the delegate Helm chart. First, add the harness-delegate Helm chart repo to your local Helm registry.
helm repo add harness-delegate https://app.harness.io/storage/harness-download/delegate-helm-chart/
helm repo update
helm search repo harness-delegate
We will use the harness-delegate/harness-delegate-ng chart in this tutorial.
NAME                                	CHART VERSION	APP VERSION	DESCRIPTION
harness-delegate/harness-delegate-ng	1.0.8        	1.16.0     	A Helm chart for deploying harness-delegate
Now we are ready to install the delegate. The following example installs/upgrades firstk8sdel delegate (which is a Kubernetes workload) in the harness-delegate-ng namespace using the harness-delegate/harness-delegate-ng Helm chart.
You can install delegates from the Account, Project, or Org scope. In this example, we'll install a delegate in the Account scope.
To install a delegate, do the following:
-
In Harness, select Account Settings, then select Account Resources. The Account Resources page opens.
-
Select Delegates. The Delegates list page opens.
-
Select New Delegate. The New Delegate dialog opens.
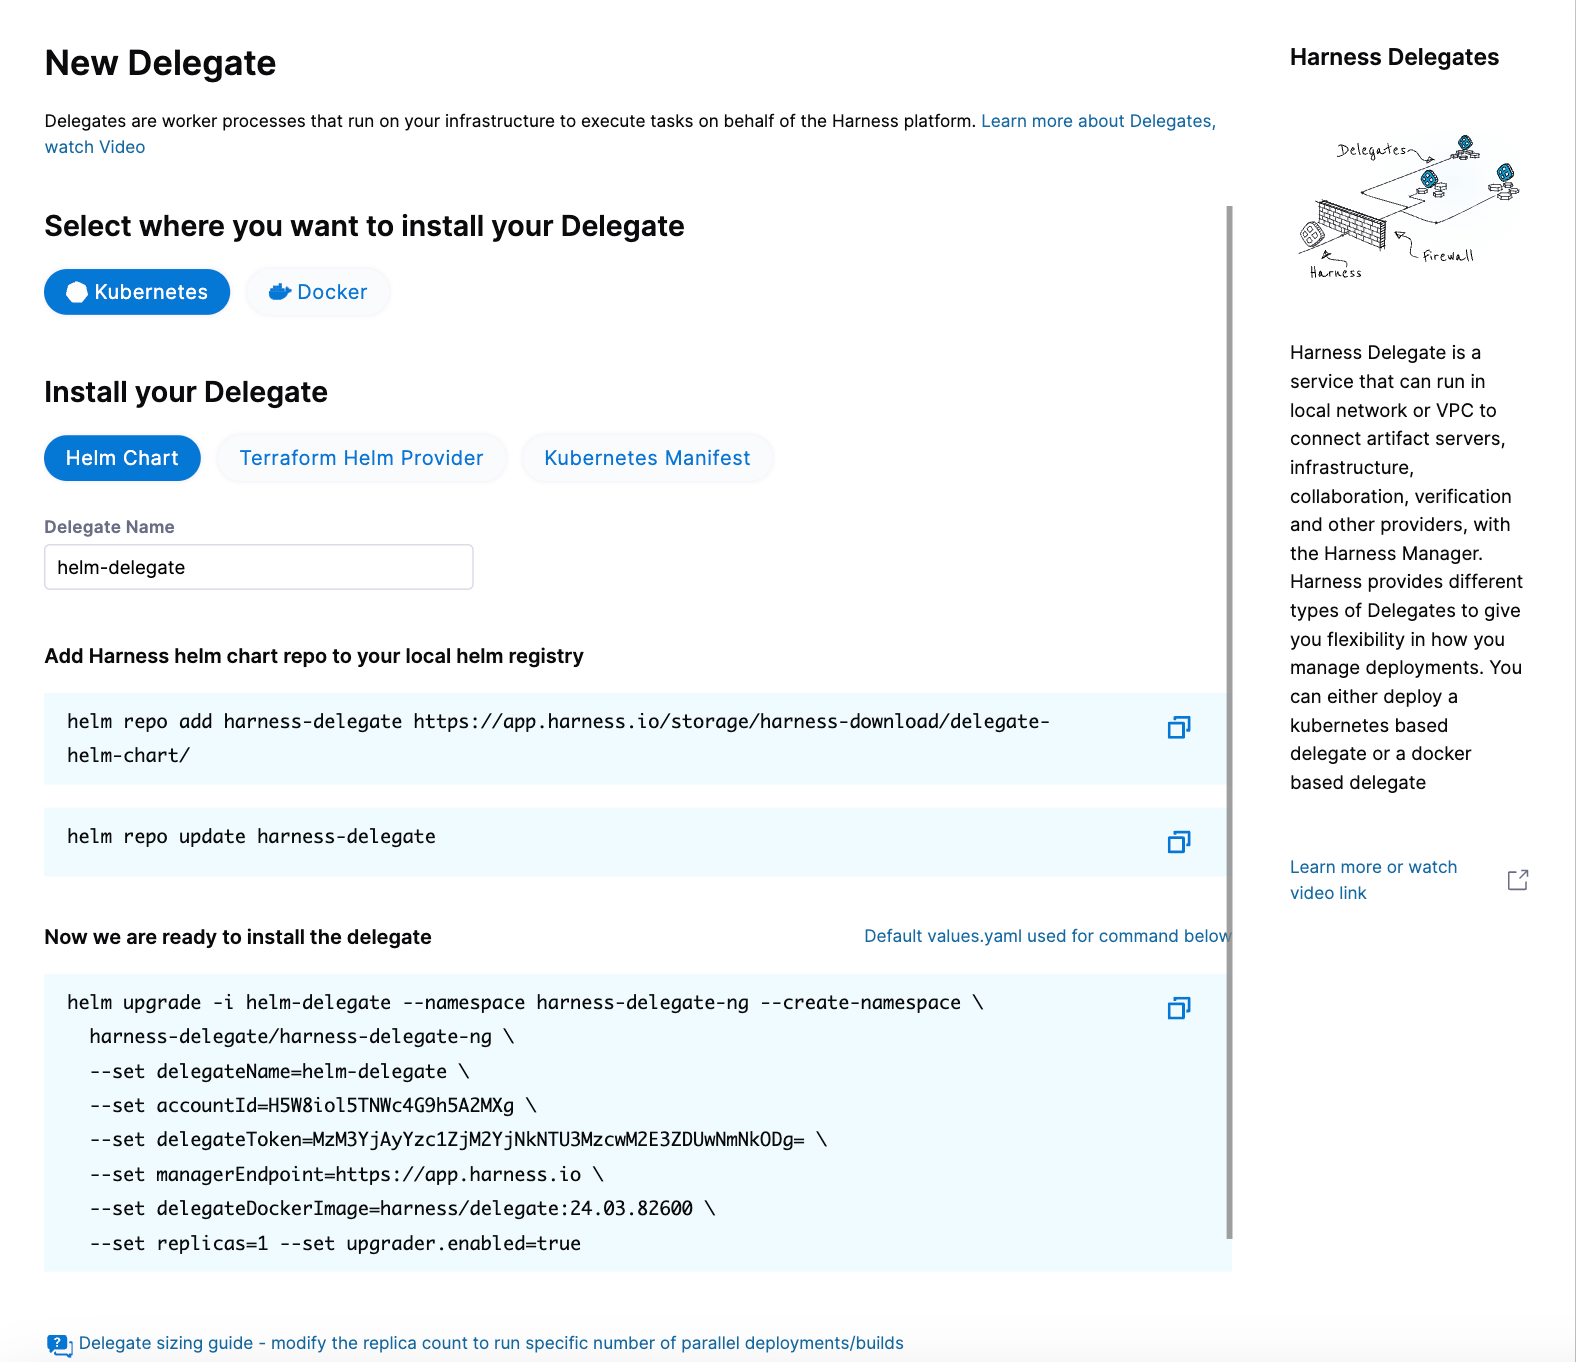
-
Under Select where you want to install your Delegate, select Kubernetes.
-
Under Install your Delegate, select Helm Chart.
-
Copy the
helm upgradecommand.The command uses the default values.yaml file located in the delegate Helm chart GitHub repo. To make persistent changes to one or more values, you can download and update the
values.yamlfile according to your requirements. Once you have updated the file, you can use it by running the upgrade command below.helm upgrade -i firstk8sdel --namespace harness-delegate-ng --create-namespace \
harness-delegate/harness-delegate-ng \
-f values.yaml \
--set delegateName=firstk8sdel \
--set accountId=PUT_YOUR_HARNESS_ACCOUNTID_HERE \
--set delegateToken=PUT_YOUR_DELEGATE_TOKEN_HERE \
--set managerEndpoint=PUT_YOUR_MANAGER_HOST_AND_PORT_HERE \
--set delegateDockerImage=harness/delegate:yy.mm.verno \
--set replicas=1 --set upgrader.enabled=true
To install a Helm delegate for Harness Self-Managed Enterprise Edition in an air-gapped environment, you must pass your certificate when you add the Helm repo.
helm repo add harness-delegate --ca-file <.PEM_FILE_PATH> <HELM_CHART_URL_FROM_UI>
For more information on requirements for air-gapped environments, go to Install in an air-gapped environment.
- Run the command.
Create main.tf file
Harness uses a Terraform module for the Kubernetes delegate. This module uses the standard Terraform Helm provider to install the Helm chart onto a Kubernetes cluster whose config by default is stored in the same machine at the ~/.kube/config path. Copy the following into a main.tf file stored on a machine from which you want to install your delegate.
module "delegate" {
  source = "harness/harness-delegate/kubernetes"
  version = "0.1.8"

  account_id = "PUT_YOUR_HARNESS_ACCOUNTID_HERE"
  delegate_token = "PUT_YOUR_DELEGATE_TOKEN_HERE"
  delegate_name = "firstk8sdel"
  deploy_mode = "Kubernetes"
  namespace = "harness-delegate-ng"
  manager_endpoint = "PUT_YOUR_MANAGER_HOST_AND_PORT_HERE"
  delegate_image = "harness/delegate:yy.mm.verno"
  replicas = 1
  upgrader_enabled = false

  # Additional optional values to pass to the helm chart
  values = yamlencode({
    javaOpts: "-Xms64M"
  })
}

provider "helm" {
  kubernetes {
    config_path = "~/.kube/config"
  }
}
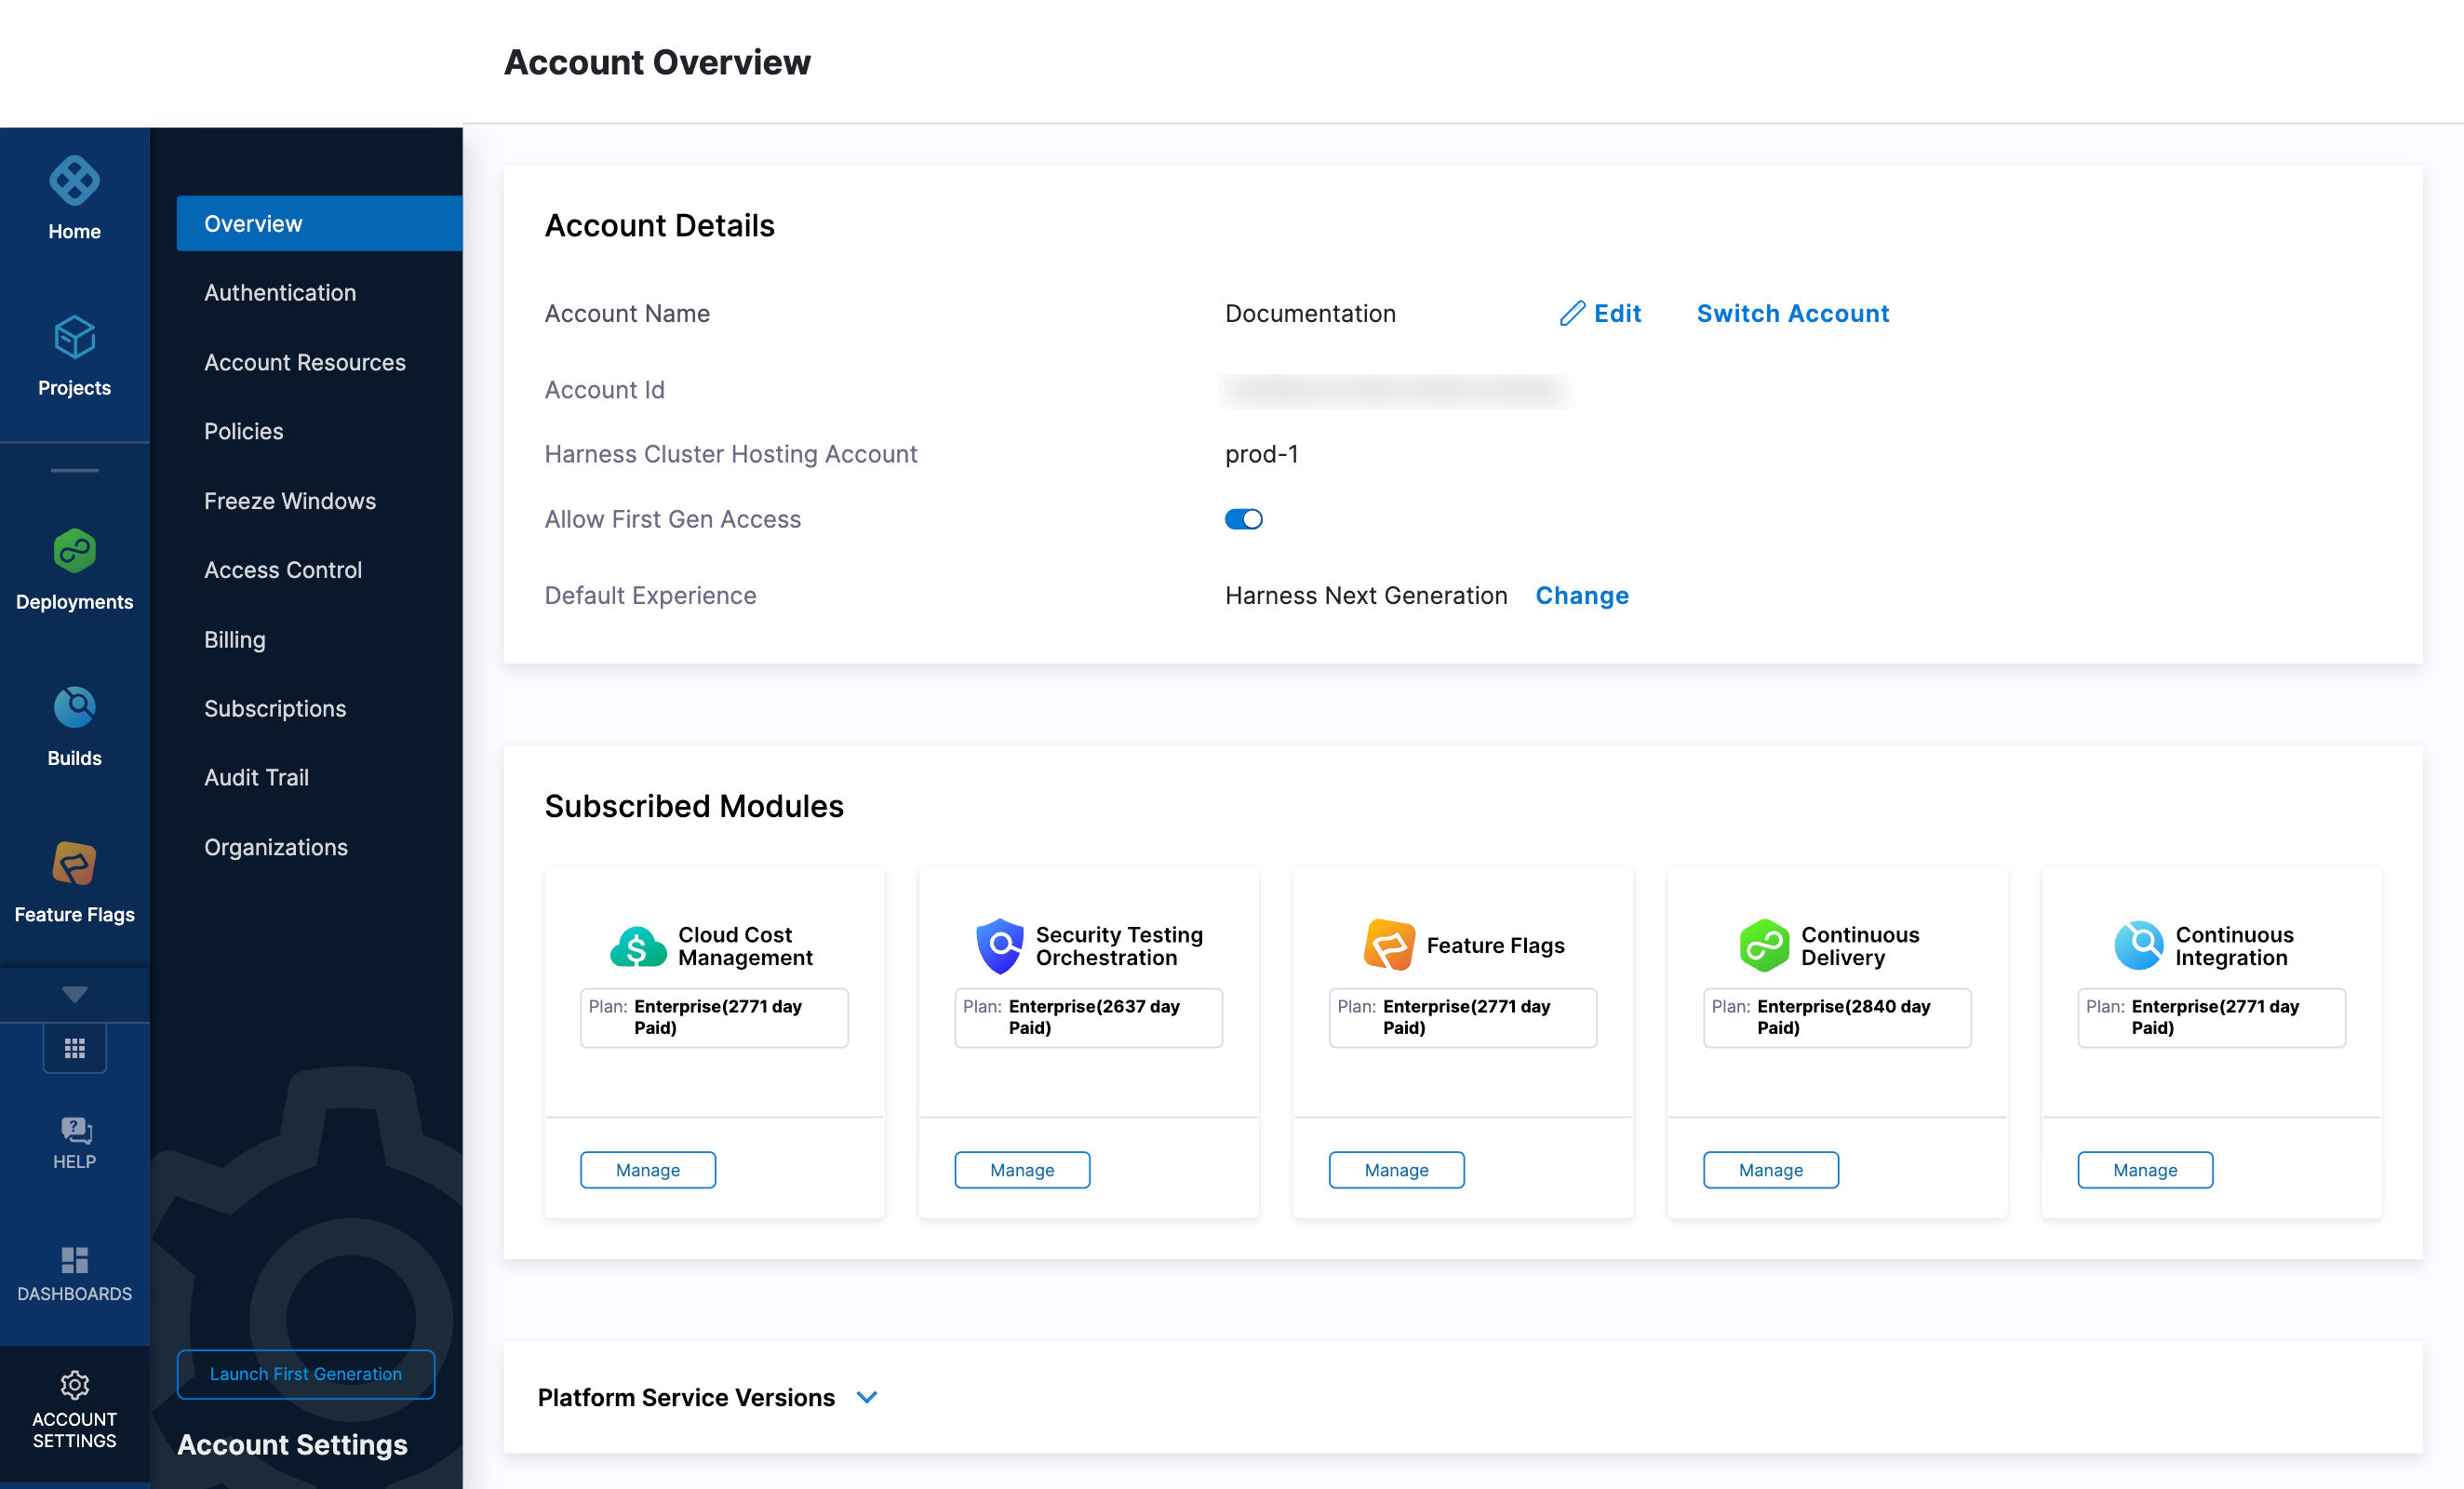
Now replace the variables in the file with your Harness account ID and delegate token values. Replace PUT_YOUR_MANAGER_HOST_AND_PORT_HERE with the Harness Manager Endpoint noted below. For Harness SaaS accounts, you can find your Harness Cluster Location on the Account Overview page under the Account Settings section of the left navigation.
| Harness Cluster Location | Harness Manager Endpoint on Harness Cluster |
|---|---|
| SaaS prod-1 | https://app.harness.io |
| SaaS prod-2 | https://app.harness.io/gratis |
| SaaS prod-3 | https://app3.harness.io |
Run Terraform init, plan, and apply
Initialize Terraform. This downloads the Terraform Helm provider to your machine.
terraform init
Run the following step to view the changes Terraform is going to make on your behalf.
terraform plan
Finally, run this step to make Terraform install the Kubernetes delegate using the Helm provider.
terraform apply
When prompted by Terraform if you want to continue with the apply step, type yes, and then you will see output similar to the following.
helm_release.delegate: Creating...
helm_release.delegate: Still creating... [10s elapsed]
helm_release.delegate: Still creating... [20s elapsed]
helm_release.delegate: Still creating... [30s elapsed]
helm_release.delegate: Still creating... [40s elapsed]
helm_release.delegate: Still creating... [50s elapsed]
helm_release.delegate: Still creating... [1m0s elapsed]
helm_release.delegate: Creation complete after 1m0s [id=firstk8sdel]

Apply complete! Resources: 1 added, 0 changed, 0 destroyed.
Download a Kubernetes manifest template
curl -LO https://raw.githubusercontent.com/harness/delegate-kubernetes-manifest/main/harness-delegate.yaml
Replace variables in the template
Open the harness-delegate.yaml file in a text editor and replace PUT_YOUR_DELEGATE_NAME_HERE, PUT_YOUR_HARNESS_ACCOUNTID_HERE, and PUT_YOUR_DELEGATE_TOKEN_HERE with your delegate name (for example, firstk8sdel), Harness accountId, and delegate token values, respectively.
Replace the PUT_YOUR_MANAGER_HOST_AND_PORT_HERE variable with the Harness Manager Endpoint noted below. For Harness SaaS accounts, you can find your Harness Cluster Location on the Account Overview page under the Account Settings section of the left navigation.
| Harness Cluster Location | Harness Manager Endpoint on Harness Cluster |
|---|---|
| SaaS prod-1 | https://app.harness.io |
| SaaS prod-2 | https://app.harness.io/gratis |
| SaaS prod-3 | https://app3.harness.io |
Apply the Kubernetes manifest
kubectl apply -f harness-delegate.yaml
Prerequisites
Ensure that you have the Docker runtime installed on your host. If not, use one of the following options to install Docker:
Install on Docker
You can install delegates from the Account, Project, or Org scope. In this example, we'll install a delegate in the Project scope.
To install a delegate, do the following:
-
In Harness, select your project, then select Project Settings.
-
Under Project-level resources, select Delegates.
-
Select Install a Delegate to open the New Delegate dialog.
-
Under Select where you want to install your Delegate, select Docker.
-
Under Install your Delegate, enter a Delegate Name.
-
Copy the
docker runcommand.docker run --cpus=1 --memory=2g \
-e DELEGATE_NAME=docker-delegate \
-e NEXT_GEN="true" \
-e DELEGATE_TYPE="DOCKER" \
-e ACCOUNT_ID=YOUR_HARNESS_ACCOUNTID_ \
-e DELEGATE_TOKEN=YOUR_DELEGATE_TOKEN \
-e DELEGATE_TAGS="" \
-e LOG_STREAMING_SERVICE_URL=YOUR_LOG_STREAMING_SERVICE_URL/log-service/ \
-e MANAGER_HOST_AND_PORT=YOUR_MANAGER_HOST_AND_PORT \
harness/delegate:yy.mm.vernoinfoThe
docker runcommand doesn't allow you to select the delegate token. You can replace the token in the command with another token if required.infoSteps 6 and 7 are optional when installing a delegate using the CLI flow.
-
(Optional) Replace the
YOUR_MANAGER_HOST_AND_PORT_HEREvariable with the Harness Manager Endpoint noted below. For Harness SaaS accounts, to find your Harness cluster location, select Account Settings, and then select Overview. In Account Overview, look in Account Settings. It is listed next to Harness Cluster Hosting Account.For more information, go to View account info and subscribe to downtime alerts.
For Harness CDCE, the endpoint varies based on the Docker vs. Helm installation options.
Harness Cluster Location Harness Manager Endpoint on Harness Cluster SaaS prod-1 https://app.harness.ioSaaS prod-2 https://app.harness.io/gratisSaaS prod-3 https://app3.harness.io -
Run the command.
Deploy using a custom role
During delegate installation, you have the option to deploy using a custom role. To use a custom role, you must edit the delegate YAML file.
Harness supports the following custom roles:
cluster-admincluster-viewernamespace-admin- custom cluster roles
To deploy using a custom cluster role, do the following:
-
Open the delegate YAML file in your text editor.
-
Add the custom cluster role to the
roleReffield in the delegate YAML.---
apiVersion: rbac.authorization.k8s.io/v1beta1
kind: ClusterRoleBinding
metadata:
name: harness-delegate-cluster-admin
subjects:
- kind: ServiceAccount
name: default
namespace: harness-delegate-ng
roleRef:
kind: ClusterRole
name: cluster-admin
apiGroup: rbac.authorization.k8s.io
---In this example, the
cluster-adminrole is defined. -
Save the delegate YAML file.
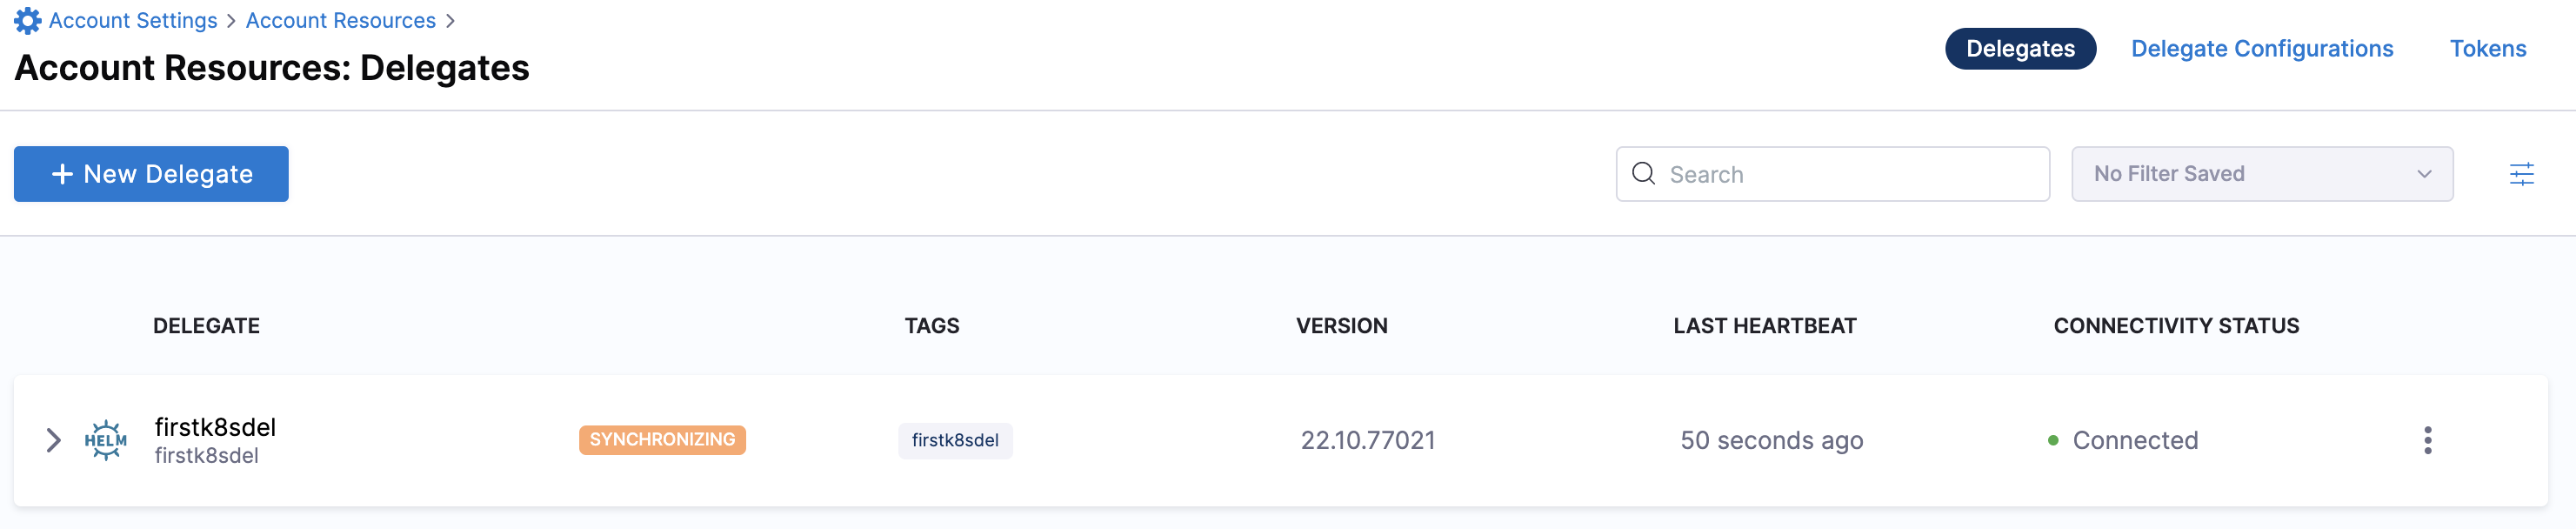
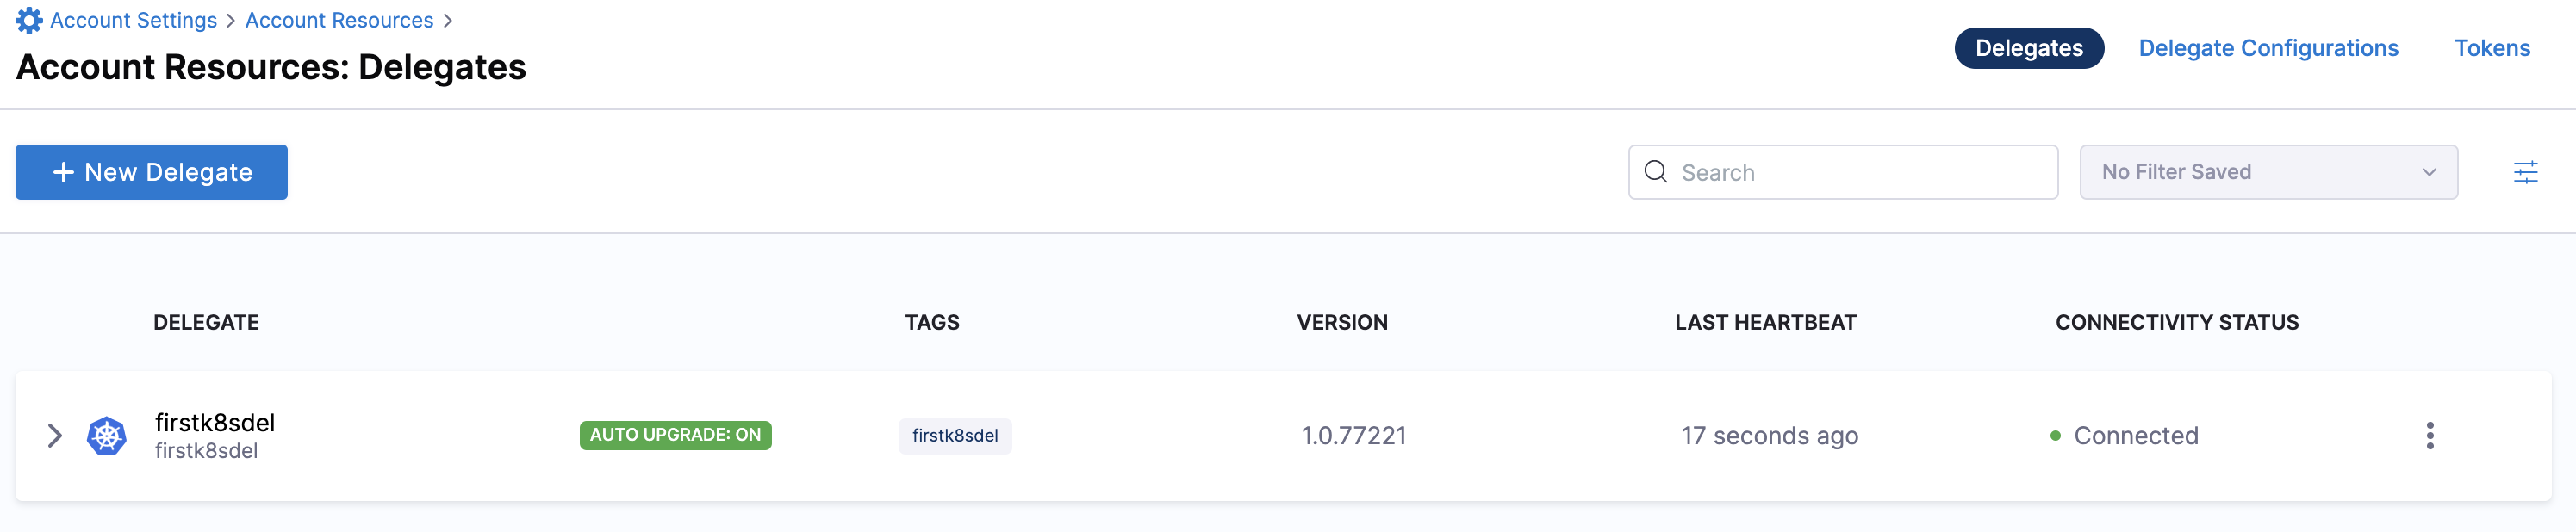
Verify delegate connectivity
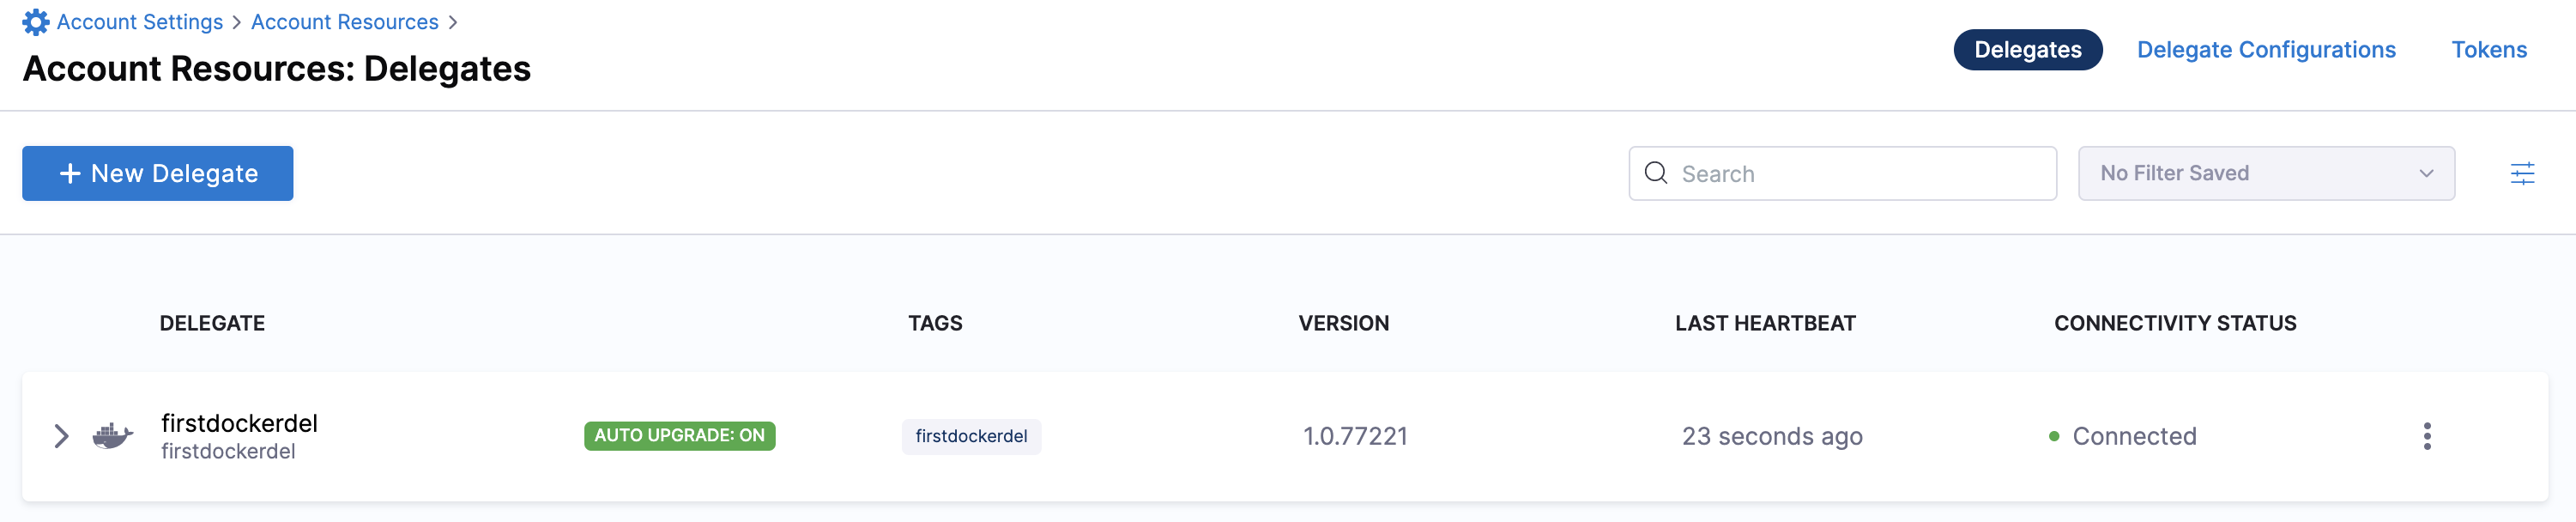
Select Continue. After the health checks pass, your delegate is available for you to use. Select Done and verify your new delegate is listed.
Helm chart & Terraform Helm provider
Kubernetes manifest
Docker
You can now route communication to external systems in Harness connectors and pipelines by selecting this delegate via a delegate selector.
Delegate selectors do not override service infrastructure connectors. Delegate selectors only determine the delegate that executes the operations of your pipeline.
Troubleshooting
The delegate installer provides troubleshooting information for each installation process. If the delegate cannot be verified, select Troubleshoot for steps you can use to resolve the problem. This section includes the same information.
Harness asks for feedback after the troubleshooting steps. You are asked, Did the delegate come up?
If the steps did not resolve the problem, select No, and use the form to describe the issue. You'll also find links to Harness Support and to Delegate docs.
- Helm Chart
- Terraform Helm Provider
- Kubernetes Manifest
- Docker
Use the following steps to troubleshoot your installation of the delegate using Helm.
-
Verify that Helm is correctly installed:
Check for Helm:
helmAnd then check for the installed version of Helm:
helm versionIf you receive the message
Error: rendered manifests contain a resource that already exists..., delete the existing namespace, and retry the Helm upgrade command to deploy the delegate.For further instructions on troubleshooting your Helm installation, go to Helm troubleshooting guide.
-
Check the status of the delegate on your cluster:
kubectl describe pods -n <NAMESPACE> -
If the pod did not start, check the delegate logs:
kubectl logs -f <DELEGATE_NAME> -n <NAMESPACE>If the state of the delegate pod is
CrashLoopBackOff, check your allocation of compute resources (CPU and memory) to the cluster. A state ofCrashLoopBackOffindicates insufficient Kubernetes cluster resources. -
If the delegate pod is not healthy, use the
kubectl describecommand to get more information:kubectl describe <POD_NAME> -n <NAMESPACE>
Use the following steps to troubleshoot your installation of the delegate using Terraform.
-
Verify that Terraform is correctly installed:
terraform -versionFor further instructions on troubleshooting your installation of Terraform, go to the Terraform troubleshooting guide.
-
Check the status of the delegate on your cluster:
kubectl describe pods -n <namespace> -
If the pod did not start, check the delegate logs:
kubectl logs -f <DELEGATE_NAME> -n <NAMESPACE>If the state of the delegate pod is
CrashLoopBackOff, check your allocation of compute resources (CPU and memory) to the cluster. A state ofCrashLoopBackOffindicates insufficient Kubernetes cluster resources. -
If the delegate pod is not healthy, use the
kubectl describecommand to get more information:kubectl describe <POD_NAME> -n <NAMESPACE>
Use the following steps to troubleshoot your installation of the delegate using Kubernetes.
-
Check the status of the delegate on your cluster:
kubectl describe pods -n <NAMESPACE> -
If the pod did not start, check the delegate logs:
kubectl logs -f <DELEGATE_NAME> -n <NAMESPACE>If the state of the delegate pod is
CrashLoopBackOff, check your allocation of compute resources (CPU and memory) to the cluster. A state ofCrashLoopBackOffindicates insufficient Kubernetes cluster resources. -
If the delegate pod is not healthy, use the
kubectl describecommand to get more information:kubectl describe <POD_NAME> -n <NAMESPACE>
Use the following steps to troubleshoot your installation of the delegate using Docker:
-
Check the status of the delegate on your cluster:
docker container ls -a -
If the pod is not running, check the delegate logs:
docker container logs <DELEGATE_NAME> -f -
Restart the delegate container. To stop the container:
docker container stop <DELEGATE_NAME>To start the container:
docker container start <DELEGATE_NAME> -
Make sure the container has sufficient CPU and memory resources. If not, remove the older containers:
docker container rm [container id]
To learn more, watch the Delegate overview video.
Install the Cloud Foundry Command Line Interface (cf CLI) on your Harness Delegate
After the delegate pods are created, you must edit your Harness Delegate YAML to install CF CLI v7, autoscaler, and Create-Service-Push plugins.
-
Open
delegate.yamlin a text editor. -
Locate the environment variable
INIT_SCRIPTin theDeploymentobject.- name: INIT_SCRIPT
value: "" -
Replace
value: ""with the following script to install CF CLI,autoscaler, andCreate-Service-Pushplugins.infoHarness Delegate uses Red Hat–based distributions such as Red Hat Enterprise Linux (RHEL) or Red Hat Universal Base Image (UBI). Hence, we recommend that you use
microdnfcommands to install CF CLI on your delegate. If you are using a package manager in Debian-based distributions such as Ubuntu, useapt-getcommands to install CF CLI on your delegate.infoMake sure to use your API token for pivnet login in the following script.
- microdnf
- apt-get
- name: INIT_SCRIPT
value: |
 # update package manager, install necessary packages, and install CF CLI v7
 microdnf update
 microdnf install yum
 microdnf install --nodocs unzip yum-utils
 microdnf install -y yum-utils
 echo y | yum install wget
 wget -O /etc/yum.repos.d/cloudfoundry-cli.repo https://packages.cloudfoundry.org/fedora/cloudfoundry-cli.repo
 echo y | yum install cf7-cli -y

 # autoscaler plugin
 # download and install pivnet
 wget -O pivnet https://github.com/pivotal-cf/pivnet-cli/releases/download/v0.0.55/pivnet-linux-amd64-0.0.55 && chmod +x pivnet && mv pivnet /usr/local/bin;
 pivnet login --api-token=<replace with api token>

 # download and install autoscaler plugin by pivnet
 pivnet download-product-files --product-slug='pcf-app-autoscaler' --release-version='2.0.295' --product-file-id=912441
 cf install-plugin -f autoscaler-for-pcf-cliplugin-linux64-binary-2.0.295

 # install Create-Service-Push plugin from community
 cf install-plugin -r CF-Community "Create-Service-Push"

 # verify cf version
 cf --version

 # verify plugins
 cf plugins
- name: INIT_SCRIPT
value: |
 # update package manager, install necessary packages, and install CF CLI v7
 apt-get install wget
 wget -q -O - https://packages.cloudfoundry.org/debian/cli.cloudfoundry.org.key | apt-key add -
 echo "deb https://packages.cloudfoundry.org/debian stable main" | tee /etc/apt/sources.list.d/cloudfoundry-cli.list
 apt-get update
 apt-get install cf7-cli

 # autoscaler plugin
 # download and install pivnet
 wget -O pivnet https://github.com/pivotal-cf/pivnet-cli/releases/download/v0.0.55/pivnet-linux-amd64-0.0.55 && chmod +x pivnet && mv pivnet /usr/local/bin;
 pivnet login --api-token=<replace with api token>

 # download and install autoscaler plugin by pivnet
 pivnet download-product-files --product-slug='pcf-app-autoscaler' --release-version='2.0.295' --product-file-id=912441
 cf install-plugin -f autoscaler-for-pcf-cliplugin-linux64-binary-2.0.295

 # install Create-Service-Push plugin from community
 cf install-plugin -r CF-Community "Create-Service-Push"

 # verify cf version
 cf --version

 # verify plugins
 cf plugins
-
Apply the profile to the delegate profile and check the logs.
The output for
cf --versioniscf version 7.2.0+be4a5ce2b.2020-12-10.Here is the output for
cf plugins.App Autoscaler 2.0.295 autoscaling-apps Displays apps bound to the autoscaler
App Autoscaler 2.0.295 autoscaling-events Displays previous autoscaling events for the app
App Autoscaler 2.0.295 autoscaling-rules Displays rules for an autoscaled app
App Autoscaler 2.0.295 autoscaling-slcs Displays scheduled limit changes for the app
App Autoscaler 2.0.295 configure-autoscaling Configures autoscaling using a manifest file
App Autoscaler 2.0.295 create-autoscaling-rule Create rule for an autoscaled app
App Autoscaler 2.0.295 create-autoscaling-slc Create scheduled instance limit change for an autoscaled app
App Autoscaler 2.0.295 delete-autoscaling-rule Delete rule for an autoscaled app
App Autoscaler 2.0.295 delete-autoscaling-rules Delete all rules for an autoscaled app
App Autoscaler 2.0.295 delete-autoscaling-slc Delete scheduled limit change for an autoscaled app
App Autoscaler 2.0.295 disable-autoscaling Disables autoscaling for the app
App Autoscaler 2.0.295 enable-autoscaling Enables autoscaling for the app
App Autoscaler 2.0.295 update-autoscaling-limits Updates autoscaling instance limits for the app
Create-Service-Push 1.3.2 create-service-push, cspush Works in the same manner as cf push, except that it will create services defined in a services-manifest.yml file first before performing a cf push.noteThe CF Command script does not require
cf login. Harness logs in by using the credentials in the TAS cloud provider set up in the infrastructure definition for the workflow executing the CF Command.
Add the Harness TAS provider
You can connect Harness to a TAS space by adding a TAS connector.
Perform the following steps to add a TAS connector.
-
Open a Harness project, and then select Connectors under Project Setup.
-
Select New Connector, and select Tanzu Application Service under Cloud Providers.
-
Enter a connector name, enter an optional description and tag, and then select Continue.
Harness automatically creates an ID for the connector. The ID is based on the connector's name.
-
Enter the TAS Endpoint URL. For example,
https://api.system.tas-mycompany.com. -
In Authentication, select one of the following options:
- Plaintext - Enter the username and password. For password, you can either create a new secret or use an existing one.
- Encrypted - Enter the username and password. You can create a new secret for your username and password or use exiting ones.
-
Select Continue.
-
In Connect to the provider, select Connect through a Harness Delegate, and then select Continue.
We don't recommend using the Connect through Harness Platform option here because you'll need a delegate later for connecting to your TAS environment. Typically, the Connect through Harness Platform option is a quick way to make connections without having to use delegates.
-
In Set Up Delegates, select the Connect using Delegates with the following Tags option, and then enter the name of the delegate you created earlier.
-
Select Save and Continue.
-
Once the test connection succeeds, select Finish.
The connector now appears in the Connectors list.
Refresh Token Support
Harness Delegate version 23.12.81804 or later is required to use this feature.
Harness provides the option to use a Refresh token to authenticate with the Tanzu connector. This Refresh token is used by Harness to verify your Tanzu instance. However, you still need to provide a username and password to authenticate with Tanzu. These credentials are used to obtain a new Refresh token. Once the Refresh token is provided in the connector, Harness uses it to authenticate and perform each task. Harness will authenticate with the Refresh token before executing each Tanzu step defined in the pipeline.
You can retrieve the Refresh token via the config.json file you receive when authenticating with the CF client. You can pass the Refresh token as a secret stored in the Harness Secrets Manager or your secrets manager of choice.
Custom configuration for extensible authentication
For Harness Delegate version 23.12.81811 and later, you can create a Tanzu connector by setting the AS_REFRESH_TOKEN_CLIENT_ID, TAS_REFRESH_TOKEN_CLIENT_SECRET, ENABLE_TAS_REFRESH_TOKEN_CLIENT_ID parameters, and providing the Refresh token. The connector will generate a Refresh token using the Client ID and Secret ID env variables.
- ENABLE_TAS_REFRESH_TOKEN_CLIENT_ID: This is the setting to configure the alternative authentication mode on the Harness Delegate for Tanzu.
- TAS_REFRESH_TOKEN_CLIENT_ID: This is the Client ID parameter for Tanzu Authentication.
- TAS_REFRESH_TOKEN_CLIENT_SECRET: This is the Client Secret parameter for Tanzu Authentication.
Configure the delegate YAML
To configure the delegate YAML, do the following:
- Go to the Kubernetes delegate YAML (deployment) or the actual deployed resource.
- Under
spec.template.spec.containers.env, add the following environment variables.
   - name: ENABLE_TAS_REFRESH_TOKEN_CLIENT_ID
      value: "true"
   - name: TAS_REFRESH_TOKEN_CLIENT_ID
      value: gam
   - name: TAS_REFRESH_TOKEN_CLIENT_SECRET
      value: public