Verify SLSA
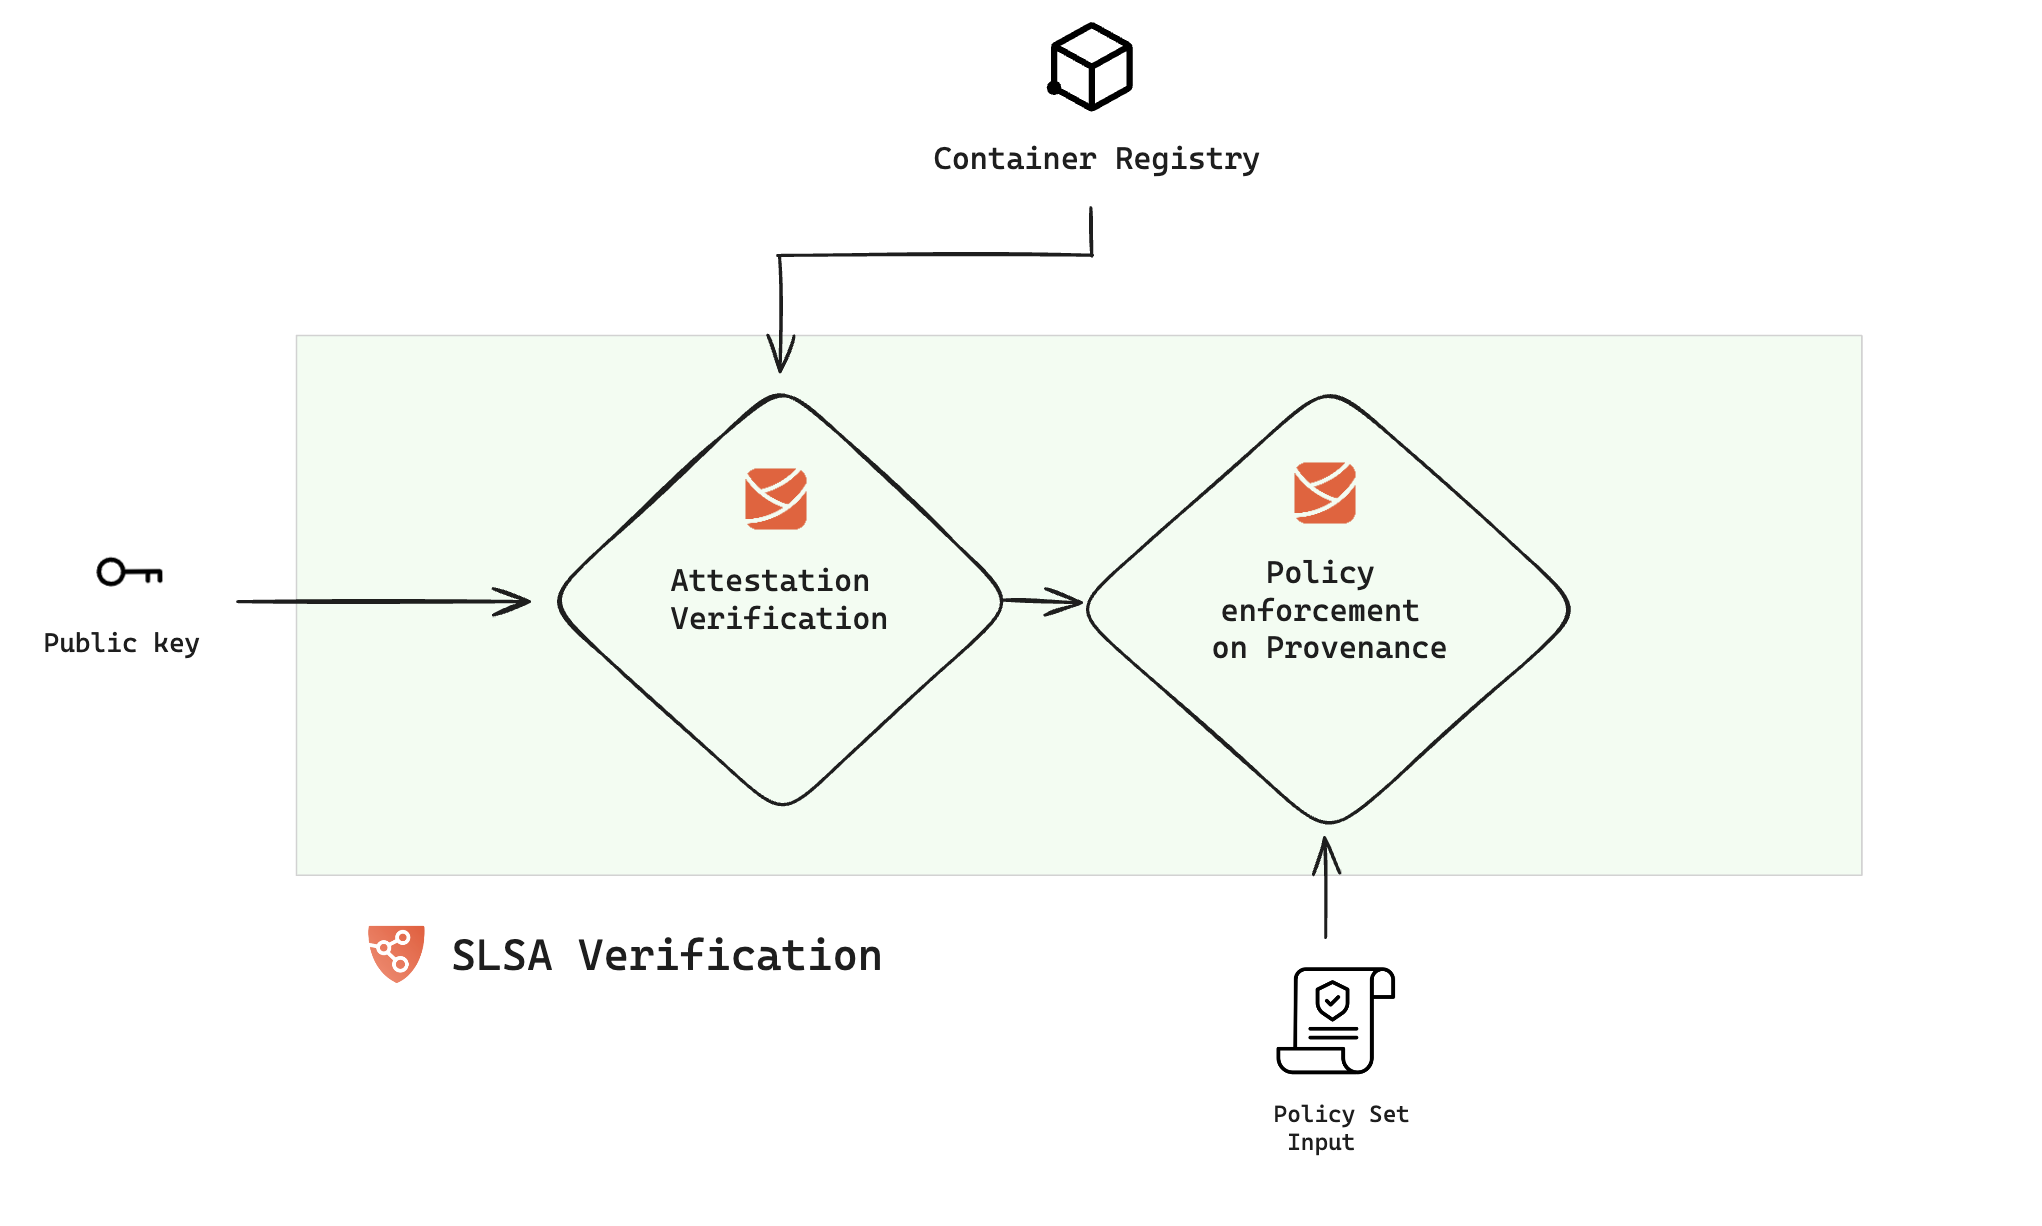
In this document, we'll explore how to verify SLSA Provenance attestation and enforce policies to guarantee the provenance contents remain unaltered. Unlike the setup for SLSA provenance generation, the verification process can be conducted in both the Build and Deploy stages of your pipeline. Here’s an overview of the procedure:

Verify SLSA Attestation
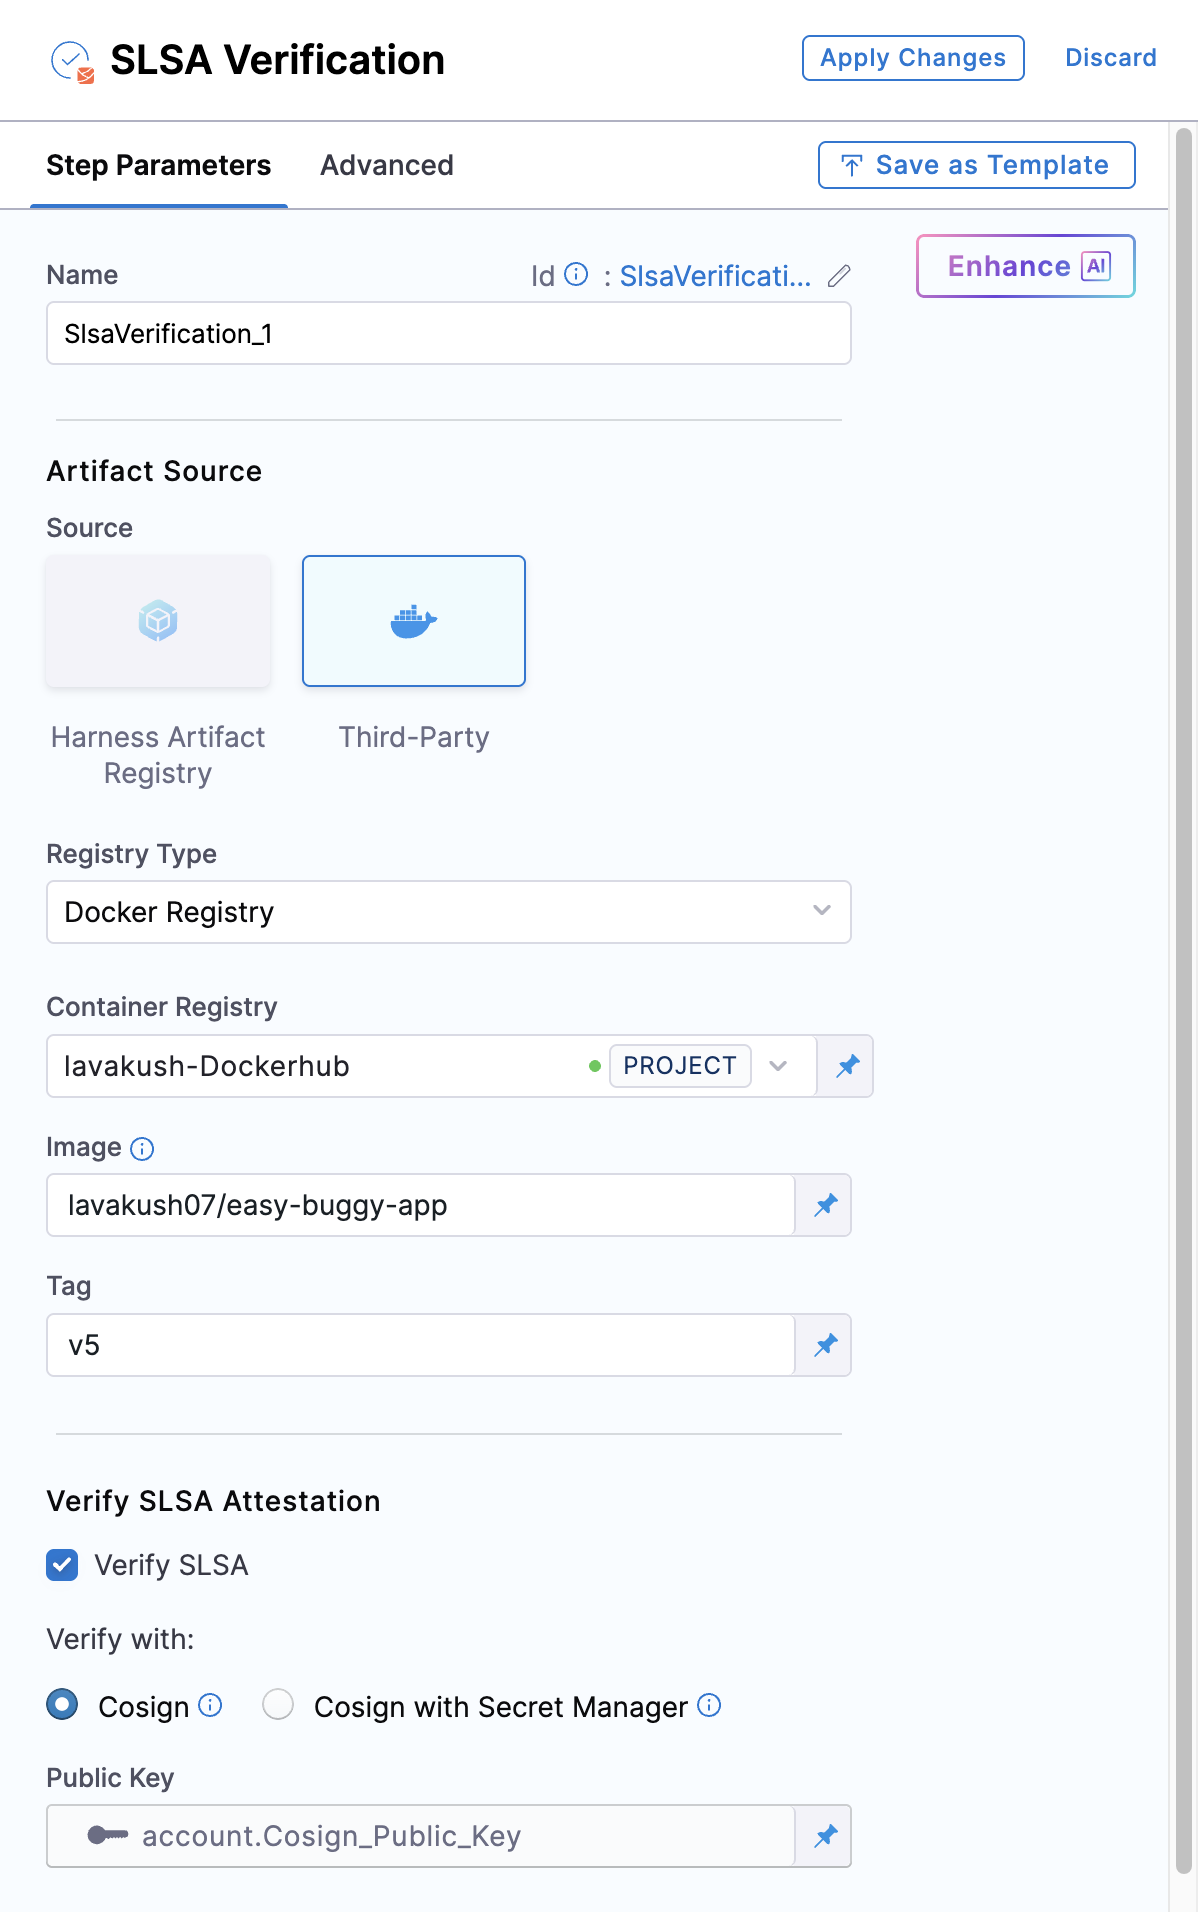
In the Harness SCS, the SLSA verification step is responsible for verifying the attested provenance and applying policies. To incorporate this, navigate to either the build or deploy stage of your pipeline and add the "SLSA Verification" step. When adding this to a deploy stage, ensure it's placed within a container step group and you enable the container based execution.

The SLSA Verification step has the following fields:
- Name: Enter a name for the step.
- Registry Type: Choose your registry from the list of supported items.
When modifying the existing SLSA steps, you must manually remove the digest from the YAML configuration to ensure compatibility with the updated functionality.
- HAR
- Docker Registry
- ECR
- GAR
- ACR
-
Registry: Select the Harness Registry configured for the Harness Artifact Registry where your artifact is stored.
-
Image: Enter the name of your image with tag or digest, such as
imagename:tagorimagename@sha256:<digest>.
-
Container Registry: Select the Docker Registry connector that is configured for the DockerHub container registry where the artifact is stored.
-
Image: Enter the name of your image using a tag or digest, example
my-docker-org/repo-name:tagormy-docker-org/repo-name@sha256:<digest>.
-
Container Registry: Select the Docker Registry connector that is configured for the Elastic container registry where the artifact is stored.
-
Image: Enter the name of your image, example
my-docker-repo/my-artifactormy-docker-repo/my-artifact@sha256:<digest>. -
Region: The geographical location of your ECR repository, example
us-east-1 -
Account ID: The unique identifier associated with your AWS account.
-
Container Registry: Select the Docker Registry connector that is configured for the Google container registry where the artifact is stored.
-
Host: Enter your GAR Host name. The Host name is regional-based. For example,
us-east1-docker.pkg.dev. -
Project ID: Enter the unique identifier of your Google Cloud Project. The Project-ID is a distinctive string that identifies your project across Google Cloud services. example:
my-gcp-project -
Image Name: Enter the name of your image with tag oe digest, example
repository-name/image:tagorrepository-name@sha256:<digest>.
OIDC Auth type is not supported.
-
Container Registry: Select the Docker Registry connector that is configured for the Azure container registry where the artifact is stored.
-
Image: Enter your image details in the format
<registry-login-server>/<repository>. The<registry-login-server>is a fully qualified name of your Azure Container Registry. It typically follows the format<registry-name>.azurecr.io, where<registry-name>is the name you have given to your container registry instance in Azure. Example:automate.azurecr.io/<my-repo>:tagor you can use digestautomate.azurecr.io/<my-repo>@sha256:<digest> -
Subscription Id: Enter the unique identifier that is associated with your Azure subscription.
OIDC Auth type is not supported.
Verify SLSA Attestation
To verify the SLSA attestation, in addition to the above configuration, you need to enable the Verify SLSA Attestation checkbox in the SLSA Generation step.
The attestation verification process requires the corresponding public key of the private key used for SLSA attestation. You can perform the verification by providing the public key through the Cosign option or Cosign with Secret Manager.
- Cosign
- Cosign with Secret Manager
To perform the attestation verification with Cosign selected, you need to pass the key from the Harness Secret Manager
- Public Key: Input your Public key from the Harness file secret.
If you used HashiCorp Vault as your Secret Manager for attestation, you can also use it for verifying the attestation.
- Connector: Select the same HashiCorp Vault connector that was used during the attestation process.
- Key: Enter the path to the Transit Secrets Engine in your HashiCorp Vault where your public key is stored. This should be the same path used for the attestation process. Note that HashiCorp Vault does not allow viewing the private key directly.
Enforce Policies on SLSA Provenance
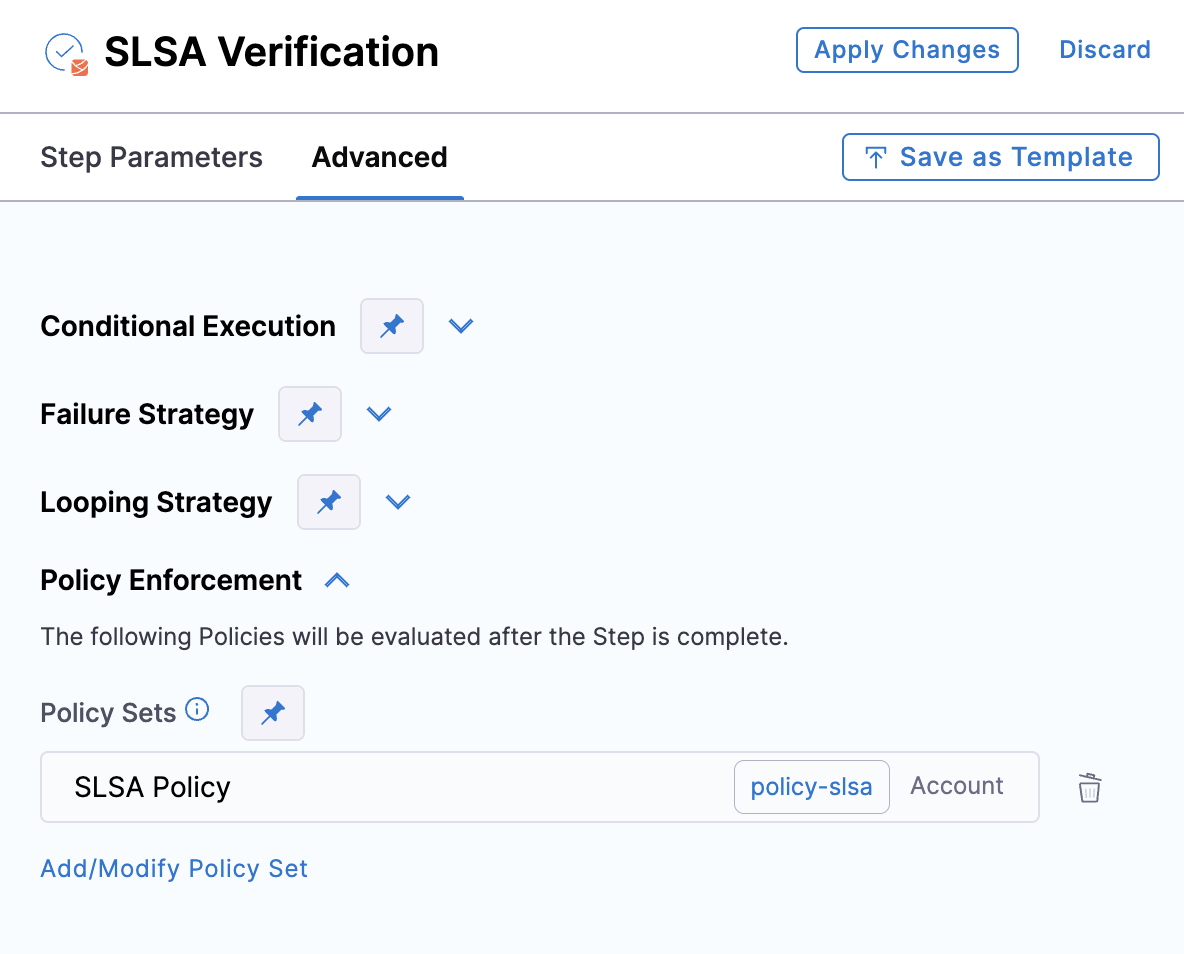
Immediately following the verification of the provenance attestation, you have the option to configure the step to enforce policies on the provenance. This ensures that the contents of the provenance remain unchanged and have not been tampered with.
To enforce policies, navigate to the Advanced tab of the SLSA Verification step, expand the Policy Enforcement section, and specify the policy sets you wish to enforce.

Run the pipeline
When the pipeline runs, the SLSA Verification step does the following:
- Verifies the authenticity of the attestation.
- Verifies the provenance data by applying the specified policy set.
- Records the policy evaluation results in the step's logs.
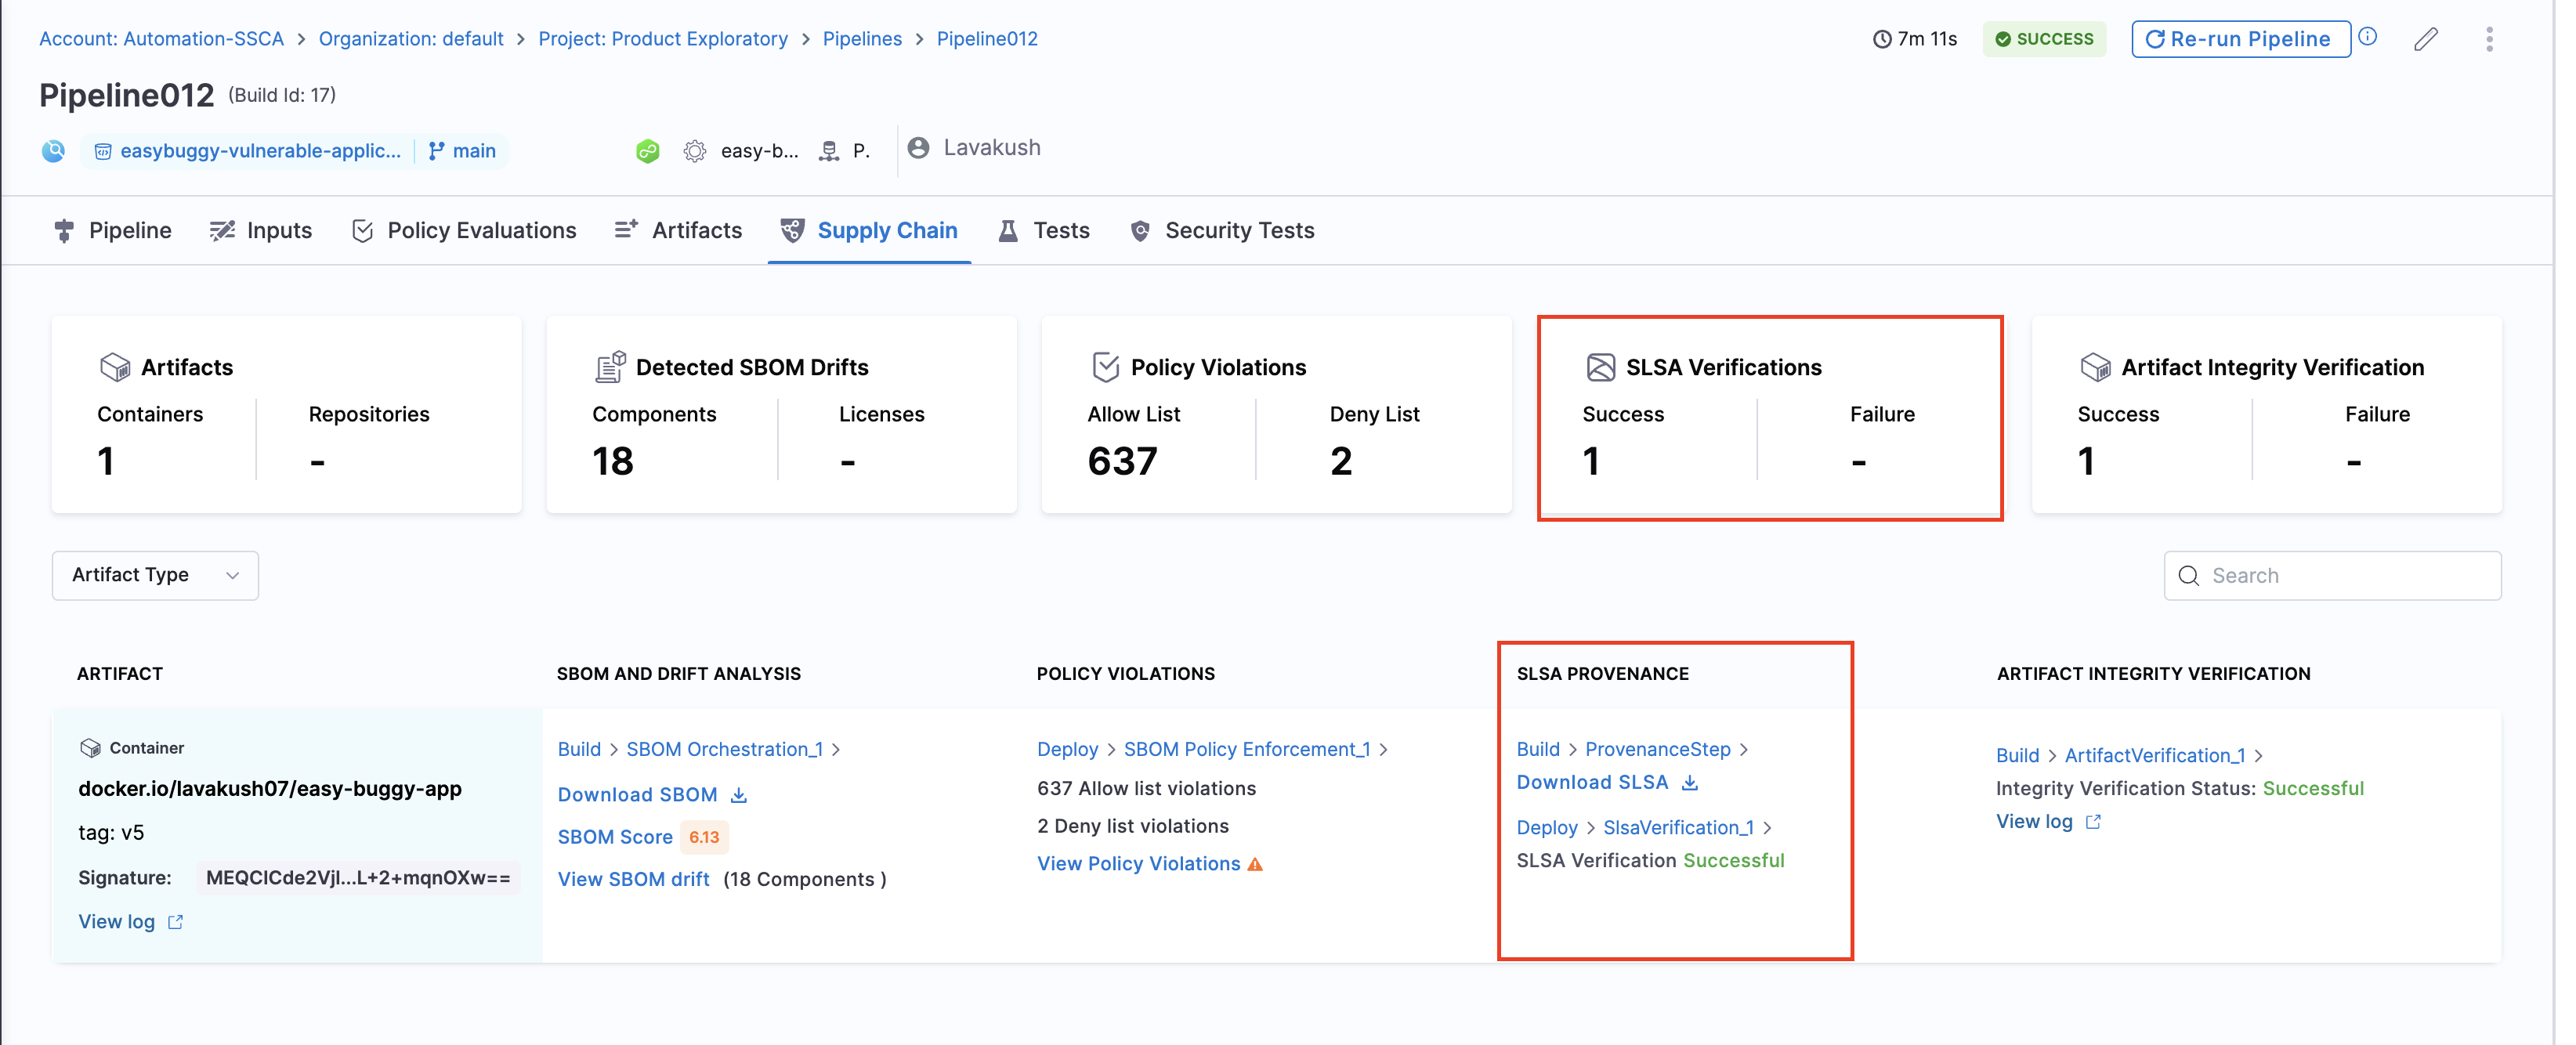
- Reports the overall pass/fail for SLSA verification on the Supply Chain tab.
For more information about inspecting SLSA verification results, go to view pipeline execution results in the supply chain tab.

Verify provenance from third-party build systems
You can use Harness SCS to verify provenance generated by third-party build systems.
To do this:
- Get the public key.
- Create SLSA policies that verify the provenance data according to the provenance structure used by in the build system provider.
- Add SLSA Verification step.