EventRelay Slack Webhook triggers
Trigger Pipelines Using Slack Events
You can trigger pipelines in response to Slack messages or events that match specific payload conditions you set up in a Harness trigger. For example, when a specific message is posted in a Slack channel or a particular event occurs, and your trigger settings match the payload conditions, a CI or CD pipeline can run.
Triggers enable event-driven CI/CD and support practices like building and/or deploying with every relevant Slack interaction.
Currently this feature is behing the Feature Flag CDS_EVENT_BRIDGE_WEBHOOK and CD_TRIGGERS_REFACTOR. Please contact Harness Support to enable this feature.
Add a trigger to a pipeline
First, let’s configure a Slack webhook to create a trigger.
Configure a webhook
Steps to Create a Slack Webhook
- Go to Account/Project settings and click on Webhook under Resources.
- Click on New Webhook.
- Enter a Name for the webhook.
- Select the type of the webhook. In this case, Slack.
- For Auth type, we have two options No Auth if you have authentication to your source. no additional configuration is reqired. HMAC for Hash-Based Message Authentication Code authentication
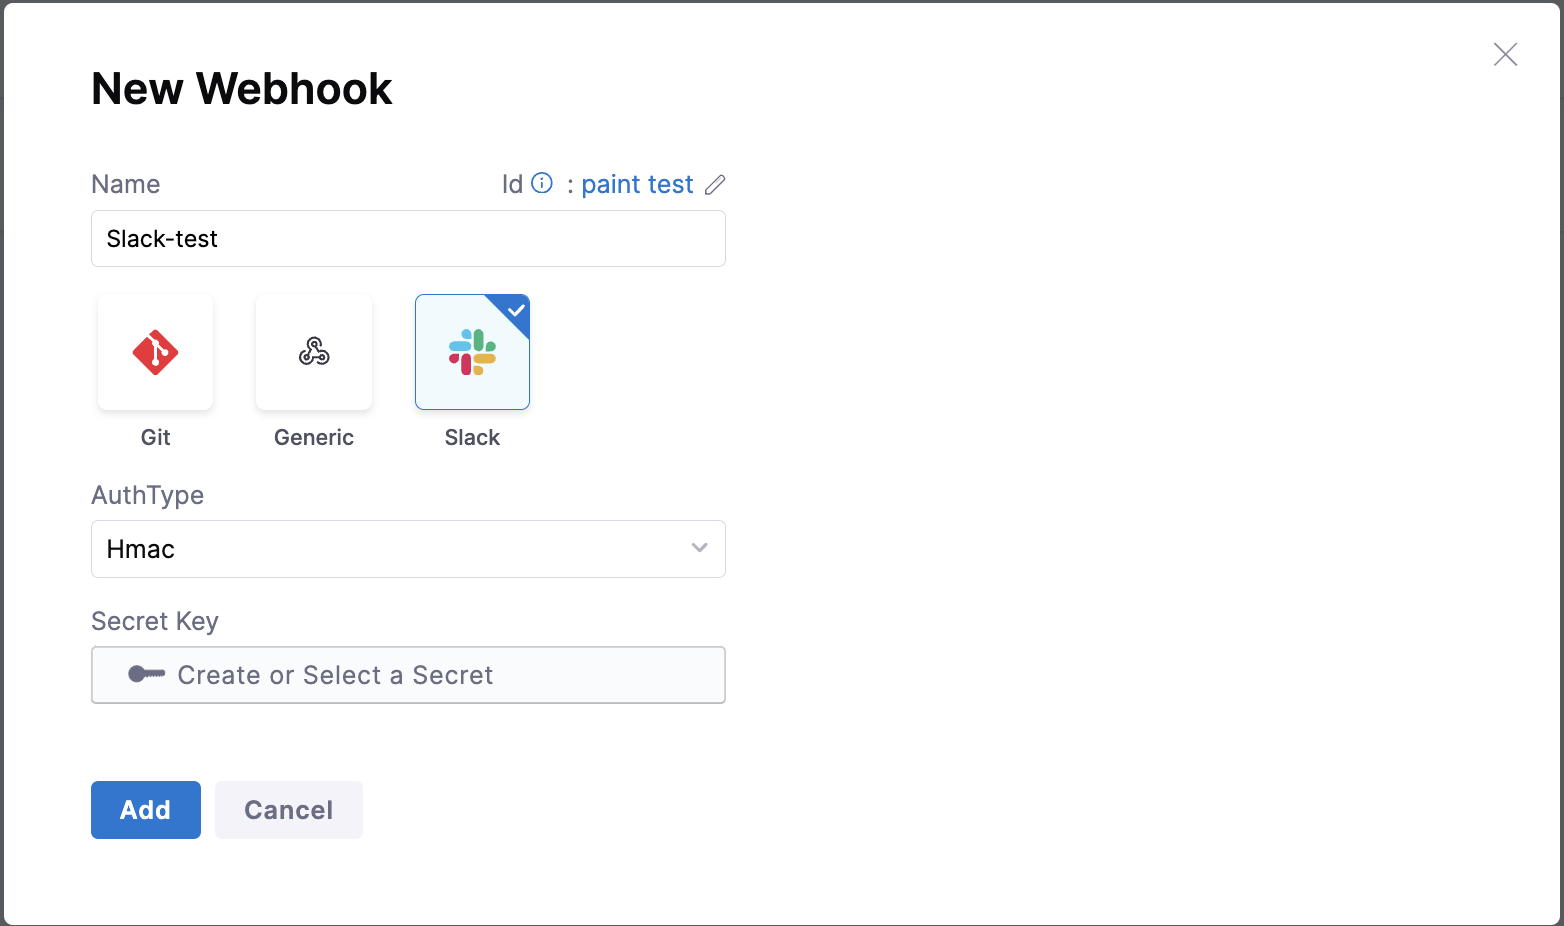
Now, click on Add to save webhook.
The webhook is now created, click on the webhook you created earlier and copy the Webhook URL provided.
Configure a trigger
To link this webhook to trigger your pipeline, navigate to the pipeline for which this webhook will be used.
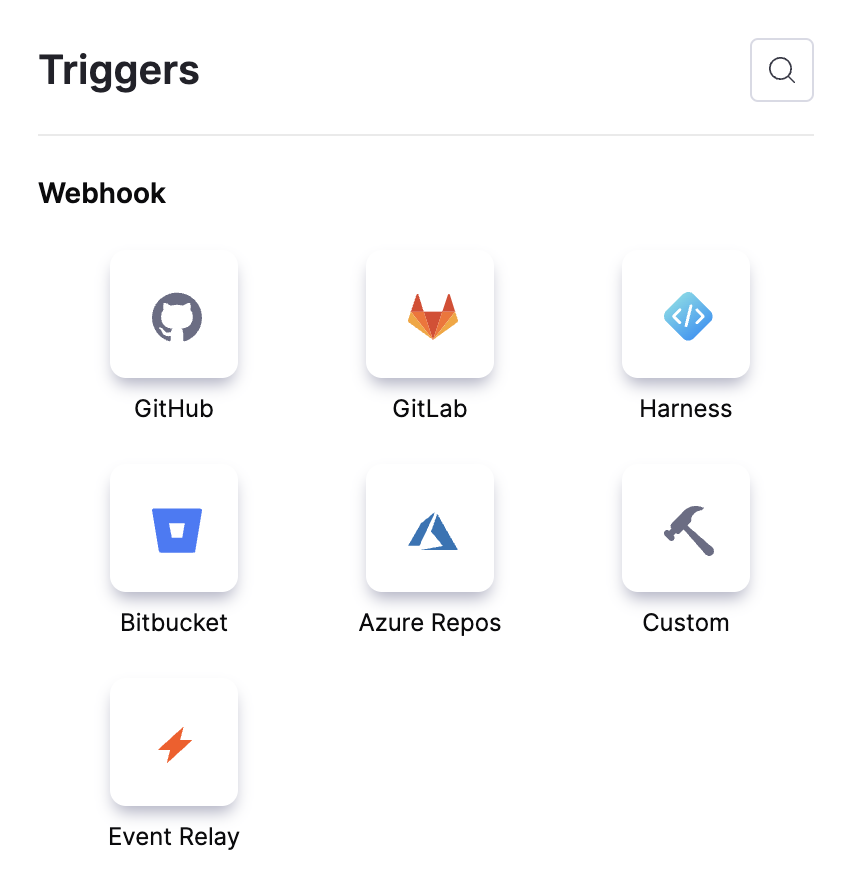
- Select Triggers in the top right corner of the page.
- Click on New Trigger and select Event Relay.
- On the configurations page, provide a Name for the webhook.
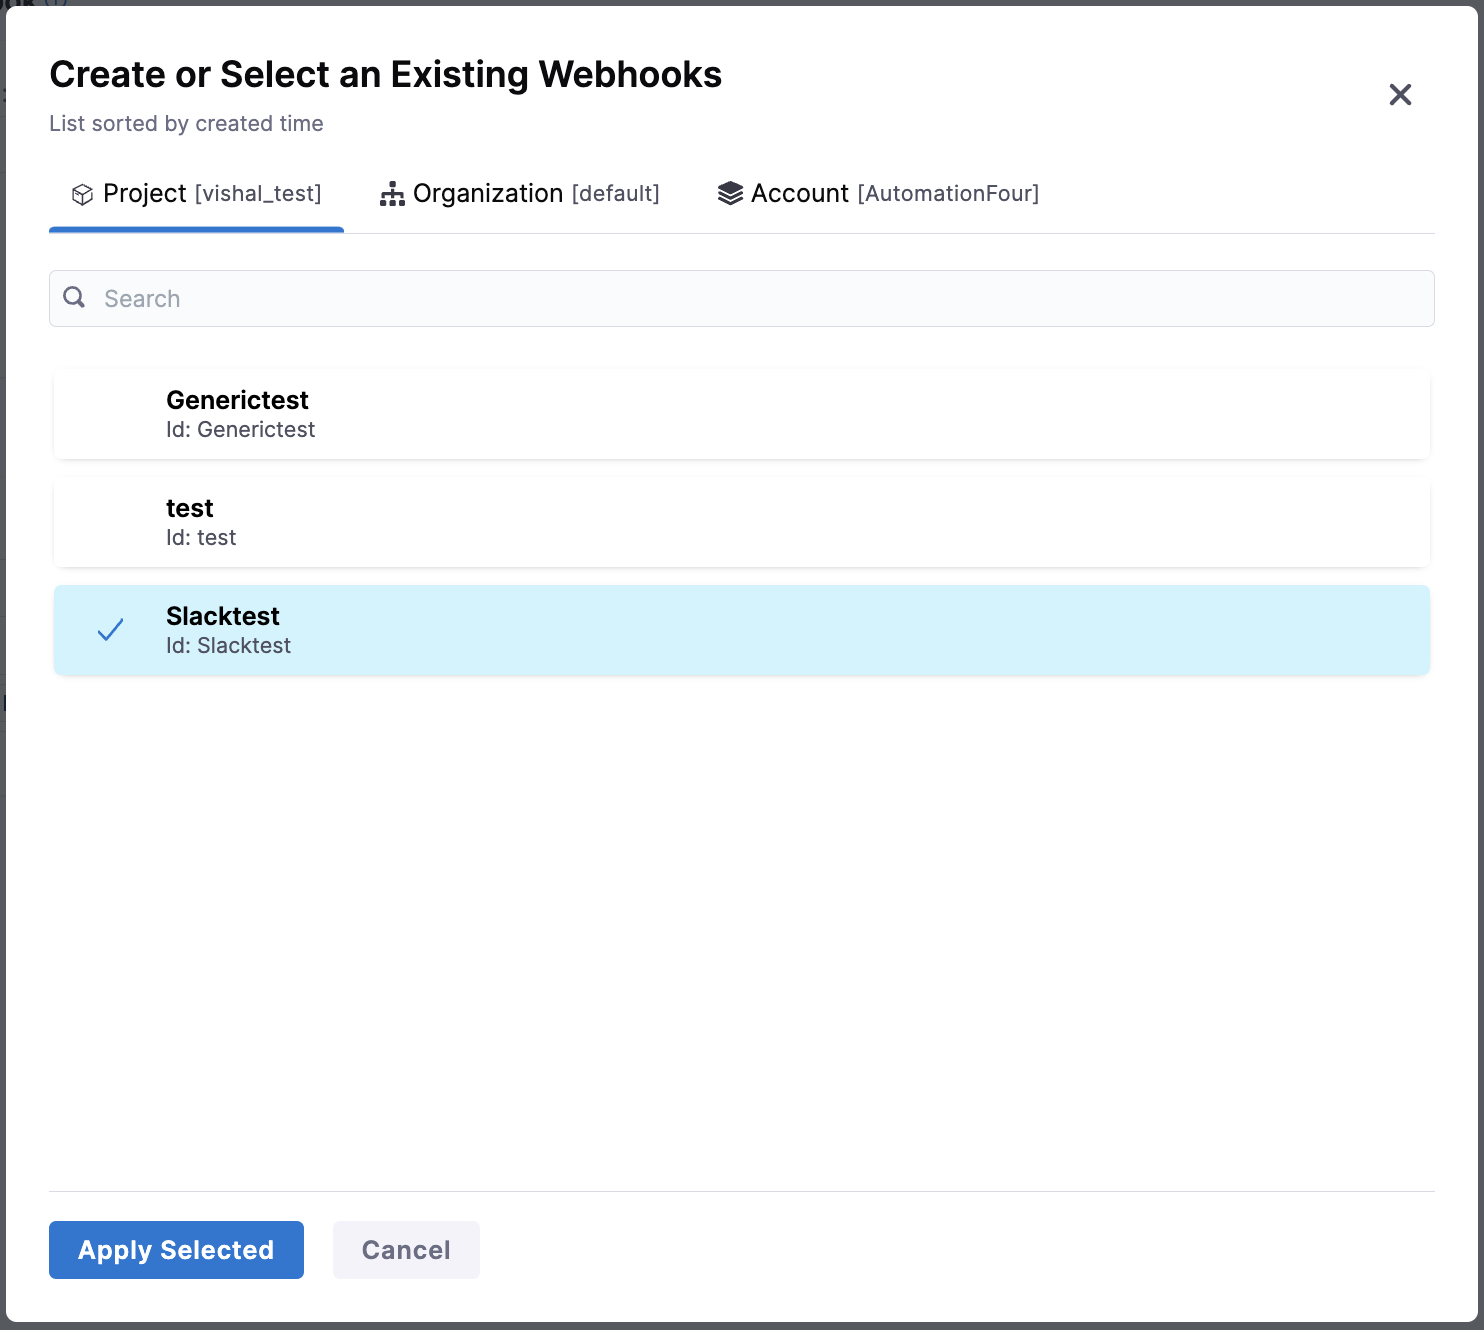
- Under Listen on New Webhook, Event Relay is selected by default for Payload Type. When selecting Webhooks, a pop-up page will display all the configured Generic and Slack webhooks.
Select the Slack webhook you created earlier.
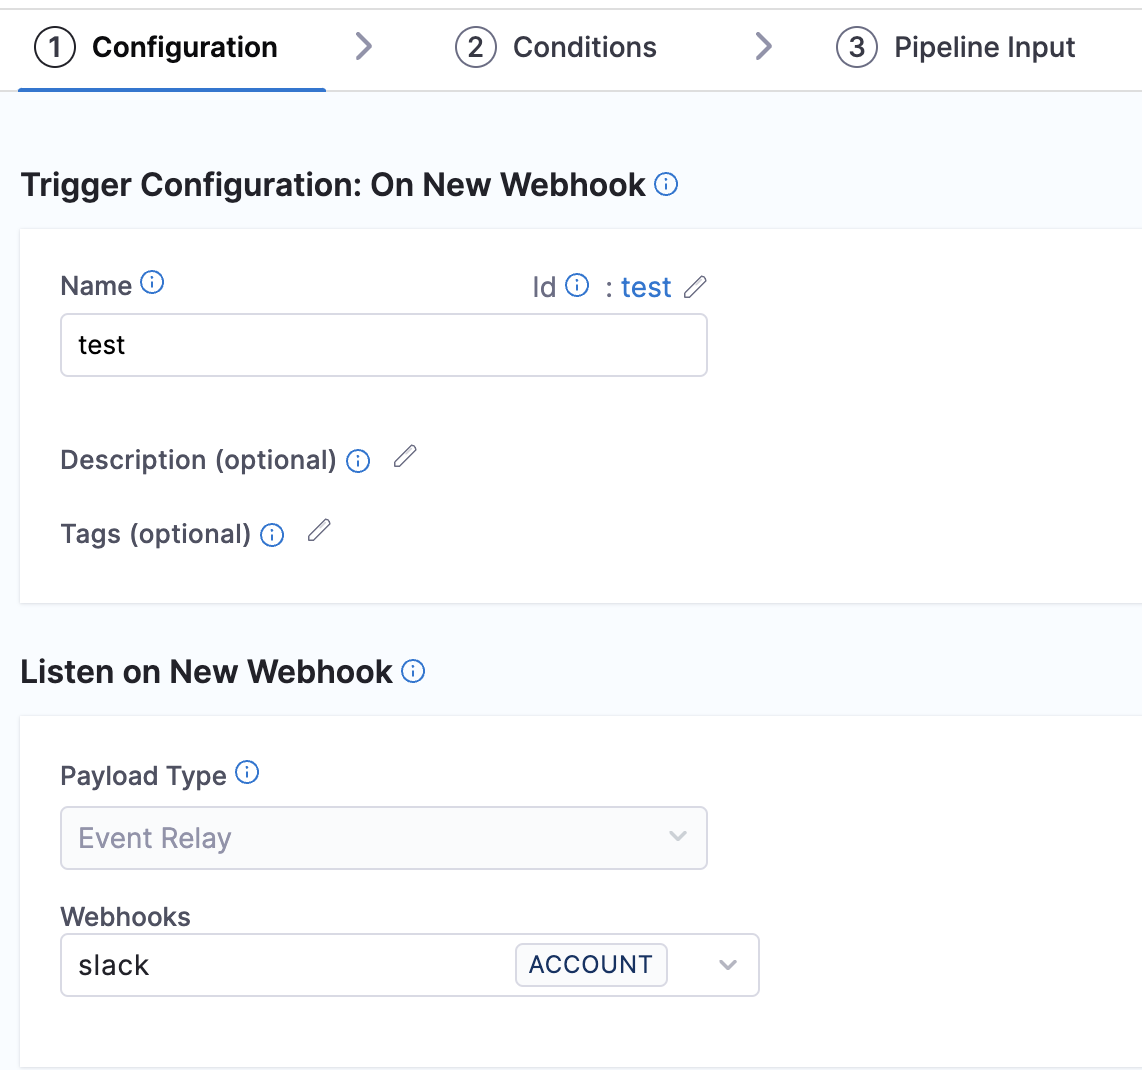
Click on Continue.
-
In the Conditions page, give the approproate Header Conditions and Payload Conditions. Click on Continue.
-
In the Pipeline Input page, you can provide any Pipeline input variables as per your requirement. Click on Create Trigger
Configure Slack with the Webhook
This section explains how to configure Slack with your webhook to enable real-time notifications.
Follow these steps to integrate the webhook and set it up for bot events in your chosen channel:
- Go to the Slack website on your browser.
- After logging in, click on Your Apps located in the top-right corner of the page.
- On the Your Apps page:
- Select an existing app where you want to configure your webhook.
- To create a new app, click Create New App.
- Choose From a manifest if you want to use a manifest file to define the app's basic info, such as scope and settings:
- Select the workspace where you want the app to be used.
- Update the JSON content based on your requirements, such as the app's name, settings, etc.
- Click Create App.
- Choose From scratch to manually add the app name and workspace through the UI.
- Choose From a manifest if you want to use a manifest file to define the app's basic info, such as scope and settings:
- In the Your Apps page, under Features in the left navigation bar, go to Event Subscriptions.
- Turn on Enable Events.
- In the Request URL field, paste the webhook URL you configured earlier. The URL will be automatically verified to ensure it is valid.
- Under the Subscribe to Bot Events section, add the events that should trigger the webhook. Click Save Changes.
- Navigate to your Slack application and open the channel where you want the webhook to trigger events. In the channel settings, go to the Integrations tab and add the app you just created.
For more information, visit the Slack Documentation.
Now that Slack is configured, any relevant Slack event in the configured channel will trigger the pipeline.