ECS deployments overview
This topic shows you how to deploy images to your Amazon Elastic Container Service (ECS) cluster using a Rolling Deployment strategy in Harness.
See Notes below for details on other ECS deployment settings and behavior.
Visual summary
Overview
In this topic, you'll learn how to:
- Set up AWS IAM and ECS for Harness ECS deployments.
- Install and register a Harness Delegate for ECS deployments.
- Connect Harness with AWS, your ECS clusters, and Docker Hub.
- Add your Docker image to Harness.
- Define your ECS container and service specs in Harness.
- Create and deploy an ECS Rolling deployment.
AWS IAM requirements
Create a custom managed policy for Harness. This policy allows Harness to perform ECS tasks. You will attach it to the IAM User you use to connect Harness with AWS.
The custom managed policy should have the following permissions:
{
  "Version": "2012-10-17",
  "Statement": [
    {
      "Effect": "Allow",
      "Action": [
        "ecr:DescribeRepositories",
        "ecs:ListClusters",
        "ecs:ListServices",
        "ecs:DescribeServices",
        "ecr:ListImages",
        "ecr:DescribeImages",
        "ecs:RegisterTaskDefinition",
        "ecs:CreateService",
        "ecs:ListTasks",
        "ecs:DescribeTasks",
        "ecs:DeleteService",
        "ecs:UpdateService",
        "ecs:DescribeContainerInstances",
        "ecs:DescribeTaskDefinition",
        "application-autoscaling:DescribeScalableTargets",
        "application-autoscaling:DescribeScalingPolicies",
        "application-autoscaling:PutScheduledAction",
        "application-autoscaling:DescribeScheduledActions",
        "application-autoscaling:DeleteScheduledAction",
        "iam:ListRoles",
        "iam:PassRole"
      ],
      "Resource": "*"
    }
  ]
}
Permissions review
| Permission | How does Harness use it? |
|---|---|
ecr:DescribeRepositories | Lists the ECR images so Harness can fetch an image from ECR and pass the tag details in for deployment with the Task Definition. Harness needs to query the ECR Repos so users can select an image. |
ecs:ListClusters | In the Harness infrastructure definition, when a user passes in an AWS connector and a region, Harness can list the set of ECS clusters in that region via a drop down. Harness also uses this permission when performing instance sync and surfacing up instance data. |
ecs:ListServices | Harness uses this permission to list the set of services that are deployed in the cluster. It helps Harness identify the service Harness deployed. |
ecr:ListImages | Lists the images from the selected ECR repo during artifact selection. |
ecs:DescribeServices | Gets details of the services Harness deployed on the cluster to check steady state. |
ecs:RegisterTaskDefinition | Creates a task definition during deployment. |
ecs:CreateService | Creates a service definition in ECS. |
ecs:DescribeTasks | Describes the tasks on the cluster. |
ecs:ListTasks | Lists the tasks that have been deployed and capture the revision. |
ecs:DeleteService | When Harness deploys a new service Harness deletes the older version of service. |
ecs:UpdateService | When Harness deploys an ECS service Harness updates the existing service and configures a revision. |
ecs:DescribeContainerInstances | Harness uses this to surface up the container image information about what container was deployed and show it on the Harness Service Dashboard. |
ecs:DescribeTaskDefinition | Describes the Task Definition Harness deployed. Harness collects the revision data for rollback purposes. Harness also uses it to understand the current state of the ECS cluster. |
application-autoscaling:DescribeScalableTargets | Describes the scalable targets Harness deploys with the ECS service. This permission can be removed if the user doesn’t leverage scalable targets. |
application-autoscaling:DescribeScalingPolicies | Describes the scaling policies associated with the deployed ECS service. This permission can be removed if the user doesn’t leverage scaling policies. |
application-autoscaling:PutScheduledAction | Creates or updates a scheduled action for the deployed ECS service. This permission can be removed if the user doesn't leverage scheduled actions. |
application-autoscaling:DescribeScheduledActions | Describes the scheduled actions associated with the deployed ECS service. Used to capture rollback data. This permission can be removed if the user doesn't leverage scheduled actions. |
application-autoscaling:DeleteScheduledAction | Deletes scheduled actions from the deployed ECS service during redeployment or rollback. This permission can be removed if the user doesn't leverage scheduled actions. |
iam:ListRoles | Lists roles. Harness uses the role associated with the Harness connector for deployment. |
iam:PassRole | Harness passes the role with the ECS deployment. |
When you do your own deployments, you might need additional permissions added to this policy. It depends on your Task Definition. Alternately, you can use AmazonECS_FullAccess.
- Create or edit an IAM user and attach the custom managed policy you create above. In this example, we'll name this policy HarnessECS.
- Generate an access key for the IAM user for connecting Harness to AWS ECS. In the IAM User, click Security credentials and then in Access keys create and save the key. You will use the Access key ID and Secret access key in the Harness AWS connector later.
If you are using the OIDC credential type for your AWS connector, add a trust relationship between the IAM role and your identity provider. For information on using OIDC with AWS at Harness, go to AWS Connector -- Credentials.
Now that you have all the AWS credentials configured, you can create or select an ECS cluster to use for your deployment.
Set up your ECS cluster
Next, let's define the target cluster.
The cluster must meet the following specs:
- EC2 Linux + Networking cluster.
- The ECS Cluster must have a minimum of 8GB memory for the Delegate. A m5.xlarge minimum is suggested.
- 2 registered container instances.
- The custom role described above.
You will select this cluster later when your define the target Infrastructure Definition for the CD stage in your Harness Pipeline.
Install and register the Harness Delegate
The Harness Delegate is a software service you install in your environment. It connects to the Harness Manager and performs ECS tasks. You can install the delegate anywhere that has connectivity to your AWS account, even locally on your computer.
-
Follow the steps in Delegate installation overview to install a Harness Delegate.
-
If you wish to install an ECS Fargate type delegate please see AWS ECS Fargate Delegate Installation Overview.
Sample ECS Fargate Delegate Task Definition JSON
 {
   "containerDefinitions": [
     {
       "cpu": 1,
       "healthCheck": { "command": [ "CMD-SHELL", "curl -f http://localhost:3460/api/health || exit 1" ]},
       "environment": [
         {
           "name": "ACCOUNT_ID",
           "value": "<ACCOUNT_ID>"
         },
         {
           "name": "DELEGATE_TOKEN",
           "value": "<DELEGATE_TOKEN>"
         },
         {
           "name": "MANAGER_HOST_AND_PORT",
           "value": "<MANAGER_HOST_AND_PORT>"
         },
         {
           "name": "DELEGATE_NAME",
           "value": "<DELEGATE_NAME>"
         },
         {
           "name": "DELEGATE_TAGS",
           "value": ""
         },
         {
           "name": "INIT_SCRIPT",
           "value": ""
         },
         {
           "name": "DELEGATE_TYPE",
           "value": "DOCKER"
         },
         {
           "name": "NEXT_GEN",
           "value": "true"
         }
       ],
       "memory": 2048,
       "image": "<IMAGE>",
       "essential": true,
       "name": "ecs-delegate-im"
     }
   ],
   "executionRoleArn": "arn:aws:iam::<AWS_ACCOUNT_ID>:role/ecsTaskExecutionRole",
   "memory": "6144",
   "requiresCompatibilities": [
     "FARGATE"
   ],
   "networkMode": "awsvpc",
   "cpu": "1024",
   "family": "harness-delegate-task-spec"
 }
Sample ECS Fargate Delegate Service Definition JSON
{
   "launchType": "FARGATE",
   "cluster": "<CLUSTER_NAME>",
   "serviceName": "<SERVICE_NAME>",
   "taskDefinition": "harness-delegate-task-spec",
   "desiredCount": 1,
   "loadBalancers": [],
   "networkConfiguration": {
     "awsvpcConfiguration": {
       "subnets": [
         "<SUBNET>"
       ],
       "securityGroups": [
         "SEC_GROUP"
       ],
       "assignPublicIp": "ENABLED"
     }
   },
   "platformVersion": "LATEST",
   "schedulingStrategy": "REPLICA",
   "enableECSManagedTags": true
 }
When you are done setting up the delegate and it has registered with Harness, you'll see the delegate's tags on the delegates list page:
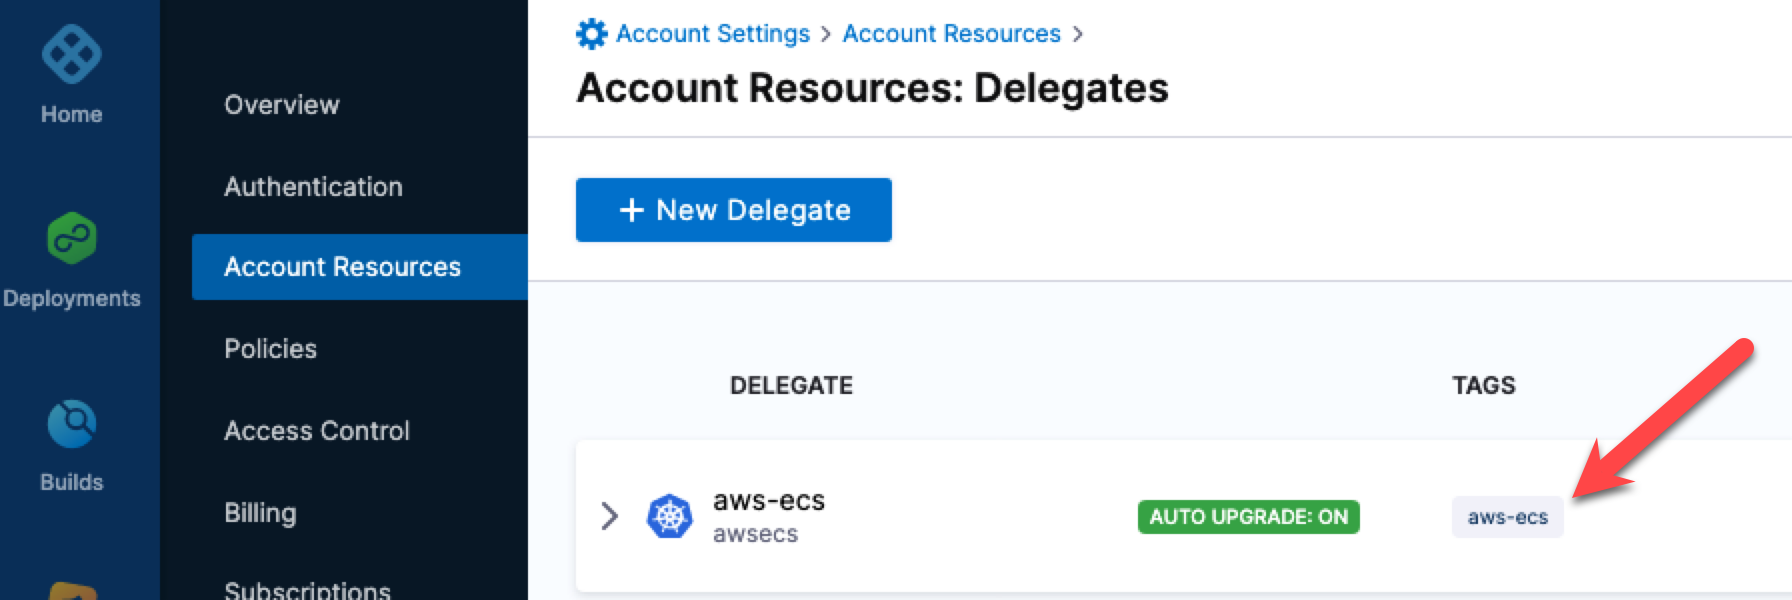
Take note of that tag name. You will use it in your Harness AWS connector and ECS Rolling Deploy step to ensure that Harness uses that delegate when performing deployments.
Create the Harness ECS pipeline
- In your Harness Project, click Deployments.
- Click Pipelines, and then click Create a Pipeline.
- Enter a name for the Pipeline and then click Start.
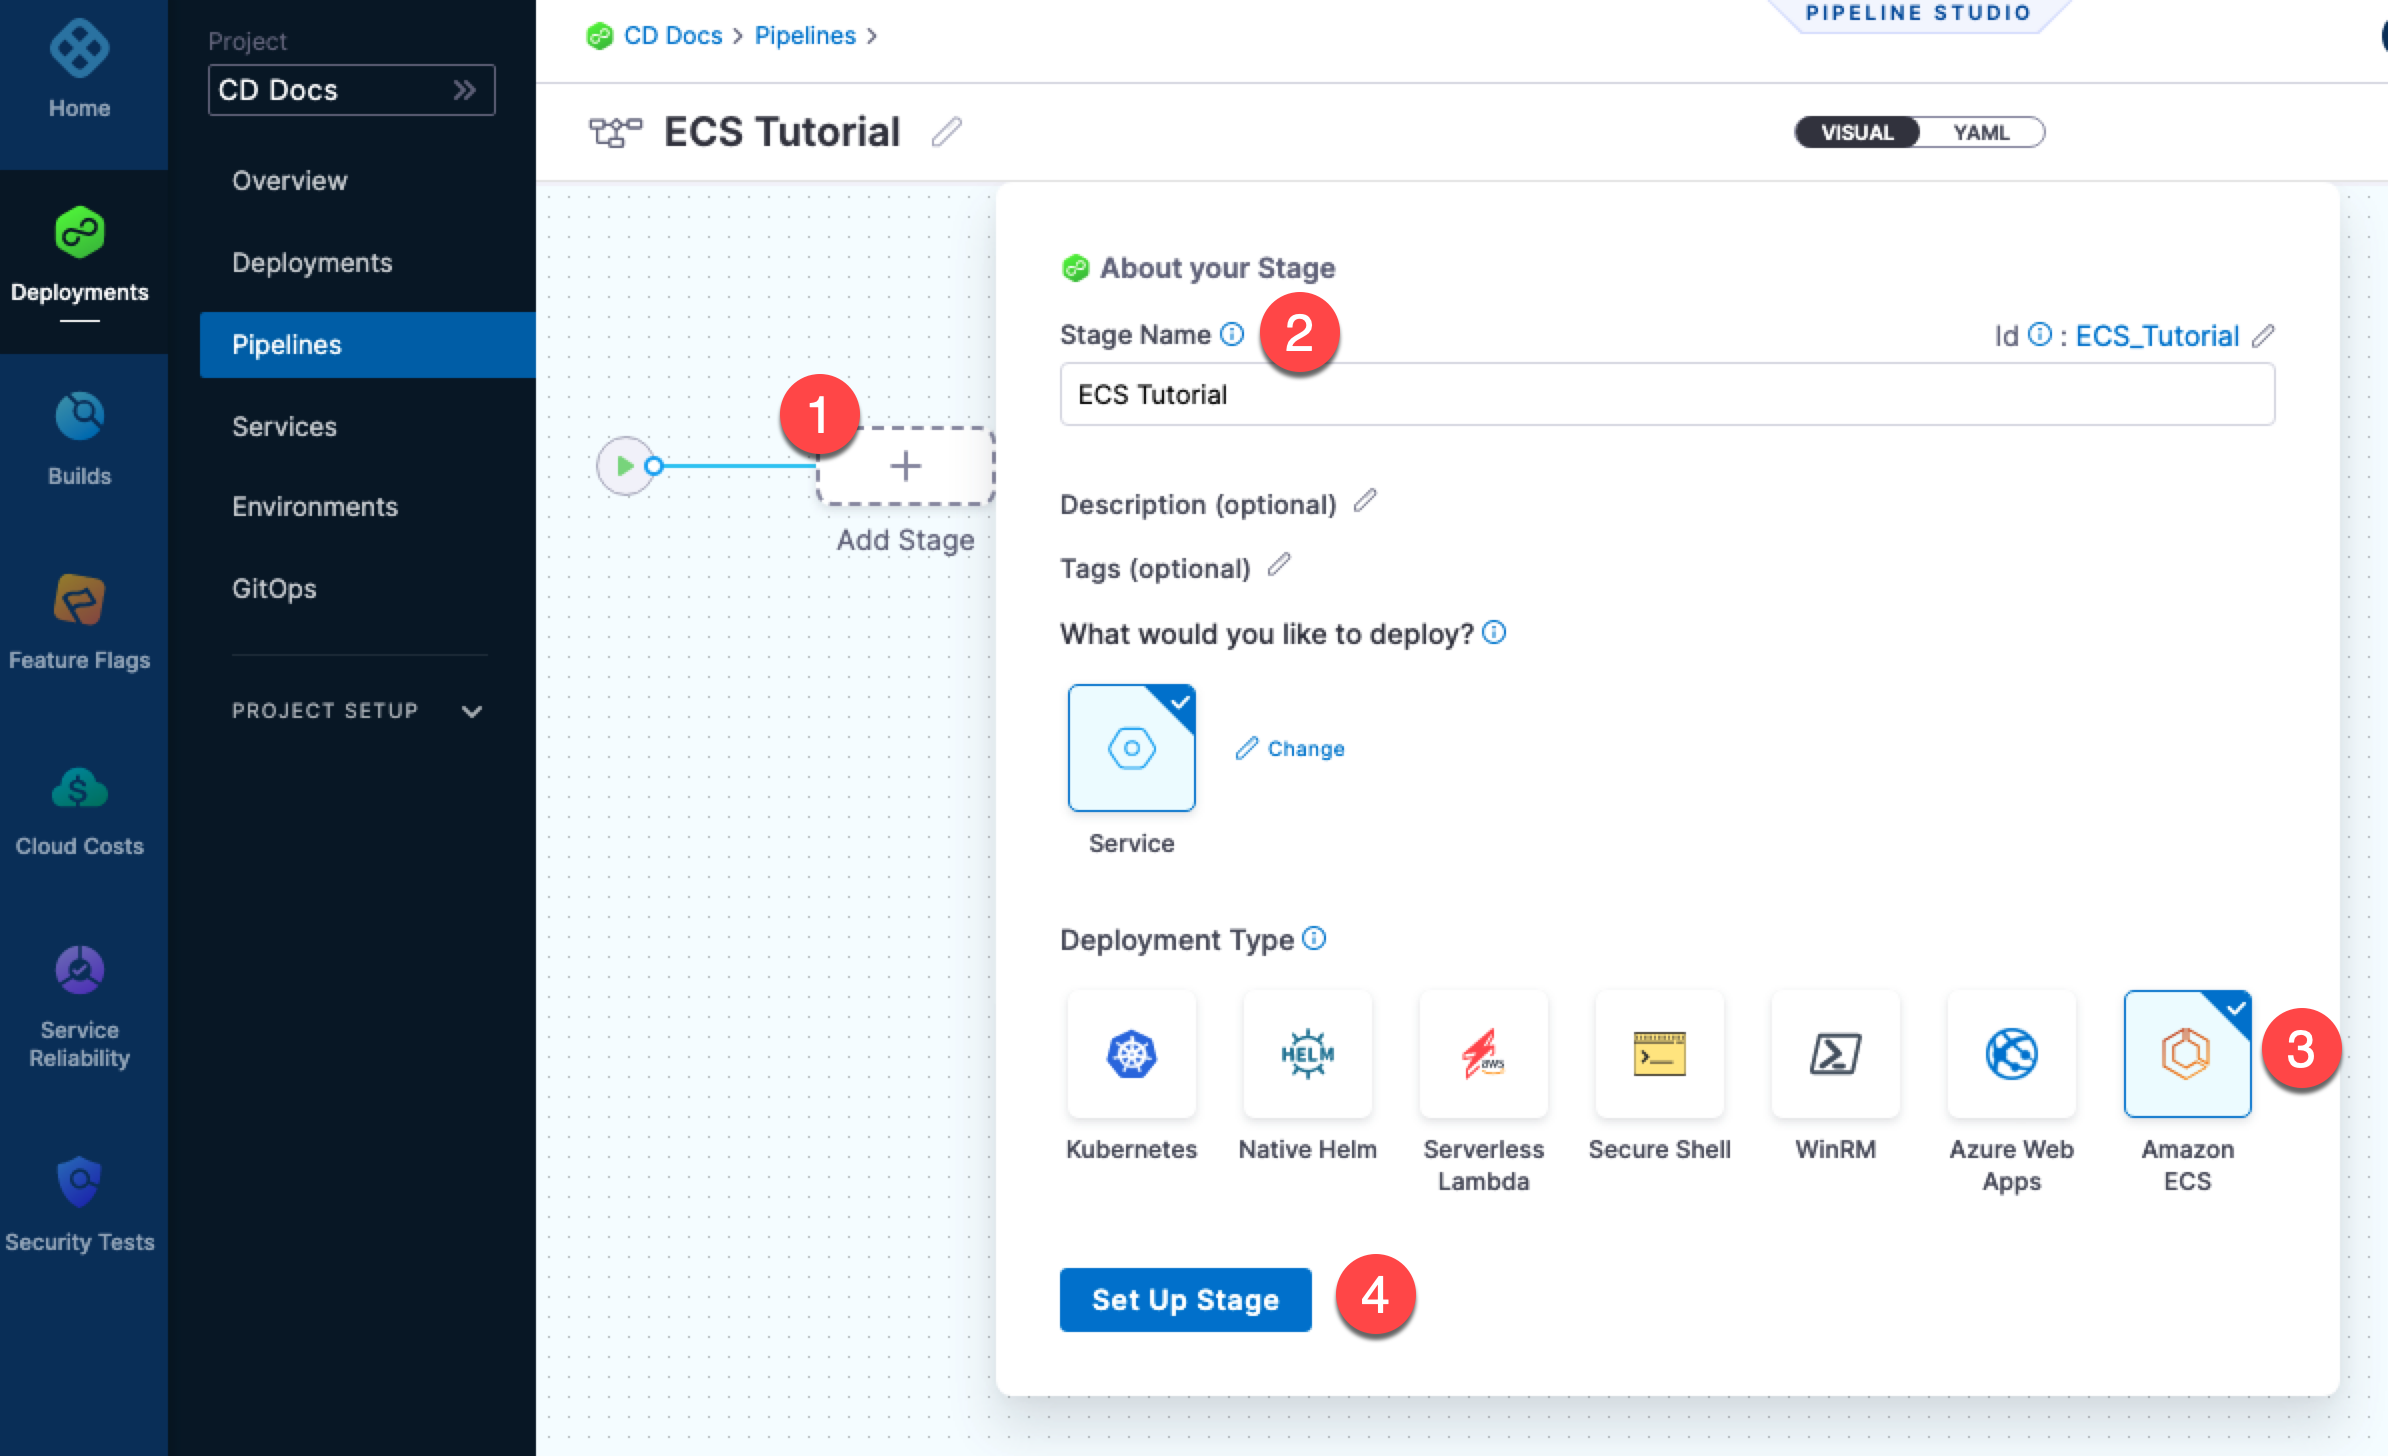
- Click Add Stage.
- Click Deploy.
- In Stage Name, enter a name.
- In Deployment Type, click Amazon ECS, and then click Set Up Stage.
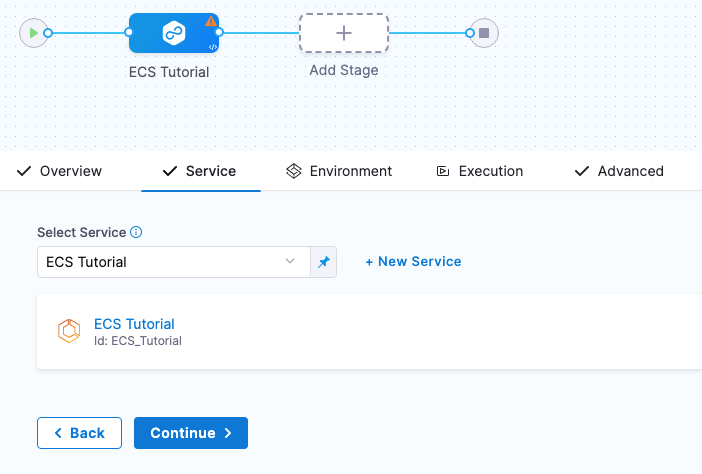
Here's a quick summary:
The new stage is created. Next, you add a Harness service to represent the app you're deploying, and configure the service with the ECS Task Definition, Service Definition, and artifact for deployment.
Add the Harness service
A Harness service represents the app you are deploying. It contains any supporting files and the artifact image.
For more information about services, see Services Overview.
- In Service, click New Service.
- In Name, enter a name.
You can see that an ECS service contains the following:
- Task Definition
- Service Definition
- Scalable Target (Optional)
- Scaling Policy (Optional)
- Scheduled Action (Optional)
- Artifacts
For this example, we'll set up the Task Definition, Service Definition, and Artifacts.
Add the task definition
Harness has full support for ECS task definitions. You simply provide Harness with a task definition and it will implement it.
There are two ways to add the ECS task definition to the Harness service:
- Task Definition: Add a connection to the task definition file in a remote Git repository, local Harness File Store, or object storage (AWS S3).
- Task Definition ARN: Add the task definition ARN.
- The task definition ARN points to an existing task created and available in the AWS cluster with the required definition.
- The task definition will be fetched using the task ARN provided and added to the ECS service configuration provided in the Harness ECS service Service Definition.
- During deployment, the required task is deployed with the desired count provided in the Service Definition.
When a task definition ARN is provided instead of a task definition spec, a force deployment is enabled for rolling deployments by default. When you perform a force deployment, ECS terminates the running tasks associated with the service and replaces them with tasks using the new task definition.
If you are new to ECS, review the AWS documentation on ECS Task Definitions.
Let's look at an example using a task definition file in the Harness File Store.
- In Task Definition, click Add Task Definition.
You specify what Task Definition to use in the ECS Task Definition Store.
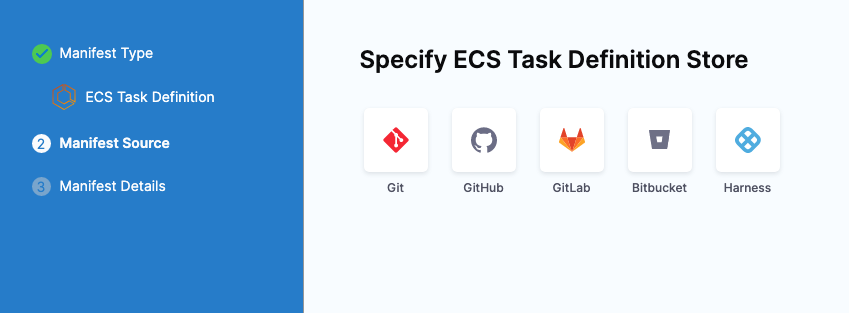
You can use a remote repo, but for this example we'll use the built-in Harness file manager, Harness File Store. 2. Select Harness, and then select Continue. 3. In Task Definition, select Add Task Definition. 4. In Specify ECS Task Definition Store, select Harness, and select Continue. 5. In Manifest Details, enter a name for the task definition. 6. In File/Folder Path, select Select. The Harness File Store appears. 7. Create a new folder. 8. In the new folder, create a new file named RegisterTaskDefinitionRequest.yaml. 9. Paste the following Task Definition into the file, select Save, and then select Apply Selected.
- Replace the two
<Role ARN>with the ARN for the ecsInstanceRole used for your cluster. See Amazon ECS Instance Role from AWS. - When you are done, in Manifest Details, select Submit.
JSON Example:
{
  "ipcMode": null,
  "executionRoleArn": "<Role ARN>",
  "containerDefinitions": [
    {
      "dnsSearchDomains": null,
      "environmentFiles": null,
      "entryPoint": null,
      "portMappings": [
        {
          "hostPort": 80,
          "protocol": "tcp",
          "containerPort": 80
        }
      ],
      "command": null,
      "linuxParameters": null,
      "cpu": 0,
      "environment": [],
      "resourceRequirements": null,
      "ulimits": null,
      "dnsServers": null,
      "mountPoints": [],
      "workingDirectory": null,
      "secrets": null,
      "dockerSecurityOptions": null,
      "memory": null,
      "memoryReservation": 128,
      "volumesFrom": [],
      "stopTimeout": null,
      "image": "<+artifacts.primary.image>",
      "startTimeout": null,
      "firelensConfiguration": null,
      "dependsOn": null,
      "disableNetworking": null,
      "interactive": null,
      "healthCheck": null,
      "essential": true,
      "links": null,
      "hostname": null,
      "extraHosts": null,
      "pseudoTerminal": null,
      "user": null,
      "readonlyRootFilesystem": null,
      "dockerLabels": null,
      "systemControls": null,
      "privileged": null,
      "name": "nginx"
    }
  ],
  "placementConstraints": [],
  "memory": "512",
  "taskRoleArn": "<Role ARN>",
  "family": "fargate-task-definition",
  "pidMode": null,
  "requiresCompatibilities": ["FARGATE"],
  "networkMode": "awsvpc",
  "runtimePlatform": null,
  "cpu": "256",
  "inferenceAccelerators": null,
  "proxyConfiguration": null,
  "volumes": []
}
YAML Example:
ipcMode:
executionRoleArn: <Role ARN>
containerDefinitions:
- dnsSearchDomains:
 environmentFiles:
 entryPoint:
 portMappings:
 - hostPort: 80
   protocol: tcp
   containerPort: 80
 command:
 linuxParameters:
 cpu: 0
 environment: []
 resourceRequirements:
 ulimits:
 dnsServers:
 mountPoints: []
 workingDirectory:
 secrets:
 dockerSecurityOptions:
 memory:
 memoryReservation: 128
 volumesFrom: []
 stopTimeout:
 image: <+artifacts.primary.image>
 startTimeout:
 firelensConfiguration:
 dependsOn:
 disableNetworking:
 interactive:
 healthCheck:
 essential: true
 links:
 hostname:
 extraHosts:
 pseudoTerminal:
 user:
 readonlyRootFilesystem:
 dockerLabels:
 systemControls:
 privileged:
 name: nginx
placementConstraints: []
memory: '512'
taskRoleArn: <Role ARN>
family: fargate-task-definition
pidMode:
requiresCompatibilities:
- FARGATE
networkMode: awsvpc
runtimePlatform:
cpu: '256'
inferenceAccelerators:
proxyConfiguration:
volumes: []
The image: <+artifacts.primary.image> setting instructs Harness to pull the image you add to the Service Artifacts section and use it for deployment. You do not have to add an image in Artifacts and reference it using <+artifacts.primary.image>. You can hardcode the image instead or use a Harness variable for the value that resolves to an image name at runtime. For this example, we will use image: <+artifacts.primary.image> and an artifact.
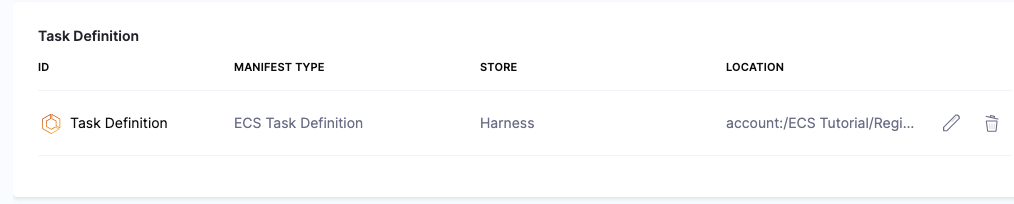
The Task Definition is added to the Service.
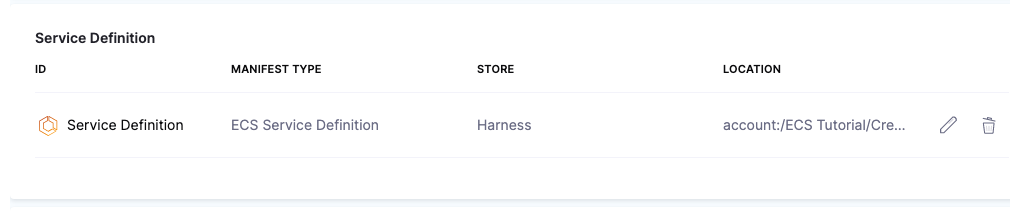
Add the Service definition
Ensure that the Service Definition services array ({"services": []}) is removed from the Service Definition you use in Harness. When you copy a Service Definition from ECS, the services array is typically included.
Harness has full support for ECS Service definitions. You simply provide Harness with a service definition and it will implement it.
If you are new to ECS, please review the AWS documentation on ECS Service Definitions.
- In Service Definition, click Add Service Definition.
- In Specify ECS Service Definition Store, click Harness, and click Continue.
- In Manifest Name, enter Service Definition.
- In File/Folder Path, click Select.
- In the same folder you used earlier, add a file named CreateServiceRequest.yaml and paste in the following YAML, then click Save, and then click Apply Selected:
Replace <Security Group Id> and <Subnet Id> with the Ids from the ECS instances for your target ECS cluster.
JSON Example:
{
    "launchType": "FARGATE",
    "serviceName": myapp,
    "desiredCount": 1,
    "networkConfiguration": {
        "awsvpcConfiguration": {
            "securityGroups": [
                "<Security Group Id>"
            ],
            "subnets": [
                "<Subnet Id>"
            ],
            "assignPublicIp": "ENABLED"
        }
    },
    "deploymentConfiguration": {
        "maximumPercent": 100,
        "minimumHealthyPercent": 0
    }
}
YAML Example:
launchType: FARGATE
serviceName: myapp
desiredCount: 1
networkConfiguration:
  awsvpcConfiguration:
    securityGroups:
      - <Security Group Id>
    subnets:
      - <Subnet Id>
    assignPublicIp: ENABLED
deploymentConfiguration:
  maximumPercent: 200
  minimumHealthyPercent: 100
ECS Tag Management Support
Currently, the tag management feature is behind the feature flag CDS_AWS_LAMBDA_ECS_TAG_SUPPORT. Contact Harness Support to enable the feature.
Harness also supports managing tags for Amazon ECS services. You can now create, update, or delete tags in your ECS service definition, allowing for better resource organization, automation, and management of your ECS deployments.
Sample yaml with tags
launchType: FARGATE
serviceName: myapp
desiredCount: 1
networkConfiguration:
  awsvpcConfiguration:
    securityGroups:
      - <Security Group Id>
    subnets:
      - <Subnet Id>
    assignPublicIp: ENABLED
deploymentConfiguration:
  maximumPercent: 200
  minimumHealthyPercent: 100
"tags":
  - "key": "Environment",
  - "value": "Production"
The ECS Service Definition is now added to the Service.
The Amazon ECS deployment type uses a deployment controller to determines the deployment strategy for your service. Harness support only rolling update (ECS) type controller. For more information, go to AWS ECS service deployment controller and Amazon ECS deployment types.
Next, we'll add the Docker image artifact for deployment.
Add the Docker image to deploy
- In Artifacts, click Add Primary Artifact.
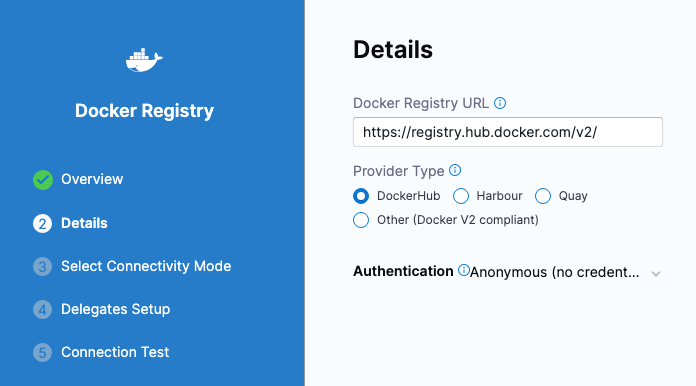
- In Specify Artifact Repository Type, click Docker Registry, and click Continue.
- In Docker Registry Repository, click New Docker Registry Repository.
- In Overview, enter the name Docker Hub, and click Continue.
- In Docker Registry URL, enter the following:
- URL
https://registry.hub.docker.com/v2/. - In Authentication, select Anonymous, and click Continue.
- URL
-
In Connect to the provider, click Connect through a Harness Delegate, and then click Continue.
-
In Delegates Setup, click Only use Delegates with all of the following tags, and then enter the tag of the Delegate you set up earlier.
-
Click Save and Continue.
-
After the test, click Finish.
-
Back in Docker Registry Repository, click Continue.
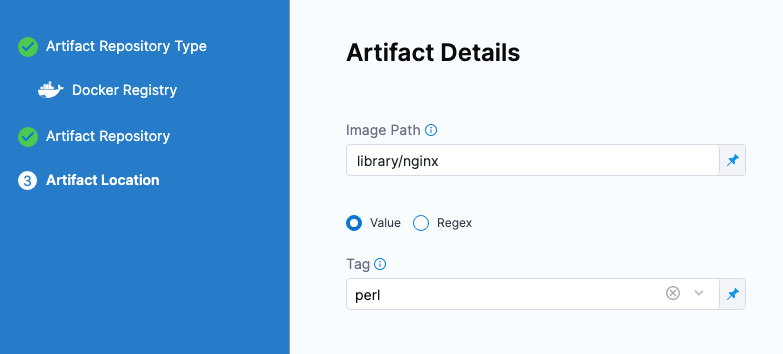
-
In Artifact Details, for Image path, enter the image path, such as
library/nginx. -
For Tag, change the setting to a Fixed value.
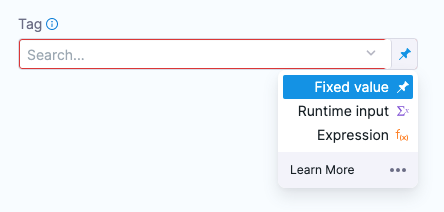
-
For example, select perl.
-
Click Submit. The artifact is now added to the Service.
-
Click Save. The Service is now added to the stage.
- Click Continue to add the target ECS cluster.
Deploy artifacts from non-ECR private registries
ECS requires explicit credential configuration to pull container images from private registries outside of Amazon ECR, such as Harness Code Repository, Azure Container Registry, and Docker Registry. Without this configuration, deployments fail with a 401 authentication error. Store your registry credentials in AWS Secrets Manager and reference the secret ARN in your task definition.
This is standard ECS behavior for non-ECR private registries and applies to all supported artifact sources in Harness.
To configure private registry authentication:
-
Create an AWS Secrets Manager secret with your registry credentials (username and password):
aws secretsmanager create-secret \--name my-registry-credentials \--secret-string '{"username":"my-username","password":"my-password"}' \--region us-east-1--region us-east-1 -
Add the
repositoryCredentials.credentialsParameterfield to your task definition and reference the secret ARN:containerDefinitions:- name: my-appimage: myregistry.example.com/my-app:latestrepositoryCredentials:credentialsParameter: arn:aws:secretsmanager:us-east-1:123456789012:secret:my-registry-credentials-AbCdEf -
Ensure your ECS task execution role has the
secretsmanager:GetSecretValuepermission for the secret.
For complete configuration details and IAM policy examples, go to Private registry authentication for tasks in the AWS documentation.
Define the infrastructure
You define the target infrastructure for your deployment in the Environment settings of the pipeline stage. You can define an environment separately and select it in the stage, or create the environment within the stage Environment tab.
There are two methods of specifying the deployment target infrastructure:
- Pre-existing: the target infrastructure already exists and you simply need to provide the required settings.
- Dynamically provisioned: the target infrastructure will be dynamically provisioned on-the-fly as part of the deployment process.
For details on Harness provisioning, go to Provisioning overview.
Pre-existing ECS infrastructure
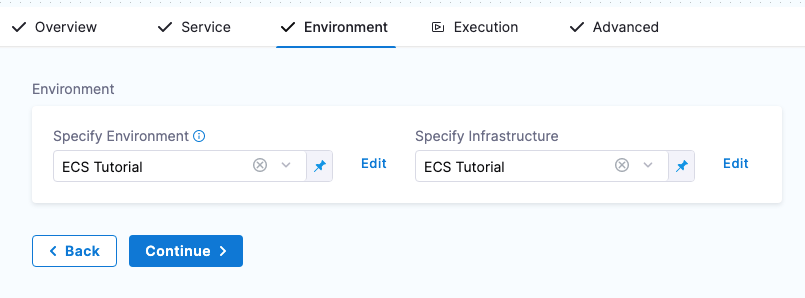
In the Environment section of the stage you define the target ECS cluster for the deployment.
Environments and Infrastructure Definitions: A Harness Environment represents where you are deploying your application. Each Infrastructure Definition in an Environment defines the target VM/cluster/etc. where you plan to deploy your application. An Environment can contain multiple Infrastructure Definitions. When you select an Environment in a Pipeline, you can pick which Infrastructure Definition to use.
- In Specify Environment, click New Environment.
- In New Environment, enter the following:
- A name.
- Environment type.
- Click Save.
- In Specify Infrastructure, click New Infrastructure.
- In Create New Infrastructure, in Name, enter a name.
- For Cluster Details, see the following sections.
Connector
Create a Harness AWS Connector to connect to your AWS account using the IAM User you configured earlier in AWS IAM requirements.
- In Connector, click Select Connector.
- In Create or Select an Existing Connector, click New Connector.
- In AWS Cloud Provider, in Name, enter a name, and click Continue.
- In Credentials, enter the following and click Continue:
- Select AWS Access Key.
noteIf you would like to use AWS with OIDC, select Use OIDC here and ignore Step 3 below.
- Access Key: enter the IAM User access key.
- Secret Key: add a new Harness Secret using the access key's secret key. Secrets are always stored in encrypted form and decrypted only when they are needed. To learn more about Harness secrets, go to Harness Secrets Management Overview.
- Test Region: US East (Virginia).
- In Connect to the provider, click Connect through a Harness Delegate, and then click Continue.
- In Delegates Setup, click Only use Delegates with all of the following tags, and then enter the tag of the Delegate you set up earlier.
- Click Save and Continue.
- After the test, click Finish.
The Connector is added to your Infrastructure Definition.
Region
In Region, click Select Region, and then AWS region where your ECS cluster is located.
Cluster
- Click in Cluster and select the target cluster. The list is populated using the AWS Connector you created.
- Click Save. The Environment and Infrastructure Definition are listed.
 3. Click Continue to choose the deployment strategy.
Dynamically provisioned ECS infrastructure
Here is a summary of the steps to dynamically provision the target infrastructure for a deployment:
-
Add dynamic provisioning to the CD stage:
-
In a Harness Deploy stage, in Environment, enable the option Provision your target infrastructure dynamically during the execution of your Pipeline.
-
Select the type of provisioner that you want to use.
Harness automatically adds the provisioner steps for the provisioner type you selected.
-
Configure the provisioner steps to run your provisioning scripts.
-
Select or create a Harness infrastructure in Environment.
-
-
Map the provisioner outputs to the Infrastructure Definition:
- In the Harness infrastructure, enable the option Map Dynamically Provisioned Infrastructure.
- Map the provisioning script/template outputs to the required infrastructure settings.
Supported provisioners
The following provisioners are supported for ECS deployments:
- Terraform
- Terragrunt
- Terraform Cloud
- CloudFormation
- Shell Script
Adding dynamic provisioning to the stage
To add dynamic provisioning to a Harness pipeline Deploy stage, do the following:
-
In a Harness Deploy stage, in Environment, enable the option Provision your target infrastructure dynamically during the execution of your Pipeline.
-
Select the type of provisioner that you want to use.
Harness automatically adds the necessary provisioner steps.
-
Set up the provisioner steps to run your provisioning scripts.
For documentation on each of the required steps for the provisioner you selected, go to the following topics:
- Terraform:
- Terraform Plan
- Terraform Apply
- Terraform Rollback. To see the Terraform Rollback step, toggle the Rollback setting.
- Terragrunt
- Terraform Cloud
- CloudFormation:
- Create Stack
- Delete Stack
- Rollback Stack. To see the Rollback Stack step, toggle the Rollback setting.
- Shell Script
Mapping provisioner output
Once you set up dynamic provisioning in the stage, you must map outputs from your provisioning script/template to specific settings in the Harness Infrastructure Definition used in the stage.
-
In the same CD Deploy stage where you enabled dynamic provisioning, select or create (New Infrastructure) a Harness infrastructure.
-
In the Harness infrastructure, in Select Infrastructure Type, select AWS if it is not already selected.
-
In Cluster details, enable the option Map Dynamically Provisioned Infrastructure.
The Cluster details section adds a Provisioner setting and configures it as a runtime input.
-
Map the provisioning script/template outputs to the required infrastructure settings.
To provision the target deployment infrastructure, Harness needs specific infrastructure information from your provisioning script. You provide this information by mapping specific Infrastructure Definition settings in Harness to outputs from your template/script.
For ECS, Harness needs the following settings mapped to outputs:
- Region
- Cluster
Ensure the Region and Cluster settings are set to the Expression option.
For example, here's a snippet of a CloudFormation template that provisions the infrastructure for an ECS deployment and includes the required outputs:
AWSTemplateFormatVersion: "2010-09-09"
Description: CloudFormation template for provisioning ECS resources

Parameters:
  ClusterName:
    Type: String
    Description: Name of the ECS cluster

Resources:
  ECSCluster:
    Type: AWS::ECS::Cluster
    Properties:
      ClusterName: !Ref ClusterName

Outputs:
  region_name:
    Value: !Ref AWS::Region
    Description: AWS region where the ECS cluster is deployed

  cluster_name:
    Value: !Ref ECSCluster
    Description: Name of the provisioned ECS cluster
In the Harness Infrastructure Definition, you map outputs to their corresponding settings using expressions in the format <+provisioner.OUTPUT_NAME>, such as <+provisioner.cluster_name>.

Define the Rolling deployment steps
- In Execution Strategies, click Rolling, and click Use Strategy.
The ECS Rolling Deploy step is added automatically.
Now you're ready to deploy.
ECS Rolling Rollback
Before you deploy, click Rollback and view the ECS Rolling Rollback step.

When you created the Execution, an ECS Rolling Rollback step is automatically added to the Rollback section of Execution.
If Harness needs to rollback and restore the ECS setup to its previous working version, or if you interrupt the deployment to roll it back manually, the first step is to roll back the ECS services.
When a rollback occurs, Harness rolls back all steps in the reverse order they were deployed. This is true for ECS services deployed to EC2 or Fargate clusters.
Run the pipeline and verify deployment
- Click Save and then click Run.
- In the deployment execution, click the ECS Rolling Deploy step and review the following:
Fetch manifests
The Delegate fetches the Task Definition and Service Definition you added to the Harness Service:
Fetching EcsTaskDefinition from Harness File Store

Fetching EcsTaskDefinition files with identifier: task def
Fetching following Files :
- account:/ECS Tutorial/RegisterTaskDefinitionRequest.yaml
Successfully fetched following files:
- account:/ECS Tutorial/RegisterTaskDefinitionRequest.yaml

Fetching EcsServiceDefinition from Harness File Store

Fetching EcsServiceDefinition files with identifier: service def
Fetching following Files :
- account:/ECS Tutorial/CreateServiceRequest.yaml
Successfully fetched following files:
- account:/ECS Tutorial/CreateServiceRequest.yaml
Fetched all manifests from Harness Store
Prepare rollback data
Harness collects the current state so it can roll back if the deployment fails.
Deploy
Harness performs the deployment and checks to make sure the ECS service reaches steady state.
Creating Task Definition with family fargate-task-definition
Created Task Definition fargate-task-definition:6 with Arn arn:aws:ecs:us-west-2:123456789:task-definition/fargate-task-definition:6..

Deleting Scaling Policies from service myapp..
Didn't find any Scaling Policies attached to service myapp

Deregistering Scalable Targets from service myapp..
Didn't find any Scalable Targets on service myapp
Updating Service myapp with task definition arn:aws:ecs:us-west-2:123456789:task-definition/fargate-task-definition:6 and desired count 1
Waiting for pending tasks to finish. 1/1 running ...
Waiting for Service myapp to reach steady state
...
Service myapp reached steady state
Updated Service myapp with Arn arn:aws:ecs:us-west-2:123456789:service/ecs-tutorial/myapp

 Deployment Successful.
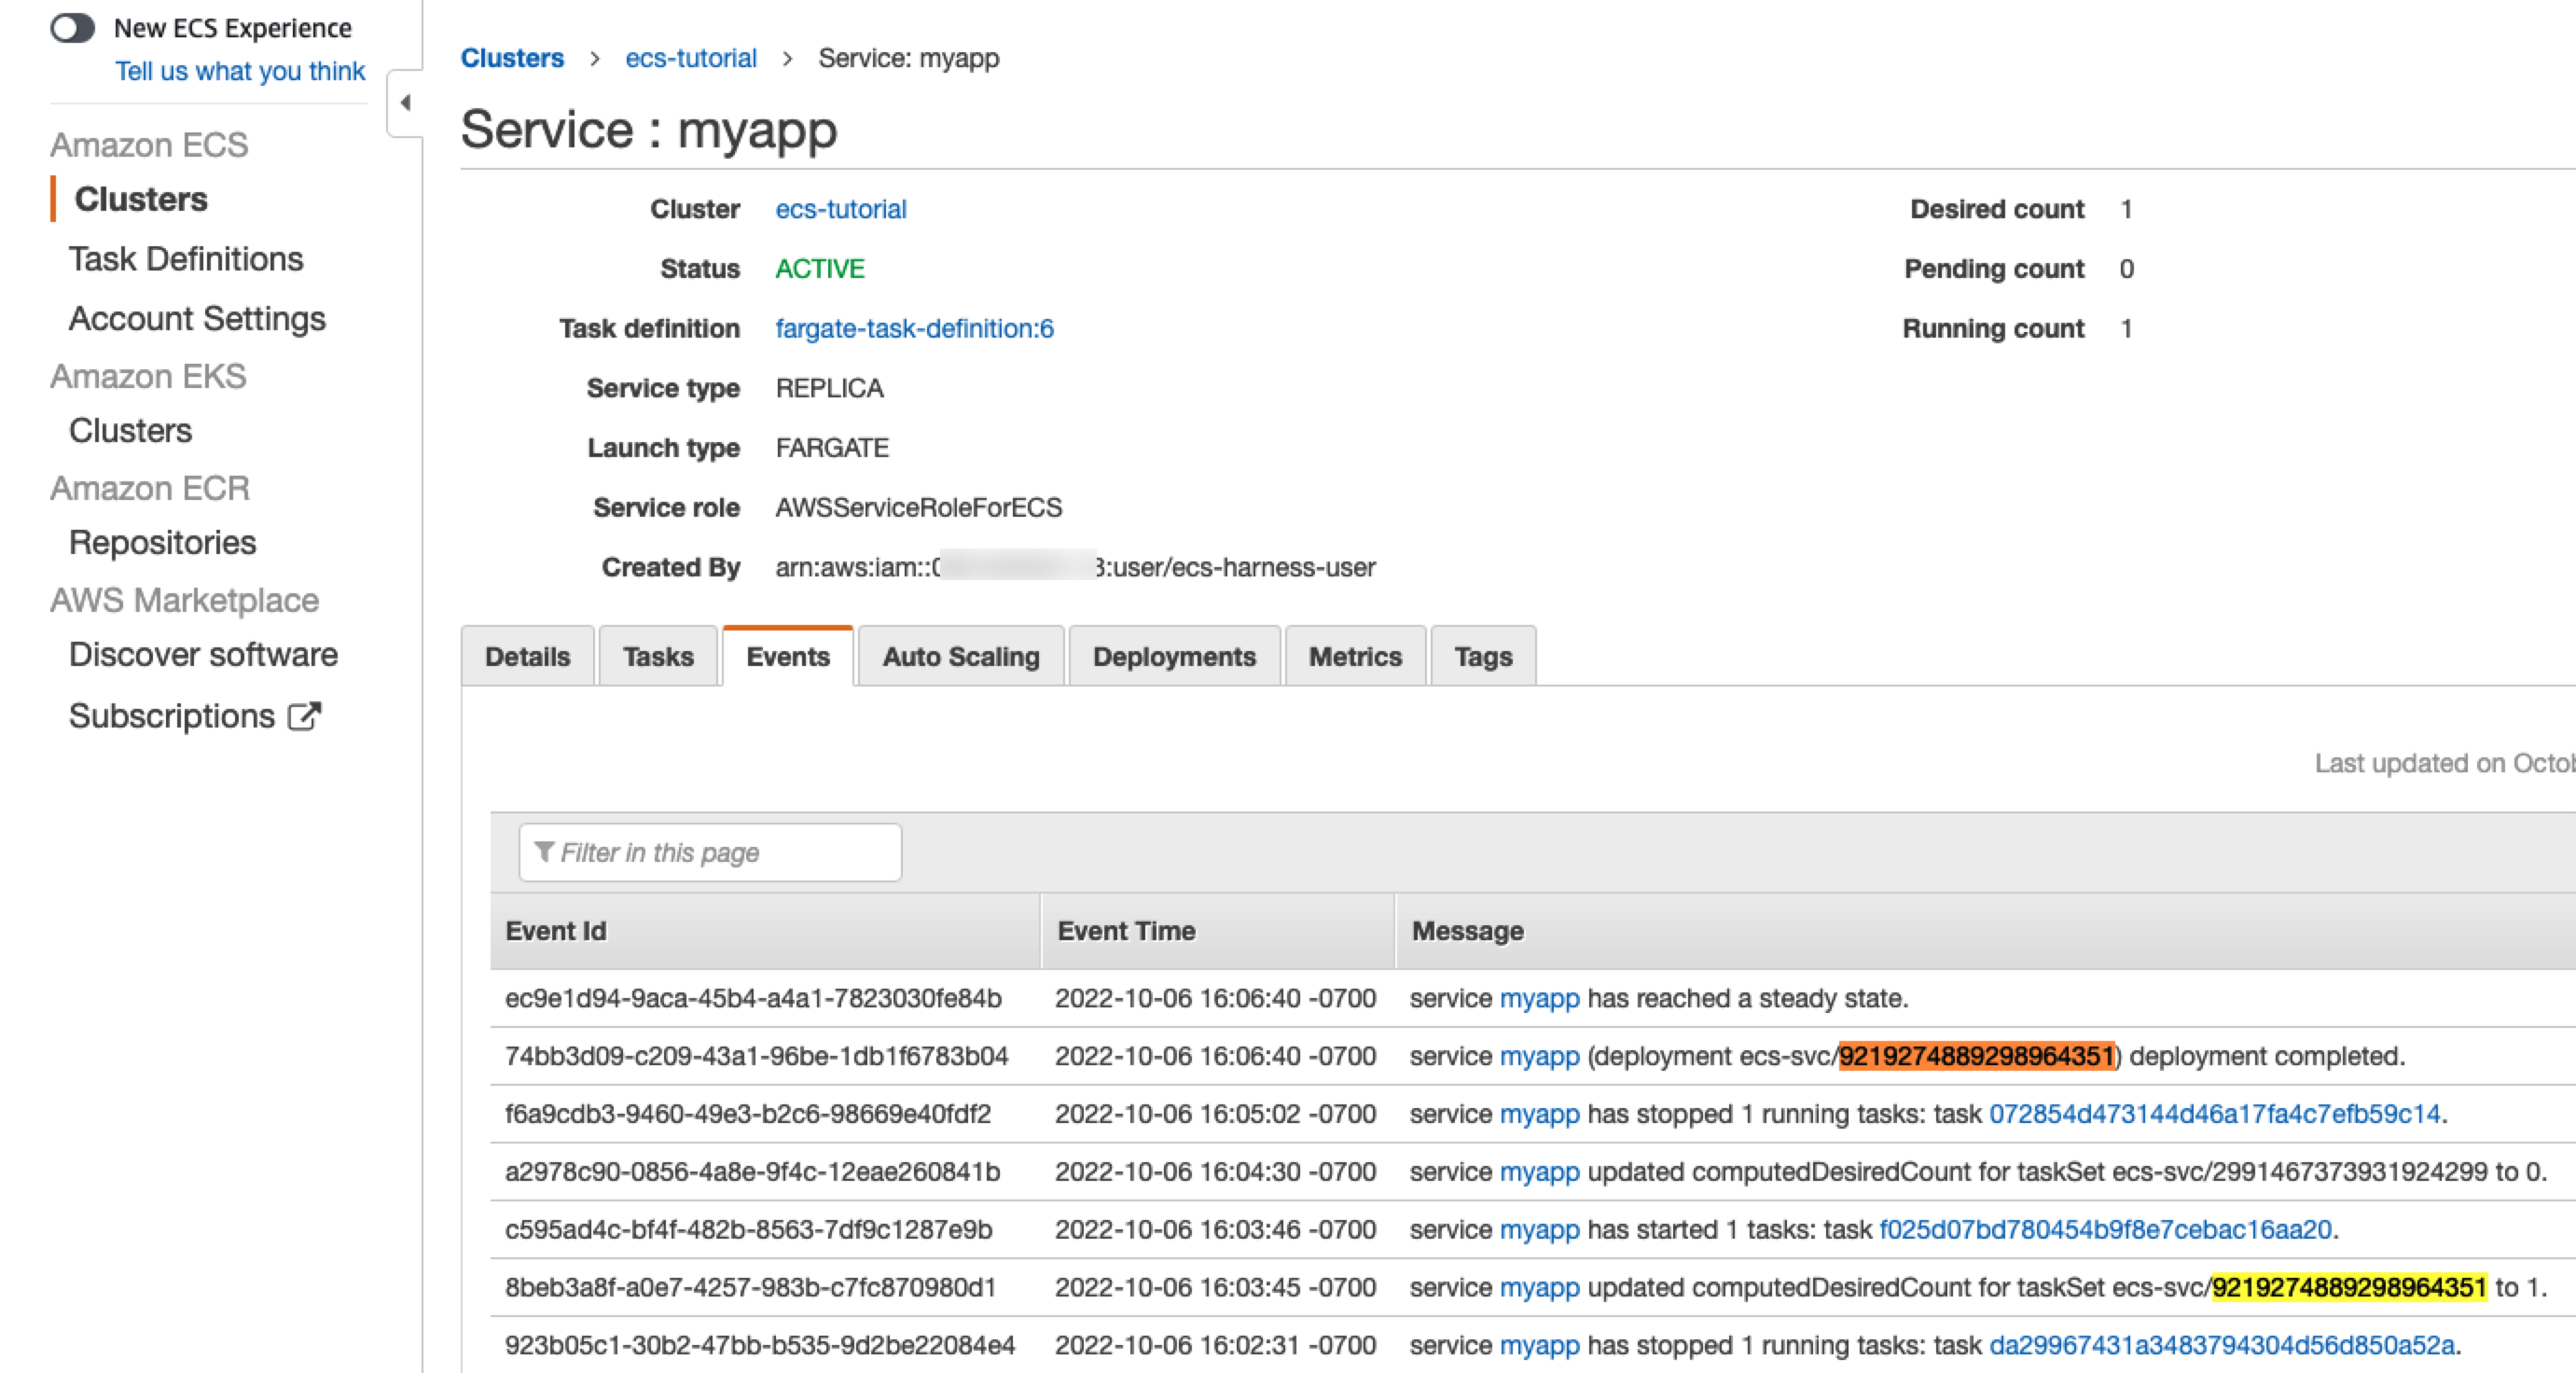
The key part to note is the AWS Events and the deployment Id (for example, 9219274889298964351). Harness starts tasks for the new version and scales the old tasks down to 0.
# AWS Event: 2022-10-06 23:03:45.606 (service myapp) updated computedDesiredCount for taskSet ecs-svc/9219274889298964351 to 1.
# AWS Event: 2022-10-06 23:03:46.251 (service myapp) has started 1 tasks: (task f025d07bd780454b9f8e7cebac16aa20).
# AWS Event: 2022-10-06 23:04:30.971 (service myapp) updated computedDesiredCount for taskSet ecs-svc/2991467373931924299 to 0.
# AWS Event: 2022-10-06 23:05:02.54 (service myapp) has stopped 1 running tasks: (task 072854d473144d46a17fa4c7efb59c14).
You can see the same events in the AWS console for the ECS service:
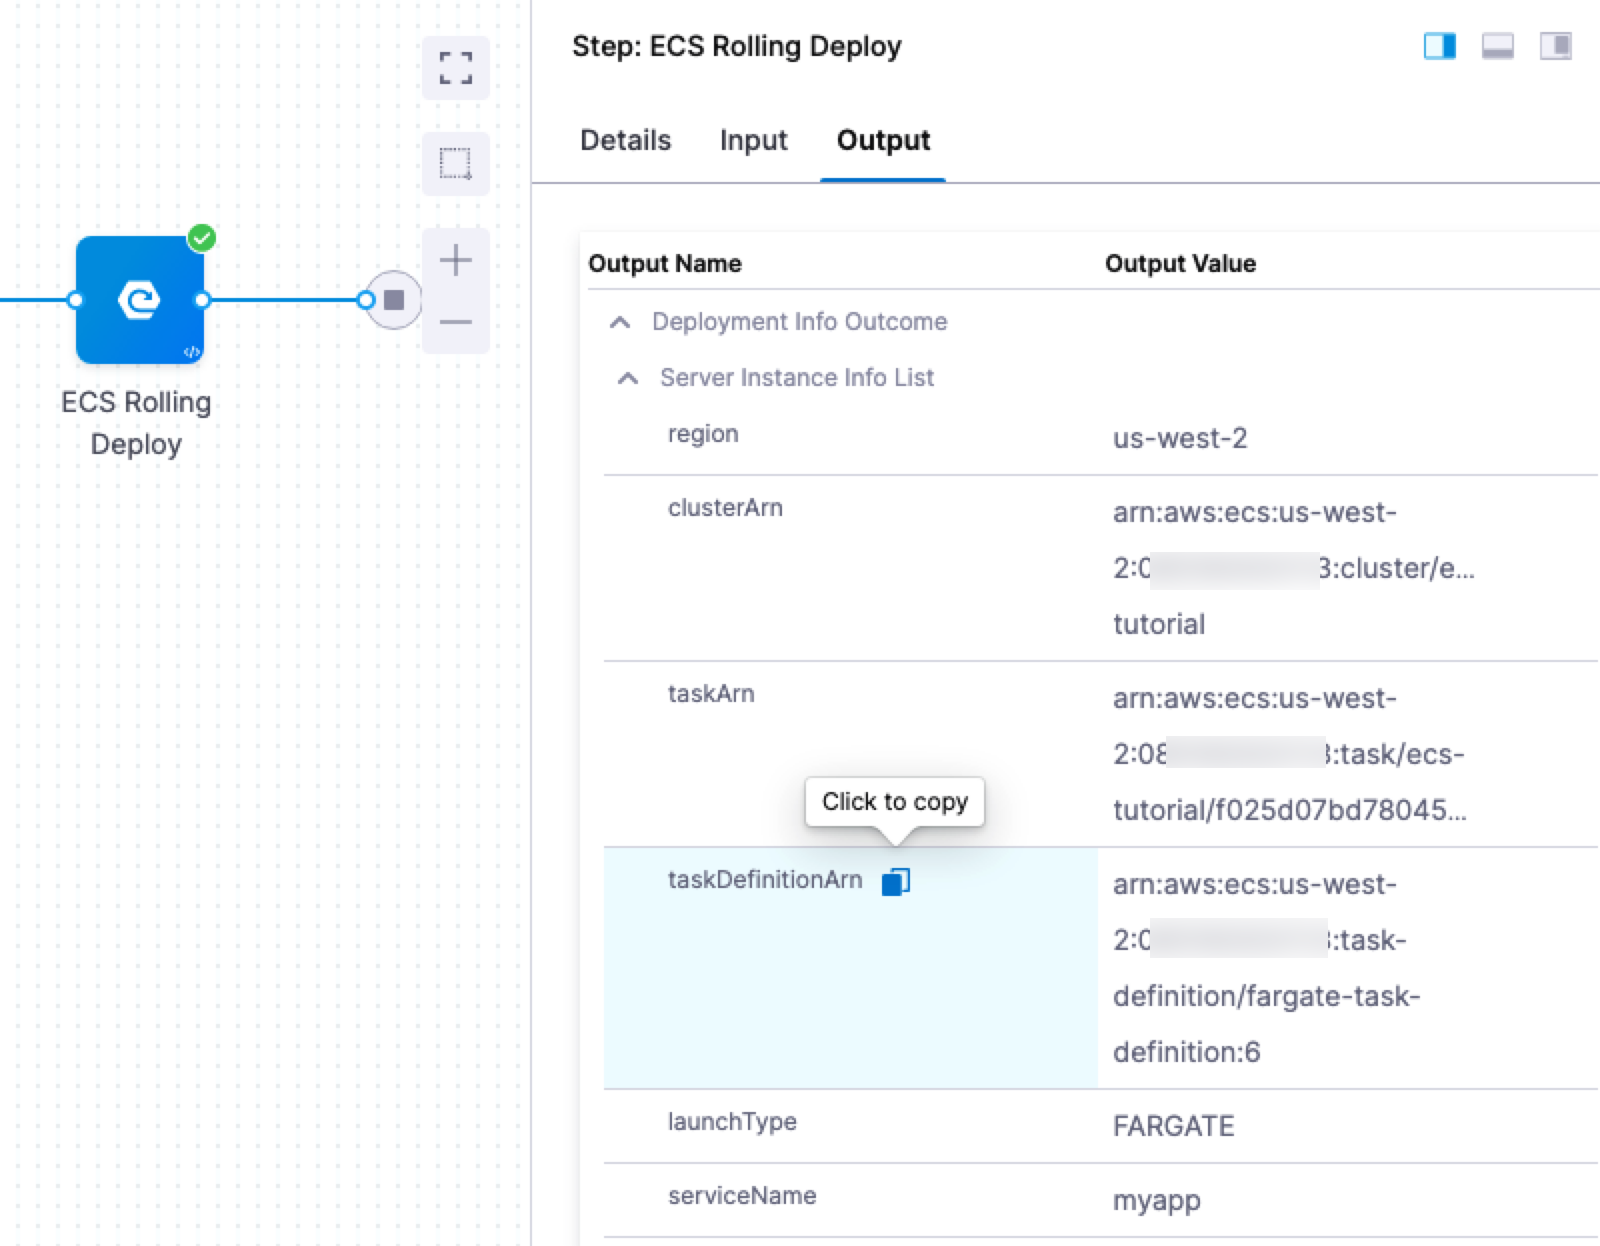
ECS Rolling Deploy step output
- In the ECS Rolling Deploy step, click Output. You can see all completed deployment details, including the version and Task Definition ARN (taskDefinitionArn).
You can copy any of these and use them in later steps in your pipeline.
You can achieve more accurate failure detection for ECS Rolling Deployments in Harness. Harness evaluates both ECS task statuses and service steady-state statuses to determine deployment health.


Currently, this feature is behind the feature flag CDS_ECS_MONITOR_TASK_STATUS. Contact Harness Support to enable the feature.
Review
Congratulations. You successfully deployed an ECS service using Harness.
In this example, you learned how to:
- Set up AWS IAM and ECS for Harness ECS deployments.
- Install and register a Harness Delegate for ECS deployments.
- Connect Harness with AWS, your ECS clusters, and Docker Hub.
- Add your Docker images to Harness.
- Define your ECS container and service specs in Harness.
- Create and deploy an ECS Rolling deployment.
Notes
See the following sections for information on other deployment strategies and steps.
Harness supports JSON and YAML for all ECS manifests
You can use both JSON and YAML for your task and service definitions. Note that fields are denoted in lower camel case rather than Pascal case, i.e., scalableDimension vs ScalableDimension.
ECS manifest examples
To ensure that your deployments are successful, please follow the AWS schema syntax for each manifest type:
- RegisterTaskDefinition
- CreateService
- RegisterScalableTarget
- PutScalingPolicy
- PutScheduledAction
- RunTask
Configure ECS task definition in service only
The ECS task definition should only be added in the Harness service Task Definition section.
Harness doesn’t expect the task definition to be configured in the ECS Service Definition or ECS Run Task Request Definition (in ECS Run Task step) manifests.
Harness will ignore any task definition configured in the ECS Service Definition and/or ECS Run Task Request Definition.
Supported stores for ECS manifests
Harness can fetch your task definitions, service definitions, scalable targets, scaling policy, and scheduled action configurations (in JSON or YAML) from the following stores:
-
Harness File Store
Harness supports specifying a folder path in the Harness file store for ECS scaling policies. Instead of manually selecting individual scaling policy files, you can select a folder, and Harness will recursively fetch all scaling policy files within that folder to use as scaling policies.
noteFolder path support currently applies only to scaling policies and is not supported for scalable targets.
-
AWS S3 buckets
- For S3, you use a Harness AWS Connector. The IAM role permissions required by Harness for S3 are described in AWS Connector Settings Reference.
-
Git providers
AWS Auto Scaling with ECS
The ECS service(s) you deploy with Harness can be configured to use AWS Service Auto Scaling to adjust their desired ECS service count up or down in response to CloudWatch alarms. For more information on using Auto Scaling with ECS, see Target Tracking Scaling Policies from AWS.
To configure Auto Scaling in Harness, you use Scalable Target, Scaling Policy, and Scheduled Action settings in the Harness Service.
Scalable Target
The Scalable Target setting in the Harness Service specifies a resource that AWS Application Auto Scaling can scale. For more information, see ScalableTarget from AWS.
JSON Example:
{
  "resourceId": "service/<ECS cluster name>/<ECS service name>",
  "scalableDimension": "ecs:service:DesiredCount",
  "serviceNamespace": "ecs",
  "minCapacity": 1,
  "maxCapacity": 3
}
YAML Example:
resourceId: service/<ECS cluster name>/<ECS service name>
serviceNamespace: ecs
scalableDimension: ecs:service:DesiredCount
minCapacity: 1
maxCapacity: 3
Scaling Policy
The Scaling Policy setting in the Harness Service defines a scaling policy that Application Auto Scaling uses to adjust your application resources. For more information, see ScalingPolicy from AWS.
JSON Example:
{
  "scalableDimension": "ecs:service:DesiredCount",
  "serviceNamespace": "ecs",
  "policyName": "P1",
  "policyType": "TargetTrackingScaling",
  "targetTrackingScalingPolicyConfiguration": {
    "targetValue": 60,
    "predefinedMetricSpecification": {
      "predefinedMetricType": "ECSServiceAverageCPUUtilization"
    },
    "scaleInCooldown": 300,
    "scaleOutCooldown": 300
  }
}
YAML Example:
scalableDimension: ecs:service:DesiredCount
serviceNamespace: ecs
policyName: P1
policyType: TargetTrackingScaling
targetTrackingScalingPolicyConfiguration:
  targetValue: 60
  predefinedMetricSpecification:
    predefinedMetricType: ECSServiceAverageCPUUtilization
  scaleOutCooldown: 300
  scaleInCooldown: 300
Scheduled Action
Currently, this feature is behind the feature flag CDS_ECS_SCHEDULED_ACTIONS. Contact Harness Support to enable the feature.
Scheduled actions let you configure time-based auto-scaling for your ECS services. With scheduled scaling, you can proactively adjust the number of running tasks at specific times to match predictable load changes—for example, scaling up every weekday morning and down in the evening.
This is useful when your application has known traffic patterns, and you want to optimize both cost and performance without relying solely on reactive metric-based policies. For more information, see Scheduled Scaling for Amazon ECS from AWS.
To add a scheduled action, go to the Scheduled Action setting in your Harness ECS Service and provide a manifest that follows the PutScheduledAction API schema.

Scheduled Action manifest
When defining a scheduled action manifest, you supply the schedule expression and the capacity range. Harness automatically populates the resourceId field based on the cluster and service name at deployment time, so you do not need to specify it in your manifest.
You can define multiple scheduled action manifests — for example, one to scale up during peak hours and another to scale down during off-peak hours.
Scale up example — scale_up.yaml
scheduledActionName: scale_up
serviceNamespace: ecs
schedule: "cron(30 6 * * ? *)"
scalableDimension: "ecs:service:DesiredCount"
scalableTargetAction:
  minCapacity: 3
  maxCapacity: 10
Scale down example — scale_down.yaml
scheduledActionName: scale_down
serviceNamespace: ecs
schedule: "cron(30 12 * * ? *)"
scalableDimension: "ecs:service:DesiredCount"
scalableTargetAction:
  minCapacity: 1
  maxCapacity: 1
Specifying a timezone
By default, schedule expressions are evaluated in UTC. To use a different timezone, add the timezone field to your manifest with a valid IANA time zone identifier. Harness expressions are supported for this field so that you can parameterize the timezone at runtime.
scheduledActionName: scale_up_afternoon_ist
serviceNamespace: ecs
schedule: "cron(0 14 * * ? *)"
timezone: "Asia/Kolkata"
scalableDimension: "ecs:service:DesiredCount"
scalableTargetAction:
  minCapacity: 3
  maxCapacity: 10
Supported schedule formats
The schedule field accepts three expression types:
| Type | Syntax | Recurring |
|---|---|---|
| Cron | cron(0 8 * * ? *) | Yes |
| Rate | rate(1 day) | Yes |
| At | at(2026-02-12T14:00:00) | No |
For full syntax details, see Schedule expressions in the AWS documentation.
Start and end times
You can optionally set startTime and endTime fields in the scheduled action manifest to define a window during which the scheduled action is active. AWS handles activation and deactivation automatically based on these times — no explicit attach/detach logic is needed.
Auto-populated fields
Harness auto-populates the resourceId field during deployment based on the target cluster and service name. You do not need to specify it in your manifest — Harness constructs the value as service/{cluster}/{serviceName} automatically. This is consistent with how Scalable Targets and Scaling Policies work.
The serviceNamespace and scalableDimension fields are part of the AWS API schema and should be included in your manifest with the values shown in the examples above (ecs and ecs:service:DesiredCount, respectively).
Service YAML reference
When you add scheduled action manifests to your Harness service, they appear alongside existing manifests like Task Definition, Service Definition, Scalable Target, and Scaling Policy. Scheduled actions use the EcsScheduledActionDefinition manifest type and can be stored in Git providers, the Harness File Store, or AWS S3.
Sample Harness service YAML with scheduled actions
service:
  name: ecs_service_rolling
  identifier: ecs_service_rolling
  serviceDefinition:
    type: ECS
    spec:
      manifests:
        - manifest:
            identifier: task_def
            type: EcsTaskDefinition
            spec:
              store:
                type: Github
                spec:
                  connectorRef: <github_connector>
                  gitFetchType: Branch
                  paths:
                    - ECS/sample/RegisterTaskDefinitionRequest.yaml
                  repoName: <your_repo>
                  branch: master
        - manifest:
            identifier: service_def
            type: EcsServiceDefinition
            spec:
              store:
                type: Github
                spec:
                  connectorRef: <github_connector>
                  gitFetchType: Branch
                  paths:
                    - ECS/sample/CreateServiceRequest.yaml
                  repoName: <your_repo>
                  branch: master
        - manifest:
            identifier: scaling_policy
            type: EcsScalingPolicyDefinition
            spec:
              store:
                type: Github
                spec:
                  connectorRef: <github_connector>
                  gitFetchType: Branch
                  paths:
                    - ECS/sample/PutScalingPolicyRequest.yaml
                  repoName: <your_repo>
                  branch: master
        - manifest:
            identifier: scalable_target
            type: EcsScalableTargetDefinition
            spec:
              store:
                type: Github
                spec:
                  connectorRef: <github_connector>
                  gitFetchType: Branch
                  paths:
                    - ECS/sample/RegisterScalableTargetRequest.yaml
                  repoName: <your_repo>
                  branch: master
        - manifest:
            identifier: scheduled_action
            type: EcsScheduledActionDefinition
            spec:
              store:
                type: Harness
                spec:
                  files:
                    - /scheduled_action
        - manifest:
            identifier: scale_down
            type: EcsScheduledActionDefinition
            spec:
              store:
                type: Harness
                spec:
                  files:
                    - /scale_down.yaml
      artifacts:
        primary:
          primaryArtifactRef: <+input>
          sources:
            - spec:
                connectorRef: <ecr_connector>
                imagePath: <image_path>
                tag: latest
                region: us-east-1
              identifier: ecr_artifact
              type: Ecr
You can attach up to 200 scheduled actions per scalable target.
Scheduled actions in different deployment strategies
Harness processes scheduled actions in all ECS deployment strategies — Rolling, Canary, Blue/Green, and Basic. The behavior mirrors how scaling policies are handled today.
In Canary deployments, scheduled actions are applied alongside the main service deployment (not to the temporary canary service).
Rollback behavior
During deployment, Harness captures the existing scheduled actions for the service before applying any changes. If the deployment fails and a rollback is triggered, Harness deletes the newly created scheduled actions and restores the previously saved actions.
The rollback sequence works as follows:
- Before deployment: Harness queries AWS for the current scheduled actions and saves them as rollback data.
- During deployment: Harness deletes the old scheduled actions and creates new ones from the manifests.
- On failure: Harness deletes the new scheduled actions and re-creates the previously saved actions from the rollback data.
Collecting Auto Scaling resources
Before you set up Auto Scaling for the ECS service in Harness, you need to obtain the JSON for the Scalable Target and Scalable Policy resources from AWS.
The JSON format used in the Auto Scaler Configurations settings should match the AWS standards as described in ScalableTarget and ScalablePolicy.
To obtain the Scalable Target, connect to an EC2 instance in your VPC and enter the following:
aws application-autoscaling describe-scalable-targets --service-namespace ecs
For more information, see describe-scalable-targets from AWS.
To obtain the Scalable Policy, enter the following:
aws application-autoscaling describe-scaling-policies --service-namespace ecs
For more information, see describe-scaling-policies from AWS.
To create the Scalable Target and Scalable Policy resources, see the register-scalable-target and put-scaling-policy commands from AWS.
Enable Auto Scaling In Swap Step
If you select Enable Auto Scaling In Swap Step in the ECS Blue Green Create Service step, then Harness will attach auto scaling policies to the new service it deploys in the Configure Swap Target Groups step. The policies are taken from the Scalable Target and Scaling Policy settings in the Harness service.
If you do not select Enable Auto Scaling In Swap Step, then Harness will attach auto scaling policies to the new service deployed in the Configure Blue Green Deployment step.
Update Green Services
If Green services exist, you can update them instead of having Harness create them again.
To update existing Green services, in the Configure Blue Green Deployment pane, select Update Green Service.
When this option is selected, Harness updates the Green service with a new manifest and artifact. The benefit of updating a Green service is that old containers go down only after new containers come up.
If you do not select this option, Harness deletes the Green service if it exists and then creates it again with a new manifest and artifact. Therefore, old containers go down before new containers come up. This behavior can impact the deployment if both the stage target group and the prod target group are the same and tags are incorrect.
Some fields from the service definition are not considered in the updated service, and they remain the same through the lifetime of the ECS service. These fields are:
- launchType
- schedulingStrategy
- roleArn
Same as already running instances
This setting in ECS Rolling Deploy and ECS Blue Green Create Service step sets the number of desired ECS service instances for this stage to the same number as the already running instances. Essentially, it ignores the desired count in the Service Definition of the new deployment.
Force new deployment
This is the same as forceNewDeployment from AWS ECS:
Determines whether to force a new deployment of the service. By default, deployments aren't forced. You can use this option to start a new deployment with no service definition changes. For example, you can update a service's tasks to use a newer Docker image with the same image/tag combination (
my_image:latest) or to roll Fargate tasks onto a newer platform version.
When a task definition ARN is provided instead of a task definition spec, a force deployment is enabled for rolling deployments by default. When you perform a force deployment, ECS terminates the running tasks associated with the service and replaces them with tasks using the new task definition.
Skip application auto scaling
The Skip application auto scaling option allows you to control whether Harness interacts with AWS Application Auto Scaling APIs during ECS Rolling deployments.
This feature is behind the feature flag CDS_ECS_SKIP_APPLICATION_SCALING. Contact Harness Support to enable the feature.
This feature requires delegate version 26.05.89205 or later.
Default behavior:
Harness treats the scaling manifests in your Harness service as the source of truth for auto-scaling configuration:
- If your Harness service contains auto-scaling manifests, Harness deletes any existing AWS scaling policies and scalable targets, deploys the ECS service, and then re-registers the scaling configuration from your Harness service manifests
- If your Harness service does not contain auto-scaling manifests, Harness still calls the AWS Application Auto Scaling APIs to delete any existing scaling policies attached to the ECS service, and does not re-attach them after deployment
This default behavior can cause issues when you deploy many services in parallel, as it may hit AWS Application Auto Scaling API rate limits.
When you enable this option, Harness skips all Application Auto Scaling API interactions regardless of whether scaling manifests are configured in your Harness service or not. Use this option when you manage auto-scaling externally (via Terraform, AWS Console, or other tools) and do not want Harness to modify your scaling configuration.
When to use this option
Enable Skip application auto scaling if:
- You manage ECS auto-scaling policies outside of Harness (through Terraform, AWS Console, CloudFormation, or other tools)
- You deploy multiple ECS services in parallel and encounter AWS Application Auto Scaling API rate limits
- Your pipeline has no scaling manifests configured and you want to avoid unnecessary AWS API calls
- You want ECS deployments to only update task definitions and service configurations without modifying scaling policies
How it works
When Skip application auto scaling is enabled and no scaling manifests are present in your pipeline:
During deployment:
- Harness skips calls to
DescribeScalingPolicies,DescribeScalableTargets,DeleteScalingPolicy, andDeregisterScalableTarget - Harness only performs task definition registration, service updates via
UpdateService, and steady-state checks - Existing scaling policies and scalable targets in AWS remain active throughout the deployment
- The deployment avoids approximately 5-6 Application Auto Scaling API calls per service
During rollback:
- Harness skips scaling policy restoration since it was never modified during deployment
- Harness only reverts the task definition and service configuration to the previous version
- Your externally-managed scaling policies continue working without disruption
If scaling manifests are present in your pipeline (scalable targets, scaling policies, or scheduled actions), Harness manages scaling normally regardless of this setting, ensuring that explicitly configured scaling is always applied.
Configure skip application auto scaling
To enable this option in your ECS Rolling Deploy step:
- In your pipeline, select the ECS Rolling Deploy step
- In the step configuration, locate the Skip application auto scaling checkbox
- Check Skip application auto scaling to skip all Application Auto Scaling API interactions.
Alternatively, you can configure this in YAML:
ECS Rolling Deploy step YAML example
- step:
    type: EcsRollingDeploy
    name: ECS Rolling Deploy
    identifier: ecsRollingDeploy
    timeout: 10m
    spec:
      skipApplicationScaling: true
Important notes
When you enable this option, also enable the feature flag CDS_ECS_USE_CREATED_AT_DEPLOYMENT_STEADY_STATE to prevent potential deployment.updatedAt race conditions. This flag ensures accurate steady-state detection when auto-scaling policies remain active during deployment.
Contact Harness Support to enable both feature flags for your account.
ECS Canary deployments
In an ECS Canary deployment, Harness deploys to 1 instance, deletes it, and then performs a Rolling deployment of the new version with full desired count.
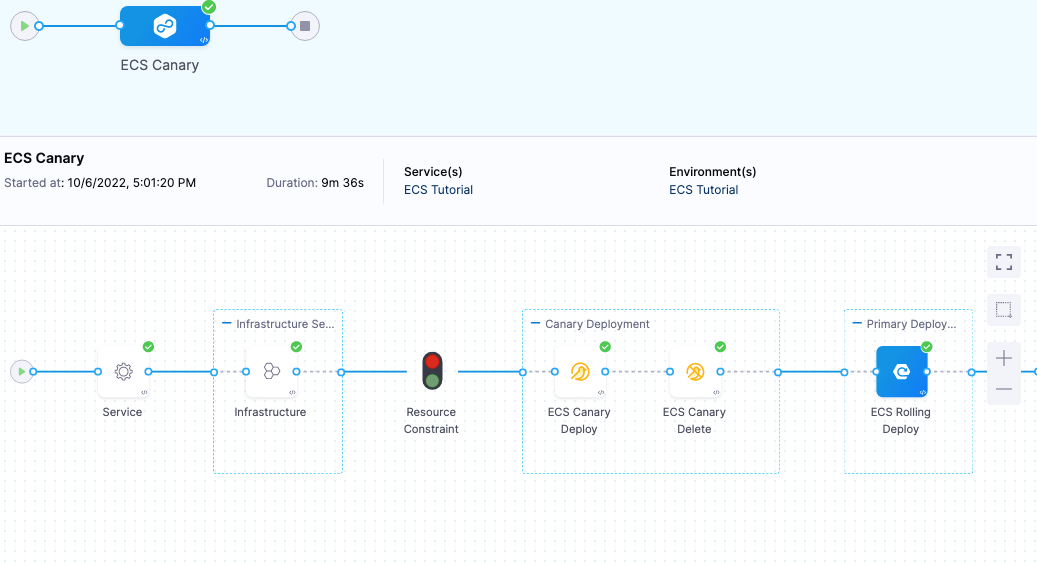
The deployment follows this process:
-
ECS Canary Deploy step.
- Harness deploys the new version of the service to 1 instance.
- Harness names the service with a Canary suffix when it deploys it as part of this step. For example, if the service name is myapp, it will be called myappCanary.
Creating Task Definition with family fargate-task-definitionCreated Task Definition fargate-task-definition:9 with Arn arn:aws:ecs:us-west-2:1234567890:task-definition/fargate-task-definition:9..Creating Service myappCanary with task definition arn:aws:ecs:us-west-2:1234567890:task-definition/fargate-task-definition:9 and desired count 1Waiting for pending tasks to finish. 0/1 running ...Waiting for pending tasks to finish. 0/1 running ...# AWS Event: 2022-10-07 00:05:14.665 (service myappCanary) has started 1 tasks: (task ab694b189d204d15950b0466c0e5bd10).Waiting for pending tasks to finish. 0/1 running ...Waiting for pending tasks to finish. 1/1 running ...Waiting for Service myappCanary to reach steady stateService myappCanary reached steady stateCreated Service myappCanary with Arn arn:aws:ecs:us-west-2:1234567890:service/ecs-canary/myappCanaryDeployment Successful. -
You can add any verification or testing steps after the ECS Canary Deploy step.
-
ECS Canary Delete step.
- Harness deletes the service deployed with the preceding ECS Canary Deploy step.
Deleting service myappCanary..Waiting for existing Service myappCanary to reach inactive stateExisting Service myappCanary reached inactive stateCanary service myappCanary deleted -
ECS Rolling Deploy.
- Harness performs a standard rolling deployment of the service to the desired count in the ECS Service Definition you added.
ECS Blue Green deployments
ECS Blue/Green deployments use old and new versions of your service running behind the load balancer. Your ELB uses two listeners, Prod and Stage, each forwarding to a different target group where ECS services are run.
For a detailed comparison of ECS Blue-Green deployments with other platforms, see Blue-Green Deployment Across Platforms.
Blue/Green deployments are achieved by swapping listeners between the target groups, always pointing the Prod listener to the target group running the latest version.
In Harness, you identify which listeners are the Prod and Stage listeners. When Harness deploys, it uses the target group for the Stage listener (for example, target1) to test the deployment, verifies the deployment, and then swaps the Prod listener to use that target group. Next, the Stage listener now uses the old target group (target2).
When a new version of the service is deployed, the Stage listener and its target group (target2) are first used, then, after verification, the swap happens and the Prod listener forwards to target2 and the Stage listener now forwards to target1.
To use ELB for Blue/Green deployment, you must have the following set up in AWS:
- ELB Load Balancer - An application load balancer must be set up in your AWS VPC. The VPC used by the ELB must have two subnets, each in a separate availability zone, which the ELB will use.
- Two Listeners - A listener checks for connection requests from clients, using the protocol and port that you configure, and forwards requests to one or more target groups, based on the rules that you define. Your load balancer must have two listeners set up: One listener for the production traffic (Prod) that points to one target group, and one listener for the stage traffic (Stage) that points to another target group.
You do not need to register instances for the target groups. Harness will perform that step during deployment.
For more information on ELB Application Load Balancers, see What Is an Application Load Balancer? from AWS.
Application Load Balancer (ALB) and Network Load Balancer (NLB) are supported.
Harness supports Blue/Green deployments with Network Load Balancers (NLB), but only with a single pair of stage/production listeners.
If your NLB has multiple listeners (exposing multiple ports), Blue/Green deployments with dynamic target group switching are not currently supported by Harness. This limitation exists even though ECS natively supports multi-listener Blue/Green strategies.
Supported configuration:
- NLB with one stage listener and one production listener
- Single port exposed per load balancer
Not supported:
- NLB with multiple listener pairs for different ports
- Multi-listener Blue/Green deployments
Ports Used in Blue/Green Using ELB
There are three places where ports are configured in this deployment:
-
Harness ECS Service's Service Specification: you will specify ports in the Port Mappings in the specification.
The port number used here must also be used in the ELB Target Groups you use for Blue/Green. -
Target Group - You will create two target groups, and Harness will swap them to perform Blue/Green. When you create a target group, you will specify the same port number as the Port Mappings in the Container Specification in Service:
 Both target groups must use the same port number, which is also the same number as the Port Mappings in the Container Specification in Service.
 -
ELB Listener - In your ELB, you create a listener for each target group. Listeners also use port numbers, but these are simply entry points for the ELB. For example, one listener uses port 80, and the other listener uses 8080.
If the port number used in the Service Specification does not match the port number used in the target groups, you will see this error:
Error: No container definition has port mapping that matches the target port: 80 for target group:
arn:aws:elasticloadbalancing:us-west-1:4xxxxxxx5317:targetgroup/target1/ac96xxxxxx1d16
Simply correct the port numbers and rerun the deployment.
Set Up AWS for Blue/Green Using ELB
To set up AWS for Blue/Green using ELB and Harness, do the following:
- Ensure you have a Harness Delegate installed on an instance in the same VPC where your ECS cluster and load balancer are installed.
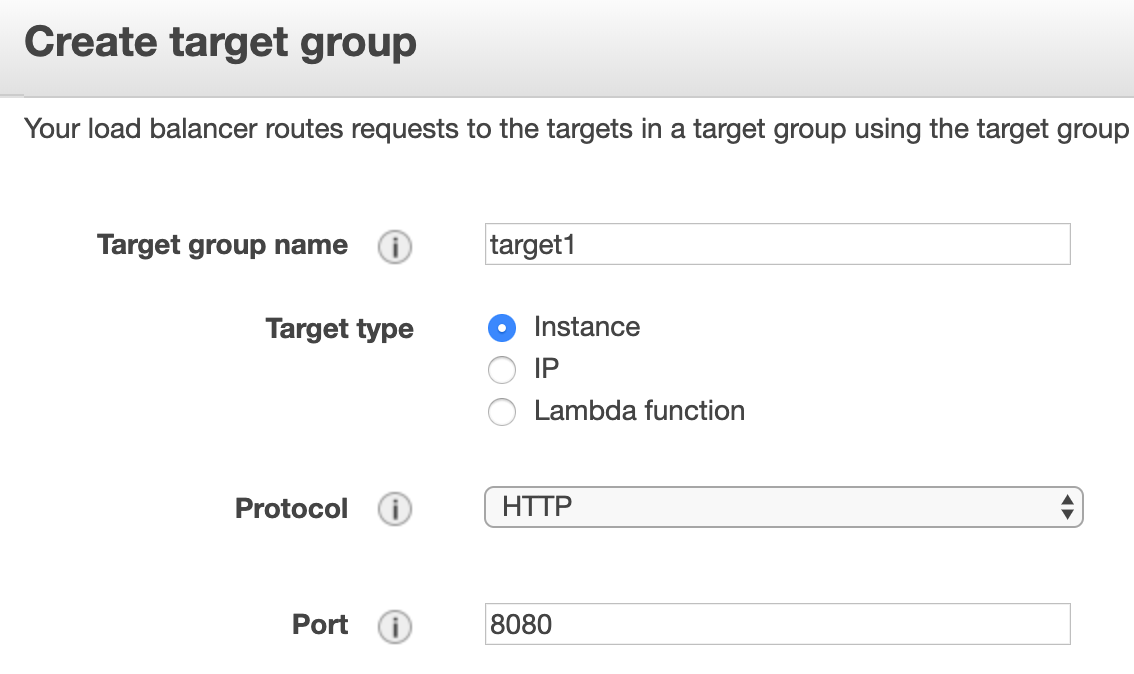
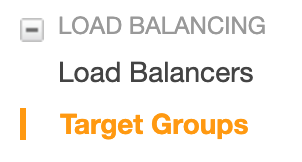
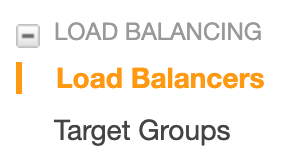
- In the AWS EC2 console, click Target Groups.
- In Target Groups, click Create target group.
- Give the target group a name, such as target1, and port 8080.
- Select the VPC where your ECS cluster instances will be hosted, and click Create.
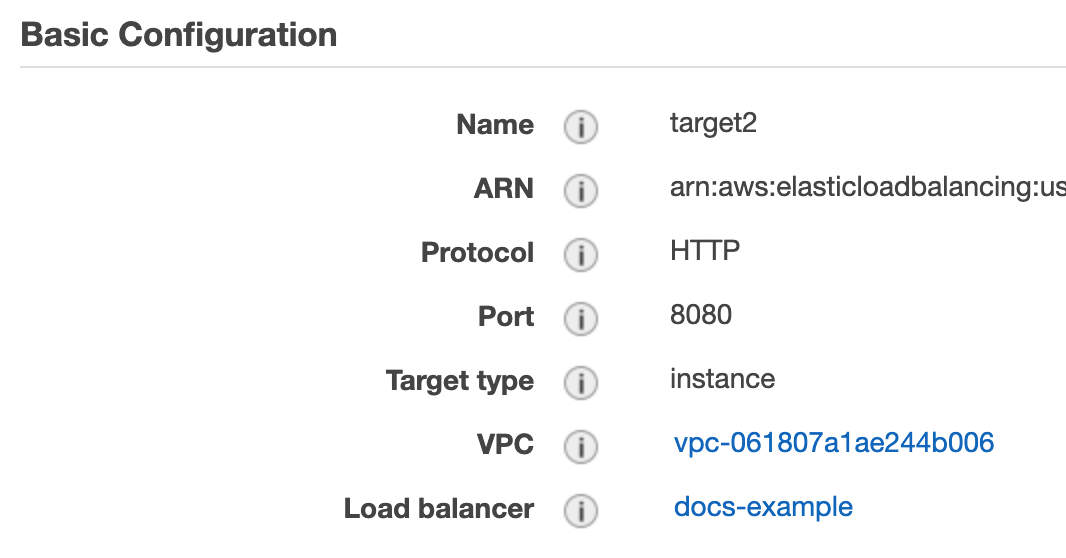
- Create a second target group using a new name, such as target2, use the same port number, 8080, and the same VPC as the first target.
It is important that you use the same port numbers for both target groups.When you are done, the target configuration will look something like this:
Now that your targets are created, you can create the load balancer that will switch between the targets.
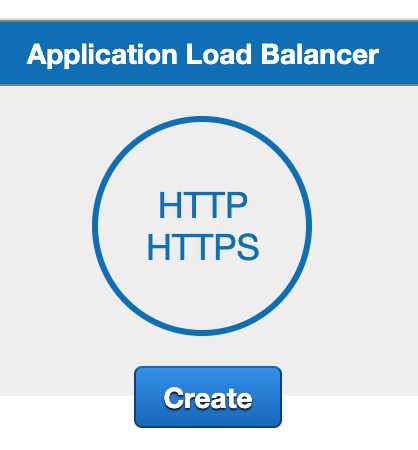
- Create a Application Load Balancer. In the EC2 Console, click Load Balancers.
 2. Click Create Load Balancer, and then under Application Load Balancer, click Create.
You do not need to add listeners at this point. We will do that after the load balancer is created.
Ensure that the VPC you select for the load balancer has two subnets, each in a separate availability zone, like the following:
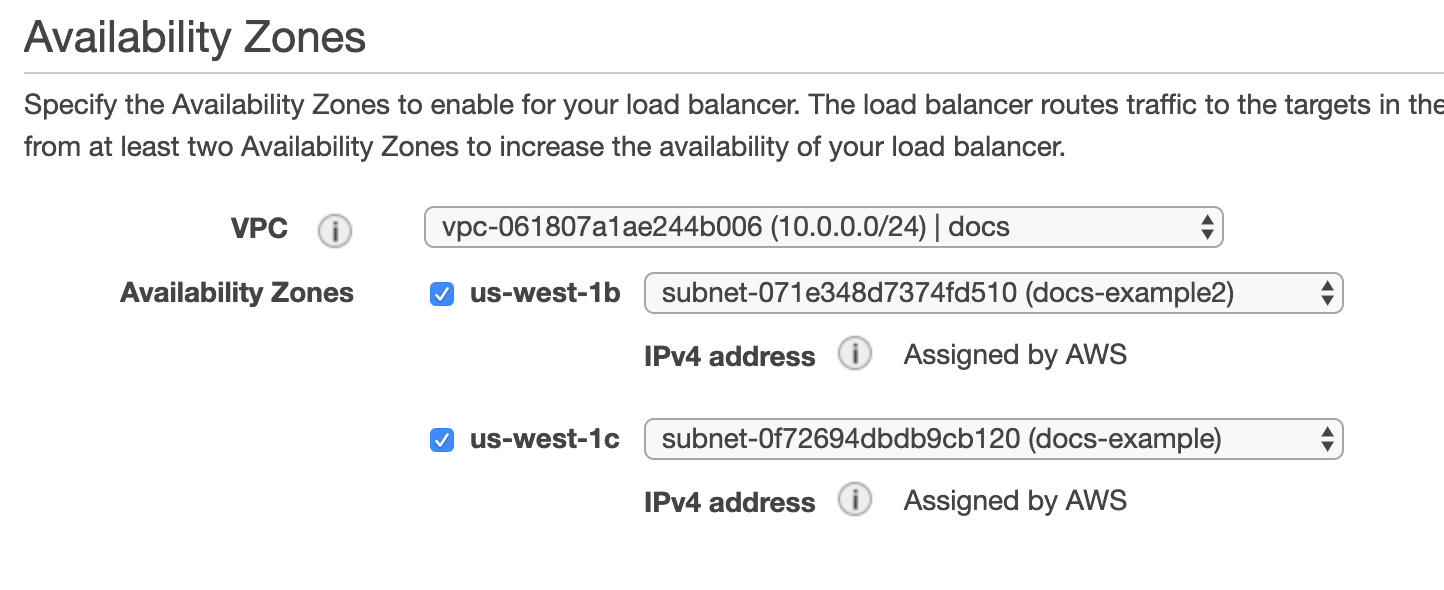
Once your load balancer is created, you can add its Prod and Stage listeners.
- In your load balancer, click its Listeners tab to add the targets you created as listeners.
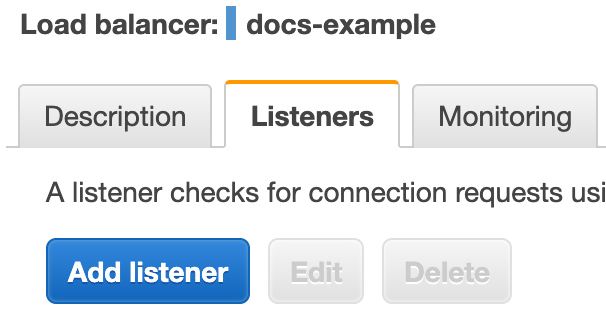 2. Click Add Listener. 3. In the Protocol : port section, enter the port number for your first target, port 80. Listeners do not need to use the same port numbers as their target groups. 4. In Default action, click Add action, and select Forward to, and then select your target
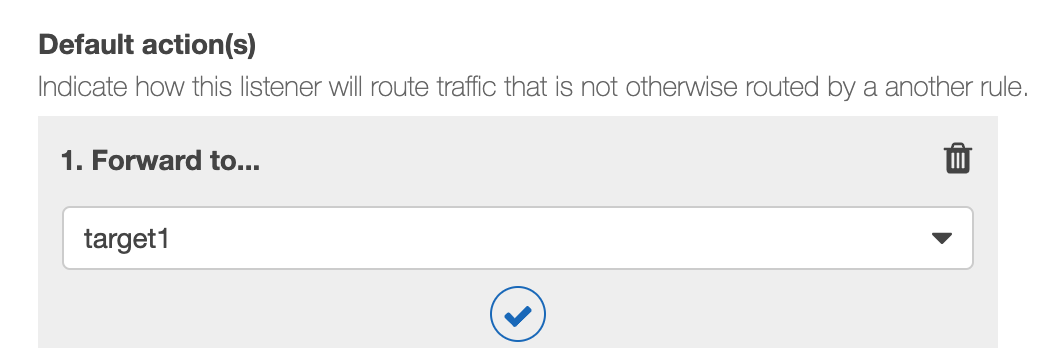 5. Click Save. 6. Repeat this process to add a listener using the other target you created, using a port number such as 8080. When you are done you will have two listeners:

You AWS ELB setup is complete. Now you can set up you Harness Pipeline.
ECS Blue Green Specification Examples
Here are some examples of the ECS Task Definition and ECS Service Definition for an ECS deployment.
ECS Task Definition:
Replace the two <ecsInstanceRole Role ARN> with the ARN for the ecsInstanceRole used for your cluster. See Amazon ECS Instance Role from AWS.
ipcMode:
executionRoleArn: <ecsInstanceRole Role ARN>
containerDefinitions:
  - dnsSearchDomains:
    environmentFiles:
    entryPoint:
    portMappings:
      - hostPort: 80
        protocol: tcp
        containerPort: 80
    command:
    linuxParameters:
    cpu: 0
    environment: []
    resourceRequirements:
    ulimits:
    dnsServers:
    mountPoints: []
    workingDirectory:
    secrets:
    dockerSecurityOptions:
    memory:
    memoryReservation: 128
    volumesFrom: []
    stopTimeout:
    image: <+artifacts.primary.image>
    startTimeout:
    firelensConfiguration:
    dependsOn:
    disableNetworking:
    interactive:
    healthCheck:
    essential: true
    links:
    hostname:
    extraHosts:
    pseudoTerminal:
    user:
    readonlyRootFilesystem:
    dockerLabels:
    systemControls:
    privileged:
    name: nginx
placementConstraints: []
memory: "512"
taskRoleArn: <ecsInstanceRole Role ARN>
family: sainath-fargate
pidMode:
requiresCompatibilities:
  - FARGATE
networkMode: awsvpc
runtimePlatform:
cpu: "256"
inferenceAccelerators:
proxyConfiguration:
volumes: []
The image: <+artifacts.primary.image> setting instructs Harness to pull the image you add to the Service Artifacts section and use it for deployment. You do not have to add an image in Artifacts and reference it using <+artifacts.primary.image>. You can hardcode the image instead or use a Harness variable for the value that resolves to an image name at runtime.ECS Service Definition:
Replace <Security Group Id> and <Subnet Id> with the Ids from the ECS instances for your target ECS cluster.
launchType: FARGATE
serviceName: myapp
desiredCount: 2
networkConfiguration:
  awsvpcConfiguration:
    securityGroups:
      - <Security Group Id>
    subnets:
      - <Subnet Id>
    assignPublicIp: ENABLED
deploymentConfiguration:
  maximumPercent: 200
  minimumHealthyPercent: 100
loadBalancers:
  - targetGroupArn: <+targetGroupArn>
    containerName: nginx
    containerPort: 80
targetGroupArn is mandatory
You can see targetGroupArn: <+targetGroupArn> in the example above. For Harness Blue Green deployments, this is mandatory.
Harness will resolve the <+targetGroupArn> expression to the ARN of the first target group associated with the Stage Listener Rule ARN in the ECS Blue Green Create Service step.
ECS Blue Green Create Service step
Configure the following settings:
-
Elastic Load Balancer: Click here and select the AWS load balancer you added. Harness uses the Delegate to locate the load balancers and list them in Elastic Load Balancer. If you do not see your load balancer, ensure that the Delegate can connect to the load balancers. Once the load balancer is selected, Harness will populate the Prod and Stage Listener drop-downs.
-
Prod Listener: Select the ELB listener that you want to use as the Prod Listener.
-
Stage Listener: Select the ELB listener that you want to use as the Stage Listener.
ImportantTypically, Harness removes auto scaling from the previous service in the ECS Blue Green Swap Target step.
However, if the Prod Listener and Stage Listener in the Configure Blue Green Deployment step are the same (the prod listener is equal to stage listener and prod listener rule is equal to stage listener rule, meaning that prod target group is equal to stage target group), then Harness will remove auto scaling from the previous service in the Configure Blue Green Deployment step.
-
Prod Listener Rule ARN and Stage Listener Rule ARN: If you are using Listener Rules in your target groups, you can select them in Production Listener Rule ARN and Stage Listener Rule ARN.
- You must select a listener rule.
- Ensure the traffic that will use the rules matches the conditions you have set in the regulations. For example, if you have a path condition on a rule to enable path-based routing, ensure that traffic uses that path.
-
Same as already running instances: Use the number of running instances as the desired count. Essentially, it ignores the desired count in the Service Definition of the new deployment.
-
Enable Auto Scaling In Swap Step:
If you select Enable Auto Scaling In Swap Step, Harness will attach auto-scaling policies to the new service it deploys during the Configure Swap Target Groups step. The policies are sourced from the Scalable Target and **Scaling Policy ** settings in the Harness service.
If you do not select Enable Auto Scaling In Swap Step, Harness will attach auto-scaling policies to the new service deployed during the Configure Blue Green Deployment step.
Here's an example of the output of the step:
Creating Task Definition with family johndoe-fargate
Created Task Definition johndoe-fargate:498 with Arn arn:aws:ecs:us-east-1:1234567890:task-definition/johndoe-fargate:498..

Creating Stage Service abc__1 with task definition arn:aws:ecs:us-east-1:1234567890:task-definition/johndoe-fargate:498 and desired count 1
Waiting for pending tasks to finish. 0/1 running ...
Waiting for pending tasks to finish. 0/1 running ...
Waiting for pending tasks to finish. 0/1 running ...
# AWS Event: 2022-10-11 02:50:59.657 (service abc__1) has started 1 tasks: (task e8ffa30be4a848d387ab8ed66ba31417).
Waiting for pending tasks to finish. 0/1 running ...
Waiting for pending tasks to finish. 1/1 running ...
# AWS Event: 2022-10-11 02:51:27.667 (service abc__1) registered 1 targets in (target-group arn:aws:elasticloadbalancing:us-east-1:1234567890:targetgroup/example-tg-ip-2/34b77f72b13e45f4)
Waiting for Service abc__1 to reach steady state
Service abc__1 reached steady state
Created Stage Service abc__1 with Arn arn:aws:ecs:us-east-1:1234567890:service/example-test/abc__1

Target Group with Arn: arn:aws:elasticloadbalancing:us-east-1:1234567890:targetgroup/example-tg-ip-2/34b77f72b13e45f4 is associated with Stage Service abc__1
Tag: [BG_VERSION, GREEN] is associated with Stage Service abc__1
You can see that the target is registered in the Target Groups associated with the selected Stage Listener; the new ECS service is deployed as the Stage Service for the Target Group, and the Service is tagged with BG_VERSION and GREEN.
ECS Blue Green Swap Target step
The ECS Blue Green Swap Target step performs the Blue/Green route swap once the deployment is verified.
Typically, you will want to add one or more steps between the ECS Blue Green Create Service step and ECS Blue Green Swap Target step for verification.
When you deploy, Harness will use the target group for the Stage Listener from the ECS Blue Green Create Service step. After verifying the deployment succeeded, the ECS Blue Green Swap Target step swaps the target groups between the listeners. Now, the target group with the latest version receives production traffic. The target group with the old version gets the stage traffic.
Here's an example of the output of the step:
Modifying the ELB Prod Listener to forward requests to the Target group associated with the new Service
,TargetGroup: arn:aws:elasticloadbalancing:us-east-1:1234567890:targetgroup/example-tg-ip-2/34b77f72b13e45f4
Modifying the default Listener: arn:aws:elasticloadbalancing:us-east-1:1234567890:listener/app/example-alb/8c164c70eb817f6a/83cbd24bc4f6d349
 with listener rule: arn:aws:elasticloadbalancing:us-east-1:1234567890:listener-rule/app/example-alb/8c164c70eb817f6a/83cbd24bc4f6d349/a249570503765d2d
 to forward traffic to TargetGroup: arn:aws:elasticloadbalancing:us-east-1:1234567890:targetgroup/example-tg-ip-2/34b77f72b13e45f4
Successfully updated Prod Listener

Modifying the ELB Stage Listener to forward requests to the Target group associated with the old Service
,TargetGroup: arn:aws:elasticloadbalancing:us-east-1:1234567890:targetgroup/example-tg-ip-1/52b1f157d3240800
Modifying the default Listener: arn:aws:elasticloadbalancing:us-east-1:1234567890:listener/app/example-alb/8c164c70eb817f6a/cfbb98e593af641b
 with listener rule: arn:aws:elasticloadbalancing:us-east-1:1234567890:listener-rule/app/example-alb/8c164c70eb817f6a/cfbb98e593af641b/30983f6b6338ce10
 to forward traffic to TargetGroup: arn:aws:elasticloadbalancing:us-east-1:1234567890:targetgroup/example-tg-ip-1/52b1f157d3240800
Successfully updated Stage Listener

Updating tag of new service: abc__1
Updating service: abc__1 with tag: [BG_VERSION, BLUE]
Successfully updated tag

Swapping Successful.
You can see that the ELB Prod Listener is now forwarding requests to the Target Group used with the new service version deployed in the previous step (ECS Blue/Green Create Service).
Also, the ELB Stage Listener is forwarding to the Target Group for the previous service version.
Lastly, the new ECS service is tagged with BG_VERSION, BLUE.
Do not downsize old service: Use this setting to choose whether to downsize the older, previous version of the service.
By default, the previous service is downsized to 0. The service is downsized, but not deleted. If the older service needs to be brought back up again, it is still available.
ECS Blue Green service validation
Harness performs some validations before the deployment. Before the deployment, Harness identifies ECS Blue and Green services based on the target group and updates tags accordingly. It then starts the deployment.
Blue Green service scenarios
-
Scenario 1: When the prod target group and stage target group are different.
- Blue service. Service version that is attached to the prod target group: tag as blue.
- Green service. Service version that is attached to the stage target group: tag as green.
-
Scenario 2: When the prod target group and stage target group are the same.
- Blue service. Service version attached to the prod target group and running tasks: tag as blue.
- Green service. Service version attached to the prod target group and with zero or fewer running tasks: tag as green.
-
If the validations for the Blue and Green ECS services fail, Harness aborts the deployment. You must fix the issue by resetting the service in the AWS Management Console.
-
If you abort the deployment, the execution remains incomplete. During the next deployment, you must fix the configuration by resetting the ECS service in the AWS Management Console.
Harness is introducing a new feature flag: CDS_ECS_BG_VALIDATION_WITH_SAME_TARGET_GROUPS. When enabled, the validation described above will only be performed if the target groups attached to the services match those connected to the Load Balancer specified in the deployment step. That will be available with the delegate version: 851xx.
This ensures that Harness leverages the configuration defined in the step, enhancing accuracy and consistency during deployment.
Please contact Harness Support to enable this feature flag.
ECS Rollbacks
When an ECS deployment fails, the service tasks it was deploying are scaled down to 0.
The service is scaled to its pre-setup number of tasks.
If ECS Service Auto Scaling is configured, it is attached to the last production service at the end of the rollback.
For multi-phase deployments (Canary), not all phases are rolled back at once.

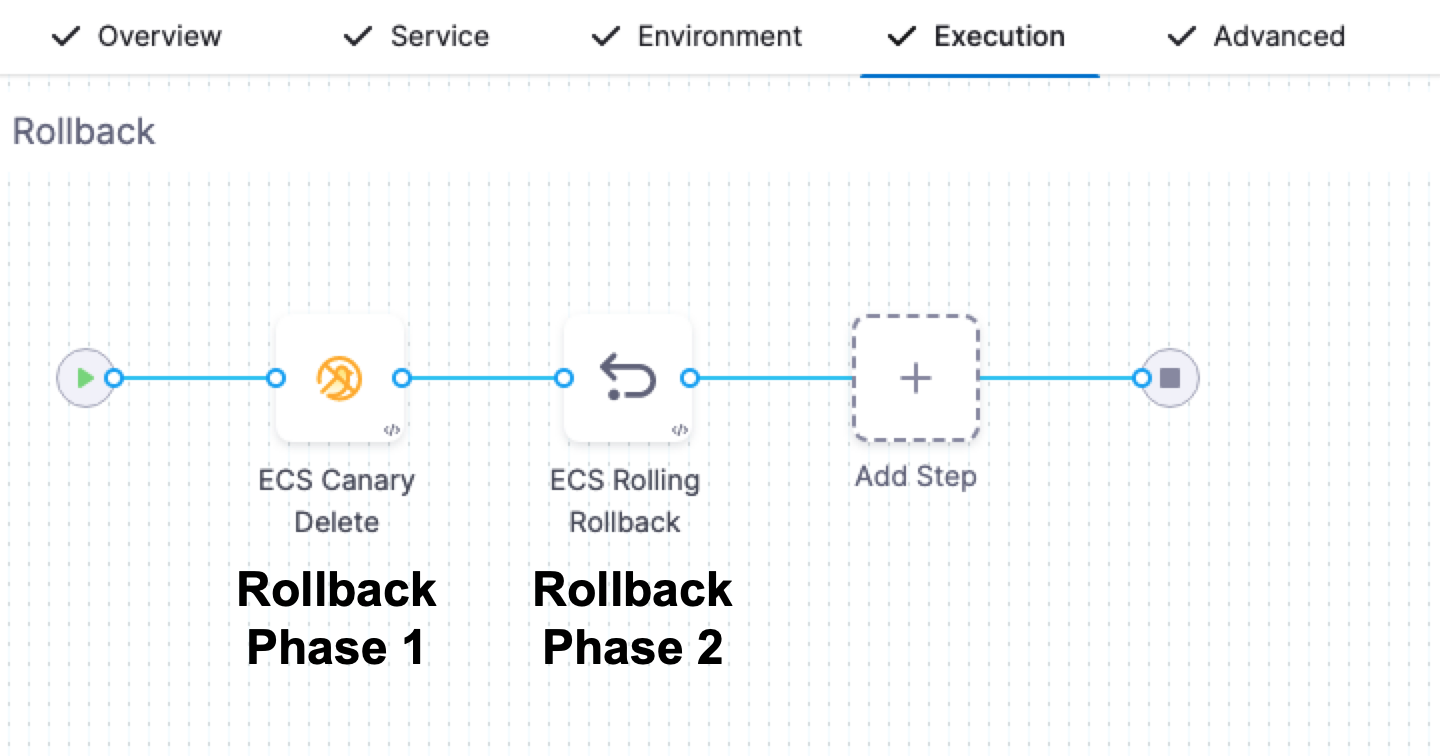
Phases are rolled back in the standard, reverse order. For example, in a 2-phase deployment with 2 rollback phases, the order is P1 → P2 → R2 → R1.
Phases are rolled back in this order regardless of whether ECS Service Auto Scaling is used.
How rollback data works with retry strategies
Harness captures rollback data at the beginning of each deployment attempt. This design assumes the production environment is in a stable state from either a successful deployment or a completed rollback.
When you configure retry strategies on ECS deployment steps, each retry attempt captures new rollback data. If a deployment fails and retries without first executing a rollback, the retry captures the state from the failed attempt rather than the last successful deployment.
Example scenario:
| Deployment | Rollback Data Captured | Task Definition Created | Result |
|---|---|---|---|
| Deployment 1 | Empty (first deploy) | 63396 | Success |
| Deployment 2 | 63396 | 63397 | Success |
| Deployment 3 (Retry 1) | 63397 | 63398 | Failed |
| Deployment 3 (Retry 2) | 63398 | 63399 | Failed |
| Rollback | Uses 63398 | — | Rolls back to 63398 instead of 63397 |
In this scenario, the rollback uses task definition 63398 (from the first failed retry) instead of 63397 (the last successful deployment).
Retry behavior by step type:
Idempotent steps handle retries without affecting rollback state:
- Upgrade Container scales containers up and down. Retries do not modify stored rollback data.
Set up steps to capture rollback data, and use stage-level rollback instead of step-level retries:
- ECS Service Setup prepares rollback data at the start of deployment.
- ECS Blue Green Create Service captures the current service state for rollback.
Recommended failure strategy configuration:
For setup steps, configure StageRollback as the failure action instead of step-level retries. This ensures the rollback uses the correct pre-deployment state.
If your pipeline requires retries for transient failures, configure StageRollback as the onRetryFailure action. This way, if all retries are exhausted, the pipeline rolls back from the original stable state rather than a failed retry state.
ECS Run Task step
In addition to deploying tasks as part of your standard ECS deployment, you can use the ECS Run Task step to run individual tasks separately as a step in your ECS stage.
The ECS Run Task step is available in all ECS strategy types.
An example of when you run a task separately is a one-time or periodic batch job that does not need to keep running or restart when it finishes.
For more information, see Running tasks from AWS.
- In your Harness ECS stage, in Execution, click Add Step, and then click ECS Run Task. Using the ECS Run Task step is the same as running a task in the AWS console.
- In ECS Run Task Definition, add a Task Definition to run. Here's an example:
ipcMode:
executionRoleArn: <ecsInstanceRole Role ARN>
containerDefinitions:
  - dnsSearchDomains:
    environmentFiles:
    entryPoint:
    portMappings:
      - hostPort: 80
        protocol: tcp
        containerPort: 80
    command:
    linuxParameters:
    cpu: 0
    environment: []
    resourceRequirements:
    ulimits:
    dnsServers:
    mountPoints: []
    workingDirectory:
    secrets:
    dockerSecurityOptions:
    memory:
    memoryReservation: 128
    volumesFrom: []
    stopTimeout:
    image: <+artifacts.primary.image>
    startTimeout:
    firelensConfiguration:
    dependsOn:
    disableNetworking:
    interactive:
    healthCheck:
    essential: true
    links:
    hostname:
    extraHosts:
    pseudoTerminal:
    user:
    readonlyRootFilesystem:
    dockerLabels:
    systemControls:
    privileged:
    name: nginx
placementConstraints: []
memory: "512"
taskRoleArn: <ecsInstanceRole Role ARN>
family: fargate-task-definition
pidMode:
requiresCompatibilities:
  - FARGATE
networkMode: awsvpc
runtimePlatform:
cpu: "256"
inferenceAccelerators:
proxyConfiguration:
volumes: []
- In ECS Run Task Request Definition, you can customize how Amazon ECS places tasks using placement constraints and placement strategies just like using a Capacity provider strategy in the ECS console.
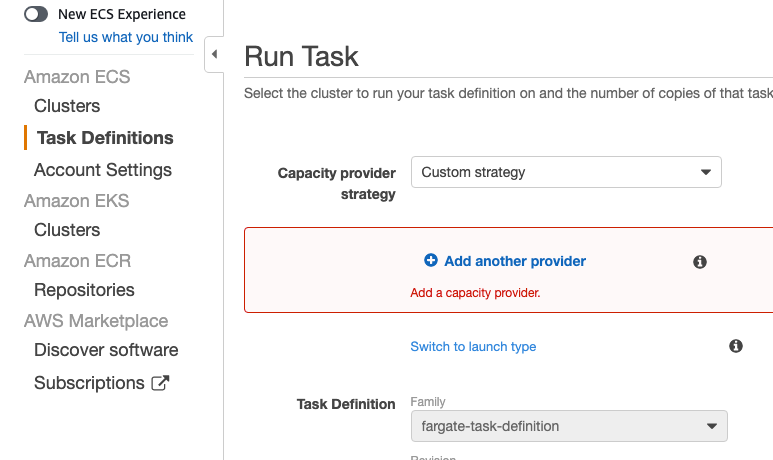
You can add the Task Definition and Task Request Definition using remote repos or the Harness File Store.
Here's an example (replace <Security Group Id> and <Subnet Id> with the Ids from the ECS instances for your target ECS cluster):
launchType: FARGATE
networkConfiguration:
  awsvpcConfiguration:
    securityGroups:
      - <Security Group Id>
    subnets:
      - <Subnet Id>
    assignPublicIp: ENABLED
count: 1
For information on running ECS Tasks, go to the AWS docs Run a standalone task in the classic Amazon ECS console, RunTask, and Amazon ECS capacity providers.
Skip Steady-State Check
If you do not select this option, Harness will not check to see if the task was triggered.
If you do select this option, Harness will poll the ECS task to see if it triggered successfully.
Support for ECS Deployments with AWS Service Mesh Configuration
Harness ECS Deployments supports deploying of ECS services with AWS Service Discovery.
AWS Service Discovery is a cloud service provided by AWS that makes it easy for microservices applications to discover and communicate with each other. It enables you to manage and discover the addresses of the services within your microservices application without the need for hard-coded IP addresses or hostnames.
You can use AWS Service Discovery as part of the ECS service definition in Harness.
Here are the steps required to configure a Service Discovery and deploy:
- Create a namespace in AWS Cloud Map.
- Create a Service Discovery with the above namespace and generate the ARN.
- Provide the Service Discovery ARN in the service definition.
launchType: FARGATE
serviceName: ecs-svc-discovery
desiredCount: 1
networkConfiguration:
  awsvpcConfiguration:
    securityGroups:
    - sg-afc848e7
    subnets:
    - subnet-9757dc98
    assignPublicIp: ENABLED
deploymentConfiguration:
  maximumPercent: 100
  minimumHealthyPercent: 0
**serviceRegistries:**
  ** - registryArn: arn:aws:servicediscovery:us-east-1:1234567890:service/srv-xeycgshb42ydmokf**
With the above Service Registry ARN specified in the ECS service definition, deployed services are marked with Service Discovery.
Support for circuit breaker configurations
Circuit breaker configuration can be applied to Harness ECS rolling and canary deployments only.
Harness ECS rolling and canary deployments support AWS ECS circuit breaker configurations.
AWS ECS circuit breaker logic determines whether the deployment will fail if the service can't reach steady state. During deployment, the failure state is identified based on a threshold. Circuit breaker creates the threshold configuration with the desired instance count configuration internally.
Circuit breaker configuration is implemented in the Harness ECS service Service Definition.
Circuit breaker configuration example
See the deployment-configuration setting in the following example:
"service": {
        "serviceArn": "arn:aws:ecs:us-east-1:1234567890:service/servicediscoverytest/ecs-service-discovery",
        "serviceName": "ecs-service-discovery",
        "clusterArn": "arn:aws:ecs:us-east-1:1234567890:cluster/servicediscoverytest",
        "loadBalancers": [],
        "serviceRegistries": [
            {
                "registryArn": "arn:aws:servicediscovery:us-east-1:1234567890:service/srv-xbnxncsqdovyuztm"
            }
        ],
        "status": "ACTIVE",
        "desiredCount": 1,
        "runningCount": 0,
        "pendingCount": 0,
        "launchType": "FARGATE",
        "platformVersion": "LATEST",
        "platformFamily": "Linux",
        "taskDefinition": "arn:aws:ecs:us-east-1:1234567890:task-definition/tutorial-task-def:1",
        "deploymentConfiguration": {
            "deploymentCircuitBreaker": {
                "enable": false,
                "rollback": false
            },
            "maximumPercent": 200,
            "minimumHealthyPercent": 100
        },
        "deployments": [
            {
                "id": "ecs-svc/0410909316449095426",
                "status": "PRIMARY",
                "taskDefinition": "arn:aws:ecs:us-east-1:1234567890:task-definition/tutorial-task-def:1",
                "desiredCount": 1,
                "deployment-configuration": "deploymentCircuitBreaker={enable=true,rollback=true}" ,
                "pendingCount": 0,
                "runningCount": 0,
...
Harness deploys the tasks in the above ECS service definition containing the circuit breaker configuration. Once deployed, the circuit breaker is activated.
During failure scenarios, ECS circuit breaker performs a rollback automatically based on the threshold configuration.
Overrides
Harness supports Harness ECS service configuration overrides to assist in managing different ECS configuration files for different environments, infrastrctures, etc. With overrides, you can override the service configuration and Harness will fetch the file and compute the variables at runtime when the service is deployed into a given environment, infrastructure definition pair.
You can override the:
- Task definition
- Service definition
- Scaling policy
- Scalable target
- Scheduled action
These overrides can be configured at the Harness environment's service-specific override level, as well as at the environment infrastructure definition level.
Attaching CloudWatch alarms to scaling policies
To attach your AWS CloudWatch alarms to a scaling policy, simply add a Harness Shell Script step with the following script after the deployment step in your stage (placeholders are in UPPERCASE):
// to fetch scaling policy arn, run this

scaling_policy=$(aws application-autoscaling describe-scaling-policies --service-namespace ecs --resource-id service/${cluster}/${serviceName})

// to attach cloud watch alarm to scaling policy.

aws cloudwatch put-metric-alarm --alarm-name $ALARM_Up --alarm-actions "$policy" --evaluation-periods 1 --comparison-operator GreaterThanOrEqualToThreshold --metric-name CPUUtilization --period 60 --namespace "AWS/ECS" --statistic Average --threshold 80 --unit Percent --dimensions Name=ClusterName,Value=$cluster Name=ServiceName,Value=$serviceName
See also
For frequently asked questions about AWS deployments in Harness, go to AWS deployment FAQs.