Harness CD GitOps tutorial
This topic describes how to use Harness GitOps to deploy services by syncing the Kubernetes manifests in your source repos with your target clusters.
What is GitOps?
GitOps automates Kubernetes-based deployments by syncing declarative specifications (your manifests) with your target environments. In GitOps, Git is the single source of truth for the desired state of a cluster and its applications. GitOps continually converges the target state (cluster) in accordance with the desired state (manifests). This method turns your deployed applications and infrastructures into fully-traceable and fully-versioned artifacts.
You set up Harness GitOps by installing a GitOps Agent in your environment. Next, you define how to manage the desired and target state in a GitOps Application in Harness. The GitOps Agent performs the sync operations defined in the Application and reacts to events in the source and target states.
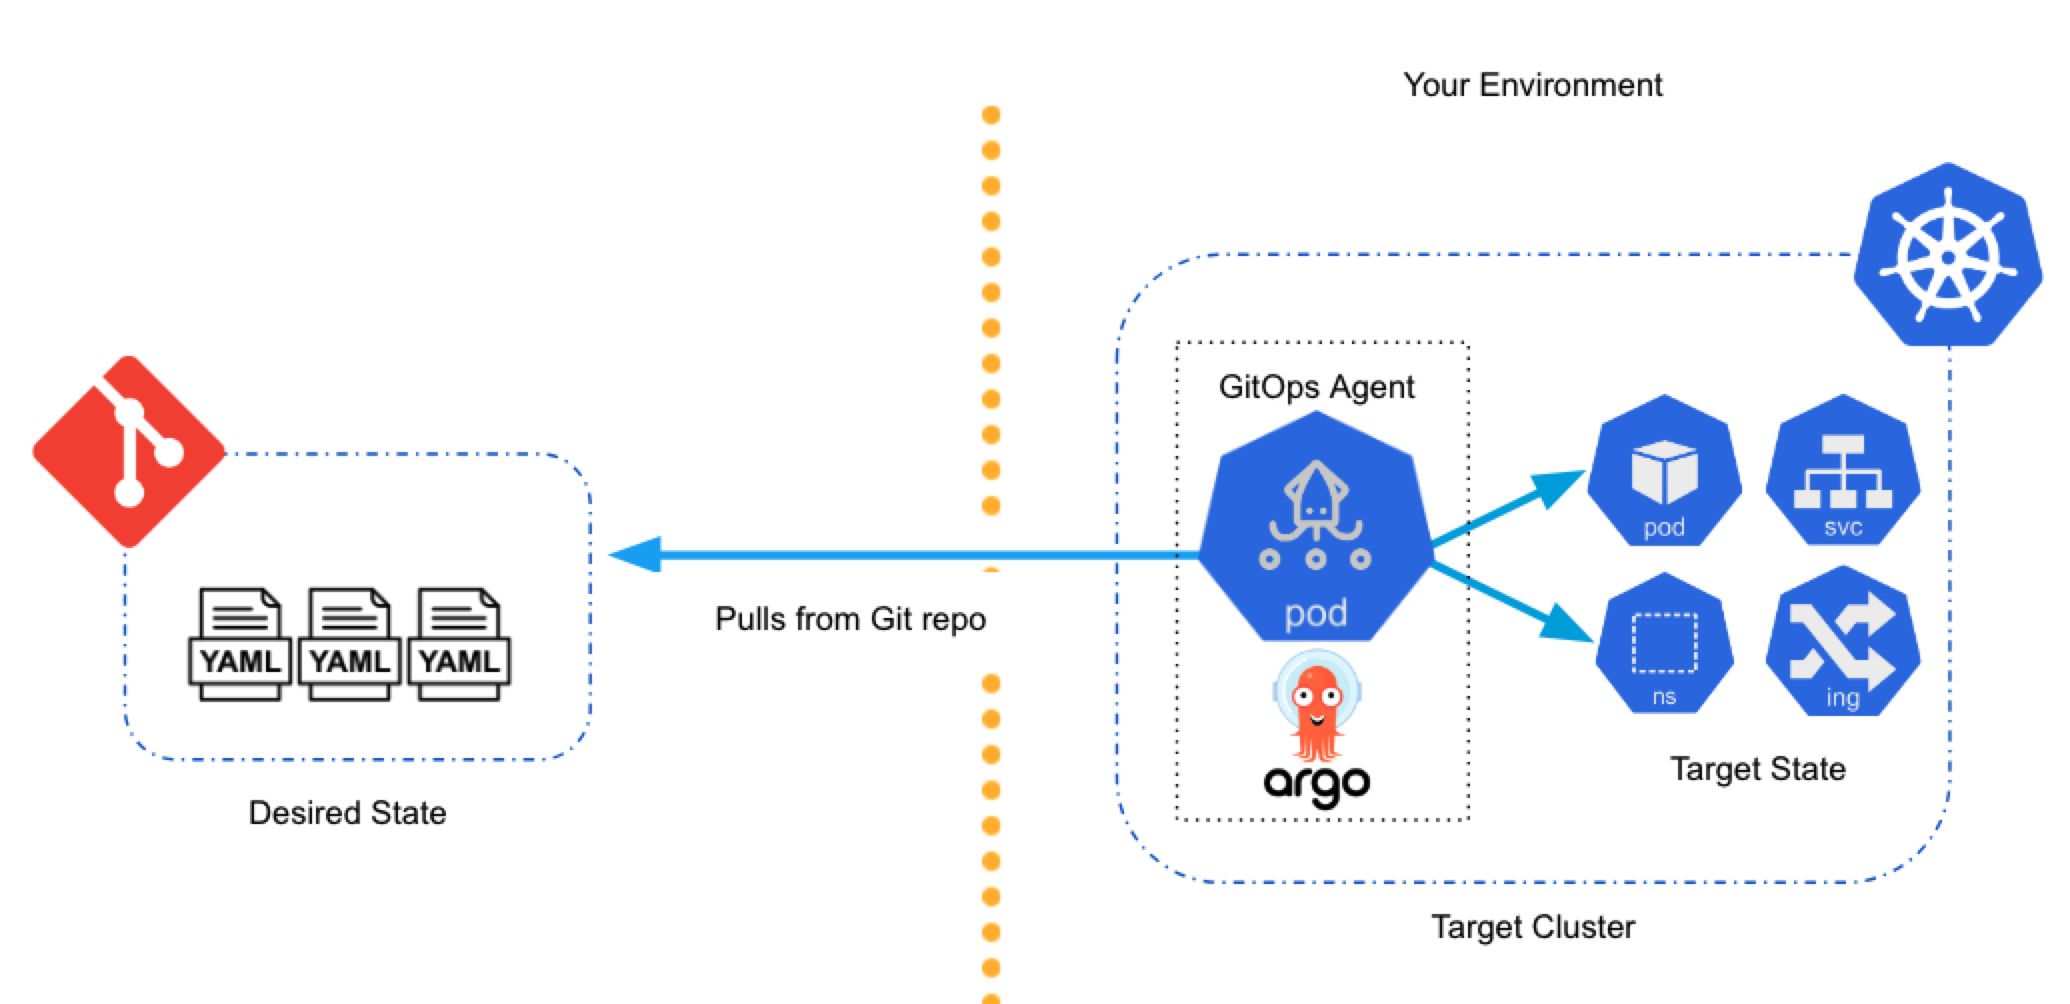
This example shows you how to set up Harness GitOps using one of your Kubernetes clusters.
Objectives
You'll learn how to:
- Set up a Harness GitOps Cluster to points to the target cluster.
- Set up a Harness GitOps Repository that points to the source manifest repo.
- Set up a Harness GitOps Application that collects the Agent Cluster, and Repository, and defines the sync policy for GitOps.
- Perform GitOps using your Harness GitOps Application.
For a quick summary of Harness GitOps concepts, see Harness GitOps Basics.
Before you begin
-
(Optional) GitHub and DockerHub account: this example uses a publicly available manifest in GitHub and a public Docker image. You will be using anonymous credentials for connection, but you can use your own credentials if you like.
We'll be using public manifests from https://github.com/argoproj/argocd-example-apps. -
Target Kubernetes cluster: you can use a cluster in any cloud platform. Harness makes a platform-agnostic connection to the cluster.
-
Set up your Kubernetes Cluster: you'll need a target Kubernetes cluster for the Harness GitOps Agent and deployment. Ensure your cluster meets the following requirements:
- Number of nodes: 2.
- vCPUs, Memory, Disk Size: the Harness GitOps Agent only needs 1vCPUs, 2GB memory, 20GB disk, but you'll also be running Kubernetes and the deployed service.
A cluster with 2vCPUs, 8GB memory, 50GB disk is sufficient. In GKE, the e2-standard-2 machine type is enough for this example. - Networking: outbound HTTPS for the Harness connection to app.harness.io, github.com, and hub.docker.com. Allow TCP port 22 for SSH.
- A Kubernetes service account with the permissions need to create your desired state. The Harness GitOps Agent requires either
cluster-adminor admin permissions in the target namespace:- Create Deployment, Service, StatefulSet, Network Policy, Service Account, Role, ClusterRole, RoleBinding, ClusterRoleBinding, ConfigMap, Secret.
- Permission to apply CustomResourceDefinition.
For more information, see User-Facing Roles from Kubernetes.
GitOps entities can be created at account, organization, and project levels. The GitOps Agent is needed to create other entities. A GitOps Agent associated with an account has the authority to create and control entities at all levels. However, an organization-level Agent can manage entities within the organization and its projects and a project-level Agent can only manage entities at a project level.
Step 1: Add a Harness GitOps agent
A Harness GitOps Agent is a worker process that runs in your environment and performs GitOps tasks.
You need to set up an Agent before you can set up a Cluster, Repository, or Application, as the Agent is selected in all three of these.
Typically, you install the Agent in the target cluster, but you can install it any cluster and it can connect to remote clusters using the credentials you provide.
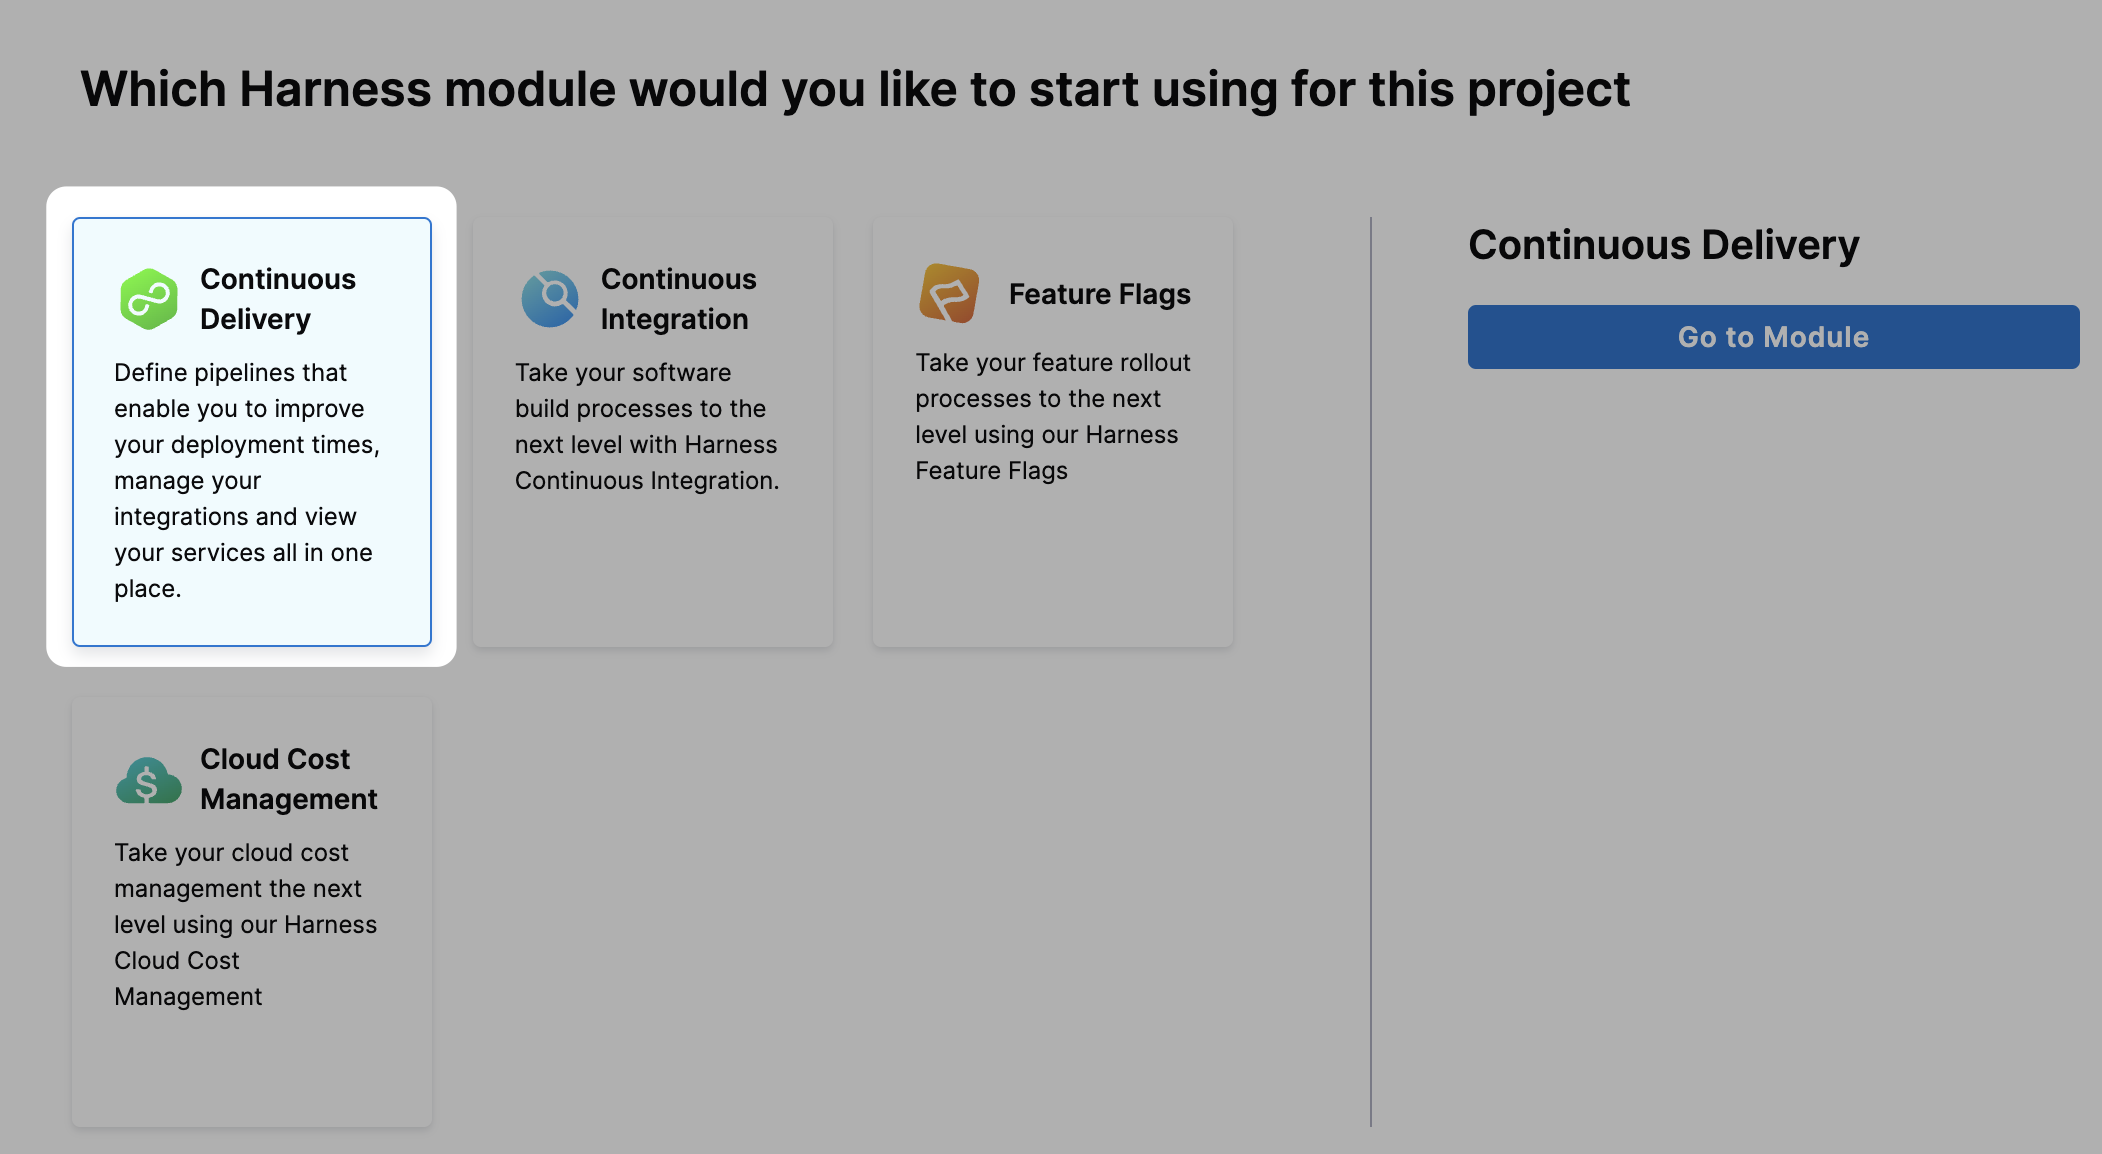
Ensure your Harness Project has the Continuous Delivery module enabled.
-
In your Harness project, select GitOps.
The Harness GitOps Overview, Applications, and Settings appear. If this is the first time GitOps has been set up in the Project, the Applications section and the dashboards in the Overview section will be empty.
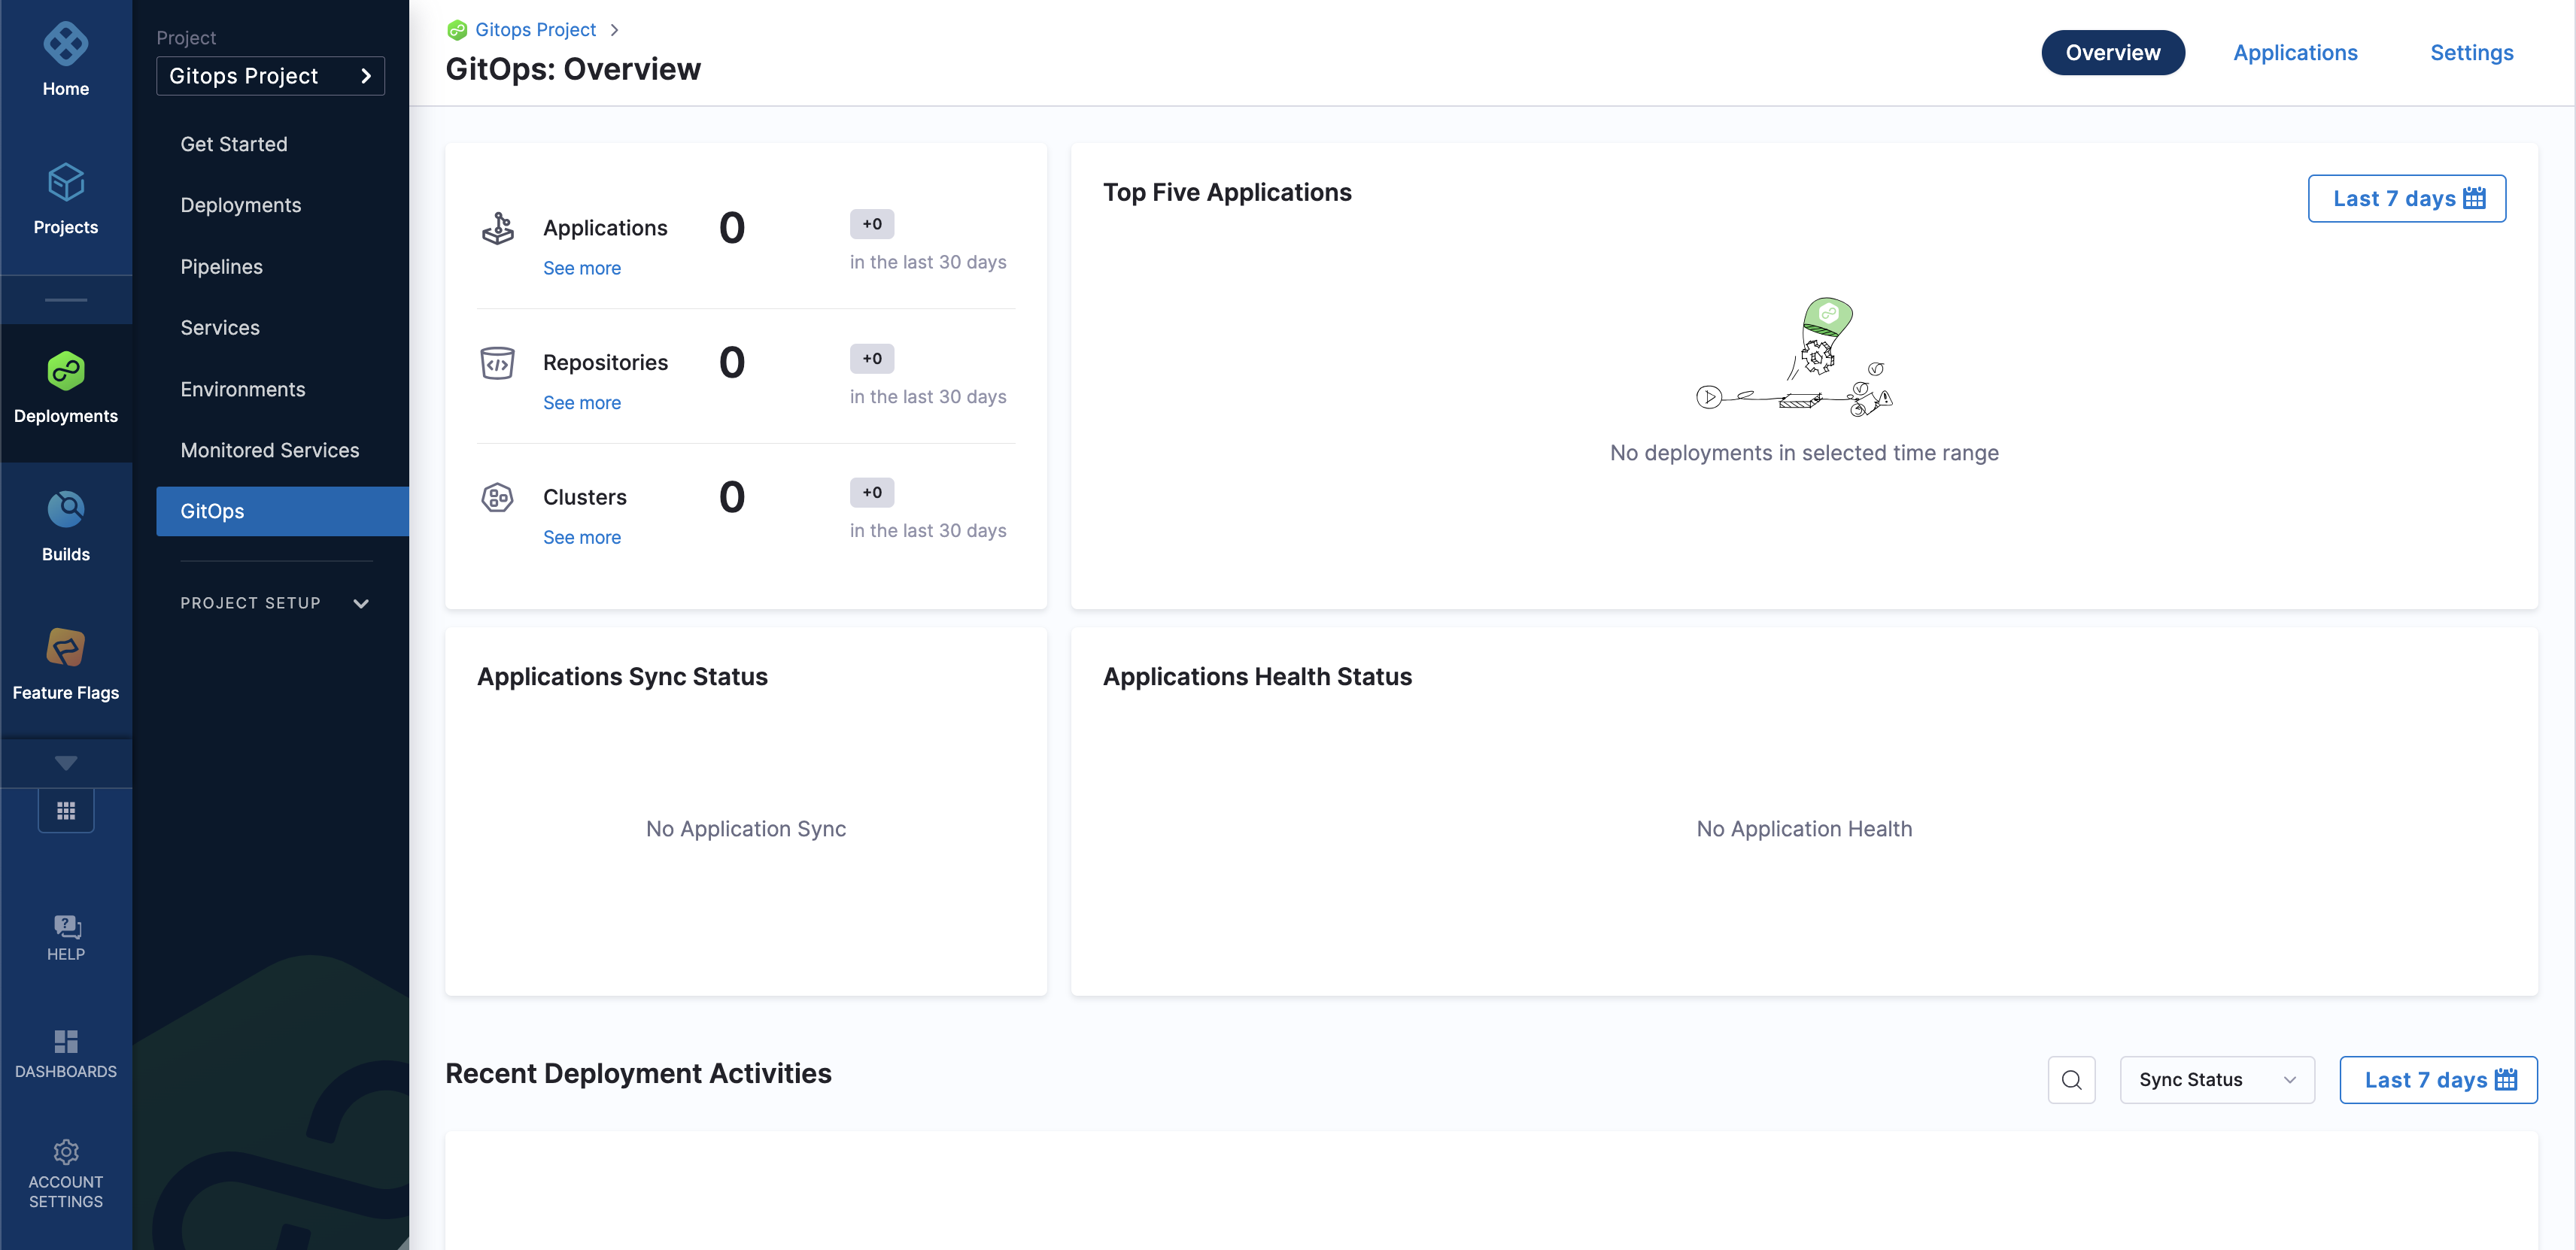
All entities other than Applications are in Settings.
-
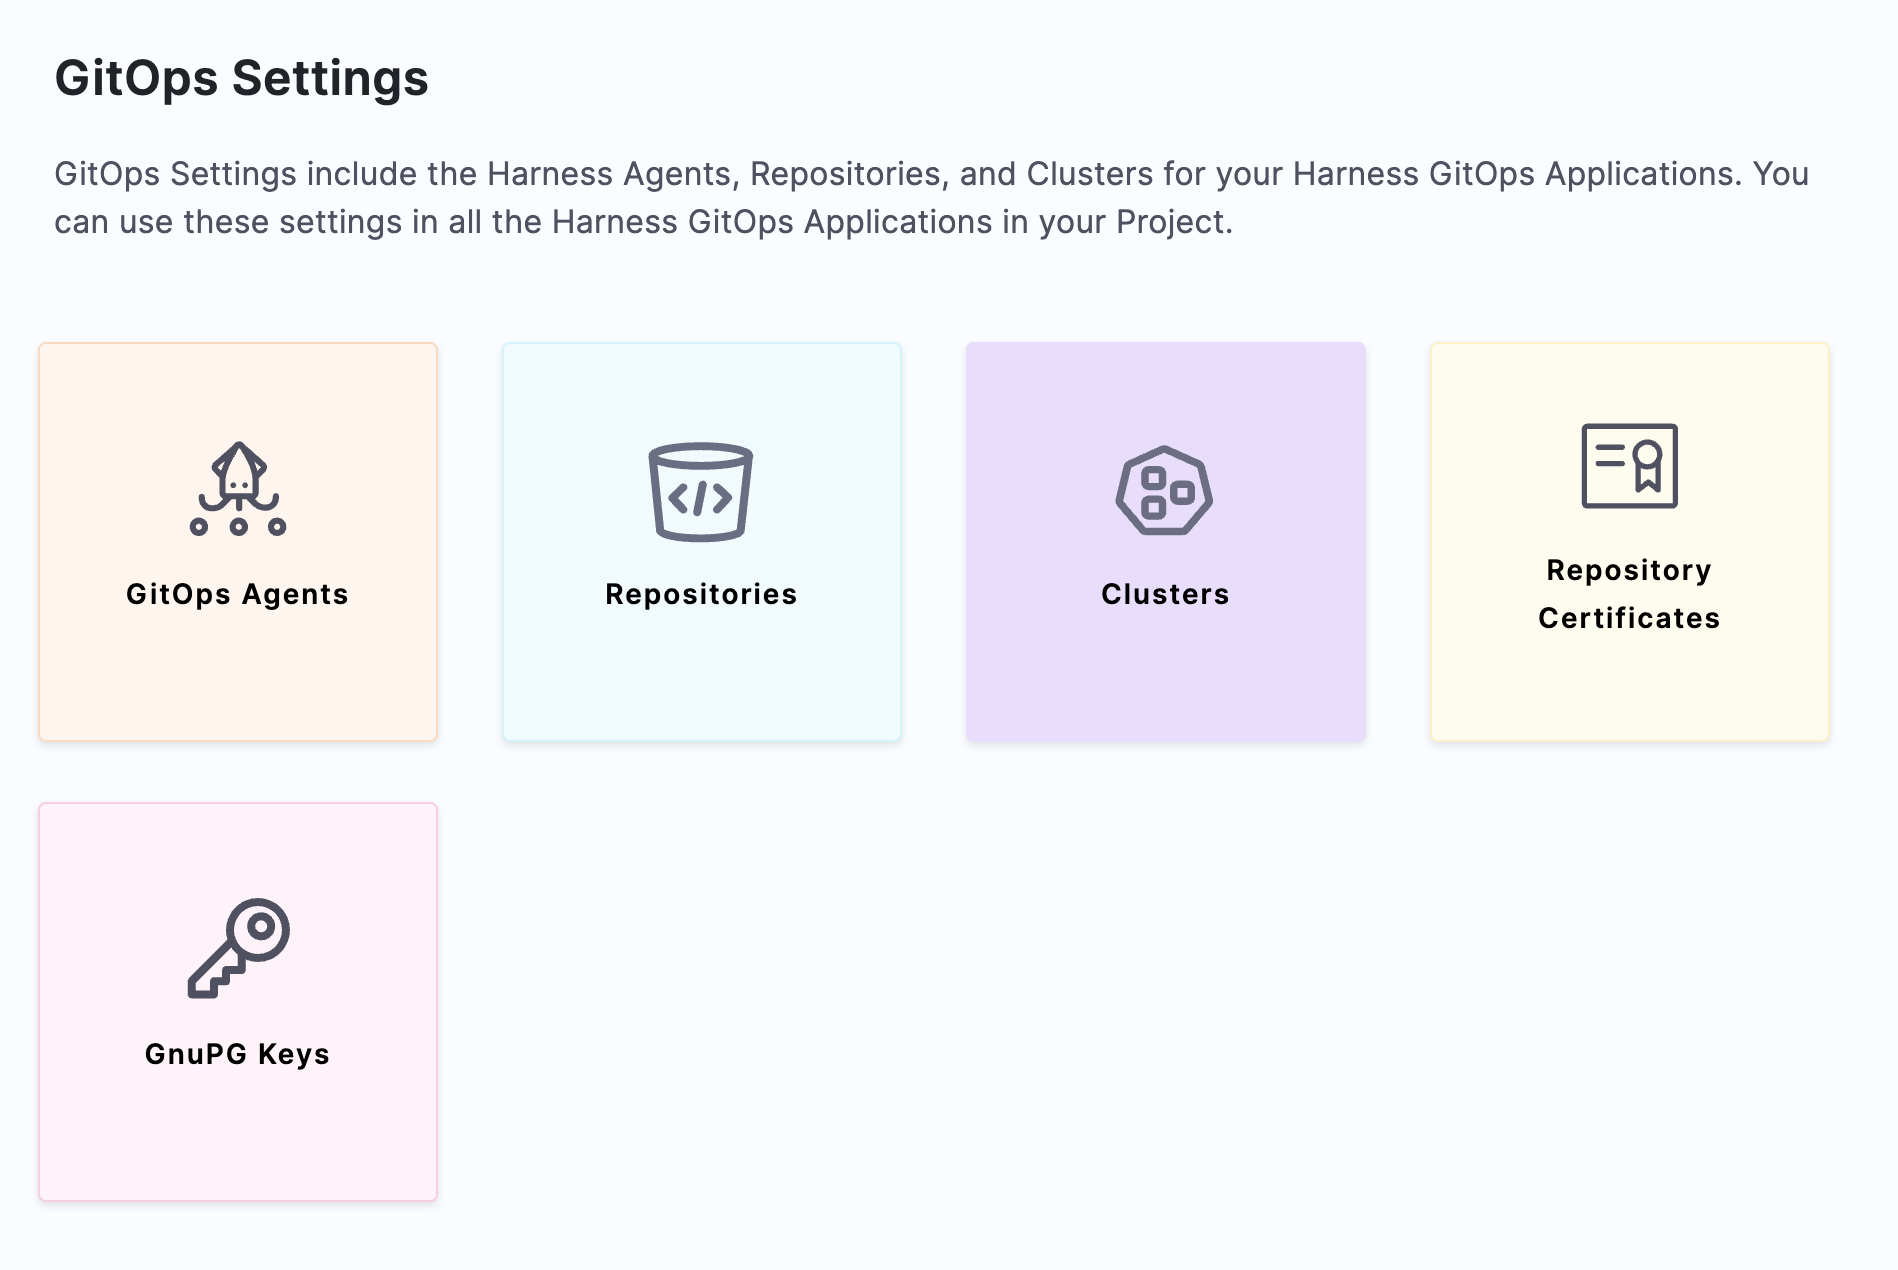
Select Settings.
-
Select GitOps Agents.
-
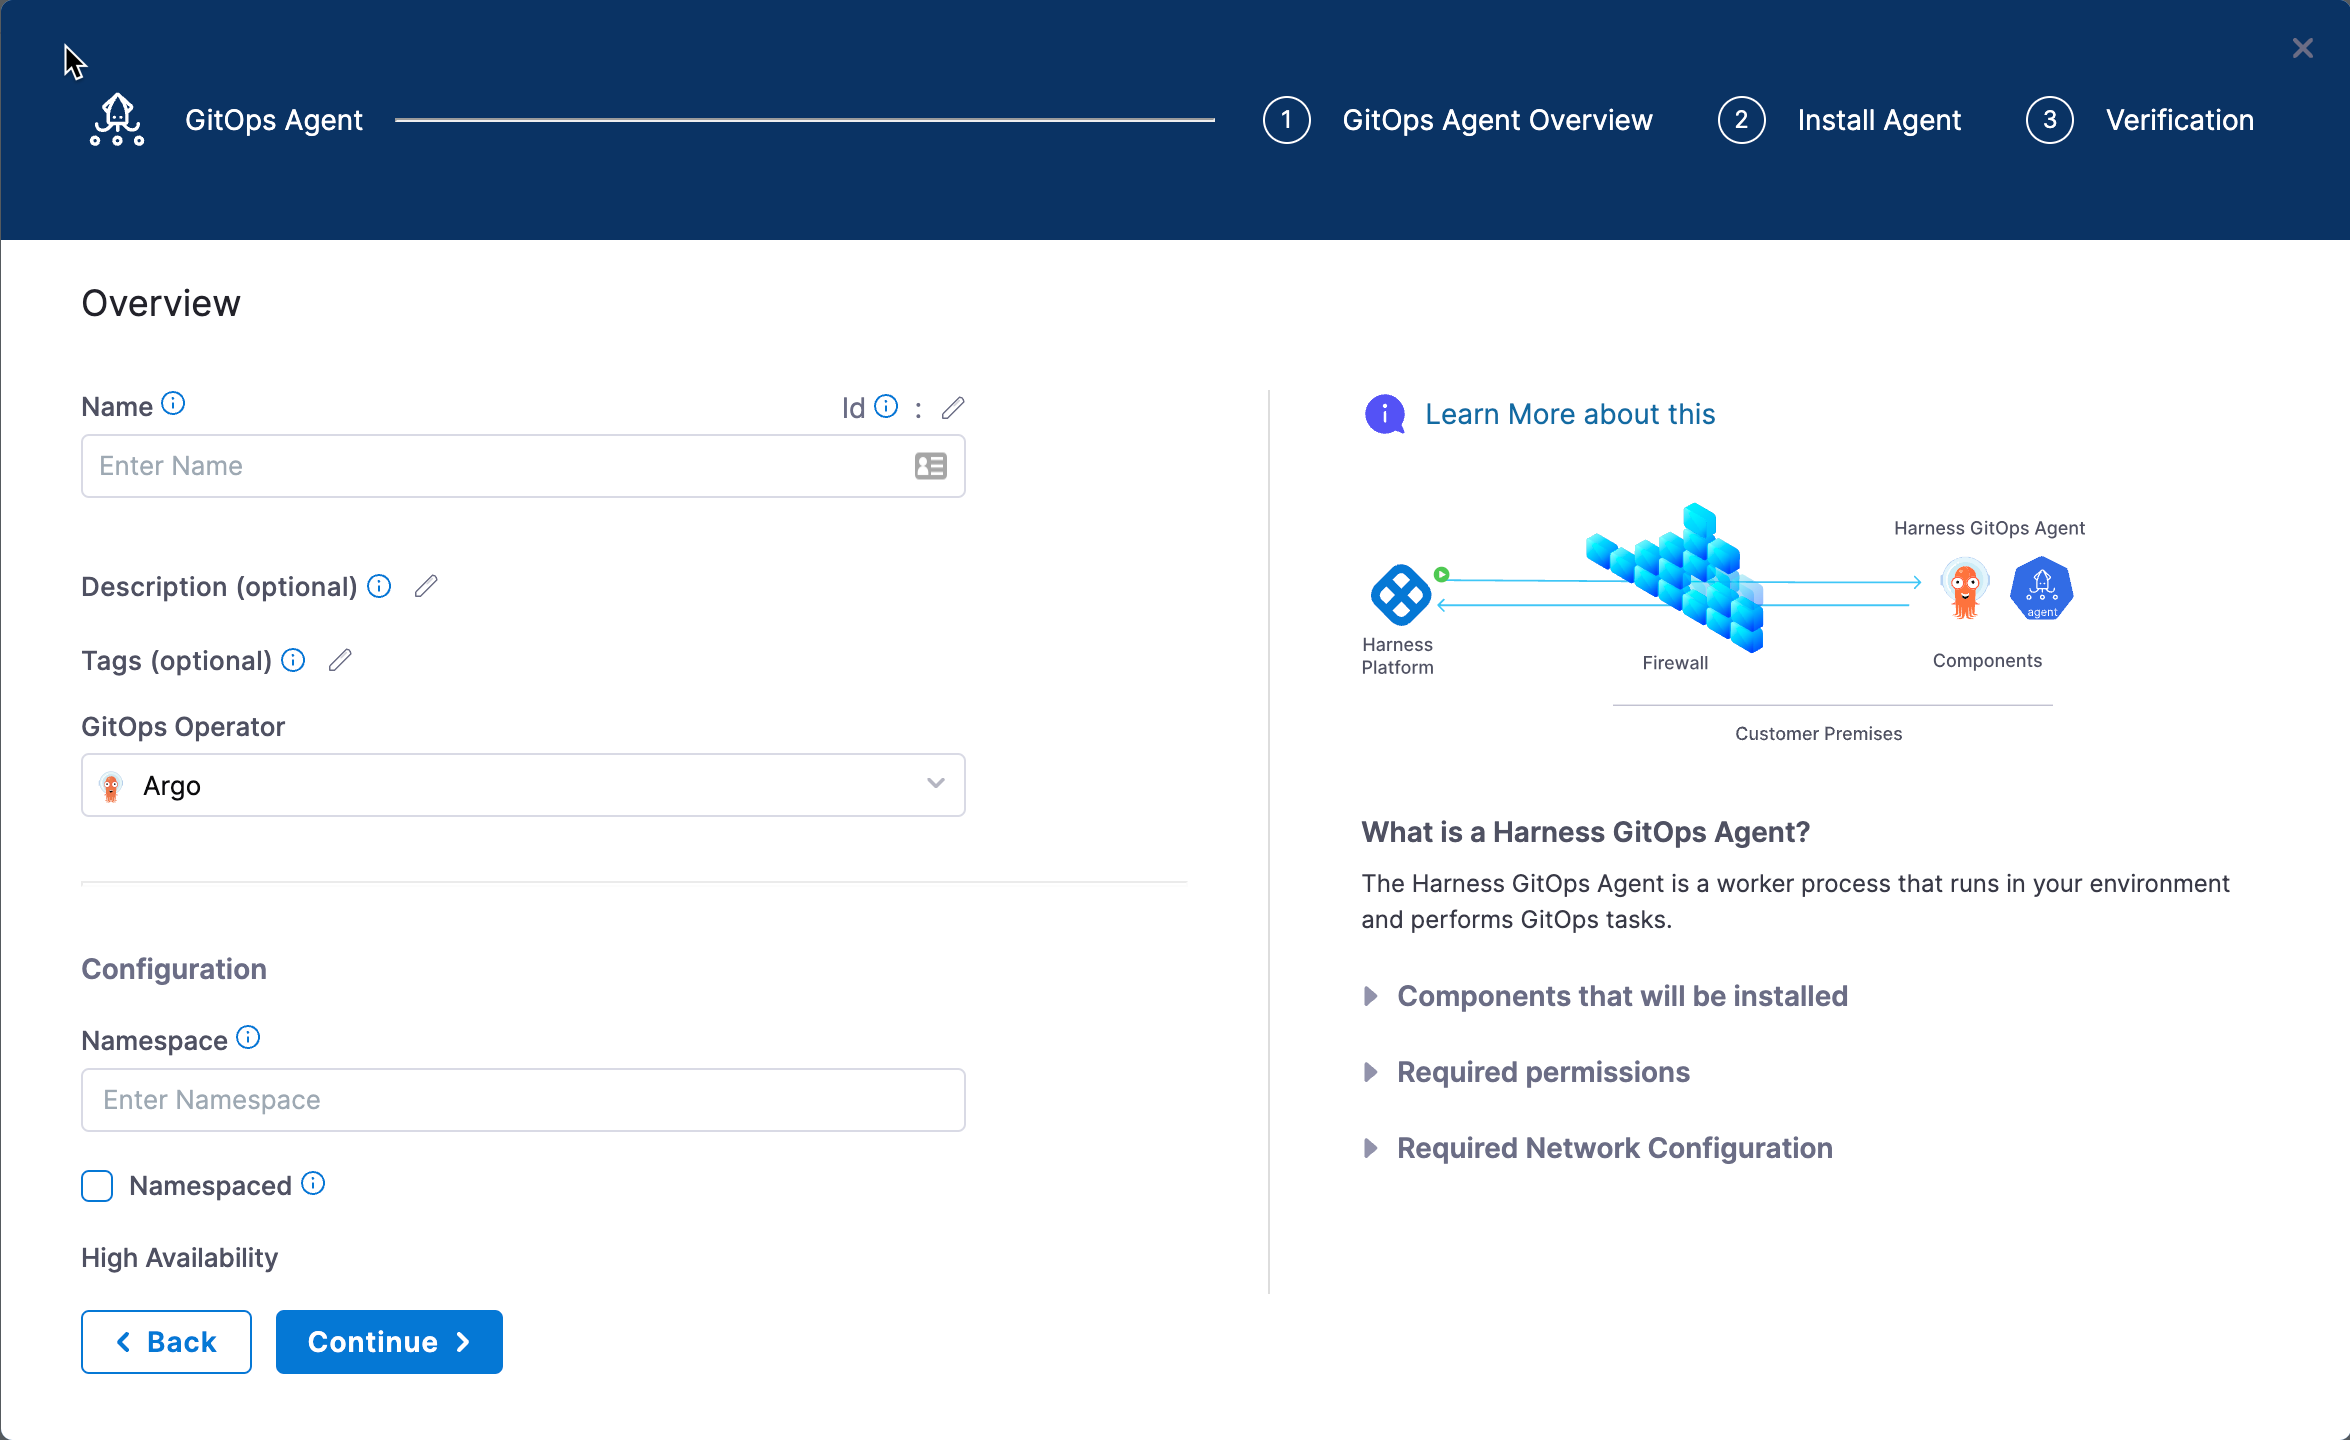
Select New GitOps Agent. The Agent creation wizard appears.
You can choose to install a Harness GitOps Agent with or without an existing Argo CD instance.
-
For this example, select No and select Start. If you already have an existing Argo CD instance, create the agent as described in these steps.
-
In Name, enter the name example.
-
Set GitOps Operator to Argo.
importantOperator-based manifest support varies by cluster type:
-
OpenShift clusters: Have Operator Lifecycle Manager (OLM) already built-in, so operator-based manifests are supported out of the box
-
Vanilla Kubernetes clusters: Require manual setup of OLM, kubectl-operator plugin, and other CRDs before using operator-based manifests
Recommendation: For vanilla Kubernetes clusters, we recommend using the Helm Chart or Kubernetes YAML manifest options instead of operator-based manifests.
-
-
Set Namespace to the namespace where you want to install the Harness GitOps Agent. Typically, this is the target namespace for your deployment. For this example, we use default.
-
Select Continue. The Review YAML settings appear.
This is the manifest YAML for the Harness GitOps Agent. You will download this YAML file and run it in your Harness GitOps Agent cluster.
-
Switch the configuration type from Helm Chart to YAML and select Download YAML. You can also review the contents of the YAML by clicking the arrow next to gitops-agent.yml.
-
Open a terminal and navigate to the folder where you downloaded the YAML file.
-
In the same terminal, log into the Kubernetes cluster where you want to install the Agent.
For example, here's a typical GKE login:
gcloud container clusters get-credentials <cluster_name> --zone us-central1-c --project <project_name>
- Run the following command to apply the YAML file you downloaded (in this example,
defaultwas the namespace entered in the Namespace setting):
kubectl apply -f gitops-agent.yaml -n default
In this output example you can see all of the Harness GitOps objects created in Kubernetes:
% kubectl apply -f harness-gitops-agent.yaml -n default
 networkpolicy.networking.k8s.io/argocd-application-controller created
 networkpolicy.networking.k8s.io/argocd-applicationset-controller created
 networkpolicy.networking.k8s.io/argocd-repo-server created
 networkpolicy.networking.k8s.io/argocd-redis created
 serviceaccount/argocd-application-controller created
 serviceaccount/argocd-applicationset-controller created
 serviceaccount/argocd-repo-server created
 serviceaccount/argocd-redis created
 serviceaccount/gitops-agent created
 serviceaccount/gitops-agent-upgrader created
 secret/argocd-secret created
 secret/gitops-agent created
 configmap/argocd-cm created
 configmap/argocd-cmd-params-cm created
 configmap/argocd-gpg-keys-cm created
 configmap/argocd-rbac-cm created
 configmap/argocd-ssh-known-hosts-cm created
 configmap/argocd-tls-certs-cm created
 configmap/gitops-agent created
 configmap/gitops-agent-upgrader created
 customresourcedefinition.apiextensions.k8s.io/applications.argoproj.io configured
 customresourcedefinition.apiextensions.k8s.io/applicationsets.argoproj.io configured
 customresourcedefinition.apiextensions.k8s.io/appprojects.argoproj.io configured
 clusterrole.rbac.authorization.k8s.io/argocd-application-controller-default created
 clusterrole.rbac.authorization.k8s.io/argocd-repo-server-default created
 clusterrole.rbac.authorization.k8s.io/example-agent created
 clusterrolebinding.rbac.authorization.k8s.io/argocd-application-controller-default created
 clusterrolebinding.rbac.authorization.k8s.io/argocd-repo-server-default created
 clusterrolebinding.rbac.authorization.k8s.io/example-agent created
 role.rbac.authorization.k8s.io/argocd-application-controller created
 role.rbac.authorization.k8s.io/argocd-applicationset-controller created
 role.rbac.authorization.k8s.io/argocd-repo-server created
 role.rbac.authorization.k8s.io/argocd-server created
 role.rbac.authorization.k8s.io/gitops-agent created
 role.rbac.authorization.k8s.io/gitops-agent-upgrader created
 rolebinding.rbac.authorization.k8s.io/argocd-application-controller created
 rolebinding.rbac.authorization.k8s.io/argocd-applicationset-controller created
 rolebinding.rbac.authorization.k8s.io/argocd-repo-server created
 rolebinding.rbac.authorization.k8s.io/argocd-server created
 rolebinding.rbac.authorization.k8s.io/gitops-agent created
 rolebinding.rbac.authorization.k8s.io/gitops-agent-upgrader created
 service/argocd-applicationset-controller-metrics created
 service/argocd-applicationset-controller created
 service/argocd-repo-server-metrics created
 service/argocd-repo-server created
 service/argocd-server created
 service/argocd-redis created
 deployment.apps/argocd-applicationset-controller created
 deployment.apps/argocd-repo-server created
 deployment.apps/argocd-server created
 deployment.apps/argocd-redis created
 deployment.apps/gitops-agent created
 statefulset.apps/argocd-application-controller created
 cronjob.batch/gitops-agent-upgrader created
 ingress.networking.k8s.io/argocd-applicationset-controller created
- Back in Harness, select Continue.
- Harness indicates that the Harness GitOps Agents is registered.
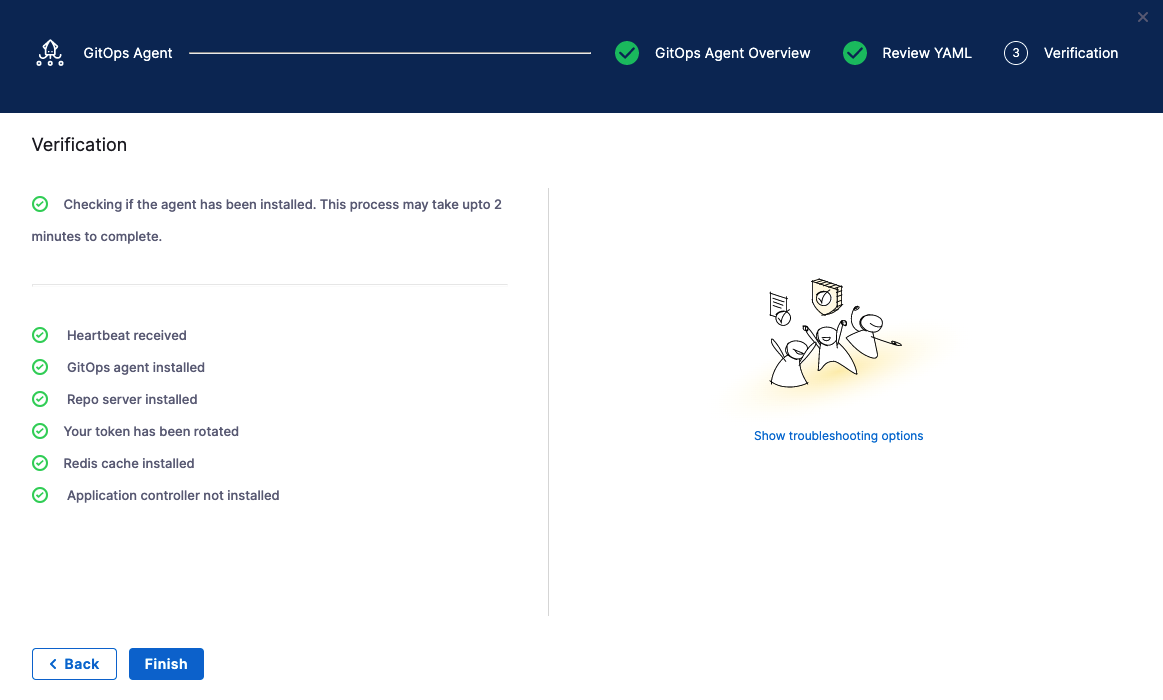 16. Select Finish.
The Agents list shows the new Agent as Healthy and Connected.

In your cloud platform Kubernetes cluster you can see the agent workload:
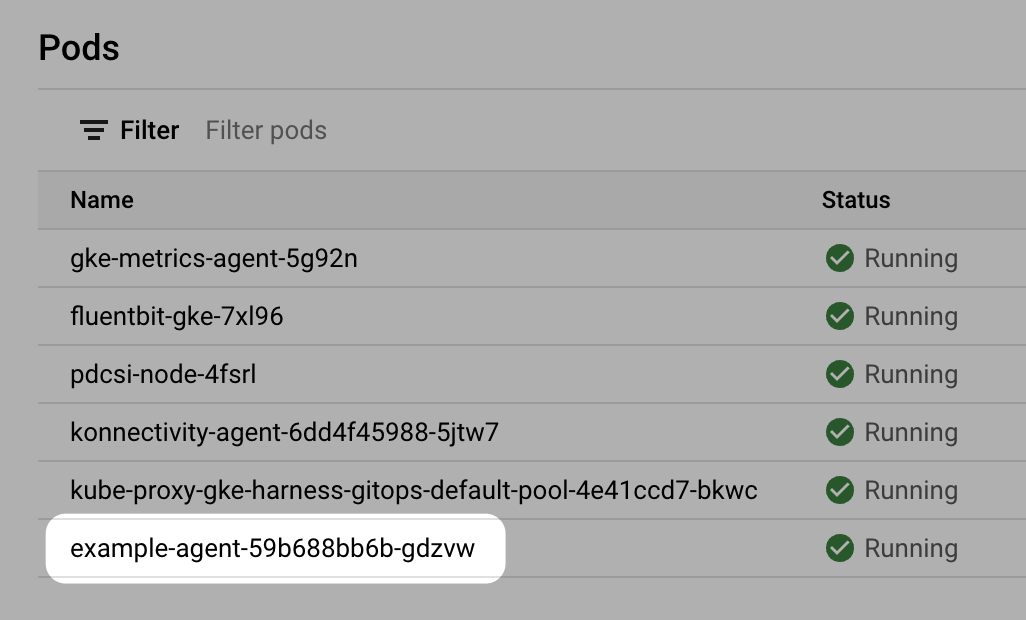
Now that you have the Harness GitOps Agent installed, running, and registered, you can configure the remaining components.
Installing mTLS GitOps Agent
For installing GitOps Agent to run in mTLS mode, Harness uses GitOps Agent Helm charts. For this, you must download the overrides.yaml file from the Harness UI.
To install Harness GitOps Agent with mTLS enabled, make sure that you've met the following conditions:
- Download the
overrides.yamlfile from the Harness UI. - Configure mTLS for Harness DelegateDelegate mTLS support
- Keep the following items ready:
- CA certificate.
- Client certificate and key created using the previously created CA certificate.
- mTLS enabled for your account and host to be used for GitOps Agent connection
<YOUR_FQDN>.agent.harness.io.
Follow the steps below to install mTLS GitOps Agent
- Add GitOps Agent Helm chart repository to your Helm:
helm repo add gitops-agent https://harness.github.io/gitops-helm/ - Using the
overrides.yamlfile, install GitOps Agent with mTLS enabled:helm install argocd gitops-agent/gitops-helm --values overrides.yaml --namespace <NAMESPACE> \
--set harness.configMap.http.agentHttpTarget=https://<FQDN>.agent.harness.io/gitops \
--set harness.gitopsServerHost=https://<FQDN>.agent.harness.io/gitops \
--set harness.configMap.http.mtls=true \
--set harness.secrets.mtlsClientCert=<B64ENCODED_CLIENT_CERT> \
--set harness.secrets.mtlsClientKey=<B64ENCODED_CLIEN_KEY>B64ENCODED_CLIENT_CERT- base64 encoded content of client certificateB64ENCODED_CLIEN_KEY- base64 encoded content of client key
Step 2: Add a Harness GitOps repository
GitOps Repositories store the source manifests you want to sync with destination environments.
In the Harness GitOps Repository setup, you select the Agent to use when synching state and provide the credentials to use when connecting to the Git repository.
- Interactive Guide
- Step-by-Step
We will use a publicly available GitHub repo and manifests located at https://github.com/argoproj/argocd-example-apps/tree/master/guestbook. We'll make an anonymous connection, so no GitHub credentials are required.
-
In your Harness project, select GitOps, and then select Settings.
-
Select Repositories.
-
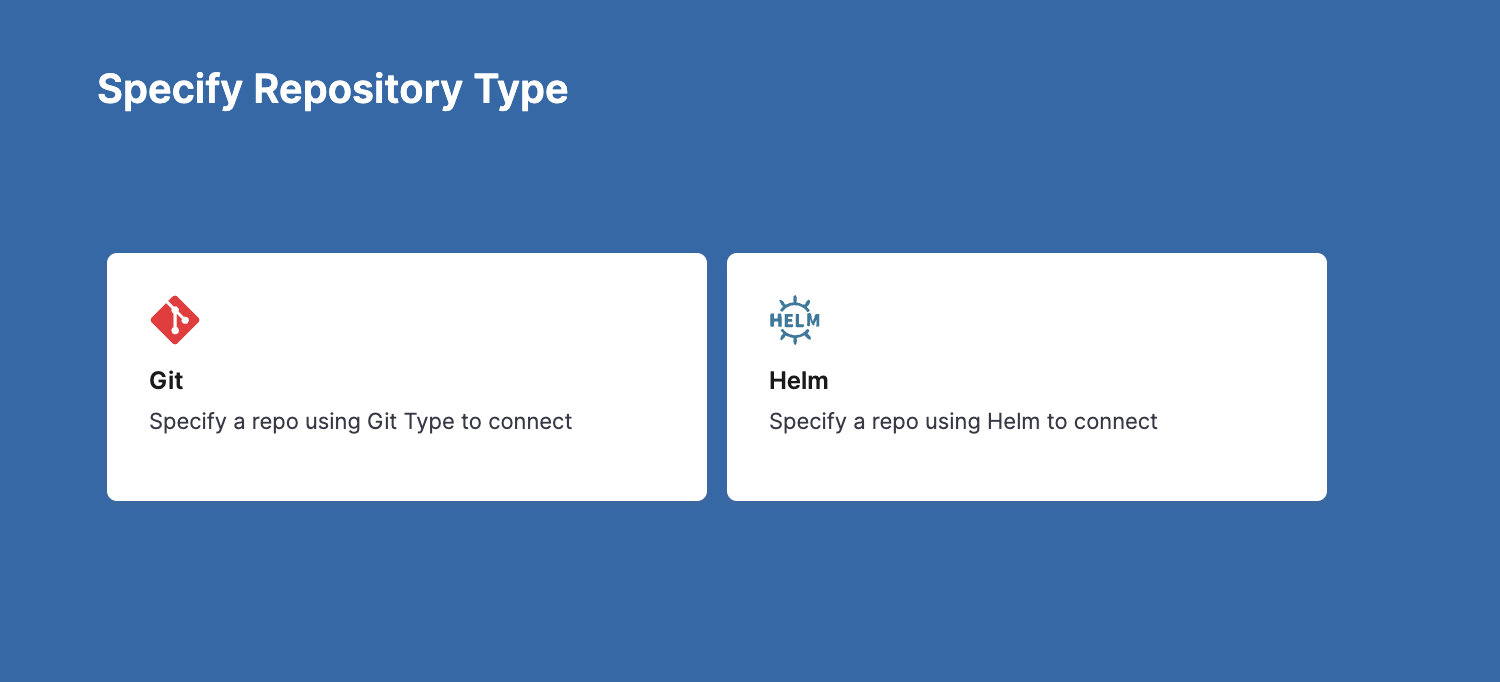
Select New Repository.
-
In Specify Repository Type, select Git.
-
Enter the following:
- In Repository Name, enter guestbook.
- In GitOps Agent, select the agent you just added and select Apply Selected. For this example, we'll make an anonymous connection to a GitHub repo over HTTPS.
- In Repository URL, enter the URL:
https://github.com/argoproj/argocd-example-apps.
-
Select Continue.
-
In Credentials, in Connection Type, select HTTPS.
-
In Authentication, select Anonymous.
-
Select Save & Continue. Harness validates the connection.

If you encounter errors, check that you have the correct repo URL and selected HTTPS.
-
Select Finish. You now have a Harness GitOps Repository added.

Step 3: Add a Harness GitOps cluster
Clusters are the target deployment environments that are synced with the source manifests you add as Harness GitOps Repositories.
In the Harness GitOps Cluster setup, you select the Harness GitOps Agent to use when synching state and provide the credentials to use when connecting to the target cluster.
In this example, we'll connect using the cluster master URL and a Service Account Token for the default namespace.
-
In your Harness project, select GitOps, and then select Settings.
-
Select Clusters, and then select New Cluster.
-
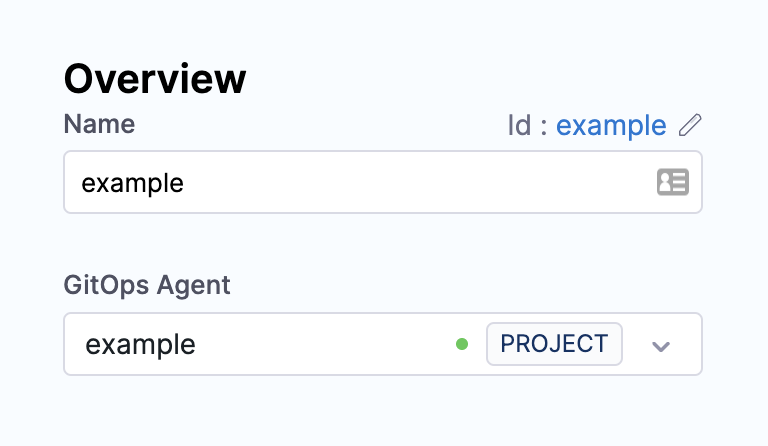
In Name, enter example.
-
In GitOps Agent, select the Agent you added earlier in this example, and then select Continue.
-
In Details, select Use the credentials of a specific Harness GitOps Agent. This Cluster will use the Agent's Kubernetes role permissions for connections.
-
If you want to use Specify Kubernetes Cluster URL and credentials, do the following:
-
In Master URL, enter the master URL for your cluster. You can just log into your cluster and run
kubectl cluster-info. Use the URL listed in the outputKubernetes master is running at. -
In Authentication, select Service Account.
-
In Service Account Token, paste in the Service Account Token for the cluster's default namespace.
To use a Kubernetes Service Account (SA) and token, you will need to either use an existing SA that has cluster-admin or admin permissions in the namespace, or create a new SA and grant it the permissions. This is described in Add a Kubernetes Cluster Connector.
To create a cluster entity using IAM role in Amazon EKS, go to Creating a GitOps cluster with IAM role.
Here's an example of a SA and ClusterRoleBinding with cluster-admin:
apiVersion: rbac.authorization.k8s.io/v1
kind: ServiceAccount
metadata:
  name: harness-service-account
  namespace: default
---
apiVersion: rbac.authorization.k8s.io/v1
kind: ClusterRoleBinding
metadata:
  name: harness-admin
roleRef:
  apiGroup: rbac.authorization.k8s.io
  kind: ClusterRole
  name: cluster-admin
subjects:
- kind: ServiceAccount
  name: harness-service-account
  namespace: default
To get a list of the SAs, run kubectl get serviceAccounts.
Once you have the SA, use the following commands to get its token (replace {SA name} with the Service Account name and {target namespace} with the target namespace name, such as default):
SERVICE_ACCOUNT_NAME={SA name}

NAMESPACE={target namespace}

SECRET_NAME=$(kubectl get sa "${SERVICE_ACCOUNT_NAME}" --namespace "${NAMESPACE}" -o=jsonpath='{.secrets[].name}')

TOKEN=$(kubectl get secret "${SECRET_NAME}" --namespace "${NAMESPACE}" -o=jsonpath='{.data.token}' | base64 -d)

echo $TOKEN
The token output is decoded and ready to be pasted into Harness.
- In Namespace, enter default.
- Select Save & Continue.
Harness validates the connection to the cluster from the Harness GitOps Agent.

In this example, the Agent is running inside the target cluster, but you might use an Agent outside a target cluster in your own scenarios. So long as the Agent you select can connect to the target cluster's master URL, you can add the cluster in Harness GitOps.
Now that you have a Harness GitOps Agent, Repository, and Cluster set up, you're ready to add a Harness GitOps Application.
Step 4: Add a Harness GitOps application
GitOps Applications manage GitOps operations for a given desired state and its live instantiation.
A GitOps Application collects the Repository (what you want to deploy), Cluster (where you want to deploy), and Agent (how you want to deploy). You define these entities and then select them when setting up your Application.
- Interactive Guide
- Step-by-Step
In the Application setup, you will select the Agent, Repository, and Cluster to use when synching state.
-
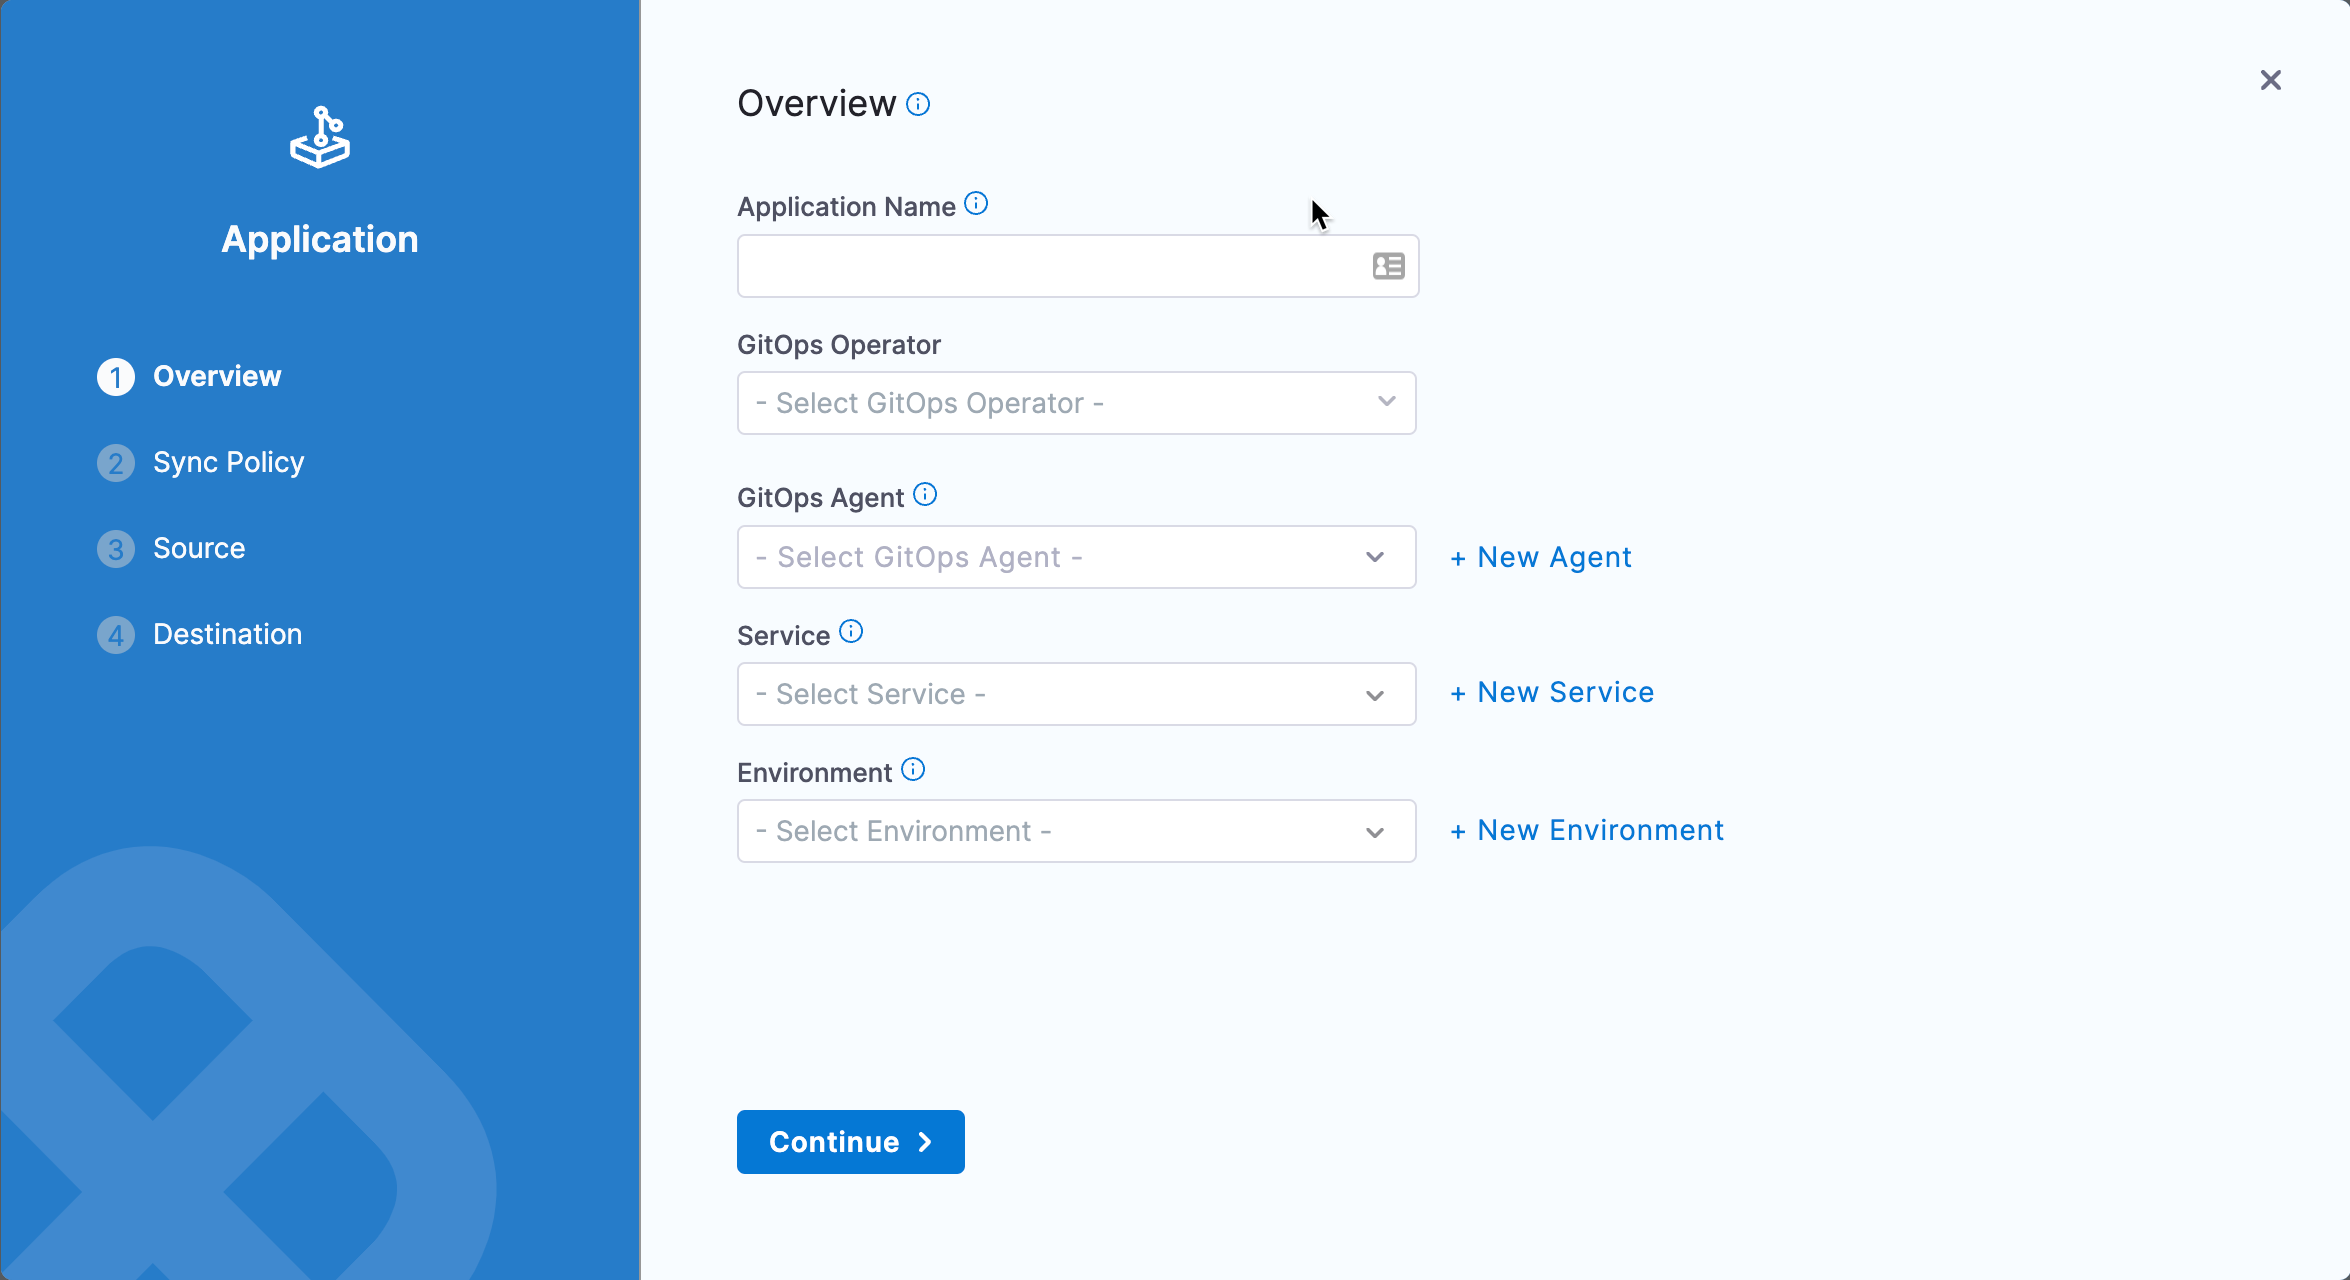
In your Harness Project, select GitOps, and then select New Application.
-
In Application Name, enter example.
-
In GitOps Operator, select Argo.
-
In GitOps Agent, select the Agent you added earlier.
-
In Service, select New Service, and name the Service guestbook.
-
In Environment, select New Environment, name the Environment example, and select Pre-Production.
-
Select Continue.
-
In Sync Policy, you can define the following:
- Sync Options to define how the Application syncs state.
- Prune Policy for garbage collection of orphaned resources.
- The Source manifest to use (Kubernetes, Helm chart, Kustomization, etc).
- The Destination cluster and namespace.
For this example, we'll simply select a manual sync policy and no other options. You can change any of these settings by editing your Application or whenever you sync.
-
In Sync Policy, select Manual, and then select Continue.
-
In Source, you specify the source repo to use.
You can add your repository in two ways.
By Repo ID: This option requires that the repository has been previously created with the necessary parameters to enable access. When creating an application using a repository by ID, you cannot remove the repository until there are no applications referencing it.
By Repo URL: This option requires only the URL of the repository (along with the matching repository credential template if the repository is private). If the URL of the pre-created repository is specified, the application will be treated as if it was created using the Repo ID option.
Note: When importing applications in BYOA, if the URL in the application matches any existing pre-created repositories (including those imported during the BYOA flow), the application will be imported as if it were created using the Repo ID option. Conversely, if the URL is not found in the list of available repositories for the specific agent, the application will be imported as if it were created using the Repo URL option.
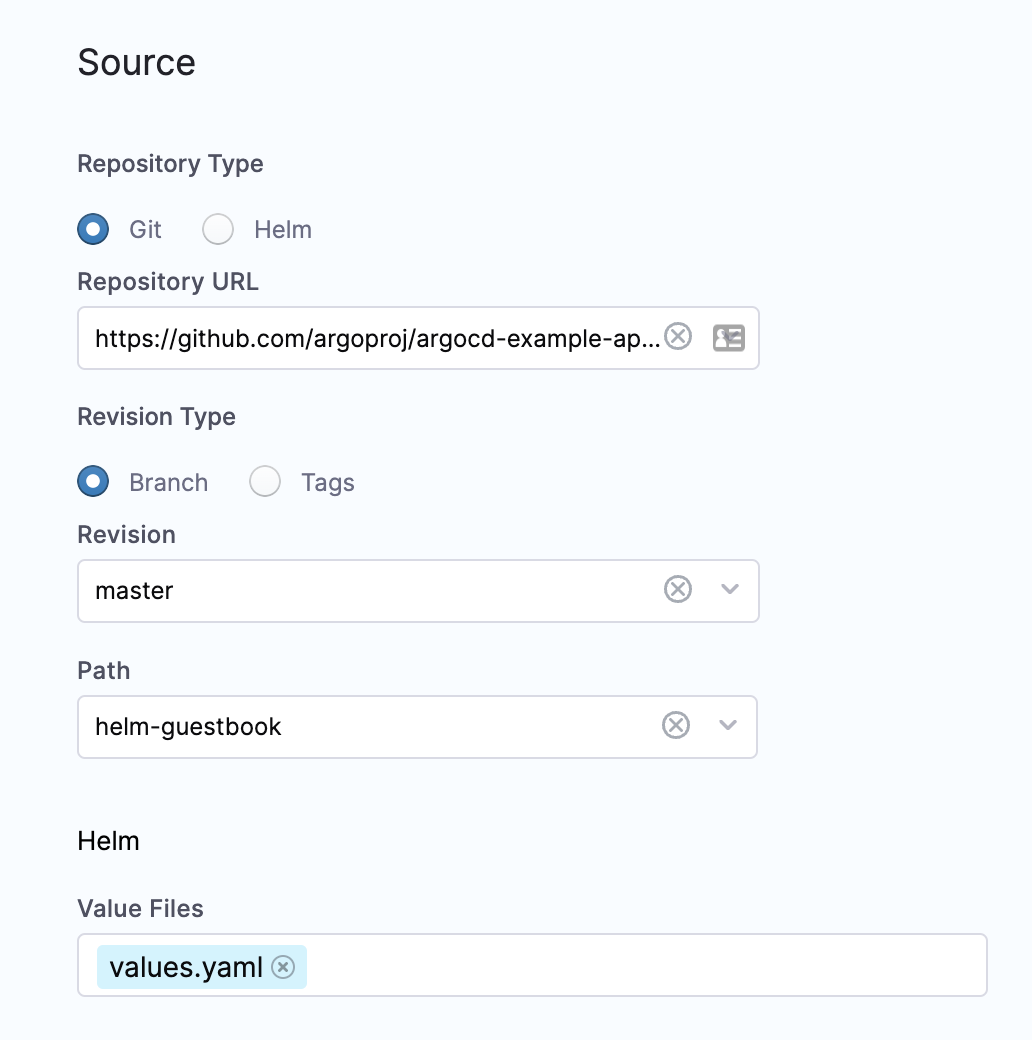
- In Repository Type, select Git.
- Click Repository URL and select the URL you entered in your Harness GitOps Repository:
https://github.com/argoproj/argocd-example-apps. - In Revision Type, select Branch.
- In Revision, select master.
- Wait a moment for Path to populate. Harness will pull the paths from the repo.
- In Path, select helm-guestbook. This is the location of this app in the repo:
https://github.com/argoproj/argocd-example-apps/tree/master/helm-guestbook. - In Revision Type, select:
- Branch: Select a branch and path from the prepopulated dropdown list.
- Tag: Select a branch and tag from the prepopulated dropdown list.
- In Helm, in Values Files, select values.yaml.
- Scroll down to see Parameters. All of the parameters from values.yaml are displayed and can be edited. This lets you modify values.yaml parameters in your Harness GitOps Application. Do not change the parameters for this example.
- When you're done, Source will look like this:
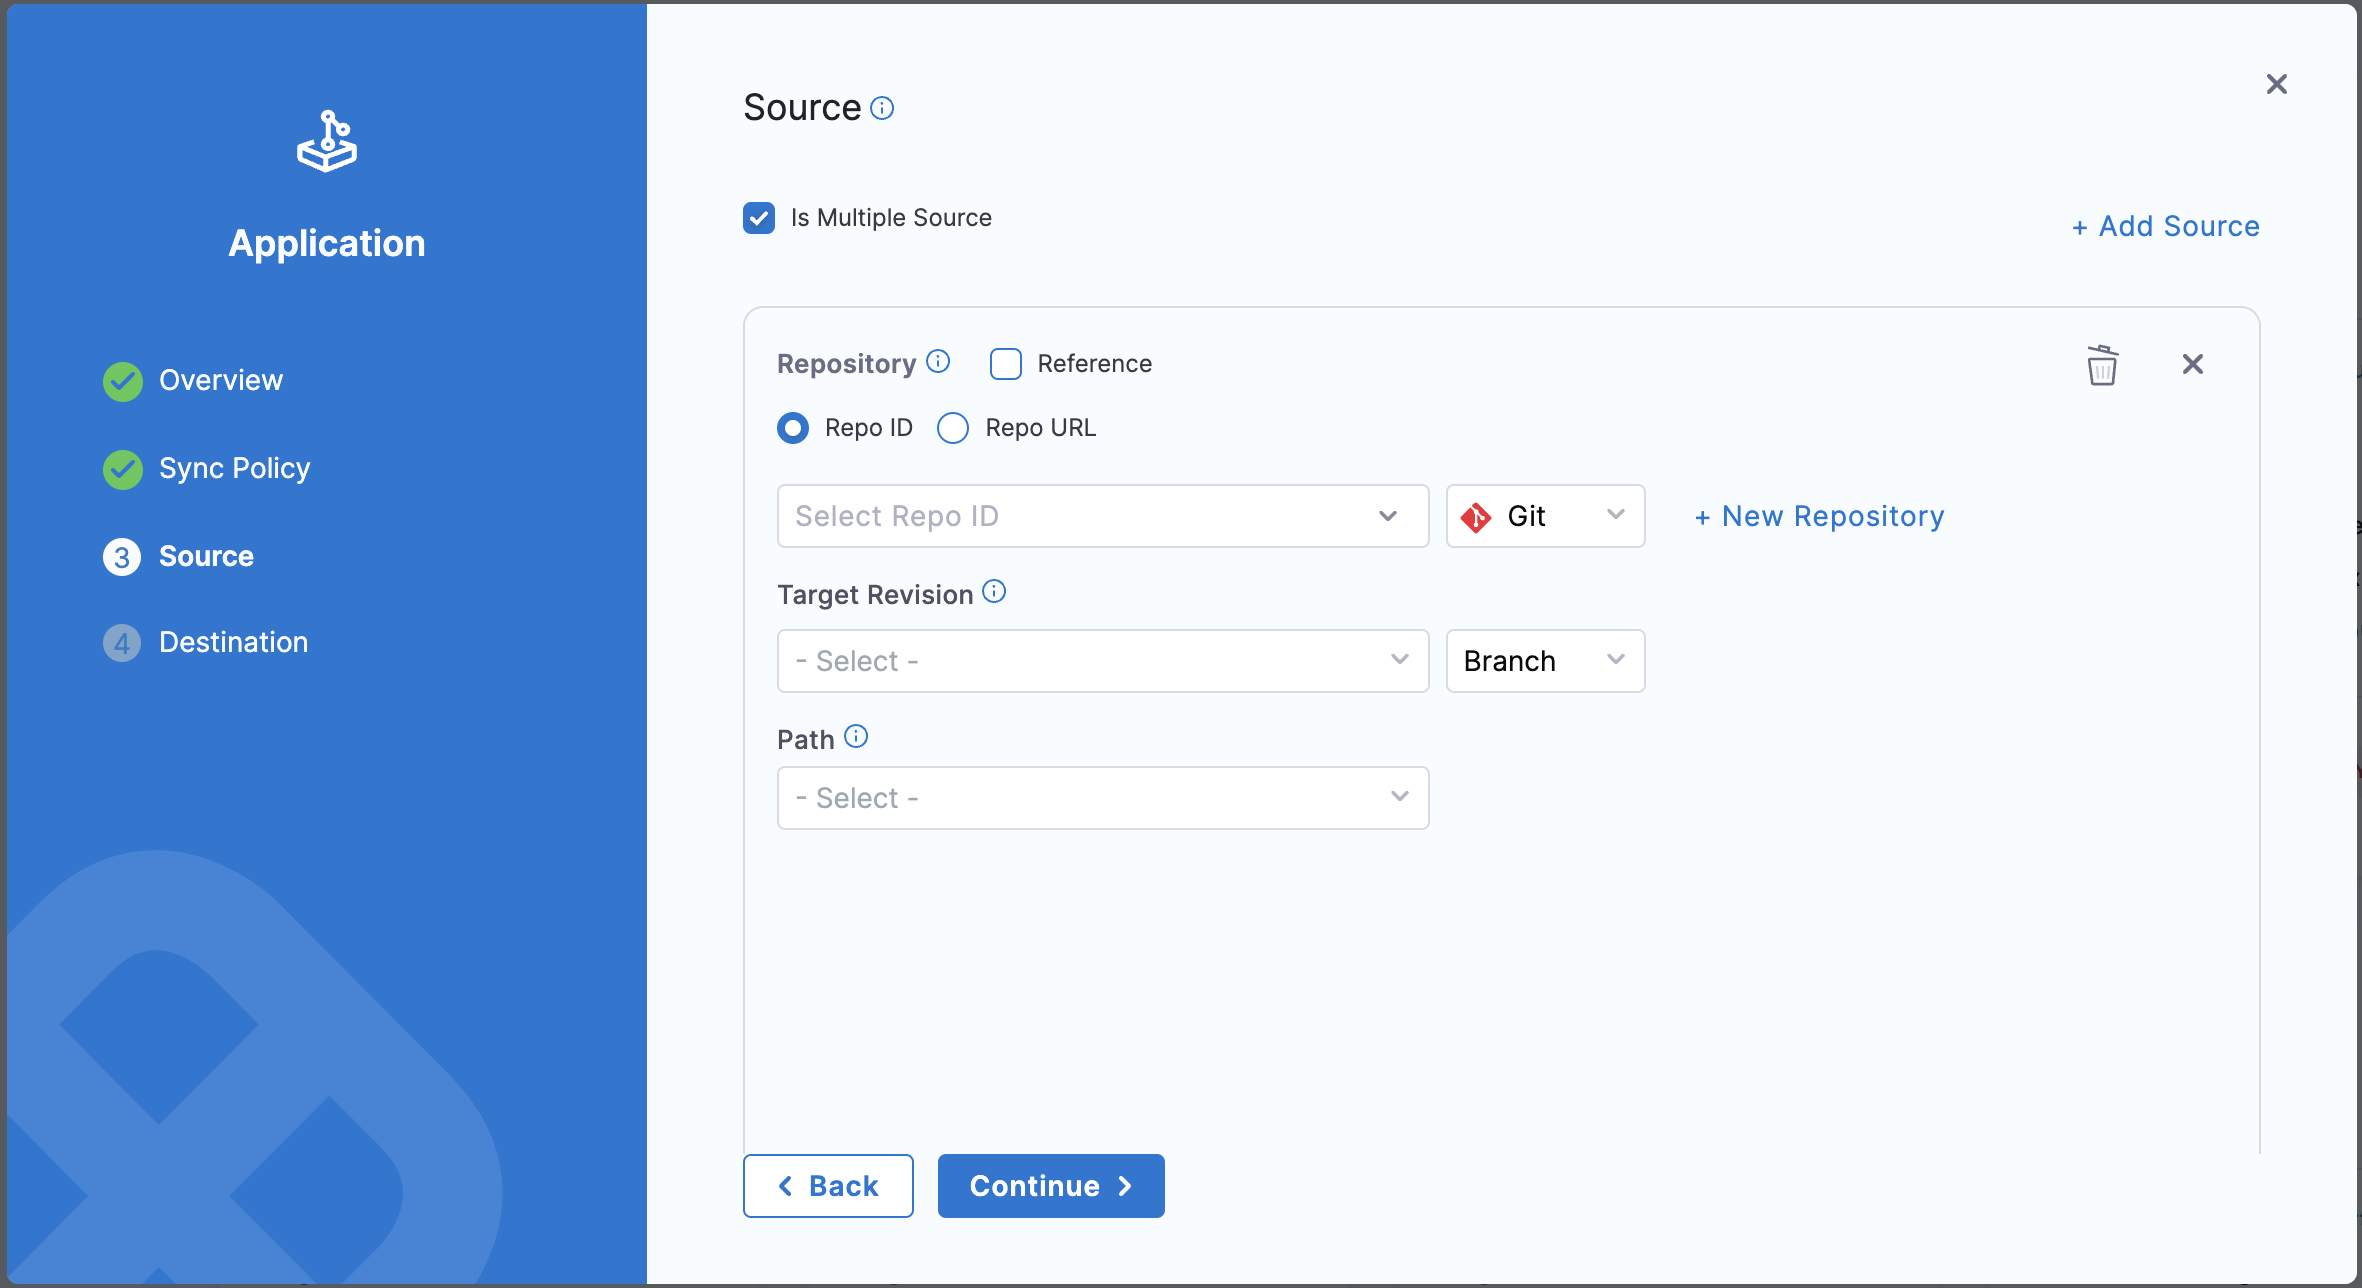
You can configure multiple sources for a single application in Harness GitOps. This feature is supported by Argo CD starting from version 2.6 and is currently in beta.
Select the checkbox Is Multiple Source in the Source section.
Under Repository, choose Repo ID if you have pre-configured repositories in Harness GitOps Repositories. If not, select Repo URL and provide the URL details of your repository. Ensure that you have a credentials template configured for the repository if it is private.
Note that if the first source is set as Repo ID, all subsequent sources must also be configured using Repo ID, and vice versa.
Select the checkbox Reference to designate this source as a reference source, which can be used later when defining the values file. Note that the reference source can only be a Git repository, not a Helm repository.
Click on + Add Source to add the details of your next source.
- Select Continue.
- The Destination section provides a dropdown that helps you choose how you want to define your cluster. Select whether you want to use cluster URL (Server) or cluster name (Name), and select the cluster you added earlier.
Since a Harness GitOps Cluster contains the authentication settings needed to access the cluster, your Harness GitOps Application can select any Cluster. 23. In Namespace, enter default.

- Select Finish.
- The new Application is created. At first, the current sync status will be UNKNOWN.

Now we can manually sync the Application.
Step 5: Perform GitOps: sync the application to Git
Now that you have everything set up, you can sync the source state with the desired state.
-
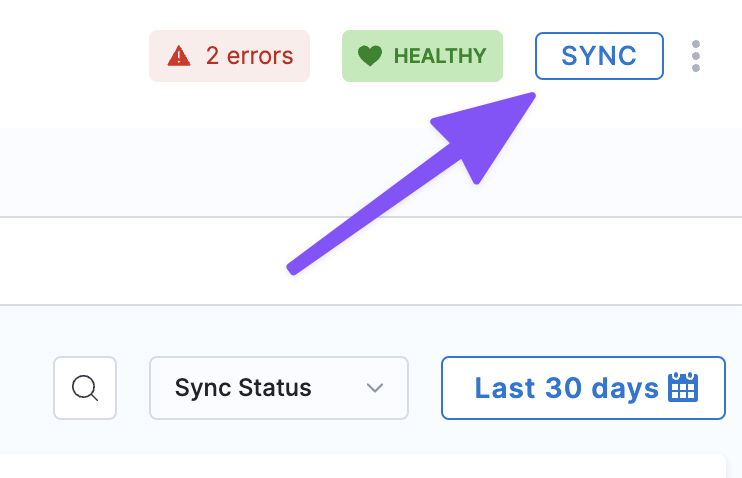
In your Application, select SYNC.
-
In the Synchronize settings wizard, you can change any of the Sync Policy options you set in the Application.
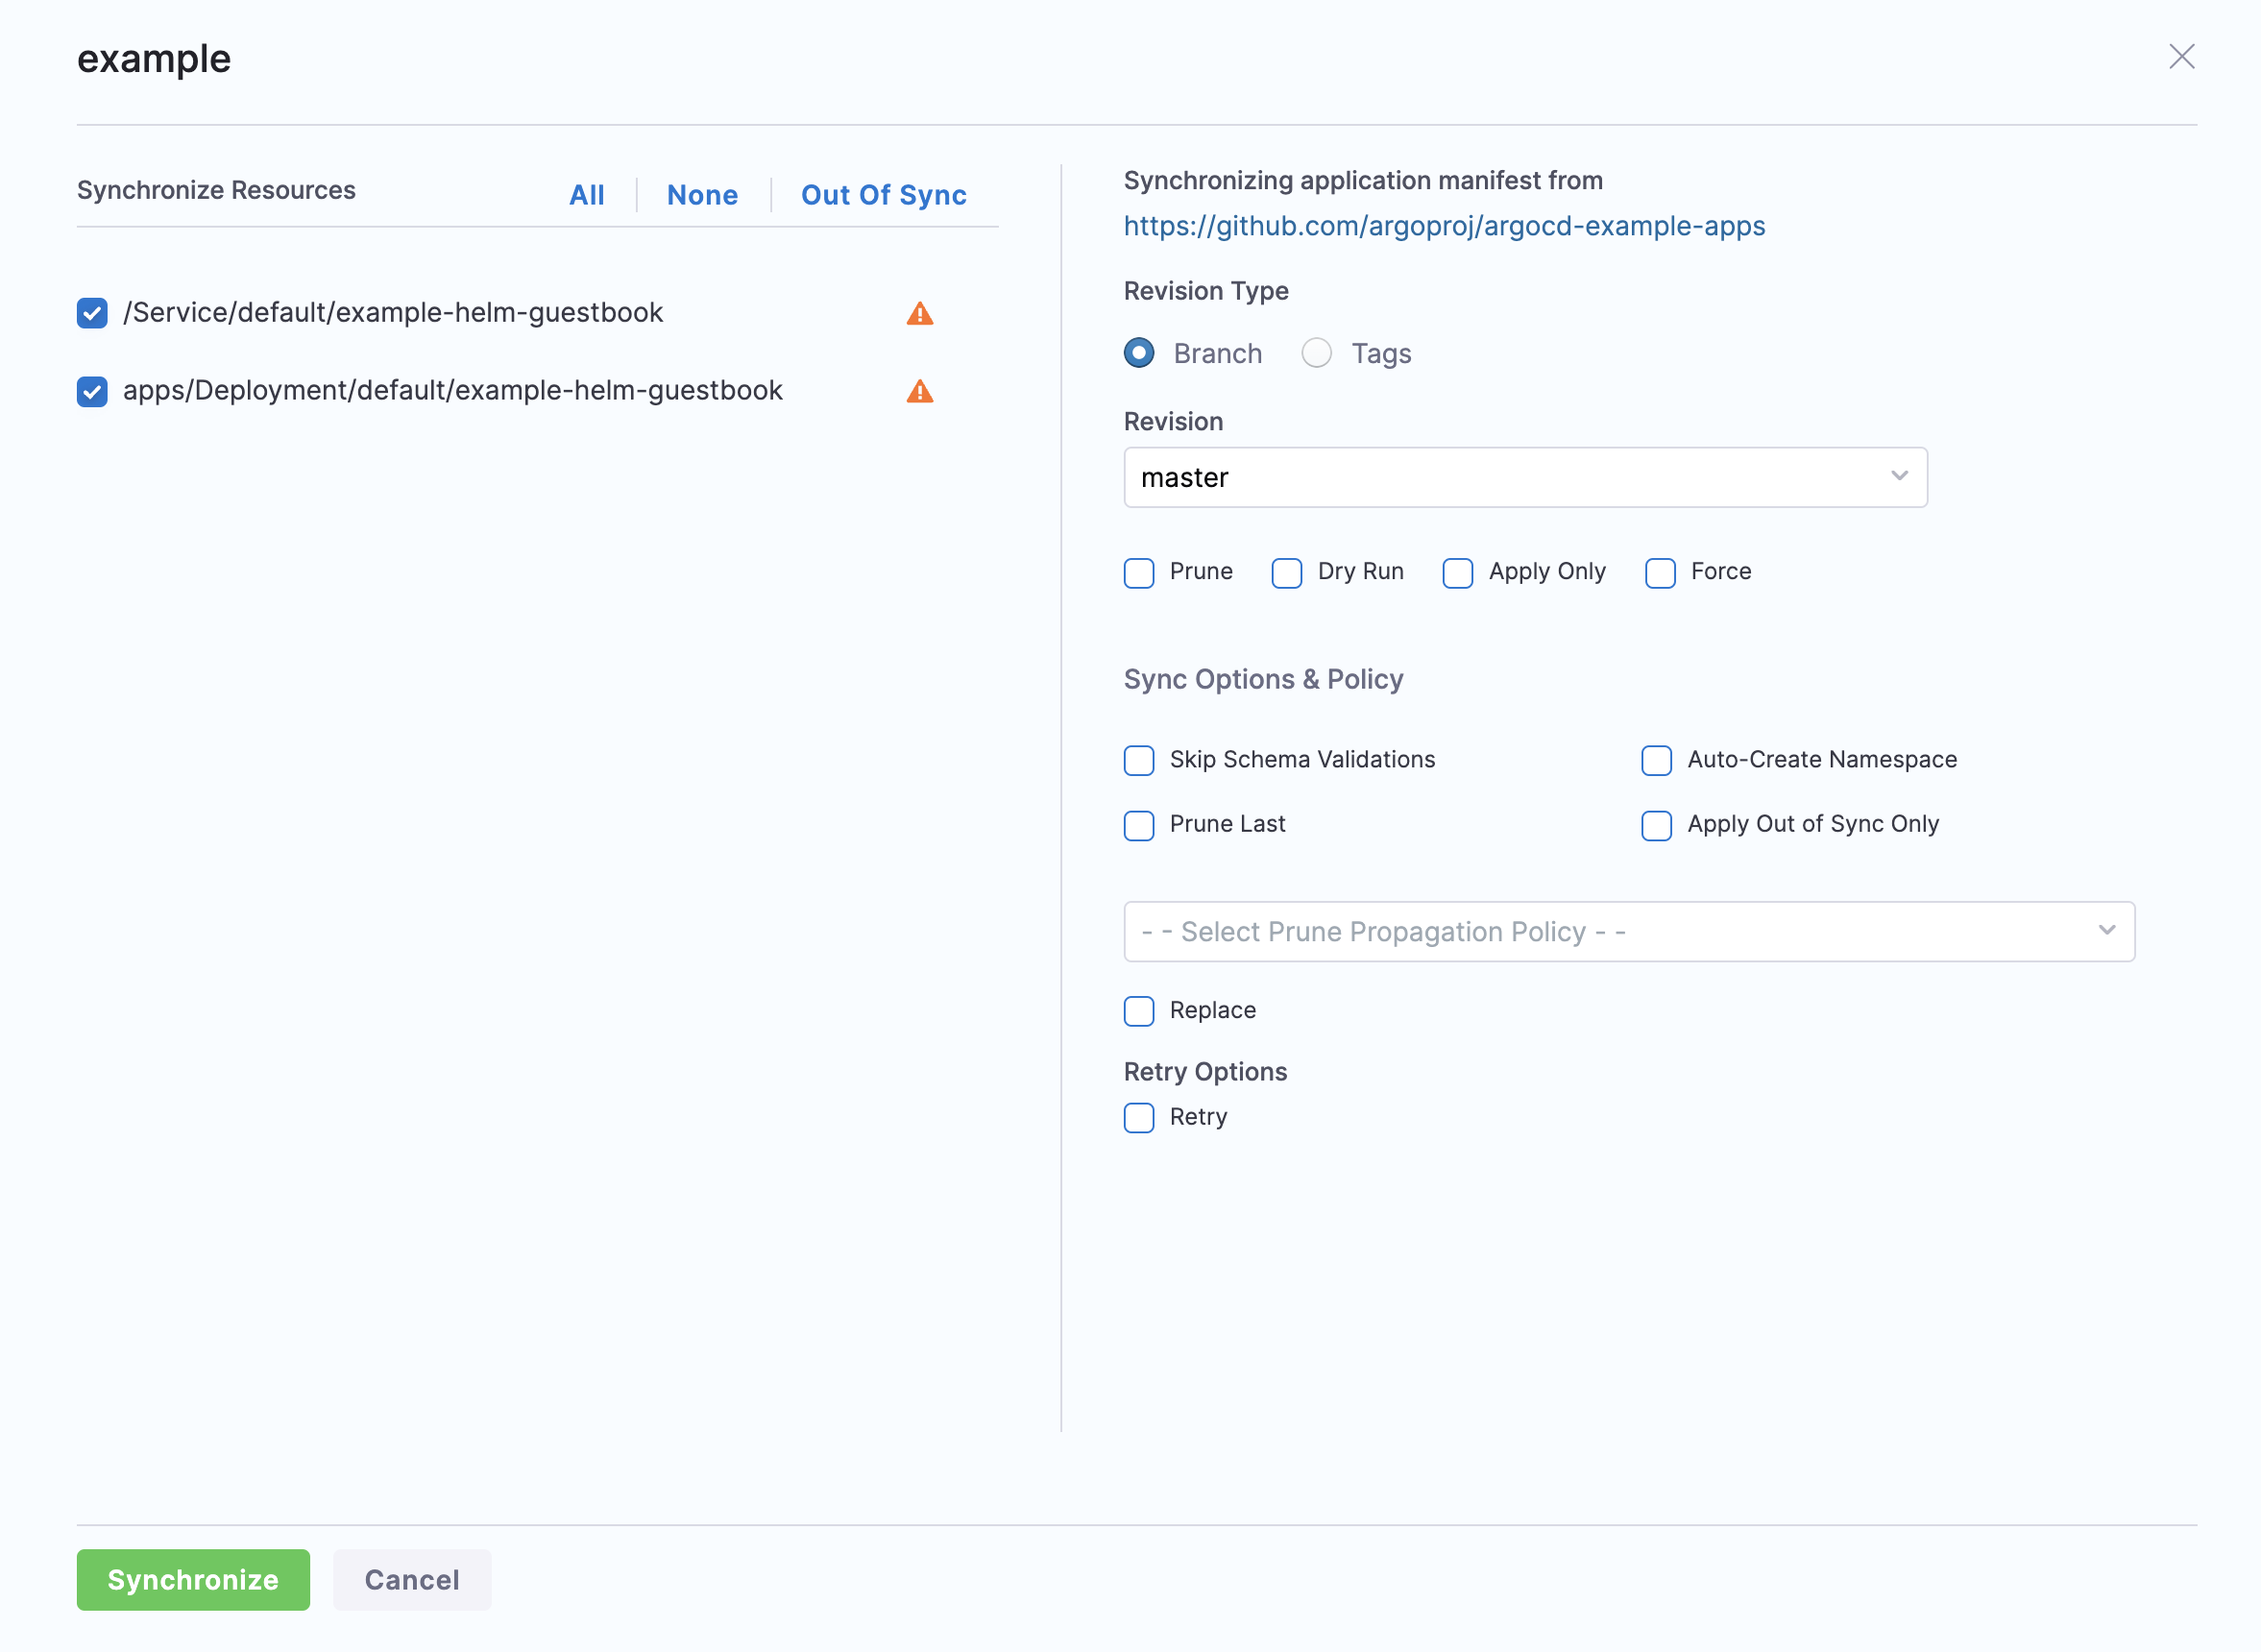
Sync option details:
- Skip Schema Validation: Does not validate the YAML schema when enabled.
- Auto Create Namespace: The namespace specified will be automatically created if it doesn't exist already. Without this enabled, the Application will fail to sync if the namespace doesn't exist.
- Prune Last: When enabled along with the Prune option, pruning of resources happens in the final wave of the sync operation.
- Apply Out of Sync Only: By default, all objects in the application are synced. For applications with a large number of objects, this will slow down the operation. Enabling this option will sync only resources in the OutOfSync state.
- Select Prune Propagation Policy: Defines how resources are pruned by Kubernetes. See more
- Retry: Retries the sync operation in case of a failure when enabled.
-
Select Synchronize.
-
You will see the status Progressing and then HEALTHY.
Congratulations! You've performed GitOps with Harness!
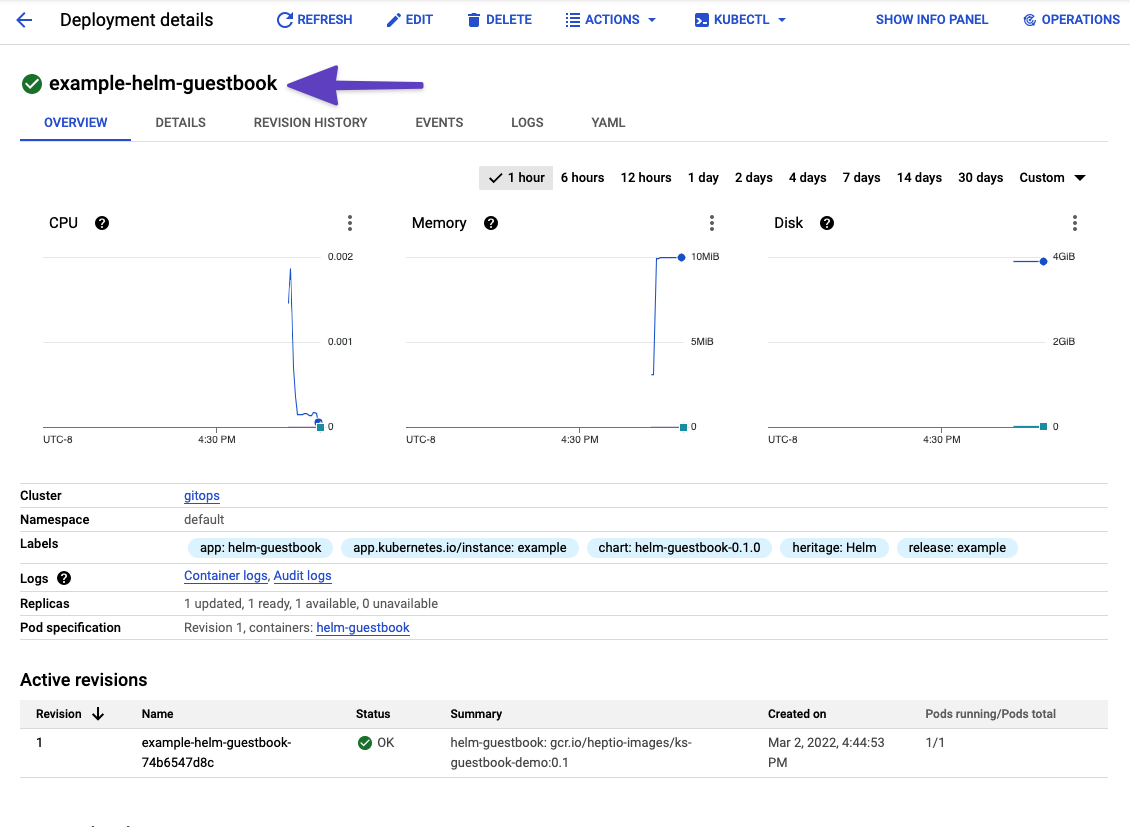
Let's look in the cluster to verify the deployment.
kubectl get pods -n default
You will see the example-helm-guestbook Pods running.
NAME                                      READY   STATUS    RESTARTS   AGE
...
example-helm-guestbook-74b6547d8c-74ckv   1/1     Running   0          5m22s
...
Here's what the deployment looks like in GCP.
Step 6: Using the application
Back in your Harness Application, you can view details on sync status, desired and live states, and perform GitOps.
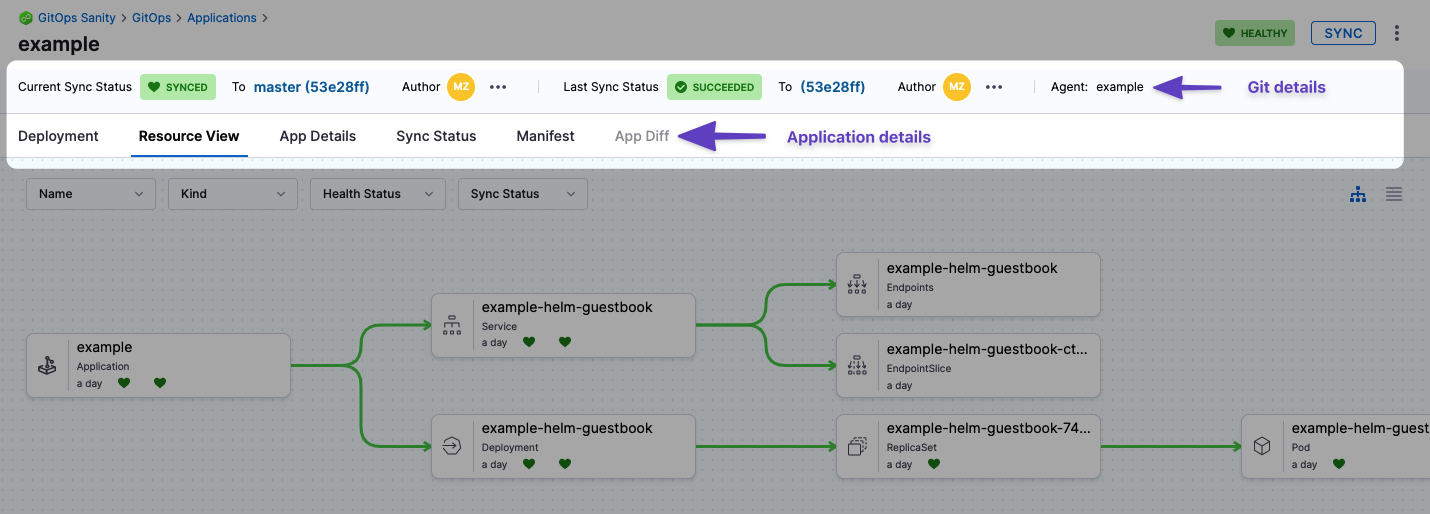
- Git details: you can see the Git commit used as the source for the sync. Clicking the commit Ids opens the commit in the source provider.
- Deployment: the deployments dashboard shows when the Application was deployed (synced).
- Resource View: displays the desired to target state mapping of each Kubernetes object. Select any item to see its logs and manifest.
The Resource View lets you inspect the live target infrastructure by:
- Name: Kubernetes object names.
- Kind: Kubernetes object types.
- Health Status: the health status of the Application. For example, is it syncing correctly (Healthy)?
- Sync Status: sort Kubernetes objects by their sync status.
- App Details: displays the settings of the Application. You can edit the settings and apply your changes, including the Sync Options & Policy.
- Sync Status: displays all of the sync operations performed by the Application.
- Manifest: displays the manifest of the Application. This is not the same as the source manifest in the Git source repo.
You can edit the manifest in Manifest and the changes are synced in the target infrastructure, but when you do a full sync from your source repo the state of the source repo overwrites any changes made in Manifest. - App Diff: displays a diff against the live state in the cluster and desired state in Git.
Here's an example:

You can also initiate a Sync or Refresh from the main GitOps page.
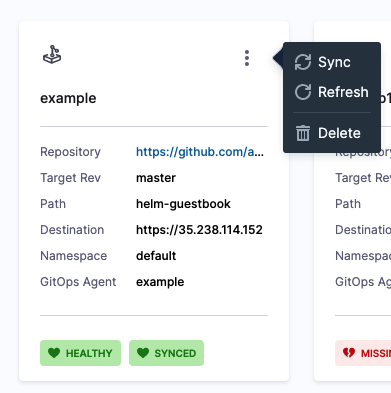
- Refresh will pull the latest commit from Git and display whether the current Sync State is Synced or Out of Sync. It does not sync with the live cluster state. You can Refresh, then use App Diff to view the diff between the desired Git state with the live cluster state.
- Sync will sync the desired Git state with the live cluster state.
Harness supports using Harness secret expressions in GitOps manifests. Other Harness expressions are not supported. For details on using Harness secret expressions in your manifests, go to Harness Secret Expressions in Application Manifests.
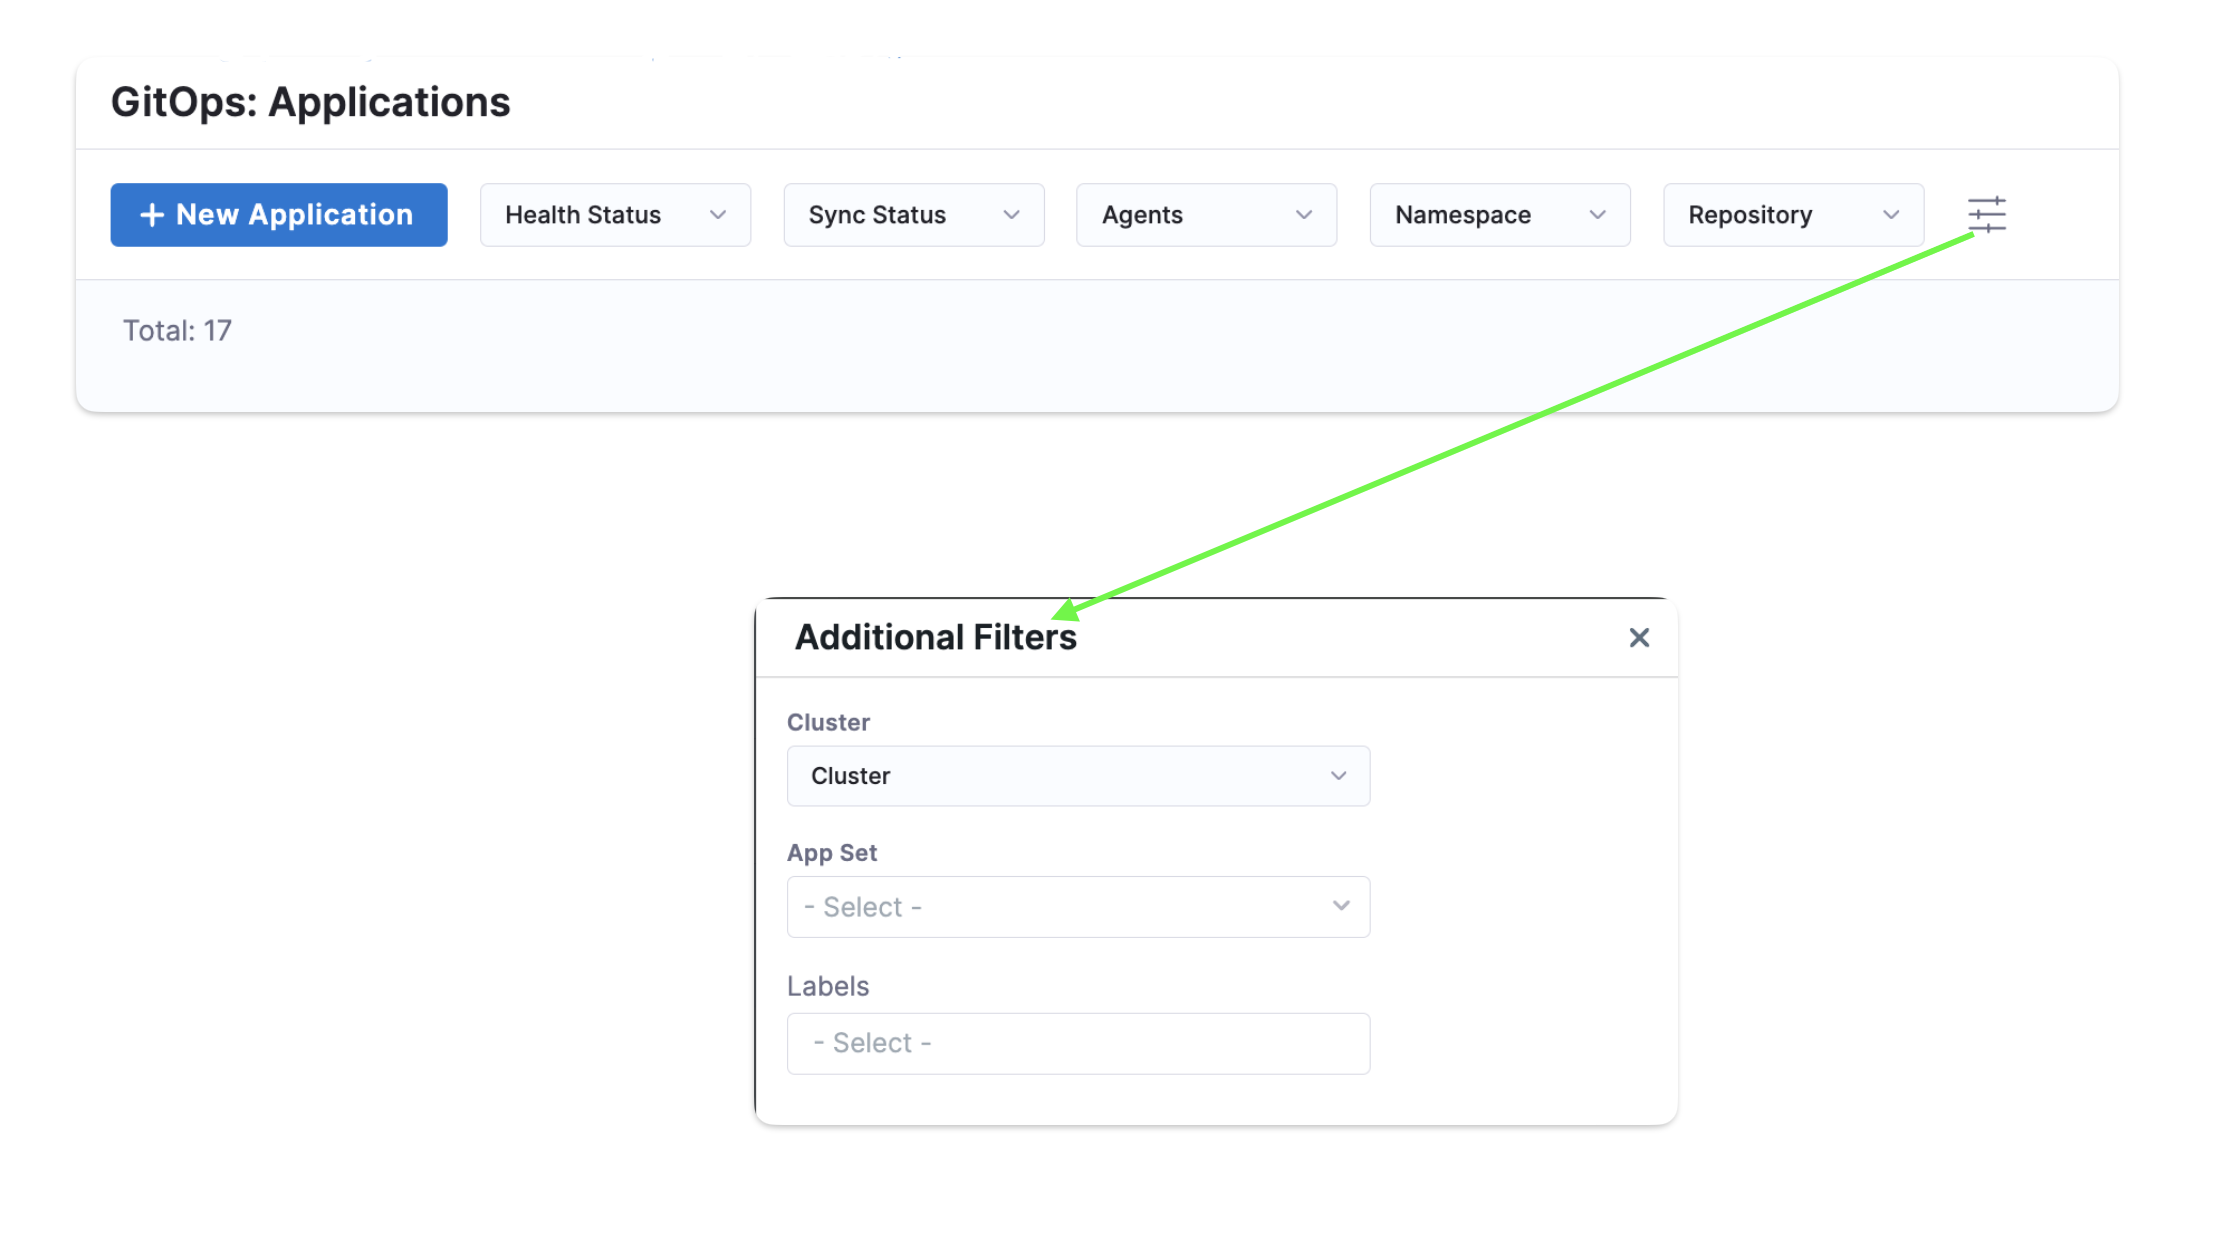
Application filters
You can filter applications based on the following criteria:
- Health Status
- Sync Status
- Agents
- Namespace
- Repository
Additionally, you can apply further filters for Cluster, App Set and Labels by clicking on Additional Filters.
Cleaning up
Delete a Harness GitOps application
You can delete an application from the main GitOps page. In the deletion prompt, you'll notice three deletion methods - Foreground, Background and Non-cascading.
Both Foreground and Background perform a cascading delete on the application.
A cascading delete removes both the app and all its resources, rather than only the app and is the recommended way to completely delete an application.
To perform a non-cascade delete, select the Non-cascading option. Please note that when performing a non-cascading delete, you need to make sure the finalizer is unset/removed and then delete the app. You can check the Remove any existing finalizer checkbox for this. However, deleting finalizers is not safe and should be used with caution.
Deleting a Harness GitOps agent
To delete the Harness GitOps Agent from your Kubernetes cluster, you delete the StatefulSet for the Agent. A StatefulSet ensures that the desired number of pods are running and available at all times. Deleting the pod without deleting the StatefulSet will result in the pod being recreated.
For example, if you have the Agent pod name gitops-agent-6877dbf7bf-wg6xv, you can delete the StatefulSet with the following command:
$ kubectl delete statefulset -n default gitops-agent-6877dbf7bf
You can also simply delete and recreate the namespace which will delete all resources except for RoleBindings, ServiceAccounts or NetworkPolicy:
kubectl delete namespace {namespace}

kubectl create namespace {namespace}
Next Steps
- Next, try Harness GitOps using one of your own repos and target clusters.
- Understand Harness GitOps ApplicationSets and how you can use them with Harness PR Pipelines to streamline GitOps across multiple environments.
- Read about how Harness GitOps approaches Managing Kubernetes secrets in Git using Mozilla SOPS.
- Checkout this sample for Fetching App Details and Syncing App using Harness Pipeline.
- Checkout this sample for Syncing Multiple GitOps Applications.
Audit Event
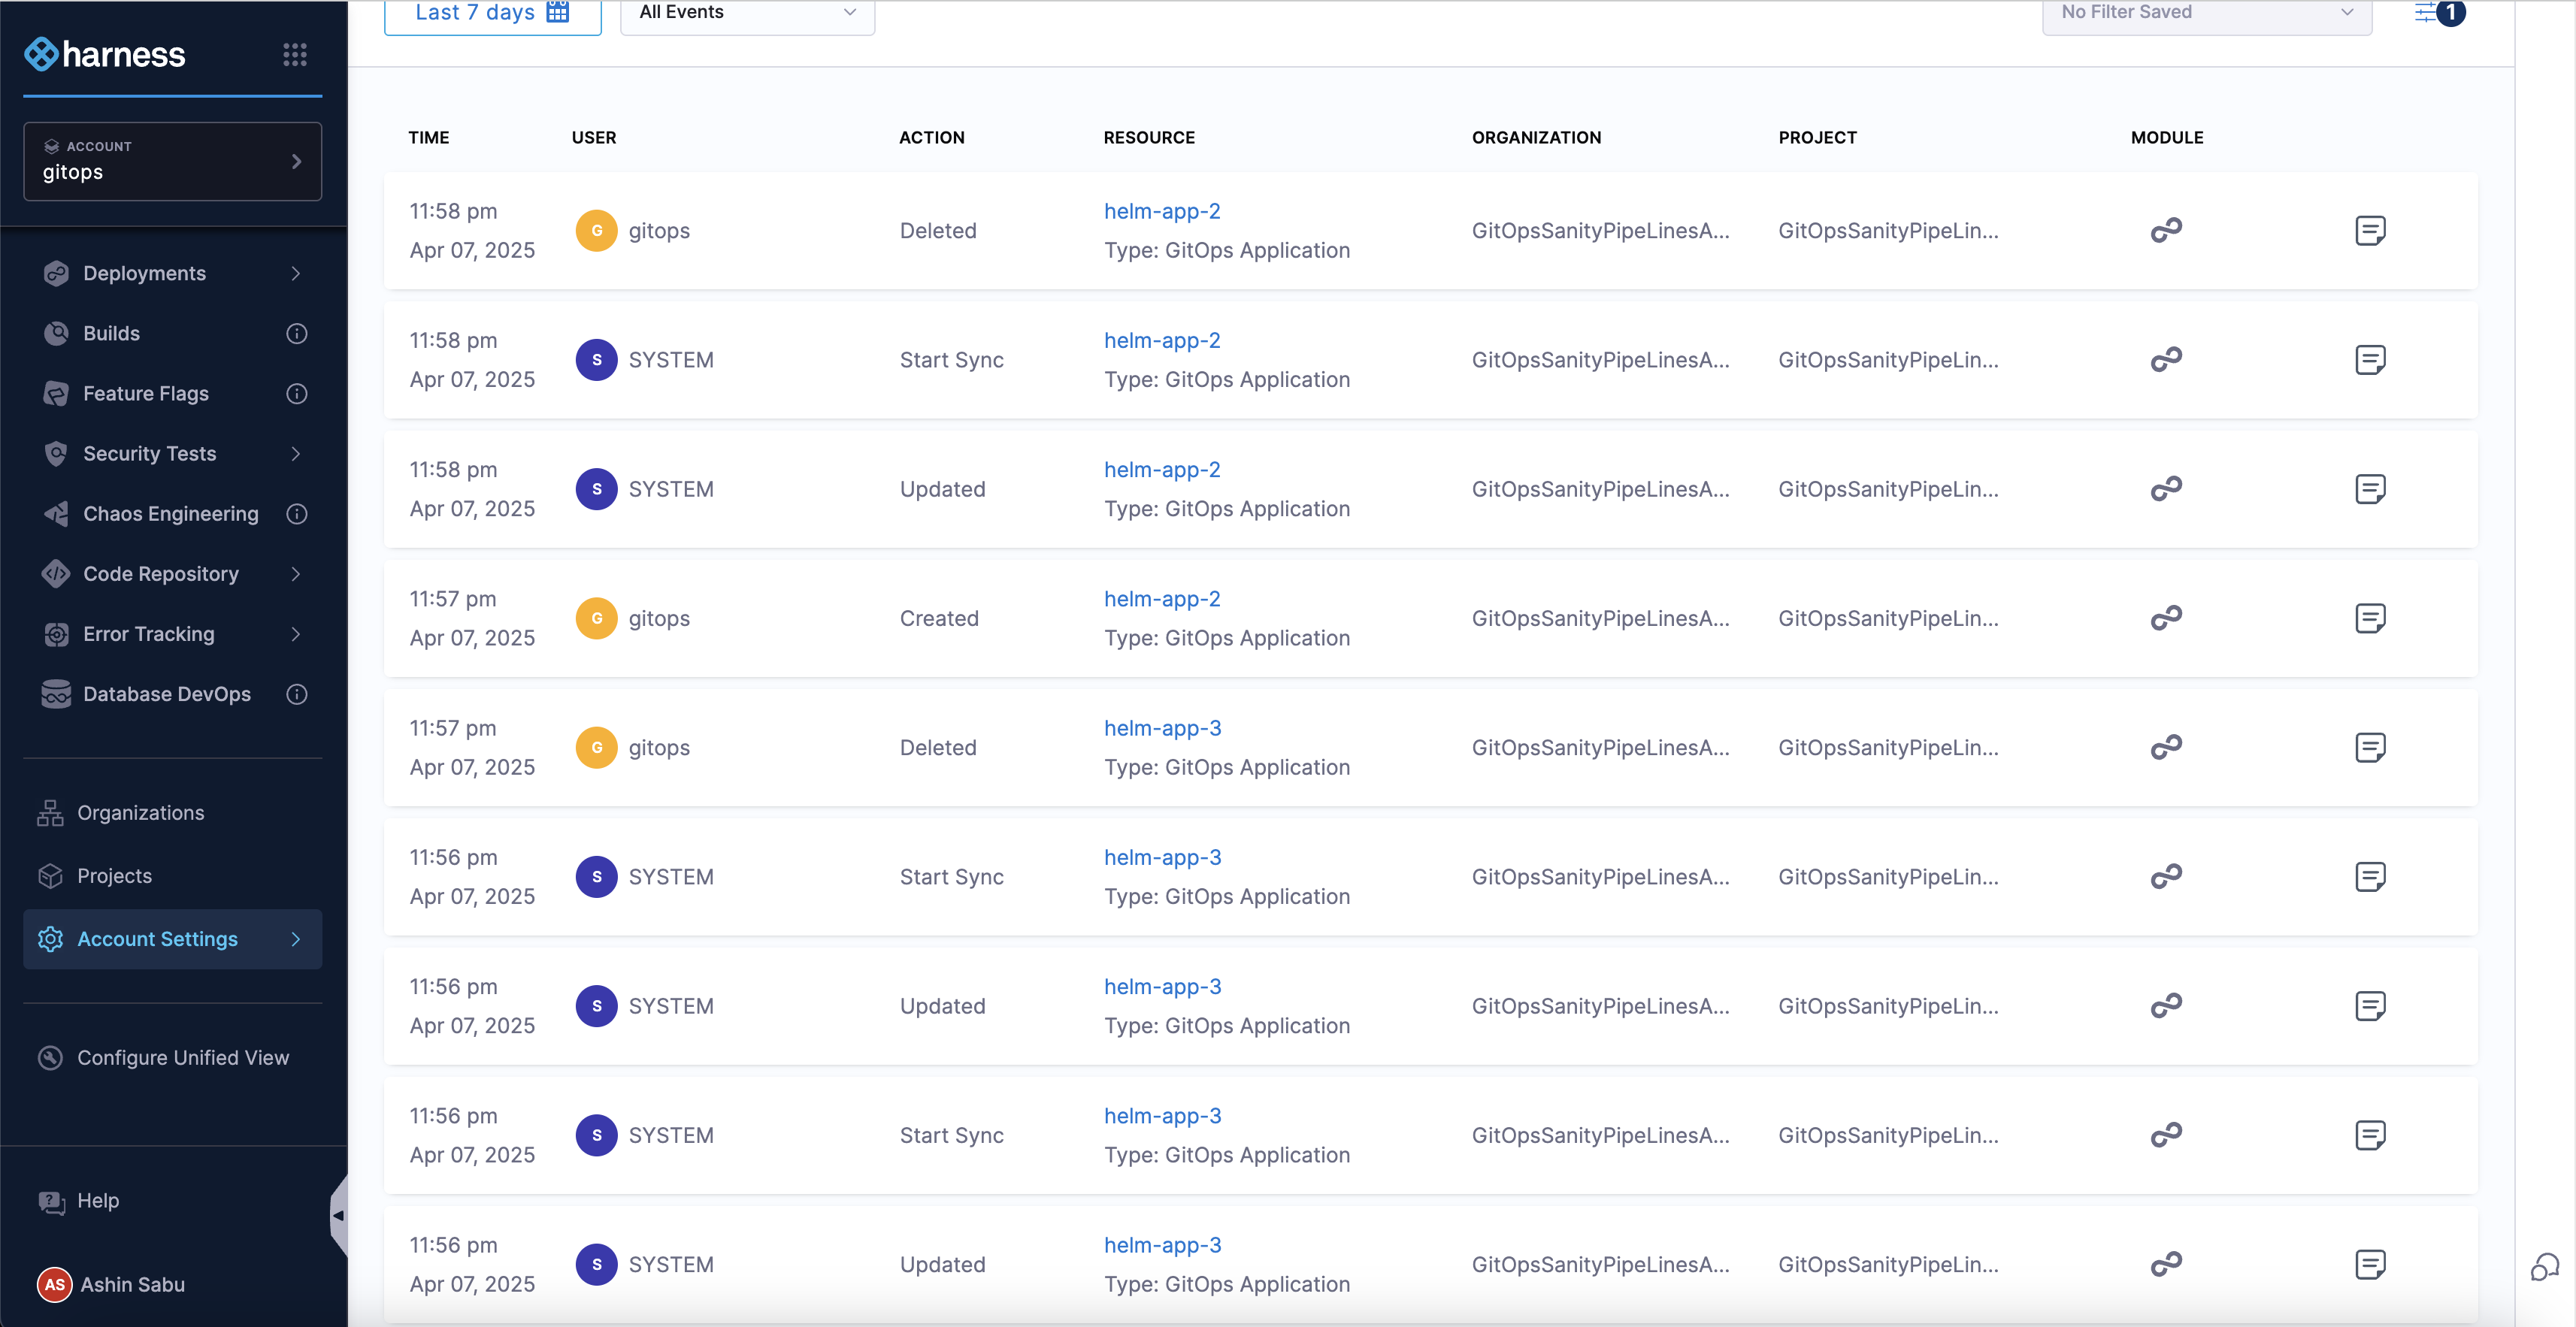
You can view audit events for GitOps in the Audit Trail page. These events include actions such as Sync, Create, Update, or Delete performed on a GitOps Application.
To view audit events specifically for a GitOps Application, apply the filter Resource Type: GitOps Application.
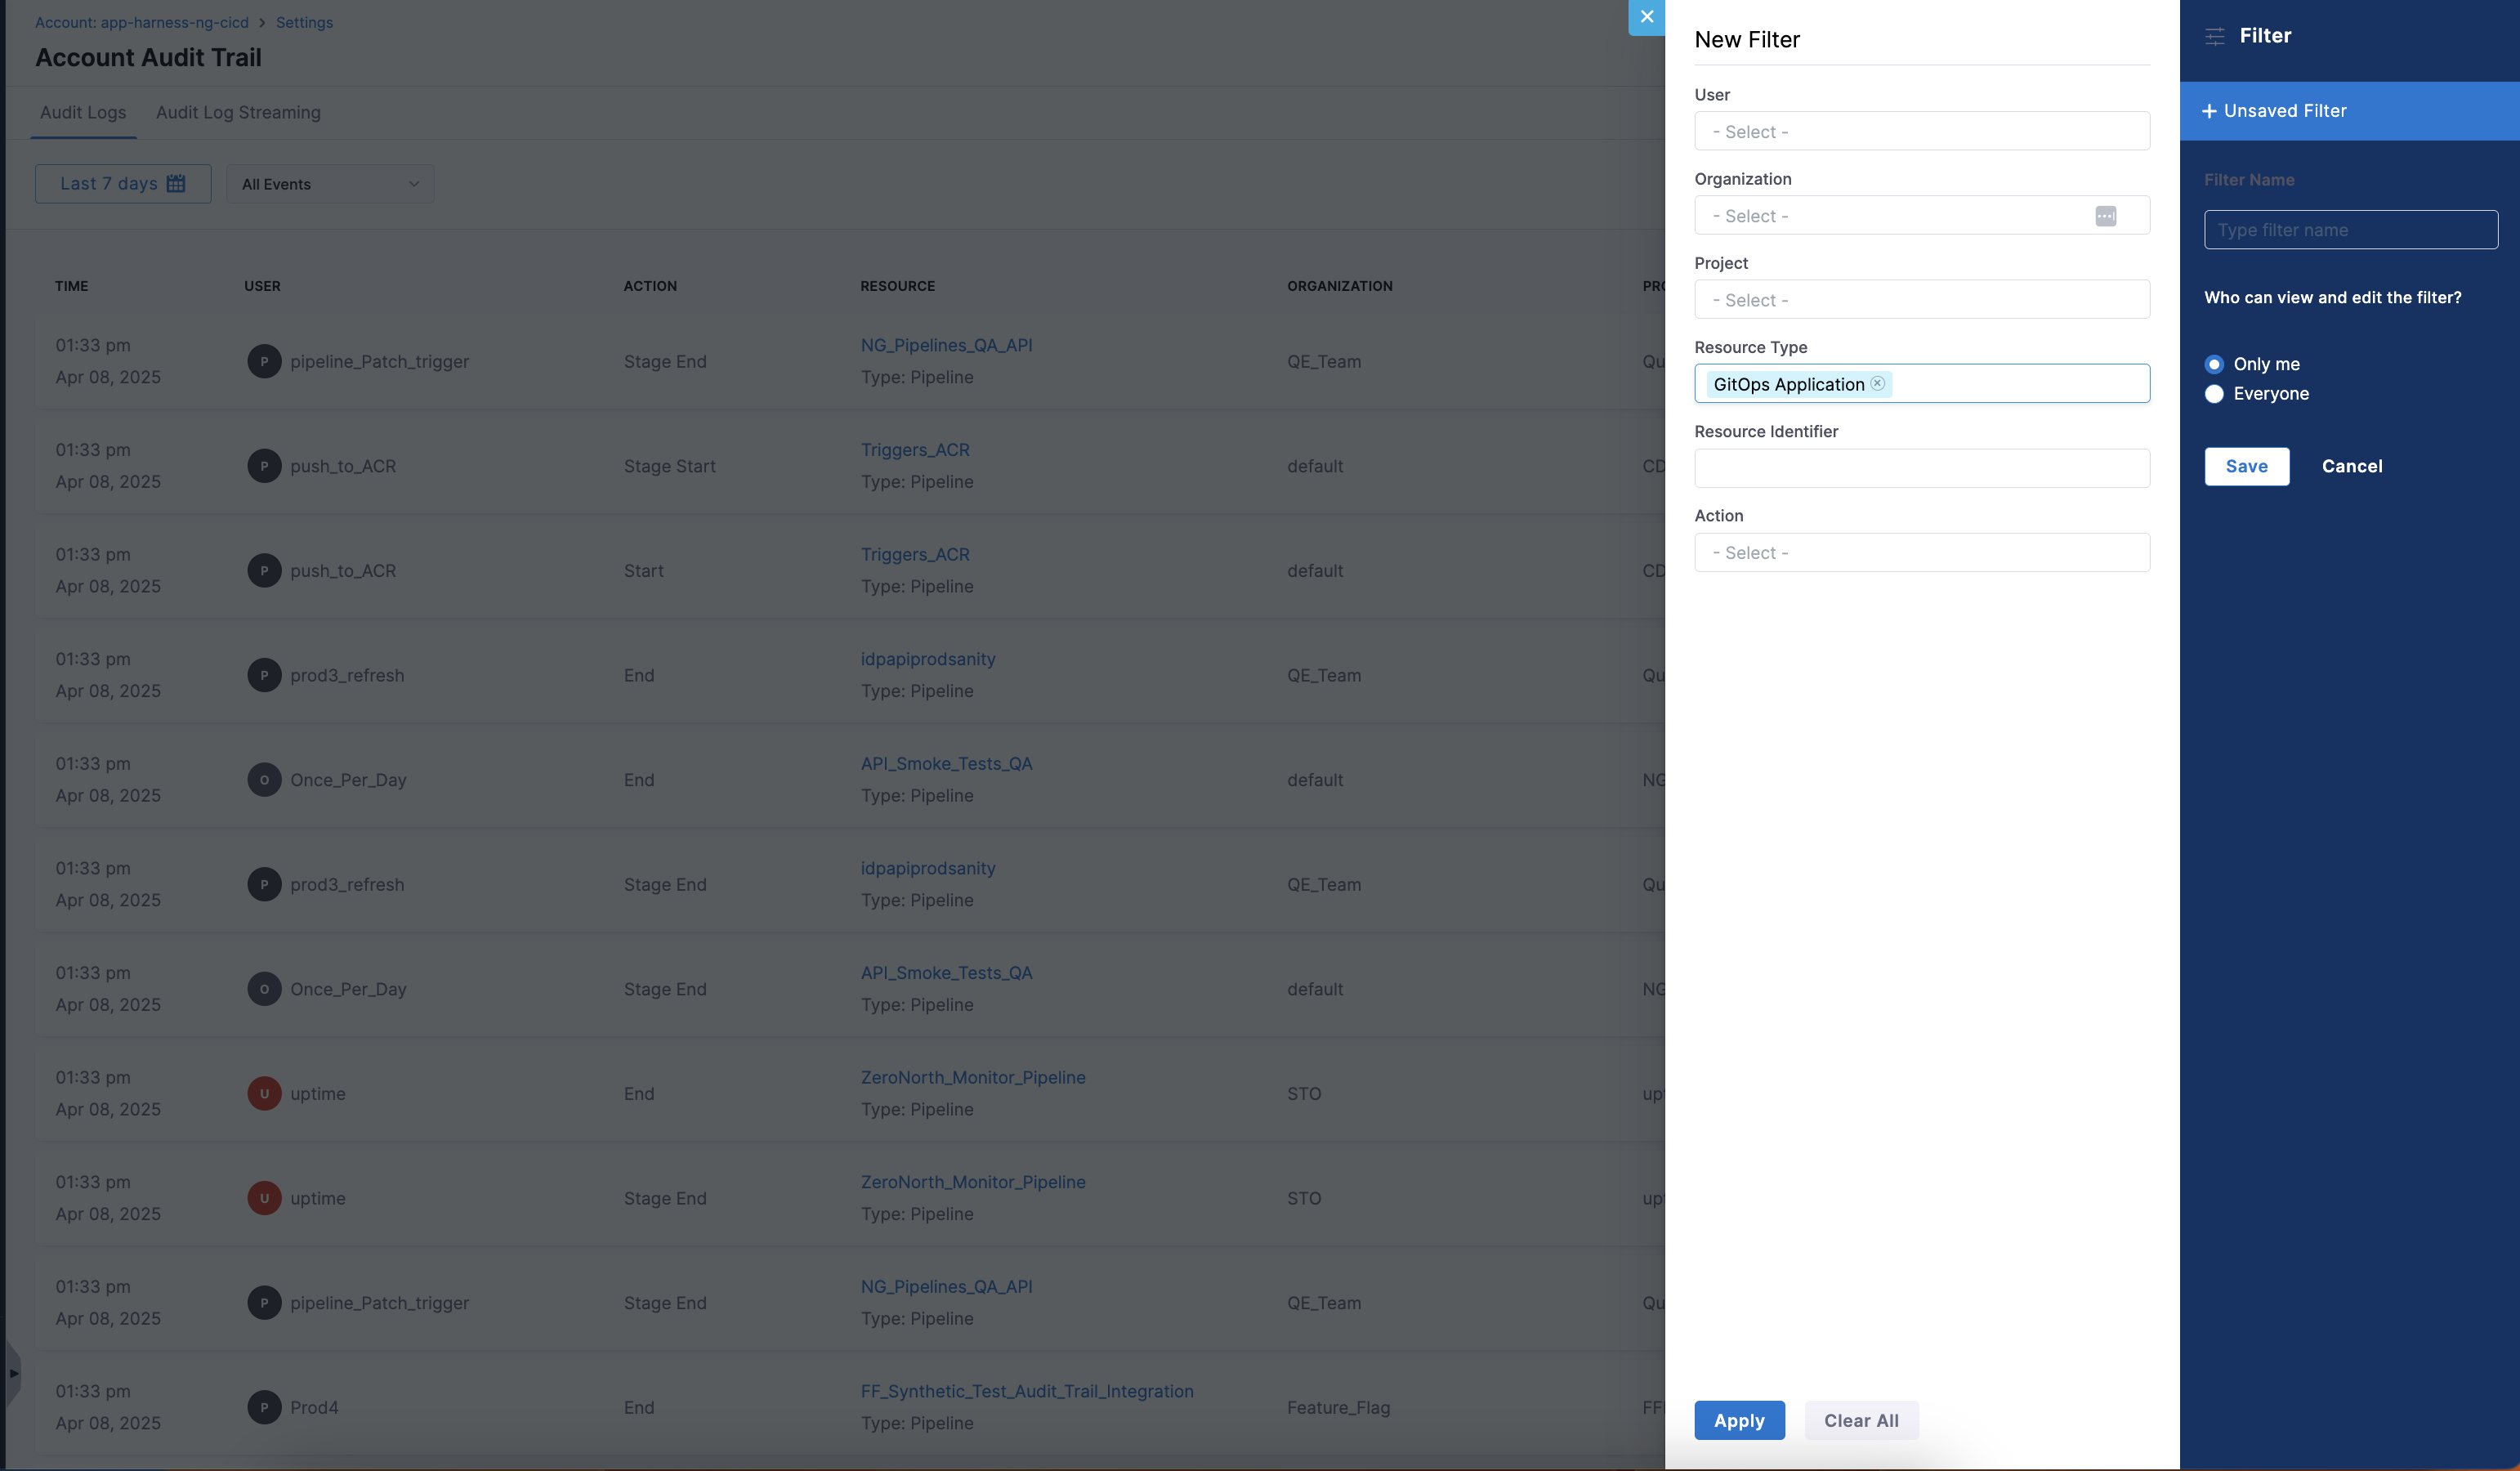
You can view the status of GitOps Application in the Audit Trail Page.
